futureplayer.futureadventureplayer.com:ClickMe
www.futureadventureplayer.com:ClickMe
Welcome to this Page of...
futureplayer Page!!!
☰ open
Mode
WorkOccupation: 1.Student
Method: The Education of Student
Procedure:The Students have 4 works to do is 1.Education: Kindergarten School with 1-3 Years of Spend time or more than for Education And Lerning, Primary School with 1-3 Years of Spend time or more than for Education And Lerning, Secondary school with 1-3 Years with 1-3 Years of Spend time or more than for Education And Lerning, Higher School with 1-3 Years of Spend time for or more than for Education And Lerning, Untill University with 1-4 Years of Spend time or more than for Education And Lerning. Addition Tip: Non-formal adult Education Learning or Any Education if you knows. 2.Skill Basic: Math, Science, Language Communication. 3.Activitie Event: School Summer Camp, Sport Day, Journey Tour Trip Carnival Festival World Fair Day, Skill Test Training, Uniform Test Training, Body Test Training. 4.Area: Survey or Exploror and Discovery All around of in School And University.
ClickMeSeeAllFull
ClickMeSeeOnMoreDetail
ClickMeSeeOnMorePictureImage
ClickMeSeeOnMoreVideo
WorkOccupation: 2.Astronaut
Method: Astronaut How to be become
Procedure:The Astronaut have 4 works to do is 1.Education: Kindergarten School with 1-3 Years of Spend time or more than for Education And Lerning, Primary School with 1-3 Years of Spend time or more than for Education And Lerning, Secondary school with 1-3 Years with 1-3 Years of Spend time or more than for Education And Lerning, Higher School with 1-3 Years of Spend time for or more than for Education And Lerning, Untill University with 1-4 Years of Spend time or more than for Education And Lerning. Addition Tip: Non-formal adult Education Learning or Any Education if you have. 2.Skill Basic: Math, Science, Language Communication, Engineer or and any Skill if you have. 3.Activitie Event: Skill Test Training, Machine Tool Test Training, Weapon Armor Uniform Test Training, Body Test Training, Special Test Training. 4.Area: Survey or Exploror and Discovery All around of on in Earth, Planet, Galaxy And Universe.
ClickMeSeeAllFull
ClickMeSeeOnMoreDetail
ClickMeSeeOnMorePictureImage
ClickMeSeeOnMoreVideo
WorkOccupation: 3.Teacher
Method: Teacher How to be become
Procedure:The Teacher have 4 works to do is 1.Education: Kindergarten School with 1-3 Years of Spend time or more than for Education And Lerning, Primary School with 1-3 Years of Spend time or more than for Education And Lerning, Secondary school with 1-3 Years with 1-3 Years of Spend time or more than for Education And Lerning, Higher School with 1-3 Years of Spend time for or more than for Education And Lerning, Untill University with 1-4 Years of Spend time or more than for Education And Lerning. Addition Tip: Non-formal adult Education Learning or Any Education if you have. 2.Skill Basic: Math, Science, Language Communication, Engineer or and any Skill if you have. 3.Activitie Event: Skill Test Training, Machine Tool Test Training, Weapon Armor Uniform Test Training, Body Test Training, Special Test Training. 4.Area: Survey or Exploror and Discovery All around of on in School And University.
ClickMeSeeAllFull
ClickMeSeeOnMoreDetail
ClickMeSeeOnMorePictureImage
ClickMeSeeOnMoreVideo
WorkOccupation: 4.Doctor
Method: Doctor How to be become
Procedure:The Doctor have 4 works to do is 1.Education: Kindergarten School with 1-3 Years of Spend time or more than for Education And Lerning, Primary School with 1-3 Years of Spend time or more than for Education And Lerning, Secondary school with 1-3 Years with 1-3 Years of Spend time or more than for Education And Lerning, Higher School with 1-3 Years of Spend time for or more than for Education And Lerning, Untill University with 1-4 Years of Spend time or more than for Education And Lerning. Addition Tip: Non-formal adult Education Learning or Any Education if you have. 2.Skill Basic: Math, Science, Language Communication, Engineer, Botany, GeneGenetic, Chemistry or and any Skill if you have. 3.Activitie Event: Skill Test Training, Machine Tool Test Training, Weapon Armor Uniform Test Training, Body Test Training, Special Test Training. 4.Area: Survey or Exploror and Discovery All around of on in our World About of The Countries, Continental, Environmental, Laboratory, Medicine, Surgery.
ClickMeSeeAllFull
ClickMeSeeOnMoreDetail
ClickMeSeeOnMorePictureImage
ClickMeSeeOnMoreVideo
WorkOccupation: 5.Police
Method: Police How to be become
Procedure:The Police have 4 works to do is 1.Education: Kindergarten School with 1-3 Years of Spend time or more than for Education And Lerning, Primary School with 1-3 Years of Spend time or more than for Education And Lerning, Secondary school with 1-3 Years with 1-3 Years of Spend time or more than for Education And Lerning, Higher School with 1-3 Years of Spend time for or more than for Education And Lerning, Untill University with 1-4 Years of Spend time or more than for Education And Lerning. Addition Tip: Non-formal adult Education Learning or Any Education if you have. 2.Skill Basic: Math, Science, Language Communication, Engineer or and any Skill if you have. 3.Activitie Event: Skill Test Training, Machine Tool Test Training, Weapon Armor Uniform Test Training, Body Test Training, Special Test Training. 4.Area: Survey or Exploror and Discovery All around of on in our World About of The Countries, Continental, Environmental, The Fight, Road, Traffic, Transportation, Lawyer, Document of information.
ClickMeSeeAllFull
ClickMeSeeOnMoreDetail
ClickMeSeeOnMorePictureImage
ClickMeSeeOnMoreVideo
WorkOccupation: 6.Soldier
Method: Soldier How to be become
Procedure:The Sodier have 4 works to do is 1.Education: Kindergarten School with 1-3 Years of Spend time or more than for Education And Lerning, Primary School with 1-3 Years of Spend time or more than for Education And Lerning, Secondary school with 1-3 Years with 1-3 Years of Spend time or more than for Education And Lerning, Higher School with 1-3 Years of Spend time for or more than for Education And Lerning, Untill University with 1-4 Years of Spend time or more than for Education And Lerning. Addition Tip: Non-formal adult Education Learning or Any Education if you have. 2.Skill Basic: Math, Science, Language Communication, Engineer or and any Skill if you have. 3.Activitie Event: Skill Test Training, Machine Tool Test Training, Weapon Armor Uniform Test Training, Body Test Training, Special People Test Training. 4.Area: Survey or Exploror and Discovery All around of on in our World About of The Countries, Continental, Environmental, Moutain, Forrest, River, Sea, Ocean, Air, The War.
ClickMeSeeAllFull
ClickMeSeeOnMoreDetail
ClickMeSeeOnMorePictureImage
ClickMeSeeOnMoreVideo
WorkOccupation: 7.Waste Management
WorkOccupation: Method: Waste Management How to be become
Procedure:The Waste Management have 4 works to do is 1.Education: Kindergarten School with 1-3 Years of Spend time or more than for Education And Lerning, Primary School with 1-3 Years of Spend time or more than for Education And Lerning, Secondary school with 1-3 Years with 1-3 Years of Spend time or more than for Education And Lerning, Higher School with 1-3 Years of Spend time for or more than for Education And Lerning, Untill University with 1-4 Years of Spend time or more than for Education And Lerning. Addition Tip: Non-formal adult Education Learning or Any Education if you have. 2.Skill Basic: Math, Science, Language Communication, Engineer or and any Skill if you have. 3.Activitie Event: Skill Test Training, Machine Tool Test Training, Weapon Armor Uniform Test Training, Body Test Training, Special People Test Training. 4.Area: Survey or Exploror and Discovery All around of on in our World About of The Countries, Continental, Environmental, City, Village, Community, River, Sea, Ocean.
ClickMeSeeAllFull
ClickMeSeeOnMoreDetail
ClickMeSeeOnMorePictureImage
ClickMeSeeOnMoreVideo
WorkOccupation: 8.FireFighter
Method: Fire Fighter How to be become
Procedure:The Fire Fighter have 4 works to do is 1.Education: Kindergarten School with 1-3 Years of Spend time or more than for Education And Lerning, Primary School with 1-3 Years of Spend time or more than for Education And Lerning, Secondary school with 1-3 Years with 1-3 Years of Spend time or more than for Education And Lerning, Higher School with 1-3 Years of Spend time for or more than for Education And Lerning, Untill University with 1-4 Years of Spend time or more than for Education And Lerning. Addition Tip: Non-formal adult Education Learning or Any Education if you have. 2.Skill Basic: Math, Science, Language Communication, Engineer or and any Skill if you have. 3.Activitie Event: Skill Test Training, Machine Tool Test Training, Weapon Armor Uniform Test Training, Body Test Training, Special People Test Training. 4.Area: Survey or Exploror and Discovery All around of on in our World About of The Countries, Continental, Environmental, School, University, Office, Mall, City, Village, Community, River, Sea, Ocean.
ClickMeSeeAllFull
ClickMeSeeOnMoreDetail
ClickMeSeeOnMorePictureImage
ClickMeSeeOnMoreVideo
WorkOccupation: 9.Engineer
Method: Engineer How to be become
Procedure:The Engineer have 4 works to do is 1.Education: Kindergarten School with 1-3 Years of Spend time or more than for Education And Lerning, Primary School with 1-3 Years of Spend time or more than for Education And Lerning, Secondary school with 1-3 Years with 1-3 Years of Spend time or more than for Education And Lerning, Higher School with 1-3 Years of Spend time for or more than for Education And Lerning, Untill University with 1-4 Years of Spend time or more than for Education And Lerning. Addition Tip: Non-formal adult Education Learning. 2.Skill Basic: Math, Science, Language Communication, Engineer such as Architectural Engineering, Civil Engineering, Chemical Engineering, Computer Engineering, Electrical Engineering, Electronic Engineering, Robotics Automotive Control Systems Engineering, Instrumentation Engineering, Aerospace Engineering, Ocean Engineering, Nuclear Engineering. or and any Skill if you have. 3.Activitie Event: Skill Test Training, Machine Tool Test Training, Weapon Armor Uniform Test Training, Body Test Training, Special People Test Training. 4.Area: Survey or Exploror and Discovery All around of on in our World About of The Countries, Continental, Environmental, School, University, Office, Mall, City, Village, Community, River, Sea, Ocean, Air.
ClickMeSeeAllFull
ClickMeSeeOnMoreDetail
ClickMeSeeOnMorePictureImage
ClickMeSeeOnMoreVideo
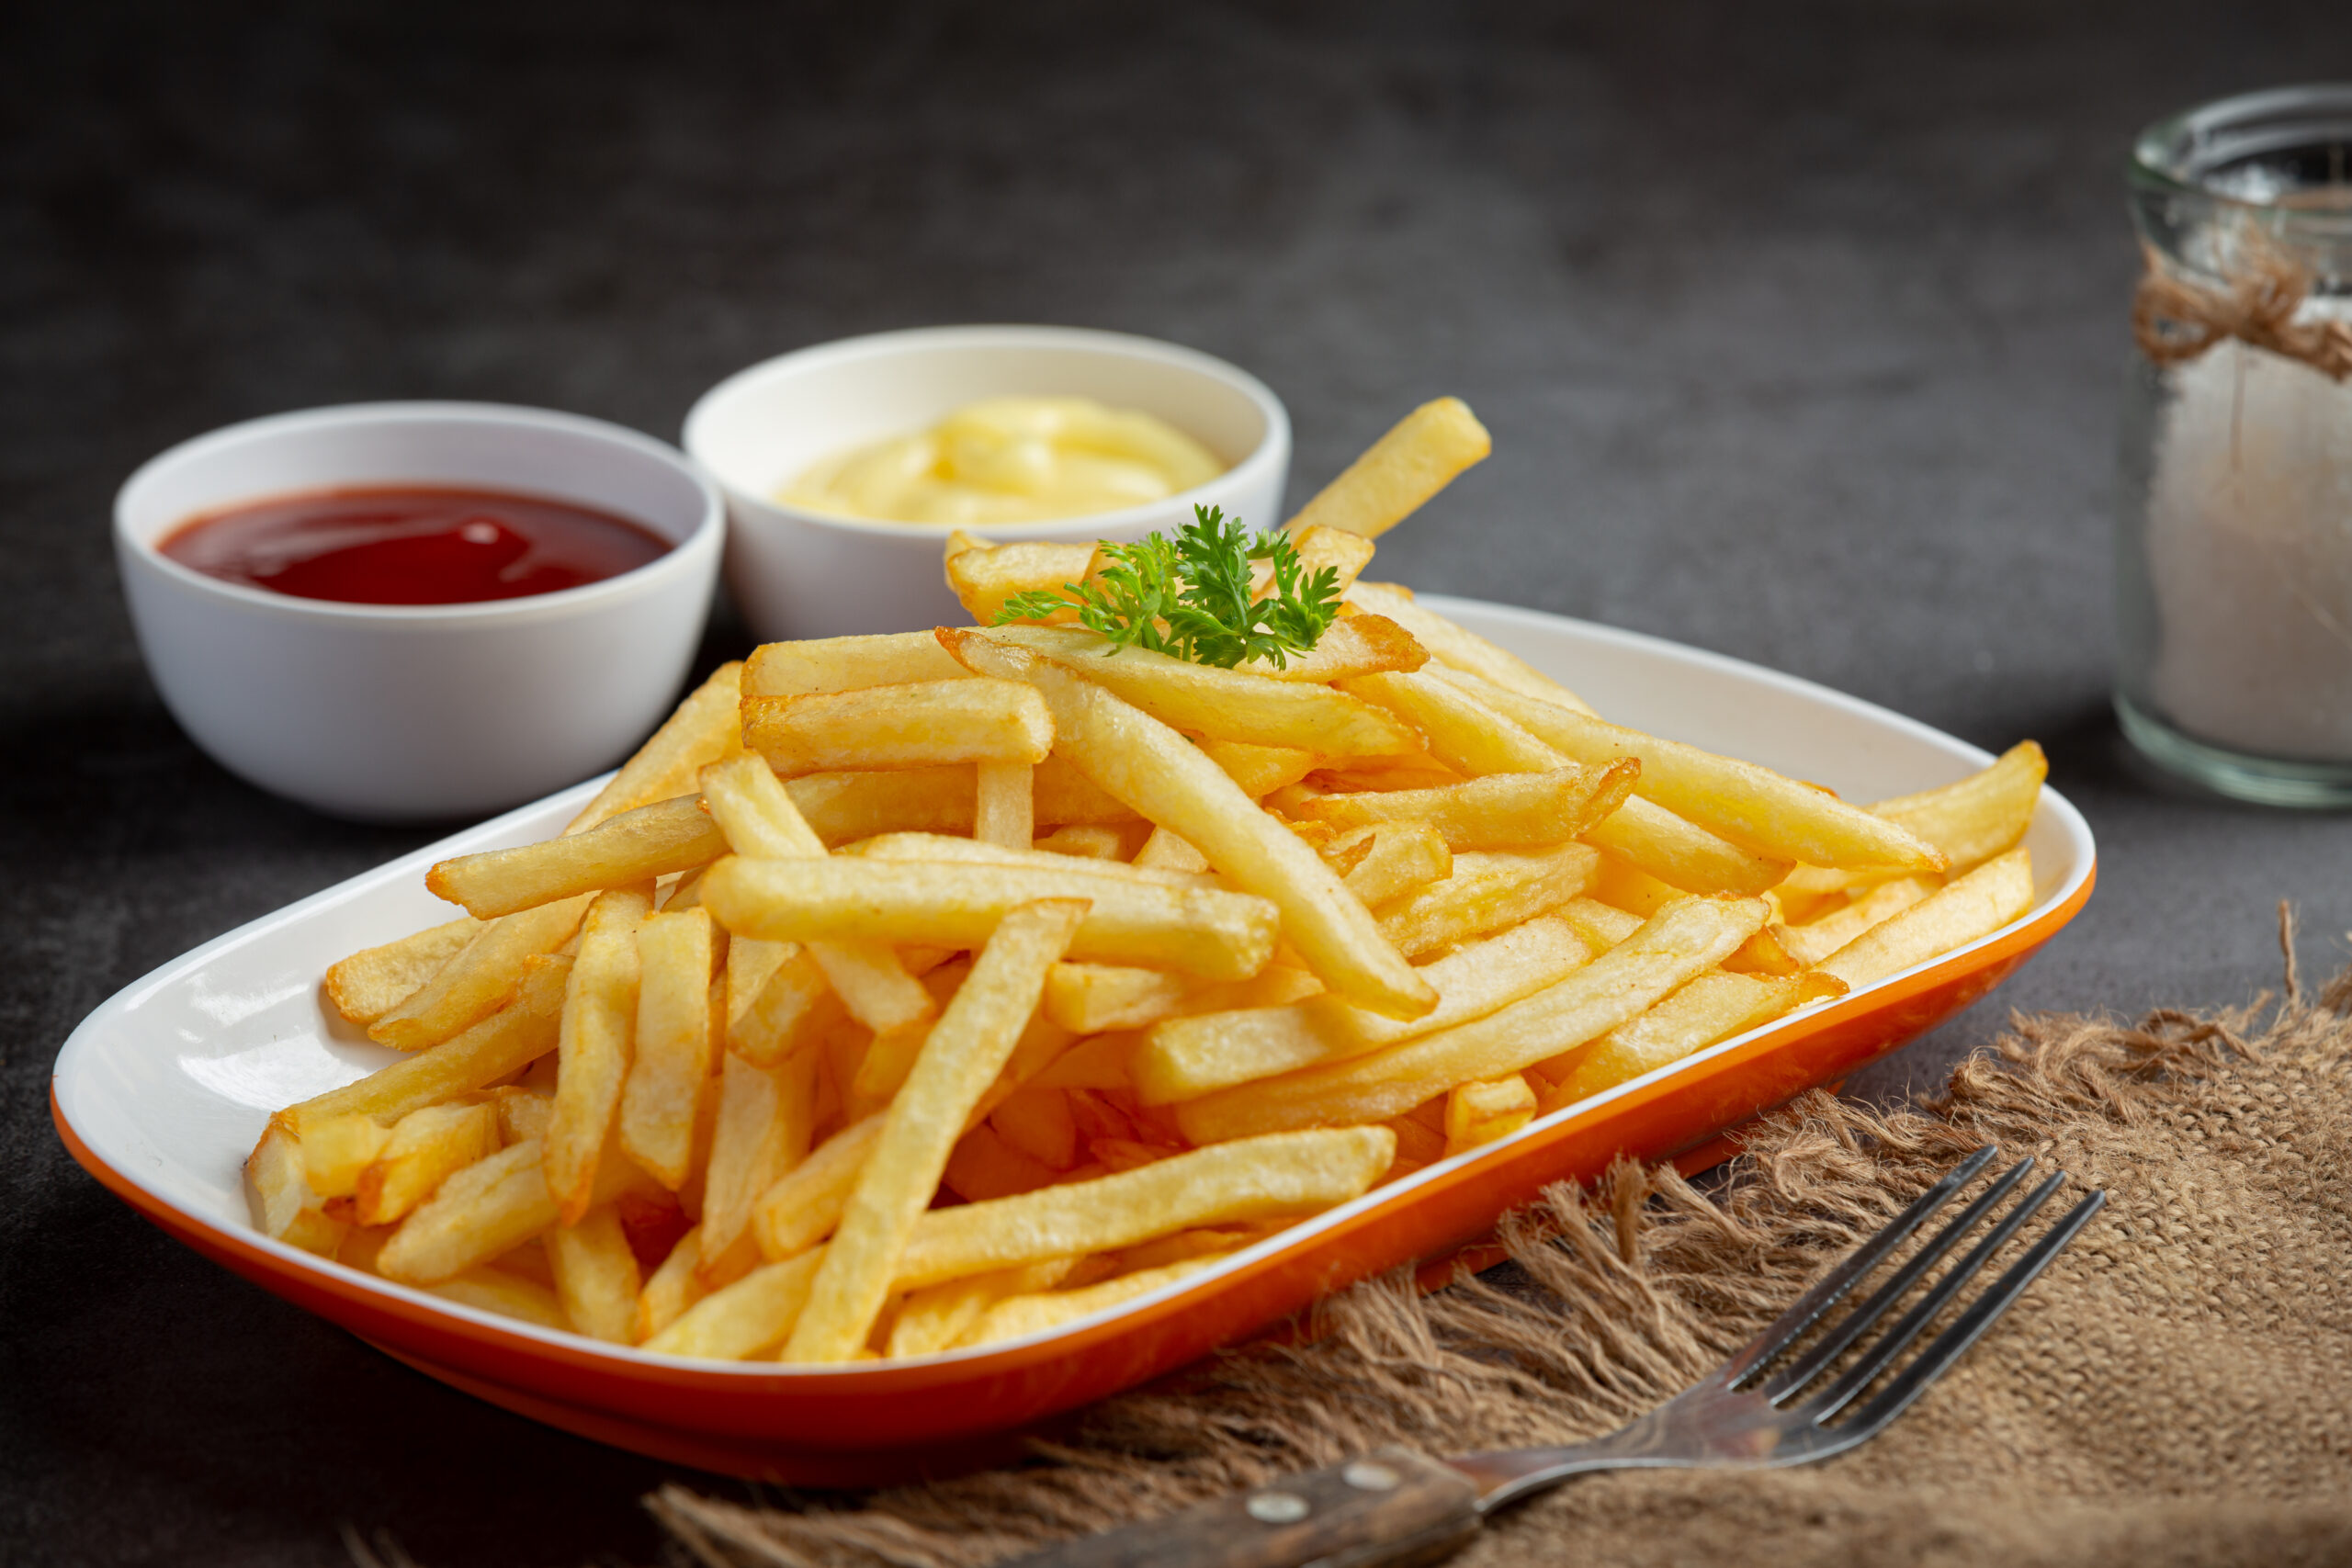
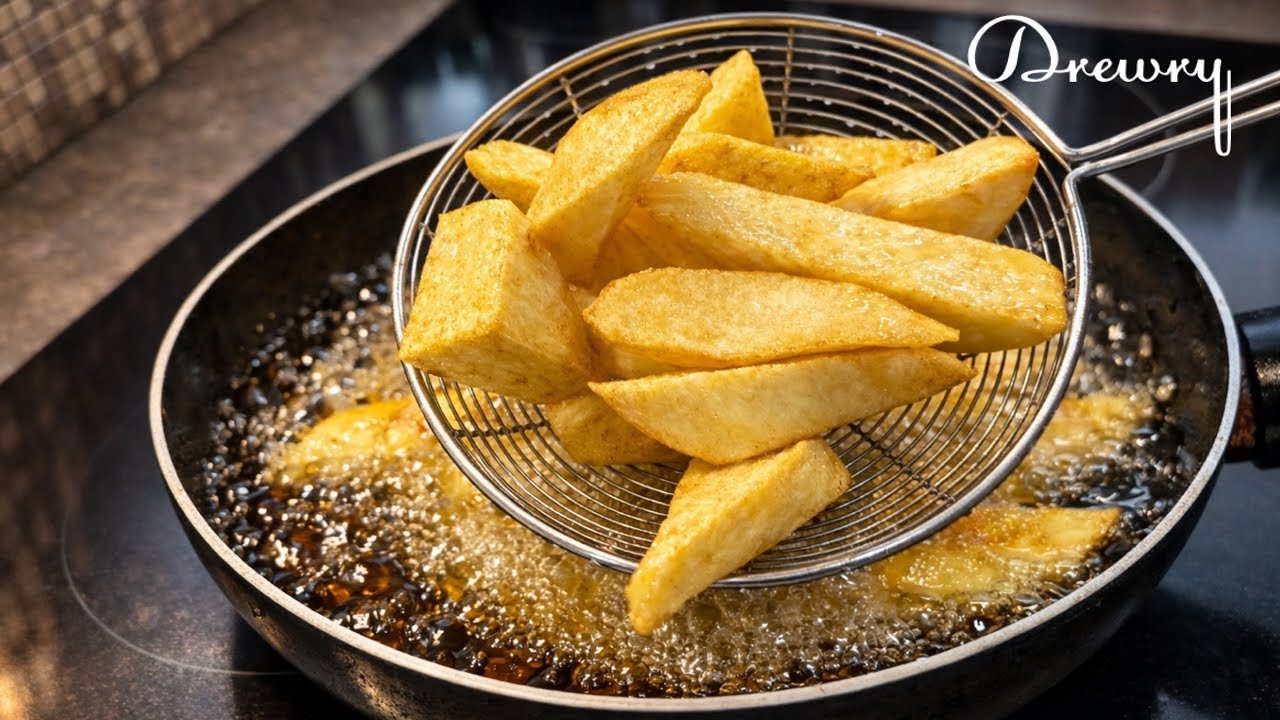
Food: 1.French Fries
Method: French Fries Fast Food Speeder Easy Quicker Nearly How to make made cook
Ingredient: 3 fresh potatoes or more than, 1/2-1 liter vegetable oil or more than, Salt. Procedure:The french fries have works to do is 1.The standard method for cooking french fries is deep frying, which submerges them in a hot fat, typically oil. The potatoes are prepared by first cutting them (peeled or unpeeled) into even strips, which are then wiped off or soaked in cold water to remove the surface starch, and thoroughly dried. They may then be fried in one or two stages. Chefs generally agree that the two-bath technique produces better results. Potatoes fresh out of the ground can have too high a water content resulting in soggy fries, so preference is for those that have been stored for a while. 2.In the two-stage or two-bath method, the first bath, sometimes called blanching, is in hot fat (around 160 °C/320 °F) to cook the fries through. This step can be done in advance. Then they are more briefly fried in very hot fat (190 °C/375 °F) to crisp the exterior. They are then placed in a colander or on a cloth to drain, then served. The exact times of the two baths depend on the size of the fries. For example, for 2-3 mm strips, the first bath takes about 1-10 minutes, and the second bath takes only seconds or 1-10 seconds. And then that the finally is All done.
ClickMeSeeAllFull
ClickMeSeeOnMoreDetail
ClickMeSeeOnMorePictureImage
ClickMeSeeOnMoreVideo
Food: 2.Hamburger
Method: Hamburger Fast Food Speeder Easy Quicker Nearly How to make made cook.
Ingredient: 400g minced meats, 1 medium onion roughly chopped, Salted butter, 3 tablespoons ketchup, 1 tablespoon oregano powder, 1 teaspoon pepper, 1 teaspoon sugar, 1 tablespoon liquid sticky food sauce, 1 egg, Burger buns or you can buy it in general the market. Sliced tomatoes, Sliced onions, Salad greens, Mayonnaise or your favorite sauce, Cheese slices. Procedure:The Hamburger have works to do is 1. Fries chopped onion with 1 tablespoon of salted butter. Put Add tomato sauce and oregano powder and continue to frying until the sauce is combined, and then Remove it and set aside to cool. 2.When it the ingredients is fried has cooled, Put add the minced meats, liquid sticky sauce, egg yolk, sugar, and pepper. Mix all ingredients together. Take the meats to rolled it into the balls or sheet page. 3.You can freeze the meat in the refrigerator or whatever, And then Setting a pan on stove, when the pan is heat, Put add 1 tablespoon of vegetable oil on in a pan, Take the prepared Meats burger to fry it on in the pan and cook them by flip flop to meats, turn meats around There for a fews time until it meats color is changed wait for it around 1-10 minutes or whatever that your want. Tip: Add pure of water or soup while waiting for the meats to cook or frying. This will make the meats tender and soft or just Put add only the water or if you won't to put add any oil. 4.Dip, Paint, Pour or Spread butter on burger buns and toast them in a pan for 1-4 minutes, While the meats is cooking and with toast the sliced onions. Tip: This will release the juices or oil from the meats, enhancing the flavor or taste up of burger, And then Once the meats is cooked, assemble the burgers. 5. Dip, Paint, Pour or Spread mayonnaise or your favorite sauce on the bread. Add salad greens, grilled onion rings, tomato rings, pork, cheese slices. Cover with bread lid, And then bring them to bake on a pan or bake machine, Or bring Specific cheese slices to fry on a pan around 1-4 seconds and then take cheese come into it and Cover with bread lid. And then that finally is All done.
ClickMeSeeAllFull
ClickMeSeeOnMoreDetail
ClickMeSeeOnMorePictureImage
ClickMeSeeOnMoreVideo
Food: 3.Steak
Method: Steak Fast Food Speeder Easy Quicker Nearly How to make made cook.
Ingredient: Other cuts of meats, about 1-1.5 inches thick, Black pepper flakes, Himalayan salt, sea salt, salt, Rosemary (optional or Whatever), Ground black pepper (optional). Procedure:The Steak have works to do is 1.Rest the meat: Remove the meat and let meats sit at room temperature for 1-1.5 hours before beginning. Pat meats dry. After resting at room temperature, pat dry any excess blood or water on the meat until the outer layer is dry. Trim the fat. Remove a small amount of fat from the meat and melt it. Use it as a cooking oil for steaks. 2. Season the meat with black pepper flakes and Himalayan, sea salt or salt, Tip: Use Himalayan, sea salt, as it's less salty than regular salt. Rosemary can be rubbed into the meat at this point to enhance the flavor or taste up, 3. Melt the fat, Melt the fat removed in step 1 over low to medium heat until it turns golden brown. Remove and discard or Tip: We melt the meats to get the oil we use for the steaks, and then season the golden brown meats with a little salt for a delicious snack. 4.Start cooking the steak. Turn the heat to higher until the oil is hot (you'll notice see smoke or cloud rising), Add the prepared steak meats to the pan, For a piece of steak about 1 inch thick. Flip Flop the steak every 30 seconds, continuing to flip flop for 2.5-3 minutes for medium rare Tip: Once the meat is cooked to your liking, flip the thicker edges over and lay, dip or sear them slightly in a pan to enhance the flavor or taste up. 5.Rest the meat. Once the meat reaches the desired doneness, remove it from the pan and rest for about 10 minutes before serving. This depends on the thickness of the meat. If the cut is very thick, you may need to rest for longer than 10 minutes. Slice and serve. Slice across the grain for easy chewing. Add freshly ground black pepper or salt to taste.And then that finally is all done.
ClickMeSeeAllFull
ClickMeSeeOnMoreDetail
ClickMeSeeOnMorePictureImage
ClickMeSeeOnMoreVideo
Food: 4.Meats Fry Fries Fried
Method: Meats Fry Fries Fried Fast Food Speeder Easy Quicker Nearly How to make made cook.
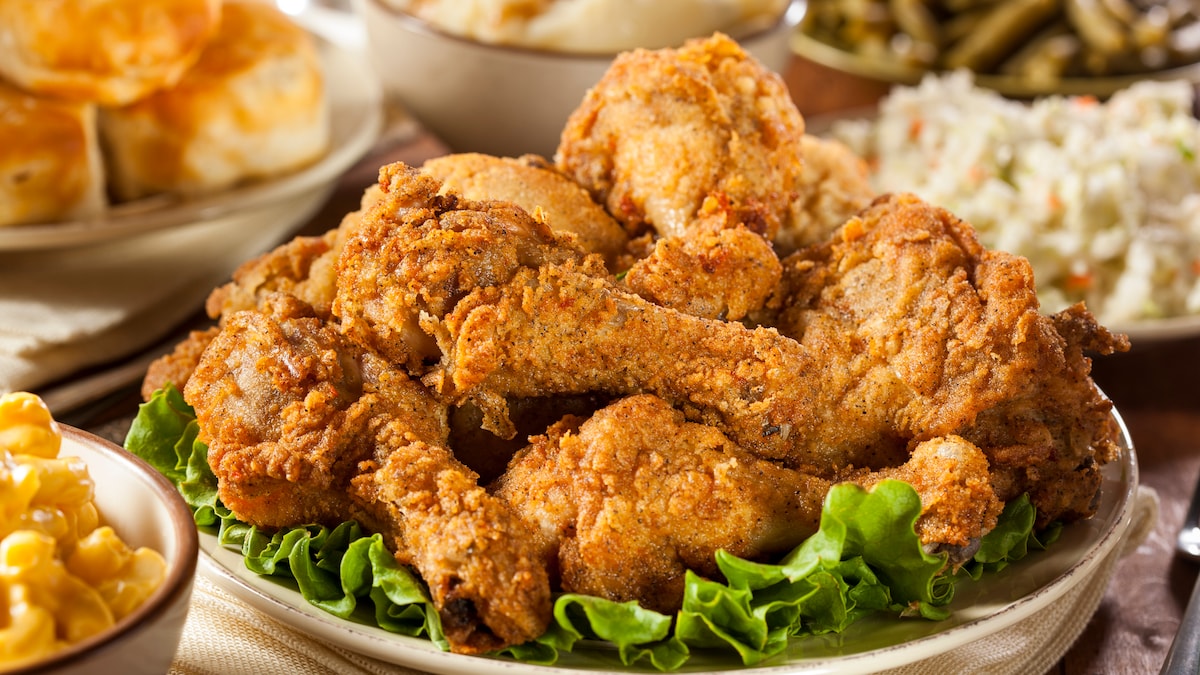
Ingredient:500 grams of meats wings or meats and more than, 2 tablespoons of fish sauce, 3-4 tablespoons of flour, 1-10 bottle of vegetable oil for frying over vegetable oil for deep-frying, 2 tablespoons of light soy or any liquid sticky sauce if you have. Procedure:The Meats Fry Fries Fried have works to do is 1.Ferment or Marinate the meats in fish sauce with liquid sticky oil sauce and fish sauce for 2 hours. 2.When you're ready to fry, Put add the tempura flour and cold water and mix as well and then take the meats to dip into the flour that you mix. 3.Heat oil until it boils. Pour enough oil to cover the meats. Put add the meats into the pan, Fry and Fries over medium to high heat until the meats is cooked through or the meats color is change. Remove from heat and drain over oil. Serve. And then that The finally is All done.
ClickMeSeeAllFull
ClickMeSeeOnMoreDetail
ClickMeSeeOnMorePictureImage
ClickMeSeeOnMoreVideo
Food: 5.Pizza
Method: Pizza Fast Food Speeder Easy Quicker Nearly How to make made cook.
The Ingredients: 1 pack of dough flour crust, 100 grams of ham, 100 grams of sausage, 100 grams of canned pineapple, 500 grams of shredded mozzarella cheese, 20 grams olive oil, 100 grams chopped onion, 100 grams chopped carrot, 30 grams tomato paste, 200 grams tomato sauce, 1 bay leaf, 5 grams oregano, 5 grams salt, 3 grams pepper, 10 grams sugar.(if You have no the ingredients about this, You can use the Other ingredients instead, and use it any other from your home and by the way you can buy it or find it out at the general Market and shops). Method: Procedure:The Pizza have works to do is 1. Prepare the pizza sauce by the heat a pan and put olive oil on in your pan. 2. Put the chopped onion and carrot and nounfry until cooked. 3. Put enter the bay leaf, oregano, and season with salt and pepper. 4. Put enter the tomato puree and nounfry until cooked. 5. Add tomato sauce up. 6. Stir until boiling, turn off heat and let cool before spreading, pour or draw, paint on pizza dough,Make pizza by spreading pizza sauce on in the dough flour. 7. Decorate or Put enter it with ham, sausage, and pineapple, on in the dough flour. 8. Sprinkle, Spreading or pour, put enter with cheese. Bake at this time at 200-210 degrees for 12-15 minutes or that your wants. Remove from oven and ready to serve and then eat the hot. And The finally is finsed. 5. Add tomato sauce up. 6. Stir until boiling, turn off heat and let cool before spreading, pour or draw, paint on pizza dough,Make pizza by spreading pizza sauce on in the dough flour. 7. Decorate or Put enter it with ham, sausage, and pineapple, on in the dough flour. 8. Sprinkle, Spreading or pour, put enter with cheese. Bake at this time at 200-210 degrees for 12-15 minutes or that your wants. Remove from oven and ready to serve then eat them while is hot or the cold that your wants, And the finally is finish, that is done.
ClickMeSeeAllFull
ClickMeSeeOnMoreDetail
ClickMeSeeOnMorePictureImage
ClickMeSeeOnMoreVideo
Food: 6.Parthonggo Youtiao Bread Stick
Method: Parthonggo Youtiao Bread Stick Fast Food Speeder Easy Quicker Nearly How to make made cook.
Ingredients: 275 grams of flour, 20 grams of powdered sand sugar, 1 teaspoon of powdered sand yeast, 1/4 teaspoon of baking soda, 20 grams of powdered milk or coffee mate, 1 teaspoon of salt, 175 grams of warm water, 1 teaspoon of baking powder, 1 plus 1/2 tablespoons vegetable oil. Procedure:The Parthonggo Youtiao Bread Stick have works to do is 1.Add granulated sugar to warm water in a measuring cup and stir until the sugar dissolves. Then add instant yeast and stir until dissolved. Let it rest sit wait for about 5 minutes. 2.Pour or Dump and Shift is a flour, milk powder, baking powder, and baking soda into a mixing bowl. Add salt and mix well. 3.Add the vegetable oil and the yeast mixture and mix well until it becomes a sticky dough. Cover with plastic wrap and let it rest for 1 hour. Then turn the dough over and let it rest and wait for it more another 1 hour. 4.When the dough has doubled in size, and then you can flip or swap over it from top to down and let it rest wait for it in around another 4-5 hours or overnight. 5.Pour or Dumb and Sprinkle flour on the floor of your preparing of the dough. Place the dough on top and knead to remove air. Press the dough flat. Divide into portions and roll or pull out the dough to about half a centimeter thin. 6. Cut the dough into 2-inch of widths or Pull and Roll the dough 2-inch of widths and then divide or cut it into 2-inch pieces. Dab or stamp or past water down on in the center of the dough and place the 2 pieces together, Especially pressing the center firmly is a type of easy layer . 7. Put a pan on in the stove with over enough oil to cover it and wait for it is heat, using palm oil and medium heat. Before place or put them in the pan, stretch them slightly is around 1-5 centimates or more than that your wants. Once the oil is hoter, add the dough your preparing and fry them. 8.Keep using chopsticks to turn it the pieces over and over or flip flop on around it until golden brown. Scoop them up and set them aside on a wire rack. Ready to serve. And the finally is finish, that is done.
ClickMeSeeAllFull
ClickMeSeeOnMoreDetail
ClickMeSeeOnMorePictureImage
ClickMeSeeOnMoreVideo
Food: 7.Sarlarpow BubbleBowl
Method: Sarlarpow Baozi BubbleBowl Fast Food Speeder Easy Quicker Nearly How to make made cook.
Ingredients: 350 grams of cake flour, 1 tablespoon of yeast, 1 tablespoon of sugar, 200 ml warm water, 150 grams of cake flour or180 g Cake Flour, 150 g of All-Purpose Flour, 80 g of Wheat Flour, ½ tablespoon of baking powder, 50 ml of water, 100 grams of sugar, 1 teaspoon of salt, 50 ml of vegetable oil, 500 grams of ground meat,3 coriander roots, 1 head of garlic, 1 tablespoon of peppercorns, 3 tablespoons of oyster sauce, 2 tablespoons of seasoning sauce, 1 tablespoon of sugar, 1 tablespoon of sesame oil, 1 egg, 2 tablespoons of cornstarch, Chopped green onions, to taste Salted egg yolk(if you have), to taste. Procedure:The Sarlarpow Baozi BubbleBowl have works to do is 1.Mix flours, yeast, sugar, and warm water together as well. 2. Massage, Knead, Rub, Bump, Punch, knocking, Crush, Dash or Drag to flour and turn it around there here for about 10 minutes until the dough is smooth. 3.and then Cover with plastic wrap and let it rest at room temperature for 60 minutes. 4.Bump, Crush, Pound together coriander roots, garlic and peppercorns. put add to the bowl with the minced meat. 5.Then Put Add oyster sauce, seasoning sauce, sugar, sesame oil, cornstarch or corn flour, chopped green onions, and egg. Mix well and set aside as well. 6.Make the dough by sifting together flour or cake flour, baking powder, and salt. 7.Put Add sugar, water, vegetable oil, and the fermented starter. Massage, Knead or Rub for about 10 minutes until the dough is smooth. 8.Divide or Cut it into 60-gram pieces and prepare to wrap more. 9.Then the Roll or Rub the dough flat, Put Add the minced meat filling down, followed by the salted egg yolk, and then wrap it up and paste it down on in the paper. 10.then Bring it to Bake or Steam on in the layer over boiling water for around 15-20 minutes. Interesting TIPS: Steaming time depends on the size of the buns (Don't forget this). this finally is finish and that is done.
ClickMeSeeAllFull
ClickMeSeeOnMoreDetail
ClickMeSeeOnMorePictureImage
ClickMeSeeOnMoreVideo
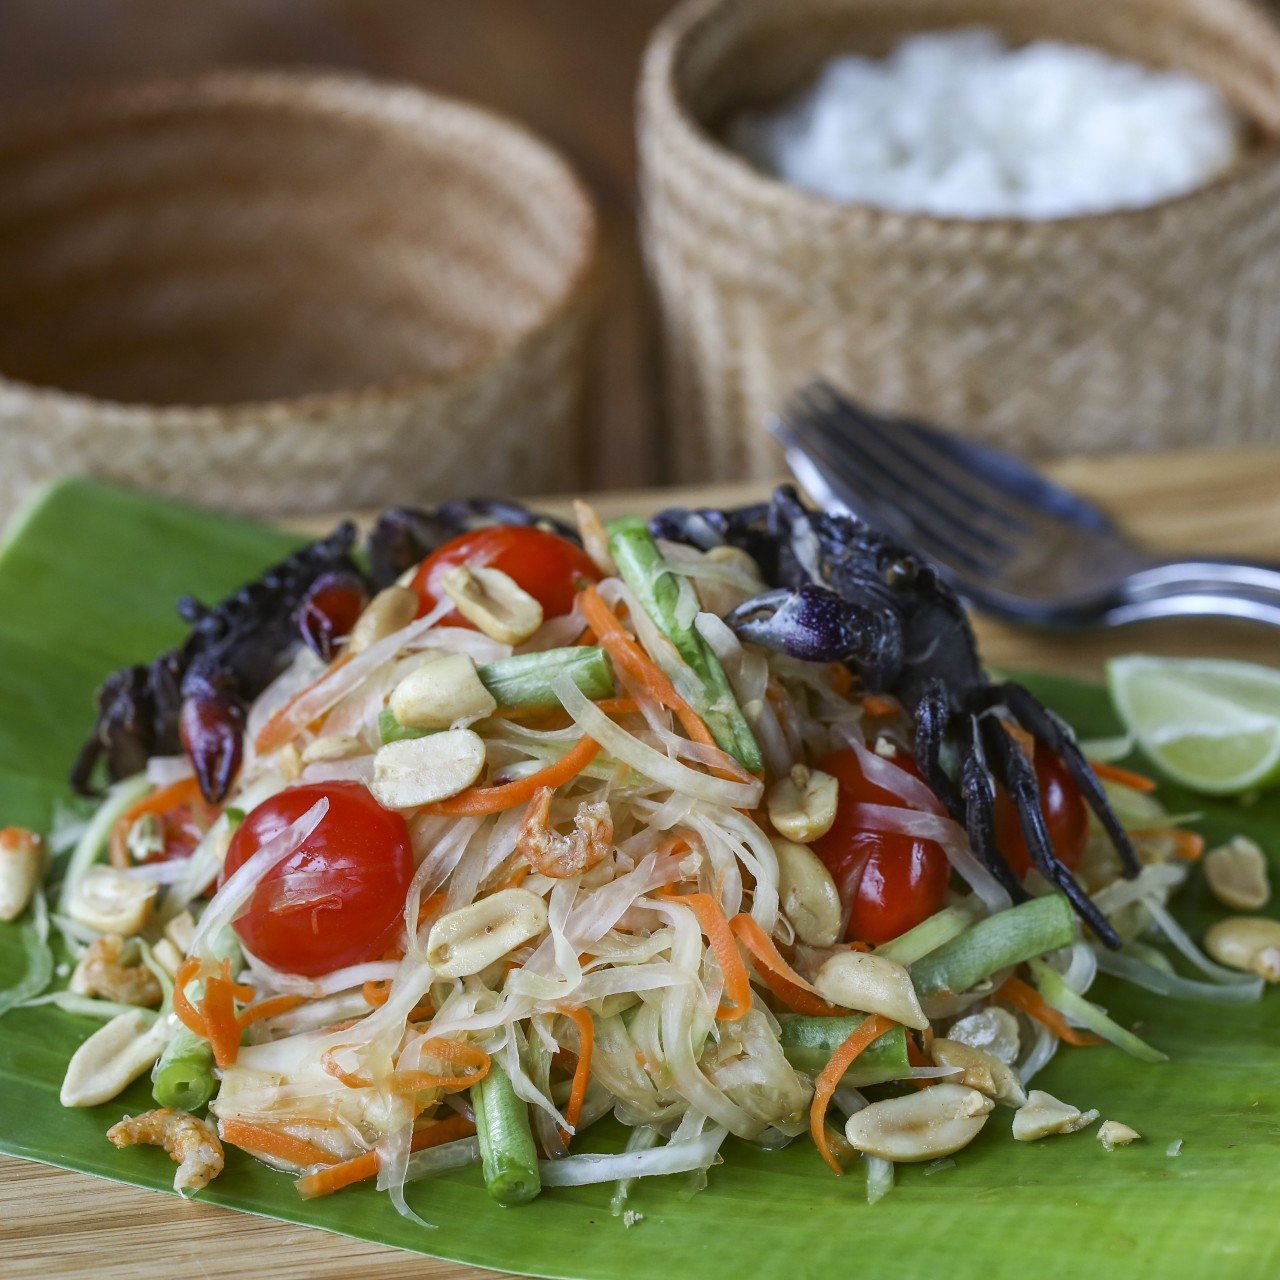
Food: 8.Somtime Green Papaya Salad
Method: Somtime Green Papaya Salad Fast Food Speeder Easy Quicker Nearly How to make made cook.
The Ingredients: Chopped papaya, Jean sticky (Khanom Jeen), noodles, Tomatoes, Fresh chilies, Garlic, Lime, Fish sauce, Fish ferment, Crap farm, Sugar, MSG(Mono Sodium Glutamate) or Gourmet powder, Meat such as field crab, octopus, shrimp or any other of Meats and Vegetables with Fruits for anything else that your wants. Procedure:The Somtime Green papaya salad have works to do is 1. Put red or orange , green chili and garlic in a pothole, mortar and pound, bump, dash, crush it until it's break of spreading enough to slice the tomatoes following down. Pound, bump, dash, crush it until it mix as well combined. 2.Put enter or Season with fish sauce, fish ferment, MSG, lime juice, and crab powder. Put enter the chopped papaya and Jean sticky(Khanom Jeen) or Jean noodles, rice vermicelli noodles and then you must to Swirling, Rolling, Winding and flip flop it, then more than it turn aroud there for mix as well until all the ingredients are as well combined. Taste and adjust that the seasoning as desired. and then it is ready to serve on a plate for you, That finally is finisher is done for all this Somtam Green papaya salad. Summary Script:The dish combines the five main basic tastes: the sourness of the lime, spiciness of the chili, saltiness and savoriness of the fish sauce, and sweetness of palm sugar. by typically , the local variety of green papaya salad in the streets of many countries is very spicy due to the addition of a fistful of chopped hot bird's eye chili. However, with its rising popularity among tourists. And the finally is finish, that is done.
ClickMeSeeAllFull
ClickMeSeeOnMoreDetail
ClickMeSeeOnMorePictureImage
ClickMeSeeOnMoreVideo
Food: 9.Rice Fried
Method: Cooked Rice Fried Fast Food Speeder Easy Quicker Nearly How to make made cook.
The Ingredients: 1 cup cooked rice, 2 chicken eggs, Meats whatever that your want, 1 tablespoon chopped green onions, 1/2-1 tablespoon salt, 1 teaspoon pepper - This adds a spicy and aromatic flavor to the fried rice, 3 tablespoons vegetable oil. Procedure:The Cooked Rice Fried have works to do is 1. Pour oil into a pan, swirl it around the pan, then drain or don't drain. Put Add cooked rice and stir-fry until hot and fluffy. 2.Put an eggs into the pan and stir-fry until the egg coats the rice grains mix as well. Stir-fry until the egg is cooked through and the rice turns a beautiful golden yellow. 3.Season with salt and pepper or any sauce that your want, Put Add chopped green onions for a beautiful presentation. And then that The finally is All done.
ClickMeSeeAllFull
ClickMeSeeOnMoreDetail
ClickMeSeeOnMorePictureImage
ClickMeSeeOnMoreVideo
Food: 10.Partgarpow Phat Kaphrao
Method: Partgarpow Phat Kaphrao Fast Food Speeder Easy Quicker Nearly How to make made cook.
The Ingredients: 1 cup minced meats, 1 minced an onion, 2 tablespoons cook sauce, 1 tablespoon soy sauce, 1/2-1 tablespoon sugar, 1-4 teacup or A little bit of water, 1-4 teacup or 1-20 tablespoon or more than to frying for holy basil leaves, 1 tablespoon chopped fresh chilies and garlic. Procedure:The Partgarpow Phat Kaphrao have works to do is 1.Heat oil in a pan. Once hot, add garlic and fresh chilies and stir-fry until fragrant. Put Add onion and stir-fry until wilted. Then add minced meats and spread it around there. 2.Enter Add cook sauce, soy sauce, and a little sugar and mix well. Add a little water. 3. Once the meat is cooked through, Enter add the basil leaves. Stir-fry until the basil leaves are evenly cooked mix as well. And then that The finally is All done.
ClickMeSeeAllFull
ClickMeSeeOnMoreDetail
ClickMeSeeOnMorePictureImage
ClickMeSeeOnMoreVideo
Food: 11.Soup Zip Spicy
Method: Soup Zip Spicy Fast Food Speeder Easy Quicker Nearly How to make made cook.
Ingredients: 5 cups of Pure drinking water, 300 grams of meat, rib, seafood or anythig else that you have want, 2 grams of galangal, 15 grams of lemongrass or 2 stalks, 5 torn of kaffir lime leaves, 1 tablespoon of seasoning powder (if you don't have about this) you can use this is 1tlablespoon of fish sauce, 1 teaspoon of sugar, 1 teaspoon of MSG(Mono Sodium Glutamate) instead than that.) 1 teaspoon of salt, 2 tablespoon of roast rice, pop rice or rice powder, 10 eye bird's, pieces of chilies, little chilies, red chilles (adjust to taste), 4 tablespoons of fish sauce, 2 tablespoons of roasted rice, 5 tablespoons of lime juice, Chili powder (adjust to taste that your wants), Chopped green onions and chopped coriander or anything else of vegetables and fruits, that you have and your wants. Procedure:The Soup Zip Spicy have works to do is 1.Pour Pure water into a pot and wait for it is a boil, heats or streams. 2.Then Put seasoning powder and salt or that you have prepared into a pot. 3.While or When the water boils, heats or streams, Put add the meat and rib and skim off, grab off, remove it off, get it off, keep it off of any white foams or bubbles on in a pot water. 4. Then reduce the heats or fires on in a little bit. 5. Let's simmer, rolls or turn around there here about 1-10 minutes or more up that your want, until the pork bones are tender. 6.Put Add the galangal, lemongrass, and torn kaffir lime leaves. Continue to boil for a while 1-10 minutes before you put seasoning into it. Interesting Tip: Put Add the tender meat, rib or bone into on in while when the boiling, heating or streams water to prevent the broth or soup from becoming fishy or the smell that you don't want. 7.Put Add Seasoning that you have prepared is such as fish sauce, bird's eye chilies, roasted rice, and chili powder and turn off or turn down the heat of fire. 8. Put add lime lemon juice, sprinkle or put with chopped green onions and chopped coriander. that the finally is the finish, Easy Quickly for Home Made. And then that The finally is All done.
ClickMeSeeAllFull
ClickMeSeeOnMoreDetail
ClickMeSeeOnMorePictureImage
ClickMeSeeOnMoreVideo
Food: 12.Jeeper jeep Jeeping jeep Shumai
Method: Jeeper jeep Jeeping jeep Shumai Fast Food Speeder Easy Quicker Nearly How to make made cook.
Ingredients: 100 grams of coarsely chopped shrimp, 200 grams of ground meat or any other that you want to eat, 2 roots of coriander, 3 cloves of garlic, 1 teaspoon of black pepper, 50 grams of diced carrots, 20 pieces of dumpling wrappers, 1 tablespoon of seasoning sauce, 1 tablespoon of oyster sauce, ½ or 0.2 tablespoon of sugar, 1 teaspoon of sesame oil, 1 tablespoon of cornstarch, corn powder, corn flour. Procedure:The Jeeper jeep Jeeping jeep Shumai have works to do is 1.Bump, Crush, Dash, Pound together coriander roots, garlic, and pepper. 2.Then mix with minced shrimp, minced meat, and diced carrots is a little cube. 3.Season with seasoning sauce, oyster sauce or anything that you have about this sauce, sugar, sesame oil, and cornstarch or corn flour. Mix or Roll it turn it around there until the ingredients are as well combined. 1.Wrap the dumplings by placing the dumpling wrapper between your thumb and index finger or you have to made make your finger or hand are type of the C or put it on in your hand. 2.then scoop it is the ingredients about 1 tablespoon of filling into the wrapper. and Use your hand and finger to roll, band, squeeze, tied the dumpling wrapper into shape or any shape your wants, Then use the back of a spoon to press the wrapper into the top side to turn off it or wrapped it. 3.Once wrapped,then sprinkle or spread with the water around it or any limit that you wants to soften the dough and prevent it from becoming hard. 4.And Then steam or bake it and paste it on the layer of water heat for 15-20 minutes and waiting until the filling is ingredients on inside is cooked. 4.Spread or Put with The fried garlic oil. The finally is finish, That the Jeeper jeep, Jeeping jeep is done. And then that The finally is All done.
ClickMeSeeAllFull
ClickMeSeeOnMoreDetail
ClickMeSeeOnMorePictureImage
ClickMeSeeOnMoreVideo
Food: 13.Pop Corn
Method: Pop Corn Fast Food Speeder Easy Quicker Nearly How to make made cook.
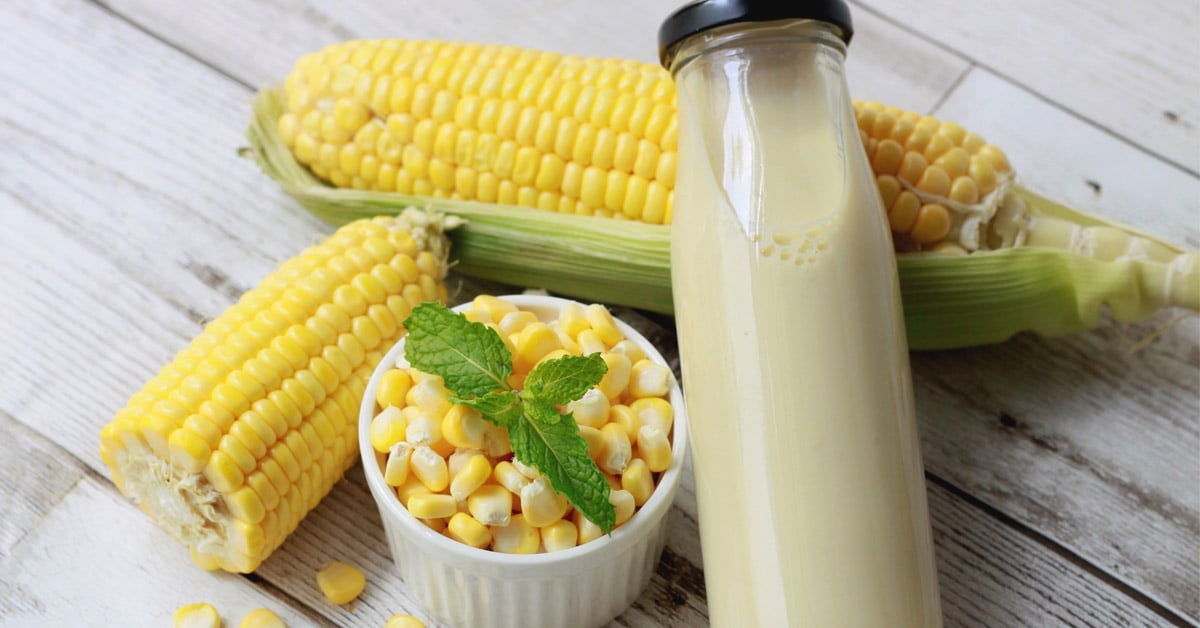
Ingredients: 50 grams of dried corn kernels 50 grams of margarine 50 grams of soybean oil 1/4 teaspoon of salt Cheese Seasoning Powder, Chocolate, Vanilla, Mlik, Greentea, Caramel. Procedure:Pop Corn have works to do is 1.Heat the oil: Add the corn kernels, oil, and butter (if using) to a pan (there should be just enough oil to coat the kernels, but not completely submerge them). 2. Test the heat: Put 3-4 corn kernels in, wait for them to pop, then add the remaining kernels in a single layer. 3. Roasting: When they start to crack, cover the pan and shake it back and forth over medium heat until the crackling sound stops. 4. Seasoning: Add salt, sugar, cheese powder, or caramel to taste. That the Pop Corn is done. Attention Interesting Tip: Popcorn is a popular snack made from a special variety of corn (Zea mays everta) that puffs up and bursts when heated by the water inside the kernel, becoming white and fluffy. It is a whole grain that is high in fiber, With a long history in the Every Continental, it now comes in a wide variety of flavors, including salty, sweet, cheesy, caramel, and other flavorings. Components and Cracking Mechanism Corn Kernel: It has a hard outer shell (pericarp) that encloses the soft starch-filled part (endosperm) and the germ, Water Inside: There is a small amount of water inside. When heated, this water turns into steam and creates high pressure within the kernel, Popping: When the pressure exceeds what the shell can withstand, it violently bursts open, expelling the soft inner dough into the popcorn shape, Benefits and Types Whole grains: High in fiber and protein, healthy when not overly processed, Variety of flavors: Available in plain (butter, salt), sweet (caramel), cheese, and other flavors, Used for breakfast: In the past, it was popular to eat with milk like cereal. And then that The finally is All done.
ClickMeSeeAllFull
ClickMeSeeOnMoreDetail
ClickMeSeeOnMorePictureImage
ClickMeSeeOnMoreVideo
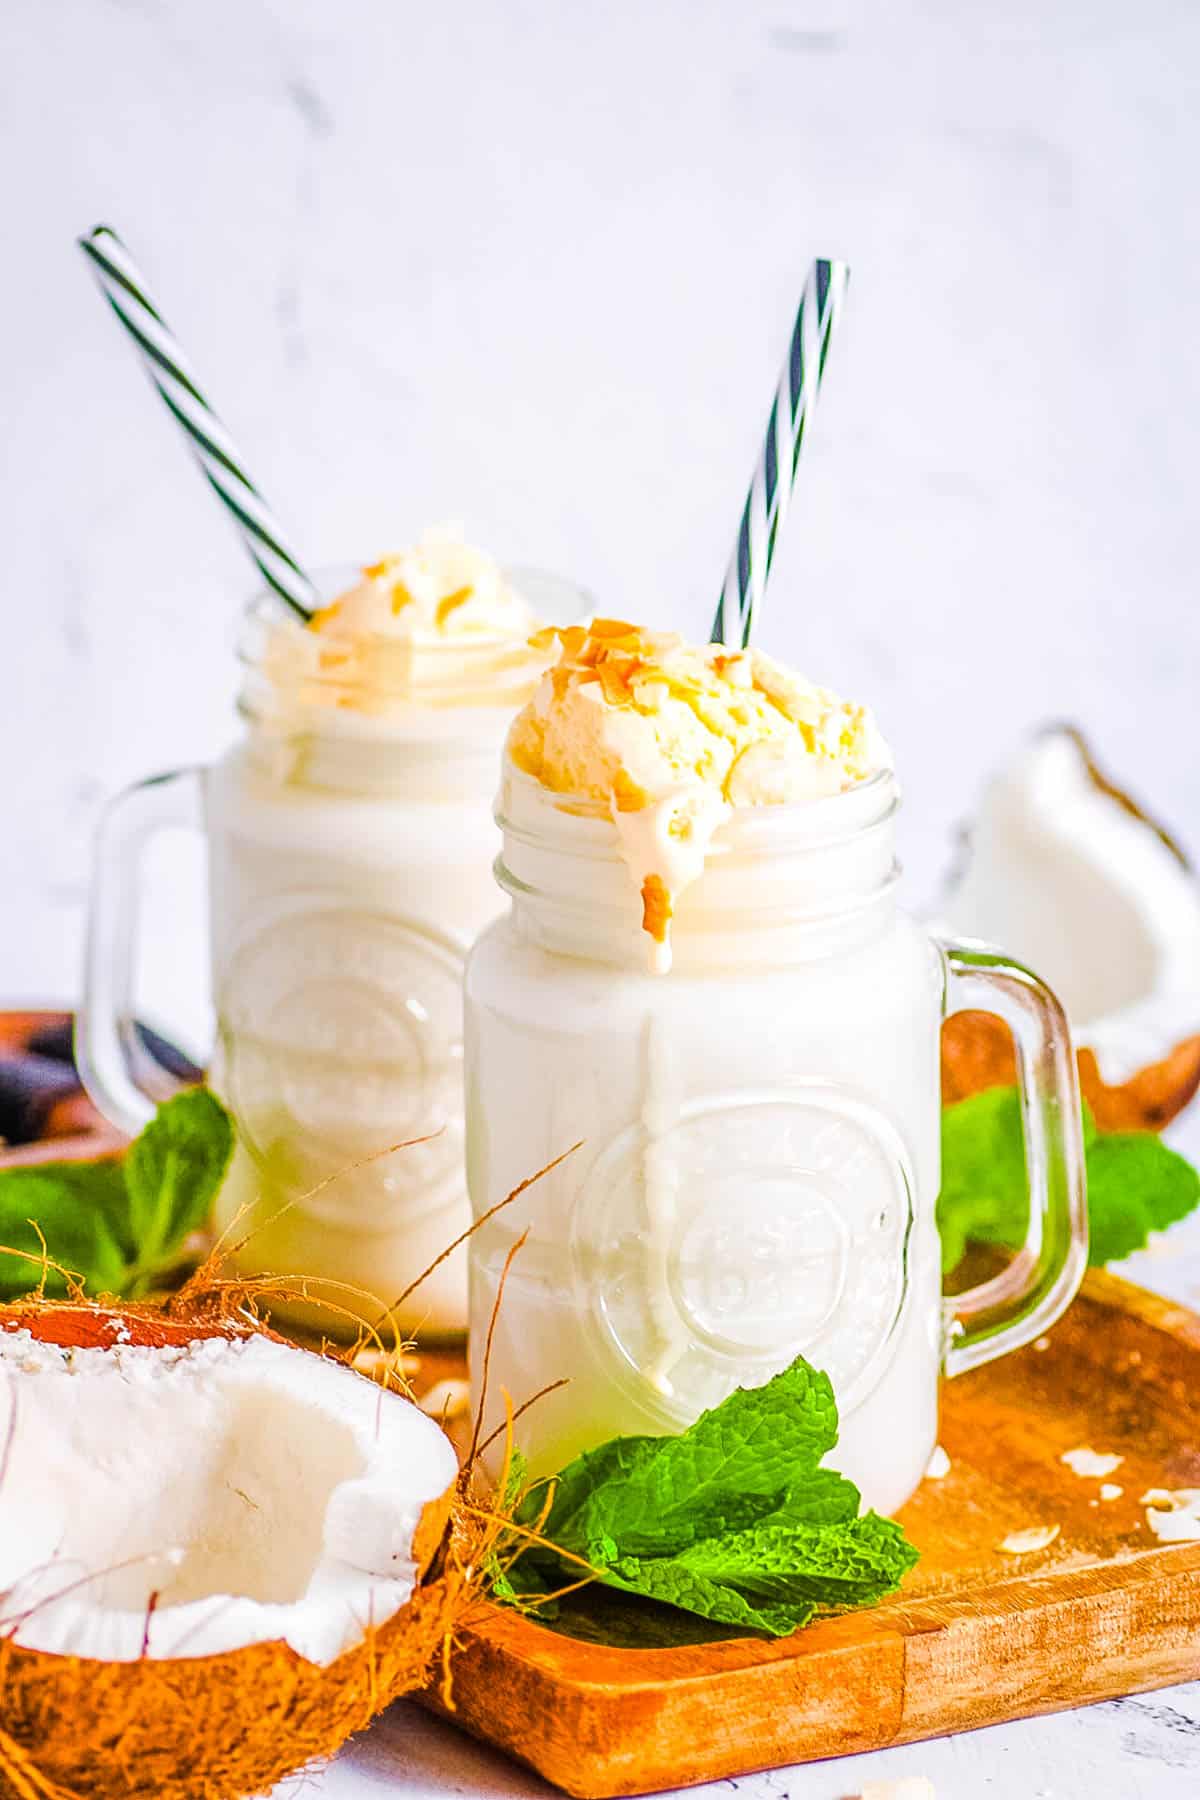
Drink: 1.Coconut Milk Juice Shake Smoothie
Method: Coconut Milk Juice Shake Smoothie Fast Drink Speeder Easy Quicker Nearly How to make made cook.
Ingredients: 50 grams young coconut meat, 100 grams coconut water, 100 grams fresh milk, 30 grams sweetened condensed milk, 50 grams unsweetened condensed milk, a little bit of salt, ice. Procedure:The Coconut Juice Shake Smoothie Milk have works to do is 1.Place Put Coconut meat, 2.Coconut water, 3.Fresh milk, 4.Sweetened condensed milk, Evaporated milk, and a pinch of salt in a blender. Add ice to the blender, close the lid, and blend all ingredients until smooth and thoroughly combined. Pour into a glass and garnish with coconut meat. And then that The finally is All done.
ClickMeSeeAllFull
ClickMeSeeOnMoreDetail
ClickMeSeeOnMorePictureImage
ClickMeSeeOnMoreVideo
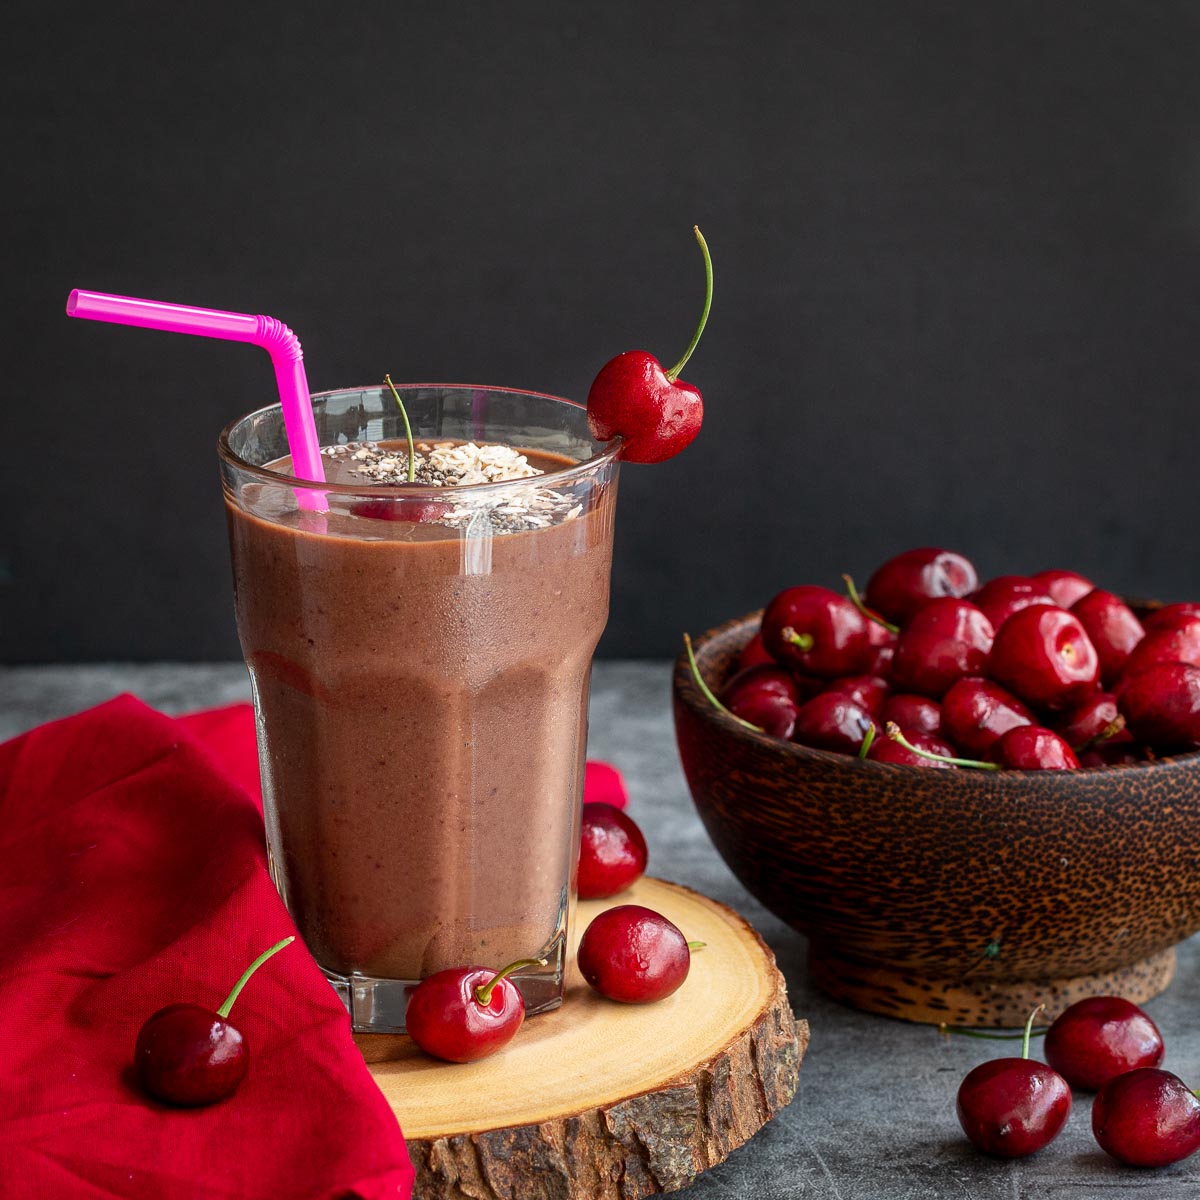
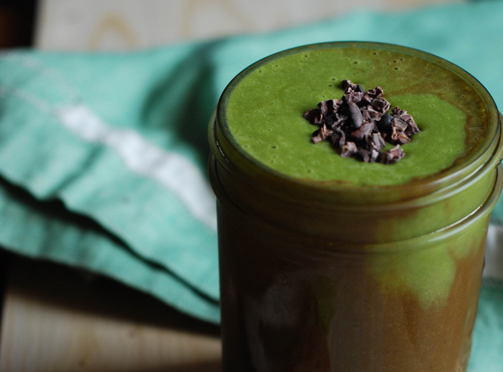
Drink: 2.Koko Chocolate Cocoa Juice Shake Smoothie Milk Juice Shake Smoothie Milk
Method: Koko Chocolate Cocoa Juice Shake Smoothie Milk Fast Drink Speeder Easy Quicker Nearly How to make made cook.
Ingredients: 10 grams cocoa powder, 75 ml hot water, 50 ml sweetened condensed milk, 100 ml fresh milk, ice. Procedure:The Koko Chocolate Cocoa Juice Shake Smoothie Milk have works to do is 1.Dissolve cocoa powder with hot water in a glass or mixing bowl. Stir well until the cocoa powder is completely dissolved and no lumps form. Set aside to cool slightly. 2.Pour the melted cocoa mixture into a blender. 3.Add the sweetened condensed milk and fresh milk. 4.Add ice to the blender. 5.Close the blender lid tightly and blend all ingredients until smooth and no ice crystals remain. Pour into a glass and garnish. The finally is done.
ClickMeSeeAllFull
ClickMeSeeOnMoreDetail
ClickMeSeeOnMorePictureImage
ClickMeSeeOnMoreVideo
Drink: 3.Green Tea Milk Juice Shake Smoothie
Method: Green Tea Milk Juice Shake Smoothie Fast Drink Speeder Easy Quicker Nearly How to make made cook.
Ingredients: 80 ml green tea extract, 60 ml sweetened condensed milk, 20 ml syrup, 30 ml fresh milk, 60 ml evaporated milk, ice. Procedure:The Green Tea Milk Juice Shake Smoothie have works to do is 1. Combine the prepared green tea extract with syrup. 2. Add sweetened condensed milk, fresh milk, and evaporated milk. 3. Stir well. 4. Place ice in a blender and pour the prepared tea mixture over the ice. 5. Close the blender lid tightly and blend all ingredients until smooth and fine, with no ice crystals remaining. Pour the blended green tea into the prepared 1/2 ounce glass. The finally is done.
ClickMeSeeAllFull
ClickMeSeeOnMoreDetail
ClickMeSeeOnMorePictureImage
ClickMeSeeOnMoreVideo
Drink: 4.Milk Tea Milk Juice Shake Smoothie
Method:Milk Tea Milk Juice Shake Smoothie Fast Drink Speeder Easy Quicker Nearly How to make made cook.
Ingredients: 80 ml Thai tea extract, 60 ml sweetened condensed milk, 20 ml syrup, 30 ml fresh milk, 60 ml evaporated milk, ice. Procedure:The Milk Tea Milk Juice Shake Smoothie have works to do is 1. Combine the prepared Thai tea extract with syrup, followed by sweetened condensed milk, fresh milk, and evaporated milk. 2. Stir well. 3. Place ice in a blender. 4. Pour the prepared tea mixture over the ice in the blender. 5. Close the blender lid tightly and blend all ingredients until smooth and fine, with no ice crystals remaining. Pour the blended Thai tea into the prepared 1/2-ounce glass. The finally is done.
ClickMeSeeAllFull
ClickMeSeeOnMoreDetail
ClickMeSeeOnMorePictureImage
ClickMeSeeOnMoreVideo
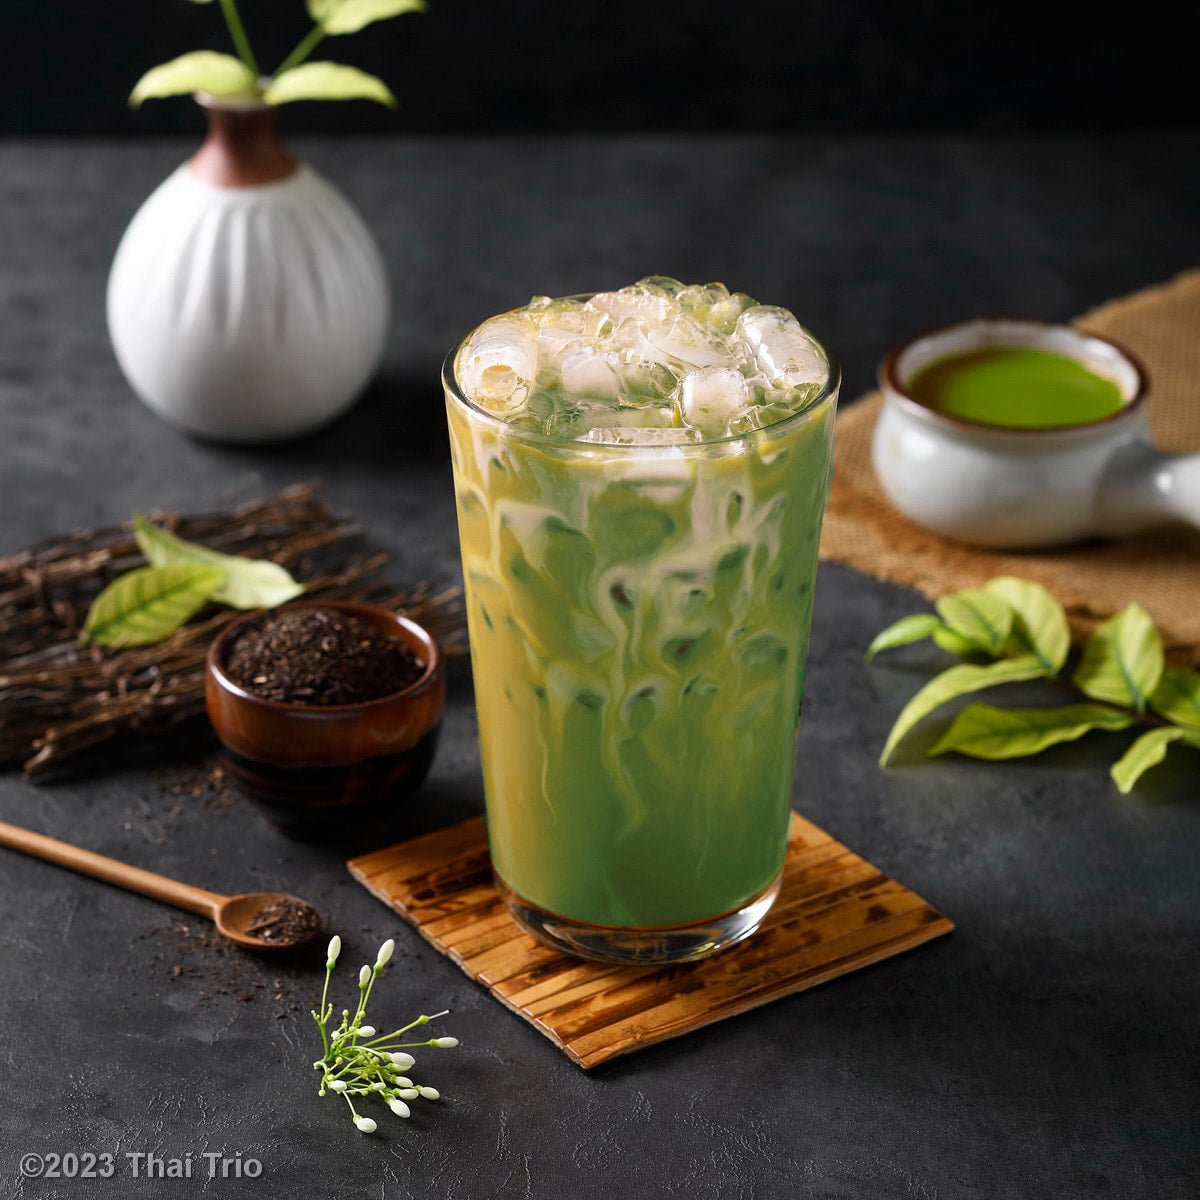
Drink: 5.Matcha Milk Juice Shake Smoothie
Method:Matcha Milk Juice Shake Smoothie Fast Drink Speeder Easy Quicker Nearly How to make made cook.
Ingredients: 1 teaspoon matcha powder, 30 ml hot water, 30 ml syrup, 150 ml fresh milk, ice. Procedure:The Matcha Milk Juice Shake Smoothie have works to do is 1. Sift the matcha powder into a small bowl to prevent clumping. 2. Then pour in hot water. 3. Using a matcha whisk, whisk quickly to dissolve the matcha powder into the water until it is smooth and lump-free. Set aside. 4. Pour the melted matcha mixture, syrup, and fresh milk into a blender. 5. Add ice to the blender. Close the blender lid tightly and blend all ingredients until smooth and uniformly colored. Pour into an ounce glass and garnish. The finally is done.
ClickMeSeeAllFull
ClickMeSeeOnMoreDetail
ClickMeSeeOnMorePictureImage
ClickMeSeeOnMoreVideo
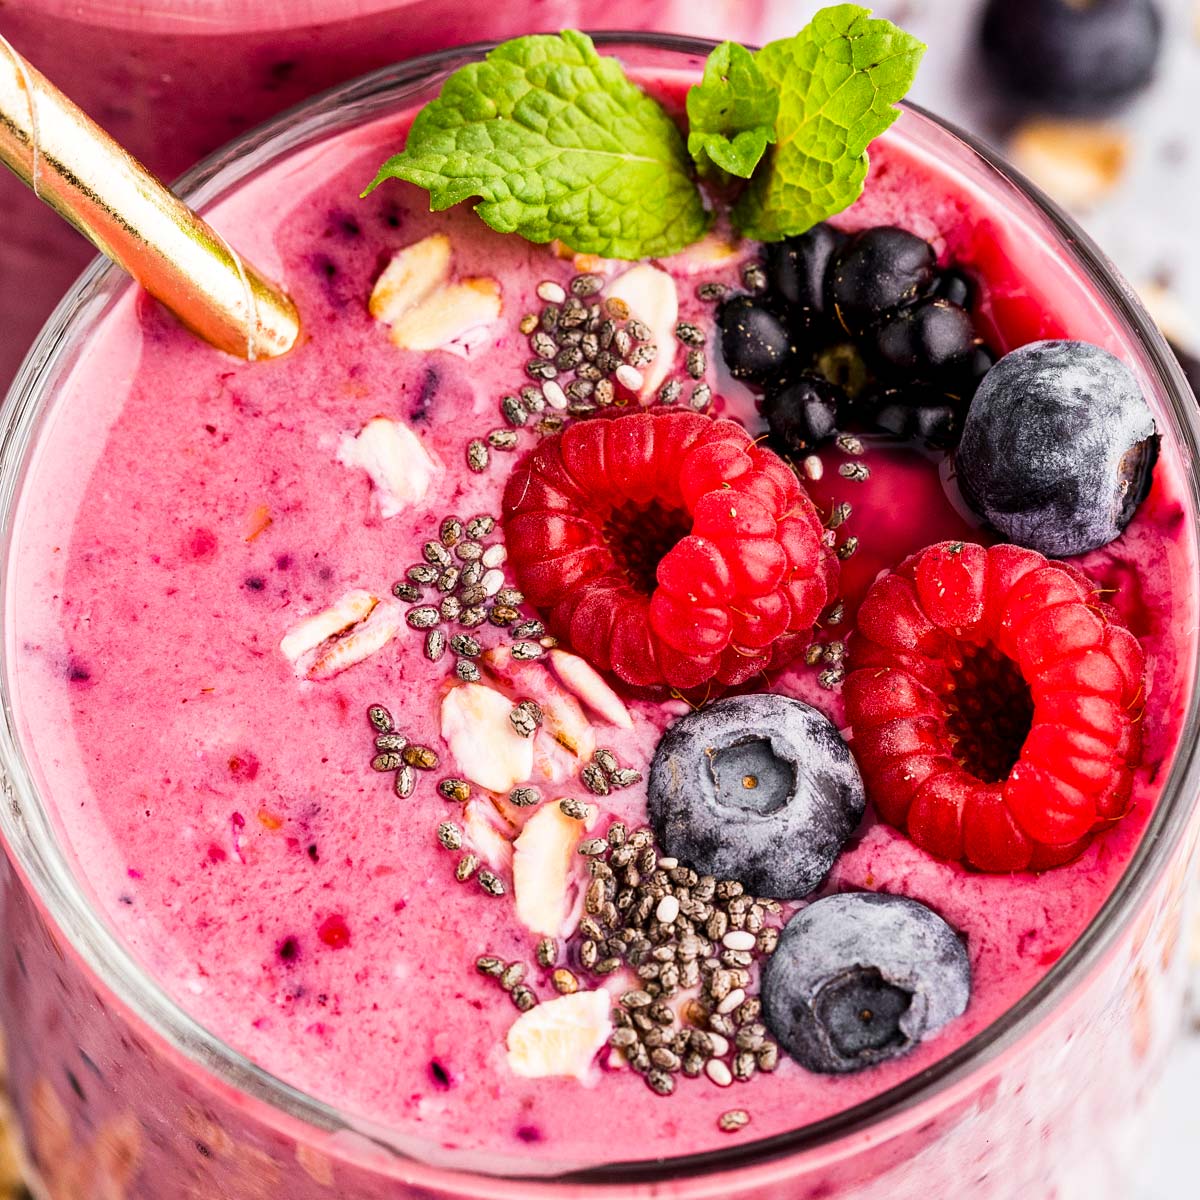
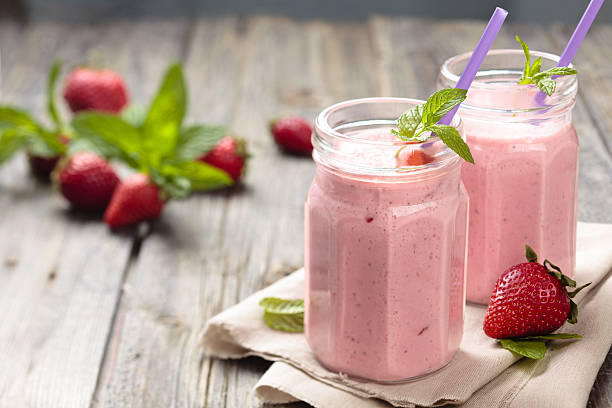
Drink: 6.Mixed Berry Yogurt Milk Juice Shake Smoothie
Method:Mixed Berry Yogurt Milk Juice Shake Smoothie Fast Drink Speeder Easy Quicker Nearly How to make made cook.
Ingredients: 50 grams frozen mixed berries, 1 cup plain yogurt, 30 ml honey, 90 ml fresh milk, a pinch of salt, ice. Procedure:The Mixed Berry Yogurt Milk Juice Shake Smoothie have works to do is 1. Place frozen mixed berries, yogurt, honey, and fresh milk in a blender. 2. Add ice, and close the blender tightly. 3. Blend all ingredients until smooth. Pour into an 8-ounce glass. 4. Garnish with various mixed berries. The finally is done.
ClickMeSeeAllFull
ClickMeSeeOnMoreDetail
ClickMeSeeOnMorePictureImage
ClickMeSeeOnMoreVideo
Drink: 7.Mocha Milk Juice Shake Smoothie
Method:Mocha Milk Juice Shake Smoothie Fast Drink Speeder Easy Quicker Nearly How to make made cook.
Ingredients: 2 espresso shots, 10 grams cocoa powder, 50 ml hot water, 20 ml syrup, 20 ml sweetened condensed milk, 40 ml fresh milk, ice. Procedure:The Mocha Milk Juice Shake Smoothie have works to do is 1. Dissolve cocoa powder in hot water. Stir well until smooth and free of clumps. Set aside. 2. Pour two espresso shots, followed by the dissolved cocoa mixture, syrup, condensed milk, fresh milk, and ice into a blender. 3. Close the blender lid tightly and blend all ingredients until smooth and no ice crystals remain. 4. Pour into a 1/4 ounce glass and garnish. The finally is done.
ClickMeSeeAllFull
ClickMeSeeOnMoreDetail
ClickMeSeeOnMorePictureImage
ClickMeSeeOnMoreVideo
Drink: 8.Fresh Milk Milk Juice Shake Smoothie
Method:Fresh Milk Milk Juice Shake Smoothie Fast Drink Speeder Easy Quicker Nearly How to make made cook.
Ingredients: 10 grams of milk powder, 50 ml hot water, 20 ml syrup, 20 ml sweetened condensed milk, 40 ml fresh milk, ice. Procedure:The Fresh Milk Milk Juice Shake Smoothie have works to do is 1. Dissolve milk powder in hot water. Stir well until smooth and free of clumps. Set aside. 2. Pour followed by the dissolved milk mixture, syrup, condensed milk, fresh milk, and ice into a blender. 3. Close the blender lid tightly and blend all ingredients until smooth and no ice crystals remain. 4. Pour into a 1/4 ounce glass and garnish. The finally is done.
ClickMeSeeAllFull
ClickMeSeeOnMoreDetail
ClickMeSeeOnMorePictureImage
ClickMeSeeOnMoreVideo
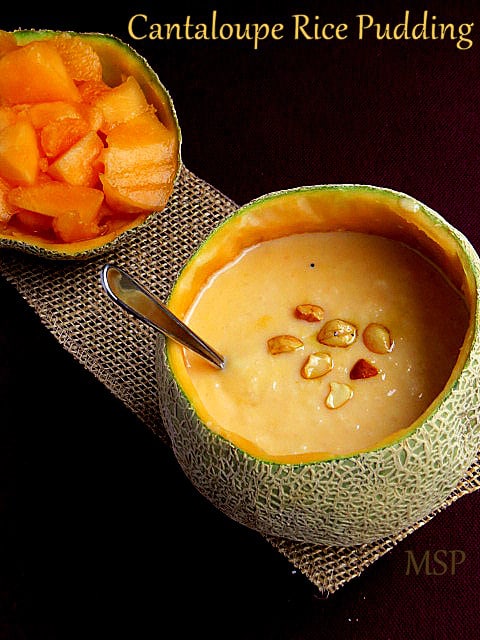
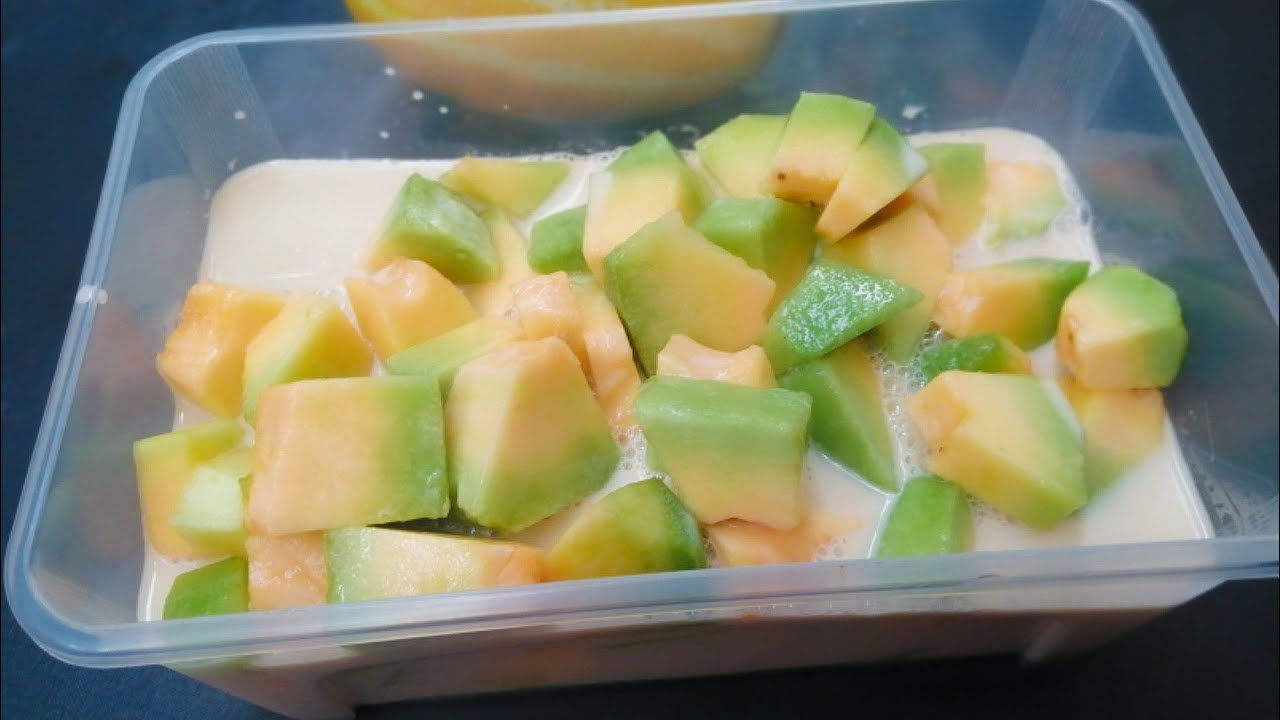
Drink: 9.Cantaloupe Milk Juice Shake Smoothie
Method:Cantaloupe Milk Juice Shake Smoothie Fast Drink Speeder Easy Quicker Nearly How to make made cook.
Ingredients: 1 Cantaloupe of chopped, 20 ml of syrup, 20 ml of sweetened condensed milk, 40 ml of fresh milk, 4 teaspoon of salt, ice. Procedure:The Cantaloupe Milk Juice Shake Smoothie have works to do is 1. Pour followed by the Cantaloupe mixture, syrup, condensed milk, fresh milk, and ice into a blender. 2. Close the blender lid tightly and blend all ingredients until smooth and no ice crystals remain. 3. Pour into ounce glass and garnish. The finally is done.
ClickMeSeeAllFull
ClickMeSeeOnMoreDetail
ClickMeSeeOnMorePictureImage
ClickMeSeeOnMoreVideo
Drink: 10.Avocado Milk Juice Shake Smoothie
Method:Avocado Milk Juice Shake Smoothie Fast Drink Speeder Easy Quicker Nearly How to make made cook.
Ingredients: 100 grams avocado, 20 ml syrup, 20 ml sweetened condensed milk, 90 ml fresh milk, a pinch of salt, ice. Procedure:The Avocado Milk Juice Shake Smoothie have works to do is 1. Scoop out the ripe avocado and place it in a blender. 2. Add the syrup, condensed milk, fresh milk, and a pinch of salt. 3. Add ice to the blender. 4. Close the blender lid tightly and blend all ingredients until smooth. The avocado's natural thickness and creaminess will be a must. Pour into an ounce glass and garnish. The finally is done.
ClickMeSeeAllFull
ClickMeSeeOnMoreDetail
ClickMeSeeOnMorePictureImage
ClickMeSeeOnMoreVideo
Trip Tour Travel Journey: 1.Island HalongBay Beach Wave Pacific Sea Ocean Aqua Surfing
Method: Beach Vietnam Land HalongBay Island Beach Wave Pacific Sea Ocean Aqua Surfing How To Go.
Procedure:The Beach Vietnam Land HalongBay Island Beach Wave Pacific Sea Ocean Aqua Surfing How To Go. 1.Vietnam Land, Buy Ticket From The Airport. 2.Facilities Entertain: Golden Heavenly, Carnival Festival Consert Streaming Restuarant Pub Bar Karaoke Movie Music Game Massage Spa Home House Hotel Motel SwimmingPool School University Hospital, Boat Bus Train Plane Bicycle Mortorcycle Car. 3.Food Meal: Airfood, Seafood, StreetFood, Alcohols, Drinks. That you have had ever seen. 4.Activities Event: Surfing, Swimming, Hiking Forest and Mountain. 5.Uniform: Swimming Suit, Hiking Suit. Play Summer Clothes. Legendary Tale: Part 1: The Tarasque (Occitan: Tarasca) is a creature from French mythology. According to the Golden Legend, the beast had a lion-like head, a body protected by turtle-like carapace(s), six feet with bear-like claws, a serpent's tail, and could expel a poisonous breath. Medieval iconography such as renditions in church sculpture did not necessarily conform to this description in the earlier Gothic period, and examples which seemed to were assigned later, in the 14th century. The six-footed, turtle-shelled tarasque was the form depicted on the city seal of Tarascon around the 15th century, and this held to be the norm in 16th- and 17th-century paintings. As St. Martha purportedly encountered the beast in the act of swallowing a human victim, it has become a stock motif in art to portray the monster swallowing a human (e.g. head first, with the victim's legs still dangling). According to tradition, in 1474, René of Anjou initiated the use of the tarasque in the Pentecostal festival, and later used also on the saint's feast day of July 29. Yearly celebration in the last weekend of June was added in the modern day. The effigy or float (French: char) of the tarasque has been built over the years for parading through town for the occasion, carried by four to a dozen men concealed inside. Part 2: According to folk legend, long ago, while the Vietnamese were fighting against the invading Chinese army, The gods sent an army of dragons to protect Vietnam. The dragons dived into the sea near what is now Ha Long Bay, causing gems and jade to fly out, These gems became islands, large and small, scattered throughout the bay, serving as a barrier against invaders, enabling the Vietnamese to successfully defend their land and establish the country that later became today's Vietnam, Some modern legends say that a mythical creature called the Tarasque still lives at the bottom of the bay. And then that The finally is All done.
ClickMeSeeAllFull
ClickMeSeeOnMoreDetail
ClickMeSeeOnMorePictureImage
ClickMeSeeOnMoreVideo
Trip Tour Travel Journey: 2.Island Palawan Beach Wave Pacific Sea Ocean Aqua Surfing
Method: Palawan Philippines Island Beach Wave Pacific Sea Ocean Aqua Surfing How To Go.
Procedure:The Palawan Philippines Land Island Beach Wave Pacific Sea Ocean Aqua Surfing How To Go. 1.Philippines Land, Buy Ticket From The Airport. 2.Facilities Entertain: Golden Heavenly, Carnival Festival Consert Streaming Restuarant Pub Bar Karaoke Movie Music Game Massage Spa Home House Hotel Motel SwimmingPool School University Hospital, Boat Bus Train Plane Bicycle Mortorcycle Car. 3.Food Meal: Airfood, Seafood, StreetFood, Alcohols, Drinks. That you have had ever seen. 4.Activities Event: Surfing, Swimming, Hiking Forest and Mountain. 5.Uniform: Swimming Suit, Hiking Suit. Play Summer Clothes. Legendary Tale: Part 1: Palaw'an, and Batak people, features a collection of unique legends and tales, including origin stories, epics, and beliefs about nature and spirits. Key legendary tales and elements from Palawan folklore include: Kudaman Epic: A significant oral epic of the Palawan people, the Kudaman is a very long, chanted story that is performed over several nights, often during wakes and full moons. It tells the tales of heroes, deities, and the origins of their people and land. The Legend of Palaesgen: A Tagbanua story about a powerful man named Palaesgen from the town of Aborlan. When his father was killed in a tournament abroad, Palaesgen avenged his death. Later, angered by immoral behavior in his community, he and his kin left Aborlan for a new land. The Pilandok (Philippine Mouse-deer) Tales: Found primarily in the southern Palawan areas where the Molbog people reside, these Muslim tales often depict the pilandok as a clever trickster and a guardian of the environment. In one story, the mouse-deer tricks a prince out of a bag of gold; in others, its wisdom is used to protect forests and seas from those who would destroy them. The Mangalok and Other Spirits: Palawan indigenous people have beliefs about various spirits and demons living in the forest. The Mangalok is a feared, winged predator (a variant of the aswang) that can be invisible. Its presence is sometimes indicated by the call of specific birds, like the gokgok (spotted wood owl) or the kirit kirit, with louder calls indicating the creature is farther away. The Origin of the 100 Islands: A legend from the Pangasinan people (but applicable to many archipelagos) describes how a hundred warriors who died defending their land were immortalized by the gods and turned into the many small islands dotting the sea, forever watching over their homeland. The Creator God Empuq: The Palawan people's supreme being is called Empuq (the Lord or Master), who is believed to be the creator of all things in the world. They also believe in other benevolent beings residing in the higher mountains. The Manunggul Jar: While not a narrative legend, this ancient burial jar found in the Tabon Caves is a significant cultural artifact reflecting the spiritual beliefs of early Palawan people regarding the afterlife, as its lid features two figures representing souls on a boat journeying to the spirit world. These tales are often passed down through generations through oral tradition, songs (tablay), and rituals like the Pagdiwata (rice wine ritual), which connects the people to their history, environment, and spiritual beliefs. And then that The finally is All done.
ClickMeSeeAllFull
ClickMeSeeOnMoreDetail
ClickMeSeeOnMorePictureImage
ClickMeSeeOnMoreVideo
Trip Tour Travel Journey: 3.Island Falls Iguazu Beach Wave Pacific Sea Ocean Aqua Surfing
Method: Island Falls Iguazu Beach Wave Pacific Sea Ocean Aqua Surfing How To Go.
Procedure:The Island Falls Iguazu Brazil Land Land And Argentina Land Beach Wave Pacific Sea Ocean Aqua Surfing How To Go. 1.Brazil Land And Argentina Land, Buy Ticket From The Airport. 2.Facilities Entertain: Golden Heavenly, Carnival Festival Consert Streaming Restuarant Pub Bar Karaoke Movie Music Game Massage Spa Home House Hotel Motel SwimmingPool School University Hospital, Boat Bus Train Plane Bicycle Mortorcycle Car. 3.Food Meal: Airfood, Seafood, StreetFood, Alcohols, Drinks. That you have had ever seen. 4.Activities Event: Surfing, Swimming, Hiking Forest and Mountain. 5.Uniform: Swimming Suit, Hiking Suit. Play Summer Clothes. Legendary Tale: Part 1: The legend of Iguazu Falls tells of a forbidden love between a mortal named Tarobá and a beautiful woman, Naipi, who was promised to a monstrous serpent god. In a fit of rage, the serpent god split the earth, creating the falls to separate the lovers forever. Tarobá was turned into a palm tree on the Brazilian side, while Naipi became a rock on the Argentine side, eternally separated by the Devil's Throat. Part 2: The legend of Iguazu Falls tells of a jealous serpent god, M'Boy, who created the falls to punish two human lovers, Naipi and Tarobá. When Naipi, who was promised to M'Boy, eloped with the warrior Tarobá, the god slit the river, creating the immense waterfalls and separating them forever. According to the legend, Naipi was transformed into a rock on the Argentine side, while Tarobá became a palm tree on the Brazilian side, both trapped in an eternal fall or leaning over the gorge. And then that The finally is All done.
ClickMeSeeAllFull
ClickMeSeeOnMoreDetail
ClickMeSeeOnMorePictureImage
ClickMeSeeOnMoreVideo
Trip Tour Travel Journey: 4.Island Seychelles Beach Wave Pacific Sea Ocean Aqua Surfing
Method: Island Seychelles Beach Wave Pacific Sea Ocean Aqua Surfing How To Go.
Procedure:The Island Seychelles Republic of Seychelles Land Beach Wave Pacific Sea Ocean Aqua Surfing How To Go. 1.Republic of Seychelles Land, Buy Ticket From The Airport. 2.Facilities Entertain: Golden Heavenly, Carnival Festival Consert Streaming Restuarant Pub Bar Karaoke Movie Music Game Massage Spa Home House Hotel Motel SwimmingPool School University Hospital, Boat Bus Train Plane Bicycle Mortorcycle Car. 3.Food Meal: Airfood, Seafood, StreetFood, Alcohols, Drinks. That you have had ever seen. 4.Activities Event: Surfing, Swimming, Hiking Forest and Mountain. 5.Uniform: Swimming Suit, Hiking Suit. Play Summer Clothes. Legendary Tale: The nut and tree of the coco de mer is a rare species of palm tree native to Africa, in the Seychelles archipelago in the Indian Ocean. It is the subject of various legends and lore. Coco de mer is endemic to the Seychelles islands of Praslin and Curieuse. Before the Seychelles were discovered and settled, nuts of this species were sometimes carried by the ocean currents to distant shores, such as those of the Maldives, where the tree was unknown. These floating nuts did not germinate. The exceptional size and suggestive form of the nut, the circumstances of its discovery, and some unusual qualities of the trees have given rise to several legends. The nut of the coco de mer is very large (the largest seed in the plant kingdom) and is oddly shaped, being the shape and size of a woman's disembodied buttocks on one side, and a woman's belly and thighs on the other side. Not surprisingly, this nut was viewed by people in other parts of the world as a rare and fascinating object with mythological and even magical properties. The nature and origin of this extraordinary nut was mysterious, and the propagation of the tree was not understood. A number of legends arose both about the nuts, and about the trees that produce them. The coco de mer palm has separate male and female trees, unlike the coconut palm. And, unlike the fruit of the coconut tree, the coco de mer fruit is not adapted to disperse naturally by floating on the ocean water. When a coco de mer fruit falls into the sea, it cannot float because of its high density; instead it sinks to the bottom. However, after the fruit has been on the sea bed for a considerable period of time, the husk drops off, the internal parts of the nut decay, and the gases that form inside the nut cause the bare nut to rise up to the surface. At that time the nut can float, but is no longer fertile, thus when the ocean currents cause the nut to wash up on a distant beach, for example in the Maldives, a tree cannot, and does not, grow from the nut. The name coco de mer is French, and means coconut of the sea. Malay seamen had seen coco de mer nuts falling upwards from the sea bed, and so they had reasoned that these nuts must grow on underwater trees, in a forest at the bottom of the Indian Ocean. According to Antonio Pigafetta and Georg Eberhard Rumphius, Malay people believed that the tree was also the home of the huge bird or bird-like creature Garuda (or Rukh of the Arabs). African priests believed that the Garuda was capable of hunting elephants and tigers. The African priests also believe that sometimes the coco de mer trees rose up above the ocean surface, and when this happened, the waves that the trees created did not allow any ship nearby to sail away and the helpless sailors were eaten by the Garuda. The nuts that were found in the ocean and on the beaches no longer had a husk, and resembled the dismembered lower part of a woman's body, including the buttocks. This association is reflected in one of the plant's archaic botanical names, Lodoicea callipyge Comm. ex J. St.-Hil., in which callipyge is from the Greek words meaning "beautiful rump". Historically these floating "beautiful rumps" were collected and sold for a fortune in Arabia and in Europe. In the Maldives, any coco de mer nuts that were found in the ocean or on the beaches were supposed to be given to the king, and keeping a nut for yourself or selling it could have resulted in the death penalty. However, Rudolf II, Holy Roman Emperor was able to purchase one of these nuts for 4,000 gold florins. The Dutch Admiral Wolfert Hermanssen also received a nut as a gift for his services, from the Sultan of Bantam in 1602, for fighting the Portuguese and protecting the capital of Bantam. However, the nut that the admiral was given was missing the top part; apparently the Sultan had ordered the top of the nut to be cut off, in order not to upset the noble admiral's modesty. João de Barros believed that coco de mer possessed amazing healing powers, superior even to those of the precious stone Bezoar. In one of his books, Dr. Berthold Carl Seemann mentioned that many believed the nuts to be an antidote to all poisons. The nuts were praised not only by scientists and botanists, but also by poets. Luís de Camões wrote: O'er lone Maldivia's islets grows the plant, beneath profoundest seas, of sov'reign might, whose pome of ev'ry Theriack is confest, by cunning leech of antidotes the best In 1769, Jean Duchemin sailed to Praslin, the second largest island in the Seychelles, on the ship L’Heureuse Marie. He loaded up with a cargo of these unusual nuts, which he later sold in Indian markets. After his trip, coco de mer nuts never again held the same extraordinary value. New legends about the coco de mer came into existence after 1743, when the real coco de mer trees were discovered. Fruits of coco de mer are developed only on female trees. Male trees have long phallic-looking catkins. Because of these unusual, erotic shapes, some people believed that the trees made passionate love on stormy nights. According to the legend, male trees uproot themselves, and approach female trees. Apparently the love-making trees are rather shy, and the legend has it that whoever sees the trees mating will die or go blind. The fact that even now the pollination of the coco de mer is not fully understood is one of the factors behind the legend. And then that The finally is All done.
ClickMeSeeAllFull
ClickMeSeeOnMoreDetail
ClickMeSeeOnMorePictureImage
ClickMeSeeOnMoreVideo
Trip Tour Travel Journey: 5.Island Galapagos Beach Wave Pacific Sea Ocean Aqua Surfing
Method: Island Galapagos Beach Wave Pacific Sea Ocean Aqua Surfing How To Go.
Procedure:The Island Galapagos Republic of Ecuador Land Beach Wave Pacific Sea Ocean Aqua Surfing How To Go. 1.Republic of Ecuador Land, Buy Ticket From The Airport. 2.Facilities Entertain: Golden Heavenly, Carnival Festival Consert Streaming Restuarant Pub Bar Karaoke Movie Music Massage Spa Home House Hotel Motel SwimmingPool School University Hospital, Boat Bus Train Plane Bicycle Mortorcycle Car. 3.Food Meal: Airfood, Seafood, StreetFood, Alcohols, Drinks. That you have had ever seen. 4.Activities Event: Surfing, Swimming, Hiking Forest and Mountain. 5.Uniform: Swimming Suit, Hiking Suit. Play Summer Clothes. Legendary Tale: Part 1: The most prominent legendary tale associated with the Galápagos is their historical nickname, the Islas Encantadas (Enchanted Islands), and the modern true-crime mystery of The Galápagos Affair. The Enchanted Islands Legend Early Spanish sailors and conquistadors considered the islands evil and enchanted because of their disorienting nature. The islands would often appear out of nowhere from the misty waters and then seem to vanish, making navigation difficult and confusing for the highly superstitious sailors. Further contributing to the mystique: Dragons and Omens: The harmless marine iguanas were perceived as dragon-ridden volcanic headlands and monstrous creatures. Legend has it that the Spaniards would shoot at them with cannons from their ships, fearing their dragon tongues. Vanishing Expedition: There was a story, now considered a figment of early colonial imagination, of an Incan expedition during the reign of Tupak Yupanqui that supposedly collected abundant gold and silver from the islands before they disappeared into the sea. The Legend of the Guava A local folktale from the islands tells of a cursed guava fruit. An unhappy mother, whose son was whipped to death by a cruel master, cursed the place, saying: Whoever eats of this fruit will not be able to leave the island, and if he does, he will return soon after from any part of the world! It is said that this curse explained the strange pull the islands had on people who arrived there. The Legend of the Guava A local folktale from the islands tells of a cursed guava fruit. An unhappy mother, whose son was whipped to death by a cruel master, cursed the place, saying: Whoever eats of this fruit will not be able to leave the island, and if he does, he will return soon after from any part of the world! It is said that this curse explained the strange pull the islands had on people who arrived there. The True-Crime Galápagos Affair A more modern, yet equally mysterious, legendary tale is the true story of the first European settlers on Floreana Island in the 1930s, chronicled in the documentary The Galápagos Affair: Satan Comes to Eden. A German doctor and his partner arrived seeking a secluded, simple life. Soon after, a family joined them, followed by an eccentric Austrian Baroness and her two lovers. Rivalries and conflicts grew among the small group of settlers. In 1934, the Baroness and one of her lovers disappeared without a trace. The other lover and a passing sailor later died under mysterious circumstances while trying to reach the mainland. The last survivor took her secrets to her grave in 2000, and the disappearances and deaths remain an unsolved mystery to this day. And then that The finally is All done.
ClickMeSeeAllFull
ClickMeSeeOnMoreDetail
ClickMeSeeOnMorePictureImage
ClickMeSeeOnMoreVideo
Trip Tour Travel Journey: 6.Island Hawaii Beach Wave Pacific Sea Ocean Aqua Surfing
Method: Island Hawaii Beach Wave Pacific Sea Ocean Aqua Surfing How To Go.
Procedure:The Island Hawaii Jaws or “Pe’ahi” in Maui. Beach Wave Pacific Sea Ocean Aqua Surfing How To Go. 1.Hawaii Jaws or “Pe’ahi” in Maui, Buy Ticket From The Airport. 2.Facilities Entertain: Golden Heavenly, Carnival Festival Consert Streaming Restuarant Pub Bar Karaoke Movie Music Game Massage Spa Home House Hotel Motel SwimmingPool School University Hospital, Boat Bus Train Plane Bicycle Mortorcycle Car. 3.Food Meal: Airfood, Seafood, StreetFood, Alcohols, Drinks. That you have had ever seen. 4.Activities Event: Surfing, Swimming, Hiking Forest and Mountain. 5.Uniform: Swimming Suit, Hiking Suit. Play Summer Clothes. Legendary Tale: Part 1: Legendary Tale Hawaii refers to a wide array of Hawaiian myths and folklore, including stories about demigod Maui, the fiery volcano goddess Pele, and the mythical Menehune. Other well-known legends include the Night Marchers, supernatural warriors who roam sacred grounds, and the unfortunate love story between Ohia and Lehua. These stories often explain the natural world, Hawaiian culture, and the consequences of disrespecting the gods. Major legends and figures, Maui: A demigod known for his cleverness and strength. He is famous for slowing down the sun to give his mother more time to dry kapa cloth, and for fishing up the islands from the sea.Pele: The goddess of volcanoes and fire, revered as the creator of the islands and feared for her destructive power. She is often depicted as having a temper and has many legends, including stories of her rage and relationships.Menehune: Mythical, small, and magical beings who are said to be excellent craftspeople and builders. They work at night, and by morning, they have completed their projects, like creating bridges and fish ponds.Night Marchers (\(Huaka^{\prime }i\) \(Pō\)): The spirits of ancient warriors who march in processions, often seen with torches or torches of light. It is said that one should lie on the ground and avoid eye contact, as looking them in the eye can cause them to walk with them for eternity.Ohia and Lehua: This is a tragic love story that explains the origin of the Ohia tree and Lehua flower. Ohia, the warrior, fell in love with Lehua, but was killed by Pele out of jealousy. Pele turned him into a tree, and Lehua was turned into a flower, so the two lovers could be together forever. Part 2: Hawaii's legendary tales include stories about the demi-god Maui, the volcanic goddess Pele, the magical Menehune, and the Night Marchers. These legends explain the creation of the islands, the origins of natural phenomena, and cautionary tales about respecting the gods, spirits, and land. Famous tales and figures Maui: A trickster demi-god who is credited with "pulling up the islands from the sea floor" with a magical fishhook and snaring the sun to ensure longer daylight. Pele: The fiery goddess of volcanoes, she is said to have created the Hawaiian islands with her lava. Her legends often involve her jealous rage, such as turning her rival, Lehua, into a flower to be with her lover, Ohia,. She is also associated with the "curse" of taking lava rock from the islands. Menehune: Small, magical beings who are master builders and craftsmen. They are said to work at night, completing large projects like bridges and fishponds by sunrise, and are often associated with the magical abilities to command elements and vanish at will.Night Marchers (\(HuakaiPō\)): A legendary procession of the spirits of ancient warriors that marches across the land at night, often preceded by the sound of a conch shell or drums. It is considered extremely dangerous to cross their path. If you encounter them, you should lie on the ground and cover your head.The Wind Keepers: The story of Pakaha and his son, Cua Pakaha, who learned to control and manipulate the winds by chanting their names, eventually creating a terrible storm that lasted four months. Part 3: The most famous scary legend in Hawaii is the Night Marchers (Huaka'i Pō), the ghostly procession of ancient Hawaiian warriors who are said to march on certain paths, especially during the new moon. Other spooky tales include the Green Lady of Wahiawa gulch, who is said to haunt a botanical garden and elementary school, and superstitions surrounding the goddess Pele. It's also considered bad luck to take lava rock, sand, or shells from the islands, angering the fire goddess Pele. You can watch this video to learn more about the history of ghost stories in Hawaii, including the Night Marchers: Folklore in Hawaii in modern times is a mixture of various aspects of Hawaiian mythology and various urban legends that have been passed on regarding various places in the Hawaiian islands. The following is a partial list of some of these legends. Night marchers According to Hawaiian legend, night marchers (huaka‘i pō in Hawaiian) are ghosts of ancient warriors. They supposedly roam large sections of the island chain, and can be seen by groups of torches. They can usually be found in areas that were once large battlefields (the Nuʻuanu Pali on the island of Oahu is a good example.) Legend has it that if you look a night marcher straight in the eye, you will be forced to walk among them for eternity, but if you have a relative taken by them, you will be spared. Hawaiians say that in the presence of night marchers, one should lie down on their stomach, face down to avoid eye contact, stay quiet, breathe shallowly, and don't move. Some say that they may nudge you to provoke a reaction so they can take you. Moanalua Gardens is one of the many places the Night Marchers are said to roam. Carrying pork over the Nuʻuanu Pali Local folklore on the island of Oahu says that one should never carry pork over the Pali Highway connecting Honolulu and Windward Oahu. The stories vary, but the classic legend is that if one carries pork of any kind over the old Pali road (not the modern pali highway) by automobile, the automobile would stop at a certain point on the way and not restart until the pork is removed from the vehicle. Some versions of the story require the pork to be raw; other versions say that this happens after dark. In some versions, a white dog or an old woman in a holuku will appear at the time the automobile stalls, and you must feed the pork to the dog to proceed. This legend has its roots in ancient Hawaiian mythology. According to legend, the Hawaiian volcano goddess Pele and the demigod Kamapua‘a (a half-man-half-pig) had a turbulent relationship, and the two agreed not to visit each other. If one takes pork over the Pali, the legend goes, one is symbolically taking a piece of Kamapua‘a from one side to the other, and it is said that Pele would stop that from happening. Alternately, the legend is attributed to a magic dog, which was killed and cooked and put in an 'umeke to be carried over the pali and given as a gift to the mother/wife of the perpetrator. Women did not eat pork in ancient Hawaii, but were allowed to eat dog. The dog's owner followed and called to the dog, which came alive, answered from within the 'umeke, causing the carrier to drop his pole and flee. The dog then returns to its master. A dog as food was offensive to the American missionaries, and under their influence, the dog meat in the story became pork. The Pele/Kamapua'a stories were adapted to make the story fit, the old lady in the white holoku is also Pele, but that too was corrupted from other tales. Part 4: Ke-alii-ai Kanaka (The chief who eats men) The legend of Ke-alii-ai Kanaka comes from the middle-to-late 18th century and tells of a Man named Kokoa, who went on to become a cannibal chief who plagued two islands. In his youth, he was a renowned fighter with a brutal appetite for human flesh. His story begins and ends on Oahu. In it unknown how he came to love the taste of humans to an obsessive degree, but he was shunned from his home shortly after it was discovered by his community. He led a small group of followers up into the Waianae mountains, where they promptly vanished. Some times later, Kokoa and his band posed as a group of settlers who came to land on Kauai's shores, seeming to be from an unknown place. The King of Kauai at the time received them and even noticed multiple differences between them and what he thought Hawaiian people to be. Notably, their darker-than-usual skin complexion, odd ways of speaking and complete lack of a set of uniform laws between them. Most glaringly, their starkly contrasting religious practices. Kokoa, renaming himself Ka-Lo, integrated smoothly into the Kauai community at first. In their public ceremonies, they would feast and play as their neighbors would. In their secret ceremonies, they would cook and eat victims and sometimes children, disguising the meat as pork. The higher-ranking members of their group, namely Ka-Lo and his daughter, were festooned with plentiful tattoos and shell jewelry. The chief himself was covered head-to-toe in tattoos of the natural world. He had his daughter wed a local chief, though this does not end well for both his people and the Kauai village nearest to his area. His daughter, unknowing of them, breaks a Kapu law and is slain. Enraged by this turn of events, Ka-lo and his followers revealed their cannibalistic nature in a night of devilry. They captured people they could find and held a feast of them. Shortly after this event, they fled back to Oahu, choosing to secret themselves away into the gulch of Waianae to a plateau called "Halemanu." (House of the Hand). This isolated location could only be reached on-foot by a single pathway, and it is from that pathway they would hunt anyone who walked it. This continued for some time, until the brother of a man named Hoahanau was kidnapped and dragged into the forest. Hoahanau was a strapping man himself, yet when he saw Ai-Kanaka's monstrous disposition, he fled the area. He would spend the next several months honing his body and reflexes with endless training and matches against any and all fighters his words could reach. When the time came for his rematch, he coated himself in oil and approached the pathway, calling out his foe's real name. Ai-kanaka, then Ka-Lo, first Kokoa, lurked out from his home and boastfully accepted the challenge unarmed. As their match ensued, he found he could not grasp the younger man's body for any grabs, nor could he match him blow-for-blow. Thrown to the ground again and again, he sprung up to flee into his home to fetch a weapon, only to be caught, knocked off balance and thrown over the edge of his plateau home into the barbed bramble of trees below. Part 5: Mujina Main article: Mujina Green Lady The story of the green lady is that of a woman who would visit the gulch of Wahiawa, which also contains the Wahiawa Botanical Garden, with her children.[3] One day while visiting one of her children became lost and was never found. The story goes that she still wanders the gulch looking for her child, or children, and will take any child that she comes across in the gulch. There have been several reports of seeing a green woman covered in moss or mold wandering the gulch. Others say that the green woman closely resembles that of a Japanese mythological creature called the kappa. This creature is said to resemble a turtle-like humanoid that steals children to feast upon. The last known sighting was said to have happened in the mid to late 1980s. In modern times, children and teenagers dare each other to run across the bridge that runs over the gulch at night. Most speculators say that this story was made up to keep children from wandering into the gulch by themselves.
ClickMeSeeAllFull
ClickMeSeeOnMoreDetail
ClickMeSeeOnMorePictureImage
ClickMeSeeOnMoreVideo
Trip Tour Travel Journey: 7.Island Cortes Bank Beach Wave Pacific Sea Ocean Aqua Surfing
Method: Island Cortes Bank Beach Wave Pacific Sea Ocean Aqua Surfing How To Go.
Procedure:The Island Cortes Bank in San Diego California Beach Wave Pacific Sea Ocean Aqua Surfing How To Go. 1.Cortes Bank in San Diego California, Buy Ticket From The Airport. 2.Facilities Entertain: Golden Heavenly, Carnival Festival Consert Streaming Restuarant Pub Bar Karaoke Movie Music Game Massage Spa Home House Hotel Motel SwimmingPool School University Hospital, Boat Bus Train Plane Bicycle Mortorcycle Car. 3.Food Meal: Airfood, Seafood, StreetFood, Alcohols, Drinks. That you have had ever seen. 4.Activities Event: Surfing, Swimming, Hiking Forest and Mountain. 5.Uniform: Swimming Suit, Hiking Suit. Play Summer Clothes. Legendary Tale: Part 1: The legendary tale of Cortes Bank is not a single ancient myth, but rather a collection of true stories, rumors, and modern-day legends, primarily centered around its nature as a fabled, submerged island that produces some of the largest and most dangerous surfable waves on Earth. Key elements of the legendary tales include: The Lost Continent of Abalonia: In the mid-1960s, a group of businessmen and a B-movie actor attempted to establish their own sovereign nation on the bank, which they nicknamed Abalonia (originally planned as Lemuria after the mythical lost continent). They planned to sink a WWII-era concrete freighter, the Jalisco, onto Bishop Rock (the shallowest point, only about 15 feet below the surface) and build a seafood processing factory, but giant waves destroyed the ship before their plan could be realized. A Ship-Destroying Hazard: For sailors and fishermen, the bank has long been a feared and respected hazard. The submerged Bishop Rock, only marked by a warning buoy, has damaged many hulls, including reportedly the clipper ship Stillwell S. Bishop in 1855 and, more recently, the USS Enterprise aircraft carrier in 1985. A Lost Eden for Divers and Fishermen: Divers and fishermen tell tales of a lost Eden or mystical spot teeming with an abundance of sea life, including enormous abalone, lobsters, and sharks. The wreck of the Jalisco is now a popular diving spot. The Unicorn of Big Wave Surfing: Among big-wave surfers, Cortes Bank has a near-mythic status, often called "the unicorn" because it is elusive and difficult to reach in perfect condition. It is known as the potential home of the biggest rideable wave on the face of the earth, a place where 80 to 100-foot waves have been sighted and potentially ridden, though not always documented. Harrowing True Stories: Modern tales are non-fiction accounts of harrowing expeditions and near-death experiences, such as the 2012 wipeout of pro surfer Greg Long, which highlighted the immense and unforgiving power of the open-ocean break. These stories and the physical reality of a massive seamount rising from the deep ocean to near the surface 100 miles offshore contribute to the bank's enduring mystique as an enigmatic and powerful place. The book Ghost Wave by Chris Dixon extensively explores these historical accounts and modern adventures. Part 2: The "legendary tale" of Cortes Bank is not a single piece of ancient folklore, but rather a collection of true, near-mythic modern stories and historical events centered around this elusive, submerged seamount 100 miles off the San Diego coast. It is most famous for producing some of the largest surfable waves on Earth, which only break under specific, rare conditions. Key elements of the legend include: The Fabled Island For a long time, the bank was known on maps as San Juan Island. Early sailors reported seeing breakers but the location and nature of the seamount remained mysterious, leading to tales of a vanished or fabled island just below the surface. The Quest for Abalonia One of the most notable tales is a real-life, audacious attempt in the 1960s by a group of entrepreneurs (including a B-movie actor) to establish their own independent island nation on the bank, which they called Abalonia. They planned to scuttle a WWII-era concrete freighter, the Jalisco, on top of the shallowest point (Bishop Rock) and build a self-sufficient seafood processing outpost. The plan was thwarted when a massive swell destroyed the ship, nearly killing the crew, proving the ocean's power over the bank. The wreck of the Jalisco is now a popular diving spot. The Lost Treasure of a Spanish Galleon In 1957, famous treasure hunter Mel Fisher led an expedition to the bank, convinced that a Spanish galleon laden with treasure had sunk there. His expedition found no treasure, and the ship he used nearly burned to the waterline, adding another cautionary tale to the bank's history. The "Ghost Wave" To big-wave surfers, the bank is a mystical, "unicorn" spot capable of producing waves estimated to be 80 to 100 feet tall, appearing in the middle of the open ocean with no visible land in sight. The wave is elusive, requiring perfect, rare conditions to break, and has been the site of record-breaking rides and near-death experiences, reinforcing its dangerous and legendary status among the surfing community. These stories, along with navigation incidents like the USS Enterprise aircraft carrier striking the reef in 1985, contribute to the powerful mystique of Cortes Bank as a dangerous, enigmatic, and awe-inspiring place. Part 3: Cortes Bank, a shallow seamount located about 100 miles off the coast of Southern California, is not primarily associated with traditional "ghost stories" or horror legends in the paranormal sense. Instead, its "scary" and "legendary" status stems from its extreme physical danger, isolation, and the numerous real-life maritime disasters and near-death experiences it has caused. Key elements contributing to its fearsome reputation: Extreme Waves: Cortes Bank is famous for producing some of the largest, fastest, and most dangerous rideable waves on Earth, sometimes exceeding 75 feet. These monstrous swells are generated by deep ocean water abruptly hitting the shallow underwater mountain range, creating an unpredictable and violent surf zone. Surfers and seafarers refer to it as "surfing's Mount Everest" due to the extreme challenge and risk. Isolation and Danger: Located in the middle of the open ocean, far from immediate help, the bank is an "eerie" and "mystical place". The lack of nearby land markers and the chaotic, shifting nature of the waves make it disorienting and highly perilous. Maritime Disasters: The submerged reef (specifically Bishop Rock, which is only a few feet below the surface) has been the site of actual tragedies: In 1855, the rock was officially discovered, and two weeks later, the ship's captain, James MacRae, committed suicide in San Francisco Bay. In 1957, a treasure hunting expedition led by Mel Fisher ended in disaster when their ship burned nearly to the waterline. In 1985, the aircraft carrier USS Enterprise struck the reef, ripping a 60-foot gash in its hull and severely damaging its propeller. Near-Fatalities: The real horror for those who venture there lies in the ocean's raw power. Noted big-wave surfer Greg Long nearly died in a brutal wipeout in 2012, an event that put a dark cloud on the spot and underscored how hopeless one is against the ocean's force. Ghost Wave Nickname: The bank is often referred to as the ghost wave because the massive waves seem to appear out of nowhere in the middle of the ocean, breaking over a submerged island that was once above water 10,000 years ago. This ghost wave moniker refers to the elusive nature of the perfect conditions needed for it to break, rather than actual spectral encounters. The true horror of Cortes Bank is the unforgiving reality of its environment, where the power of nature and the isolation from safety create an intensely scary and life-threatening experience for even the most expert individuals.
ClickMeSeeAllFull
ClickMeSeeOnMoreDetail
ClickMeSeeOnMorePictureImage
ClickMeSeeOnMoreVideo
Trip Tour Travel Journey: 8.Island Praia do Norte (Nazaré) Beach Wave Pacific Sea Ocean Aqua Surfing
Method: Island Praia do Norte (Nazaré) Beach Wave Pacific Sea Ocean Aqua Surfing How To Go.
Procedure:The Island Praia do Norte in Nazaré Portugal Beach Wave Pacific Sea Ocean Aqua Surfing How To Go. 1.Praia do Norte in Nazaré Portugal, Buy Ticket From The Airport. 2.Facilities Entertain: Golden Heavenly, Carnival Festival Consert Streaming Restuarant Pub Bar Karaoke Movie Music Game Massage Spa Home House Hotel Motel School University Hospital, Boat Bus Train Plane Bicycle Mortorcycle Car. 3.Food Meal: Airfood, Seafood, StreetFood, Alcohols, Drinks. That you have had ever seen. 4.Activities Event: Surfing, Swimming, Hiking Forest and Mountain. 5.Uniform: Swimming Suit, Hiking Suit. Play Summer Clothes. Legendary Tale: Part 1: The legendary tale and horror scary aspects of Praia do Norte in Nazaré, Portugal, stem from two different sources: the local religious legend of the 12th-century hunting miracle and the real-life danger of the world's largest waves, which are the subject of modern surfing horror stories. The religious tale speaks of miraculous salvation on a cliff, while the modern fear comes from the immense power of the waves that can be deadly to even professional surfers. Religious legend: The miracle on the cliff The story: In 1182, a nobleman named Dom Fuas Roupinho was hunting a deer through thick fog when he found himself galloping toward a cliff edge. The miracle: He called out to the Virgin Mary for help, and his horse miraculously stopped just in time, with its hooves on the very edge of the cliff. The outcome: Grateful for his life, Dom Fuas built a chapel at the site, now known as the Point of the Miracle, to honor the Virgin Mary. Modern horror scary tales: The giant waves The danger: Praia do Norte is famous for having the tallest surfable waves on Earth, formed by the underwater Nazaré Canyon. The horror stories: Surfers can have terrifying close calls, like one who fell and had to retrieve their board from the rocky shore, narrowly escaping being hit by multiple waves. The sheer power of the waves can be overwhelming, with the area lacking the safe channels found at other big wave spots, creating an unpredictable and unridable environment. The first-ever death from a giant wave at Nazaré occurred in January 2023 when surfer Marcio Freire was pulled from the sea in cardio-respiratory arrest, adding a real-life, tragic horror element to the legendary location.
ClickMeSeeAllFull
ClickMeSeeOnMoreDetail
ClickMeSeeOnMorePictureImage
ClickMeSeeOnMoreVideo
Trip Tour Travel Journey: 9.Island Panama Beach Wave Pacific Sea Ocean Aqua Surfing
Method: Island Panama Beach Wave Pacific Sea Ocean Aqua Surfing How To Go.
Procedure:The Island Panama Land Beach Wave Pacific Sea Ocean Aqua Surfing How To Go. 1.Panama Land, Buy Ticket From The Airport. 2.Facilities Entertain: Golden Heavenly, Carnival Festival Consert Streaming Restuarant Pub Bar Karaoke Movie Music Game Massage Spa Home House Hotel Motel SwimmingPool School University Hospital, Boat Bus Train Plane Bicycle Mortorcycle Car. 3.Food Meal: Airfood, Seafood, StreetFood, Alcohols, Drinks. That you have had ever seen. 4.Activities Event: Surfing, Swimming, Hiking Forest and Mountain. 5.Uniform: Swimming Suit, Hiking Suit. Play Summer Clothes. Legendary Tale: Part 1: The Caribbean coastline of Panama is rich with legendary tales rooted in the history of piracy, the Afro-Caribbean Congo culture, and the indigenous Guna Yala mythology. These stories are a blend of historical events, spiritual beliefs, and local traditions passed down through generations. Tales of Pirates and Sunken Treasure The Panamanian Caribbean, particularly around Portobelo and the San Blas islands (Guna Yala archipelago), was a major hub during the Golden Age of Piracy. Henry Morgan's Exploits: The Welsh privateer Henry Morgan is a central figure in the region's history. He famously stormed and sacked the Spanish colonial towns of Portobelo and Panama City in the 17th century. The ruins of the Spanish fortifications at Portobelo and Fort San Lorenzo are a testament to these violent clashes, and local lore suggests hidden pirate treasures are still waiting to be discovered in the area. Ghost Ships: Seafaring stories are rife with sightings of ghost ships, often those with troubled pasts, like slave ships or vessels ruled by cruel captains. These phantom vessels are said to appear and disappear in the mist, crewed by the spirits of the long-dead. Sunken Galleons: Hundreds of treasure-laden Spanish galleons were lost at sea due to storms or pirate attacks. While some have been salvaged, legends persist of massive, undiscovered fortunes lying on the Caribbean seabed, waiting for lucky explorers. Indigenous Guna Yala Mythology The indigenous Guna people, who inhabit the autonomous Guna Yala islands, have a rich mythology that is integral to their daily life and art. Moon Children (Albinos): Albinos, known as "Moon Children, hold a special, sacred place in Guna culture. They are considered the children of the moon and are believed to have the power to save the Guna during hurricanes and lunar eclipses. They are the only ones permitted to go outside during these celestial events. Origin Stories: The intricate mola panels, which are traditional clothing worn by Guna women, often depict sacred animals and cosmogenic origin stories based on their belief system that links God, Nature, and the Cosmos. Gender Fluidity: Guna mythology and culture embrace a third gender called Omeggid, where a person born male chooses to live as a woman. This identity has deep, supportive community roots, dating back to one of their original leaders, Wigudun. Afro-Caribbean Congo Culture The Congo culture, centered in the Colón province, is an Intangible Cultural Heritage of Humanity recognized by UNESCO. It is a vibrant expression of the African people's resistance against slavery. Congo Music and Dance: The culture is expressed through music, dance, and a distinct language that tells the story of struggle, resilience, and freedom. Their vibrant traditions keep the history of their ancestors alive. These tales and traditions continue to shape the cultural landscape of the Panamanian Caribbean coastline today, offering a captivating glimpse into its diverse heritage. Part 2: The Caribbean coastline of Panama is rich with legendary tales, prominently featuring stories of pirates and privateers, indigenous folklore, and general seafaring myths. Legends of Pirates and Sunken Treasure The history of the Panamanian Caribbean coast is heavily intertwined with the Golden Age of Piracy, as the region served as a major Spanish trade route for gold and silver from South America. Henry Morgan's Exploits: One of the most famous figures is the Welsh privateer (and later, pirate) Sir Henry Morgan. He led daring raids on Spanish strongholds, including a significant attack on Portobelo and the subsequent sack and burning of Panama City (on the Pacific side, after crossing the isthmus) in 1671. The ruins of these colonial towns are steeped in tales of his exploits and the vast treasure he plundered. Portobelo as a Pirate Haven: The historic port city of Portobelo, a UNESCO World Heritage site, was a primary hub for Spanish trade and thus a frequent target for pirates. Legends of hidden pirate treasure abound along this stretch of coastline, with stories of countless sunken ships laden with gold and silver still waiting to be discovered in the surrounding waters. Ghost Ships: Seafaring stories are rife with sightings of mystery ghost ships that appear and disappear in the fog and mist, some said to be crewed by undead pirates cursed by stolen gold. Indigenous Folklore The Guna (Kuna) and Emberá indigenous peoples, who inhabit areas like the Guna Yala archipelago and the Darién jungle near the Caribbean coast, have their own rich traditions. Guna Mythology: The Guna people have a strong connection to their environment and their culture involves animistic beliefs. They use small, carved wooden dolls called nuchus for protection against evil spirits (poni) that are believed to cause illness and disease. Creation Stories: According to Guna traditions, their creator god Pugad guided them to settle the islands and provided them with everything they needed, a story that underpins their deep reverence for their ancestral lands. Emberá Traditions: The Emberá people, known for their elaborate carvings and basket weaving, share their history and deep connection to the rivers and rainforests in their communities, preserving their ancestral stories through oral tradition and cultural practices. General Caribbean Myths The wider Caribbean has shared folklore that touches upon the Panamanian coastline: Mermaids Aycayía: Tales of mermaids, half-human and half-aquatic creatures, are common. Known as Aycayía to some indigenous groups (like the Taíno), they are often depicted as luring sailors to their deaths. Sea Monsters: Stories of giant squid and octopuses capable of pulling ships down into the depths have circulated among mariners for centuries, though scientific understanding has since clarified the actual size of these creatures. Part 3: While there is no single Legendary Tale Horror Scary Caribbean Coastline Panama, Panama's Caribbean coast shares similar fearsome folklore with the rest of the region, including shapeshifting monsters like the Lagahoo and the Soucouyant, a terrifying witch who flies as a fireball. Stories often involve dangerous creatures from the sea, while local legends mention specific hauntings or mythical figures tied to specific locations, as seen in other Caribbean nations. Caribbean folklore relevant to Panama's coast Lagahoo: A shapeshifting creature that appears human by day but becomes a headless man at night, carrying a coffin on its neck. This monster is common across many Caribbean islands, including Trinidad and Tobago. Soucouyant: A fearsome, elderly witch who sheds her skin and flies through the night in the form of a fireball to suck the blood of victims. La Diablesse: A seductive devil woman who is a prominent figure in the folklore of several Caribbean islands, including Dominica. Douens: Mysterious forest spirits that roam at night. Mermaids: Myths of mermaids and other sea creatures are common, with tales like that of Aycayia, a cursed mermaid from the Taino people of the Caribbean, being notable examples.
ClickMeSeeAllFull
ClickMeSeeOnMoreDetail
ClickMeSeeOnMorePictureImage
ClickMeSeeOnMoreVideo
Trip Tour Travel Journey: 10.Island Cape Town Peninsula Dungeons South Africa Beach Wave Pacific Sea Ocean Aqua Surfing
Method: Island Cape Town Peninsula Dungeons South Africa Beach Wave Pacific Sea Ocean Aqua Surfing How To Go.
Procedure:The Island Cape Town Peninsula Dungeons South Africa Land Beach Wave Pacific Sea Ocean Aqua Surfing How To Go. 1.Cape Town Peninsula Dungeons South Africa Land, Buy Ticket From The Airport. 2.Facilities Entertain: Golden Heavenly, Carnival Festival Consert Streaming Restuarant Pub Bar Karaoke Movie Music Game Massage Spa Home House Hotel Motel SwimmingPool School University Hospital, Boat Bus Train Plane Bicycle Mortorcycle Car. 3.Food Meal: Airfood, Seafood, StreetFood, Alcohols, Drinks. That you have had ever seen. 4.Activities Event: Surfing, Swimming, Hiking Forest and Mountain. 5.Uniform: Swimming Suit, Hiking Suit. Play Summer Clothes. Legendary Tale: Part 1: The phrase Legendary Tale Cape Peninsula Dungeons South Africa appears to refer to the historical dungeons within the Castle of Good Hope in Cape Town and the local legends and ghost stories associated with them. The location itself is also sometimes referred to as "the Cape Peninsula Dungeons" in a historical context. Key aspects of the legend and historical accounts include: The Location: The dungeons are part of the Castle of Good Hope, a star fort built by the Dutch in the 17th century, the oldest building in South Africa. Conditions and Prisoners: The dungeons were used to imprison various individuals during the early years of the Cape Colony. One specific dungeon was known as the Donker Gat ("dark hole") because it had no windows. Notable prisoners included the Pedi King Sekhukhune and the Hlubi Chief Langalibalele. Ghost Stories and Legends: The Castle is widely considered one of the most haunted places in Cape Town, with several ghost stories directly linked to the dungeons: Voices and Footsteps: Visitors and workers report hearing disembodied voices and footsteps within the windowless dungeons and narrow corridors. The Bell Ringer: The bell in the bell tower sometimes rings on its own, which is considered impossible as the tower was bricked up centuries ago. Legend attributes this to the ghost of a soldier who once hung himself by the bell rope. Governor van Noodt's Curse: The ghost most often claimed to haunt the castle is that of Governor Pieter Gysbert van Noodt, known for his harsh rule. He allegedly overturned a lighter sentence for seven soldiers and had them executed; one soldier cursed him, and the governor died in his chair the same day. Other Related Tales: Another historical legend from the area involves the escape of the Indonesian spiritual leader Tuan Ismail Dea Malela from the Simon's Town dungeons, after which he hid in caves at Cape Point. It is important not to confuse the historical "dungeons" with "Dungeons," a world-famous, dangerous big-wave surfing spot off Hout Bay on the Cape Peninsula, known for its challenging waves and the historical presence of great white sharks. Part 2: The primary legendary tale associated with dungeons in the Cape Peninsula relates to the underground tunnels beneath Cape Town and the ghost stories of the Castle of Good Hope, South Africa's oldest colonial building. The Castle of Good Hope and its Ghosts The 17th-century Castle of Good Hope, a former military fortress and prison, is a central point for local folklore. Haunted Dungeons: Stories abound of voices and footsteps heard in the windowless dungeons and narrow corridors of the building. One particularly grim tale suggests that convicts in these dungeons would sometimes drown when the area flooded. The Lady in Grey: A famous ghost, the Lady in Grey, was frequently seen running through the castle, holding her face and crying hysterically. Sightings stopped after a woman's body was discovered during an excavation, leading many to believe her spirit was finally at rest. Governor van Noodt's Curse: Another popular story involves Governor Pieter Gysbert van Noodt, a stern man who died of a heart attack on the same day he sentenced seven deserting soldiers to death. One of the soldiers allegedly cursed him to attend the execution, which Van Noodt had skipped, and locals believe the curse led to his sudden death. The Black Dog: There is a legend of a spectral black dog that pounces on unsuspecting visitors and then vanishes into thin air. The Tunnels Beneath the City A network of disused stormwater and canal tunnels, some dating back to the arrival of the Dutch in 1652, runs beneath the city center and is the source of many tales. These were originally open canals used to supply fresh water from Table Mountain to the Company Gardens and passing ships. Hidden Passageways: The sheer extent of these hidden passages has led to modern adventure tours exploring the dark, sometimes wet, tunnels, fueling tales of secret routes, forgotten bunkers (some linked to WWII), and mysterious goings-on beneath the bustling city. Connection to the Castle: Some of these tunnels run directly to and from the Castle of Good Hope, adding to the mystique of the historic fort. Dungeons Surf Spot It is important to note that Dungeons is also the name of a world-famous, challenging big wave surf spot off the coast of Hout Bay, known for its enormous waves and the dangerous presence of great white sharks (before orcas allegedly chased them away). The legend here is one of extreme sport and the inherent dangers of the ocean, rather than historical dungeons or folklore. Part 3: The Dungeons in the Cape Peninsula is not an actual building with historical dungeons, but rather a world-renowned, and exceptionally dangerous, big-wave surf spot off the coast of Hout Bay. The horror and scary tales associated with it are rooted in the extreme physical danger of the location and the prevalent presence of great white sharks, not paranormal activity. The True Horror of the Dungeons Extreme Waves: Dungeons is famous for massive, powerful, and unpredictable waves that can reach up to 60 feet (18 meters) during major swells. Surfers describe it as an ocean battleground and arguably the scariest big wave spot in the world due to its shifty peaks and treacherous currents. Shark Infestation: The area sits near Seal Island, a large seal colony, making the surrounding waters a known feeding ground for great white sharks. Surfers who lose their boards (wipe out) face a terrifying wait in what is known as the channel of death until a rescue jet ski can reach them, knowing they are essentially bait. The Name's Origin: The name Dungeons was reportedly coined by a local surfer who was held underwater by two consecutive 25-foot waves, experiencing the feeling of being trapped in a watery dungeon. Other Cape Peninsula Ghost Stories While the Dungeons surf spot doesn't have traditional ghost stories, the broader Cape Peninsula is home to many famous, genuinely scary legends and haunted locations, including: The Castle of Good Hope: The oldest colonial building in South Africa is considered the most haunted site in Cape Town. Its Die Donker Gat (Dark Hole) once served as a windowless torture chamber where prisoners sometimes drowned when it flooded. Visitors report disembodied voices, phantom footsteps, and the ghosts of Governor Pieter Gysbert van Noodt and Lady Anne Barnard. The Flying Dutchman: The legendary tale of a spectral ship doomed to sail the waters around the Cape of Storms for eternity after its captain swore to round the tip in a storm, even if it was the last thing he did. The Ghost of Verlatenbosch (Table Mountain): The story of a governor's son who contracted leprosy from a cursed flute and was exiled to a hut on the mountain, where some still claim to hear his mournful tune. Tokai Manor House: The site of a New Year's Eve legend where a nobleman, dared to ride his horse indoors, did so and subsequently broke his neck. His ghostly re-enactment is reportedly seen on the anniversary.
ClickMeSeeAllFull
ClickMeSeeOnMoreDetail
ClickMeSeeOnMorePictureImage
ClickMeSeeOnMoreVideo
Trip Tour Travel Journey: 11.Island Bali Beach Wave Pacific Sea Ocean Aqua Surfing
Method: Island Bali Indonesia Land Beach Wave Pacific Sea Ocean Aqua Surfing How To Go.
Procedure:The Island Bali Indonesia Land Beach Wave Pacific Sea Ocean Aqua Surfing How To Go. 1.Bali Indonesia Land, Buy Ticket From The Airport. 2.Facilities Entertain: Golden Heavenly, Carnival Festival Consert Streaming Restuarant Pub Bar Karaoke Movie Music Game Massage Spa Home House Hotel Motel SwimmingPool School University Hospital, Boat Bus Train Plane Bicycle Mortorcycle Car. 3.Food Meal: Airfood, Seafood, StreetFood, Alcohols, Drinks. That you have had ever seen. 4.Activities Event: Surfing, Swimming, Hiking Forest and Mountain. 5.Uniform: Swimming Suit, Hiking Suit. Play Summer Clothes. Legendary Tale: Part 1: Bali is known as the Island of the Gods due to its rich Hindu heritage, numerous temples, and the belief that powerful deities inhabit the island's natural elements, such as mountains and lakes. The legendary tale is not a single story, but rather a collection of myths and a way of life that emphasizes a deep connection between humans, nature, and the divine, expressed through daily rituals and ceremonies. Key elements of this spiritual landscape include: The Nickname Origin: The name Bali is believed to derive from the Sanskrit word bali (बलि), meaning offering or tribute, reflecting the culture's emphasis on daily canang sari offerings to the gods. The island was historically referred to as Bali-dvīpa, or Island of Offerings. Balinese Hinduism: The island is the only Hindu-majority province in Indonesia, blending ancient animism with Hinduism. The local belief system holds that gods and spirits live on the island and must be honored to maintain cosmic harmony. Volcanoes and Deities: The Balinese look inland and upward to the volcanic peak, Mount Agung, which they call the navel of the world and consider home to the gods. A foundational creation myth tells how a part of the cosmic mountain Mahameru was used to pin the wildly floating island in place, thus creating Mount Agung and other sacred peaks. The Philosophy of Tri Hita Karana: This local philosophy emphasizes happiness through harmony between humans, nature, and the divine, further reinforcing the island's reputation as a sacred place. Famous Legends: The island's culture is steeped in various myths, including: The Battle of Barong and Rangda: This classic tale, often performed in traditional dances, depicts the eternal struggle between good (Barong, a protective creature) and evil (Rangda, a demon queen). Dewi Danu: The goddess of water, lakes, and irrigation, who is central to the island's agricultural system and worshipped at temples like Pura Ulun Danu Bratan. Essentially, the legendary tale is the continuous, living narrative of the Balinese people's devotion and their unique spiritual connection to the beautiful natural world around them. Part 2: Bali is known as the Island of the Gods primarily due to its deep connection with Hinduism, abundant temples, and rich mythology, rather than a single unifying origin legend about the island itself. Balinese folklore features numerous local deities, spirits, and myths that explain various natural phenomena and moral lessons, the most prominent of which include: The Battle of Barong and Rangda This is perhaps the most famous Balinese legend, representing the eternal struggle between good and evil. Barong: A mythical, lion-like or panther-like creature that is the leader of the forces of good and a protector of villages. Rangda: The embodiment of evil, a fearsome demon queen and witch who leads the dark spirits. The story is often performed as a traditional dance, where Barong and Rangda engage in a fierce battle. Though Barong may seem to lose at times, goodness always prevails in the end, symbolizing the necessary balance of these forces in the world. The Legend of Dewi Danu Dewi Danu is the revered water goddess responsible for the lakes and the complex irrigation system (subak) that sustains Bali's fertile rice paddies. The legend states that she gave life to the island by controlling the water flow from sacred lakes like Lake Batur. Ceremonies are held to honor her and maintain the natural balance and fertility of the land. The Story of Kebo Iwa Kebo Iwa was a giant baby born to parents who prayed for a child. He grew to have a massive appetite, causing difficulties for his village. He was a powerful warrior who built infrastructure and protected the community. When Majapahit troops planned to conquer Bali, they tricked Kebo Iwa into a deep well and buried him alive. His death allowed for the conquest, and he is remembered for his contributions and strength. Creation Myths Balinese cosmology includes a creation myth where, in the beginning, only Antaboga, the world snake, existed. Antaboga meditated and created the world turtle Bedawang, on top of which two snakes and a black stone (the lid of the underworld) were placed. The underworld is ruled by the goddess Setesuyara and the god Batara Kala, who created light and the earth. These stories, along with a multitude of gods, spirits inhabiting natural elements like mountains and rivers, and a high density of temples, form the core of the spiritual life that has earned Bali its divine nickname. Part 3: Bedawang, or Bedawang Nala, is a mythical giant turtle in Balinese and Hindu cosmology that supports the world. It is believed to live at the bottom of the earth and, along with two dragons, carries the weight of the world. When it shifts, earthquakes and volcanic eruptions occur. Bedawang is also a popular decorative motif, often found at the base of Hindu temples, representing the earth and the forces of nature. Role in Balinese and Hindu belief World-bearer: Bedawang Nala is the cosmic turtle that physically holds up the world. Symbol of natural power: Its movements are said to cause natural disasters like earthquakes and volcanic eruptions, representing the dynamic forces of nature. Support of the earth: It is often depicted entwined with two dragons, Anantabhoga and Basuki, who also help support the world and its oceans and atmosphere. Symbolism in architecture: Bedawang Nala is a common decorative element in temples, particularly at the base of the Padmasana (a place for prayer and offerings), symbolizing its role as the foundation of the earth. Origin and adaptation Adaptation from Indian mythology: The concept is believed to be an adaptation of the Indian myth of Vadavanala, which features a fiery mare's head on the seabed as a cause of earthquakes and tsunamis. Shift from fiery mare to turtle: The form was adapted to a turtle because turtles are a well-known and natural part of Bali's aquatic environment, according to balinemo-naturetrip.com. Symbol of fire: The name Bedawang Nala is linked to the word anala (fire) from its mythological origins, notes ResearchGate. Modern and other meanings Villa name: "Bedawang" is also used as the name for a luxury villa in Seminyak, Bali. Media inspiration: The myth has served as a source of inspiration for modern works, such as films, that use the story to explore environmental themes, explains ResearchGate. A cartoon character: Bedawang also appears as a character in the animated series Droners. Part 4: Bali, known as the "Island of the Gods," has rich and complex horror folklore centered on its unique spiritual beliefs. The most prominent and terrifying figures in these legends are Rangda, the demon queen, and her followers, the Leyaks. The Legend of Rangda and Barong The central legend in Balinese horror and mythology is the eternal battle between Rangda (evil) and Barong (good). Rangda, the Demon Queen: Her name means widow in Old Javanese. She is a terrifying figure depicted as a mostly nude old woman with long, unkempt hair, pendulous breasts, claws, large fangs, and a long, flaming tongue. She leads an army of evil witches (Leyaks) and is known for cannibalistic behaviors, sometimes even feeding on the blood of babies. Despite being a symbol of destructive forces, her mask is also revered in some village temples as a protector, highlighting the Balinese belief in the necessary balance between good and evil. Barong, the Protector: The counterpart to Rangda, Barong is the king of spirits, a benevolent, lion-like or bear-like creature who symbolises goodness, courage, and protection. The Eternal Battle: The Barong and Rangda dance-drama, a popular cultural performance, re-enacts their struggle. In the performance, Rangda casts a black magic spell on Barong's followers, forcing them to stab themselves with their kris (daggers). However, Barong's magic protects them, making them invulnerable to the sharp weapons, a scene known as the Keris Dance. The conflict ends with Barong's victory, restoring balance, though Rangda is never truly destroyed, as evil must exist in balance with good.
ClickMeSeeAllFull
ClickMeSeeOnMoreDetail
ClickMeSeeOnMorePictureImage
ClickMeSeeOnMoreVideo
Trip Tour Travel Journey: 12.Island Teahupoo Tahiti Polynesia French Beach Wave Pacific Sea Ocean Aqua Surfing
Method: Island Teahupoo Tahiti Polynesia French Land Beach Wave Pacific Sea Ocean Aqua Surfing How To Go.
Procedure:The Island Teahupoo Tahiti Polynesia French Land Beach Wave Pacific Sea Ocean Aqua Surfing How To Go. 1.Teahupoo Tahiti Polynesia French Land, Buy Ticket From The Airport. 2.Facilities Entertain: Golden Heavenly, Carnival Festival Consert Streaming Restuarant Pub Bar Karaoke Movie Music Game Massage Spa Home House Hotel Motel SwimmingPool School University Hospital, Boat Bus Train Plane Bicycle Mortorcycle Car. 3.Food Meal: Airfood, Seafood, StreetFood, Alcohols, Drinks. That you have had ever seen. 4.Activities Event: Surfing, Swimming, Hiking Forest and Mountain. 5.Uniform: Swimming Suit, Hiking Suit. Play Summer Clothes. Legendary Tale: Part 1: The village and surf break of Teahupo'o in French Polynesia are steeped in legend and known for a powerful, dangerous wave with a name that translates grimly to the pile of heads or wall of skulls. The name originates from a historical battle between two tribes, where the victors built a wall with the skulls of their enemies. The area and its massive waves are associated with several aspects of Polynesian legend: The Goddess Pere: In Polynesian culture, ocean waves were seen as living entities, sometimes a response to the wrath of gods. The mythical wave at Teahupo'o is called Pererure, a name linked to the anger of Pere, the goddess of volcanoes who was once revered on the local Taiarapu peninsula. Vēhiatua i te Māta'i: A legend speaks of a high-ranking young woman and champion surfer (hōrue) named Vēhiatua, who could ride the biggest waves. A jealous local chief chased her away and took her name and fame for himself. The stèle (stone monument) in Teahupo'o is dedicated to her legend. Mana and Danger: The power and beauty of the wave are considered part of Mana, a supernatural force. The wave's reputation for being life-threatening is well-earned; its unique bathymetry causes swells from deep water to suddenly jack up and break with immense force over a shallow coral reef. This physical danger has led to serious injuries and even deaths, contributing to the spot's fearsome reputation and nickname, The End of the Road. While the immediate stories around the surf break are related to tribal history and local heroines, the inherent danger and power of the natural phenomenon are deeply tied to the broader Polynesian beliefs in the sacred and potentially wrathful nature of the ocean and its gods. Part 2: The mythologies in present-day France encompass the mythology of the Gauls, Franks, Normans, Bretons, and other peoples living in France, those ancient stories about divine or heroic beings that these particular cultures believed to be true and that often use supernatural events or characters to explain the nature of the universe and humanity. French myth has been primarily influenced by the myths and legends of the Gauls (or Celts) and the Bretons as they migrated to the French region from modern day England and Ireland. Other smaller influences on the development of French mythology came from the Franks. Until March 1790, France was divided into 34 provinces which existed independently of each other. All provinces operated under the regime of the King, but there was no national citizenship or holistic nation state. Most provinces were settled by several different racial groups. As such, most provinces developed their own unique mythological beliefs and customs. These historic geographic divisions have led to a great diversity of myths and legends which survive across contemporary France. Gallia, etymologically distinct from Gaul though in common parlance used interchangeably, was the name given to contemporary France by the Romans, and comprised land from the Mediterranean coast of France to the Pyrenees. Gaul was inhabited by several ethnic groups, mostly descendant from Celtic peoples, known as the Gallic tribes. These Gallic tribes developed distinct forms of Gallo-Roman culture after the Roman sacking of Gaul in the second century.[2] The first settlers inhabited modern day Brittany, and the mythology of the northernmost Gallic tribes, including werewolves and other mischwesen, survive in lais from Medieval manuscripts.[3] Between the 3rd and 7th century, Germanic migrants began to settle in Roman-Gaul. As the Western-Roman empire began to collapse, the German migrants who would become known as the Franks began to exercise their influence over the west of France. The Franks shared many of the customs and superstitions with other Germanic peoples, and spread many of their nature rituals and beliefs across western France. French legendary tales of horror include folktales like Bluebeard and The Dames Blanches (White Ladies), as well as monstrous creatures such as the Beast of Gévaudan, the Cheval Mallet, and the Sarramauca. Beyond folklore, French horror is also known for its rich tradition in literature, like the works of Joris-Karl Huysmans and Gaston Leroux, and its influential modern cinema, including films like Diabolique and High Tension. Legendary tales and creatures Bluebeard: A folktale about a man who murders his wives. The story was famously written by Charles Perrault. The Dames Blanches (White Ladies): Spirits of women who are said to haunt castles and sometimes guard treasures, but can also act as an oracle of death or a scary hitchhiker in urban legends. Beast of Gévaudan: A wolf-like beast that terrorized the Gévaudan region of France in the 18th century. Cheval Mallet: An evil, ghostly white horse that appears to tired travelers and carries them off to a never-to-be-seen-again fate. Sarramauca: A female witch-like figure from Occitanie said to sit on sleepers' chests and cause breathlessness and choking. Tarasque: A dragon-like beast from the Provence region that was said to be a man-eating monster. Part 3: The Beast of Gévaudan was a real man-eating animal (likely a wolf or wolf-dog hybrid) that terrorized the Gévaudan province of France in the mid-18th century, while the Cheval Mallet is a fabulous, evil horse from French folklore. They are distinct figures from different historical and cultural contexts. The Beast of Gévaudan Nature: The Beast was a real animal, or potentially a pack of animals, whose identity is still debated but generally believed by modern scholars to be an unusually large and aggressive wolf or wolf-dog hybrid. Time and Location: It was active between 1764 and 1767 in the remote, mountainous Gévaudan province (modern-day Lozère) in south-central France. Activity: It was responsible for a high number of brutal, man-eating attacks, with estimates ranging from 60 to over 100 deaths, mostly women and children. The attacks were a national sensation, prompting King Louis XV to send royal hunters and troops to the region. Description: Witness descriptions varied due to hysteria, but commonly mentioned a creature the size of a calf, with reddish fur, a black stripe down its back, an enormous tail, and a large, wolf-like or pig-like head. It was said to be fearless of humans and resistant to musket balls. Outcome: Two large wolves were killed in 1765 and 1767 by royal gunbearer François Antoine and local hunter Jean Chastel, respectively. The attacks ceased after Chastel's kill, in whose stomach human remains were reportedly found. Part 4: The Cheval Mallet Nature: The Cheval Mallet (Mallet Horse) is a purely fabulous and evil creature of French folklore, not based on a specific historical animal or event. Time and Location: The legend originates from the folklore of Western France, specifically the Vendée and Poitou regions. Activity: It was said to appear at night as a beautiful, saddled and bridled white or black horse, tempting weary travelers to ride it. Once a person mounted the horse, they were abducted and never returned. Protection: The only way to protect oneself from the Cheval Mallet was to possess a specific protection, such as a medal of St. Benedict. Cultural Role: It served as a sort of bogeyman figure in local tales. A related regional feast featuring an actor disguised as a horse was banned by ecclesiastical authorities in 1791.
ClickMeSeeAllFull
ClickMeSeeOnMoreDetail
ClickMeSeeOnMorePictureImage
ClickMeSeeOnMoreVideo
Trip Tour Travel Journey: 13.Island Shipstern Bluff Tasmania Australia Beach Wave Pacific Sea Ocean Aqua Surfing
Method: Island Shipstern Bluff Tasmania Australia Land Beach Wave Pacific Sea Ocean Aqua Surfing How To Go.
Procedure:The Island Shipstern Bluff Tasmania Australia Land Beach Wave Pacific Sea Ocean Aqua Surfing How To Go. 1.Shipstern Bluff Tasmania Australia Land, Buy Ticket From The Airport. 2.Facilities Entertain: Golden Heavenly, Carnival Festival Consert Streaming Restuarant Pub Bar Karaoke Movie Music Game Massage Spa Home House Hotel Motel SwimmingPool School University Hospital, Boat Bus Train Plane Bicycle Mortorcycle Car. 3.Food Meal: Airfood, Seafood, StreetFood, Alcohols, Drinks. That you have had ever seen. 4.Activities Event: Surfing, Swimming, Hiking Forest and Mountain. 5.Uniform: Swimming Suit, Hiking Suit. Play Summer Clothes. Legendary Tale: Part 1: Shipstern Bluff in Tasmania is known for its extreme natural danger, but there are no established legendary horror or sacred scary tales specifically associated with the location in popular culture or surf folklore. Its fearsome reputation stems from its intense physical challenges: a monstrous, unpredictable wave, a rugged coastline, freezing water, and the presence of great white sharks. The Horror of Shipstern Bluff The horror associated with Shipstern Bluff is rooted in its objective danger for surfers: The Steps: The wave is famous for its unique steps—sudden, unpredictable ledges and mutations in the wave face caused by the shallow, jagged reef. Surfers describe freefalling with thousands of kilograms of water behind them, making it one of the most technically difficult and dangerous rides in the world. Marine Life: The waters are known to be infested with menacing sharks, particularly great whites, which are attracted by the nearby seal colony at Cape Raoul. Orcas are also sighted in the area. Isolation and Environment: The location is extremely remote, accessible only by a two-hour hike through the rugged Tasman National Park or a 30 km boat/jet ski ride, far from immediate help. "Devil's Point": The area was formerly named Devil's Point, a name that reflects the intimidating and wild nature of the spot, though no specific devil legend is widely circulated beyond the general sense of danger. Port Arthur's Eerie Proximity: The trail to the bluff requires driving through the area near Port Arthur, a location famous for its dark colonial history and known for ghost stories, which some locals say adds to the general eeriness of the journey. Sacred or Legendary Tales While the area is within Tasmania, which has rich Indigenous Australian history and folklore, no specific sacred scary tale or supernatural legend directly linked to the Shipstern Bluff break is widely known or documented in the available information. The site's legendary status refers to its reputation as a mythical, challenging surf spot that locals knew about for years before it was widely publicized. In essence, the true "horror" of Shipstern Bluff lies not in ghosts or supernatural entities, but in the raw, untamed power of nature and the extreme physical risks faced by those who dare to surf it. Part 2: Legendary Tales of the Australian Aborigines - Reading AustraliaLegendary Tale Australia most likely refers to Australian Legendary Tales, a collection of Aboriginal myths and folktales from the Noongahburrah people. The tales explain natural phenomena and the origin of animals and landmarks, and the book is a significant early record of Indigenous Australian culture. Another key work is Legendary Tales of the Australian Aborigines, a collection of stories collected by David Unaipon. Content: This collection of folklore from the Noongahburrah people was recorded after colonisation, making it one of the first attempts to preserve First Australian culture. Purpose: The stories explain the origins of local landmarks, animal habits, and other aspects of the natural world. Significance: It provides valuable insight into the life and customs of Australia's first inhabitants and includes original illustrations by the Aboriginal artist Tommy McRae. Legendary Tales of the Australian Aborigines Author: David Unaipon Content: This book is a compilation of stories collected by Unaipon, an important Aboriginal figure. Significance: This edition has worked to restore the text to its original form, acknowledging Unaipon as the primary collector and narrator and righting historical injustices. Other legendary figures Yowie: A mythical creature from Australian folklore, described as a long, narrow, humanlike cryptid. The bunyip is a creature from the aboriginal mythology of southeastern Australia, said to lurk in swamps, billabongs, creeks, riverbeds, and waterholes. The origin of the word bunyip has been traced to the Wemba-Wemba or Wergaia language of the Aboriginal people of Victoria, in South-Eastern Australia. The word bunyip is usually translated by Aboriginal Australians today as devil or evil spirit. This contemporary translation may not accurately represent the role of the bunyip in pre-contact Aboriginal mythology or its possible origins before written accounts were made. Some modern sources allude to a linguistic connection between the bunyip and Bunjil, a mythic 'Great Man' who made the mountains, rivers, man, and all the animals. The word bahnyip first appeared in the Sydney Gazette in 1812. It was used by James Ives to describe a large black animal like a seal, with a terrible voice which creates terror among the blacks. The bunyip is part of traditional Aboriginal beliefs and stories throughout Australia, while its name varies according to tribal nomenclature. In his 2001 book, writer Robert Holden identified at least nine regional variations of the creature known as the bunyip across Aboriginal Australia. The bunyip has been described as amphibious, almost entirely aquatic (there are no reports of the creature being sighted on land), inhabiting lakes, rivers, swamps, lagoons, billabongs, creeks, waterholes, sometimes particular waterholes in the riverbeds. Physical descriptions of bunyips vary widely. George French Angus may have collected a description of a bunyip in his account of a "water spirit" from the Moorundi people of the Murray River before 1847, stating it is much dreaded by them ... It inhabits the Murray; but ... they have some difficulty describing it. Its most usual form ... is said to be that of an enormous starfish. The Challicum bunyip, an outline image of a bunyip carved by Aboriginal people into the bank of Fiery Creek, near Ararat, Victoria, was first recorded by The Australasian newspaper in 1851. According to the report, the bunyip had been speared after killing an Aboriginal man. Antiquarian Reynell Johns claimed that until the mid-1850s, Aboriginal people made a "habit of visiting the place annually and retracing the outlines of the figure [of the bunyip] which is about 11 paces long and 4 paces in extreme breadth".[16] The outline image no longer exists.[17] Robert Brough Smyth's Aborigines of Victoria (1878) devoted ten pages to the bunyip, but concluded "in truth little is known among the blacks respecting its form, covering or habits; they appear to have been in such dread of it as to have been unable to take note of its characteristics".[18] Eugénie Louise McNeil recalled from her childhood memory in the 1890s that the bunyip supposedly had a snout like an owl ("a Mopoke"), and was probably a nocturnal creature by her estimation. The bunyips presumably seen by witnesses, according to their descriptions, most commonly fit one of two categories: 60% of sightings resemble seals or swimming dogs, and 20% of sightings are of long-necked creatures with small heads; the remaining descriptions are ambiguous beyond categorisation. The seal-dog variety is most often described as being between 4 and 6 feet long with a shaggy black or brown coat. According to reports, these bunyips have round heads resembling a bulldog, prominent ears, no tail, and whiskers like a seal or otter. The long-necked variety is allegedly between 5 and 15 feet long, and is said to have black or brown fur, large ears, small tusks, a head like a horse or emu, an elongated, maned neck about three feet long and with many folds of skin, and a horse-like tail. The bunyip has been described by natives as amphibious, nocturnal, reclusive, and inhabiting lakes, rivers, and swamps. Bunyips, according to Aboriginal mythology, can swim swiftly with fins or flippers, have a loud, roaring call, and feed on crayfish, though some legends portray them as bloodthirsty predators of humans, particularly women and children. As a result, Aboriginal People purposely avoided unfamiliar bodies of water lest there were bunyips lurking in the depths. Bunyip eggs are allegedly laid in platypus nests. The bunyip appears in Ngarrindjeri dreaming as a water spirit called the Mulyawonk, which would get anyone who took more than their fair share of fish from the waterways, or take children if they got too close to the water. The stories taught practical means of ensuring long-term survival for the Ngarrindjeri, embodying care for country and its people. Part 3: The Yowie is one of several names for an Australian folklore entity that is reputed to live in the Outback. The creature has origins in Aboriginal oral history. In parts of Queensland, it is known as a Quinkin (or as a type of Quinkin), and as joogabinna. In parts of New South Wales, it is referred to by various names, including Ghindaring, Jurrawarra, Myngawin, Puttikan, Doolaga, Gulaga and Thoolagal. Other recorded names for similar entities include, Noocoonah, Wawee, Pangkarlangu, Jimbra and Tjangara. Legends of Yowie-type creatures appear in Aboriginal Australian legends, particularly in the eastern Australian states. Description and reported characteristics Yaroma swallowing a man (1907 drawing) The Yowie is typically described as a bipedal, hairy, and ape-like creature, standing upright at between 2.1 m (6 ft 11 in) and 3.6 m (12 ft). Reports of Yowie footprints describe them as significantly larger than a human's, but alleged Yowie tracks are inconsistent in shape and toe number. The Yowie's nose is described as wide and flat. Descriptions of the Yowie's behavior vary; some accounts depict the Yowie as timid and reclusive, while others suggest it can be violent or aggressive. The exact origin of the name Yowie in reference to Australian hominid legends is uncertain. The term was documented in 1875 among the Gamilaraay people by Rev. William Ridley in Kámilarói and Other Australian Languages, where Yō-wī[a] was described as a spirit that roams the earth at night. Some researchers suggest that the term arose through Aboriginal legends of the Yahoo. Nineteenth century European accounts describe the creature and deem it the Yahoo, specifically the entry of Robert Holden, who described it saying The natives of Australia... believe in... [the] Yahoo. Another story about the terms origins come from an Aboriginal source. One account from Old Bungaree, a Gunedah elder, stating that the Yahoo was an ancient race that once inhabited Australia. He describes conflicts between Yahoos and Aboriginal people in an event called Dreamtime, claiming that the latter usually overpowered them, although the Yahoo is said to be a fast runner. Additionally, some scholars propose that the Yowie legend may have been influenced by European folklore. Possible sources for this claim include: Jonathan Swift's yahoos from Gulliver's Travels, depicted as primitive, bestial humanoids European myths of hairy wild men, describing hairy, ape-like beings Early 19th century public excitement with captive orangutans for display, which sparked curiosity about large primates Early reports (19th century) A 1987 column in The Sydney Morning Herald, columnist Margaret Jones suggest that the first reported Yowie sighting in Australian occurred as early as 1795. By the 1850s, accounts of indigenous apes appeared in the Australian Town and Country Journal. The earliest account in November 1876 asked readers Who has not heard, from the earliest settlement of the colony, the blacks speaking of some unearthly animal or inhuman creature ... namely the Yahoo-Devil Devil, or hairy man of the wood? In 1882, amateur naturalist Henry James McCooey claimed to have seen an indigenous ape on the New South Wales south coast, between Batemans Bay and Ulladulla. He described the creature as tailless, covered in long black hair, with reddish fur around the throat and chest. He estimated its height at nearly five feet tall when standing upright and noted that its small, restless eyes were partially obscured by matted hair. McCooey claimed to have thrown a stone at the creature, prompting it to flee. McCooey offered to capture an ape for the Australian Museum for a reward £40. According to researcher Robert Holden, a second outbreak of reported ape sightings appeared in 1912. The Yowie also appeared in Australian folklore and literature, including Donald Friend's Hillendiana, a collection of writings about the goldfields near Hill End, New South Wales, where it was described as species of bunyip.[23] Holden also cites the appearance of the Yowie's presence in a number of Australian tall stories in the late 19th and early 20th centuries. 20 and 21st century sightings Modern reports of the Yowie continue, often associated with cryptozoology investigations. One such case involved Top End Yowie investigator Andrew McGinn who claimed the death and mutilation of a pet dog near Darwin could have been the result of an attack by the mythological Yowie. Part 4: Yara-ma-yha-who A Book of CreaturesThe Yara-ma-yha-who is a creature from Australian Aboriginal mythology, described as a small, red, frog-like man with a large head and a wide, toothless mouth. It lives in fig trees, drops on unsuspecting people to drink their blood, and can swallow them whole, later regurgitating them repeatedly until the victim becomes smaller and weaker before eventually transforming into another Yara-ma-yha-who. Part 5: The legendary tale of Shipstern Bluff primarily revolves around its status in the surfing world as a mythical, formidable, and highly unpredictable big-wave location. Locals initially considered it a myth before it was widely surfed in the early 2000s, adding to its mystique, Key aspects of its legendary status include: The Wave within a Wave (The Steps): The most famous and legendary aspect is the unique geological formation of the wave, caused by a shallow, stair-step reef rising suddenly from the deep ocean. Swells coming from the South Pole hit this jagged dolerite reef, causing the wave face to mutate into random, jack-knife humps (known as the steps). Surfers must navigate these unpredictable steps to lock into the main barrel, a technical challenge unlike anywhere else in the world. A Mythical Discovery: Before widespread documentation, locals knew the wave existed but considered it more of a myth, with only a few people willing to make the difficult hike or boat trip to attempt to surf it. New Zealander David Guiney was the first to claim surfing it around 2000, followed by Australian Andy Campbell, who brought it into the limelight via a surf film, causing a media frenzy and cementing its place in surf lore. Extreme Danger and Remoteness: The location's isolation on the wild Tasman Peninsula, accessed only by a two-hour hike or a 30 km boat ride, contributes to its fearsome reputation. The freezing water, proximity to sharp rocks, potential for equipment failure (leashes wrapped around boulders), and the presence of great white sharks and orcas add layers of extreme risk, making tales of survival common among those who ride it. A Proving Ground: Shipstern Bluff has become a legendary proving ground for some of the world's best big-wave surfers, including Mick Fanning and Kelly Slater. The tales of their extreme sessions and dramatic wipeouts are a major part of the spot's contemporary legend, often captured in intense surf films and videos. Sammy the Seal: A more lighthearted, local legend is Sammy the Seal, a harmless fur seal who frequently hangs out in the lineup with the surfers and has even been known to ride a wave occasionally.
ClickMeSeeAllFull
ClickMeSeeOnMoreDetail
ClickMeSeeOnMorePictureImage
ClickMeSeeOnMoreVideo
Trip Tour Travel Journey: 14.Island Piha New Zealand’s North Beach Wave Pacific Sea Ocean Aqua Surfing
Method: Island Piha New Zealand’s North Land Beach Wave Pacific Sea Ocean Aqua Surfing How To Go.
Procedure:The Island Piha New Zealand’s North Land Beach Wave Pacific Sea Ocean Aqua Surfing How To Go. 1.Piha New Zealand’s North Land, Buy Ticket From The Airport. 2.Facilities Entertain: Golden Heavenly, Carnival Festival Consert Streaming Restuarant Pub Bar Karaoke Movie Music Game Massage Spa Home House Hotel Motel SwimmingPool School University Hospital, Boat Bus Train Plane Bicycle Mortorcycle Car. 3.Food Meal: Airfood, Seafood, StreetFood, Alcohols, Drinks. That you have had ever seen. 4.Activities Event: Surfing, Swimming, Hiking Forest and Mountain. 5.Uniform: Swimming Suit, Hiking Suit. Play Summer Clothes. Legendary Tale: Part 1: New Zealand has many legendary tales involving scary or sacred places, including the Māori belief that Spirits Bay is where souls depart to the afterlife, and the terrifying taniwha, supernatural creatures said to inhabit rivers and the sea. Sacred locations often have a spiritual or mythical basis, while spooky sites are linked to local legends of ghosts and unfinished business. Sacred legends Spirits Bay: A sacred place in Māori belief where the spirits of the dead are said to leap from a pōhutukawa tree at Cape Reinga to journey to their ancestral home. Te Ika-a-Māui (North Island): According to legend, the North Island was created by the demigod Māui who fished it up from the sea with a magical hook. Tan Mahuta, Lord of the Forest: In some legends, the ancient kauri trees in the Wua forest are imbued with the spirit of a forest god, creating a sacred and powerful atmosphere. Scary legends and haunted places Taniwha: These are supernatural beings in Māori tradition, often described as dragons or serpents, that live in deep water, caves, or the sea. Some legends say they could be dangerous, eating or kidnapping people. Te Mata Peak: The silhouette of this mountain is said to be the body of a giant chief who died trying to bite through the hills. The misty sunsets are said to be the cloak of his grieving wife. Larnach Castle: This historic castle is reportedly haunted by the ghosts of Kate and Eliza Larnach. St. James Theatre: The historic theatre in Wellington is said to be home to several ghosts, including a Russian performer named Yuri. The Vulcan Hotel: A 19th-century prostitute known as The Rose is said to haunt this hotel. Part 2: Piha, New Zealand, is a place of local legends and real-life mysteries, combining natural hazards with folklore about disappearances and spirits. Key stories include the legendary battle between Tāmure and the man-eating taniwha Kaiwhare, the sorrowful spirit of the Wahine Moana (Ocean Woman) who eternally waits for her lost love, and a more modern mystery of six unexplained disappearances from the area. Legendary tales Tāmure and Kaiwhare: According to Māori legend, a warrior named Tāmure came to Piha to fight Kaiwhare, a man-eating taniwha (sea monster) living in a cave. Tāmure, wielding a powerful greenstone weapon, wounded the taniwha so it could no longer eat people and was forced to live on crayfish and octopus instead.Wahine Moana (Ocean Woman): This legend tells of a young woman who waited on Piha's beach for her lover to return from the sea. She eventually succumbed to the waves herself, and her spirit is said to still roam the shore, especially on stormy nights, crying out for her lost love. Modern mysteries and scary lore Unexplained disappearances: Piha has a reputation for unsolved disappearances. Six people have vanished without a trace, which has fueled local fears and speculation that there is more to these cases than simple accidents.The Black Coast mystery: The unexplained nature of these disappearances has earned Piha the nickname Black Coast, and the true-crime mystery series Black Coast Vanishings explores these real-life events.Eerie atmosphere: The combination of treacherous surf, dramatic cliffs, and an aura of unresolved mystery has contributed to Piha's reputation as a place of both rugged beauty and unsettling, supernatural lore. Mythical Creatures: Taniwha (New Zealand) | Anderson Design GroupTaniwha are supernatural beings in Māori mythology, often depicted as serpentine or dragon-like creatures that live in deep pools, caves, or the sea. They are described as either fearsome monsters that can eat people or as protective guardians for a tribe or specific individuals. Their form can vary, with some being shaped like giant lizards or geckos, others like sharks or whales, and some can even shapeshift. Characteristics and forms Habitat: They live in deep water, including the sea, rivers, and lakes, and in their lairs known as rua taniwha. Appearance: Their forms are varied and can depend on their environment. They are often described as giant, reptilian creatures, but can also appear as sharks, whales, or even logs of wood. Shapeshifting: Some taniwha have the ability to change their shape from one form to another. Roles and legends Guardians: Many stories portray taniwha as protectors. For example, Kupe's guardian taniwha, Tuhirangi, is said to have guided his canoe and was later believed to have reappeared as the dolphin Pelorus Jack. Monsters: Other legends depict them as dangerous beings that capture and eat people or kidnap women. Offering respect: People would offer gifts and perform rituals (karakia) to appease or gain the favor of taniwha. Taniwha slayers: Stories also exist of heroes who would hunt and kill dangerous taniwha using clever strategies.
ClickMeSeeAllFull
ClickMeSeeOnMoreDetail
ClickMeSeeOnMorePictureImage
ClickMeSeeOnMoreVideo
Trip Tour Travel Journey: 15.Island Lahinch Ireland Beach Wave Pacific Sea Ocean Aqua Surfing
Method: Island Lahinch Ireland Beach Wave Pacific Sea Ocean Aqua Surfing How To Go.
Procedure:The Island Lahinch Ireland Beach Wave Pacific Sea Ocean Aqua Surfing How To Go. 1.Lahinch Ireland, Buy Ticket From The Airport. 2.Facilities Entertain: Golden Heavenly, Carnival Festival Consert Streaming Restuarant Pub Bar Karaoke Movie Music Game Massage Spa Home House Hotel Motel SwimmingPool School University Hospital, Boat Bus Train Plane Bicycle Mortorcycle Car. 3.Food Meal: Airfood, Seafood, StreetFood, Alcohols, Drinks. That you have had ever seen. 4.Activities Event: Surfing, Swimming, Hiking Forest and Mountain. 5.Uniform: Swimming Suit, Hiking Suit. Play Summer Clothes. Legendary Tale: Part 1:Legendary tales from Ireland are abundant, often centering on heroes like Fionn mac Cumhaill and Cú Chulainn, supernatural events, and mythical lands. Famous stories include the warrior Oisín's journey to the land of eternal youth, Tír na nÓg; the tragic enchantment of the Children of Lir, who were turned into swans; and the quest of Saint Brendan the Navigator across the Atlantic. These myths cover themes of heroism, love, tragedy, and the supernatural, and are often tied to specific locations in Ireland. Heroes and their myths Fionn mac Cumhaill: An epic hero known for his wisdom after eating the Salmon of Knowledge and his leadership of the Fianna warriors. He is also said to have shaped the landscape, creating the Giant's Causeway. Cú Chulainn: A legendary warrior who earned his name by killing a hound and then working to repay the owner. Diarmuid and Gráinne: A love story about a warrior and a princess who are chased by fate, with their story often linked to the cliffs of Benbulben. Mythical lands and enchantments Tír na nÓg: A land of eternal youth, known for the story of Oisín, who falls in love with the princess Niamh and travels there with her. The Children of Lir: A tale of four children who are transformed into swans by their jealous stepmother, condemned to live on the lakes and seas of Ireland for centuries. The Isle of the Blessed: Also known as Saint Brendan's Island, a mythical land that the monk Brendan supposedly found during a voyage across the Atlantic. Other notable legends Mac Da Thó's Pig: A humorous and satirical tale from the Ulster Cycle about a dispute that arises over a champion's portion at a feast. The Claddagh Ring: A legendary symbol of love, loyalty, and friendship that originated in Galway and has a story rooted in the devotion of a fisherman. Part 2: The legendary tale of Oisín's journey to the land of eternal youth, known as Tír na nÓg (Land of the Young), is a poignant Irish myth about love, homesickness, and the passage of time. It tells the story of the warrior Oisín, a member of the Fianna, who is lured to a magical realm and returns centuries later to a changed Ireland. The Journey to Tír na nÓg The legend begins when Oisín and his father, Fionn Mac Cumhaill, are hunting and encounter Niamh Chinn Óir (Niamh of the Golden Hair), a beautiful princess from the otherworld, riding a magical white horse. Niamh has fallen in love with Oisín from afar and invites him to her homeland, Tír na nÓg, a place of everlasting beauty, joy, and youth where no one ages or experiences sorrow. Smitten by her beauty and the promise of a paradise, Oisín agrees to go. He mounts Niamh's horse, and together they ride across the sea to Tír na nÓg, leaving Ireland behind. Life in the Land of Eternal Youth In Tír na nÓg, Oisín finds a land of eternal spring and happiness. He and Niamh are married and live a blissful life, even having children (including a son named Oscar). Time is without consequence, and Oisín remains a strong, vital young man. However, what feels to Oisín like only three short years is, in reality, 300 years in the mortal world of Ireland. Despite the paradise, Oisín eventually becomes homesick and longs to see his father and the Fianna again. The Return to Ireland and Tragic End Niamh reluctantly agrees to Oisín's return but gives him a strict warning: he must take her magical white horse, Embarr, and must not, under any circumstances, touch the ground of Ireland with his bare feet. She explains that outside of the magical realm, he is vulnerable to the passage of time. Oisín returns to Ireland to find the land changed beyond recognition. The grand halls of the Fianna are gone, and the people he meets are small and speak of Fionn and his warriors as ancient myths. As he rides through a place called Gleann na Smól (the glen of the thrushes), he encounters a group of men struggling to move a large, heavy stone onto a wagon. Seeing their difficulty, Oisín, ever the hero, leans down from his saddle to help lift the stone. In the effort, his saddle girth breaks, he loses his balance, and falls to the ground. The moment his feet touch Irish soil, the three hundred years he missed in Ireland catch up with him. Instantly, the magical horse vanishes and Oisín transforms into a withered, old man. He is found by Saint Patrick's men and brought to the saint, to whom he recounts his adventures and the stories of the Fianna before passing away, forever separated from Niamh and the Land of Youth. The story serves as a poignant reminder of the inescapable nature of time and the bittersweet reality of mortal life.
ClickMeSeeAllFull
ClickMeSeeOnMoreDetail
ClickMeSeeOnMorePictureImage
ClickMeSeeOnMoreVideo
Vehicle: 1.AirPlane Airship Aircraft AirTransport Balloon
Method: What is All Planes and How do Airplanes Airship Aircraft AirTransport Balloon works?.
Procedure:Job Occupation Career Benefit Passive Income Money: Delivery Transportation Exportation Importation such as Delivery Taxi Foods Drinks GoodsThings HomeWorks Farmworks Townworks 1.Facilities Entertain: Golden Heavenly, Carnival Festival Consert Streaming Restuarant Pub Bar Karaoke Movie Music Game Massage Spa Home House Hotel Motel School University Hospital, Boat Bus Train Plane Bicycle Mortorcycle Car. 2.Food Meal: Airfood, Seafood, StreetFood, Alcohols, Drinks. That you have had ever seen. Air transport: Air transport is the movement of people, goods and mail using air vehicles such as airplanes to travel over long distances quickly and efficiently, creating connections around the world. It is important for international trade, especially high-value goods, tourism, and transportation that requires exceptional speed. Key Features of Air Transport: High-speed: This is the fastest mode of transport, allowing goods and passengers to reach their destinations quickly. Globally Connected: Connecting routes between airports around the world. Crossing Geographic Barriers: Able to travel across seas, mountains, or areas difficult to access by other modes of transportation. High Security: A strict security system is in place. Covering both passengers and goods: There are both passenger airlines and cargo aircraft. Types of Air Transport: Passenger Transport: Passenger planes transport people to their destinations. Air Freight/Air Cargo: Cargo planes transport goods, charged based on weight and size. Special transport: such as rescue helicopters, military aircraft, or even recreational flying such as hot air balloons. 1. Key role Facilitating global travel and trade. Transporting high-value goods that require speed (e.g., electronics and pharmaceuticals). Part of the international supply chain. Driver License: A driver's license is a legal permit to operate motor vehicles, issued by a government authority after proving fitness and knowledge, typically requiring application, tests (written/practical), medical checks, and fees, with validity periods and renewal processes varying by country, like Thailand's 2-year temporary licenses for new drivers and 5-year permanent ones, and often requiring documents like passports and sometimes an International Driving Permit (IDP) for foreigners. Key Aspects of a Driver's License (General - many Countries Context) Purpose: Authorizes you to drive specific vehicles (cars, motorcycles, etc.) on public roads. Issuing Body (Many Countries): Department of Land Transport (DLT). Eligibility (Countries): Age: 18 for cars, 15 for motorcycles. Physical/Mental Fitness: Requires a medical certificate. Application Process (Countries): Book an appointment via DLT Smart Queue app or walk-in. Provide documents: Passport, visa, residence certificate, home license (if any). Pass required tests (vision, reflexes, written, practical) after watching training videos. License Types (Countries): Temporary: 2 years, for new drivers. Permanent: 5 years, renewable. International Driving Permit (IDP): Allows driving abroad; used with your home license. How to Get One in Many Countries(Foreigner Example) Gather Documents: Passport, visa, residence certificate, medical certificate, home country license/IDP (originals & copies). Book Appointment: Use the DLT Smart Queue app. Complete Tests: Vision, reflex, and practical-written tests (may have an online component). Pay Fees: Fees vary by license type. Important Reminders Always carry your license when driving. Renew early (up to 180 days before expiry) to avoid re-testing. ID Card Identification Card: An identification card (ID card) is a document proving a person's identity, often a plastic card with personal data like name, photo, and birthdate, used for verification for services, travel, or age checks, with common types including national IDs, driver's licenses, employee badges, and student IDs. In many Countries, it's a crucial document for citizens and foreigners (Pink ID card) for various official purposes, issued by government bodies like the Department of Provincial Administration (DOPA) or embassies. Key Functions Proof of Identity: Verifies who you are. Age Verification: Confirms you meet age requirements (e.g., for alcohol, entry). Access: Used for building access, online services (Digital ID). Official Document: Required for legal and administrative processes. Examples of ID Cards National ID: Issued by a country (e.g., Thai National ID). Driver's License: Also serves as proof of identity and driving authorization. Employee-Student ID: For work or school access and benefits. International IDs: Like the ISIC for students or IYTC for youth. Many Countries ID Card Specifics For Nationals: Issued to Countries citizens from age 7, valid for 8 years from the holder's birthday. For Foreigners: Special Pink ID cards are issued to eligible residents, requiring documents like passports, work permits, and a witness. Issuance: Can be applied for at local DOPA offices or Countries embassies-consulates. Passport No.: A passport number is a unique identifier on your passport (usually top right of the data page) used for international travel, changing with each new passport issuance, and is a mix of letters and numbers, like 'P' then 8 digits for many Countries passports or one letter then 6 digits for Countries ones. It's different from your national ID number, as it identifies the specific document, not you personally over time, and is vital for identity verification. Where to find it Bio Data Page: Look at the page with your photo and personal details. Top Right Corner: It's typically labeled "Document No." or similar. Bottom of Pages: The number is also often repeated at the bottom of each page. What it looks like Format varies by country: For example, a Countries passport is one letter followed by eight numbers (e.g., P12345678). Countries passports: May be one letter and six digits (e.g., A123456). Watch for '0' vs 'O': Some countries avoid the letter 'O' to prevent confusion with the number '0'. Key facts Unique to the document: It's a serial number for that specific passport booklet, not your lifetime ID. Changes on renewal: You get a new number when you renew, replace, or get a new type of passport. Driver Delivery: A delivery person (or courier/messenger) is responsible for transporting and delivering goods, food, or documents to customers, requiring skills in navigation, organization, and customer service, using vehicles like cars, bikes, or vans, and playing a vital role in logistics by ensuring timely and safe receipt of items by recipients. Key Responsibilities: Pick-up & Delivery: Collecting items from businesses or warehouses and delivering them to specified addresses. Route Optimization: Planning efficient routes to save time and fuel. Document Management: Handling delivery confirmations, receipts, and digital records. Customer Interaction: Communicating with customers, resolving issues, and ensuring satisfaction. Types of Delivery Roles: Food Delivery: Couriers for apps like Abcdefg, delivering meals. Package Delivery: Drivers for logistics companies delivering parcels. Courier Services: Transporting important documents and small items quickly. Skills Needed: Reliability and time management. Good local knowledge or navigation skills. Physical stamina for handling items. Problem-solving for unexpected challenges (traffic, customer issues). Transportation: Transportation is the movement of people, animals, or goods between locations, using various modes like land (cars, trains, walking, biking), air (planes, helicopters), water (boats, ships), and pipelines, supported by infrastructure (roads, railways, airports) and vehicles, crucial for civilization and commerce, with modern systems focusing on efficiency, speed, and sustainability. Key Modes of Transport Land: Cars, buses, trains, bicycles, walking, motorcycles, trucks, subways, tuk-tuks (in many Countries). Air: Airplanes, helicopters, hot air balloons. Water: Boats, ships, submarines, jet skis. Other: Cable transport, pipelines, space transport. Components of Transportation Infrastructure: Roads, railways, ports, airports, bike lanes, terminals. Vehicles: Automobiles, trains, ships, aircraft, bicycles. Operations: The management, logistics, and services that make movement happen (e.g., airlines, public transit systems). Significance & Evolution Index of Civilization: Advances in transport have driven technological progress, allowing movement over greater distances. Technological Progress: From human-animal power on dirt tracks to paved roads, tar roads, to modern jet aircraft and digital logistics. Urbanization: Population growth, economic activity, and migration increase demand for transport, leading to congestion and infrastructure development (e.g., Countries's rail system). Modern Considerations (Many Countries Example) Variety: Tuk-tuks, motorcycle taxis, extensive road networks, low-cost air travel. Efficiency: Public transit like Countries's rail systems have high ridership; private cars contribute to traffic. Sustainability: Bikes and electric scooters are integrated into public transport to improve "last-mile" connectivity. Exportation: Exportation is the act of sending goods or services from one country to another for sale, a vital part of international trade that moves products, ideas, or even culture across borders. It involves an exporter (seller) and an importer (buyer), and can involve physical items like cars, food, or technology, or intangible services and cultural influence. Key aspects of exportation: Definition: The process of conveying commodities or services out of a country. Scope: Applies to physical goods (e.g., grain, cars) and services (e.g., IT, insurance). Economic Role: A fundamental way for nations to sell products abroad, generate revenue, and participate in the global economy. Beyond Goods: Can also refer to the spread of ideas, culture (like many Countries pop culture), or even ideology from one country to another. Regulation: Often regulated by governments, with restrictions on certain items like weapons or archaeological artifacts. Examples in use: The main business of the port is the exportation of grain. Countries has prohibited the exportation of archaeological items. Countries's global exportation of its popular culture. In essence, if you're selling something to a customer in another country, you're engaging in exportation, a core component of global commerce and exchange. Import: Import is the act of buying goods and services from other countries, while export is selling goods and services to other countries. These terms are central to international trade, which involves the exchange of products across national borders, and are subject to customs, licensing, and trade regulations. Import Definition: Bringing goods and services into a country from a foreign source. Example: The many Countries importing goods from National. Key aspects: A country's imports represent an outflow of funds. Export Definition: Selling products and services to customers in foreign countries. Example: The Countries exporting goods to other countries. Key aspects: A country's exports represent an inflow of funds. In international trade Regulations: Countries have specific regulations, including import-export licenses, that must be obtained for trade to occur. Documents: Essential documents for customs clearance include a Bill of Lading, commercial invoice, packing list, and certificate of origin. Prohibited goods: Some goods are prohibited from being imported or exported, such as narcotics, pornography, and counterfeit products. Balance of trade: The difference between a country's exports and imports is called its balance of trade. A trade deficit occurs when imports exceed exports, while a trade surplus occurs when exports exceed imports.
ClickMeSeeAllFull
ClickMeSeeOnMoreDetail
ClickMeSeeOnMorePictureImage
ClickMeSeeOnMoreVideo
Vehicle: 2.Boat Yacht Ship
Method: All Boat Yacht Ship Works?
Procedure:Job Occupation Career Benefit Passive Income Money: Delivery Transportation Exportation Importation such as Delivery Taxi Foods Drinks GoodsThings HomeWorks Farmworks Townworks 1.Facilities Entertain: Golden Heavenly, Carnival Festival Consert Streaming Restuarant Pub Bar Karaoke Movie Music Game Massage Spa Home House Hotel Motel School University Hospital, Boat Bus Train Plane Bicycle Mortorcycle Car. 2.Food Meal: Airfood, Seafood, StreetFood, Alcohols, Drinks. That you have had ever seen. Boat Yacht Ship: A boat is a watercraft, generally smaller than a ship, used for transport, recreation, or work on water, offering buoyancy and stability through its design, with types ranging from small canoes to larger fishing vessels, powered by oars, sails, or engines. Boats are essential for activities like fishing, watersports, and short-distance travel, with common examples including rowing boats, sailboats, motorboats, and even submarines (which are technically boats). Key Characteristics & Types Size: Usually smaller than a ship, though the distinction isn't strict; some large vessels (like submarines) are called boats. Purpose: Used for leisure (yachts, kayaks), work (fishing boats, tugboats), transport (ferries, longtail boats), or military-rescue (lifeboats). Examples: Canoes, dinghies, sailboats, motorboats, houseboats, longtail boats (in every Countries), and even gravy boats (boat-shaped containers). Common Uses Recreation (fishing, watersports) Transportation (crossing rivers, coastal travel) Commercial (fishing, cargo) Related Terms & Idioms Yacht: Generally a larger, more luxurious boat, often over 40 feet. Ship: Typically a much larger vessel for ocean-going travel. In the same boat: To be in the same difficult situation. Miss the boat: To be too late for an opportunity. Driver License: A driver's license is a legal permit to operate motor vehicles, issued by a government authority after proving fitness and knowledge, typically requiring application, tests (written/practical), medical checks, and fees, with validity periods and renewal processes varying by country, like Thailand's 2-year temporary licenses for new drivers and 5-year permanent ones, and often requiring documents like passports and sometimes an International Driving Permit (IDP) for foreigners. Key Aspects of a Driver's License (General - many Countries Context) Purpose: Authorizes you to drive specific vehicles (cars, motorcycles, etc.) on public roads. Issuing Body (Many Countries): Department of Land Transport (DLT). Eligibility (Countries): Age: 18 for cars, 15 for motorcycles. Physical/Mental Fitness: Requires a medical certificate. Application Process (Countries): Book an appointment via DLT Smart Queue app or walk-in. Provide documents: Passport, visa, residence certificate, home license (if any). Pass required tests (vision, reflexes, written, practical) after watching training videos. License Types (Countries): Temporary: 2 years, for new drivers. Permanent: 5 years, renewable. International Driving Permit (IDP): Allows driving abroad; used with your home license. How to Get One in Many Countries(Foreigner Example) Gather Documents: Passport, visa, residence certificate, medical certificate, home country license/IDP (originals & copies). Book Appointment: Use the DLT Smart Queue app. Complete Tests: Vision, reflex, and practical-written tests (may have an online component). Pay Fees: Fees vary by license type. Important Reminders Always carry your license when driving. Renew early (up to 180 days before expiry) to avoid re-testing. ID Card Identification Card: An identification card (ID card) is a document proving a person's identity, often a plastic card with personal data like name, photo, and birthdate, used for verification for services, travel, or age checks, with common types including national IDs, driver's licenses, employee badges, and student IDs. In many Countries, it's a crucial document for citizens and foreigners (Pink ID card) for various official purposes, issued by government bodies like the Department of Provincial Administration (DOPA) or embassies. Key Functions Proof of Identity: Verifies who you are. Age Verification: Confirms you meet age requirements (e.g., for alcohol, entry). Access: Used for building access, online services (Digital ID). Official Document: Required for legal and administrative processes. Examples of ID Cards National ID: Issued by a country (e.g., Thai National ID). Driver's License: Also serves as proof of identity and driving authorization. Employee-Student ID: For work or school access and benefits. International IDs: Like the ISIC for students or IYTC for youth. Many Countries ID Card Specifics For Nationals: Issued to Countries citizens from age 7, valid for 8 years from the holder's birthday. For Foreigners: Special Pink ID cards are issued to eligible residents, requiring documents like passports, work permits, and a witness. Issuance: Can be applied for at local DOPA offices or Countries embassies-consulates. Passport No.: A passport number is a unique identifier on your passport (usually top right of the data page) used for international travel, changing with each new passport issuance, and is a mix of letters and numbers, like 'P' then 8 digits for many Countries passports or one letter then 6 digits for Countries ones. It's different from your national ID number, as it identifies the specific document, not you personally over time, and is vital for identity verification. Where to find it Bio Data Page: Look at the page with your photo and personal details. Top Right Corner: It's typically labeled "Document No." or similar. Bottom of Pages: The number is also often repeated at the bottom of each page. What it looks like Format varies by country: For example, a Countries passport is one letter followed by eight numbers (e.g., P12345678). Countries passports: May be one letter and six digits (e.g., A123456). Watch for '0' vs 'O': Some countries avoid the letter 'O' to prevent confusion with the number '0'. Key facts Unique to the document: It's a serial number for that specific passport booklet, not your lifetime ID. Changes on renewal: You get a new number when you renew, replace, or get a new type of passport. Driver Delivery: A delivery person (or courier/messenger) is responsible for transporting and delivering goods, food, or documents to customers, requiring skills in navigation, organization, and customer service, using vehicles like cars, bikes, or vans, and playing a vital role in logistics by ensuring timely and safe receipt of items by recipients. Key Responsibilities: Pick-up & Delivery: Collecting items from businesses or warehouses and delivering them to specified addresses. Route Optimization: Planning efficient routes to save time and fuel. Document Management: Handling delivery confirmations, receipts, and digital records. Customer Interaction: Communicating with customers, resolving issues, and ensuring satisfaction. Types of Delivery Roles: Food Delivery: Couriers for apps like Abcdefg, delivering meals. Package Delivery: Drivers for logistics companies delivering parcels. Courier Services: Transporting important documents and small items quickly. Skills Needed: Reliability and time management. Good local knowledge or navigation skills. Physical stamina for handling items. Problem-solving for unexpected challenges (traffic, customer issues). Transportation: Transportation is the movement of people, animals, or goods between locations, using various modes like land (cars, trains, walking, biking), air (planes, helicopters), water (boats, ships), and pipelines, supported by infrastructure (roads, railways, airports) and vehicles, crucial for civilization and commerce, with modern systems focusing on efficiency, speed, and sustainability. Key Modes of Transport Land: Cars, buses, trains, bicycles, walking, motorcycles, trucks, subways, tuk-tuks (in many Countries). Air: Airplanes, helicopters, hot air balloons. Water: Boats, ships, submarines, jet skis. Other: Cable transport, pipelines, space transport. Components of Transportation Infrastructure: Roads, railways, ports, airports, bike lanes, terminals. Vehicles: Automobiles, trains, ships, aircraft, bicycles. Operations: The management, logistics, and services that make movement happen (e.g., airlines, public transit systems). Significance & Evolution Index of Civilization: Advances in transport have driven technological progress, allowing movement over greater distances. Technological Progress: From human-animal power on dirt tracks to paved roads, tar roads, to modern jet aircraft and digital logistics. Urbanization: Population growth, economic activity, and migration increase demand for transport, leading to congestion and infrastructure development (e.g., Countries's rail system). Modern Considerations (Many Countries Example) Variety: Tuk-tuks, motorcycle taxis, extensive road networks, low-cost air travel. Efficiency: Public transit like Countries's rail systems have high ridership; private cars contribute to traffic. Sustainability: Bikes and electric scooters are integrated into public transport to improve "last-mile" connectivity. Exportation: Exportation is the act of sending goods or services from one country to another for sale, a vital part of international trade that moves products, ideas, or even culture across borders. It involves an exporter (seller) and an importer (buyer), and can involve physical items like cars, food, or technology, or intangible services and cultural influence. Key aspects of exportation: Definition: The process of conveying commodities or services out of a country. Scope: Applies to physical goods (e.g., grain, cars) and services (e.g., IT, insurance). Economic Role: A fundamental way for nations to sell products abroad, generate revenue, and participate in the global economy. Beyond Goods: Can also refer to the spread of ideas, culture (like many Countries pop culture), or even ideology from one country to another. Regulation: Often regulated by governments, with restrictions on certain items like weapons or archaeological artifacts. Examples in use: The main business of the port is the exportation of grain. Countries has prohibited the exportation of archaeological items. Countries's global exportation of its popular culture. In essence, if you're selling something to a customer in another country, you're engaging in exportation, a core component of global commerce and exchange. Import: Import is the act of buying goods and services from other countries, while export is selling goods and services to other countries. These terms are central to international trade, which involves the exchange of products across national borders, and are subject to customs, licensing, and trade regulations. Import Definition: Bringing goods and services into a country from a foreign source. Example: The many Countries importing goods from National. Key aspects: A country's imports represent an outflow of funds. Export Definition: Selling products and services to customers in foreign countries. Example: The Countries exporting goods to other countries. Key aspects: A country's exports represent an inflow of funds. In international trade Regulations: Countries have specific regulations, including import-export licenses, that must be obtained for trade to occur. Documents: Essential documents for customs clearance include a Bill of Lading, commercial invoice, packing list, and certificate of origin. Prohibited goods: Some goods are prohibited from being imported or exported, such as narcotics, pornography, and counterfeit products. Balance of trade: The difference between a country's exports and imports is called its balance of trade. A trade deficit occurs when imports exceed exports, while a trade surplus occurs when exports exceed imports.
ClickMeSeeAllFull
ClickMeSeeOnMoreDetail
ClickMeSeeOnMorePictureImage
ClickMeSeeOnMoreVideo
Vehicle: 3.Train
Method: All Train Works?.
Procedure:Job Occupation Career Benefit Passive Income Money: Delivery Transportation Exportation Importation such as Delivery Taxi Foods Drinks GoodsThings HomeWorks Farmworks Townworks 1.Facilities Entertain: Golden Heavenly, Carnival Festival Consert Streaming Restuarant Pub Bar Karaoke Movie Music Game Massage Spa Home House Hotel Motel School University Hospital, Boat Bus Train Plane Bicycle Mortorcycle Car. 2.Food Meal: Airfood, Seafood, StreetFood, Alcohols, Drinks. That you have had ever seen. Train: Train import-export involves using rail networks for moving goods, offering a cost-effective, eco-friendly alternative to air-sea freight, especially for bulk/general cargo across continents (Asia-Europe, China-Europe), handling FCL-LCL, and streamlining customs via bonded services, crucial for global supply chains but requires infrastructure like terminals and efficient networks, notes Abcdefg Shipping. Key Aspects of Train Import-Export: Cost-Effective: Cheaper than air, better for long distances than road, good for bulk-general goods. Eco-Friendly: Lower CO2 emissions compared to road and air freight. Efficient: Reliable, punctual transit times (e.g., Asia-Europe in ~16-20 days), often faster than sea. Flexible: Handles Full Container Load (FCL) and Less than Container Load (LCL). Integrated: Can connect to ports, use intermodal transport, and offer door-to-door services. Customs: Facilitated by special agreements (like Every Countries) and specialized forwarders. Major Routes & Players: Asia-Europe: Major routes connect China, CIS countries, South Korea, Japan, Russia, with European hubs like Duisburg. Intra-Asia: Landbridge services link Malaysia, Thailand, etc.. Key Countries: China, North America, Russia, India lead in volume; EU, UK, Germany, US major importers/exporters of rail tech. Services & Solutions: Freight Forwarders: Companies like Abcdefg Express (International) Co.,Ltd., Seacon Logistics, FURLOG manage logistics, customs, warehousing, and transport. Customs: Services handle declarations and clearance, often at discharge ports. Challenges: Infrastructure: Requires robust networks, inland terminals; older systems (like every Countries's STR) face capacity-modernization issues. Coordination: Needs coordinated national-international approaches for demand. In essence, rail import-export is a vital link in global trade, balancing speed, cost, and sustainability for diverse cargo. Driver License: A driver's license is a legal permit to operate motor vehicles, issued by a government authority after proving fitness and knowledge, typically requiring application, tests (written/practical), medical checks, and fees, with validity periods and renewal processes varying by country, like Thailand's 2-year temporary licenses for new drivers and 5-year permanent ones, and often requiring documents like passports and sometimes an International Driving Permit (IDP) for foreigners. Key Aspects of a Driver's License (General - many Countries Context) Purpose: Authorizes you to drive specific vehicles (cars, motorcycles, etc.) on public roads. Issuing Body (Many Countries): Department of Land Transport (DLT). Eligibility (Countries): Age: 18 for cars, 15 for motorcycles. Physical/Mental Fitness: Requires a medical certificate. Application Process (Countries): Book an appointment via DLT Smart Queue app or walk-in. Provide documents: Passport, visa, residence certificate, home license (if any). Pass required tests (vision, reflexes, written, practical) after watching training videos. License Types (Countries): Temporary: 2 years, for new drivers. Permanent: 5 years, renewable. International Driving Permit (IDP): Allows driving abroad; used with your home license. How to Get One in Many Countries(Foreigner Example) Gather Documents: Passport, visa, residence certificate, medical certificate, home country license/IDP (originals & copies). Book Appointment: Use the DLT Smart Queue app. Complete Tests: Vision, reflex, and practical-written tests (may have an online component). Pay Fees: Fees vary by license type. Important Reminders Always carry your license when driving. Renew early (up to 180 days before expiry) to avoid re-testing. ID Card Identification Card: An identification card (ID card) is a document proving a person's identity, often a plastic card with personal data like name, photo, and birthdate, used for verification for services, travel, or age checks, with common types including national IDs, driver's licenses, employee badges, and student IDs. In many Countries, it's a crucial document for citizens and foreigners (Pink ID card) for various official purposes, issued by government bodies like the Department of Provincial Administration (DOPA) or embassies. Key Functions Proof of Identity: Verifies who you are. Age Verification: Confirms you meet age requirements (e.g., for alcohol, entry). Access: Used for building access, online services (Digital ID). Official Document: Required for legal and administrative processes. Examples of ID Cards National ID: Issued by a country (e.g., Thai National ID). Driver's License: Also serves as proof of identity and driving authorization. Employee-Student ID: For work or school access and benefits. International IDs: Like the ISIC for students or IYTC for youth. Many Countries ID Card Specifics For Nationals: Issued to Countries citizens from age 7, valid for 8 years from the holder's birthday. For Foreigners: Special Pink ID cards are issued to eligible residents, requiring documents like passports, work permits, and a witness. Issuance: Can be applied for at local DOPA offices or Countries embassies-consulates. Passport No.: A passport number is a unique identifier on your passport (usually top right of the data page) used for international travel, changing with each new passport issuance, and is a mix of letters and numbers, like 'P' then 8 digits for many Countries passports or one letter then 6 digits for Countries ones. It's different from your national ID number, as it identifies the specific document, not you personally over time, and is vital for identity verification. Where to find it Bio Data Page: Look at the page with your photo and personal details. Top Right Corner: It's typically labeled "Document No." or similar. Bottom of Pages: The number is also often repeated at the bottom of each page. What it looks like Format varies by country: For example, a Countries passport is one letter followed by eight numbers (e.g., P12345678). Countries passports: May be one letter and six digits (e.g., A123456). Watch for '0' vs 'O': Some countries avoid the letter 'O' to prevent confusion with the number '0'. Key facts Unique to the document: It's a serial number for that specific passport booklet, not your lifetime ID. Changes on renewal: You get a new number when you renew, replace, or get a new type of passport. Driver Delivery: A delivery person (or courier/messenger) is responsible for transporting and delivering goods, food, or documents to customers, requiring skills in navigation, organization, and customer service, using vehicles like cars, bikes, or vans, and playing a vital role in logistics by ensuring timely and safe receipt of items by recipients. Key Responsibilities: Pick-up & Delivery: Collecting items from businesses or warehouses and delivering them to specified addresses. Route Optimization: Planning efficient routes to save time and fuel. Document Management: Handling delivery confirmations, receipts, and digital records. Customer Interaction: Communicating with customers, resolving issues, and ensuring satisfaction. Types of Delivery Roles: Food Delivery: Couriers for apps like Abcdefg, delivering meals. Package Delivery: Drivers for logistics companies delivering parcels. Courier Services: Transporting important documents and small items quickly. Skills Needed: Reliability and time management. Good local knowledge or navigation skills. Physical stamina for handling items. Problem-solving for unexpected challenges (traffic, customer issues). Transportation: Transportation is the movement of people, animals, or goods between locations, using various modes like land (cars, trains, walking, biking), air (planes, helicopters), water (boats, ships), and pipelines, supported by infrastructure (roads, railways, airports) and vehicles, crucial for civilization and commerce, with modern systems focusing on efficiency, speed, and sustainability. Key Modes of Transport Land: Cars, buses, trains, bicycles, walking, motorcycles, trucks, subways, tuk-tuks (in many Countries). Air: Airplanes, helicopters, hot air balloons. Water: Boats, ships, submarines, jet skis. Other: Cable transport, pipelines, space transport. Components of Transportation Infrastructure: Roads, railways, ports, airports, bike lanes, terminals. Vehicles: Automobiles, trains, ships, aircraft, bicycles. Operations: The management, logistics, and services that make movement happen (e.g., airlines, public transit systems). Significance & Evolution Index of Civilization: Advances in transport have driven technological progress, allowing movement over greater distances. Technological Progress: From human-animal power on dirt tracks to paved roads, tar roads, to modern jet aircraft and digital logistics. Urbanization: Population growth, economic activity, and migration increase demand for transport, leading to congestion and infrastructure development (e.g., Countries's rail system). Modern Considerations (Many Countries Example) Variety: Tuk-tuks, motorcycle taxis, extensive road networks, low-cost air travel. Efficiency: Public transit like Countries's rail systems have high ridership; private cars contribute to traffic. Sustainability: Bikes and electric scooters are integrated into public transport to improve "last-mile" connectivity. Exportation: Exportation is the act of sending goods or services from one country to another for sale, a vital part of international trade that moves products, ideas, or even culture across borders. It involves an exporter (seller) and an importer (buyer), and can involve physical items like cars, food, or technology, or intangible services and cultural influence. Key aspects of exportation: Definition: The process of conveying commodities or services out of a country. Scope: Applies to physical goods (e.g., grain, cars) and services (e.g., IT, insurance). Economic Role: A fundamental way for nations to sell products abroad, generate revenue, and participate in the global economy. Beyond Goods: Can also refer to the spread of ideas, culture (like many Countries pop culture), or even ideology from one country to another. Regulation: Often regulated by governments, with restrictions on certain items like weapons or archaeological artifacts. Examples in use: The main business of the port is the exportation of grain. Countries has prohibited the exportation of archaeological items. Countries's global exportation of its popular culture. In essence, if you're selling something to a customer in another country, you're engaging in exportation, a core component of global commerce and exchange. Import: Import is the act of buying goods and services from other countries, while export is selling goods and services to other countries. These terms are central to international trade, which involves the exchange of products across national borders, and are subject to customs, licensing, and trade regulations. Import Definition: Bringing goods and services into a country from a foreign source. Example: The many Countries importing goods from National. Key aspects: A country's imports represent an outflow of funds. Export Definition: Selling products and services to customers in foreign countries. Example: The Countries exporting goods to other countries. Key aspects: A country's exports represent an inflow of funds. In international trade Regulations: Countries have specific regulations, including import-export licenses, that must be obtained for trade to occur. Documents: Essential documents for customs clearance include a Bill of Lading, commercial invoice, packing list, and certificate of origin. Prohibited goods: Some goods are prohibited from being imported or exported, such as narcotics, pornography, and counterfeit products. Balance of trade: The difference between a country's exports and imports is called its balance of trade. A trade deficit occurs when imports exceed exports, while a trade surplus occurs when exports exceed imports.
ClickMeSeeAllFull
ClickMeSeeOnMoreDetail
ClickMeSeeOnMorePictureImage
ClickMeSeeOnMoreVideo
Vehicle: 4.Car Primary Person
Method: All Car Primary Person Works?
Procedure:Job Occupation Career Benefit Passive Income Money: Delivery Transportation Exportation Importation such as Delivery Taxi Foods Drinks GoodsThings HomeWorks Farmworks Townworks 1.Facilities Entertain: Golden Heavenly, Carnival Festival Consert Streaming Restuarant Pub Bar Karaoke Movie Music Game Massage Spa Home House Hotel Motel School University Hospital, Boat Bus Train Plane Bicycle Mortorcycle Car. 2.Food Meal: Airfood, Seafood, StreetFood, Alcohols, Drinks. That you have had ever seen. Car Person: A Car Person (or enthusiast, gearhead, petrolhead) is someone with a deep passion for automobiles, appreciating their mechanics, design, performance, and culture, often enjoying racing, modifying, collecting, or simply talking about cars, going beyond just driving them for transport. They might identify as a motorhead, shade-tree mechanic, or tuner, showing excitement over engine sounds, new models, or getting hands-on with maintenance. Key Characteristics of a Car Person: Passion: Genuine interest in all things automotive, from history to future tech,. Engagement: Actively watches racing, reads car magazines, attends shows, or spends time in garages. Technical Interest: Understands or wants to learn about engines, tuning, performance, and modifications. Community: Connects with other enthusiasts to share knowledge and experiences. Appreciation: Notices and appreciates other cars on the road, often identifying makes and models. Different Types of Car People: Gearhead-Petrolhead: Someone obsessed with the mechanics and performance of cars. Shade-Tree Mechanic: Enjoys doing their own repairs and modifications in the driveway. Collector-Historian: Focuses on vintage or classic automobiles. Tuner-Racer: Interested in modifying cars for speed or competing. Essentially, a car person sees cars as more than just transportation—they are a hobby, a lifestyle, and a source of joy. Taxis are public vehicles for hire for travel within the city. In every national, there are both metered taxis that start at 1-100 dollar (depending on the type of vehicle) and kilometer-based fares that increase according to distance, with a congestion charge of 1-100 dollar per minute. And calling through an application (such as Abcdefg Transportation, ) with a starting service fee and actual fare (including the calling fee) makes it convenient and allows you to see the estimated price before traveling. Types of Taxi Services in every nation Metered Taxis (Common): Taxis of various colors, waiting at designated points or hailed on the roadside, charge a fare based on the meter (starting at 1-100 dollar ). Airport Taxis: There are counters (such as CABBAGE) at every Airport. The starting fare is higher than normal (about 1-100 dollar) and there is an airport service charge of 1-100 dollar. Normal fare (approximately 1-100 dollar ) and an airport service fee of 1-100 dollar. Ride-hailing apps: Transportation offer convenient taxi hailing services via app, with price estimates and a large number of participating taxis. Taxi Meter Fares (Approximate): First kilometer: 1-100 dollar (depending on vehicle type). Additional distance: Approximately 1-100 dollar per kilometer (rates increase with increasing distance). Traffic/waiting: Approximately 1.00-10 dollar per minute. Airport toll: 1-100 dollar (depending on airport/vehicle type). How to call a taxi via an app (e.g., Abcdefg App) Open the app, specify the pick-up/drop-off point, and select a taxi (there will be a symbol indicating the taxi). The system will calculate the initial fare (including the call fee). Payment can be made in cash or via digital channels. Driver License: A driver's license is a legal permit to operate motor vehicles, issued by a government authority after proving fitness and knowledge, typically requiring application, tests (written/practical), medical checks, and fees, with validity periods and renewal processes varying by country, like Thailand's 2-year temporary licenses for new drivers and 5-year permanent ones, and often requiring documents like passports and sometimes an International Driving Permit (IDP) for foreigners. Key Aspects of a Driver's License (General - many Countries Context) Purpose: Authorizes you to drive specific vehicles (cars, motorcycles, etc.) on public roads. Issuing Body (Many Countries): Department of Land Transport (DLT). Eligibility (Countries): Age: 18 for cars, 15 for motorcycles. Physical/Mental Fitness: Requires a medical certificate. Application Process (Countries): Book an appointment via DLT Smart Queue app or walk-in. Provide documents: Passport, visa, residence certificate, home license (if any). Pass required tests (vision, reflexes, written, practical) after watching training videos. License Types (Countries): Temporary: 2 years, for new drivers. Permanent: 5 years, renewable. International Driving Permit (IDP): Allows driving abroad; used with your home license. How to Get One in Many Countries(Foreigner Example) Gather Documents: Passport, visa, residence certificate, medical certificate, home country license/IDP (originals & copies). Book Appointment: Use the DLT Smart Queue app. Complete Tests: Vision, reflex, and practical-written tests (may have an online component). Pay Fees: Fees vary by license type. Important Reminders Always carry your license when driving. Renew early (up to 180 days before expiry) to avoid re-testing. ID Card Identification Card: An identification card (ID card) is a document proving a person's identity, often a plastic card with personal data like name, photo, and birthdate, used for verification for services, travel, or age checks, with common types including national IDs, driver's licenses, employee badges, and student IDs. In many Countries, it's a crucial document for citizens and foreigners (Pink ID card) for various official purposes, issued by government bodies like the Department of Provincial Administration (DOPA) or embassies. Key Functions Proof of Identity: Verifies who you are. Age Verification: Confirms you meet age requirements (e.g., for alcohol, entry). Access: Used for building access, online services (Digital ID). Official Document: Required for legal and administrative processes. Examples of ID Cards National ID: Issued by a country (e.g., Thai National ID). Driver's License: Also serves as proof of identity and driving authorization. Employee-Student ID: For work or school access and benefits. International IDs: Like the ISIC for students or IYTC for youth. Many Countries ID Card Specifics For Nationals: Issued to Countries citizens from age 7, valid for 8 years from the holder's birthday. For Foreigners: Special Pink ID cards are issued to eligible residents, requiring documents like passports, work permits, and a witness. Issuance: Can be applied for at local DOPA offices or Countries embassies-consulates. Passport No.: A passport number is a unique identifier on your passport (usually top right of the data page) used for international travel, changing with each new passport issuance, and is a mix of letters and numbers, like 'P' then 8 digits for many Countries passports or one letter then 6 digits for Countries ones. It's different from your national ID number, as it identifies the specific document, not you personally over time, and is vital for identity verification. Where to find it Bio Data Page: Look at the page with your photo and personal details. Top Right Corner: It's typically labeled "Document No." or similar. Bottom of Pages: The number is also often repeated at the bottom of each page. What it looks like Format varies by country: For example, a Countries passport is one letter followed by eight numbers (e.g., P12345678). Countries passports: May be one letter and six digits (e.g., A123456). Watch for '0' vs 'O': Some countries avoid the letter 'O' to prevent confusion with the number '0'. Key facts Unique to the document: It's a serial number for that specific passport booklet, not your lifetime ID. Changes on renewal: You get a new number when you renew, replace, or get a new type of passport. Driver Delivery: A delivery person (or courier/messenger) is responsible for transporting and delivering goods, food, or documents to customers, requiring skills in navigation, organization, and customer service, using vehicles like cars, bikes, or vans, and playing a vital role in logistics by ensuring timely and safe receipt of items by recipients. Key Responsibilities: Pick-up & Delivery: Collecting items from businesses or warehouses and delivering them to specified addresses. Route Optimization: Planning efficient routes to save time and fuel. Document Management: Handling delivery confirmations, receipts, and digital records. Customer Interaction: Communicating with customers, resolving issues, and ensuring satisfaction. Types of Delivery Roles: Food Delivery: Couriers for apps like Abcdefg, delivering meals. Package Delivery: Drivers for logistics companies delivering parcels. Courier Services: Transporting important documents and small items quickly. Skills Needed: Reliability and time management. Good local knowledge or navigation skills. Physical stamina for handling items. Problem-solving for unexpected challenges (traffic, customer issues). Transportation: Transportation is the movement of people, animals, or goods between locations, using various modes like land (cars, trains, walking, biking), air (planes, helicopters), water (boats, ships), and pipelines, supported by infrastructure (roads, railways, airports) and vehicles, crucial for civilization and commerce, with modern systems focusing on efficiency, speed, and sustainability. Key Modes of Transport Land: Cars, buses, trains, bicycles, walking, motorcycles, trucks, subways, tuk-tuks (in many Countries). Air: Airplanes, helicopters, hot air balloons. Water: Boats, ships, submarines, jet skis. Other: Cable transport, pipelines, space transport. Components of Transportation Infrastructure: Roads, railways, ports, airports, bike lanes, terminals. Vehicles: Automobiles, trains, ships, aircraft, bicycles. Operations: The management, logistics, and services that make movement happen (e.g., airlines, public transit systems). Significance & Evolution Index of Civilization: Advances in transport have driven technological progress, allowing movement over greater distances. Technological Progress: From human-animal power on dirt tracks to paved roads, tar roads, to modern jet aircraft and digital logistics. Urbanization: Population growth, economic activity, and migration increase demand for transport, leading to congestion and infrastructure development (e.g., Countries's rail system). Modern Considerations (Many Countries Example) Variety: Tuk-tuks, motorcycle taxis, extensive road networks, low-cost air travel. Efficiency: Public transit like Countries's rail systems have high ridership; private cars contribute to traffic. Sustainability: Bikes and electric scooters are integrated into public transport to improve "last-mile" connectivity. Exportation: Exportation is the act of sending goods or services from one country to another for sale, a vital part of international trade that moves products, ideas, or even culture across borders. It involves an exporter (seller) and an importer (buyer), and can involve physical items like cars, food, or technology, or intangible services and cultural influence. Key aspects of exportation: Definition: The process of conveying commodities or services out of a country. Scope: Applies to physical goods (e.g., grain, cars) and services (e.g., IT, insurance). Economic Role: A fundamental way for nations to sell products abroad, generate revenue, and participate in the global economy. Beyond Goods: Can also refer to the spread of ideas, culture (like many Countries pop culture), or even ideology from one country to another. Regulation: Often regulated by governments, with restrictions on certain items like weapons or archaeological artifacts. Examples in use: The main business of the port is the exportation of grain. Countries has prohibited the exportation of archaeological items. Countries's global exportation of its popular culture. In essence, if you're selling something to a customer in another country, you're engaging in exportation, a core component of global commerce and exchange. Import: Import is the act of buying goods and services from other countries, while export is selling goods and services to other countries. These terms are central to international trade, which involves the exchange of products across national borders, and are subject to customs, licensing, and trade regulations. Import Definition: Bringing goods and services into a country from a foreign source. Example: The many Countries importing goods from National. Key aspects: A country's imports represent an outflow of funds. Export Definition: Selling products and services to customers in foreign countries. Example: The Countries exporting goods to other countries. Key aspects: A country's exports represent an inflow of funds. In international trade Regulations: Countries have specific regulations, including import-export licenses, that must be obtained for trade to occur. Documents: Essential documents for customs clearance include a Bill of Lading, commercial invoice, packing list, and certificate of origin. Prohibited goods: Some goods are prohibited from being imported or exported, such as narcotics, pornography, and counterfeit products. Balance of trade: The difference between a country's exports and imports is called its balance of trade. A trade deficit occurs when imports exceed exports, while a trade surplus occurs when exports exceed imports.
ClickMeSeeAllFull
ClickMeSeeOnMoreDetail
ClickMeSeeOnMorePictureImage
ClickMeSeeOnMoreVideo
Vehicle: 5.Pickup Car
Method: All Pickup Car Works?
Procedure:Job Occupation Career Benefit Passive Income Money: Delivery Transportation Exportation Importation such as Delivery Taxi Foods Drinks GoodsThings HomeWorks Farmworks Townworks 1.Facilities Entertain: Golden Heavenly, Carnival Festival Consert Streaming Restuarant Pub Bar Karaoke Movie Music Game Massage Spa Home House Hotel Motel School University Hospital, Boat Bus Train Plane Bicycle Mortorcycle Car. 2.Food Meal: Airfood, Seafood, StreetFood, Alcohols, Drinks. That you have had ever seen. Pickup Car: Pickup refers to collecting someone something, a small truck (pickup truck), improving conditions (like a business pickup), a casual acquaintance, or an electronic component in instruments-turntables, with the context determining the meaning; generally, use pickup as a noun-adjective and pick up as a verb (e.g., a pickup truck vs. to pick up passengers). Common Meanings Action (Verb): To collect or gather someone/something (e.g., Pick up the kids). Vehicle (Noun): A light truck with an open cargo bed (e.g., Benz, Bmw, Ford, Toyota, Isuzu, Nissan, Ford, Mazda, Chevrolet, Subaru and other so on). Improvement (Noun): An increase in health, business, or conditions (e.g., economic pickup). Social (Noun): A casual acquaintance, often for dating (e.g., He went for a pickup at the bar). Music/Electronics (Noun): A device that converts vibrations into electrical signals (e.g., guitar pickups, turntable cartridges). Spelling Tip Use pickup (one word) as a noun or adjective (e.g., a pickup truck, a pickup order). Use pick up (two words) as a verb (e.g., Let's pick up dinner). Driver License: A driver's license is a legal permit to operate motor vehicles, issued by a government authority after proving fitness and knowledge, typically requiring application, tests (written/practical), medical checks, and fees, with validity periods and renewal processes varying by country, like Thailand's 2-year temporary licenses for new drivers and 5-year permanent ones, and often requiring documents like passports and sometimes an International Driving Permit (IDP) for foreigners. Key Aspects of a Driver's License (General - many Countries Context) Purpose: Authorizes you to drive specific vehicles (cars, motorcycles, etc.) on public roads. Issuing Body (Many Countries): Department of Land Transport (DLT). Eligibility (Countries): Age: 18 for cars, 15 for motorcycles. Physical/Mental Fitness: Requires a medical certificate. Application Process (Countries): Book an appointment via DLT Smart Queue app or walk-in. Provide documents: Passport, visa, residence certificate, home license (if any). Pass required tests (vision, reflexes, written, practical) after watching training videos. License Types (Countries): Temporary: 2 years, for new drivers. Permanent: 5 years, renewable. International Driving Permit (IDP): Allows driving abroad; used with your home license. How to Get One in Many Countries(Foreigner Example) Gather Documents: Passport, visa, residence certificate, medical certificate, home country license/IDP (originals & copies). Book Appointment: Use the DLT Smart Queue app. Complete Tests: Vision, reflex, and practical-written tests (may have an online component). Pay Fees: Fees vary by license type. Important Reminders Always carry your license when driving. Renew early (up to 180 days before expiry) to avoid re-testing. ID Card Identification Card: An identification card (ID card) is a document proving a person's identity, often a plastic card with personal data like name, photo, and birthdate, used for verification for services, travel, or age checks, with common types including national IDs, driver's licenses, employee badges, and student IDs. In many Countries, it's a crucial document for citizens and foreigners (Pink ID card) for various official purposes, issued by government bodies like the Department of Provincial Administration (DOPA) or embassies. Key Functions Proof of Identity: Verifies who you are. Age Verification: Confirms you meet age requirements (e.g., for alcohol, entry). Access: Used for building access, online services (Digital ID). Official Document: Required for legal and administrative processes. Examples of ID Cards National ID: Issued by a country (e.g., Thai National ID). Driver's License: Also serves as proof of identity and driving authorization. Employee-Student ID: For work or school access and benefits. International IDs: Like the ISIC for students or IYTC for youth. Many Countries ID Card Specifics For Nationals: Issued to Countries citizens from age 7, valid for 8 years from the holder's birthday. For Foreigners: Special Pink ID cards are issued to eligible residents, requiring documents like passports, work permits, and a witness. Issuance: Can be applied for at local DOPA offices or Countries embassies-consulates. Passport No.: A passport number is a unique identifier on your passport (usually top right of the data page) used for international travel, changing with each new passport issuance, and is a mix of letters and numbers, like 'P' then 8 digits for many Countries passports or one letter then 6 digits for Countries ones. It's different from your national ID number, as it identifies the specific document, not you personally over time, and is vital for identity verification. Where to find it Bio Data Page: Look at the page with your photo and personal details. Top Right Corner: It's typically labeled "Document No." or similar. Bottom of Pages: The number is also often repeated at the bottom of each page. What it looks like Format varies by country: For example, a Countries passport is one letter followed by eight numbers (e.g., P12345678). Countries passports: May be one letter and six digits (e.g., A123456). Watch for '0' vs 'O': Some countries avoid the letter 'O' to prevent confusion with the number '0'. Key facts Unique to the document: It's a serial number for that specific passport booklet, not your lifetime ID. Changes on renewal: You get a new number when you renew, replace, or get a new type of passport. Driver Delivery: A delivery person (or courier/messenger) is responsible for transporting and delivering goods, food, or documents to customers, requiring skills in navigation, organization, and customer service, using vehicles like cars, bikes, or vans, and playing a vital role in logistics by ensuring timely and safe receipt of items by recipients. Key Responsibilities: Pick-up & Delivery: Collecting items from businesses or warehouses and delivering them to specified addresses. Route Optimization: Planning efficient routes to save time and fuel. Document Management: Handling delivery confirmations, receipts, and digital records. Customer Interaction: Communicating with customers, resolving issues, and ensuring satisfaction. Types of Delivery Roles: Food Delivery: Couriers for apps like Abcdefg, delivering meals. Package Delivery: Drivers for logistics companies delivering parcels. Courier Services: Transporting important documents and small items quickly. Skills Needed: Reliability and time management. Good local knowledge or navigation skills. Physical stamina for handling items. Problem-solving for unexpected challenges (traffic, customer issues). Transportation: Transportation is the movement of people, animals, or goods between locations, using various modes like land (cars, trains, walking, biking), air (planes, helicopters), water (boats, ships), and pipelines, supported by infrastructure (roads, railways, airports) and vehicles, crucial for civilization and commerce, with modern systems focusing on efficiency, speed, and sustainability. Key Modes of Transport Land: Cars, buses, trains, bicycles, walking, motorcycles, trucks, subways, tuk-tuks (in many Countries). Air: Airplanes, helicopters, hot air balloons. Water: Boats, ships, submarines, jet skis. Other: Cable transport, pipelines, space transport. Components of Transportation Infrastructure: Roads, railways, ports, airports, bike lanes, terminals. Vehicles: Automobiles, trains, ships, aircraft, bicycles. Operations: The management, logistics, and services that make movement happen (e.g., airlines, public transit systems). Significance & Evolution Index of Civilization: Advances in transport have driven technological progress, allowing movement over greater distances. Technological Progress: From human-animal power on dirt tracks to paved roads, tar roads, to modern jet aircraft and digital logistics. Urbanization: Population growth, economic activity, and migration increase demand for transport, leading to congestion and infrastructure development (e.g., Countries's rail system). Modern Considerations (Many Countries Example) Variety: Tuk-tuks, motorcycle taxis, extensive road networks, low-cost air travel. Efficiency: Public transit like Countries's rail systems have high ridership; private cars contribute to traffic. Sustainability: Bikes and electric scooters are integrated into public transport to improve "last-mile" connectivity. Exportation: Exportation is the act of sending goods or services from one country to another for sale, a vital part of international trade that moves products, ideas, or even culture across borders. It involves an exporter (seller) and an importer (buyer), and can involve physical items like cars, food, or technology, or intangible services and cultural influence. Key aspects of exportation: Definition: The process of conveying commodities or services out of a country. Scope: Applies to physical goods (e.g., grain, cars) and services (e.g., IT, insurance). Economic Role: A fundamental way for nations to sell products abroad, generate revenue, and participate in the global economy. Beyond Goods: Can also refer to the spread of ideas, culture (like many Countries pop culture), or even ideology from one country to another. Regulation: Often regulated by governments, with restrictions on certain items like weapons or archaeological artifacts. Examples in use: The main business of the port is the exportation of grain. Countries has prohibited the exportation of archaeological items. Countries's global exportation of its popular culture. In essence, if you're selling something to a customer in another country, you're engaging in exportation, a core component of global commerce and exchange. Import: Import is the act of buying goods and services from other countries, while export is selling goods and services to other countries. These terms are central to international trade, which involves the exchange of products across national borders, and are subject to customs, licensing, and trade regulations. Import Definition: Bringing goods and services into a country from a foreign source. Example: The many Countries importing goods from National. Key aspects: A country's imports represent an outflow of funds. Export Definition: Selling products and services to customers in foreign countries. Example: The Countries exporting goods to other countries. Key aspects: A country's exports represent an inflow of funds. In international trade Regulations: Countries have specific regulations, including import-export licenses, that must be obtained for trade to occur. Documents: Essential documents for customs clearance include a Bill of Lading, commercial invoice, packing list, and certificate of origin. Prohibited goods: Some goods are prohibited from being imported or exported, such as narcotics, pornography, and counterfeit products. Balance of trade: The difference between a country's exports and imports is called its balance of trade. A trade deficit occurs when imports exceed exports, while a trade surplus occurs when exports exceed imports.
ClickMeSeeAllFull
ClickMeSeeOnMoreDetail
ClickMeSeeOnMorePictureImage
ClickMeSeeOnMoreVideo
Vehicle: 6.Truck Car
Method: All Truck Car.
Procedure:Job Occupation Career Benefit Passive Income Money: Delivery Transportation Exportation Importation such as Delivery Taxi Foods Drinks GoodsThings HomeWorks Farmworks Townworks 1.Facilities Entertain: Golden Heavenly, Carnival Festival Consert Streaming Restuarant Pub Bar Karaoke Movie Music Game Massage Spa Home House Hotel Motel School University Hospital, Boat Bus Train Plane Bicycle Mortorcycle Car. 2.Food Meal: Airfood, Seafood, StreetFood, Alcohols, Drinks. That you have had ever seen. Truck Car: A truck (or lorry) is a motorized vehicle for hauling goods, specialized payloads, or performing utility work, varying from small pickups to massive rigs, typically featuring a separate cabin and frame for the cargo area, with common types including freight haulers, fire engines, and tow trucks, while in daily use, it can refer to a pickup truck for personal use or large commercial vehicles for business. Key Characteristics Purpose: Transporting freight, construction materials, or specialized equipment (like concrete mixers, fire apparatus). Construction: Often body-on-frame (cabin separate from payload), though smaller ones are similar to cars. Types: Ranges from light-duty pickups (e.g., Benz, Bmw, Ford, Toyota, Isuzu, Nissan, Ford, Mazda, Chevrolet, Subaru and other so on) to heavy-duty tractor-trailers, dump trucks, tow trucks, and forklifts. Variations: Includes 2WD-4WD systems for different terrains (city vs. off-road) and different cab styles (regular, extended). Common Uses & Terms Pickup Truck: A light-duty truck with an open cargo bed, popular for personal and light commercial use. Lorry (UK): The British term for a large commercial truck. Straight Truck (US): A single, non-articulated truck. Tractor-Semi-Truck: A powerful front unit designed to pull trailers. Truck Farming: Growing vegetables and other crops for market. Hand Truck: A small, wheeled frame for moving heavy objects. Driver License: A driver's license is a legal permit to operate motor vehicles, issued by a government authority after proving fitness and knowledge, typically requiring application, tests (written/practical), medical checks, and fees, with validity periods and renewal processes varying by country, like Thailand's 2-year temporary licenses for new drivers and 5-year permanent ones, and often requiring documents like passports and sometimes an International Driving Permit (IDP) for foreigners. Key Aspects of a Driver's License (General - many Countries Context) Purpose: Authorizes you to drive specific vehicles (cars, motorcycles, etc.) on public roads. Issuing Body (Many Countries): Department of Land Transport (DLT). Eligibility (Countries): Age: 18 for cars, 15 for motorcycles. Physical/Mental Fitness: Requires a medical certificate. Application Process (Countries): Book an appointment via DLT Smart Queue app or walk-in. Provide documents: Passport, visa, residence certificate, home license (if any). Pass required tests (vision, reflexes, written, practical) after watching training videos. License Types (Countries): Temporary: 2 years, for new drivers. Permanent: 5 years, renewable. International Driving Permit (IDP): Allows driving abroad; used with your home license. How to Get One in Many Countries(Foreigner Example) Gather Documents: Passport, visa, residence certificate, medical certificate, home country license/IDP (originals & copies). Book Appointment: Use the DLT Smart Queue app. Complete Tests: Vision, reflex, and practical-written tests (may have an online component). Pay Fees: Fees vary by license type. Important Reminders Always carry your license when driving. Renew early (up to 180 days before expiry) to avoid re-testing. ID Card Identification Card: An identification card (ID card) is a document proving a person's identity, often a plastic card with personal data like name, photo, and birthdate, used for verification for services, travel, or age checks, with common types including national IDs, driver's licenses, employee badges, and student IDs. In many Countries, it's a crucial document for citizens and foreigners (Pink ID card) for various official purposes, issued by government bodies like the Department of Provincial Administration (DOPA) or embassies. Key Functions Proof of Identity: Verifies who you are. Age Verification: Confirms you meet age requirements (e.g., for alcohol, entry). Access: Used for building access, online services (Digital ID). Official Document: Required for legal and administrative processes. Examples of ID Cards National ID: Issued by a country (e.g., Thai National ID). Driver's License: Also serves as proof of identity and driving authorization. Employee-Student ID: For work or school access and benefits. International IDs: Like the ISIC for students or IYTC for youth. Many Countries ID Card Specifics For Nationals: Issued to Countries citizens from age 7, valid for 8 years from the holder's birthday. For Foreigners: Special Pink ID cards are issued to eligible residents, requiring documents like passports, work permits, and a witness. Issuance: Can be applied for at local DOPA offices or Countries embassies-consulates. Passport No.: A passport number is a unique identifier on your passport (usually top right of the data page) used for international travel, changing with each new passport issuance, and is a mix of letters and numbers, like 'P' then 8 digits for many Countries passports or one letter then 6 digits for Countries ones. It's different from your national ID number, as it identifies the specific document, not you personally over time, and is vital for identity verification. Where to find it Bio Data Page: Look at the page with your photo and personal details. Top Right Corner: It's typically labeled "Document No." or similar. Bottom of Pages: The number is also often repeated at the bottom of each page. What it looks like Format varies by country: For example, a Countries passport is one letter followed by eight numbers (e.g., P12345678). Countries passports: May be one letter and six digits (e.g., A123456). Watch for '0' vs 'O': Some countries avoid the letter 'O' to prevent confusion with the number '0'. Key facts Unique to the document: It's a serial number for that specific passport booklet, not your lifetime ID. Changes on renewal: You get a new number when you renew, replace, or get a new type of passport. Driver Delivery: A delivery person (or courier/messenger) is responsible for transporting and delivering goods, food, or documents to customers, requiring skills in navigation, organization, and customer service, using vehicles like cars, bikes, or vans, and playing a vital role in logistics by ensuring timely and safe receipt of items by recipients. Key Responsibilities: Pick-up & Delivery: Collecting items from businesses or warehouses and delivering them to specified addresses. Route Optimization: Planning efficient routes to save time and fuel. Document Management: Handling delivery confirmations, receipts, and digital records. Customer Interaction: Communicating with customers, resolving issues, and ensuring satisfaction. Types of Delivery Roles: Food Delivery: Couriers for apps like Abcdefg, delivering meals. Package Delivery: Drivers for logistics companies delivering parcels. Courier Services: Transporting important documents and small items quickly. Skills Needed: Reliability and time management. Good local knowledge or navigation skills. Physical stamina for handling items. Problem-solving for unexpected challenges (traffic, customer issues). Transportation: Transportation is the movement of people, animals, or goods between locations, using various modes like land (cars, trains, walking, biking), air (planes, helicopters), water (boats, ships), and pipelines, supported by infrastructure (roads, railways, airports) and vehicles, crucial for civilization and commerce, with modern systems focusing on efficiency, speed, and sustainability. Key Modes of Transport Land: Cars, buses, trains, bicycles, walking, motorcycles, trucks, subways, tuk-tuks (in many Countries). Air: Airplanes, helicopters, hot air balloons. Water: Boats, ships, submarines, jet skis. Other: Cable transport, pipelines, space transport. Components of Transportation Infrastructure: Roads, railways, ports, airports, bike lanes, terminals. Vehicles: Automobiles, trains, ships, aircraft, bicycles. Operations: The management, logistics, and services that make movement happen (e.g., airlines, public transit systems). Significance & Evolution Index of Civilization: Advances in transport have driven technological progress, allowing movement over greater distances. Technological Progress: From human-animal power on dirt tracks to paved roads, tar roads, to modern jet aircraft and digital logistics. Urbanization: Population growth, economic activity, and migration increase demand for transport, leading to congestion and infrastructure development (e.g., Countries's rail system). Modern Considerations (Many Countries Example) Variety: Tuk-tuks, motorcycle taxis, extensive road networks, low-cost air travel. Efficiency: Public transit like Countries's rail systems have high ridership; private cars contribute to traffic. Sustainability: Bikes and electric scooters are integrated into public transport to improve "last-mile" connectivity. Exportation: Exportation is the act of sending goods or services from one country to another for sale, a vital part of international trade that moves products, ideas, or even culture across borders. It involves an exporter (seller) and an importer (buyer), and can involve physical items like cars, food, or technology, or intangible services and cultural influence. Key aspects of exportation: Definition: The process of conveying commodities or services out of a country. Scope: Applies to physical goods (e.g., grain, cars) and services (e.g., IT, insurance). Economic Role: A fundamental way for nations to sell products abroad, generate revenue, and participate in the global economy. Beyond Goods: Can also refer to the spread of ideas, culture (like many Countries pop culture), or even ideology from one country to another. Regulation: Often regulated by governments, with restrictions on certain items like weapons or archaeological artifacts. Examples in use: The main business of the port is the exportation of grain. Countries has prohibited the exportation of archaeological items. Countries's global exportation of its popular culture. In essence, if you're selling something to a customer in another country, you're engaging in exportation, a core component of global commerce and exchange. Import: Import is the act of buying goods and services from other countries, while export is selling goods and services to other countries. These terms are central to international trade, which involves the exchange of products across national borders, and are subject to customs, licensing, and trade regulations. Import Definition: Bringing goods and services into a country from a foreign source. Example: The many Countries importing goods from National. Key aspects: A country's imports represent an outflow of funds. Export Definition: Selling products and services to customers in foreign countries. Example: The Countries exporting goods to other countries. Key aspects: A country's exports represent an inflow of funds. In international trade Regulations: Countries have specific regulations, including import-export licenses, that must be obtained for trade to occur. Documents: Essential documents for customs clearance include a Bill of Lading, commercial invoice, packing list, and certificate of origin. Prohibited goods: Some goods are prohibited from being imported or exported, such as narcotics, pornography, and counterfeit products. Balance of trade: The difference between a country's exports and imports is called its balance of trade. A trade deficit occurs when imports exceed exports, while a trade surplus occurs when exports exceed imports.
ClickMeSeeAllFull
ClickMeSeeOnMoreDetail
ClickMeSeeOnMorePictureImage
ClickMeSeeOnMoreVideo
Vehicle: 7.ฺฺBackhoe Excavator Car
Method: All ฺฺBackhoe Excavator Car.
Procedure:Job Occupation Career Benefit Passive Income Money: Delivery Transportation Exportation Importation such as Delivery Taxi Foods Drinks GoodsThings HomeWorks Farmworks Townworks 1.Facilities Entertain: Golden Heavenly, Carnival Festival Consert Streaming Restuarant Pub Bar Karaoke Movie Music Game Massage Spa Home House Hotel Motel School University Hospital, Boat Bus Train Plane Bicycle Mortorcycle Car. 2.Food Meal: Airfood, Seafood, StreetFood, Alcohols, Drinks. That you have had ever seen. ฺฺBackhoe Excavator Car: A backhoe is versatile construction equipment, typically a tractor with a loader bucket on the front and a digging arm (the backhoe) on the back, used for tasks like digging trenches, loading materials, demolition, and landscaping. It's highly maneuverable due to its wheels and offers dual functionality, making it popular for diverse jobs from utility work to farming. Key Features Backhoe Arm: An articulated, two-part arm with a bucket for digging and trenching. Loader Bucket: A front-mounted bucket for scooping, lifting, and moving materials. Mobility: Wheeled chassis for quick movement around job sites and roads. Versatility: Can be fitted with various attachments like hammers, rippers, and brooms. Common Uses Digging: Trenches, holes, and foundations. Material Handling: Loading trucks, moving dirt, and clearing debris. Landscaping: Grading, planting trees, and stump removal. Road Work: Paving assistance and repairs. Utility Installation: Digging for pipes and cables. Backhoe vs. Excavator While often confused, a backhoe is a specific type of machine that combines front-end loader and rear-digger functions, whereas a traditional excavator usually focuses solely on digging with a rotating cab and tracks or wheels, often being larger. The term backhoe comes from back (rear) and hoe (digging tool). Driver License: A driver's license is a legal permit to operate motor vehicles, issued by a government authority after proving fitness and knowledge, typically requiring application, tests (written/practical), medical checks, and fees, with validity periods and renewal processes varying by country, like Thailand's 2-year temporary licenses for new drivers and 5-year permanent ones, and often requiring documents like passports and sometimes an International Driving Permit (IDP) for foreigners. Key Aspects of a Driver's License (General - many Countries Context) Purpose: Authorizes you to drive specific vehicles (cars, motorcycles, etc.) on public roads. Issuing Body (Many Countries): Department of Land Transport (DLT). Eligibility (Countries): Age: 18 for cars, 15 for motorcycles. Physical/Mental Fitness: Requires a medical certificate. Application Process (Countries): Book an appointment via DLT Smart Queue app or walk-in. Provide documents: Passport, visa, residence certificate, home license (if any). Pass required tests (vision, reflexes, written, practical) after watching training videos. License Types (Countries): Temporary: 2 years, for new drivers. Permanent: 5 years, renewable. International Driving Permit (IDP): Allows driving abroad; used with your home license. How to Get One in Many Countries(Foreigner Example) Gather Documents: Passport, visa, residence certificate, medical certificate, home country license/IDP (originals & copies). Book Appointment: Use the DLT Smart Queue app. Complete Tests: Vision, reflex, and practical-written tests (may have an online component). Pay Fees: Fees vary by license type. Important Reminders Always carry your license when driving. Renew early (up to 180 days before expiry) to avoid re-testing. ID Card Identification Card: An identification card (ID card) is a document proving a person's identity, often a plastic card with personal data like name, photo, and birthdate, used for verification for services, travel, or age checks, with common types including national IDs, driver's licenses, employee badges, and student IDs. In many Countries, it's a crucial document for citizens and foreigners (Pink ID card) for various official purposes, issued by government bodies like the Department of Provincial Administration (DOPA) or embassies. Key Functions Proof of Identity: Verifies who you are. Age Verification: Confirms you meet age requirements (e.g., for alcohol, entry). Access: Used for building access, online services (Digital ID). Official Document: Required for legal and administrative processes. Examples of ID Cards National ID: Issued by a country (e.g., Thai National ID). Driver's License: Also serves as proof of identity and driving authorization. Employee-Student ID: For work or school access and benefits. International IDs: Like the ISIC for students or IYTC for youth. Many Countries ID Card Specifics For Nationals: Issued to Countries citizens from age 7, valid for 8 years from the holder's birthday. For Foreigners: Special Pink ID cards are issued to eligible residents, requiring documents like passports, work permits, and a witness. Issuance: Can be applied for at local DOPA offices or Countries embassies-consulates. Passport No.: A passport number is a unique identifier on your passport (usually top right of the data page) used for international travel, changing with each new passport issuance, and is a mix of letters and numbers, like 'P' then 8 digits for many Countries passports or one letter then 6 digits for Countries ones. It's different from your national ID number, as it identifies the specific document, not you personally over time, and is vital for identity verification. Where to find it Bio Data Page: Look at the page with your photo and personal details. Top Right Corner: It's typically labeled "Document No." or similar. Bottom of Pages: The number is also often repeated at the bottom of each page. What it looks like Format varies by country: For example, a Countries passport is one letter followed by eight numbers (e.g., P12345678). Countries passports: May be one letter and six digits (e.g., A123456). Watch for '0' vs 'O': Some countries avoid the letter 'O' to prevent confusion with the number '0'. Key facts Unique to the document: It's a serial number for that specific passport booklet, not your lifetime ID. Changes on renewal: You get a new number when you renew, replace, or get a new type of passport. Driver Delivery: A delivery person (or courier/messenger) is responsible for transporting and delivering goods, food, or documents to customers, requiring skills in navigation, organization, and customer service, using vehicles like cars, bikes, or vans, and playing a vital role in logistics by ensuring timely and safe receipt of items by recipients. Key Responsibilities: Pick-up & Delivery: Collecting items from businesses or warehouses and delivering them to specified addresses. Route Optimization: Planning efficient routes to save time and fuel. Document Management: Handling delivery confirmations, receipts, and digital records. Customer Interaction: Communicating with customers, resolving issues, and ensuring satisfaction. Types of Delivery Roles: Food Delivery: Couriers for apps like Abcdefg, delivering meals. Package Delivery: Drivers for logistics companies delivering parcels. Courier Services: Transporting important documents and small items quickly. Skills Needed: Reliability and time management. Good local knowledge or navigation skills. Physical stamina for handling items. Problem-solving for unexpected challenges (traffic, customer issues). Transportation: Transportation is the movement of people, animals, or goods between locations, using various modes like land (cars, trains, walking, biking), air (planes, helicopters), water (boats, ships), and pipelines, supported by infrastructure (roads, railways, airports) and vehicles, crucial for civilization and commerce, with modern systems focusing on efficiency, speed, and sustainability. Key Modes of Transport Land: Cars, buses, trains, bicycles, walking, motorcycles, trucks, subways, tuk-tuks (in many Countries). Air: Airplanes, helicopters, hot air balloons. Water: Boats, ships, submarines, jet skis. Other: Cable transport, pipelines, space transport. Components of Transportation Infrastructure: Roads, railways, ports, airports, bike lanes, terminals. Vehicles: Automobiles, trains, ships, aircraft, bicycles. Operations: The management, logistics, and services that make movement happen (e.g., airlines, public transit systems). Significance & Evolution Index of Civilization: Advances in transport have driven technological progress, allowing movement over greater distances. Technological Progress: From human-animal power on dirt tracks to paved roads, tar roads, to modern jet aircraft and digital logistics. Urbanization: Population growth, economic activity, and migration increase demand for transport, leading to congestion and infrastructure development (e.g., Countries's rail system). Modern Considerations (Many Countries Example) Variety: Tuk-tuks, motorcycle taxis, extensive road networks, low-cost air travel. Efficiency: Public transit like Countries's rail systems have high ridership; private cars contribute to traffic. Sustainability: Bikes and electric scooters are integrated into public transport to improve "last-mile" connectivity. Exportation: Exportation is the act of sending goods or services from one country to another for sale, a vital part of international trade that moves products, ideas, or even culture across borders. It involves an exporter (seller) and an importer (buyer), and can involve physical items like cars, food, or technology, or intangible services and cultural influence. Key aspects of exportation: Definition: The process of conveying commodities or services out of a country. Scope: Applies to physical goods (e.g., grain, cars) and services (e.g., IT, insurance). Economic Role: A fundamental way for nations to sell products abroad, generate revenue, and participate in the global economy. Beyond Goods: Can also refer to the spread of ideas, culture (like many Countries pop culture), or even ideology from one country to another. Regulation: Often regulated by governments, with restrictions on certain items like weapons or archaeological artifacts. Examples in use: The main business of the port is the exportation of grain. Countries has prohibited the exportation of archaeological items. Countries's global exportation of its popular culture. In essence, if you're selling something to a customer in another country, you're engaging in exportation, a core component of global commerce and exchange. Import: Import is the act of buying goods and services from other countries, while export is selling goods and services to other countries. These terms are central to international trade, which involves the exchange of products across national borders, and are subject to customs, licensing, and trade regulations. Import Definition: Bringing goods and services into a country from a foreign source. Example: The many Countries importing goods from National. Key aspects: A country's imports represent an outflow of funds. Export Definition: Selling products and services to customers in foreign countries. Example: The Countries exporting goods to other countries. Key aspects: A country's exports represent an inflow of funds. In international trade Regulations: Countries have specific regulations, including import-export licenses, that must be obtained for trade to occur. Documents: Essential documents for customs clearance include a Bill of Lading, commercial invoice, packing list, and certificate of origin. Prohibited goods: Some goods are prohibited from being imported or exported, such as narcotics, pornography, and counterfeit products. Balance of trade: The difference between a country's exports and imports is called its balance of trade. A trade deficit occurs when imports exceed exports, while a trade surplus occurs when exports exceed imports.
ClickMeSeeAllFull
ClickMeSeeOnMoreDetail
ClickMeSeeOnMorePictureImage
ClickMeSeeOnMoreVideo
Vehicle: 8.Harvester Car
Method: All ฺฺHarvester Car.
Procedure:Job Occupation Career Benefit Passive Income Money: Delivery Transportation Exportation Importation such as Delivery Taxi Foods Drinks GoodsThings HomeWorks Farmworks Townworks 1.Facilities Entertain: Golden Heavenly, Carnival Festival Consert Streaming Restuarant Pub Bar Karaoke Movie Music Game Massage Spa Home House Hotel Motel School University Hospital, Boat Bus Train Plane Bicycle Mortorcycle Car. 2.Food Meal: Airfood, Seafood, StreetFood, Alcohols, Drinks. That you have had ever seen. ฺHarvester Car: A harvester is a person or, more commonly, a machine that gathers crops (like grain, corn, or forage) or timber from fields or forests, automating the collection process to save time and labor. The term also refers to heavy forestry equipment that fells trees, or even brand names for restaurants (Harvester) and video games (Harvester). In technology, it can describe software for data collection or management. Types of Harvesters (Machinery) Combine Harvester: The most common type, it cuts, threshes, and cleans grain crops like wheat in a single operation, collecting the grain in a hopper. Forage Harvester: Used to harvest crops like hay or silage for animal feed, chopping them into small pieces. Forestry Harvester (Feller Buncher): A heavy vehicle that fells trees, delimb them, cuts them into logs, and bunches them, often on steep terrain. Other Meanings People: Individuals who help with harvesting, often called reapers. Software (e.g., in Kubernetes): Harvester.io is an open-source hyperconverged infrastructure (HCI) solution for managing virtual machines. Brand Names: A popular UK restaurant chain, Harvester known for grilled food, and a vintage horror video game, Harvester. Functions of Agricultural Harvesters Cutting-Reaping: Severing crops from the ground. Threshing-Separating: Beating grains from stalks and separating them from chaff. Cleaning: Using air to blow away lighter debris (chaff). Collecting: Storing clean grain in a hopper for transfer to trailers. Driver License: A driver's license is a legal permit to operate motor vehicles, issued by a government authority after proving fitness and knowledge, typically requiring application, tests (written/practical), medical checks, and fees, with validity periods and renewal processes varying by country, like Thailand's 2-year temporary licenses for new drivers and 5-year permanent ones, and often requiring documents like passports and sometimes an International Driving Permit (IDP) for foreigners. Key Aspects of a Driver's License (General - many Countries Context) Purpose: Authorizes you to drive specific vehicles (cars, motorcycles, etc.) on public roads. Issuing Body (Many Countries): Department of Land Transport (DLT). Eligibility (Countries): Age: 18 for cars, 15 for motorcycles. Physical/Mental Fitness: Requires a medical certificate. Application Process (Countries): Book an appointment via DLT Smart Queue app or walk-in. Provide documents: Passport, visa, residence certificate, home license (if any). Pass required tests (vision, reflexes, written, practical) after watching training videos. License Types (Countries): Temporary: 2 years, for new drivers. Permanent: 5 years, renewable. International Driving Permit (IDP): Allows driving abroad; used with your home license. How to Get One in Many Countries(Foreigner Example) Gather Documents: Passport, visa, residence certificate, medical certificate, home country license/IDP (originals & copies). Book Appointment: Use the DLT Smart Queue app. Complete Tests: Vision, reflex, and practical-written tests (may have an online component). Pay Fees: Fees vary by license type. Important Reminders Always carry your license when driving. Renew early (up to 180 days before expiry) to avoid re-testing. ID Card Identification Card: An identification card (ID card) is a document proving a person's identity, often a plastic card with personal data like name, photo, and birthdate, used for verification for services, travel, or age checks, with common types including national IDs, driver's licenses, employee badges, and student IDs. In many Countries, it's a crucial document for citizens and foreigners (Pink ID card) for various official purposes, issued by government bodies like the Department of Provincial Administration (DOPA) or embassies. Key Functions Proof of Identity: Verifies who you are. Age Verification: Confirms you meet age requirements (e.g., for alcohol, entry). Access: Used for building access, online services (Digital ID). Official Document: Required for legal and administrative processes. Examples of ID Cards National ID: Issued by a country (e.g., Thai National ID). Driver's License: Also serves as proof of identity and driving authorization. Employee-Student ID: For work or school access and benefits. International IDs: Like the ISIC for students or IYTC for youth. Many Countries ID Card Specifics For Nationals: Issued to Countries citizens from age 7, valid for 8 years from the holder's birthday. For Foreigners: Special Pink ID cards are issued to eligible residents, requiring documents like passports, work permits, and a witness. Issuance: Can be applied for at local DOPA offices or Countries embassies-consulates. Passport No.: A passport number is a unique identifier on your passport (usually top right of the data page) used for international travel, changing with each new passport issuance, and is a mix of letters and numbers, like 'P' then 8 digits for many Countries passports or one letter then 6 digits for Countries ones. It's different from your national ID number, as it identifies the specific document, not you personally over time, and is vital for identity verification. Where to find it Bio Data Page: Look at the page with your photo and personal details. Top Right Corner: It's typically labeled "Document No." or similar. Bottom of Pages: The number is also often repeated at the bottom of each page. What it looks like Format varies by country: For example, a Countries passport is one letter followed by eight numbers (e.g., P12345678). Countries passports: May be one letter and six digits (e.g., A123456). Watch for '0' vs 'O': Some countries avoid the letter 'O' to prevent confusion with the number '0'. Key facts Unique to the document: It's a serial number for that specific passport booklet, not your lifetime ID. Changes on renewal: You get a new number when you renew, replace, or get a new type of passport. Driver Delivery: A delivery person (or courier/messenger) is responsible for transporting and delivering goods, food, or documents to customers, requiring skills in navigation, organization, and customer service, using vehicles like cars, bikes, or vans, and playing a vital role in logistics by ensuring timely and safe receipt of items by recipients. Key Responsibilities: Pick-up & Delivery: Collecting items from businesses or warehouses and delivering them to specified addresses. Route Optimization: Planning efficient routes to save time and fuel. Document Management: Handling delivery confirmations, receipts, and digital records. Customer Interaction: Communicating with customers, resolving issues, and ensuring satisfaction. Types of Delivery Roles: Food Delivery: Couriers for apps like Abcdefg, delivering meals. Package Delivery: Drivers for logistics companies delivering parcels. Courier Services: Transporting important documents and small items quickly. Skills Needed: Reliability and time management. Good local knowledge or navigation skills. Physical stamina for handling items. Problem-solving for unexpected challenges (traffic, customer issues). Transportation: Transportation is the movement of people, animals, or goods between locations, using various modes like land (cars, trains, walking, biking), air (planes, helicopters), water (boats, ships), and pipelines, supported by infrastructure (roads, railways, airports) and vehicles, crucial for civilization and commerce, with modern systems focusing on efficiency, speed, and sustainability. Key Modes of Transport Land: Cars, buses, trains, bicycles, walking, motorcycles, trucks, subways, tuk-tuks (in many Countries). Air: Airplanes, helicopters, hot air balloons. Water: Boats, ships, submarines, jet skis. Other: Cable transport, pipelines, space transport. Components of Transportation Infrastructure: Roads, railways, ports, airports, bike lanes, terminals. Vehicles: Automobiles, trains, ships, aircraft, bicycles. Operations: The management, logistics, and services that make movement happen (e.g., airlines, public transit systems). Significance & Evolution Index of Civilization: Advances in transport have driven technological progress, allowing movement over greater distances. Technological Progress: From human-animal power on dirt tracks to paved roads, tar roads, to modern jet aircraft and digital logistics. Urbanization: Population growth, economic activity, and migration increase demand for transport, leading to congestion and infrastructure development (e.g., Countries's rail system). Modern Considerations (Many Countries Example) Variety: Tuk-tuks, motorcycle taxis, extensive road networks, low-cost air travel. Efficiency: Public transit like Countries's rail systems have high ridership; private cars contribute to traffic. Sustainability: Bikes and electric scooters are integrated into public transport to improve "last-mile" connectivity. Exportation: Exportation is the act of sending goods or services from one country to another for sale, a vital part of international trade that moves products, ideas, or even culture across borders. It involves an exporter (seller) and an importer (buyer), and can involve physical items like cars, food, or technology, or intangible services and cultural influence. Key aspects of exportation: Definition: The process of conveying commodities or services out of a country. Scope: Applies to physical goods (e.g., grain, cars) and services (e.g., IT, insurance). Economic Role: A fundamental way for nations to sell products abroad, generate revenue, and participate in the global economy. Beyond Goods: Can also refer to the spread of ideas, culture (like many Countries pop culture), or even ideology from one country to another. Regulation: Often regulated by governments, with restrictions on certain items like weapons or archaeological artifacts. Examples in use: The main business of the port is the exportation of grain. Countries has prohibited the exportation of archaeological items. Countries's global exportation of its popular culture. In essence, if you're selling something to a customer in another country, you're engaging in exportation, a core component of global commerce and exchange. Import: Import is the act of buying goods and services from other countries, while export is selling goods and services to other countries. These terms are central to international trade, which involves the exchange of products across national borders, and are subject to customs, licensing, and trade regulations. Import Definition: Bringing goods and services into a country from a foreign source. Example: The many Countries importing goods from National. Key aspects: A country's imports represent an outflow of funds. Export Definition: Selling products and services to customers in foreign countries. Example: The Countries exporting goods to other countries. Key aspects: A country's exports represent an inflow of funds. In international trade Regulations: Countries have specific regulations, including import-export licenses, that must be obtained for trade to occur. Documents: Essential documents for customs clearance include a Bill of Lading, commercial invoice, packing list, and certificate of origin. Prohibited goods: Some goods are prohibited from being imported or exported, such as narcotics, pornography, and counterfeit products. Balance of trade: The difference between a country's exports and imports is called its balance of trade. A trade deficit occurs when imports exceed exports, while a trade surplus occurs when exports exceed imports.
ClickMeSeeAllFull
ClickMeSeeOnMoreDetail
ClickMeSeeOnMorePictureImage
ClickMeSeeOnMoreVideo
Vehicle: 9.Submarine Boat
Method: All Submarine Boat.
Procedure:Job Occupation Career Benefit Passive Income Money: Delivery Transportation Exportation Importation such as Delivery Taxi Foods Drinks GoodsThings HomeWorks Farmworks Townworks 1.Facilities Entertain: Golden Heavenly, Carnival Festival Consert Streaming Restuarant Pub Bar Karaoke Movie Music Game Massage Spa Home House Hotel Motel School University Hospital, Boat Bus Train Plane Bicycle Mortorcycle Car. 2.Food Meal: Airfood, Seafood, StreetFood, Alcohols, Drinks. That you have had ever seen. Submarine Boat: Submarine boat tours offer a dry, comfortable way to explore underwater worlds, viewing coral reefs, marine life, and shipwrecks through large viewports, with popular locations in places like Waikiki (Atlantis Submarines), the Caribbean (Barbados), and the Maldives, providing narrated adventures at depths up to 150 feet for tourists who don't snorkel or dive, often involving a boat transfer to the actual submersible. What to Expect Comfortable & Dry: Stay dry while experiencing the ocean depths. Marine Life Viewing: See colorful fish, coral, and sometimes sunken ships. Narration: Onboard guides provide commentary about the underwater environment. Process: You typically take a boat to the submarine, then transfer, with sessions lasting around 45 minutes underwater. Depth: Tours can go over 100 feet deep, depending on the location and operator. Popular Locations Hawaii (Waikiki): Atlantis Submarines offers tours off Waikiki Beach. Caribbean (Barbados): Atlantis XV submarine offers tours to shipwrecks and reefs. Maldives: Offers tours to see reefs and marine life, with various operators. Rhodes, Greece: Hippo Submarine provides tours with underwater views. How to Find Tours Check platforms like Viator, Tripadvisor, and Atlantis Submarines for options in your desired destination. Driver License: A driver's license is a legal permit to operate motor vehicles, issued by a government authority after proving fitness and knowledge, typically requiring application, tests (written/practical), medical checks, and fees, with validity periods and renewal processes varying by country, like Thailand's 2-year temporary licenses for new drivers and 5-year permanent ones, and often requiring documents like passports and sometimes an International Driving Permit (IDP) for foreigners. Key Aspects of a Driver's License (General - many Countries Context) Purpose: Authorizes you to drive specific vehicles (cars, motorcycles, etc.) on public roads. Issuing Body (Many Countries): Department of Land Transport (DLT). Eligibility (Countries): Age: 18 for cars, 15 for motorcycles. Physical/Mental Fitness: Requires a medical certificate. Application Process (Countries): Book an appointment via DLT Smart Queue app or walk-in. Provide documents: Passport, visa, residence certificate, home license (if any). Pass required tests (vision, reflexes, written, practical) after watching training videos. License Types (Countries): Temporary: 2 years, for new drivers. Permanent: 5 years, renewable. International Driving Permit (IDP): Allows driving abroad; used with your home license. How to Get One in Many Countries(Foreigner Example) Gather Documents: Passport, visa, residence certificate, medical certificate, home country license/IDP (originals & copies). Book Appointment: Use the DLT Smart Queue app. Complete Tests: Vision, reflex, and practical-written tests (may have an online component). Pay Fees: Fees vary by license type. Important Reminders Always carry your license when driving. Renew early (up to 180 days before expiry) to avoid re-testing. ID Card Identification Card: An identification card (ID card) is a document proving a person's identity, often a plastic card with personal data like name, photo, and birthdate, used for verification for services, travel, or age checks, with common types including national IDs, driver's licenses, employee badges, and student IDs. In many Countries, it's a crucial document for citizens and foreigners (Pink ID card) for various official purposes, issued by government bodies like the Department of Provincial Administration (DOPA) or embassies. Key Functions Proof of Identity: Verifies who you are. Age Verification: Confirms you meet age requirements (e.g., for alcohol, entry). Access: Used for building access, online services (Digital ID). Official Document: Required for legal and administrative processes. Examples of ID Cards National ID: Issued by a country (e.g., Thai National ID). Driver's License: Also serves as proof of identity and driving authorization. Employee-Student ID: For work or school access and benefits. International IDs: Like the ISIC for students or IYTC for youth. Many Countries ID Card Specifics For Nationals: Issued to Countries citizens from age 7, valid for 8 years from the holder's birthday. For Foreigners: Special Pink ID cards are issued to eligible residents, requiring documents like passports, work permits, and a witness. Issuance: Can be applied for at local DOPA offices or Countries embassies-consulates. Passport No.: A passport number is a unique identifier on your passport (usually top right of the data page) used for international travel, changing with each new passport issuance, and is a mix of letters and numbers, like 'P' then 8 digits for many Countries passports or one letter then 6 digits for Countries ones. It's different from your national ID number, as it identifies the specific document, not you personally over time, and is vital for identity verification. Where to find it Bio Data Page: Look at the page with your photo and personal details. Top Right Corner: It's typically labeled "Document No." or similar. Bottom of Pages: The number is also often repeated at the bottom of each page. What it looks like Format varies by country: For example, a Countries passport is one letter followed by eight numbers (e.g., P12345678). Countries passports: May be one letter and six digits (e.g., A123456). Watch for '0' vs 'O': Some countries avoid the letter 'O' to prevent confusion with the number '0'. Key facts Unique to the document: It's a serial number for that specific passport booklet, not your lifetime ID. Changes on renewal: You get a new number when you renew, replace, or get a new type of passport. Driver Delivery: A delivery person (or courier/messenger) is responsible for transporting and delivering goods, food, or documents to customers, requiring skills in navigation, organization, and customer service, using vehicles like cars, bikes, or vans, and playing a vital role in logistics by ensuring timely and safe receipt of items by recipients. Key Responsibilities: Pick-up & Delivery: Collecting items from businesses or warehouses and delivering them to specified addresses. Route Optimization: Planning efficient routes to save time and fuel. Document Management: Handling delivery confirmations, receipts, and digital records. Customer Interaction: Communicating with customers, resolving issues, and ensuring satisfaction. Types of Delivery Roles: Food Delivery: Couriers for apps like Abcdefg, delivering meals. Package Delivery: Drivers for logistics companies delivering parcels. Courier Services: Transporting important documents and small items quickly. Skills Needed: Reliability and time management. Good local knowledge or navigation skills. Physical stamina for handling items. Problem-solving for unexpected challenges (traffic, customer issues). Transportation: Transportation is the movement of people, animals, or goods between locations, using various modes like land (cars, trains, walking, biking), air (planes, helicopters), water (boats, ships), and pipelines, supported by infrastructure (roads, railways, airports) and vehicles, crucial for civilization and commerce, with modern systems focusing on efficiency, speed, and sustainability. Key Modes of Transport Land: Cars, buses, trains, bicycles, walking, motorcycles, trucks, subways, tuk-tuks (in many Countries). Air: Airplanes, helicopters, hot air balloons. Water: Boats, ships, submarines, jet skis. Other: Cable transport, pipelines, space transport. Components of Transportation Infrastructure: Roads, railways, ports, airports, bike lanes, terminals. Vehicles: Automobiles, trains, ships, aircraft, bicycles. Operations: The management, logistics, and services that make movement happen (e.g., airlines, public transit systems). Significance & Evolution Index of Civilization: Advances in transport have driven technological progress, allowing movement over greater distances. Technological Progress: From human-animal power on dirt tracks to paved roads, tar roads, to modern jet aircraft and digital logistics. Urbanization: Population growth, economic activity, and migration increase demand for transport, leading to congestion and infrastructure development (e.g., Countries's rail system). Modern Considerations (Many Countries Example) Variety: Tuk-tuks, motorcycle taxis, extensive road networks, low-cost air travel. Efficiency: Public transit like Countries's rail systems have high ridership; private cars contribute to traffic. Sustainability: Bikes and electric scooters are integrated into public transport to improve "last-mile" connectivity. Exportation: Exportation is the act of sending goods or services from one country to another for sale, a vital part of international trade that moves products, ideas, or even culture across borders. It involves an exporter (seller) and an importer (buyer), and can involve physical items like cars, food, or technology, or intangible services and cultural influence. Key aspects of exportation: Definition: The process of conveying commodities or services out of a country. Scope: Applies to physical goods (e.g., grain, cars) and services (e.g., IT, insurance). Economic Role: A fundamental way for nations to sell products abroad, generate revenue, and participate in the global economy. Beyond Goods: Can also refer to the spread of ideas, culture (like many Countries pop culture), or even ideology from one country to another. Regulation: Often regulated by governments, with restrictions on certain items like weapons or archaeological artifacts. Examples in use: The main business of the port is the exportation of grain. Countries has prohibited the exportation of archaeological items. Countries's global exportation of its popular culture. In essence, if you're selling something to a customer in another country, you're engaging in exportation, a core component of global commerce and exchange. Import: Import is the act of buying goods and services from other countries, while export is selling goods and services to other countries. These terms are central to international trade, which involves the exchange of products across national borders, and are subject to customs, licensing, and trade regulations. Import Definition: Bringing goods and services into a country from a foreign source. Example: The many Countries importing goods from National. Key aspects: A country's imports represent an outflow of funds. Export Definition: Selling products and services to customers in foreign countries. Example: The Countries exporting goods to other countries. Key aspects: A country's exports represent an inflow of funds. In international trade Regulations: Countries have specific regulations, including import-export licenses, that must be obtained for trade to occur. Documents: Essential documents for customs clearance include a Bill of Lading, commercial invoice, packing list, and certificate of origin. Prohibited goods: Some goods are prohibited from being imported or exported, such as narcotics, pornography, and counterfeit products. Balance of trade: The difference between a country's exports and imports is called its balance of trade. A trade deficit occurs when imports exceed exports, while a trade surplus occurs when exports exceed imports.
ClickMeSeeAllFull
ClickMeSeeOnMoreDetail
ClickMeSeeOnMorePictureImage
ClickMeSeeOnMoreVideo
Vehicle: 10.Motorcycle
Method: All Motorcycle.
Procedure:Job Occupation Career Benefit Passive Income Money: Delivery Transportation Exportation Importation such as Delivery Taxi Foods Drinks GoodsThings HomeWorks Farmworks Townworks 1.Facilities Entertain: Golden Heavenly, Carnival Festival Consert Streaming Restuarant Pub Bar Karaoke Movie Music Game Massage Spa Home House Hotel Motel School University Hospital, Boat Bus Train Plane Bicycle Mortorcycle Car. 2.Food Meal: Airfood, Seafood, StreetFood, Alcohols, Drinks. That you have had ever seen. Motorcycle: A motorcycle is a two-wheeled (or sometimes three-wheeled) motor vehicle, steered with handlebars from a saddle seat, used for commuting, sport, touring, and off-road riding, with designs varying greatly for specific purposes, from small, automatic scooters popular in every Countries like the Benz Bmw Kawasaki Honda and Yamaha to large sport bikes and cruisers, requiring safety gear like helmets and adherence to traffic laws. Popular brands include Honda, Yamaha, Harley-Davidson, and Ducati, with new models constantly emerging, including electric options. Types & Styles Commuter/Scooter: Automatic, easy to ride (e.g., Benz, Bmw, Kawasaki, Honda, Yamaha,). Sport Bikes: Aerodynamic fairings, aggressive riding position for speed (e.g., Motor series). Cruisers-Touring: Comfortable for long distances, often large and powerful (e.g., Harley-Davidson, Honda Forza). Adventure/Dual-Purpose: Versatile for on-road and light off-road (e.g., Suzuki DR-Z4S). Modern Classics/Retro: Blending vintage looks with modern tech (e.g., Triumph Speed Twin). Off-Road (Trials/Enduro): Lightweight, agile, designed for specific terrain challenges. Key Features & Considerations Engine: Ranges from small displacement (e.g., 125cc) to large, powerful engines. Transmission: Manual (clutch & gears) or Automatic (CVT). Safety: Helmets and protective gear are essential; always follow traffic rules. Electric: Growing market with electric scooters and bikes available (e.g., Deco Electric). Driver License: A driver's license is a legal permit to operate motor vehicles, issued by a government authority after proving fitness and knowledge, typically requiring application, tests (written/practical), medical checks, and fees, with validity periods and renewal processes varying by country, like Thailand's 2-year temporary licenses for new drivers and 5-year permanent ones, and often requiring documents like passports and sometimes an International Driving Permit (IDP) for foreigners. Key Aspects of a Driver's License (General - many Countries Context) Purpose: Authorizes you to drive specific vehicles (cars, motorcycles, etc.) on public roads. Issuing Body (Many Countries): Department of Land Transport (DLT). Eligibility (Countries): Age: 18 for cars, 15 for motorcycles. Physical/Mental Fitness: Requires a medical certificate. Application Process (Countries): Book an appointment via DLT Smart Queue app or walk-in. Provide documents: Passport, visa, residence certificate, home license (if any). Pass required tests (vision, reflexes, written, practical) after watching training videos. License Types (Countries): Temporary: 2 years, for new drivers. Permanent: 5 years, renewable. International Driving Permit (IDP): Allows driving abroad; used with your home license. How to Get One in Many Countries(Foreigner Example) Gather Documents: Passport, visa, residence certificate, medical certificate, home country license/IDP (originals & copies). Book Appointment: Use the DLT Smart Queue app. Complete Tests: Vision, reflex, and practical-written tests (may have an online component). Pay Fees: Fees vary by license type. Important Reminders Always carry your license when driving. Renew early (up to 180 days before expiry) to avoid re-testing. ID Card Identification Card: An identification card (ID card) is a document proving a person's identity, often a plastic card with personal data like name, photo, and birthdate, used for verification for services, travel, or age checks, with common types including national IDs, driver's licenses, employee badges, and student IDs. In many Countries, it's a crucial document for citizens and foreigners (Pink ID card) for various official purposes, issued by government bodies like the Department of Provincial Administration (DOPA) or embassies. Key Functions Proof of Identity: Verifies who you are. Age Verification: Confirms you meet age requirements (e.g., for alcohol, entry). Access: Used for building access, online services (Digital ID). Official Document: Required for legal and administrative processes. Examples of ID Cards National ID: Issued by a country (e.g., Thai National ID). Driver's License: Also serves as proof of identity and driving authorization. Employee-Student ID: For work or school access and benefits. International IDs: Like the ISIC for students or IYTC for youth. Many Countries ID Card Specifics For Nationals: Issued to Countries citizens from age 7, valid for 8 years from the holder's birthday. For Foreigners: Special Pink ID cards are issued to eligible residents, requiring documents like passports, work permits, and a witness. Issuance: Can be applied for at local DOPA offices or Countries embassies-consulates. Passport No.: A passport number is a unique identifier on your passport (usually top right of the data page) used for international travel, changing with each new passport issuance, and is a mix of letters and numbers, like 'P' then 8 digits for many Countries passports or one letter then 6 digits for Countries ones. It's different from your national ID number, as it identifies the specific document, not you personally over time, and is vital for identity verification. Where to find it Bio Data Page: Look at the page with your photo and personal details. Top Right Corner: It's typically labeled "Document No." or similar. Bottom of Pages: The number is also often repeated at the bottom of each page. What it looks like Format varies by country: For example, a Countries passport is one letter followed by eight numbers (e.g., P12345678). Countries passports: May be one letter and six digits (e.g., A123456). Watch for '0' vs 'O': Some countries avoid the letter 'O' to prevent confusion with the number '0'. Key facts Unique to the document: It's a serial number for that specific passport booklet, not your lifetime ID. Changes on renewal: You get a new number when you renew, replace, or get a new type of passport. Driver Delivery: A delivery person (or courier/messenger) is responsible for transporting and delivering goods, food, or documents to customers, requiring skills in navigation, organization, and customer service, using vehicles like cars, bikes, or vans, and playing a vital role in logistics by ensuring timely and safe receipt of items by recipients. Key Responsibilities: Pick-up & Delivery: Collecting items from businesses or warehouses and delivering them to specified addresses. Route Optimization: Planning efficient routes to save time and fuel. Document Management: Handling delivery confirmations, receipts, and digital records. Customer Interaction: Communicating with customers, resolving issues, and ensuring satisfaction. Types of Delivery Roles: Food Delivery: Couriers for apps like Abcdefg, delivering meals. Package Delivery: Drivers for logistics companies delivering parcels. Courier Services: Transporting important documents and small items quickly. Skills Needed: Reliability and time management. Good local knowledge or navigation skills. Physical stamina for handling items. Problem-solving for unexpected challenges (traffic, customer issues). Transportation: Transportation is the movement of people, animals, or goods between locations, using various modes like land (cars, trains, walking, biking), air (planes, helicopters), water (boats, ships), and pipelines, supported by infrastructure (roads, railways, airports) and vehicles, crucial for civilization and commerce, with modern systems focusing on efficiency, speed, and sustainability. Key Modes of Transport Land: Cars, buses, trains, bicycles, walking, motorcycles, trucks, subways, tuk-tuks (in many Countries). Air: Airplanes, helicopters, hot air balloons. Water: Boats, ships, submarines, jet skis. Other: Cable transport, pipelines, space transport. Components of Transportation Infrastructure: Roads, railways, ports, airports, bike lanes, terminals. Vehicles: Automobiles, trains, ships, aircraft, bicycles. Operations: The management, logistics, and services that make movement happen (e.g., airlines, public transit systems). Significance & Evolution Index of Civilization: Advances in transport have driven technological progress, allowing movement over greater distances. Technological Progress: From human-animal power on dirt tracks to paved roads, tar roads, to modern jet aircraft and digital logistics. Urbanization: Population growth, economic activity, and migration increase demand for transport, leading to congestion and infrastructure development (e.g., Countries's rail system). Modern Considerations (Many Countries Example) Variety: Tuk-tuks, motorcycle taxis, extensive road networks, low-cost air travel. Efficiency: Public transit like Countries's rail systems have high ridership; private cars contribute to traffic. Sustainability: Bikes and electric scooters are integrated into public transport to improve "last-mile" connectivity. Exportation: Exportation is the act of sending goods or services from one country to another for sale, a vital part of international trade that moves products, ideas, or even culture across borders. It involves an exporter (seller) and an importer (buyer), and can involve physical items like cars, food, or technology, or intangible services and cultural influence. Key aspects of exportation: Definition: The process of conveying commodities or services out of a country. Scope: Applies to physical goods (e.g., grain, cars) and services (e.g., IT, insurance). Economic Role: A fundamental way for nations to sell products abroad, generate revenue, and participate in the global economy. Beyond Goods: Can also refer to the spread of ideas, culture (like many Countries pop culture), or even ideology from one country to another. Regulation: Often regulated by governments, with restrictions on certain items like weapons or archaeological artifacts. Examples in use: The main business of the port is the exportation of grain. Countries has prohibited the exportation of archaeological items. Countries's global exportation of its popular culture. In essence, if you're selling something to a customer in another country, you're engaging in exportation, a core component of global commerce and exchange. Import: Import is the act of buying goods and services from other countries, while export is selling goods and services to other countries. These terms are central to international trade, which involves the exchange of products across national borders, and are subject to customs, licensing, and trade regulations. Import Definition: Bringing goods and services into a country from a foreign source. Example: The many Countries importing goods from National. Key aspects: A country's imports represent an outflow of funds. Export Definition: Selling products and services to customers in foreign countries. Example: The Countries exporting goods to other countries. Key aspects: A country's exports represent an inflow of funds. In international trade Regulations: Countries have specific regulations, including import-export licenses, that must be obtained for trade to occur. Documents: Essential documents for customs clearance include a Bill of Lading, commercial invoice, packing list, and certificate of origin. Prohibited goods: Some goods are prohibited from being imported or exported, such as narcotics, pornography, and counterfeit products. Balance of trade: The difference between a country's exports and imports is called its balance of trade. A trade deficit occurs when imports exceed exports, while a trade surplus occurs when exports exceed imports.
ClickMeSeeAllFull
ClickMeSeeOnMoreDetail
ClickMeSeeOnMorePictureImage
ClickMeSeeOnMoreVideo
Vehicle: 11.Bicycle
Method: All Bicycle.
Procedure:Job Occupation Career Benefit Passive Income Money: Delivery Transportation Exportation Importation such as Delivery Taxi Foods Drinks GoodsThings HomeWorks Farmworks Townworks 1.Facilities Entertain: Golden Heavenly, Carnival Festival Consert Streaming Restuarant Pub Bar Karaoke Movie Music Game Massage Spa Home House Hotel Motel School University Hospital, Boat Bus Train Plane Bicycle Mortorcycle Car. 2.Food Meal: Airfood, Seafood, StreetFood, Alcohols, Drinks. That you have had ever seen. Bicycle: A bicycle, or bike, is a human-powered vehicle with two wheels in-line on a frame, propelled by pedals and used for transport, recreation, or sport, with common types including road, mountain, hybrid, and electric bikes, offering an efficient way to travel and exercise. Key Components & Function Frame: The structure holding everything together, with the front wheel in a rotatable fork. Pedals & Drivetrain: Feet turn pedals, which power a chain that turns the rear wheel. Steering: Handbars attached to the fork allow the rider to steer. Wheels: Two in-line wheels, typically with tires. Types of Bicycles Road Bikes: Lightweight with smooth tires for speed on paved roads. Mountain Bikes (MTBs): Sturdy with knobby tires for off-road trails. Hybrid Bikes: Versatile, combining features of road and mountain bikes for varied terrain. Electric Bikes (E-Bikes): Have a motor for assistance, great for commuting. City/Commuter Bikes: Designed for comfort and practicality in urban settings. Folding Bikes: Compact for easy storage and transport. Usage & Benefits Transport: An efficient, eco-friendly way to get around, especially in cities. Exercise: Excellent for fitness, from casual rides to intense training. Sport: Used in competitive events like racing, BMX, and mountain biking. Safety & Riding Tips Always wear a helmet. Follow traffic laws and ride on designated paths or roads. Driver License: A driver's license is a legal permit to operate motor vehicles, issued by a government authority after proving fitness and knowledge, typically requiring application, tests (written/practical), medical checks, and fees, with validity periods and renewal processes varying by country, like Thailand's 2-year temporary licenses for new drivers and 5-year permanent ones, and often requiring documents like passports and sometimes an International Driving Permit (IDP) for foreigners. Key Aspects of a Driver's License (General - many Countries Context) Purpose: Authorizes you to drive specific vehicles (cars, motorcycles, etc.) on public roads. Issuing Body (Many Countries): Department of Land Transport (DLT). Eligibility (Countries): Age: 18 for cars, 15 for motorcycles. Physical/Mental Fitness: Requires a medical certificate. Application Process (Countries): Book an appointment via DLT Smart Queue app or walk-in. Provide documents: Passport, visa, residence certificate, home license (if any). Pass required tests (vision, reflexes, written, practical) after watching training videos. License Types (Countries): Temporary: 2 years, for new drivers. Permanent: 5 years, renewable. International Driving Permit (IDP): Allows driving abroad; used with your home license. How to Get One in Many Countries(Foreigner Example) Gather Documents: Passport, visa, residence certificate, medical certificate, home country license/IDP (originals & copies). Book Appointment: Use the DLT Smart Queue app. Complete Tests: Vision, reflex, and practical-written tests (may have an online component). Pay Fees: Fees vary by license type. Important Reminders Always carry your license when driving. Renew early (up to 180 days before expiry) to avoid re-testing. ID Card Identification Card: An identification card (ID card) is a document proving a person's identity, often a plastic card with personal data like name, photo, and birthdate, used for verification for services, travel, or age checks, with common types including national IDs, driver's licenses, employee badges, and student IDs. In many Countries, it's a crucial document for citizens and foreigners (Pink ID card) for various official purposes, issued by government bodies like the Department of Provincial Administration (DOPA) or embassies. Key Functions Proof of Identity: Verifies who you are. Age Verification: Confirms you meet age requirements (e.g., for alcohol, entry). Access: Used for building access, online services (Digital ID). Official Document: Required for legal and administrative processes. Examples of ID Cards National ID: Issued by a country (e.g., Thai National ID). Driver's License: Also serves as proof of identity and driving authorization. Employee-Student ID: For work or school access and benefits. International IDs: Like the ISIC for students or IYTC for youth. Many Countries ID Card Specifics For Nationals: Issued to Countries citizens from age 7, valid for 8 years from the holder's birthday. For Foreigners: Special Pink ID cards are issued to eligible residents, requiring documents like passports, work permits, and a witness. Issuance: Can be applied for at local DOPA offices or Countries embassies-consulates. Passport No.: A passport number is a unique identifier on your passport (usually top right of the data page) used for international travel, changing with each new passport issuance, and is a mix of letters and numbers, like 'P' then 8 digits for many Countries passports or one letter then 6 digits for Countries ones. It's different from your national ID number, as it identifies the specific document, not you personally over time, and is vital for identity verification. Where to find it Bio Data Page: Look at the page with your photo and personal details. Top Right Corner: It's typically labeled "Document No." or similar. Bottom of Pages: The number is also often repeated at the bottom of each page. What it looks like Format varies by country: For example, a Countries passport is one letter followed by eight numbers (e.g., P12345678). Countries passports: May be one letter and six digits (e.g., A123456). Watch for '0' vs 'O': Some countries avoid the letter 'O' to prevent confusion with the number '0'. Key facts Unique to the document: It's a serial number for that specific passport booklet, not your lifetime ID. Changes on renewal: You get a new number when you renew, replace, or get a new type of passport. Driver Delivery: A delivery person (or courier/messenger) is responsible for transporting and delivering goods, food, or documents to customers, requiring skills in navigation, organization, and customer service, using vehicles like cars, bikes, or vans, and playing a vital role in logistics by ensuring timely and safe receipt of items by recipients. Key Responsibilities: Pick-up & Delivery: Collecting items from businesses or warehouses and delivering them to specified addresses. Route Optimization: Planning efficient routes to save time and fuel. Document Management: Handling delivery confirmations, receipts, and digital records. Customer Interaction: Communicating with customers, resolving issues, and ensuring satisfaction. Types of Delivery Roles: Food Delivery: Couriers for apps like Abcdefg, delivering meals. Package Delivery: Drivers for logistics companies delivering parcels. Courier Services: Transporting important documents and small items quickly. Skills Needed: Reliability and time management. Good local knowledge or navigation skills. Physical stamina for handling items. Problem-solving for unexpected challenges (traffic, customer issues). Transportation: Transportation is the movement of people, animals, or goods between locations, using various modes like land (cars, trains, walking, biking), air (planes, helicopters), water (boats, ships), and pipelines, supported by infrastructure (roads, railways, airports) and vehicles, crucial for civilization and commerce, with modern systems focusing on efficiency, speed, and sustainability. Key Modes of Transport Land: Cars, buses, trains, bicycles, walking, motorcycles, trucks, subways, tuk-tuks (in many Countries). Air: Airplanes, helicopters, hot air balloons. Water: Boats, ships, submarines, jet skis. Other: Cable transport, pipelines, space transport. Components of Transportation Infrastructure: Roads, railways, ports, airports, bike lanes, terminals. Vehicles: Automobiles, trains, ships, aircraft, bicycles. Operations: The management, logistics, and services that make movement happen (e.g., airlines, public transit systems). Significance & Evolution Index of Civilization: Advances in transport have driven technological progress, allowing movement over greater distances. Technological Progress: From human-animal power on dirt tracks to paved roads, tar roads, to modern jet aircraft and digital logistics. Urbanization: Population growth, economic activity, and migration increase demand for transport, leading to congestion and infrastructure development (e.g., Countries's rail system). Modern Considerations (Many Countries Example) Variety: Tuk-tuks, motorcycle taxis, extensive road networks, low-cost air travel. Efficiency: Public transit like Countries's rail systems have high ridership; private cars contribute to traffic. Sustainability: Bikes and electric scooters are integrated into public transport to improve "last-mile" connectivity. Exportation: Exportation is the act of sending goods or services from one country to another for sale, a vital part of international trade that moves products, ideas, or even culture across borders. It involves an exporter (seller) and an importer (buyer), and can involve physical items like cars, food, or technology, or intangible services and cultural influence. Key aspects of exportation: Definition: The process of conveying commodities or services out of a country. Scope: Applies to physical goods (e.g., grain, cars) and services (e.g., IT, insurance). Economic Role: A fundamental way for nations to sell products abroad, generate revenue, and participate in the global economy. Beyond Goods: Can also refer to the spread of ideas, culture (like many Countries pop culture), or even ideology from one country to another. Regulation: Often regulated by governments, with restrictions on certain items like weapons or archaeological artifacts. Examples in use: The main business of the port is the exportation of grain. Countries has prohibited the exportation of archaeological items. Countries's global exportation of its popular culture. In essence, if you're selling something to a customer in another country, you're engaging in exportation, a core component of global commerce and exchange. Import: Import is the act of buying goods and services from other countries, while export is selling goods and services to other countries. These terms are central to international trade, which involves the exchange of products across national borders, and are subject to customs, licensing, and trade regulations. Import Definition: Bringing goods and services into a country from a foreign source. Example: The many Countries importing goods from National. Key aspects: A country's imports represent an outflow of funds. Export Definition: Selling products and services to customers in foreign countries. Example: The Countries exporting goods to other countries. Key aspects: A country's exports represent an inflow of funds. In international trade Regulations: Countries have specific regulations, including import-export licenses, that must be obtained for trade to occur. Documents: Essential documents for customs clearance include a Bill of Lading, commercial invoice, packing list, and certificate of origin. Prohibited goods: Some goods are prohibited from being imported or exported, such as narcotics, pornography, and counterfeit products. Balance of trade: The difference between a country's exports and imports is called its balance of trade. A trade deficit occurs when imports exceed exports, while a trade surplus occurs when exports exceed imports.
ClickMeSeeAllFull
ClickMeSeeOnMoreDetail
ClickMeSeeOnMorePictureImage
ClickMeSeeOnMoreVideo
Fruit: Processer Processed Processing food Menu : 1.Durian Crispy Fried Frier Fries Durian
Method: All Durian Works: Durian Crispy Fried Frier Fries Durian
Method: How to make made cook: Recipe Procedure: Crispy Fried Frier Fries Durian Ingredients Materials: 1. 1 pieces of unripe durian. 2. ½ tablespoon salt. 3. Palm oil for frying. Part 1: Method: 1. Cut the unripe durian in half, and remove the seeds, and slice it into thin pieces. 2. Heat oil in a pan, then add the sliced durian and Fry until crispy as well wait for it around 1-10 minutes. 3.Remove it out of the pan and Lite Wipe Mop drain the oil out down. 4.Add salt to the fried durian that has been set aside, Then shake it mix as well. Part 2: Method: 1.Prepare Durian: Use ripe but firm durian flesh (like Monthong). 2.Slice: Cut the flesh into thin slices or small chunks. 3.Brine: Dip slices in a saltwater solution (brine). 4.Fry: Deep-fry in hot oil until golden and crisp, sometimes with a touch of turmeric powder for color. 5.Cool & Pack: Drain excess oil and cool before packaging in sealed bags to maintain crispness. And the finally then You can eat it and Sell it to the Merchant or Customer with Who people you known. Where can i you me buy it, Where to Buy, Where to find it: Internet Online, Supermarkets. Widely available from street food stalls, especially in durian-growing regions like, and at markets. Online: Easily ordered from platforms like Abcdefg in various grades and sizes. Interesting Attention: Durian Chips Fried Snack Fruit in the Basket, Durian Crispy ...Crispy durian is a popular snack made from fresh durian (usually Monthong) that's processed to be crunchy, often through freeze-drying or vacuum frying, removing moisture while retaining its signature aroma and flavor, resulting in a convenient, shelf-stable treat that's chewy, sweet, and sometimes comes in various flavors like spicy or cheese. It's a healthy-ish option with no added sugar, oil, or preservatives in some versions, making it a great snack for durian lovers who want that rich taste in a crispy form, available online at on the Internet Online and Supermarket, or in physical stores. Key Features & Types: Freeze-Dried: Removes water to create a light, airy, and crispy texture, often 100% natural durian with no additives. Vacuum Fried: Uses less oil than deep-frying, offering crispiness with less oil content. Flavors: Available in original, seaweed, spicy, or cheese flavors. Health Aspects: Many brands offer oil-free, sugar-free, and preservative-free options, suitable for vegans. Why People Love It: Convenient: Easy to eat on the go, no need for fresh durian's mess. Intense Flavor: Delivers the rich taste of durian in a crunchy bite. Good for Gifting: A popular souvenir. And the finally then You can eat it and Sell it to the Merchant or Customer with Who people you known.
ClickMeSeeAllFull
ClickMeSeeOnMoreDetail
ClickMeSeeOnMorePictureImage
ClickMeSeeOnMoreVideo
Fruit: Recipe Processer Processed Processing food Menu : 2.Durian Egg Tart
Method: All Durian Works: Durian Egg Tart
Recipe Procedure: Durian Egg Tart Method: How to make made cook: Step 1: Ingredients Materials: 1. 10 pieces of 6304-P foil trays 2. 1 roll of food wrap 3. 1 roll of food foil 4. 300 grams of all-purpose flour 5. 100 grams of icing sugar 6. 24 grams of ground almonds 7. 24 grams of egg yolk (size 1) 8. 193 grams of diced salted butter 9. 2 grams of salt 10. 4 grams of vanilla extract Method: 1.Combine the diced salted butter, icing sugar, and salt in a creamy batter until well combined. Add the egg yolks and continue beating until well combined. Then add the all-purpose flour, ground almonds, and vanilla extract. Beat just until combined, then use a rubber spatula to scrape down the sides of the pan to mix everything together. 2. Wrap the tart dough in plastic wrap, press it slightly flat, and refrigerate for about an hour to allow it to set. 3. After one hour, cut the dough into 65-gram portions, roll them into sheets, line Star Products foil trays (6304-S), and prick the dough with a fork. Freeze for 15-20 minutes. 4. After one hour, remove the tart and bake in a preheated oven at 180 degrees Celsius for 12 minutes. If the edges of the tart crust become too dark, cover the top with aluminum foil. Let it cool completely before preparing the durian cream cheese filling. Step 2: Ingredients Materials: 1. Cream cheese 200 grams 2. Whipping cream 150 grams 3. Finely mashed durian pulp 100 grams 4. Egg yolk (size 1) 40 grams 5. Cornstarch 12 grams 6. Egg white (size 1) 78 grams 7. Sugar 50 grams 8. Cream of tartar 2 grams Method: 1. Let the cream cheese soften slightly. Place the whipping cream (Arla Whipping Cream High Stability) over a hot water bath and whisk with a hand whisk until smooth. Reduce the heat to low and add the mashed durian. 2. Add the egg yolks and quickly stir to combine. Then add the cornstarch and stir rapidly until the mixture begins to thicken. Remove from heat and let the mixture cool. 3. Prepare another mixing bowl. Add the egg whites and cream of tartar and beat at high speed until frothy. Gradually add the granulated sugar, continuing to beat at medium speed until all the sugar is incorporated. Continue beating until the mixture forms soft peaks. 4. Divide the egg whites and mix them with the cream cheese mixture. Gently fold until all ingredients are well combined. 5. Spoon the durian cream cheese mixture into the tart shells until full. Freeze for at least 30 minutes. Remove from the freezer, brush with egg yolk, and bake in a preheated oven at 180°C for 10-15 minutes. Remove from the oven and let cool. Serve hot, enjoying it as a lava cake, or serve cold, as preferred. The foil tray can also be reheated in the microwave. And the finally then You can eat it and Sell it to the Merchant or Customer with Who people you known. Where can i you me buy it, Where to Buy, Where to find it: Internet Online, Supermarkets. Widely available from street food stalls, especially in durian-growing regions like, and at markets. Online: Easily ordered from platforms like Abcdefg in various grades and sizes. And the finally then You can eat it and Sell it to the Merchant or Customer with Who people you known.
ClickMeSeeAllFull
ClickMeSeeOnMoreDetail
ClickMeSeeOnMorePictureImage
ClickMeSeeOnMoreVideo
Fruit: Processer Processed Processing food Menu : 3.Durian Rice Coconut Milk
Method: All Durian Works: Durian Rice Coconut Milk
Recipe Procedure: Durian Rice Coconut Milk Method: How to make made cook: Step 1: Ingredients Materials: 250 grams of rice, 130 milliliters of coconut milk, 60 grams of granulated sugar, 1 teaspoon of salt. Method: 1.Soak the rice in clean water for 1-2 hours. Steam the soaked rice for approximately 20-30 minutes. 2. Meanwhile, put the coconut milk, sugar, and salt in a pot and heat over low heat, stirring until everything dissolves. Set aside. 3. After one hour, cut the dough into 65-gram portions, roll them into sheets, line Star Products foil trays (6304-S), and prick the dough with a fork. Freeze for 15-20 minutes. 4. Place the warmed glutinous rice in a large bowl. Mix the boiled coconut milk with the rice, stir well, and cover. Open the lid and stir every 15 minutes. Repeat this process for a total of 1 hour. TIP: For added aroma, you can add pandan leaves while steaming. Step 2: Ingredients Materials: 350 ml coconut milk, 60 g palm sugar, 200 g durian flesh, 1 teaspoon salt. Method: 1.Peel half of the durian and mash it into strands. Set aside. 2. Combine coconut milk, palm sugar, salt, and pandan leaves in a pot. Heat over medium heat, stirring until the sugar dissolves. Remove the pandan leaves. Add the mashed durian to the pot and stir again until well combined. Turn off the heat and let it rest. 3. Scoop the sticky rice into a bowl and pour the durian coconut milk over it. And just like that, your "Durian Sticky Rice" is ready to eat! And the finally then You can eat it and Sell it to the Merchant or Customer with Who people you known. Where can i you me buy it, Where to Buy, Where to find it: Internet Online, Supermarkets. Widely available from street food stalls, especially in durian-growing regions like, and at markets. Online: Easily ordered from platforms like Abcdefg in various grades and sizes. And the finally then You can eat it and Sell it to the Merchant or Customer with Who people you known.
ClickMeSeeAllFull
ClickMeSeeOnMoreDetail
ClickMeSeeOnMorePictureImage
ClickMeSeeOnMoreVideo
Fruit: Processer Processed Processing food Menu : 4.Durian Smoothie MIlk
Method: All Durian Works: Durian Smoothie MIlk
Recipe Procedure: Durian Smoothie MIlk Method: How to make made cook: Step 1: 1 cup durian pulp 3 tablespoons sweetened condensed milk (adjust amount to your liking) 1/3 cup fresh milk 1 tablespoon + 1/2 tablespoon simple syrup (adjust amount to your liking) Ice Method: 1. Put all the ingredients into a blender. Blend until smooth and creamy. Pour into a glass and serve. And the finally then You can eat it and Sell it to the Merchant or Customer with Who people you known. Where can i you me buy it, Where to Buy, Where to find it: Internet Online, Supermarkets. Widely available from street food stalls, especially in durian-growing regions like, and at markets. Online: Easily ordered from platforms like Abcdefg in various grades and sizes. And the finally then You can eat it and Sell it to the Merchant or Customer with Who people you known.
ClickMeSeeAllFull
ClickMeSeeOnMoreDetail
ClickMeSeeOnMorePictureImage
ClickMeSeeOnMoreVideo
Fruit: Processer Processed Processing food Menu : 5.Durian Cheesecake
Method: All Durian Works: Durian Cheesecake
Recipe Procedure: Durian Cheesecake Method: How to make made cook: Step 1: Crumble Ingredients: 80 grams granulated sugar, 65 grams cold unsalted butter, diced, 45 grams brown sugar, 110 grams all-purpose flour, 1/2 teaspoon Nan Bo Kluea mountain salt. Method: 1. Blend all ingredients together. Pour into a baking tray lined with parchment paper. Bake at 160-165 degrees Celsius for 12-15 minutes, or until cooked and golden brown. Let cool. Step 2: Durian Cheesecake Ingredients: 2 cups diced cream cheese (soft), 1/2 cup icing sugar, 1/2 cup whipping cream, 3 sheets gelatin (soaked in water), 1 teaspoon vanilla extract, 1/2 teaspoon Nan salt, 1 cup ripe and soft Monthong durian from Pa La-oo. Method: 1. Beat the cream cheese and icing sugar until soft and slightly fluffy. Add the whipping cream, vanilla extract, and salt. Beat again until well combined. 2. Add the durian pulp and beat until well combined. Add the dissolved gelatin and stir until well mixed. Let it rest. 3. Spoon the crumble into serving bowls, add the prepared cream cheese, and refrigerate for 1-2 hours until set. Arrange the durian flesh on top for decoration. And the finally then You can eat it and Sell it to the Merchant or Customer with Who people you known. Where can i you me buy it, Where to Buy, Where to find it: Internet Online, Supermarkets. Widely available from street food stalls, especially in durian-growing regions like, and at markets. Online: Easily ordered from platforms like Abcdefg in various grades and sizes. And the finally then You can eat it and Sell it to the Merchant or Customer with Who people you known.
ClickMeSeeAllFull
ClickMeSeeOnMoreDetail
ClickMeSeeOnMorePictureImage
ClickMeSeeOnMoreVideo
Fruit: Processer Processed Processing food Menu : 6.Durian Ice Scream
Method: All Durian Works: Durian Ice Scream
Recipe Procedure: Durian Ice Scream Method: How to make made cook: Ingredients: 500 grams of durian pulp, 500 milliliters of coconut milk, 2 tablespoons of cornstarch, 1-2 tablespoons of sugar, 1/2 teaspoon of salt. Method: 1. Blend the ingredients: Blend ripe durian pulp, fresh milk, coconut milk/whipping cream, sugar (or condensed milk), and salt until smooth. 2. Let it cool: Chill the mixture until it is very cold. 3. Freezing: Pour into the prepared container and freeze for at least 4-5 hours or overnight. 4. Serving: Before serving, let it sit at room temperature for a while to make it easier to scoop. It can be served with rice. And the finally then You can eat it and Sell it to the Merchant or Customer with Who people you known. Where can i you me buy it, Where to Buy, Where to find it: Internet Online, Supermarkets. Widely available from street food stalls, especially in durian-growing regions like, and at markets. Online: Easily ordered from platforms like Abcdefg in various grades and sizes. Interesting Tip Attention: 3 Menu 1.Traditional recipe: Uses coconut milk, durian pulp, sugar, and possibly a small amount of cornstarch. 2.Creamy recipe: Uses durian pulp, whipping cream, fresh milk, and condensed milk, blended together. 3.Pure durian recipe: Uses only finely blended durian pulp, then frozen. Taste: Sweet, creamy, rich, with the distinctive aroma of durian. Texture: Smooth, soft, and melts in your mouth. Some recipes may contain small pieces of durian. Aroma: Has a strong durian aroma, which is the charm of this dessert. Durian ice cream is a chilled dessert made from fresh durian pulp mixed with fresh milk, coconut milk, and/or whipped cream, blended until smooth, and then frozen until solid. It has a rich, creamy, and intense durian flavor. Very popular in our World, it's available both homemade and in stores. It's usually served on its own or with sticky rice. And the finally then You can eat it and Sell it to the Merchant or Customer with Who people you known.
ClickMeSeeAllFull
ClickMeSeeOnMoreDetail
ClickMeSeeOnMorePictureImage
ClickMeSeeOnMoreVideo
Fruit: Processer Processed Processing food Menu : 7.Durian Pudding
Method: All Durian Works: Durian Pudding
Recipe Procedure: Durian Pudding Method: How to make made cook: Ingredients: 1. 300 grams of mashed durian, 2. 150 milliliters of whipping cream, 3. 150 milliliters of fresh milk, 4. 100 grams of granulated or 1/2 teaspoon sugar, 5. 6 sheets of gelatin, 6. Durian (to taste), 7. Mint leaves, fruit, and flowers for decoration, 8. 250 milliliters of coconut cream, 9. ¼ or 1/2 teaspoon of salt. Method: 1. Place a pot on the stove, pour in the coconut milk, add salt, and bring to a boil. Then remove from heat and let it cool. 2. Soak the gelatin sheets in cold water and wait until they soften, about 5 minutes. Then squeeze out the excess water and set aside. 3. Place a pot over medium heat. Pour in the fresh milk, followed by the whipping cream, sugar, and durian pulp. Stir until well combined and wait until it boils. Add the prepared gelatin sheets, stir until dissolved, and remove from the heat. 4. Pour the durian pudding into cups or molds, then refrigerate for 1 hour or until set. Remove the durian pudding from the molds and place it on a plate. Place the durian pieces on top and garnish with mint leaves. Drizzle with coconut milk and serve. And the finally then You can eat it and Sell it to the Merchant or Customer with Who people you known. Where can i you me buy it, Where to Buy, Where to find it: Internet Online, Supermarkets. Widely available from street food stalls, especially in durian-growing regions like, and at markets. Online: Easily ordered from platforms like Abcdefg in various grades and sizes. Interesting Tip Attention: Taste: Sweet, creamy, rich, with the distinctive aroma of durian. Texture: Smooth, soft, and melts in your mouth. Some recipes may contain small pieces of durian. Aroma: Has a strong durian aroma, which is the charm of this dessert. You can use ready-made pudding mix or make your own by boiling the ingredients together and then chilling to set. Serve with coconut milk or enjoy it plain; it's delicious either way. And the finally then You can eat it and Sell it to the Merchant or Customer with Who people you known.
ClickMeSeeAllFull
ClickMeSeeOnMoreDetail
ClickMeSeeOnMorePictureImage
ClickMeSeeOnMoreVideo
Fruit: Processer Processed Processing food Menu : 8.Roller Sticky Durian
Method: All Durian Works: Roller Sticky Durian
Recipe Procedure: Roller Sticky Durian Method: How to make made cook: Ingredients: 1. 2 kilograms of durian (ripe and overripe), 2. 0-200 grams of granulated sugar. Method: 1. Peel the durian, take out the flesh, and remove the seeds. 2. Heat a pan over medium-low heat. Add the durian and use a spatula to mash and press it until the durian flesh becomes a smooth, liquid consistency. 3. Add the sugar and stir until it dissolves completely into the durian pulp. Continue stirring without stopping until the durian paste reaches the desired consistency, which takes approximately 1 hour. 4. Once the mixture is ready, scoop it into a bowl and let it cool. You can eat it as is or use the durian paste to make durian toffee, whichever you prefer. And the finally then You can eat it and Sell it to the Merchant or Customer with Who people you known. Where can i you me buy it, Where to Buy, Where to find it: Internet Online, Supermarkets. Widely available from street food stalls, especially in durian-growing regions like, and at markets. Online: Easily ordered from platforms like Abcdefg in various grades and sizes. And the finally then You can eat it and Sell it to the Merchant or Customer with Who people you known.
ClickMeSeeAllFull
ClickMeSeeOnMoreDetail
ClickMeSeeOnMorePictureImage
ClickMeSeeOnMoreVideo
Fruit: Processer Processed Processing food Menu : 9.Durian jam Cheese Bread Toast
Method: All Durian Works: Durian jam Cheese Bread Toast
Recipe Procedure: Durian jam Cheese Bread Toast Method: How to make made cook: Ingredients: 1. 1 cup plain yogurt, 2. 3 large slices of bread, 3. 1 egg, 4. 1 small durian segment, mashed, 5. 1 tablespoon condensed milk or whatever, 6. 1 tablespoon fresh milk or a glass of fresh milk or whatever, 7. 1 tablespoon milk powder or whatever, 8. 1/4 teaspoon or 1 tablespoon salt or whatever. Method: 1. Prepare the bread. Press a groove in the center of the bread. 2. Pour the yogurt into a mixing bowl, crack an egg into it, and beat until well combined. Then add the durian pulp and beat until well mixed. Add condensed milk, fresh milk, milk powder, and salt, and beat until well combined. Pour the mixture onto the bread. 3. Bake at 150°C for 20 minutes. 4. Remove from the oven, arrange on a plate, and serve with durian, ice cream, cheese, fresh milk or jam. Ready to eat! And the finally then You can eat it and Sell it to the Merchant or Customer with Who people you known. Where can i you me buy it, Where to Buy, Where to find it: Internet Online, Supermarkets. Widely available from street food stalls, especially in durian-growing regions like, and at markets. Online: Easily ordered from platforms like Abcdefg in various grades and sizes. And the finally then You can eat it and Sell it to the Merchant or Customer with Who people you known.
ClickMeSeeAllFull
ClickMeSeeOnMoreDetail
ClickMeSeeOnMorePictureImage
ClickMeSeeOnMoreVideo
Fruit: Processer Processed Processing food Menu : 10.Candied Durian
Method: All Durian Works: Candied Durian
Recipe Procedure: Candied Durian Method: How to make made cook: Ingredients: 1. 400 grams of unripe durian flesh, seed removed; 2. 0-300 grams of granulated sugar or not use; 3. cups of water; 4. Lime water (betel nut lime) or clear lime water, enough to cover the durian. Method: 1. Cut the durian into bite-sized pieces, removing the white part attached to the seed. 2. Boil water and sugar in a 1:1 ratio (estimate enough water to completely cover the durian you'll be making the durian syrup). Gradually add the sugar and do not stir. Simmer over low heat until it boils. Add the sliced durian, reduce the heat to low, cover the pot, and wait. 3. Check the durian. Once the flesh is submerged in the liquid, leave the lid open for a short time to prevent it from becoming mushy. Then close the lid and continue boiling until the flesh turns a clear yellow color. 4. Check with a spoon. If the texture is firm enough and the color is translucent yellow throughout, turn off the heat and let it cool. Pour coconut milk or wipe cream or fresh milk over it and serve. And the finally then You can eat it and Sell it to the Merchant or Customer with Who people you known. Where can i you me buy it, Where to Buy, Where to find it: Internet Online, Supermarkets. Widely available from street food stalls, especially in durian-growing regions like, and at markets. Online: Easily ordered from platforms like Abcdefg in various grades and sizes. And the finally then You can eat it and Sell it to the Merchant or Customer with Who people you known.
ClickMeSeeAllFull
ClickMeSeeOnMoreDetail
ClickMeSeeOnMorePictureImage
ClickMeSeeOnMoreVideo
Fruit: Processer Processed Processing food Menu : 1.Coconut iceCream Milk
Method: All Coconut Works: Coconut iceCream Milk
Recipe Procedure: Coconut iceCream Milk Method: How to make made cook: Ingredients: 1-10 glass of concentrated coconut milk, 1-20 tablespoons of granulated sugar, 1-20 tablespoons of salt, 1-20 tablespoon of cornstarch, 1-10 kilograms of roasted, fried, or boiled peanuts, corn kernels, and cashews, Coconut water (from 1-10 young or fragrant coconuts), Young coconut flesh (grated or sliced), Fresh milk/whipped cream (some recipes use a thicker consistency) 1-10 glass, Pandan leaves (to add aroma). or Coconut milk (thick coconut cream or ready-made coconut milk), Coconut water (from young coconuts or fragrant coconut water), Young coconut flesh (grated or shredded), Sugar or palm sugar, Salt, Fresh milk/whipping cream (some recipes add softness), cornstarch/tapioca starch (helps to smooth the texture), pandan leaves (adds fragrance). Method: 1. Prepare the coconut cream: Steam the grated coconut, squeeze out the coconut water, and add pandan leaves. 2. Mixing: Combine the extracted coconut cream with coconut water, sugar, salt, fresh milk/whipping cream, and flour (if using). Stir well and heat over low heat. 3. Churning: Let the mixture cool, then churn it in an ice cream maker until thick. Add coconut flesh: Add the young coconut flesh and stir until well combined. 4. Freeze: Chill until set into ice cream. Serve in a young coconut (use the whole coconut). Tip: Add toppings such as sticky rice cakes, rice crackers, various nuts, or drizzle with caramel, Using shredded young coconut flesh at the end will give it a delicious texture. Recipes that don't use a blender often use cornstarch mixed with coconut milk and then frozen, alternating with grating it until it's smooth and flaky. And the finally then You can eat it and Sell it to the Merchant or Customer with Who people you known. Where can i you me buy it, Where to Buy, Where to find it: Internet Online, Supermarkets. Widely available from street food stalls, especially in durian-growing regions like, and at markets. Online: Easily ordered from platforms like Abcdefg in various grades and sizes. Profit Useful Benefit Available: 1. Coconut water can be used as an electrolyte drink because it is rich in potassium. In addition, it is antiseptic and an isotonic solution, which is why coconut water can be used for intravenous injection. 2. In patients with dehydration or abnormally low blood volume, coconut water can be used to make coconut jelly by adding a small amount of weak acid to the coconut water. 3. Mature coconut flesh can be used to make coconut milk by grating the flesh into small pieces and squeezing the coconut milk out. 4. The coconut pulp left over from extracting coconut milk can also be used as animal feed. 5. The young shoots of the coconut tree, also known as coconut hearts, can be used in cooking. These shoots are very expensive because harvesting them kills the coconut tree. For this reason, a salad made with young coconut shoots is often called millionaire's salad. 6. Coconut fiber can be used to stuff mattresses, make mats, or for agricultural purposes, and can also be used as a body scrub. 7. Coconut oil is obtained by pressing or boiling crushed coconut pulp. It can be used in cooking or in cosmetics. Currently, biodiesel is also being produced from coconut oil. 8. Coconut shells can be used to make various crafts such as ladles, lamps, buttons, musical instruments like the Thai fiddle (saw u), etc. 9. The leaf stalks, or coconut fronds, are used to make coconut frond brooms. The leaves can be spun to make hats, etc. 10.Coconut embryo can be used as food. It contains auxin and other hormones, but has the highest concentration of auxin. When the embryo is extracted and the resulting liquid is used to water plants, it stimulates plant growth. And the finally then You can eat it and Sell it to the Merchant or Customer with Who people you known.
ClickMeSeeAllFull
ClickMeSeeOnMoreDetail
ClickMeSeeOnMorePictureImage
ClickMeSeeOnMoreVideo
Fruit: Processer Processed Processing food Menu : 2.Coconut Shake Smoothie Milk
Method: All Coconut Works: Coconut Shake Smoothie Milk
Recipe Procedure: Coconut Shake Smoothie Milk Method: How to make made cook: Ingredients: 1-4 coconuts, 1 bottle or carton of fresh milk, 1 can of condensed milk (sweetened or unsweetened), 1-4 glasses of ice, 1-2 tablespoons of salt. Method: 1. Crack open the coconut and pour the coconut water into a container. Scrape out all the coconut flesh. 2. Crush the ice into small pieces. 3. Using a blender, add coconut water, coconut flesh, condensed milk, ice, and fresh milk. Blend well. Gradually add the condensed milk, tasting as you go to adjust the sweetness to your liking. 4. Taste the mixture and adjust the seasoning as needed. Add a pinch of salt if you prefer a slightly salty taste. Blend until well combined. Pour into a glass, garnish with shredded coconut, and serve immediately. Tip: Use regular fresh milk, not low-fat or 0% fat, for a richer consistency. And the finally then You can eat it and Sell it to the Merchant or Customer with Who people you known. Where can i you me buy it, Where to Buy, Where to find it: Internet Online, Supermarkets. Widely available from street food stalls, especially in durian-growing regions like, and at markets. Online: Easily ordered from platforms like Abcdefg in various grades and sizes. Profit Useful Benefit Available: 1. Coconut water can be used as an electrolyte drink because it is rich in potassium. In addition, it is antiseptic and an isotonic solution, which is why coconut water can be used for intravenous injection. 2. In patients with dehydration or abnormally low blood volume, coconut water can be used to make coconut jelly by adding a small amount of weak acid to the coconut water. 3. Mature coconut flesh can be used to make coconut milk by grating the flesh into small pieces and squeezing the coconut milk out. 4. The coconut pulp left over from extracting coconut milk can also be used as animal feed. 5. The young shoots of the coconut tree, also known as coconut hearts, can be used in cooking. These shoots are very expensive because harvesting them kills the coconut tree. For this reason, a salad made with young coconut shoots is often called millionaire's salad. 6. Coconut fiber can be used to stuff mattresses, make mats, or for agricultural purposes, and can also be used as a body scrub. 7. Coconut oil is obtained by pressing or boiling crushed coconut pulp. It can be used in cooking or in cosmetics. Currently, biodiesel is also being produced from coconut oil. 8. Coconut shells can be used to make various crafts such as ladles, lamps, buttons, musical instruments like the Thai fiddle (saw u), etc. 9. The leaf stalks, or coconut fronds, are used to make coconut frond brooms. The leaves can be spun to make hats, etc. 10.Coconut embryo can be used as food. It contains auxin and other hormones, but has the highest concentration of auxin. When the embryo is extracted and the resulting liquid is used to water plants, it stimulates plant growth. And the finally then You can eat it and Sell it to the Merchant or Customer with Who people you known.
ClickMeSeeAllFull
ClickMeSeeOnMoreDetail
ClickMeSeeOnMorePictureImage
ClickMeSeeOnMoreVideo
Fruit: Processer Processed Processing food Menu : 3.Coconut Young Coconut Pancake Barbin Dessert
Method: All Coconut Works: Coconut Young Coconut Pancake Barbin Dessert
Recipe Procedure: Coconut Young Coconut Pancake Barbin Dessert Method: How to make made cook: Ingredients: 350 grams of grated young coconut flesh, 130 grams of glutinous rice flour, 5 grams of tapioca flour, 70 grams of granulated sugar, 50 grams of palm sugar, 3 grams of salt, 60 grams of coconut milk, 40 grams of pandan leaf extract. Method: 1. Combine glutinous rice flour and tapioca flour in a mixing bowl. Add palm sugar, granulated sugar, and salt. Knead with your hands until well combined, then add pandan leaf extract and coconut milk. Mix well. 2. Add the grated young coconut flesh to the mixture and stir to distribute it evenly. 3. Lightly grease a non-stick pan with oil and heat over low heat. Spoon the batter onto the pan. 4. Once it starts to cook, flip it over, turning it back and forth until the inside is thoroughly cooked and the cake has a nice, crispy surface. Serve warm. And the finally then You can eat it and Sell it to the Merchant or Customer with Who people you known. Where can i you me buy it, Where to Buy, Where to find it: Internet Online, Supermarkets. Widely available from street food stalls, especially in durian-growing regions like, and at markets. Online: Easily ordered from platforms like Abcdefg in various grades and sizes. Profit Useful Benefit Available: 1. Coconut water can be used as an electrolyte drink because it is rich in potassium. In addition, it is antiseptic and an isotonic solution, which is why coconut water can be used for intravenous injection. 2. In patients with dehydration or abnormally low blood volume, coconut water can be used to make coconut jelly by adding a small amount of weak acid to the coconut water. 3. Mature coconut flesh can be used to make coconut milk by grating the flesh into small pieces and squeezing the coconut milk out. 4. The coconut pulp left over from extracting coconut milk can also be used as animal feed. 5. The young shoots of the coconut tree, also known as coconut hearts, can be used in cooking. These shoots are very expensive because harvesting them kills the coconut tree. For this reason, a salad made with young coconut shoots is often called millionaire's salad. 6. Coconut fiber can be used to stuff mattresses, make mats, or for agricultural purposes, and can also be used as a body scrub. 7. Coconut oil is obtained by pressing or boiling crushed coconut pulp. It can be used in cooking or in cosmetics. Currently, biodiesel is also being produced from coconut oil. 8. Coconut shells can be used to make various crafts such as ladles, lamps, buttons, musical instruments like the Thai fiddle (saw u), etc. 9. The leaf stalks, or coconut fronds, are used to make coconut frond brooms. The leaves can be spun to make hats, etc. 10.Coconut embryo can be used as food. It contains auxin and other hormones, but has the highest concentration of auxin. When the embryo is extracted and the resulting liquid is used to water plants, it stimulates plant growth. And the finally then You can eat it and Sell it to the Merchant or Customer with Who people you known.
ClickMeSeeAllFull
ClickMeSeeOnMoreDetail
ClickMeSeeOnMorePictureImage
ClickMeSeeOnMoreVideo
Fruit: Processer Processed Processing food Menu : 4.Coconut Young Coconut Pancake Khanom Krok
Method: All Coconut Works: Coconut Young Coconut Pancake Khanom Krok
Recipe Procedure: Coconut Young Coconut Pancake Khanom Krok Method: How to make made cook: Ingredients: Ingredients for Khanom Krok batter: 200 grams rice flour 25 grams glutinous rice flour 1 1/2 cups coconut milk 1 1/2 cups very hot water 1 tablespoon granulated sugar 1 teaspoon salt 2 tablespoons vegetable oil (for greasing the Khanom Krok pan) Ingredients for the topping of Khanom Krok (coconut pancake): 1 1/2 cups coconut cream 1/2 cup granulated sugar 1 teaspoon salt 1 tablespoon rice flour Toppings for Khanom Krok (chopped scallions, corn) Method: Step 1: Prepare the batter for Khanom Krok (coconut pancake). 1. Mix the rice flour, glutinous rice flour, sugar, and salt together. 2. Gradually add the coconut milk, stirring constantly. 3. Then, gradually add the very hot water, stirring continuously until well combined. Let it rest. Step 2: Prepare the Coconut Topping 1. Next, let's make the coconut topping. Put the sugar, salt, and rice flour into another mixing bowl. 2. Gently fold the ingredients together, gradually adding the coconut cream. Stir until well combined, then set aside. Step 3: Make Khanom Krok + Serve 1. Use a cloth soaked in vegetable oil to grease the Khanom Krok pan thoroughly. Heat over medium heat. Carefully pour the Khanom Krok batter into the molds, leaving a small gap at the edge for drizzling with coconut milk. 2. When the batter starts to cook slightly, pour the coconut cream topping into the molds, making sure not to overflow. Then cover the stove for a while. 3. Sprinkle the toppings into each mold, as much or as little as you like, then cover again. Tip: Sprinkle the toppings into the molds while the batter is still slightly undercooked. This will help the batter hold the toppings in place. Wait until the edges of the pancakes start to become crispy and brown, then use a spoon to remove them from the molds and serve. And the finally then You can eat it and Sell it to the Merchant or Customer with Who people you known. Where can i you me buy it, Where to Buy, Where to find it: Internet Online, Supermarkets. Widely available from street food stalls, especially in durian-growing regions like, and at markets. Online: Easily ordered from platforms like Abcdefg in various grades and sizes. Profit Useful Benefit Available: 1. Coconut water can be used as an electrolyte drink because it is rich in potassium. In addition, it is antiseptic and an isotonic solution, which is why coconut water can be used for intravenous injection. 2. In patients with dehydration or abnormally low blood volume, coconut water can be used to make coconut jelly by adding a small amount of weak acid to the coconut water. 3. Mature coconut flesh can be used to make coconut milk by grating the flesh into small pieces and squeezing the coconut milk out. 4. The coconut pulp left over from extracting coconut milk can also be used as animal feed. 5. The young shoots of the coconut tree, also known as coconut hearts, can be used in cooking. These shoots are very expensive because harvesting them kills the coconut tree. For this reason, a salad made with young coconut shoots is often called millionaire's salad. 6. Coconut fiber can be used to stuff mattresses, make mats, or for agricultural purposes, and can also be used as a body scrub. 7. Coconut oil is obtained by pressing or boiling crushed coconut pulp. It can be used in cooking or in cosmetics. Currently, biodiesel is also being produced from coconut oil. 8. Coconut shells can be used to make various crafts such as ladles, lamps, buttons, musical instruments like the Thai fiddle (saw u), etc. 9. The leaf stalks, or coconut fronds, are used to make coconut frond brooms. The leaves can be spun to make hats, etc. 10.Coconut embryo can be used as food. It contains auxin and other hormones, but has the highest concentration of auxin. When the embryo is extracted and the resulting liquid is used to water plants, it stimulates plant growth. And the finally then You can eat it and Sell it to the Merchant or Customer with Who people you known.
ClickMeSeeAllFull
ClickMeSeeOnMoreDetail
ClickMeSeeOnMorePictureImage
ClickMeSeeOnMoreVideo
Fruit: Processer Processed Processing food Menu : 5.Coconut Young Coconut Pudding Custard Khanom Thuai
Method: All Coconut Works: Coconut Young Coconut Pudding Custard Khanom Thuai
Recipe Procedure: Coconut Young Coconut Pudding Custard Khanom Thuai Method: How to make made cook: Ingredients: Ingredients for Pudding Custard Khanom Thuai batter: 50 grams of rice flour, 3 tablespoons of tapioca starch, 1 tablespoon of mung bean flour, 4 tablespoons of concentrated pandan leaf juice, 140 grams of palm sugar, 1 cup of coconut milk. Ingredients for the topping of Pudding Custard Khanom Thuai: Coconut cream topping: 25 grams of rice flour, 330 milliliters of coconut milk, ¾ teaspoon of salt Method: 1. Set up a steamer over high heat and steam the small cups for 2 minutes to heat them up. For the cake batter, mix rice flour, tapioca starch, and mung bean flour with pandan leaf water. Knead the mixture for 3 minutes, Add the palm sugar and continue kneading until the sugar is well dissolved. Add the coconut milk, mix well, and then strain. 2. Spoon the mixture into the small cups, filling them ¾ full. Cover and steam for 8 minutes. 3. To make the topping, mix the rice flour, salt, and coconut milk together. 4.Pour the topping over the cakes and steam for another 5 minutes. Let them cool slightly. And eat it immediately. And the finally then You can eat it and Sell it to the Merchant or Customer with Who people you known. Where can i you me buy it, Where to Buy, Where to find it: Internet Online, Supermarkets. Widely available from street food stalls, especially in durian-growing regions like, and at markets. Online: Easily ordered from platforms like Abcdefg in various grades and sizes. Profit Useful Benefit Available: 1. Coconut water can be used as an electrolyte drink because it is rich in potassium. In addition, it is antiseptic and an isotonic solution, which is why coconut water can be used for intravenous injection. 2. In patients with dehydration or abnormally low blood volume, coconut water can be used to make coconut jelly by adding a small amount of weak acid to the coconut water. 3. Mature coconut flesh can be used to make coconut milk by grating the flesh into small pieces and squeezing the coconut milk out. 4. The coconut pulp left over from extracting coconut milk can also be used as animal feed. 5. The young shoots of the coconut tree, also known as coconut hearts, can be used in cooking. These shoots are very expensive because harvesting them kills the coconut tree. For this reason, a salad made with young coconut shoots is often called millionaire's salad. 6. Coconut fiber can be used to stuff mattresses, make mats, or for agricultural purposes, and can also be used as a body scrub. 7. Coconut oil is obtained by pressing or boiling crushed coconut pulp. It can be used in cooking or in cosmetics. Currently, biodiesel is also being produced from coconut oil. 8. Coconut shells can be used to make various crafts such as ladles, lamps, buttons, musical instruments like the Thai fiddle (saw u), etc. 9. The leaf stalks, or coconut fronds, are used to make coconut frond brooms. The leaves can be spun to make hats, etc. 10.Coconut embryo can be used as food. It contains auxin and other hormones, but has the highest concentration of auxin. When the embryo is extracted and the resulting liquid is used to water plants, it stimulates plant growth. And the finally then You can eat it and Sell it to the Merchant or Customer with Who people you known.
ClickMeSeeAllFull
ClickMeSeeOnMoreDetail
ClickMeSeeOnMorePictureImage
ClickMeSeeOnMoreVideo
Fruit: Processer Processed Processing food Menu : 6.Coconut Young Coconut Jelly Pudding
Method: All Coconut Works: Coconut Young Coconut Jelly Pudding
Recipe Procedure: Coconut Young Coconut Jelly Pudding Method: How to make made cook: Ingredients: 1.5 liters of coconut water, young coconut flesh (grated), 13 grams of agar powder, sugar (to taste) salt (to taste) Method: 1. Mix the coconut water, sugar, and agar powder. Stir until well combined. Once the agar powder and sugar have dissolved, heat the mixture over medium heat. 2. Continue stirring until the jelly starts to boil, then add the young coconut. Simmer over low heat for about 10 minutes (remember to skim off the foam). 3. The coconut jelly is now cooked. Prepare to scoop the jelly into the coconut shells. 4. Spoon the jelly into the coconut shell. Scoop carefully, as it's hot, Spoon the jelly into the balls until full, then refrigerate for 2-3 hours. They are then ready to eat. And the finally then You can eat it and Sell it to the Merchant or Customer with Who people you known. Where can i you me buy it, Where to Buy, Where to find it: Internet Online, Supermarkets. Widely available from street food stalls, especially in durian-growing regions like, and at markets. Online: Easily ordered from platforms like Abcdefg in various grades and sizes. Profit Useful Benefit Available: 1. Coconut water can be used as an electrolyte drink because it is rich in potassium. In addition, it is antiseptic and an isotonic solution, which is why coconut water can be used for intravenous injection. 2. In patients with dehydration or abnormally low blood volume, coconut water can be used to make coconut jelly by adding a small amount of weak acid to the coconut water. 3. Mature coconut flesh can be used to make coconut milk by grating the flesh into small pieces and squeezing the coconut milk out. 4. The coconut pulp left over from extracting coconut milk can also be used as animal feed. 5. The young shoots of the coconut tree, also known as coconut hearts, can be used in cooking. These shoots are very expensive because harvesting them kills the coconut tree. For this reason, a salad made with young coconut shoots is often called millionaire's salad. 6. Coconut fiber can be used to stuff mattresses, make mats, or for agricultural purposes, and can also be used as a body scrub. 7. Coconut oil is obtained by pressing or boiling crushed coconut pulp. It can be used in cooking or in cosmetics. Currently, biodiesel is also being produced from coconut oil. 8. Coconut shells can be used to make various crafts such as ladles, lamps, buttons, musical instruments like the Thai fiddle (saw u), etc. 9. The leaf stalks, or coconut fronds, are used to make coconut frond brooms. The leaves can be spun to make hats, etc. 10.Coconut embryo can be used as food. It contains auxin and other hormones, but has the highest concentration of auxin. When the embryo is extracted and the resulting liquid is used to water plants, it stimulates plant growth. And the finally then You can eat it and Sell it to the Merchant or Customer with Who people you known.
ClickMeSeeAllFull
ClickMeSeeOnMoreDetail
ClickMeSeeOnMorePictureImage
ClickMeSeeOnMoreVideo
Fruit: Processer Processed Processing food Menu : 7.Coconut Cocoanut Dry Candied Ribbons Sticky
Method: All Coconut Works: Coconut Cocoanut Dry Candied Ribbons Sticky
Recipe Procedure: Coconut Cocoanut Dry Candied Ribbons Sticky Method: How to make made cook: Ingredients: 200 grams grated coconut, 1/2 cup pandan leaf juice, 1/4 teaspoon salt (optional), 1 cup granulated sugar (optional). Method: 1. Grate the mature coconut into thin strands. (Once you have the grated coconut, try not to grate all the way to the shell, only using the white flesh.) 2. Prepare concentrated pandan leaf water (made by blending pandan leaves with water). Add grated coconut, sugar, pandan leaf water, and salt to a pan. 3. Turn on the heat to medium, stirring constantly until the water has reduced, then turn off the heat. 4. Next, use a spoon and fork to scoop out bite-sized pieces of coconut jelly, place them in a container, and let them dry in the sun or in an oven at 50 degrees Celsius until completely dry. And the finally then You can eat it and Sell it to the Merchant or Customer with Who people you known. Where can i you me buy it, Where to Buy, Where to find it: Internet Online, Supermarkets. Widely available from street food stalls, especially in durian-growing regions like, and at markets. Online: Easily ordered from platforms like Abcdefg in various grades and sizes. Profit Useful Benefit Available: 1. Coconut water can be used as an electrolyte drink because it is rich in potassium. In addition, it is antiseptic and an isotonic solution, which is why coconut water can be used for intravenous injection. 2. In patients with dehydration or abnormally low blood volume, coconut water can be used to make coconut jelly by adding a small amount of weak acid to the coconut water. 3. Mature coconut flesh can be used to make coconut milk by grating the flesh into small pieces and squeezing the coconut milk out. 4. The coconut pulp left over from extracting coconut milk can also be used as animal feed. 5. The young shoots of the coconut tree, also known as coconut hearts, can be used in cooking. These shoots are very expensive because harvesting them kills the coconut tree. For this reason, a salad made with young coconut shoots is often called millionaire's salad. 6. Coconut fiber can be used to stuff mattresses, make mats, or for agricultural purposes, and can also be used as a body scrub. 7. Coconut oil is obtained by pressing or boiling crushed coconut pulp. It can be used in cooking or in cosmetics. Currently, biodiesel is also being produced from coconut oil. 8. Coconut shells can be used to make various crafts such as ladles, lamps, buttons, musical instruments like the Thai fiddle (saw u), etc. 9. The leaf stalks, or coconut fronds, are used to make coconut frond brooms. The leaves can be spun to make hats, etc. 10.Coconut embryo can be used as food. It contains auxin and other hormones, but has the highest concentration of auxin. When the embryo is extracted and the resulting liquid is used to water plants, it stimulates plant growth. And the finally then You can eat it and Sell it to the Merchant or Customer with Who people you known.
ClickMeSeeAllFull
ClickMeSeeOnMoreDetail
ClickMeSeeOnMorePictureImage
ClickMeSeeOnMoreVideo
Fruit: Processer Processed Processing food Menu : 8.Coconut Young Coconut Tarts
Method: All Coconut Works: Coconut Young Coconut Tarts
Recipe Procedure: Coconut Young Coconut Tarts Method: How to make made cook: Ingredients: Tart Crust Ingredients: 500 grams all-purpose flour, 250 grams chilled butter, 2 tablespoons granulated sugar, 1/2 teaspoon salt, 80 grams water, 1 egg yolk. Method: Tart Crust Ingredients: 1. Sift the all-purpose flour and set aside. 2. Mix the egg yolks, water, sugar, and salt together and set aside. 3. Knead the chilled flour and butter together. Gradually add the egg yolk mixture to the flour mixture, continuing to knead until smooth and well combined. 4. Press the dough into the desired molds. Bake at 180°C for approximately 20 minutes, or until cooked. Remove from the oven and let it cool. Ingredients for the young coconut filling: 120 grams coconut milk, 110 grams evaporated milk, 20 grams coconut water, 30 grams salted butter, 20 grams cornstarch, 50 grams granulated sugar, 100 grams young coconut flesh, cut into pieces as desired, 1/2 teaspoon salt, 1 teaspoon agar powder, 30 grams unsweetened whipped cream. Method: Ingredients for the young coconut filling: 1. Measure out the salted butter and set aside. 2. Measure out the evaporated milk and cornstarch, mix them together, and set aside. 3. Add the remaining ingredients to a pot or pan and stir the filling until well combined. Cook over medium-low heat. 4. Once the mixture starts to heat up and the sugar has melted, add the butter. Once the butter has melted, add the cornstarch mixture. At this point, the mixture will begin to thicken; stir quickly until it boils vigorously, then turn off the heat. Fill the tart shells with the young coconut filling as desired. And eat it. And the finally then You can eat it and Sell it to the Merchant or Customer with Who people you known. Where can i you me buy it, Where to Buy, Where to find it: Internet Online, Supermarkets. Widely available from street food stalls, especially in durian-growing regions like, and at markets. Online: Easily ordered from platforms like Abcdefg in various grades and sizes. Profit Useful Benefit Available: 1. Coconut water can be used as an electrolyte drink because it is rich in potassium. In addition, it is antiseptic and an isotonic solution, which is why coconut water can be used for intravenous injection. 2. In patients with dehydration or abnormally low blood volume, coconut water can be used to make coconut jelly by adding a small amount of weak acid to the coconut water. 3. Mature coconut flesh can be used to make coconut milk by grating the flesh into small pieces and squeezing the coconut milk out. 4. The coconut pulp left over from extracting coconut milk can also be used as animal feed. 5. The young shoots of the coconut tree, also known as coconut hearts, can be used in cooking. These shoots are very expensive because harvesting them kills the coconut tree. For this reason, a salad made with young coconut shoots is often called millionaire's salad. 6. Coconut fiber can be used to stuff mattresses, make mats, or for agricultural purposes, and can also be used as a body scrub. 7. Coconut oil is obtained by pressing or boiling crushed coconut pulp. It can be used in cooking or in cosmetics. Currently, biodiesel is also being produced from coconut oil. 8. Coconut shells can be used to make various crafts such as ladles, lamps, buttons, musical instruments like the Thai fiddle (saw u), etc. 9. The leaf stalks, or coconut fronds, are used to make coconut frond brooms. The leaves can be spun to make hats, etc. 10.Coconut embryo can be used as food. It contains auxin and other hormones, but has the highest concentration of auxin. When the embryo is extracted and the resulting liquid is used to water plants, it stimulates plant growth. And the finally then You can eat it and Sell it to the Merchant or Customer with Who people you known.
ClickMeSeeAllFull
ClickMeSeeOnMoreDetail
ClickMeSeeOnMorePictureImage
ClickMeSeeOnMoreVideo
Fruit: Processer Processed Processing food Menu : 9.Coconut Young Coconut Pie
Method: All Coconut Works: Coconut Young Coconut Pie
Recipe Procedure: Coconut Young Coconut Pie Method: How to make made cook: Ingredients: Step1: Pie Crust Ingredients: 400 grams all-purpose flour, 20 grams icing sugar, 1 teaspoon salt, 60 grams unsalted butter, 70 grams shortening, 2 egg yolks (size 2), 1+1/2 teaspoons vinegar, 1/4 cup ice-cold water. Method: Pie Crust Ingredients: 1.Sift the flour together with the icing sugar. Add the salt and mix well. Add the butter and shortening to the flour mixture. 2.Use your hands to mix and knead the flour until it resembles small grains of sand, or you can use a pastry cutter. Mix the egg yolks, distilled vinegar, and ice-cold water together. 3. Gradually pour the egg yolk mixture into the flour mixture. Use a fork to gently fold the flour into a ball. Just fold gently; do not knead, as the dough will become too sticky. 4. Once the dough has formed a ball using a fork or spatula, gently press and knead it with your hands. Don't knead too hard or for too long; just enough to make a ball. Kneading for too long will make the dough sticky, If the dough is too dry, add ice-cold water one tablespoon at a time. Don't add too much at once, or the dough will become soggy. Once the dough forms a ball, cover it with plastic wrap or a lid and refrigerate for about 1 hour. Step2: Ingredients for the Young Coconut Filling: Coconut water (part 1) 1/2 cup, Coconut water (part 2) 1+1/2 cups, Cornstarch 1/4 cup, Young coconut flesh 350 grams, Evaporated milk 1/4 cup (fresh milk or coconut milk can also be used), Sweetened condensed milk 1/3 cup, White sugar 1/4 cup (adjust to taste), Salt 1/4 teaspoon. Method: Ingredients for the Young Coconut Filling: 1. Mix the coconut water (part 1) with the cornstarch and set aside. 2. Use a heavy-duty pot and heat over medium-low heat. Add the coconut water (part 2). Once the coconut water simmers slightly (not too much), add the coconut flesh. 3. Add evaporated milk, condensed milk, sugar, and salt. Stir for a while until the ingredients are well combined. At this stage, taste it and adjust the seasoning to your liking. 4. Pour in the coconut water mixed with cornstarch and stir until thickened, but not too thick. Remove from the heat. This consistency is ideal; not too thick, not too thin, or the pie will become soggy. Let it cool completely before using. Step3: Method: How to make young coconut pie: 1. Remove the pie dough from the refrigerator and knead it for about 1-2 minutes, just enough to combine the ingredients. Divide the dough into two parts: a 70:30 ratio. Use the larger piece for the base and the smaller piece for the topping. Roll or flatten the dough into a thin or thick sheet as desired. (Personally, I don't like it too thin because the dough contributes to the deliciousness of the pastry when eaten with the filling, but the dough shouldn't be too thick either.) I like the crust this thick; it's just right. 2. Place the base dough into a 3-pound cake pan that has been lightly greased with shortening. Press the dough evenly. Add the filling and spread it evenly. Cover with another sheet of dough, Press the edges together. Trim off any excess, uneven dough. Decorate as desired. Use a fork to press the edges of the pie, or you can do it like you would for puff pastry. 3. Apply a thin layer of pure egg yolk to your face for a beautiful color. 4. Use a knife to score the surface of the pastry along the lines you will cut, to create air vents during baking (do not cut all the way through, just enough to create openings). Bake at 225 degrees Celsius using both top and bottom heat, without the fan, for approximately 30 minutes, Then reduce the temperature to 180 degrees Celsius and use only bottom heat for another 30 minutes. The total baking time is 1 hour. It's done! The aroma fills the room; it's incredibly enticing. Remove from the mold and let it cool before cutting. Chilling it is even better. And the finally then You can eat it and Sell it to the Merchant or Customer with Who people you known. Where can i you me buy it, Where to Buy, Where to find it: Internet Online, Supermarkets. Widely available from street food stalls, especially in durian-growing regions like, and at markets. Online: Easily ordered from platforms like Abcdefg in various grades and sizes. Tip: Using a 2-pound pan will fill the pan perfectly. However, if you use a 3-pound pan as intended, the cake will not fill the pan completely, but will be about 3/4 full. This results in a cake that isn't too tall, is wider, and looks more appealing. Those who sell cakes recommend using a 3-pound pan as it allows for more slices, When making the pie dough, there's no need to knead it, as this will make the dough sticky. Just gently gather the dough together into a ball. Let the pie dough rest in the refrigerator for at least 1 hour, Vinegar is an essential ingredient that helps the dough become more elastic than typical pie crusts, so it's indispensable. However, apple cider vinegar can also be used, Use only size 2 eggs. If the batter is dry, add water one tablespoon at a time. Coconut water makes the filling more fragrant and delicious. You can use plain water instead, but it won't taste as good. Adjust the amount of sugar to your liking. Taste and adjust to your preference, Stir the filling carefully, being careful not to let it thicken too much. Bake at 225 degrees Celsius using both top and bottom heat (no fan) for about 30 minutes. Then reduce the temperature to 180 degrees Celsius and use only bottom heat for another 30 minutes. The total baking time is 1 hour, Type of flour: I used Kite brand all-purpose flour, but other brands of all-purpose flour can be used instead. Sugar: I recommend white granulated sugar because the filling will be white, but if you're not particular about it being white, you can use any type of sugar. And the finally then You can eat it and Sell it to the Merchant or Customer with Who people you Know Knew known.
ClickMeSeeAllFull
ClickMeSeeOnMoreDetail
ClickMeSeeOnMorePictureImage
ClickMeSeeOnMoreVideo
Fruit: Processer Processed Processing food Menu : 10.Coconut Young Coconut Puff Pastry Croissant
Method: All Coconut Works: Coconut Young Coconut Puff Pastry Croissant
Recipe Procedure: Coconut Young Coconut Puff Pastry Croissant Method: How to make made cook: Ingredients: Croissant Ingredients For the dough: 500 g all-purpose flour, 250 ml fresh milk, 10 g dry yeast, 50 g granulated sugar, 10 g salt, 30 g butter (room temperature), For folding the dough: 250 g flat butter, For brushing the top: 1 egg (for brushing). Method 1: 1. Combine flour, sugar, salt, and yeast in a mixing bowl. Add milk and butter. Knead the mixture until well combined, about 10-15 minutes. 2. Let the dough rest in a bowl covered with plastic wrap for about 1 hour, or until it has doubled in size. Roll the dough into a rectangle, place a sheet of butter in the center, and fold the dough over the butter. 3. Roll the dough into a rectangle again, fold it into 3 layers, and refrigerate for 30 minutes. Repeat step 5 two more times. 4. Roll the dough into a triangle, cut into small triangles, and roll from the base to the top. Let the rolled dough rest for about 1 hour. Brush the top of the croissants with egg wash. Bake at 190 degrees Celsius for about 15-20 minutes, or until golden brown. Method 2: Step 1: Part 1: Preparing the Young Coconut Filling 1. Prepare the coconut: Peel the young coconut, grate the coconut flesh, and remove the black outer skin. 2. Making the filling: Combine the shredded coconut, sugar, and a pinch of salt. Cook over low heat, stirring until the sugar coats the coconut (you can continue baking at 90-100°C to dry it slightly if desired). Step 2: Part 2: Making Croissant Dough (Briefly) 1. Mixing the Dough: Combine T45/T55 flour, yeast, sugar, salt, fresh milk, cold water, and tremollin (if available). 2. Kneading the dough: Use a dough hook attachment to knead the dough until it becomes elastic and reaches a temperature of 24-26°C. 3. Wrap the butter: Crush/roll the butter into a flat sheet (e.g., 15x15 cm) and wrap it, then set aside. 4. Rolling the dough: Roll out the dough into a sheet, place the prepared butter in the center, then fold it over and roll it into layers, alternating with resting the dough in the refrigerator. (This process is called lamination). Step 3: Part 3: Assembling and Baking Croissants 1. Cutting and Shaping: Roll the dough into a thin sheet, cut into triangles, and place the prepared young coconut filling at the base of each triangle. Roll them up to form croissants. 2. Proofing: Place the shaped croissants on a tray and let them rest in a warm place until they puff up. 3. Egg wash: Before baking, brush the surface of the croissants with a mixture of egg yolk and a little water. 4. Baking: Bake in an oven at approximately 180-200°C (according to the recipe) for about 15-20 minutes, or until the surface is golden brown. And the finally then You can eat it and Sell it to the Merchant or Customer with Who people you known. Where can i you me buy it, Where to Buy, Where to find it: Internet Online, Supermarkets. Widely available from street food stalls, especially in durian-growing regions like, and at markets. Online: Easily ordered from platforms like Abcdefg in various grades and sizes. Additional tips: Tips for making delicious croissants like a professional. Making croissants as delicious as those made by a professional involves many factors, starting from the choice of ingredients to the preparation process. Let's take a look at some of these tips, Use high-quality butter. Butter is a key ingredient that gives croissants their fragrant aroma and delicious taste. Control the temperature. Keep the dough and butter cool throughout the folding process, Fold the dough carefully. Correct folding will create beautiful layers of dough. Let the dough rest sufficiently. Resting the dough allows the gluten to relax, resulting in a softer croissant texture, Control the humidity; be careful not to let the dough dry out too much during resting. Bake at the right temperature. The correct temperature will allow the croissants to rise and have a beautiful color. Freshness: Use fresh coconut for the best aroma and flavor. Cooling: Keeping the flour and butter at a consistently cool temperature is very important. And the finally then You can eat it and Sell it to the Merchant or Customer with Who people you Know Knew known.
ClickMeSeeAllFull
ClickMeSeeOnMoreDetail
ClickMeSeeOnMorePictureImage
ClickMeSeeOnMoreVideo
Fruit: Processer Processed Processing food Menu: 1.Strawberry Ice SCream Milk Cone
Method: All Works: Strawberry Ice Scream Milk Cone
Recipe Procedure: Strawberry Ice Scream Milk Cone Method: How to make made cook: Ingredients: 100-200 grams of frozen strawberries, 1-450 grams of whipped cream, 1 can of condensed milk, 1/2 teaspoon of lemon juice, 50 grams of granulated sugar, vanilla extract(if you have), strawberry flavor(if you have). Method 1: 1. For leftover whipped cream (not consumed within 3 days), freeze it first. Before whipping, let it thaw in the refrigerator overnight. 2. Whip the cream and condensed milk. Add a little vanilla and strawberry extract. Whipped until slightly fluffy. 3. Cut the frozen strawberries into your desired size. Add the cut strawberries and mix well. Reserve some for decoration. 4. You will get ice cream with this consistency. Pour into a container and decorate with the remaining frozen strawberries. Close the lid and freeze overnight. Scoop. Ready to eat. And the finally then You can eat it and Sell it to the Merchant or Customer with Who people you known. Where can i you me buy it, Where to Buy, Where to find it: Internet Online, Supermarkets. Widely available from street food stalls, especially in durian-growing regions like, and at markets. Online: Easily ordered from platforms like Abcdefg in various grades and sizes. Additional tips Profit Useful Benefit Available Nutrition: Strawberries are rich in vitamins A, B, and C, They also contain folic acid and dietary fiber. And the finally then You can eat it and Sell it to the Merchant or Customer with Who people you Know Knew known.
ClickMeSeeAllFull
ClickMeSeeOnMoreDetail
ClickMeSeeOnMorePictureImage
ClickMeSeeOnMoreVideo
Fruit: Processer Processed Processing food Menu: 2.Strawberry Ice Cream Sandwiches
Method: All Works: Strawberry Ice Cream Sandwiches
Recipe Procedure: Strawberry Ice Cream Sandwiches Method: How to make made cook: Ingredients: Roasted Strawberry Ice Cream: 1 lb. strawberries sliced 2 Tbsp sugar 6 large egg yolks 1 large whole egg ½ cup sugar ½ tsp kosher salt 2 oz freeze dried strawberries finely ground to powder 2 cups heavy cream Brownies: Your favorite boxed brownie mix Method : Step 1: To roast strawberries: 1.Toss sliced strawberries with sugar, spread onto baking sheet in a single layer. Roast at 375°F for 25 minutes. 2.Remove from oven and transfer to a blender and puree. Transfer the puree to a bowl and chill in the refrigerator for 2 hours or overnight. Step 2: To make Roasted Strawberry Ice Cream: 1.Lightly grease a 9x5 inch loaf pan (this will prevent the plastic wrap from shifting around in the pan) and the line pan with plastic wrap, leaving a 4-inch overhang on each side. Set aside. 2.Fill a medium saucepan with water and bring to a simmer over medium heat. In a standmixer bowl, whisk together egg yolks, whole egg, sugar and salt. Set the bowl over the simmering water, making sure the bottom does not touch the water. Whisk the mixture continuously until it reaches 175°F. Transfer the bowl to the standmixer fitted with the whisk attachment. Beat on medium-high speed until mixture doubles in volume and is cool to the touch. Add the freeze-dried strawberries and beat until well combined. Turn off mixer and fold in strawberry puree. Set aside. 3.mixer and fold in strawberry puree. Set aside. In a second bowl, beat heavy cream until soft peaks form. Add half of the whipped cream to the whipped egg mixture and fold until just streaky. Add in remaining whipped cream and fold until well combined and no streaks remain. Pour the mixture into prepared loaf pan. Cover and freeze for at least 8 hours or overnight. Step 3: To assemble: Prepare boxed brownie mix according to directions, baking in a parchment-lined pan. Once brownies have cooled, cut into 24 squares (6 rows x 4 rows). Peel parchment paper from bottom of each square. For each sandwich, spoon 1/4 cup Roasted Strawberry Ice Cream on bottom of 1 brownie square. Top with a second brownie square, bottom side down; gently press together. Notes: The freeze dried strawberries are highly concentrated and give this ice cream a bright burst of flavor and provide a nice shot of color. Freeze dried strawberries can be found in most supermarkets or can easily be ordered from Amazon. Nutrition facts provided for Roasted Strawberry Ice Cream only, as brownie mix nutrition will vary. And the finally then You can eat it and Sell it to the Merchant or Customer with Who people you known. Where can i you me buy it, Where to Buy, Where to find it: Internet Online, Supermarkets. Widely available from street food stalls, especially in durian-growing regions like, and at markets. Online: Easily ordered from platforms like Abcdefg in various grades and sizes. Additional tips Profit Useful Benefit Available Nutrition : Strawberries are rich in vitamins A, B, and C, They also contain folic acid and dietary fiber. Serving: 1g, Calories: 357 kcal, Carbohydrates: 29g, Protein: 5g, Fat: 25g, Saturated Fat: 15g, Trans Fat: 1g, Cholesterol: 206 mg, Sodium: 151mg, Fiber: 2g, Sugar: 25g. And the finally then You can eat it and Sell it to the Merchant or Customer with Who people you Know Knew known.
ClickMeSeeAllFull
ClickMeSeeOnMoreDetail
ClickMeSeeOnMorePictureImage
ClickMeSeeOnMoreVideo
Fruit: Processer Processed Processing food Menu: 3.Strawberry Ice Cream Cake
Method: All Works: Strawberry Ice Cream Cake
Recipe Procedure: Strawberry Ice Cream Cake Method: How to make made cook: Ingredients: 1 cup Woolworths pistachio kernels, lightly toasted, 250grams butternut biscuits, broken, 1 1/2teaspoons Woolworths ground cinnamon, 80grams Woolworths unsalted butter, melted, 2L Woolworths vanilla ice-cream, softened slightly, 500grams strawberries, hulled, 375g raspberry jam. Method: 1.Line a 5cm-deep, 20.5x26cm pan with baking paper, extending 5cm above the edges on all sides. Process pistachio in a food processor until finely chopped. Reserve 2 tbs pistachio in a bowl. Add biscuits and cinnamon to the processor and pulse until a coarse crumb forms. Add ¼ cup to the reserved pistachio and set aside for the topping. 2.Add butter to the processor and pulse until the mixture just comes together. Transfer mixture to the prepared pan, pressing down with the back of a spoon. Freeze for 1 hour or until firm. 3.Top biscuit base with half of the ice-cream and level surface. Freeze for 1 hour. Thinly slice 250g strawberries. Place in a bowl with jam. Spread strawberry mixture over ice-cream and freeze for 1 hour or until slightly firm. 4.Spoon remaining ice-cream over jam mixture and freeze for 4 hours or overnight until firm. Slice remaining strawberries and arrange over top of ice-cream. Sprinkle with reserved pistachio mixture. Cut into pieces to serve. And the finally then You can eat it and Sell it to the Merchant or Customer with Who people you known. Where can i you me buy it, Where to Buy, Where to find it: Internet Online, Supermarkets. Widely available from street food stalls, especially in durian-growing regions like, and at markets. Online: Easily ordered from platforms like Abcdefg in various grades and sizes. Additional tips Profit Useful Benefit Available Nutrition : Strawberries are rich in vitamins A, B, and C, They also contain folic acid and dietary fiber. And the finally then You can eat it and Sell it to the Merchant or Customer with Who people you Know Knew known.
ClickMeSeeAllFull
ClickMeSeeOnMoreDetail
ClickMeSeeOnMorePictureImage
ClickMeSeeOnMoreVideo
Fruit: Processer Processed Processing food Menu: 4.Strawberry Milk WipeCream Shake
Method: All Works: Strawberry Milk WipeCream Shake
Recipe Procedure: Strawberry Milk WipeCream Shake Method: How to make made cook: Ingredients: 1/4(¼) cup milk 7 strawberries, hulled and sliced 1/4(¼) cup vanilla ice cream 1/4(¼) cup white sugar Wipe Cream(if you Have had has it.). Method: 1.In the container of a blender, combine milk, strawberries, ice cream, and sugar. Blend until smooth, about 10 seconds. Pour into a glass and drink with a wide straw. And the finally then You can eat it and Sell it to the Merchant or Customer with Who people you known. Where can i you me buy it, Where to Buy, Where to find it: Internet Online, Supermarkets. Widely available from street food stalls, especially in durian-growing regions like, and at markets. Online: Easily ordered from platforms like Abcdefg in various grades and sizes. Additional tips Profit Useful Benefit Available Nutrition : 317 = Calories, 5g = Fat, 67g = Carbs4g = Protein. Strawberries are rich in vitamins A, B, and C, They also contain folic acid and dietary fiber. And the finally then You can eat it and Sell it to the Merchant or Customer with Who people you Know Knew known.
ClickMeSeeAllFull
ClickMeSeeOnMoreDetail
ClickMeSeeOnMorePictureImage
ClickMeSeeOnMoreVideo
Fruit: Processer Processed Processing food Menu: 5.Strawberry Puff Pastry
Method: All Works: Strawberry Puff Pastry
Method: How to make made cook: Recipe Procedure: Strawberry Puff Pastry Ingredients: 1 sheet of puff pastry thawed, sprinkling of turbinado sugar, optional, STRAWBERRY PASTRY CREAM, 1 cup of strawberries, diced small, extra for garnish, 8 oz. mascarpone cheese, room temperature, 1 cup of heavy whipping cream, 1 teaspoon, vanilla, 1/2(½) cup powdered sugar, extra for dusting. Method: 1.Heat oven to 400 degrees and place some parchment on a baking sheet. 2.Cut your puff pastry into squares, you can easily get 6 to eight slices depending on the size of your puff pastry sheet, no docking necessary and If using turbinado sugar press some onto the tops and Place into the oven for 10- 15 minutes til nice and golden, ovens do vary so check. next Remove and let them cool down completely, When completely cooled you can slice them in half lengthwise. 3.To make the strawberry cream, place the mascarpone into a deep medium bowl using a hand mixer to smooth it out, adding the vanilla and powdered sugar, Pour in the heavy cream and continue to mix well until mixture holds together well and is not runny.Then Fold the diced strawberries into the cream mixture being careful not to add juice if there is some. 4.Pipe or spoon the mixture onto your pastry sheet bottoms, add a few extra sliced strawberries on top of the mixture if you want, put the lid on and sprinkle powdered sugar all over the top. Place on your serving plate with a couple whole fresh strawberries for garnish. And the finally then You can eat it and Sell it to the Merchant or Customer with Who people you known. Where can i you me buy it, Where to Buy, Where to find it: Internet Online, Supermarkets. Widely available from street food stalls, especially in durian-growing regions like, and at markets. Online: Easily ordered from platforms like Abcdefg in various grades and sizes. Additional tips Profit Useful Benefit Available Nutrition : Strawberries are rich in vitamins A, B, and C, They also contain folic acid and dietary fiber. And the finally then You can eat it and Sell it to the Merchant or Customer with Who people you Know Knew known.
ClickMeSeeAllFull
ClickMeSeeOnMoreDetail
ClickMeSeeOnMorePictureImage
ClickMeSeeOnMoreVideo
Fruit: Processer Processed Processing food Menu: 6.Strawberry Tart
Method: All Works: Strawberry Tart
Method: How to make made cook: Recipe Procedure: Strawberry Tart Ingredients: 5 tablespoons Unsalted Butter At room temperature 1/4 cup Granulated Sugar 1 large Egg At room temperature 1/2 teaspoon Pure Vanilla Extract 1 cup All-Purpose Flour 1/2 teaspoon Kosher Salt 1 cup Mashed Strawberries Washed and hulled 1/4 cup Granulated Sugar Plus 2 tablespoons zest of one Lemon 2 teaspoons Cornstarch 1/4 cup Sour Cream Full fat 1 tablespoon Dark Brown Sugar Packed 1/2 Vanilla Bean Seeds scraped out Small Strawberries For garnish, optional WipeCream(If you have!!!) Method: 1.In the bowl of an electric mixer fitted with the paddle attachment, cream together the butter and sugar for about 5 minutes. Add in the egg and vanilla and mix until incorporated. Add in the flour and salt on low speed and mix until just incorporated. Then Scrape the dough out onto a piece of plastic wrap and shape into a disk. Wrap and refrigerate for at least 1 hour or overnight. 2.Flour work surface and roll out your dough to 1/4" thick. Press the dough into the bottom and up the sides four 4″ tartlet pans. Place in the freezer for 10-15 minutes, or in the fridge for an hour. 3.When ready to bake, preheat the oven to 350°F. Line your crust-filled tart shell(s) with tin foil, and fill with pie weights or dried beans. Bake for 20 minutes. Remove the foil and weights from the tarts and bake for about 10 minutes more, or until the tart shells are golden. Let cool on a wire rack before filling. 4.In a small saucepan, combine all of the ingredients, and bring to a boil over medium-high heat. Then Continue to cook for about 5 minutes, until thickened. Allow to cool for 5 minutes, then divide into the four tartlet shells. Place in the fridge to chill. Then In a small bowl, stir together the sour cream, brown sugar, and vanilla, until smooth. Then Dollop onto the chilled tarts, and top with a mini strawberry. Ready to Serve or eat right away! And the finally then You can eat it and Sell it to the Merchant or Customer with Who people you known. Where can i you me buy it, Where to Buy, Where to find it: Internet Online, Supermarkets. Widely available from street food stalls, especially in durian-growing regions like, and at markets. Online: Easily ordered from platforms like Abcdefg in various grades and sizes. Additional tips Profit Useful Benefit Available Nutrition : Strawberries are rich in vitamins A, B, and C, They also contain folic acid and dietary fiber. And the finally then You can eat it and Sell it to the Merchant or Customer with Who people you Know Knew known.
ClickMeSeeAllFull
ClickMeSeeOnMoreDetail
ClickMeSeeOnMorePictureImage
ClickMeSeeOnMoreVideo
Fruit: Processer Processed Processing food Menu: 7.Strawberry Croissant
Method: All Works: Strawberry Croissant
Method: How to make made cook: Recipe Procedure: Strawberry Croissant Ingredients: Ingredients Croissant Dough Ingredients: 600 g (4 ¾ cups) all-purpose flour or (King Arthur’s organic flour options), 65 g (⅓ cup) granulated sugar, 12 g 2 teaspoons salt, 60 g (¼ cup) active sourdough starter 100% hydration, 205 g (1 cup) water, room temperature (34% (whatever)), 112 g (½ cup) whole milk, room temperature (18.5%(whatever)), 56 g (¼ cup) unsalted butter, cut into ½-inch pieces, chilled (9.5%), Optional: 1.5g (½ teaspoon) active dry yeast (0.2%), 40 g (½ cup) freeze-dried strawberries, crushed All-natural plant-based food coloring to make the base dough light pink any food coloring will work but I like to use this one because it’s made from simple ingredients. All-natural red plant-based food coloring needed for the dark pink layer Reserved for topping the dough: 25g ¼ cup Freeze dried strawberries whole and pieces, soaked in water. 170 g (3/4 cups) fresh strawberries, stemmed(Whatever). Butter Block: 340 g (1 ½ cups) unsalted butter, 84-86% butterfat, Egg Wash: 1 egg yolk, 1 Tbsp heavy cream. Strawberry Pastry Cream Filling: 500 g (2 cups) whole milk, 67 g (⅓ cups) granulated sugar, 40 g (4 Tablespoons) cornstarch, 2 large egg yolks, 2 teaspoons vanilla bean paste or vanilla extract, ¼ teaspoons salt, 150 g (Optional): 150g (⅔ cup) strawberries, stemmed and pureed. Method: Step 1: Prepare the Dough 1.(Optional) Make strawberry milk: This step can be omitted and you can simply use plain whole milk for this recipe, but if you’d like to add an extra burst of strawberry flavor, this is a great way to do it! Add the milk and fresh strawberries to a blender and blend on high speed until smooth. Reserve 112g total (1/2 cup) of the strawberry milk for step 2 and the rest can be used for anything else or enjoyed as is! 2.Mix the dough: In the bowl of a stand mixer, add flour, sugar, salt, milk (or strawberry milk if you made it in Step 1), sourdough starter, water, pink all-natural plant-based food coloring (to make the dough light pink), crushed freeze-dried strawberries, and optional active dry yeast if using. (Note: adding a tiny percentage of active dry yeast can achieve a proper fermentation process without taking a way any of the benefits of sourdough!). Mix on low speed with the dough hook attachment for 1 minute. Add the butter and continue mixing, scraping down the sides as needed, until a smooth dough forms about 3-4 minutes). 600g all purpose flour, 65 g sugar, 12g salt, (optional: 1.5g active dry yeast), 205g water, 112g whole milk (or strawberry milk), 60g sourdough starter, (optional: pink food coloring), 56g (1/4 cup) butter. 3.Make the dark pink dough: Remove the dough from the mixing bowl and slice off approximately 20% of it (~225g). Add the small (225g) piece back into your mixing bowl and add more of the all natural plant based pink food coloring and a little all-natural planted-based red food coloring. Mix until combined, and add more pink/red if needed until you achieve a hot pink color that is darker than the larger dough. 4.First rise: Shape both doughs into a ball and place each in a separate bowl. Optional: Add the dampened whole freeze dried strawberry slices to the main light pink dough for added flavor, color, and texture. Cover both doughs and let rise at room temperature for 3 – 6 hours. Once your doughs have increased in volume by roughly 1.5x, transfer to the fridge for a minimum of 4 hours or overnight (~12 hours). 5.Make the butter block: Here is a helpful video of Claire Saffitz demonstrating how to make a butter block at home. Start by laying out a large sheet of parchment paper. Place your sticks of butter next to each other in the center of the paper, and fold the sides of the paper over to fully enclose the butter. Flip the parchment paper over so that the folds are against the table. Using a rolling pin, lightly beat the butter into a ½’’ thick layer. Remove the butter from the parchment paper and re-wrap the butter, measuring the parchment paper so that it forms an 8’’ square. The ½’’ butter layer should be smaller than the 8’’ parchment paper square. Flip the packet over again and beat the butter into an 8’’x8’’ square that fills our the parchment paper. Refer to the video linked above for helpful visual cues for this process. Eventually, it will be easy to roll the butter out to the edges of the parchment paper and get a clean square shape. Place the butter in the fridge to firm up. 340g unsalted butter, 84-86% butterfat Step 2: Laminating the Dough 1.Prepare the dough for laminating: The next day, remove the main dough from the fridge and place it on a floured surface. Using your hand deflate the dough and form it into a square shape. Wrap the dough in plastic wrap on all sides. Using your rolling pin, roll the dough into a flat 8’’ x 8’’ square. Place the wrapped dough in the freezer for 20 minutes. Video: Preparing the Dough. 2.Roll the dough: Remove the butter from the refrigerator and the dough from the freezer. Unwrap the dough and place it on a lightly floured surface. Roll the dough, dusting with flour if needed, until it reaches 16’’ long while maintaining a width of 8 inches. 3.Lock in the butter: Place the butter in the center of the dough and peel off the parchment paper. The butter block should be aligned with the sides of the dough, with an equal amount of dough overhanging at the top and the bottom. Fold the overhanging flaps of the dough over the butter so that the two ends meet in the middle. If they don’t meet, gently tug until they do. Seal both sides of the dough together and pinch the remaining sides of the dough to full enclose the butter. Video: locking in the butter. 4.First Turn: Rotate the dough so the seam is vertical. Roll the dough, lengthwise, to create a 24’’ long sheet that is ¼’’ – ½’’ thick. With a knife or a dough cutter, trim the short ends of your rectangle so that you have a clean 24’’ long rectangle that is straight on all 4 sides. Take the shorter edge of the rectangle that’s farthest from you an fold it towards the center, lining up the edges. Press down lighty to make sure the dough sticks together. Do the same with the opposite side, leaving a small ⅛’’ gap between the edges in the middle. Next, fold the entire dough in half along this gap, bringing the top half down over the bottom half. At this point, you should have a recangular packet of dough, also known as a “book,” with four layers. This technique is referred to as the “first turn” or “book fold” and it quadruples the butter layers within the dough. Video: First Turn – Book Fold. 5.Rest the dough: Wrap the dough tightly in plastic wrap and place in the freezer for 15 minutes, then refrigerate for 1 hour. 6.Simple turn (second turn): Remove the dough from the fridge and let it sit at room temperature for about 5 minutes. Lightly flour your work surface and roll out the dough into a 24''x8'' rectable again, creating a long, narrow slab about ⅜’’ thick. Fold the dough into thirds. This is called the “simple turn,” and it triples the layers in the dough. Warp the dough again in plastic wrap and freeze for 15 minutes, then refrigerate for 1 hours. Video: Simple Turn. 7.Add the red layer: Remove the red dough from the fridge and place on a floured work surface. Roll the dough out out so that it’s the same size square as your main dough (about 8’’x8’’). Remove the main dough from the fridge and place on your floured work surface. Using a spray bottle or damped pastry brush, gently dampen the top of the main dough with a little bit of water. Add the red dough on top and gently beat with your rolling pin to make sure it sticks. Video: Adding a dough layer for bi-color croissants. 8.Preshape the dough: Flip your dough over so that the red layer is against the table. Using your rolling pin, roll the dough out into a 14’’ x 17’’ rectangle. Wrap and freeze for 20 minutes then refrigerate overnight, between 8-12 hours. Step 3: Shaping and Baking 1.Slice the dough: Remove the dough from the fridge and place it on a lightly floured surface. If necessary, re-roll the dough so that it’s a 14’’ x 17’’ rectangle. Carefully dust off any extra flour with a pastry brush. Use a knife or wheel cutter to trim any uneven edges so that you have a nice clean rectangle that’s exactly 14’’x16’’ now. Now slice the dough into four 4’’ x 14’’ rectangles. Starting with one rectangle, use a knife/wheel cutter and a ruler to slice a straight line from one corner of the rectangle to it’s opposite corner, creating two long equal triangles. Repeat the process with the remaining rectangles to create 8 triangles. Video: Shaping Croissants. 2.Roll the croissants: Using a knife or a wheel cutter, trim the base of your triangle to ensure it’s a nice straight line – you’re just looking to clean it up a bit, so trim as little as possible. Starting one triangle at a time, widen the base by gently tugging on the 2 corners of the bottom of the triangle. You’re looking to achieve a 3’’ base of the triangle. Then, running your fingers along the length of the triangle towards the point, gently pull to lengthen the triangle. Now you’re ready to roll it into a croissant! Lay out one triangle so that the dark pink side is against the table and the light pink side is facing up. Then, starting at the base of the triangle, roll the dough towards the tip to form a cresent shaped croissant. Repeat this process with all 8 triangles. Place the shaped croissants on a parchment-lined baking tray and cover loosely with plastic wrap. 3.Proof the croissants: There are two options for this step. Option 1 – Room temperature proof: Proof at room temperature for 4-6 hours until the croissants are jiggly and have roughly doubled in size. Option 2 – Faster proof with steam: Using a proofing box, countertop oven with a proof setting, or placing a pan filled with warm water in an oven to create steam, proof your croissants at 70F-75F for 2-3 hours until jiggly and doubled in size. 4.(Optional) Make the pastry cream: If you’d like to pipe your croissants with a delicious strawberry pastry cream, now is a great time to prepare that because it needs to sit for about 3 hours before it’s ready to pipe. Use the Strawberry Pastry Cream recipe outlined below. 5.Preheat oven and chill croissants: Once your croissants are done proofing, preheat your oven to 375F. Transfer the croissants to the fridge to chill for 15-20 minutes. 6.Egg wash: In a small bowl, whisk together the egg and heavy cream. Remove your croissants from the fridge. Using a pastry brush, apply the egg wash to tops of the croissants on the dark pink lines of dough, not the exposed light pink sides. Video: Egg wash. 7.Bake the croissants: Bake for 15 minutes. Rotate the sheet and bake for an additional 10-15 minutes until deep golden brown. Cool completely on baking sheets. 8.10-15 minutes until deep golden brown. Cool completely on baking sheets. Optional, Fill croissants: Fill a piping bag with a small piping tip attached. with the strawberry pastry cream. Use a small piping tip or skewer to poke a hole on the bottom side of each croissant by inserting the skewer three quarters of the way inside the croissant and rotating a few times to widen the opening. Insert the piping tip into the croissant and fill with strawberry pastry cream until the cream begins to poke out of the hole. 9.Enjoy your homemade sourdough croissants as is or with a delightful strawberry pastry cream filling! Or Eat it Right away! if you are hungry Right!. Strawberry Pastry Cream Sauce(Whatever If you want!!!): 1.Heat the milk: Pour 1.5 cups of the milk into a saucepan, and heat over medium heat to bring it to a simmer. Don’t bring to a full boil, 375g (1.5 cups) whole milk. 2.Whisk the remaining ingredients: In a separte bowl, add the egg yolks, sugar, cornstarch, remaining milk, and salt and whisk together. 125g (½ cup) milk, 67g (⅓ cups) granulated sugar, 40g (4 Tbsp) cornstarch, 2 large eggs, 2 tsp vanilla bean paste, ¼ tsp salt. 3.Pour in the milk: Once the milk reaches a swimmer remove it from the heat. Slowly pour the steaming hot milk into the bowl with the other ingredients, whisking constantly to temper the eggs. One the eggs have tempered, pour the mixture back into the saucepan. 4.Heat the mixture: Return the saucepan to the stove and heat over medium high heat, whisking constantly until the mixture starts to thicken and bubbles form. Lower the heat and cook for another 1-2 minutes. Remove from the heat. 5.Cover: Allow the pastry cream to cool for a few minutes, then place plastic wrap directly on top to prevent a skin from forming. Refrigerate for at least 3 hours. 6.Add the strawberries: Remove the mixture from the fridge and pour in the pureed fresh strawberries. Whisk together to create a strawberry swirl. 7.Add to a piping bag: Pour the mixture into a piping bag and use it for your croissants! Then to Serve to... or eat it Away! And the finally then You can eat it and Sell it to the Merchant or Customer with Who people you known. Where can i you me buy it, Where to Buy, Where to find it: Internet Online, Supermarkets. Widely available from street food stalls, especially in durian-growing regions like, and at markets. Online: Easily ordered from platforms like Abcdefg in various grades and sizes. Additional tips Profit Useful Benefit Available Nutrition : Strawberries are rich in vitamins A, B, and C, They also contain folic acid and dietary fiber. And the finally then You can eat it and Sell it to the Merchant or Customer with Who people you Know Knew known.
ClickMeSeeAllFull
ClickMeSeeOnMoreDetail
ClickMeSeeOnMorePictureImage
ClickMeSeeOnMoreVideo
Fruit: Processer Processed Processing food Menu: 8.Strawberry Yogurt
Method: All Works: Strawberry Yogurt
Method: How to make made cook: Recipe Procedure: Strawberry Yogurt Ingredients: ½ cup milk (or more to taste (any kind works – skim, 2%, whole, almond)), 1 cup vanilla yogurt (I used Greek vanilla, but regular works, too (plain is also fine!)), 1 tablespoon maple syrup (OR honey OR white sugar), 1 (10-12oz) package frozen strawberries (can also use fresh hulled, but then add 4-6 ice cubes as well). Method: 1.Place everything in a high-power blender in order given and blend until smooth. 1/2(½) cup milk,1 cup vanilla yogurt,1 tablespoon maple syrup,1 (10-12oz) package frozen strawberries 2.Serve immediately, or chill in the fridge for up to 2 hours. And the finally then You can eat it and Sell it to the Merchant or Customer with Who people you known. Where can i you me buy it, Where to Buy, Where to find it: Internet Online, Supermarkets. Widely available from street food stalls, especially in durian-growing regions like, and at markets. Online: Easily ordered from platforms like Abcdefg in various grades and sizes. Additional tips Profit Useful Benefit Available Nutrition : Strawberries are rich in vitamins A, B, and C, They also contain folic acid and dietary fiber. And the finally then You can eat it and Sell it to the Merchant or Customer with Who people you Know Knew known.
ClickMeSeeAllFull
ClickMeSeeOnMoreDetail
ClickMeSeeOnMorePictureImage
ClickMeSeeOnMoreVideo
Fruit: Processer Processed Processing food Menu: 9.Strawberry Pudding Jelly
Method: All Works: Strawberry Pudding Jelly
Method: How to make made cook: Recipe Procedure: Strawberry Pudding Jelly Ingredients: 2 tablespoons corn starch, 1/3 cup sugar, 1 pinch salt, 1 cup strawberries minced, 2 cups whole milk, 2 teaspoon vanilla, 2 egg yolks. Method: 1.Add cornstarch to medium sauce pan and then whisk in milk. Add rest of ingredients and mix well. 2.Put on stovetop over medium to medium high heat and mix. Continue mixing. The big risk here is scalding and continually mixing will help prevent this. 3.Once the mixture starts to bubble, you should notice it starting to thicken. When about the consistency of a gravy or… well.. pudding, remove from heat and continue to stir for two minutes. 4.Put pudding into separate container and put in fridge to cool around 1 - 4 hours or more than that your wants. The Finailly is Ready to Serve or Eat it right away!!! And the finally then You can eat it and Sell it to the Merchant or Customer with Who people you known. Where can i you me buy it, Where to Buy, Where to find it: Internet Online, Supermarkets. Widely available from street food stalls, especially in durian-growing regions like, and at markets. Online: Easily ordered from platforms like Abcdefg in various grades and sizes. Additional tips Profit Useful Benefit Available Nutrition : Strawberries are rich in vitamins A, B, and C, They also contain folic acid and dietary fiber. And the finally then You can eat it and Sell it to the Merchant or Customer with Who people you Know Knew known.
ClickMeSeeAllFull
ClickMeSeeOnMoreDetail
ClickMeSeeOnMorePictureImage
ClickMeSeeOnMoreVideo
Fruit: Processer Processed Processing food Menu: 10.Strawberry Pie
Method: All Works: Strawberry Pie
Method: How to make made cook: Recipe Procedure: Strawberry Pie Part 1: Ingredients: Crust: 1 cup all purpose flour(This is a simple shortbread crust that doesn’t require any rolling. Simply mix the ingredients together and press them into a deep dish pie plate.), 1/2 cup salted butter softened, 3 Tablespoons granulated sugar. Filling: 2 cups water, 2 cups sugar, 6 Tablespoons cornstarch, 6 ounce package strawberry jell-o, 3 pounds strawberries cleaned and de-stemmed. Method: Step 1: Crust: 1.In a medium bowl, combine flour, butter, and sugar. Mix well, then press into a buttered 10-inch deep dish pie plate. Bake at 375°F for 10-15 minutes, until lightly browned. Remove from oven and set aside to cool. Step 2: Filling: 1.In a large saucepan, combine water, sugar, and cornstarch. Bring to a boil, stirring, until thick and clear. 2.Remove from heat; add strawberry jell-o. 3.Mix well and cool at room temperature for 10-15 minutes. 4.Fold in strawberries and gently stir to coat. 5.Pour coated strawberries into baked pie crust. 6.Refrigerate until completely set. Serve with whipped cream as desired. Part 2: Ingredients: 2 (9-inch) unbaked pie crusts(This is a simple shortbread crust that doesn’t require any rolling. Simply mix the ingredients together and press them into a deep dish pie plate.), 1 ¼ cups white sugar, ⅓ cup all-purpose flour, ½ teaspoon ground cinnamon, 4 cups fresh strawberries, 2 tablespoons butter, cut into pieces. Method: 1.Gather all ingredients. Preheat the oven to 425 degrees F (220 degrees C), Place 1 crust in the bottom of a 9-inch pie pan. 2.Combine sugar, flour, and cinnamon in a bowl. Mix lightly through strawberries, Pour filling into the pastry-lined pan and dot with butter pieces. 3.Cover with top crust and cut slits in the top to vent. Seal and flute the edges. 4.Bake in the preheated oven until the crust is slightly browned, 35 to 45 minutes. Then Serve or Eat it. And the finally then You can eat it and Sell it to the Merchant or Customer with Who people you known. Where can i you me buy it, Where to Buy, Where to find it: Internet Online, Supermarkets. Widely available from street food stalls, especially in durian-growing regions like, and at markets. Online: Easily ordered from platforms like Abcdefg in various grades and sizes. Additional tips Profit Useful Benefit Available Nutrition : Strawberries are rich in vitamins A, B, and C, They also contain folic acid and dietary fiber. And the finally then You can eat it and Sell it to the Merchant or Customer with Who people you Know Knew known.
ClickMeSeeAllFull
ClickMeSeeOnMoreDetail
ClickMeSeeOnMorePictureImage
ClickMeSeeOnMoreVideo
Fruit: Processer Processed Processing food Menu: 1.Mulberry Ice Scream Milk Cone
Method: All Works: Mulberry Ice Scream Milk Cone
Method: How to make made cook: Recipe Procedure: Mulberry Ice Scream Milk Cone Ingredients: Mulberries: 100 grams (roughly chopped or blended), Coconut milk: 500 ml, Sugar: 8 tablespoons (adjust to the sweetness of the mulberries), Cornstarch: 3 tablespoons (helps to smooth the texture), Milk (evaporated milk): 100 ml (if unavailable, you can substitute with coconut milk), Salt: 1/2 teaspoon or more as desired, Vanilla extract: 1 teaspoon (optional). Method: 1.Prepare the mulberries: Wash the mulberries thoroughly, remove the stems, and chop them coarsely or blend them finely as desired. Mix the coconut milk: Pour the coconut cream, sugar, cornstarch, milk, salt, and vanilla extract into a pot. Stir until all the ingredients are well dissolved before heating it over the stove. 2.Making the ice cream mixture: Turn on low heat and stir the coconut milk continuously until it begins to thicken (to a consistency similar to condensed milk). Then turn off the heat and let it cool down. Adding the mulberry pulp: Once the coconut milk has warmed or cooled, add the prepared mulberry pulp and stir until well combined. 3. Freezing: Pour the mixture into a container or box, close the lid tightly, and place in the freezer overnight. 4. Serving: Once completely frozen, remove and serve. For an even smoother texture, you can blend it again after freezing and then refreeze. And the finally then You can eat it and Sell it to the Merchant or Customer with Who people you known. Where can i you me buy it, Where to Buy, Where to find it: Internet Online, Supermarkets. Widely available from street food stalls, especially in durian-growing regions like, and at markets. Online: Easily ordered from platforms like Abcdefg in various grades and sizes. Additional tips Profit Useful Benefit Available Nutrition : You can use plain yogurt instead of condensed milk for a sweeter, more tangy flavor. If you prefer a softer ice cream texture, stir it every 1-2 hours while freezing. Characteristics: Small fruit growing in clusters; reddish-brown bark. Benefits: High in beneficial nutrients, vitamins, and minerals, such as high in Vitamin C, comparable to mandarin oranges. Consumption: Eaten fresh, processed into jam, juice, desserts, or dried. Popular varieties: White mulberry (Morus alba), Black mulberry (Morus nigra), Red mulberry (Morus rubra). Mulberry (fashion brand) Origin: Founded in 1971 in Somerset, United Kingdom. Highlights: Produces luxury leather goods with high-quality craftsmanship. Popular models: Bayswater, Alexa, Darley Mulberry (fruit) Characteristics: Small fruit growing in clusters; reddish-brown bark. Benefits: High in beneficial nutrients, vitamins, and minerals, such as high in Vitamin C, comparable to mandarin oranges. Consumption: Eaten fresh, processed into jam, juice, desserts, or dried. Popular varieties: White mulberry (Morus alba), Black mulberry (Morus nigra), Red mulberry (Morus rubra). And the finally then You can eat it and Sell it to the Merchant or Customer with Who people you Know Knew known.
ClickMeSeeAllFull
ClickMeSeeOnMoreDetail
ClickMeSeeOnMorePictureImage
ClickMeSeeOnMoreVideo
Fruit: Processer Processed Processing food Menu: 2.Mulberry Ice Scream Milk Sandwiches
Method: All Works: Mulberry Ice Scream Milk Sandwiches
Method: How to make made cook: Recipe Procedure: Mulberry Ice Scream Milk Sandwiches Ingredients: Brown Sugar Cookies 112 grams melted vegan butter, 150 grams granulated sugar, 20 grams molasses, 60 milliliters water, 2 teaspoons vanilla extract, 220 grams all-purpose flour, 40 grams cornstarch, 1 teaspoon cornstarch, 1/2 teaspoon baking soda, 1/4 teaspoon baking powder, 1/2 teaspoon salt. Method: Directions Brown Sugar Cookieies: Step 1 : 1.Set your oven to 180°C (350°F) and line a baking sheet with parchment paper, In a large bowl, combine the melted vegan butter, sugar, molasses, water, and vanilla extract. Whisk until smooth and well combined. 2.In a separate bowl, sift together the flour, cornmeal, cornstarch, baking soda, baking powder, and salt. Mix until well combined, Gradually add the dry ingredients to the wet ingredients. Stir until a thick dough forms. 3.Cover the dough with plastic wrap and let it chill in the fridge for 1 hour, After chilling, roll the dough into small balls, about 1.5 tablespoon each (50g), and place them on the lined baking sheet, leaving some space between them. Press the cookies to flatten slightly. 4.Bake the cookies for 10-12 minutes, or until the edges are slightly golden. The centers will still be soft, Bang the tray against the counter 5-10 times to flatten the cookies, Let the cookies cool on the baking sheet for a few minutes before transferring them to a wire rack to cool completely. Assembly: Step 2 : 1.Once cookies have completely cooled, place in freezer until firm. 2.On the bottom of one cookie spread 1 tsp of jam across the bottom. 3.Scoop heaping portions of your ice cream of choice onto the bottom of a cookie. Press the jam and cookie into the ice cream. 4.Freeze for 1 hour to let the sandwich set completely. Or eat right now. I won't judge! And the finally then You can eat it and Sell it to the Merchant or Customer with Who people you known. Where can i you me buy it, Where to Buy, Where to find it: Internet Online, Supermarkets. Widely available from street food stalls, especially in durian-growing regions like, and at markets. Online: Easily ordered from platforms like Abcdefg in various grades and sizes. Additional tips Profit Useful Benefit Available Nutrition : Characteristics: Small fruit growing in clusters; reddish-brown bark. Benefits: High in beneficial nutrients, vitamins, and minerals, such as high in Vitamin C, comparable to mandarin oranges. Consumption: Eaten fresh, processed into jam, juice, desserts, or dried. Popular varieties: White mulberry (Morus alba), Black mulberry (Morus nigra), Red mulberry (Morus rubra). Mulberry (fashion brand) Origin: Founded in 1971 in Somerset, United Kingdom. Highlights: Produces luxury leather goods with high-quality craftsmanship. Popular models: Bayswater, Alexa, Darley Mulberry (fruit) Characteristics: Small fruit growing in clusters; reddish-brown bark. Benefits: High in beneficial nutrients, vitamins, and minerals, such as high in Vitamin C, comparable to mandarin oranges. Consumption: Eaten fresh, processed into jam, juice, desserts, or dried. Popular varieties: White mulberry (Morus alba), Black mulberry (Morus nigra), Red mulberry (Morus rubra). And the finally then You can eat it and Sell it to the Merchant or Customer with Who people you Know Knew known.
ClickMeSeeAllFull
ClickMeSeeOnMoreDetail
ClickMeSeeOnMorePictureImage
ClickMeSeeOnMoreVideo
Fruit: Processer Processed Processing food Menu: 3.Mulberry Ice Scream Milk Cake
Method: All Works: Mulberry Ice Scream Milk Cake
Method: How to make made cook: Recipe Procedure: Mulberry Ice Cream Milk Cake Ingredients: 12 oz cream cheese, 1 1/4 Cup granulated sugar divided, 1/2 tsp. salt, 2 tsp. vanilla extract, 1/2 Cup greek yogurt, 1 Cup heavy cream, 1 1/2 Cups blackberries. Directions Instructions Method : 1.In a stand mixer fitted with a mixing paddle beat the cream cheese until very smooth, scraping down the bowl sides, as needed. 2.With the mixer running add 1 cup of your sugar, the salt, vanilla, heavy cream and greek yogurt; one at a time. Mixing until all ingredients are smooth and creamy, Turn on the ice cream maker and pour this mixture into the freezer bowl. Set a timer for 15 minutes. 3.Meanwhile mix together the blackberries and remaining sugar until sugar is dissolved. Puree this mixture if you don't like the seedy texture. Set aside, When the timer goes off slowly add the blackberry mixture, a little at a time, until the ice cream fully incorporates the blackberry mixture. Mix another 5 minutes or until firm. 4.This is REALLY thick ice cream and will set to a firm soft set that can be immediately eaten. Otherwise, put it into a freezer container and set until hard This thick, creamy textured ice cream will need about 10 minutes to set out on the counter before serving, for ease of scooping. And the finally then You can eat it and Sell it to the Merchant or Customer with Who people you known. Where can i you me buy it, Where to Buy, Where to find it: Internet Online, Supermarkets. Widely available from street food stalls, especially in durian-growing regions like, and at markets. Online: Easily ordered from platforms like Abcdefg in various grades and sizes. Additional tips Profit Useful Benefit Available Nutrition : Characteristics: Small fruit growing in clusters; reddish-brown bark. Benefits: High in beneficial nutrients, vitamins, and minerals, such as high in Vitamin C, comparable to mandarin oranges. Consumption: Eaten fresh, processed into jam, juice, desserts, or dried. Popular varieties: White mulberry (Morus alba), Black mulberry (Morus nigra), Red mulberry (Morus rubra). Mulberry (fashion brand) Origin: Founded in 1971 in Somerset, United Kingdom. Highlights: Produces luxury leather goods with high-quality craftsmanship. Popular models: Bayswater, Alexa, Darley Mulberry (fruit) Characteristics: Small fruit growing in clusters; reddish-brown bark. Benefits: High in beneficial nutrients, vitamins, and minerals, such as high in Vitamin C, comparable to mandarin oranges. Consumption: Eaten fresh, processed into jam, juice, desserts, or dried. Popular varieties: White mulberry (Morus alba), Black mulberry (Morus nigra), Red mulberry (Morus rubra). And the finally then You can eat it and Sell it to the Merchant or Customer with Who people you Know Knew known.
ClickMeSeeAllFull
ClickMeSeeOnMoreDetail
ClickMeSeeOnMorePictureImage
ClickMeSeeOnMoreVideo
Fruit: Processer Processed Processing food Menu: 4.Mulberry Wipe Cream Milk Smoothie Shake
Method: All Works: Mulberry Whipped Cream Milk Smoothie Shake
Method: How to make made cook: Recipe Procedure: Mulberry Whipped Cream Milk Smoothie Shake Ingredients: 50 g Mulberry fruits, 1 cup full cream milk, 1 tbsp Vanilla ice cream, 1 tsp honey or syrup or sugar(which one do you prefer or use that all), wipe cream(if you have and more on your want), cubes Ice(it's up to your want). Directions Instructions Method : 1.Add Mulberry in tail container. Add milk honey and ice cubes blend 3 minutes with hands blender to smooth mixture. 2.In serving glass add fhesh Mulberry and vanilla ice cream on top, Ready to serve or eat it. And the finally then You can eat it and Sell it to the Merchant or Customer with Who people you known. Where can i you me buy it, Where to Buy, Where to find it: Internet Online, Supermarkets. Widely available from street food stalls, especially in durian-growing regions like, and at markets. Online: Easily ordered from platforms like Abcdefg in various grades and sizes. Additional tips Profit Useful Benefit Available Nutrition : Characteristics: Small fruit growing in clusters; reddish-brown bark. Benefits: High in beneficial nutrients, vitamins, and minerals, such as high in Vitamin C, comparable to mandarin oranges. Consumption: Eaten fresh, processed into jam, juice, desserts, or dried. Popular varieties: White mulberry (Morus alba), Black mulberry (Morus nigra), Red mulberry (Morus rubra). Mulberry (fashion brand) Origin: Founded in 1971 in Somerset, United Kingdom. Highlights: Produces luxury leather goods with high-quality craftsmanship. Popular models: Bayswater, Alexa, Darley Mulberry (fruit) Characteristics: Small fruit growing in clusters; reddish-brown bark. Benefits: High in beneficial nutrients, vitamins, and minerals, such as high in Vitamin C, comparable to mandarin oranges. Consumption: Eaten fresh, processed into jam, juice, desserts, or dried. Popular varieties: White mulberry (Morus alba), Black mulberry (Morus nigra), Red mulberry (Morus rubra). And the finally then You can eat it and Sell it to the Merchant or Customer with Who people you Know Knew known.
ClickMeSeeAllFull
ClickMeSeeOnMoreDetail
ClickMeSeeOnMorePictureImage
ClickMeSeeOnMoreVideo
Fruit: Processer Processed Processing food Menu: 5.Mulberry Puff Pastry
Method: All Works: Mulberry Puff Pastry
Method: How to make made cook: Recipe Procedure: Mulberry Puff Pastry Ingredients FOR THE PUFF PASTRY: 1¼ cup very cold butter (salted)* cut into cubes, ½ cup very cold water, ¼ teaspoon salt*, 2 cups all-purpose flour. Ingredients Blackberry Filling: 2 cups blackberries, ⅓ cup sugar, 4 tablespoons water, 2 tablespoon cornstarch. Cream Cheese Mixture: 8 ounce cream cheese, ½ cup sugar, 1 egg yolk, 1 teaspoon vanilla extract. Egg Wash: 1 large egg, 1 tablespoon water. Glaze Drizzle: ½ cup powdered sugar 1 ½ teaspoon milk 1 box puff pastry sheets Warning Tip: Instructions: Preheat the oven to 375 degrees and line a baking sheet with parchment paper. Directions Instructions Method : Step 1: Instructions: 10 MINUTE PUFF PASTRY: 1.Using a food processor, fitted with the metal blade, add flour and salt to the bowl, then add ¾ cup (170 grams) cold butter cut in cubes and pulse until butter is absorbed (about 10 to 12 one second pulses), then add the remaining cold butter (cubed) and pulse two or three times (no more) to combine, add the cold water and pulse four or five times just until the dough comes together to form a ball (really important not to over process). 2.On a lightly floured surface place dough and knead lightly approximately 10 times. With a lightly floured rolling- pin (lightly flour the dough so it doesn't stick) roll into a rectangle approximately 12 x 18 inches (30 x 45 cm). 3.Fold the dough like an envelope (see photos) then fold in half, wrap in plastic and refrigerate for 1 – 2 hours (I left mine in the fridge for two hours). Pre-heat oven to 375° (190° celsius) (for all recipes). Notes: *If using unsalted butter then add ¾ teaspoon of salt. Be sure to use a good quality butter. The weight of the finished puff pastry dough is 1 1/2 pounds / 690 grams. If you do make the dough by hand be sure to not over work the dough, you just want to gently combine the ingredients. The dough can be made in a stand up mixer with the flat beaters, beat on low just to bring the dough together and continue with the recipe. You can also leave the dough in the fridge over night. If you find your dough is browning too much, then cover it with foil and continue baking. Store the homemade puff pastry in the refrigerator for 2-3 days. Be sure it is sealed in plastic wrap. You can also freeze it. Wrap it well in plastic wrap and place in a freezer-safe bag or container, it will keep in the freezer for up to a month. Before using the frozen dough, leave it folded and wrapped and thaw it in the fridge overnight. Roll the dough out without unfolding it first. Step 2: Blackberry Filling: 1.In a small saucepan over low heat, add blackberries and sugar. Stir 2.Mix water and cornstarch together until combined and add to the blackberry mixture. 3.Cook on low for 5-7 minutes or until the blackberry mixture has thickened. Set aside to cool. Step 3: Cream Cheese Mixture: 1.In a medium bowl, beat cream cheese until fluffy, about 2-3 minutes, Add sugar, egg yolk, and vanilla extract. Beat until combined, Cut the Pastry Dough 2.Gently roll puff pastry a few times until square on a lightly floured surface, Spoon half of the cream cheese mixture down the center of each puff pastry leaving about 1½ inch free from filling at each end. 3.Once the blackberry mixture has cooled, add half of the mixture on top of the cream cheese filling, gently spread, then repeat with the other puff pastry, Cut two slits at each end of the pastry about 1 inch long and fold over the top of the filling and secure to prevent mixture from leaking out. 4.Next cut off the top and bottom side pieces at an angle (see above photo) and continue to make cuts into the pastry along each side making sure not to cut too close to the filling, Once the ends have been secured, start folding each piece over each other like a braid and secure. Step 4: Egg Wash: Mix egg and water together Brush egg wash over both pastries and bake for 25-30 minutes or until golden brown. Step 5: Glaze Drizzle: In a small bowl, stir powdered sugar and milk together. Drizzle over pastry on cool enough, and Ready to serve or eat it away. And the finally then You can eat it and Sell it to the Merchant or Customer with Who people you known. Where can i you me buy it, Where to Buy, Where to find it: Internet Online, Supermarkets. Widely available from street food stalls, especially in durian-growing regions like, and at markets. Online: Easily ordered from platforms like Abcdefg in various grades and sizes. Additional tips Profit Useful Benefit Available Nutrition : Characteristics: Small fruit growing in clusters; reddish-brown bark. Benefits: High in beneficial nutrients, vitamins, and minerals, such as high in Vitamin C, comparable to mandarin oranges. Consumption: Eaten fresh, processed into jam, juice, desserts, or dried. Popular varieties: White mulberry (Morus alba), Black mulberry (Morus nigra), Red mulberry (Morus rubra). Mulberry (fashion brand) Origin: Founded in 1971 in Somerset, United Kingdom. Highlights: Produces luxury leather goods with high-quality craftsmanship. Popular models: Bayswater, Alexa, Darley Mulberry (fruit) Characteristics: Small fruit growing in clusters; reddish-brown bark. Benefits: High in beneficial nutrients, vitamins, and minerals, such as high in Vitamin C, comparable to mandarin oranges. Consumption: Eaten fresh, processed into jam, juice, desserts, or dried. Popular varieties: White mulberry (Morus alba), Black mulberry (Morus nigra), Red mulberry (Morus rubra). And the finally then You can eat it and Sell it to the Merchant or Customer with Who people you Know Knew known.
ClickMeSeeAllFull
ClickMeSeeOnMoreDetail
ClickMeSeeOnMorePictureImage
ClickMeSeeOnMoreVideo
Fruit: Processer Processed Processing food Menu: 6.Mulberry Tart Shells
Method: All Works: Mulberry Tart Shells
Method: How to make made cook: Recipe Procedure: Mulberry Tart Shells Ingredients: For The Tart Dough Ingredients: 208g (1 2/3 cups) All purpose flour, 125g (1 cup) Powdered sugar, 84g (6 tbsp) Unsalted butter, cold, 1 Medium egg (50g). For Tart Filling Ingredients: 1 batch pie dough, 3 cups mulberries, 3/4 cup granulated sugar, 1/3 cup flour, 2 tablespoon lemon juice, 2 tablespoons butter, 1 cup powdered sugar, 2 teaspoons milk. Directions Instructions Method : Step 1: For The Tart Dough: Using a food processor: 1.Add the flour and powdered sugar to the food processor. Mix on medium speed for a few seconds until combined 2.Cut the cold butter into tablespoon size pieces and add to the food processor. Pulse until the butter has broken into very small pieces, and the mixture has a sandy texture. 3.Add the egg. Mix on medium speed until the dough comes together into a smooth ball 4.Flatten the dough into a disk and cover with plastic wrap. Rest for a minimum of 2 hours in the fridge before using Make by hand: 1.Mix together the flour and powdered sugar, and place in a mound on your clean countertop, Cut the cold butter into small cubes, about 1 – 2cm wide. Place the butter in the middle of the dry ingredients, Use a bench scraper to repeatedly cut the butter into the dough until the butter is pea-sized or smaller. Gently rub the butter and flour in a gentle back and forth motion between the palm of your hands. This helps distribute the butter more evenly and break down the butter even more 2.For a well in the middle of the ingredients, and add the egg in the center of the well. Use your bench scraper to cut the egg into the dry ingredients 3.Keep cutting with your bench scraper until the egg is combined with the dry ingredients. Smear the dough across the counter with the palm of your hand to fully incorporate everything. Keep smearing and gathering the mixture until a smooth dough forms. Avoid kneading, as this toughens the gluten 4.Flatten the dough into a disk and cover with plastic wrap. Rest for a minimum of 2 hours in the fridge before using. Notes: The dough needs to be rested before using so that the gluten relaxes. Otherwise, the tart shells may shrink while baking. Tart dough freezes very well. Make sure to wrap and store in an airtight bag so it does not get freezer burn. Step 2: For Tart Filling: 1.Take the stems off of all the berries, Mix berries with sugar, flour, and lemon juice and set aside. Pre-heat oven to 400 degrees F, Spray two 24 muffin, mini muffin pans. (Or you can bake half at a time). 2.Lightly flour work surface, dough ball, and rolling pin, Roll out dough to 1/8 inch thick, Cut out 48 circles a little bigger than muffin tin spaces, Press each circle into muffin space, Press the dough into the bottom to to get rid of any air pockets and up the sides to fill the muffin spaces. 3.Use a fork to poke holes in the bottom of each tart crust, Fill each tart with a heaping teaspoon of filling, Add a small amount of butter to the top of the tart, Bake for 15-17 minutes until golden brown and bubbling. 4.Let cool for 5 minutes while you whisk powdered sugar and milk together. Drizzle tarts with glaze. Enjoy. And the finally then You can eat it and Sell it to the Merchant or Customer with Who people you known. Where can i you me buy it, Where to Buy, Where to find it: Internet Online, Supermarkets. Widely available from street food stalls, especially in durian-growing regions like, and at markets. Online: Easily ordered from platforms like Abcdefg in various grades and sizes. Additional tips Profit Useful Benefit Available Nutrition : Characteristics: Small fruit growing in clusters; reddish-brown bark. Benefits: High in beneficial nutrients, vitamins, and minerals, such as high in Vitamin C, comparable to mandarin oranges. Consumption: Eaten fresh, processed into jam, juice, desserts, or dried. Popular varieties: White mulberry (Morus alba), Black mulberry (Morus nigra), Red mulberry (Morus rubra). Mulberry (fashion brand) Origin: Founded in 1971 in Somerset, United Kingdom. Highlights: Produces luxury leather goods with high-quality craftsmanship. Popular models: Bayswater, Alexa, Darley Mulberry (fruit) Characteristics: Small fruit growing in clusters; reddish-brown bark. Benefits: High in beneficial nutrients, vitamins, and minerals, such as high in Vitamin C, comparable to mandarin oranges. Consumption: Eaten fresh, processed into jam, juice, desserts, or dried. Popular varieties: White mulberry (Morus alba), Black mulberry (Morus nigra), Red mulberry (Morus rubra). And the finally then You can eat it and Sell it to the Merchant or Customer with Who people you Know Knew known.
ClickMeSeeAllFull
ClickMeSeeOnMoreDetail
ClickMeSeeOnMorePictureImage
ClickMeSeeOnMoreVideo
Fruit: Processer Processed Processing food Menu: 7.Mulberry Pudding jelly
Method: All Works: Mulberry Pudding jelly
Method: How to make made cook: Recipe Procedure: Mulberry Pudding jelly Ingredients: 400 grams of fresh mulberries, 600 grams of water, 1 tablespoon of agar powder, 120 grams of sugar (adjust according to the sweetness of the mulberries). Directions Instructions Method : 1. Make mulberry juice: Wash the mulberries thoroughly. Boil them in water until they are soft and the color turns a deep purple. 2. Filter: Filter out the mulberry pulp, leaving only the liquid. Alternatively, you can mash the pulp and mix it in as well. 3. Making the jelly: Heat the mulberry juice over medium heat, add the sugar and agar powder, stir until dissolved and boiling. 4. Cool and Serve: Pour into molds, let cool, then refrigerate until set. Note: To make mulberry pudding, simmer 400 grams of fresh mulberries with 600 grams of water and 120 grams of sugar until you get a sweet and sour sauce. Then, add 1 tablespoon of agar powder and boil until dissolved. Pour into molds and refrigerate until set. You can add layers by making coconut jelly or topping with mulberry jam for extra deliciousness. And the finally then You can eat it and Sell it to the Merchant or Customer with Who people you known. Where can i you me buy it, Where to Buy, Where to find it: Internet Online, Supermarkets. Widely available from street food stalls, especially in durian-growing regions like, and at markets. Online: Easily ordered from platforms like Abcdefg in various grades and sizes. Additional tips Profit Useful Benefit Available Nutrition : Characteristics: Small fruit growing in clusters; reddish-brown bark. Benefits: High in beneficial nutrients, vitamins, and minerals, such as high in Vitamin C, comparable to mandarin oranges. Consumption: Eaten fresh, processed into jam, juice, desserts, or dried. Popular varieties: White mulberry (Morus alba), Black mulberry (Morus nigra), Red mulberry (Morus rubra). Mulberry (fashion brand) Origin: Founded in 1971 in Somerset, United Kingdom. Highlights: Produces luxury leather goods with high-quality craftsmanship. Popular models: Bayswater, Alexa, Darley Mulberry (fruit) Characteristics: Small fruit growing in clusters; reddish-brown bark. Benefits: High in beneficial nutrients, vitamins, and minerals, such as high in Vitamin C, comparable to mandarin oranges. Consumption: Eaten fresh, processed into jam, juice, desserts, or dried. Popular varieties: White mulberry (Morus alba), Black mulberry (Morus nigra), Red mulberry (Morus rubra). And the finally then You can eat it and Sell it to the Merchant or Customer with Who people you Know Knew known.
ClickMeSeeAllFull
ClickMeSeeOnMoreDetail
ClickMeSeeOnMorePictureImage
ClickMeSeeOnMoreVideo
Fruit: Processer Processed Processing food Menu: 8.Mulberry Yogurt
Method: All Works: Mulberry Yogurt
Method: How to make made cook: Recipe Procedure: Mulberry Yogurt Ingredients: Mulberries (fresh or frozen): 1 cup, Plain yogurt: 1 cup, Milk: 60 ml, If you have (full-fat milk powder, pasteurized full-fat milk, low-fat milk), Ice: 1 glass, Honey or sugar: 1 tablespoon. Directions Instructions Method : 1. Heat the milk over medium heat until it almost boils, reaching approximately 80-90 degrees Celsius, or until you see bubbles beginning to form around the edges of the pot. 2. Blend the mulberries until smooth. Then add the mulberries (or extract only the mulberry juice) and milk powder. Stir until dissolved and the mixture is smooth. 3. Let the milk sit until its temperature cools down to about 50-60 degrees Celsius (°C). If you don't have a thermometer, you can test it on your forearm; if the milk feels warm, not hot, it's ready. Add the yogurt starter and stir well. 4. Pour the mixture into a container with a lid and incubate it by wrapping it in a thick cloth or incubating it in a styrofoam box. Leave it at room temperature for about 4-5 hours, or longer if your home is cooler. Check to see if the yogurt has started to set and harden, then refrigerate it for about 12-24 hours. It's then ready to eat. And the finally then You can eat it and Sell it to the Merchant or Customer with Who people you known. Where can i you me buy it, Where to Buy, Where to find it: Internet Online, Supermarkets. Widely available from street food stalls, especially in durian-growing regions like, and at markets. Online: Easily ordered from platforms like Abcdefg in various grades and sizes. Additional tips Profit Useful Benefit Available Nutrition : Characteristics: Small fruit growing in clusters; reddish-brown bark. Benefits: High in beneficial nutrients, vitamins, and minerals, such as high in Vitamin C, comparable to mandarin oranges. Consumption: Eaten fresh, processed into jam, juice, desserts, or dried. Popular varieties: White mulberry (Morus alba), Black mulberry (Morus nigra), Red mulberry (Morus rubra). Mulberry (fashion brand) Origin: Founded in 1971 in Somerset, United Kingdom. Highlights: Produces luxury leather goods with high-quality craftsmanship. Popular models: Bayswater, Alexa, Darley Mulberry (fruit) Characteristics: Small fruit growing in clusters; reddish-brown bark. Benefits: High in beneficial nutrients, vitamins, and minerals, such as high in Vitamin C, comparable to mandarin oranges. Consumption: Eaten fresh, processed into jam, juice, desserts, or dried. Popular varieties: White mulberry (Morus alba), Black mulberry (Morus nigra), Red mulberry (Morus rubra). And the finally then You can eat it and Sell it to the Merchant or Customer with Who people you Know Knew known.
ClickMeSeeAllFull
ClickMeSeeOnMoreDetail
ClickMeSeeOnMorePictureImage
ClickMeSeeOnMoreVideo
Fruit: Processer Processed Processing food Menu: 9.Mulberry Croissant
Method: All Works: Mulberry Croissant
Method: How to make made cook: Recipe Procedure: Mulberry Croissant Ingredients: For The Croissant Dough Ingredients: Bread Flour (Protein 13-14%) Dry Yeast Sugar Salt Fresh Milk (Cold) Unsalted Butter (for mixing into the dough) High-Quality Unsalted Butter (for making the butter sheet) Warning Additional Tips: if you have! (Butter: Use unsalted butter with low moisture content (dry butter) to prevent it from melting while rolling the dough. Baking: If using frozen croissants, let them thaw at room temperature before baking.) For The Cream filling ingredients: 200 ml unsweetened fresh milk, 100-1000 ml of mulberries (whole, mashed, or juiced), 2-3 tablespoons granulated sugar, 1 tablespoon cornstarch, 1 tablespoon all-purpose flour, and vanilla powder. Directions Instructions Method : Step 1: How to make croissant dough: 1. Mix and knead: Combine flour, yeast, sugar, salt, milk, and butter. Knead until well combined, about 10-15 minutes. Rest the dough: Refrigerate the dough for about 1 hour, or until it has doubled in size. 2. Making the Butter Layers: Roll the dough into a rectangle. Place a butter sheet in the center. Fold the dough around the butter, roll the dough again and fold it over (3 times). Repeat 3 times. Refrigerate for 30 minutes between rounds. 3. Shaping: Roll the dough into a thin sheet, cut into triangles, and roll from the base to the top. Proofing: Let the rolled dough rest for about 1-2 hours at room temperature until it expands. 4. Baking: Brush the croissants with egg wash and bake at 180-190 degrees Celsius for approximately 15-20 minutes, or until golden brown. Step 2: How to make the cream filling: 1. Mix unsweetened fresh milk, mulberry pulp, granulated sugar, cornstarch, all-purpose flour, and vanilla powder together. 2. Simmer over low heat until thickened. Add 1/2 tablespoon of unsalted butter. 3. Let it cool, then add 100 ml of whipped cream that has been whipped until stiff peaks form. 4. Once the croissant has cooled, make a hole in the side or top and inject the fresh cream filling, Then Ready to serve or Eat it away. Summation Notes: To make croissants filled with fresh milk cream, start by kneading flour, yeast, sugar, salt, milk, and butter. Let the dough rise. Roll and fold the butter (lamination) 3-4 times to create a crispy layer. Roll into a croissant shape and let it rise again. Brush with egg wash and bake at 180-190°C until golden brown and crispy. Finally, make holes in the croissants and inject the fresh milk cream filling (fresh milk, cornstarch, all-purpose flour, sugar, butter). And the finally then You can eat it and Sell it to the Merchant or Customer with Who people you known. Where can i you me buy it, Where to Buy, Where to find it: Internet Online, Supermarkets. Widely available from street food stalls, especially in durian-growing regions like, and at markets. Online: Easily ordered from platforms like Abcdefg in various grades and sizes. Additional tips Profit Useful Benefit Available Nutrition : Characteristics: Small fruit growing in clusters; reddish-brown bark. Benefits: High in beneficial nutrients, vitamins, and minerals, such as high in Vitamin C, comparable to mandarin oranges. Consumption: Eaten fresh, processed into jam, juice, desserts, or dried. Popular varieties: White mulberry (Morus alba), Black mulberry (Morus nigra), Red mulberry (Morus rubra). Mulberry (fashion brand) Origin: Founded in 1971 in Somerset, United Kingdom. Highlights: Produces luxury leather goods with high-quality craftsmanship. Popular models: Bayswater, Alexa, Darley Mulberry (fruit) Characteristics: Small fruit growing in clusters; reddish-brown bark. Benefits: High in beneficial nutrients, vitamins, and minerals, such as high in Vitamin C, comparable to mandarin oranges. Consumption: Eaten fresh, processed into jam, juice, desserts, or dried. Popular varieties: White mulberry (Morus alba), Black mulberry (Morus nigra), Red mulberry (Morus rubra). And the finally then You can eat it and Sell it to the Merchant or Customer with Who people you Know Knew known.
ClickMeSeeAllFull
ClickMeSeeOnMoreDetail
ClickMeSeeOnMorePictureImage
ClickMeSeeOnMoreVideo
Fruit: Processer Processed Processing food Menu: 10.Mulberry Pie
Method: All Works: Mulberry Pie
Method: How to make made cook: Recipe Procedure: Mulberry Pie Ingredients: For The Pie Dough Ingredients: Bread Flour (Protein 13-14%), All-purpose flour, The water is very cold, Dry Yeast, Sugar, Salt, Fresh Milk (Cold) Unsalted Butter (for mixing into the dough) High-Quality Unsalted Butter (for making the butter sheet) For the Pie Filling ingredients: Main ingredients: Fresh mulberries Sugar Cornstarch (for thickening the filling) Ready-made pie crusts Addition Tips: Water must be ice cold: Using ice-cold water prevents the butter from melting, resulting in a beautiful pie crust. Roll out the dough patiently: If the dough starts to stick or the butter melts, fold the dough and refrigerate immediately. Rest the dough in the refrigerator: Resting/fermenting the dough is very important to ensure the pie crust is soft and doesn't shrink during baking. Tip: You can sprinkle with sliced almonds or chocolate chips for extra deliciousness. Directions Instructions Method : Step 1: Detailed Pie Crusting and Dough Preparation Steps: 1. Prepare the butter: Place unsalted butter on parchment paper. Use a rolling pin to knead the butter until soft and creamy. Shape into squares about 1 cm thick. Refrigerate, Knead the dough: Sift the all-purpose flour and salt (or use a little sugar). Mix with ice-cold water. Knead until well combined and smooth. Then refrigerate for 30 minutes to let the dough rest. 2. Wrapping the butter: Roll out the rested dough into a rectangular sheet (about twice the size of the butter). Place the chilled butter in the center and wrap the dough around it, completely covering the butter. 3. Folding: Gently roll the buttered dough into a long sheet, then fold it into three layers (fold the left side to the center, then fold the right side overlapping). Roll again and fold another three layers. Repeat this process about 2-3 times. 4. Resting and Fermenting the Dough: Wrap the pie dough in plastic wrap and refrigerate for at least 1 hour to allow the butter to set and the dough to relax, resulting in a crispy and fluffy pie crust. Step 2: Instructions: 1. Prepare the filling: Wash the mulberries thoroughly and boil them with sugar. Add a little cornstarch and simmer until the mixture thickens. 2. Prepare the dough: Cut the pre-made pie crust to the desired size. 3. Assemble: Spoon the mulberry filling onto the pie crust. 4. Baking: Bake in an oven or air fryer at a temperature of approximately 15-20 minutes, and Then Ready to serve or Eat it away. Summation Notes: To prepare pie dough (for puff pastry/crust pie), knead all-purpose flour with salt and ice-cold water until well combined. Soften the butter and form a rectangular sheet. Chill the flour and butter separately for 30 minutes. Roll out the dough, wrap it around the butter, and fold it into three layers, repeating 2-3 times. Refrigerate for 1 hour before baking to achieve a crispy and fluffy pie crust. And the finally then You can eat it and Sell it to the Merchant or Customer with Who people you known. Where can i you me buy it, Where to Buy, Where to find it: Internet Online, Supermarkets. Widely available from street food stalls, especially in durian-growing regions like, and at markets. Online: Easily ordered from platforms like Abcdefg in various grades and sizes. Additional tips Profit Useful Benefit Available Nutrition : Characteristics: Small fruit growing in clusters; reddish-brown bark. Benefits: High in beneficial nutrients, vitamins, and minerals, such as high in Vitamin C, comparable to mandarin oranges. Consumption: Eaten fresh, processed into jam, juice, desserts, or dried. Popular varieties: White mulberry (Morus alba), Black mulberry (Morus nigra), Red mulberry (Morus rubra). Mulberry (fashion brand) Origin: Founded in 1971 in Somerset, United Kingdom. Highlights: Produces luxury leather goods with high-quality craftsmanship. Popular models: Bayswater, Alexa, Darley Mulberry (fruit) Characteristics: Small fruit growing in clusters; reddish-brown bark. Benefits: High in beneficial nutrients, vitamins, and minerals, such as high in Vitamin C, comparable to mandarin oranges. Consumption: Eaten fresh, processed into jam, juice, desserts, or dried. Popular varieties: White mulberry (Morus alba), Black mulberry (Morus nigra), Red mulberry (Morus rubra). And the finally then You can eat it and Sell it to the Merchant or Customer with Who people you Know Knew known.
ClickMeSeeAllFull
ClickMeSeeOnMoreDetail
ClickMeSeeOnMorePictureImage
ClickMeSeeOnMoreVideo
Fruit: Processer Processed Processing food Menu: 1.Cherry Ice Cream
Method: All Works: Cherry Ice Cream
Method: How to make made cook: Recipe Procedure: Cherry Ice Cream Ingredients: For The Cone Materials Ingredients: Main Ingredients and Equipment: 2 large eggs, 100 grams granulated sugar, 40 grams melted butter, 60 grams fresh milk, 110 grams all-purpose flour, 1 teaspoon vanilla extract, Salt (a pinch), Equipment: Waffle cone maker, stainless steel waffle cone maker. For The Cherry Ice Cream Material Ingredients: Cherries (pitted), Greek yogurt, Whipped cream, Sugar, Honey or syrup (adjust sweetness to your liking), Sweetened condensed milk, Evaporated milk, Milk powder, Fresh milk, Cerelac, Cereal, Salt, Chocolate chips (optional). Directions Instructions Method : Step 1: Detailed Cone Crusting and Dough Preparation Steps: Tips for crispness: Roll immediately after removing from the oven. Store in an airtight container immediately after cooling to prevent moisture and maintain crispness. If the cones are not crispy, you can bake or reheat them in the oven. 1. Mix the flour: Beat the eggs with the sugar until well combined and dissolved. Add the vanilla extract, salt, milk, and melted butter. Sift the flour: Sift the all-purpose flour into the mixture and stir until smooth. 2. Baking: Preheat the waffle cone maker, lightly grease it with oil or butter, pour in about 1-2 tablespoons of batter, cover and bake until golden brown. 3. Rolling the cone: Quickly roll the cooked waffle sheet around the stainless steel cone while it's still very hot (it will crack if it cools down). 4. Let it cool: Hold it for a while until it holds its shape, then place it on a wire rack to cool completely and become crispy. Summation Notes: Making your own crispy ice cream cones is easy! Simply beat eggs and sugar until well combined. Add melted butter, milk, and all-purpose flour, stirring until smooth. Pour the batter onto a hot, buttered waffle maker. Bake until golden brown, then quickly roll into a cone shape while still hot using a stainless steel cone mold. Let cool until crispy. Step 2: Detailed Cherry Ice Cream Steps: Tip: You can use preserved cherries instead of fresh cherries to enhance the flavor and sweetness. 1. Prepare the cherries: If using fresh cherries, wash and remove the pits. For convenience, use frozen cherries. 2. Blend the ingredients: Put the cherries, Greek yogurt, whipping cream, honey, and All ingredients into a blender. Blend until smooth and creamy. 3. Freezing: Pour the blended mixture into an airtight container and freeze for approximately 4-6 hours, or until solid. 4. Repeat blending (technique for smooth texture): Once the ice cream has frozen, blend it again to make the texture smooth and creamy, preventing ice crystals. Then freeze until set. Serving: Scoop into a bowl and enjoy immediately. Summation Notes: This easy no-bake homemade cherry ice cream recipe involves blending cherries (fresh or frozen) with Greek yogurt, whipping cream, honey and All ingredients until smooth. Pour into a container and freeze for 4-6 hours, or repeat the process for a smoother, less lumpy texture. Add candied cherries or chocolate chips for extra flavor as desired. And the finally then You can eat it and Sell it to the Merchant or Customer with Who people you known. Where can i you me buy it, Where to Buy, Where to find it: Internet Online, Supermarkets. Widely available from street food stalls, especially in durian-growing regions like, and at markets. Online: Easily ordered from platforms like Abcdefg in various grades and sizes. Additional tips Profit Useful Benefit Available Nutrition : Characteristics: Small fruit growing in clusters; reddish-brown bark. Benefits: High in beneficial nutrients, vitamins, and minerals, such as high in Vitamin C, comparable to mandarin oranges. Consumption: Eaten fresh, processed into jam, juice, desserts, or dried. Popular varieties: White mulberry (Morus alba), Black mulberry (Morus nigra), Red mulberry (Morus rubra). Mulberry (fashion brand) Origin: Founded in 1971 in Somerset, United Kingdom. Highlights: Produces luxury leather goods with high-quality craftsmanship. Popular models: Bayswater, Alexa, Darley Mulberry (fruit) Characteristics: Small fruit growing in clusters; reddish-brown bark. Benefits: High in beneficial nutrients, vitamins, and minerals, such as high in Vitamin C, comparable to mandarin oranges. Consumption: Eaten fresh, processed into jam, juice, desserts, or dried. Popular varieties: White mulberry (Morus alba), Black mulberry (Morus nigra), Red mulberry (Morus rubra). And the finally then You can eat it and Sell it to the Merchant or Customer with Who people you Know Knew known.
ClickMeSeeAllFull
ClickMeSeeOnMoreDetail
ClickMeSeeOnMorePictureImage
ClickMeSeeOnMoreVideo
Fruit: Processer Processed Processing food Menu: 2.Cherry Sandwich Ice Cream
Method: All Works: Cherry Sandwich Ice Cream
Method: How to make made cook: Recipe Procedure: Cherry Sandwich Ice Cream Ingredients: For the wafer and Waffle Dough: Batter ingredients: 300 grams all-purpose flour, 100 grams granulated sugar, 2 teaspoons baking powder, 1/4 teaspoon salt, 380 grams unsweetened milk, 3 eggs, 100 grams vegetable oil or melted butter, 2 teaspoons vanilla extract. For the Cherry ice Cream: Frozen cherries (or fresh pitted cherries) Whipped cream Fresh milk Honey, Sugar (or cherry syrup) Cookies, wafers, or sandwich crackers, Sweetened condensed milk, Evaporated milk, Milk powder, Fresh milk, Cerelac, Cereal, Salt. Directions Instructions Method : Step 1: For the Wafer and Waffle: Additional Tips Crispy Waffles: To keep them crispy longer, let the waffles rest on a wire rack instead of a plate. Savory Fillings: You can use ham, cheese, or bologna in the center before torching or baking them again. Marinating: Refrigerating the batter overnight significantly improves the flavor and texture of the waffles. 1. Combine the dry ingredients (flour, sugar, baking powder, salt). Mix the liquid ingredients (milk, eggs, melted butter, vanilla) together and pour into the flour mixture. Stir until smooth and well combined. 2. Tip: Let the dough rest for about 15-30 minutes, or refrigerate it overnight to help it become softer and fluffier. 3. Heat the waffle iron, lightly grease it with butter, then pour in the batter and bake until golden brown and crispy. 4. Assemble the sandwiches by spreading your desired fillings, such as Nutella, jam, whipped cream, cheese, or ice cream. Summation Notes: To make crispy yet soft wafer sandwiches, mix cake flour, all-purpose flour, rice flour, baking powder, sugar, salt, fresh milk, eggs, and melted butter together. Let the batter rest for 15 minutes, then bake in a waffle maker until golden brown and fragrant. You can add fillings such as Nutella, fresh fruit, or ham and cheese for extra deliciousness. Step 2: For the Cherry Ice Scream 1. Prepare the ice cream batter: Put frozen cherries, whipping cream, fresh milk, granulated sugar, and All materials Ingredients into a blender and blend until smooth. 2. Freezing: Pour the blended mixture into the mixer or sometimes place it in the freezer for 5-6 hours or until solid. 3. Assemble: Cut or scoop the frozen ice cream into pieces, place it on a cookie or wafer or waffle, and then top with another cookie. 4. Serving: Can be served immediately, or frozen again to allow it to set for easier consumption. Summation Notes: To make cherry sandwich ice cream, blend frozen cherries with whipping cream, sugar, and milk until smooth. Then freeze until set, and sandwich with your favorite cookies or wafers. The main ingredients are cherries, whipping cream, fresh milk, and sugar; chocolate chips can be added for extra flavor. And the finally then You can eat it and Sell it to the Merchant or Customer with Who people you known. Where can i you me buy it, Where to Buy, Where to find it: Internet Online, Supermarkets. Widely available from street food stalls, especially in durian-growing regions like, and at markets. Online: Easily ordered from platforms like Abcdefg in various grades and sizes. Additional tips Profit Useful Benefit Available Nutrition : Characteristics: Small fruit growing in clusters; reddish-brown bark. Benefits: High in beneficial nutrients, vitamins, and minerals, such as high in Vitamin C, comparable to mandarin oranges. Consumption: Eaten fresh, processed into jam, juice, desserts, or dried. Popular varieties: White mulberry (Morus alba), Black mulberry (Morus nigra), Red mulberry (Morus rubra). Mulberry (fashion brand) Origin: Founded in 1971 in Somerset, United Kingdom. Highlights: Produces luxury leather goods with high-quality craftsmanship. Popular models: Bayswater, Alexa, Darley Mulberry (fruit) Characteristics: Small fruit growing in clusters; reddish-brown bark. Benefits: High in beneficial nutrients, vitamins, and minerals, such as high in Vitamin C, comparable to mandarin oranges. Consumption: Eaten fresh, processed into jam, juice, desserts, or dried. Popular varieties: White mulberry (Morus alba), Black mulberry (Morus nigra), Red mulberry (Morus rubra). And the finally then You can eat it and Sell it to the Merchant or Customer with Who people you Know Knew known.
ClickMeSeeAllFull
ClickMeSeeOnMoreDetail
ClickMeSeeOnMorePictureImage
ClickMeSeeOnMoreVideo
Fruit: Processer Processed Processing food Menu: 3.Cherry Cake Ice Cream
Method: All Works: Cherry Cake Ice Cream
Method: How to make made cook: Recipe Procedure: Cherry Cake Ice Cream Materials Ingredients: 200-300 grams frozen cherries 2-3 tablespoons granulated sugar 150-200 grams cream cheese (room temperature) 1/2 cup sweetened condensed milk (adjust to taste) 1 cup whipping cream 1/2 cup coarsely crushed crackers (such as Hawksbread) 1 teaspoon vanilla extract (optional) Directions Instructions Method : Tip: If you don't have an ice cream maker, stirring the ice cream while it's freezing is very important to ensure a smooth and creamy texture. 1. Make the cherry sauce: Boil the frozen cherries with granulated sugar until boiling and thickened. Let it cool completely. Beat the cream cheese: Beat the cream cheese until smooth, add the condensed milk and vanilla extract until well combined. 2. Whip the cream: In another bowl, whip the cream until soft peaks form, then gently fold it into the prepared cream cheese. 3. Mixing: Gently fold in the cooled cherry sauce (reserve some for topping) and crushed crackers to create a decorative pattern. 4. Freezing: Pour into molds, place in the freezer for 1-2 hours, then remove and stir to prevent ice crystals from forming. Repeat 2-3 times. Serving: Freeze until completely solid (4-6 hours or overnight), spoon into bowls and drizzle with the remaining cherry sauce.Then You can take it to serve or eat it away, The Enjoy your meal, Have fun. Summation Notes: Make easy cherry cheesecake ice cream by simmering cherry sauce (frozen cherries + sugar) until thickened. Let cool. Beat cream cheese, condensed milk, and whipping cream together. Add crushed cherries and crushed crackers. Pour into a mold and freeze overnight. Stir every 30 minutes for the first 2 hours to ensure a smooth texture. And the finally then You can eat it and Sell it to the Merchant or Customer with Who people you known. Where can i you me buy it, Where to Buy, Where to find it: Internet Online, Supermarkets. Widely available from street food stalls, especially in durian-growing regions like, and at markets. Online: Easily ordered from platforms like Abcdefg in various grades and sizes. Additional tips Profit Useful Benefit Available Nutrition : Characteristics: Small fruit growing in clusters; reddish-brown bark. Benefits: High in beneficial nutrients, vitamins, and minerals, such as high in Vitamin C, comparable to mandarin oranges. Consumption: Eaten fresh, processed into jam, juice, desserts, or dried. Popular varieties: White mulberry (Morus alba), Black mulberry (Morus nigra), Red mulberry (Morus rubra). Mulberry (fashion brand) Origin: Founded in 1971 in Somerset, United Kingdom. Highlights: Produces luxury leather goods with high-quality craftsmanship. Popular models: Bayswater, Alexa, Darley Mulberry (fruit) Characteristics: Small fruit growing in clusters; reddish-brown bark. Benefits: High in beneficial nutrients, vitamins, and minerals, such as high in Vitamin C, comparable to mandarin oranges. Consumption: Eaten fresh, processed into jam, juice, desserts, or dried. Popular varieties: White mulberry (Morus alba), Black mulberry (Morus nigra), Red mulberry (Morus rubra). And the finally then You can eat it and Sell it to the Merchant or Customer with Who people you Know Knew known.
ClickMeSeeAllFull
ClickMeSeeOnMoreDetail
ClickMeSeeOnMorePictureImage
ClickMeSeeOnMoreVideo
Fruit: Processer Processed Processing food Menu: 4.Cherry Milk WipeCream Smoothie Shake
Method: All Works: Cherry Milk WipeCream Smoothie Shake
Method: How to make made cook: Recipe Procedure: Cherry Milk WipeCream Smoothie Shake Materials Ingredients: 1 cup fresh cherries (washed and pitted), 1 cup plain yogurt, 1 cup fresh milk, 2-3 tablespoons honey or sugar or syrup(to taste), salt 1 or 1/2 teaspoon(to taste), and crushed ice. Directions Instructions Method : Tip: Choose very ripe cherries for the sweetest and most delicious flavor. 1. Blending: Put all the ingredients into a blender. Blend on low speed until combined, then increase the speed and blend until smooth. 2. Serving: Pour into a glass, garnish with fresh cherries, or add yogurt/cherries for a richer flavor. Summation Notes: Making a refreshing and delicious cherry smoothie is easy. Simply blend 1 cup of fresh cherries (pitted and deseeded) with 1 cup of plain yogurt, 1 cup of fresh milk, 2-3 tablespoons of honey, and crushed ice until smooth. You can add bananas or blueberries for extra richness, and garnish with fresh cherries before serving. And the finally then You can eat it and Sell it to the Merchant or Customer with Who people you known. Where can i you me buy it, Where to Buy, Where to find it: Internet Online, Supermarkets. Widely available from street food stalls, especially in durian-growing regions like, and at markets. Online: Easily ordered from platforms like Abcdefg in various grades and sizes. Additional tips Profit Useful Benefit Available Nutrition : Characteristics: Small fruit growing in clusters; reddish-brown bark. Benefits: High in beneficial nutrients, vitamins, and minerals, such as high in Vitamin C, comparable to mandarin oranges. Consumption: Eaten fresh, processed into jam, juice, desserts, or dried. Popular varieties: White mulberry (Morus alba), Black mulberry (Morus nigra), Red mulberry (Morus rubra). Mulberry (fashion brand) Origin: Founded in 1971 in Somerset, United Kingdom. Highlights: Produces luxury leather goods with high-quality craftsmanship. Popular models: Bayswater, Alexa, Darley Mulberry (fruit) Characteristics: Small fruit growing in clusters; reddish-brown bark. Benefits: High in beneficial nutrients, vitamins, and minerals, such as high in Vitamin C, comparable to mandarin oranges. Consumption: Eaten fresh, processed into jam, juice, desserts, or dried. Popular varieties: White mulberry (Morus alba), Black mulberry (Morus nigra), Red mulberry (Morus rubra). And the finally then You can eat it and Sell it to the Merchant or Customer with Who people you Know Knew known.
ClickMeSeeAllFull
ClickMeSeeOnMoreDetail
ClickMeSeeOnMorePictureImage
ClickMeSeeOnMoreVideo
Fruit: Processer Processed Processing food Menu: 5.Cherry Puff Pastry
Method: All Works: Cherry Puff Pastry
Method: How to make made cook: Recipe Procedure: Cherry Puff Pastry Materials Ingredients: Prepare the Cherry Puff Pastry dough ingredients: 250 grams all-purpose flour, 50 grams unsalted butter (very cold), 120 milliliters very cold water, Salt 1-1/2 teaspoon or whatever. For the Cherry Puff Pastry Filling: 2 cups of cherries with 1/2 cup sugar or syrup or honey or sweetened condensed milk(whatever), lemon juice, and 1.5 tbsp cornstarch, milk, salt. Directions Instructions Method : Step 1: Tip: Keep the butter cool at all times. Avoid touching the butter directly with your hands for extended periods to achieve a clear and crispy puff pastry layer. 1. Kneading and resting the dough: Combine the flour and salt. Add the cold butter, cut into small pieces, and mix until combined. Gradually add the cold water and knead until the dough forms a ball (do not overmix until the butter melts). Wrap in plastic wrap and refrigerate for 30 minutes. 2. Prepare the butter for rolling: Take 200 grams of unsalted butter and roll it into a rectangle about 1 cm thick. Chill it while you wait. 3. Lamination (Wrapping and Folding Butter): 3.1 Roll out the rested dough into a rectangular sheet (about twice the width of the butter). 3.2 Place the butter in the center, fold the dough over it completely, wrap in plastic and refrigerate for 15 minutes. 3.3 Take it out, knead and roll the dough into a long sheet, then fold it into 3 layers (fold the left side to the center, then fold the right side over). 3.4 Refrigerate for 15-30 minutes. Repeat the rolling and folding (folding into 3 layers) process 3-4 more times. 4. Storage: Once rolled, let the dough rest in the refrigerator before rolling it thinly again to shape and make pastries (such as pies, curry puffs). Summation Notes: How to make homemade puff pastry: Start by making the dough. Combine 250 grams of all-purpose flour, 50 grams of cold unsalted butter (cut into small pieces), 120 ml of ice-cold water, and a teaspoon of salt. Gently knead until well combined. Wrap in plastic wrap and refrigerate for 30 minutes. Then, roll out the dough into a sheet. Place a slice of cold unsalted butter (200 grams) in the center. Fold the dough over the butter to completely cover it. Roll the dough into a rectangle. Fold in three sections, repeating 3-4 times (refrigerating between folds) to create a crispy layer of butter and dough. Step 2: Tips for Success Keep it Cold: Chill assembled pastries for 20–30 minutes before baking to ensure maximum puff. Prevent Soggy Bottoms: Use breadcrumbs or cornstarch to absorb excess moisture from the filling. Vent: Cut small slits in the top of the pastry to allow steam to 1.Filling: Combine 2 cups of cherries with 1/2 cup sugar, lemon juice, and 1.5 tbsp cornstarch, cooking until thickened. 2.Assembly: Cut thawed puff pastry into squares or rectangles, add filling to the center, fold, and seal edges with a fork. 3.Sealing: Edges are sealed with a fork and sometimes brushed with egg wash (egg + milk/water) for a golden finish. Finish: Brush with egg wash (1 egg + 1 tsp water) and sprinkle with coarse sugar before baking. 4.Glaze: Whisk 1 cup powdered sugar with 1–2 tbsp milk and 1/2 tsp vanilla to drizzle over cooled pastries. Summation Tips: Cherry puff pastry is a simple, flaky dessert made by filling store-bought puff pastry with cherry pie filling or a homemade cherry-cornstarch mixture. Common variations include turnovers, braided pastries, or hand pies, often enhanced with cream cheese, egg wash, and a simple powdered sugar glaze. Bake at for 15–25 minutes until golden brown. And the finally then You can eat it and Sell it to the Merchant or Customer with Who people you known. Where can i you me buy it, Where to Buy, Where to find it: Internet Online, Supermarkets. Widely available from street food stalls, especially in durian-growing regions like, and at markets. Online: Easily ordered from platforms like Abcdefg in various grades and sizes. Additional tips Profit Useful Benefit Available Nutrition : Characteristics: Small fruit growing in clusters; reddish-brown bark. Benefits: High in beneficial nutrients, vitamins, and minerals, such as high in Vitamin C, comparable to mandarin oranges. Consumption: Eaten fresh, processed into jam, juice, desserts, or dried. Popular varieties: White mulberry (Morus alba), Black mulberry (Morus nigra), Red mulberry (Morus rubra). Mulberry (fashion brand) Origin: Founded in 1971 in Somerset, United Kingdom. Highlights: Produces luxury leather goods with high-quality craftsmanship. Popular models: Bayswater, Alexa, Darley Mulberry (fruit) Characteristics: Small fruit growing in clusters; reddish-brown bark. Benefits: High in beneficial nutrients, vitamins, and minerals, such as high in Vitamin C, comparable to mandarin oranges. Consumption: Eaten fresh, processed into jam, juice, desserts, or dried. Popular varieties: White mulberry (Morus alba), Black mulberry (Morus nigra), Red mulberry (Morus rubra). And the finally then You can eat it and Sell it to the Merchant or Customer with Who people you Know Knew known.
ClickMeSeeAllFull
ClickMeSeeOnMoreDetail
ClickMeSeeOnMorePictureImage
ClickMeSeeOnMoreVideo
Fruit: Processer Processed Processing food Menu: 6.Cherry Tart
Method: All Works: Cherry Tart
Method: How to make made cook: Recipe Procedure: Cherry Tart Materials Ingredients: Prepare the Tart dough ingredients: 250 grams all-purpose flour, 50 grams unsalted butter (very cold), 120 milliliters very cold water, Salt 1-1/2 teaspoon or whatever. For the Cherry Tart Filling: 400 grams of fresh, pitted cherries, ground almonds, unsalted butter, granulated sugar, eggs, almond extract (for almond cream), 1-1/2 or more than(that your want) of salt(), cherry jam or apricot jam. Directions Instructions Method : Step 1: Tip: Keep the butter cool at all times. Avoid touching the butter directly with your hands for extended periods to achieve a clear and crispy puff pastry layer. 1. Kneading and resting the dough: Combine the flour and salt. Add the cold butter, cut into small pieces, and mix until combined. Gradually add the cold water and knead until the dough forms a ball (do not overmix until the butter melts). Wrap in plastic wrap and refrigerate for 30 minutes. 2. Prepare the butter for rolling: Take 200 grams of unsalted butter and roll it into a rectangle about 1 cm thick. Chill it while you wait. 3. Lamination (Wrapping and Folding Butter): 3.1 Roll out the rested dough into a rectangular sheet (about twice the width of the butter). 3.2 Place the butter in the center, fold the dough over it completely, wrap in plastic and refrigerate for 15 minutes. 3.3 Take it out, knead and roll the dough into a long sheet, then fold it into 3 layers (fold the left side to the center, then fold the right side over). 3.4 Refrigerate for 15-30 minutes. Repeat the rolling and folding (folding into 3 layers) process 3-4 more times. 4. Storage: Once rolled, let the dough rest in the refrigerator before rolling it thinly again to shape and make pastries (such as pies, curry puffs). Summation Notes: How to make homemade puff pastry: Start by making the dough. Combine 250 grams of all-purpose flour, 50 grams of cold unsalted butter (cut into small pieces), 120 ml of ice-cold water, and a teaspoon of salt. Gently knead until well combined. Wrap in plastic wrap and refrigerate for 30 minutes. Then, roll out the dough into a sheet. Place a slice of cold unsalted butter (200 grams) in the center. Fold the dough over the butter to completely cover it. Roll the dough into a rectangle. Fold in three sections, repeating 3-4 times (refrigerating between folds) to create a crispy layer of butter and dough. Step 2: 1. To make a delicious cherry tart, roll out the puff pastry to a thickness of approximately 3mm. 2. Then place them on a baking tray. 3. Next, spread a thin layer of jam onto the dough, followed by the almond cream filling (cream together butter, sugar, eggs, almond extract, and ground almonds). 4. Arrange the pitted fresh cherries evenly over the crust. Bake at degrees Celsius for minutes, until the crust is crispy and the filling is cooked through. then take it to serve or eat it away. have fun. Summation Notes: To make delicious cherry tarts, roll out pre-made puff pastry to a thickness of approximately mm and place it on a baking sheet. Spread a thin layer of jam on the pastry, followed by the almond cream filling (beat butter, sugar, eggs, almond extract, and ground almonds). Arrange pitted fresh cherries evenly on top. Bake at degrees Celsius for minutes, or until the pastry is crispy and the filling is cooked through. And the finally then You can eat it and Sell it to the Merchant or Customer with Who people you known. Where can i you me buy it, Where to Buy, Where to find it: Internet Online, Supermarkets. Widely available from street food stalls, especially in durian-growing regions like, and at markets. Online: Easily ordered from platforms like Abcdefg in various grades and sizes. Additional tips Profit Useful Benefit Available Nutrition : Characteristics: Small fruit growing in clusters; reddish-brown bark. Benefits: High in beneficial nutrients, vitamins, and minerals, such as high in Vitamin C, comparable to mandarin oranges. Consumption: Eaten fresh, processed into jam, juice, desserts, or dried. Popular varieties: White mulberry (Morus alba), Black mulberry (Morus nigra), Red mulberry (Morus rubra). Mulberry (fashion brand) Origin: Founded in 1971 in Somerset, United Kingdom. Highlights: Produces luxury leather goods with high-quality craftsmanship. Popular models: Bayswater, Alexa, Darley Mulberry (fruit) Characteristics: Small fruit growing in clusters; reddish-brown bark. Benefits: High in beneficial nutrients, vitamins, and minerals, such as high in Vitamin C, comparable to mandarin oranges. Consumption: Eaten fresh, processed into jam, juice, desserts, or dried. Popular varieties: White mulberry (Morus alba), Black mulberry (Morus nigra), Red mulberry (Morus rubra). And the finally then You can eat it and Sell it to the Merchant or Customer with Who people you Know Knew known.
ClickMeSeeAllFull
ClickMeSeeOnMoreDetail
ClickMeSeeOnMorePictureImage
ClickMeSeeOnMoreVideo
Fruit: Processer Processed Processing food Menu: 7.Cherry Croissant
Method: All Works: Cherry Croissant
Method: How to make made cook: Recipe Procedure: Cherry Croissant Directions Instructions Method : Step 1: Materials Ingredients: Prepare the Croissant dough ingredients: Main Ingredients (for the Dough): Flour: Bread flour or French flour T55 (500 g) Yeast: Dry yeast (11 g) Liquid: Cold water (140 g) and cold fresh milk (140 g) Sugar and Salt: Granulated sugar (55 g), salt (12 g) Butter: Softened unsalted butter (40 g for mixing) and dry butter/butter sheet (280-300 g) Tips: Butter: Use dry butter (unsalted butter with low moisture content) to prevent it from melting easily during rolling and folding. Temperature: Keep the dough cool while folding to prevent the butter from melting. Mixing and Resting the Dough: 1. Combine flour, yeast, sugar, salt, milk, and unsalted butter. Knead for 10-15 minutes until smooth. Rest the dough in the refrigerator or freezer for 1-2 hours. Making the Butter Lamination: Roll the dough into a rectangular sheet. Place a sheet of dry butter in the center. Fold the dough to completely enclose the butter. 2. Roll and Fold (Turn): Roll the buttered dough into a rectangle. Fold it into three layers (Letter Fold). Refrigerate for 30 minutes. Repeat this process three times. 3. Shaping and Filling: Roll the dough into a thin sheet, cut into triangular pieces, place the cherry filling at the base, and roll from the base to the top. 4. Proof & Bake: Let the shaped dough rest for about 1-2 hours until it doubles in size. Brush thoroughly with egg wash. Bake at 190-200 degrees Celsius for about 15-20 minutes. Summation Notes: Making cherry croissants starts with preparing the croissant dough (mixing flour, sugar, yeast, salt, milk, and butter). The dough is then rolled and folded with butter (lamination) 3-4 times to create layers. After rolling into a triangular sheet, add the cherry filling before rolling it into a croissant shape. Let the dough rise, brush with egg wash, and bake at 190-200°C for about 15-20 minutes, or until golden brown and crispy. Step 2: For the Cherry Jam Filling: Ingredients and Components (Quantities adjustable) Filling: Cherry Pie Filling or Cherry Jam Filling: 1 kg fresh cherries (pitted), 200-500 g granulated sugar (adjust according to the sweetness of the cherries), 1-2 teaspoons salt, lemon juice (for balancing the taste), 2 tablespoons gelatin powder or pectin (thickener), 200 ml water (optional). Tip: For longer storage, sterilize the jars by boiling the tightly sealed jam jars in boiling water for about 10 minutes. 1. Preparation Steps Preparing the cherries: Wash the cherries thoroughly, remove any spoiled ones, remove the pits, and cut them into small pieces or chop them coarsely. Making the jam: Put the cherries in a pot over medium heat. Add a little water. Once it boils, reduce the heat to low and simmer until the cherries are tender and the mixture has thickened. 2. Seasoning: Add sugar, salt, and gelatin (if using). Stir constantly to prevent sticking to the bottom of the pot. Simmer until the desired consistency is achieved. 3. Balance the flavors: Add the jam and a little lemon juice to enhance the sweet and sour taste. 4. Bottling: Turn off the heat, let it cool slightly, then pour into glass bottles sterilized with hot water. Seal the lids tightly. Summation Notes: Homemade cherry jam is easy to make. Wash the cherries, remove the pits, mash or roughly chop them, and simmer with sugar and salt over low heat until thickened (about 1-2 hours). You can add lemon juice to balance the flavors or gelatin to speed up the thickening process. Then, pour into sterilized jars. And the finally then You can eat it and Sell it to the Merchant or Customer with Who people you known. Where can i you me buy it, Where to Buy, Where to find it: Internet Online, Supermarkets. Widely available from street food stalls, especially in durian-growing regions like, and at markets. Online: Easily ordered from platforms like Abcdefg in various grades and sizes. Additional tips Profit Useful Benefit Available Nutrition : Characteristics: Small fruit growing in clusters; reddish-brown bark. Benefits: High in beneficial nutrients, vitamins, and minerals, such as high in Vitamin C, comparable to mandarin oranges. Consumption: Eaten fresh, processed into jam, juice, desserts, or dried. Popular varieties: White mulberry (Morus alba), Black mulberry (Morus nigra), Red mulberry (Morus rubra). Mulberry (fashion brand) Origin: Founded in 1971 in Somerset, United Kingdom. Highlights: Produces luxury leather goods with high-quality craftsmanship. Popular models: Bayswater, Alexa, Darley Mulberry (fruit) Characteristics: Small fruit growing in clusters; reddish-brown bark. Benefits: High in beneficial nutrients, vitamins, and minerals, such as high in Vitamin C, comparable to mandarin oranges. Consumption: Eaten fresh, processed into jam, juice, desserts, or dried. Popular varieties: White mulberry (Morus alba), Black mulberry (Morus nigra), Red mulberry (Morus rubra). And the finally then You can eat it and Sell it to the Merchant or Customer with Who people you Know Knew known.
ClickMeSeeAllFull
ClickMeSeeOnMoreDetail
ClickMeSeeOnMorePictureImage
ClickMeSeeOnMoreVideo
Fruit: Processer Processed Processing food Menu: 8.Cherry Pie
Method: All Works: Cherry Pie
Method: How to make made cook: Recipe Procedure: Cherry Pie Directions Instructions Method : Baked cherry pie: Tip: Using high heat for the first 15-20 minutes (around 200°C) will help the pie crust rise beautifully. You can also bake it in an air fryer at 180°C for about 10-15 minutes. 1. Prepare the pie base: Use ready-made pie crust or crispy pie crust and place it in a baking pan. 2. Add the filling: Pour the cherry filling evenly over the pie crust. 3. Covering the pie: You can either cover the entire pie or cut the dough into strips and weave them together in a basket weave pattern. 4. Baking: Bake in a preheated oven at 180-200°C for approximately 15-30 minutes, or until the dough is crispy and golden brown. Summation Notes: To make baked cherry pie, prepare the pie crust (or ready-made puff pastry) and place it in a pie pan. Add canned cherries or cherry jam filling and bake at approximately 180-200°C for 15-30 minutes, or until the crust is golden brown and crispy. Step 1: For The Pie Dough: (Dough optional 1) Shortcrust Pie Crust Ingredients (Basic): All-purpose flour: 240 grams Butter (chilled/cut into small pieces): 125 grams Granulated sugar: 10 grams Salt: 2 teaspoons Ice-cold water: 60 grams. Additional Tips Puff Pastry: Use 30 grams of all-purpose flour, 30 grams of bread flour, and 3 grams of butter for rolling. Focus on folding the dough into multiple layers to achieve a thin, crispy texture. Coldness is very important: The butter must be kept very cold at all times to ensure the pastry is crispy, flaky, and not hard. If the dough is sticky: This may be due to over-kneading. Knead only until the ingredients are combined. 1. Dry ingredients: Combine the wheat flour, granulated sugar, and salt. Chop the butter: Add the very cold butter. Use a pastry cutter to chop the butter and flour together until it resembles crumbly sand. 2. Add cold water: Add very cold water and mix well, but don't knead for too long as this will make the dough sticky. 3. Resting the dough: Gather the dough into a ball, wrap it in plastic wrap, and refrigerate for about 10-30 minutes to allow the butter to set. 4. Roll and Fold, Wrap the Butter and Filling, Knead and Bake: Roll out the rested dough into a rectangular sheet about 2 inches thick. Place the rolled butter in the center, drizzle the sauce and add the filling onto the dough, fold the dough over the butter to completely cover it. Line the pan and bake at 180°C until golden brown and crispy. Summation Notes: To make shortcrust pastry, combine 240 grams of all-purpose flour, 10 grams of sugar, 1 teaspoon of salt, and 125 grams of cold, diced butter. Chop the butter and flour until it resembles sand, then add about 60 grams of ice-cold water. Gently knead until the dough comes together. Chill for 10-30 minutes before rolling out and baking at 180°C. (Dough optional 2)Puff Pastry Ingredients: Bread flour: 600 grams All-purpose flour: 400 grams Ice-cold water: 500 grams Softened salted butter: 120 grams Granulated sugar: 100 grams Salt: 1-2 teaspoons Butter for rolling (pie butter): 600 grams Important Tips Coldness: Always refrigerate the dough after folding to prevent the butter from melting before baking. Oven: Bake at high heat so that the butter between the layers of dough creates steam, causing the dough to rise. 1. Make the dough: Combine both types of flour, sugar, salt, softened butter, and ice-cold water. Knead until just combined, but not too sticky. Chill the dough in the refrigerator for approximately [number] minutes. Prepare the butter for rolling: Place the butter on plastic wrap, roll it into a rectangular sheet, and chill to set. 2. Wrapping the butter: Roll out the rested dough into a rectangular sheet. Place the rolled-out butter in the center, drizzle the sauce and add the filling onto the dough, then fold the dough over the butter to completely cover it. 3. Rolling and Folding (Lamination): Roll the buttered dough into a long sheet. Fold it in three times (folding the left and right sides towards the center). Chill for 15-20 minutes. Repeat the rolling and folding process 3-4 times to create the pie layers. 4. Baking: Roll the dough into the desired shape, trim it, and bake at 180-200 °C until the dough is cooked, puffed up, and golden brown. Summation Notes: To make crispy and fluffy puff pastry, combine 600g bread flour, 400g all-purpose flour, sugar, salt, 500g ice-cold water, and softened butter. Knead the dough until well combined. Let it cool. Roll out the dough using a portion of the butter (600g), fold and roll again 3-4 times. Refrigerate while the dough rests. Bake at 180-200°C until golden brown and crispy. Step 2: For the Cherry Sauce Filling 200 grams of fresh or frozen cherries (halved) 50 grams of granulated sugar 50 milliliters of water 1 teaspoon of lemon juice 1 teaspoon of cornstarch (dissolved in water) 1/2 teaspoon of vanilla extract (optional) Tips: Adjust thickness: Simmer until desired thickness is achieved. Flavor: Add lime or lemon juice for a sweet and tangy flavor. Aroma: Add vanilla extract after turning off the heat. Storage: Can be stored in the refrigerator. 1. Simmer 200 grams of cherries (fresh/frozen), 50 grams of sugar, 50 ml of water, and 1 teaspoon of lemon juice until boiling. 2. Continue simmering over low heat for 5-7 minutes until it begins to thicken. You may add cornstarch dissolved in water (1 teaspoon) to increase viscosity. Turn off the heat, add vanilla extract, and let cool. Suitable as a topping for cakes, yogurt, or ice cream. For the Cherry Jam Filling: Ingredients and Components (Quantities adjustable) Filling: Cherry Pie Filling or Cherry Jam Filling: 1 kg fresh cherries (pitted), 200-500 g granulated sugar (adjust according to the sweetness of the cherries), 1-2 teaspoons salt, lemon juice (for balancing the taste), 2 tablespoons gelatin powder or pectin (thickener), 200 ml water (optional). Tip: For longer storage, sterilize the jars by boiling the tightly sealed jam jars in boiling water for about 10 minutes. 1. Preparation Steps Preparing the cherries: Wash the cherries thoroughly, remove any spoiled ones, remove the pits, and cut them into small pieces or chop them coarsely. Making the jam: Put the cherries in a pot over medium heat. Add a little water. Once it boils, reduce the heat to low and simmer until the cherries are tender and the mixture has thickened. 2. Seasoning: Add sugar, salt, and gelatin (if using). Stir constantly to prevent sticking to the bottom of the pot. Simmer until the desired consistency is achieved. 3. Balance the flavors: Add the jam and a little lemon juice to enhance the sweet and sour taste. 4. Bottling: Turn off the heat, let it cool slightly, then pour into glass bottles sterilized with hot water. Seal the lids tightly. Summation Notes: Homemade cherry jam is easy to make. Wash the cherries, remove the pits, mash or roughly chop them, and simmer with sugar and salt over low heat until thickened (about 1-2 hours). You can add lemon juice to balance the flavors or gelatin to speed up the thickening process. Then, pour into sterilized jars. And the finally then You can eat it and Sell it to the Merchant or Customer with Who people you known. Where can i you me buy it, Where to Buy, Where to find it: Internet Online, Supermarkets. Widely available from street food stalls, especially in durian-growing regions like, and at markets. Online: Easily ordered from platforms like Abcdefg in various grades and sizes. Additional tips Profit Useful Benefit Available Nutrition : Characteristics: Small fruit growing in clusters; reddish-brown bark. Benefits: High in beneficial nutrients, vitamins, and minerals, such as high in Vitamin C, comparable to mandarin oranges. Consumption: Eaten fresh, processed into jam, juice, desserts, or dried. Popular varieties: White mulberry (Morus alba), Black mulberry (Morus nigra), Red mulberry (Morus rubra). Mulberry (fashion brand) Origin: Founded in 1971 in Somerset, United Kingdom. Highlights: Produces luxury leather goods with high-quality craftsmanship. Popular models: Bayswater, Alexa, Darley Mulberry (fruit) Characteristics: Small fruit growing in clusters; reddish-brown bark. Benefits: High in beneficial nutrients, vitamins, and minerals, such as high in Vitamin C, comparable to mandarin oranges. Consumption: Eaten fresh, processed into jam, juice, desserts, or dried. Popular varieties: White mulberry (Morus alba), Black mulberry (Morus nigra), Red mulberry (Morus rubra). And the finally then You can eat it and Sell it to the Merchant or Customer with Who people you Know Knew known.
ClickMeSeeAllFull
ClickMeSeeOnMoreDetail
ClickMeSeeOnMorePictureImage
ClickMeSeeOnMoreVideo
Fruit: Processer Processed Processing food Menu: 8.Cherry Pudding
Method: All Works: Cherry Pudding
Method: How to make made cook: Recipe Procedure: Cherry Pudding Directions Instructions Method : Materials Ingredients (Cherry Milk Pudding): Cherry-flavored syrup: 1/2 cup Water: 1/2 cup Unsweetened fresh milk: 1 cup Agar powder: 1 teaspoon (divide for later use) Sugar: to taste Cherry stems or fresh cherries for decoration Tip: For a softer, bouncier texture, you can use gelatin powder instead of agar powder. 1. Make the cherry topping: Dissolve 1/2 teaspoon of agar powder in water. Bring to a boil over medium heat. Add cherry-flavored syrup and stir well. Pour into small molds and refrigerate until firm. 2. Prepare the milk mixture: Dissolve the remaining agar powder in the fresh milk. Let it sit for 15 minutes to allow the agar to swell. Heat the mixture over medium heat, add the sugar, and stir until the sugar dissolves and the milk simmers slightly. Turn off the heat and let it cool down. 3. Assemble: Remove the firm cherry jelly from the mold and place it in a larger glass or mold. Pour the milk jelly on top. 4. Chill: Refrigerate again for about 30-60 minutes until set. Serve. Summation Notes: To make cherry milk pudding, dissolve the agar powder in hot water, mix with concentrated cherry-flavored syrup, pour into molds, and refrigerate until set. Next, prepare the milk jelly by boiling sugar, fresh milk, and agar powder until dissolved. Pour this mixture on top of the set cherry jelly and refrigerate again until firm. Remove from molds and serve. And the finally then You can eat it and Sell it to the Merchant or Customer with Who people you known. Where can i you me buy it, Where to Buy, Where to find it: Internet Online, Supermarkets. Widely available from street food stalls, especially in durian-growing regions like, and at markets. Online: Easily ordered from platforms like Abcdefg in various grades and sizes. Additional tips Profit Useful Benefit Available Nutrition : Characteristics: Small fruit growing in clusters; reddish-brown bark. Benefits: High in beneficial nutrients, vitamins, and minerals, such as high in Vitamin C, comparable to mandarin oranges. Consumption: Eaten fresh, processed into jam, juice, desserts, or dried. Popular varieties: White mulberry (Morus alba), Black mulberry (Morus nigra), Red mulberry (Morus rubra). Mulberry (fashion brand) Origin: Founded in 1971 in Somerset, United Kingdom. Highlights: Produces luxury leather goods with high-quality craftsmanship. Popular models: Bayswater, Alexa, Darley Mulberry (fruit) Characteristics: Small fruit growing in clusters; reddish-brown bark. Benefits: High in beneficial nutrients, vitamins, and minerals, such as high in Vitamin C, comparable to mandarin oranges. Consumption: Eaten fresh, processed into jam, juice, desserts, or dried. Popular varieties: White mulberry (Morus alba), Black mulberry (Morus nigra), Red mulberry (Morus rubra). And the finally then You can eat it and Sell it to the Merchant or Customer with Who people you Know Knew known.
ClickMeSeeAllFull
ClickMeSeeOnMoreDetail
ClickMeSeeOnMorePictureImage
ClickMeSeeOnMoreVideo
Fruit: Processer Processed Processing food Menu: 10.Cherry Yogurt
Method: All Works: Cherry Yogurt
Method: How to make made cook: Recipe Procedure: Cherry Yogurt Directions Instructions Method : Step 1: Materials Ingredients: Plain yogurt: 1 cup (Greek yogurt will be thicker) Cherries: 10-15 cherries (pitted and diced) Honey or syrup: 1-2 tablespoons (adjust to taste) Salt 1-2 teaspoon(whatever, optional). Method for Cherry Yogurt (Mixed Recipe): 1.Method: Mix all ingredients together. Chill or blend for a smooth texture. Materials Ingredients : 450 grams of milk. Step 2: Steps for making homemade yogurt (before adding cherries): 1. Warm the milk: Warm approximately 450 grams of fresh milk until it's lukewarm (not piping hot). 2. Mix the starter culture: Add 1-2 tablespoons of plain yogurt and stir well with the milk. 3. Aging: Pour into a container, close the lid, and ferment at room temperature for 8-12 hours until the mixture thickens and sets. 4. Add the fruit: Once the yogurt is ready, mix it with the sliced cherries as desired. enjoy your meal and have fun. Summation Notes: Making cherry yogurt is easy. Simply combine 1 cup of plain yogurt with fresh or frozen cherries (chopped) and honey or syrup to taste. Blend or mix well and refrigerate before serving. Alternatively, to make your own yogurt, simply warm 450 grams of milk, add 1 cup of plain yogurt, let it ferment for 8-10 hours, and then add the cherries. And the finally then You can eat it and Sell it to the Merchant or Customer with Who people you known. Where can i you me buy it, Where to Buy, Where to find it: Internet Online, Supermarkets. Widely available from street food stalls, especially in durian-growing regions like, and at markets. Online: Easily ordered from platforms like Abcdefg in various grades and sizes. Additional tips Profit Useful Benefit Available Nutrition : Characteristics: Small fruit growing in clusters; reddish-brown bark. Benefits: High in beneficial nutrients, vitamins, and minerals, such as high in Vitamin C, comparable to mandarin oranges. Consumption: Eaten fresh, processed into jam, juice, desserts, or dried. Popular varieties: White mulberry (Morus alba), Black mulberry (Morus nigra), Red mulberry (Morus rubra). Mulberry (fashion brand) Origin: Founded in 1971 in Somerset, United Kingdom. Highlights: Produces luxury leather goods with high-quality craftsmanship. Popular models: Bayswater, Alexa, Darley Mulberry (fruit) Characteristics: Small fruit growing in clusters; reddish-brown bark. Benefits: High in beneficial nutrients, vitamins, and minerals, such as high in Vitamin C, comparable to mandarin oranges. Consumption: Eaten fresh, processed into jam, juice, desserts, or dried. Popular varieties: White mulberry (Morus alba), Black mulberry (Morus nigra), Red mulberry (Morus rubra). And the finally then You can eat it and Sell it to the Merchant or Customer with Who people you Know Knew known.
ClickMeSeeAllFull
ClickMeSeeOnMoreDetail
ClickMeSeeOnMorePictureImage
ClickMeSeeOnMoreVideo
Fruit: Processer Processed Processing food Menu: 1.Cantaloupe Ice Cream Cone
Method: All Works: Cantaloupe Ice Cream Cone
Method: How to make made cook: Recipe Procedure: Cantaloupe Ice Cream Cone Step 1: Ingredients for Ice Cream Cones and Vanilla or Anythings Waffles The Dough: 240 grams all-purpose flour, 180 grams granulated sugar, 4 medium eggs (size 2), 100 milliliters rice bran oil (soybean oil can also be used), 1 teaspoon vanilla extract, 150 milliliters unsweetened fresh milk, 1/4 teaspoon salt, 20 grams of cocoa powder(select option), 20 grams of green tea powder (select option). 1. Prepare a mixing bowl. Crack the eggs and add the sugar. Use a whisk to beat until dissolved and well combined. Then add the rice bran oil, unsweetened milk, and salt. Continue stirring until the mixture is well combined. 2. Next, gradually sift the all-purpose flour into the mixture and beat until well combined. Set aside. 3. Preheat the waffle cone maker. Pour the prepared batter into the waffle cone maker. Turn off the heat and wait 1-2 minutes. Once the batter is cooked, use a cone-shaped piping bag to roll it into a cone. Let it cool before serving. Step2: ice cream filling Ingredients Materials : 250 grams of sliced cantaloupe, 1/2 cup water, 1/4 cup sugar, 1/4 cup fresh milk or The milk is boiling, 1-6 chicken eggs, 1-2 lemons, salt 1 tsp - 4 table spoon or more than(if you like). Directions Instructions Method : 1. Blend the cantaloupe flesh in a food processor until smooth. In a mixing bowl, add the eggs and sugar, and whisk until well combined. 2. Pour water into a pot larger than the mixing bowl and heat it until boiling. Place the mixing bowl on top of the water (use heat-resistant gloves to handle). Stir the mixture constantly. Meanwhile, bring the milk to a boil, then immediately turn off the heat. Gradually pour the milk into the egg and sugar mixture. 3. Continue stirring until the mixture thickens into a creamy consistency, then remove from heat. Continue stirring for a while and let it cool. Add the blended cantaloupe and stir to combine. Add the lemon juice and stir again until well combined. 4. Close the container tightly and place it in the freezer for about 1 hour. Then, take it out and stir it with a whisk or scrape it with a fork. Then, return it to the freezer. Repeat this process 8 times. (The more times you do this, the smoother your ice cream will be.) enjoy to eat it or take it to sell to Anyone else or Merchant, i hope you have fun with this. And the finally then You can eat it and Sell it to the Merchant or Customer with Who people you known. Where can i you me buy it, Where to Buy, Where to find it: Internet Online, Supermarkets. Widely available from street food stalls, especially in durian-growing regions like, and at markets. Online: Easily ordered from platforms like Abcdefg in various grades and sizes. Additional tips Profit Useful Benefit Available Nutrition : Beta-carotene, found in cantaloupes as vitamin A, may help prevent asthma later in life. Choline, an antioxidant found in cantaloupes, may also help reduce inflammation in people with asthma. Lower blood pressure. The fiber, potassium, and vitamin C present in cantaloupes are important nutrients for your heart health. And the finally then You can eat it and Sell it to the Merchant or Customer with Who people you Know Knew known.
ClickMeSeeAllFull
ClickMeSeeOnMoreDetail
ClickMeSeeOnMorePictureImage
ClickMeSeeOnMoreVideo
Fruit: Processer Processed Processing food Menu: 2.Cantaloupe Ice Cream Sanwich waffle
Method: All Works: Cantaloupe Ice Cream Sanwich waffle
Method: How to make made cook: Recipe Procedure: Cantaloupe Ice Cream Sanwich waffle Step 1: Waffle Milk Batter for the Dough Ingredients: 320 grams all-purpose flour, 2 size 3 eggs (approximately 60 grams each), 1/4 teaspoon salt, 80 grams granulated sugar, 80 grams melted unsalted butter, 360 milliliters milk, 2 tablespoons baking powder. Directions Instructions Method : 1. Melt the butter and set it aside; do not pour it into the mixing bowl yet. 2. Prepare a mixing bowl. Crack the eggs into it and whisk them until broken. 3. Pour in the all-purpose flour, granulated sugar, salt, baking powder, fresh milk, the melted butter from earlier, and add the Hokkaido milk flavoring. Use a whisk to mix everything together until well combined. 4. Bake the waffle maker in a preheated oven at 150 degrees Celsius for approximately 3-5 minutes (depending on the oven). Let the waffles cool before filling them with the batter. Step 2: ice cream filling Ingredients Materials : 250 grams of sliced cantaloupe, 1/2 cup water, 1/4 cup sugar, 1/4 cup fresh milk or The milk is boiling, 1-6 chicken eggs, 1-2 lemons, salt 1 tsp - 4 table spoon or more than(if you like). Directions Instructions Method : 1. Blend the cantaloupe flesh in a food processor until smooth. In a mixing bowl, add the eggs and sugar, and whisk until well combined. 2. Pour water into a pot larger than the mixing bowl and heat it until boiling. Place the mixing bowl on top of the water (use heat-resistant gloves to handle). Stir the mixture constantly. Meanwhile, bring the milk to a boil, then immediately turn off the heat. Gradually pour the milk into the egg and sugar mixture. 3. Continue stirring until the mixture thickens into a creamy consistency, then remove from heat. Continue stirring for a while and let it cool. Add the blended cantaloupe and stir to combine. Add the lemon juice and stir again until well combined. 4. Close the container tightly and place it in the freezer for about 1 hour. Then, take it out and stir it with a whisk or scrape it with a fork. Then, return it to the freezer. Repeat this process 8 times. (The more times you do this, the smoother your ice cream will be.) enjoy to eat it or take it to sell to Anyone else or Merchant, i hope you have fun with this. And the finally then You can eat it and Sell it to the Merchant or Customer with Who people you known. Where can i you me buy it, Where to Buy, Where to find it: Internet Online, Supermarkets. Widely available from street food stalls, especially in durian-growing regions like, and at markets. Online: Easily ordered from platforms like Abcdefg in various grades and sizes. Additional tips Profit Useful Benefit Available Nutrition : Beta-carotene, found in cantaloupes as vitamin A, may help prevent asthma later in life. Choline, an antioxidant found in cantaloupes, may also help reduce inflammation in people with asthma. Lower blood pressure. The fiber, potassium, and vitamin C present in cantaloupes are important nutrients for your heart health. And the finally then You can eat it and Sell it to the Merchant or Customer with Who people you Know Knew known.
ClickMeSeeAllFull
ClickMeSeeOnMoreDetail
ClickMeSeeOnMorePictureImage
ClickMeSeeOnMoreVideo
Fruit: Processer Processed Processing food Menu: 3.Cantaloupe Ice Cream Cake
Method: All Works: Cantaloupe Ice Cream Cake
Method: How to make made cook: Recipe Procedure: Cantaloupe Ice Cream Cake Cantaloupe Ice Cream Cake Ingredients: 50 grams salted butter, 400 grams whipping cream, 60 grams condensed milk, crepes (chunks or finely chopped) cantaloupe (to taste), 1/2 pound removable bottom cake pan. Directions Instructions Method : 1. Place the cantaloupe in a ziplock bag and mash it until fairly smooth. Mash it while it still has the white cream filling, as this will provide a base sweetened by the cantaloupe. Prepare a mixing bowl. Add the mashed cantaloupe to the bowl, followed by the salted butter. Stir both ingredients together until well combined. 2. Press the mixture into the mold, pressing the cantaloupe firmly into the mold to create a solid base. Place the cantaloupe base in the freezer. 3. Prepare a new mixing bowl (it's recommended to chill it beforehand to make whipping cream easier to whip). Add the whipping cream and condensed milk. Whip the two mixtures together until fluffy and stiff peaks form. 4. Remove the cantaloupe base from the freezer and gradually pour the whipped cream into the mold, filling it completely. Use a spatula or other utensil to smooth the surface of the whipped cream. Then cover the cake with plastic wrap before freezing for about 5-6 hours, or if you have time, freezing it overnight will allow it to set more fully. After letting it set completely, remove it from the mold and decorate the top of the cake with cantaloupe, whipped cream, or other decorations such as jelly as desired. Before serving, it is recommended to refrigerate the ice cream cake every time to prevent it from melting. And the finally then You can eat it and Sell it to the Merchant or Customer with Who people you known. Where can i you me buy it, Where to Buy, Where to find it: Internet Online, Supermarkets. Widely available from street food stalls, especially in durian-growing regions like, and at markets. Online: Easily ordered from platforms like Abcdefg in various grades and sizes. Additional tips Profit Useful Benefit Available Nutrition : Beta-carotene, found in cantaloupes as vitamin A, may help prevent asthma later in life. Choline, an antioxidant found in cantaloupes, may also help reduce inflammation in people with asthma. Lower blood pressure. The fiber, potassium, and vitamin C present in cantaloupes are important nutrients for your heart health. And the finally then You can eat it and Sell it to the Merchant or Customer with Who people you Know Knew known.
ClickMeSeeAllFull
ClickMeSeeOnMoreDetail
ClickMeSeeOnMorePictureImage
ClickMeSeeOnMoreVideo
Fruit: Processer Processed Processing food Menu: 4.Cantaloupe Milk WipeCream Smoothie Shake
Method: All Works: Cantaloupe Milk WipeCream Smoothie Shake
Method: How to make made cook: Recipe Procedure: Cantaloupe Milk WipeCream Smoothie Shake Cantaloupe Milk WipeCream Smoothie Shake Ingredients: 5 ice cubes, 10 pieces of cantaloupe, 1/2 cup of water, 2 ladles of syrup(Select option), 1-2 tablespoons of honey(Select option). Sugar 1-2 table Spoon(Select option), Salt 1/2-4 tea spoon(if You like), Wipe Cream on your like, Milk on your like. Directions Instructions Method : 1. Put the ingredients into a blender and blend until smooth to your liking. Pour into a glass and serve or sell it to the merchant and who people you know knew known or anyone else that want. And the finally then You can eat it and Sell it to the Merchant or Customer with Who people you known. Where can i you me buy it, Where to Buy, Where to find it: Internet Online, Supermarkets. Widely available from street food stalls, especially in durian-growing regions like, and at markets. Online: Easily ordered from platforms like Abcdefg in various grades and sizes. Additional tips Profit Useful Benefit Available Nutrition : Beta-carotene, found in cantaloupes as vitamin A, may help prevent asthma later in life. Choline, an antioxidant found in cantaloupes, may also help reduce inflammation in people with asthma. Lower blood pressure. The fiber, potassium, and vitamin C present in cantaloupes are important nutrients for your heart health. And the finally then You can eat it and Sell it to the Merchant or Customer with Who people you Know Knew known.
ClickMeSeeAllFull
ClickMeSeeOnMoreDetail
ClickMeSeeOnMorePictureImage
ClickMeSeeOnMoreVideo
Fruit: Processer Processed Processing food Menu: 5.Cantaloupe Yogurt
Method: All Works: Cantaloupe Yogurt
Method: How to make made cook: Recipe Procedure: Cantaloupe Yogurt Cantaloupe Yogurt Ingredients: 2-3 cups plain Greek yogurt or Greek yogurt (to taste), Finely minced or powdered cantaloupe, shredded, diced, or chunked cantaloupe, cantaloupe, honey, sugar, fresh milk, whipped cream, a pinch of salt, (put everything on You like). Directions Instructions Method : 1. Pour the milk into a pot, heat over medium heat, and simmer until it reaches 85 degrees Celsius, stirring for 10 minutes. Remove from the heat and stir to let it cool. 2. Put the yogurt in a pot, stir well, pour into an airtight container, cover with a cloth, and let it rest for 4-6 hours. 3. Squeeze out excess water and refrigerate for another 60 minutes. 4. Serve or Sell it, that I hope you have fun. And the finally then You can eat it and Sell it to the Merchant or Customer with Who people you known. Where can i you me buy it, Where to Buy, Where to find it: Internet Online, Supermarkets. Widely available from street food stalls, especially in durian-growing regions like, and at markets. Online: Easily ordered from platforms like Abcdefg in various grades and sizes. Additional tips Profit Useful Benefit Available Nutrition : Beta-carotene, found in cantaloupes as vitamin A, may help prevent asthma later in life. Choline, an antioxidant found in cantaloupes, may also help reduce inflammation in people with asthma. Lower blood pressure. The fiber, potassium, and vitamin C present in cantaloupes are important nutrients for your heart health. And the finally then You can eat it and Sell it to the Merchant or Customer with Who people you Know Knew known.
ClickMeSeeAllFull
ClickMeSeeOnMoreDetail
ClickMeSeeOnMorePictureImage
ClickMeSeeOnMoreVideo
Fruit: Processer Processed Processing food Menu: 6.Cantaloupe Pudding Jelly
Method: All Works: Cantaloupe Pudding Jelly
Method: How to make made cook: Recipe Procedure: Cantaloupe Pudding Jelly Cantaloupe Pudding Jelly Ingredients: Cantaloupe(On more your like), Cantaloupe, either finely shredded, julienned, or diced(for filling mix), 4 cups of sugar or sweet milk, 1 a cup of fresh milk, milk 1/2-4 tea spoon(Are you like that one), 1/4 cup lemon juice, gelatin or agar powder. Key Preparation Methods Directions Instructions : 1.Classic Pudding Jelly: Blend 6 cups of cantaloupe, strain, and combine with 4 cups of sugar and 1/4 cup lemon juice, thickening with gelatin or agar powder before chilling. 2.Sicilian Gelo di Melone: Puree cantaloupe and simmer with sugar and cornstarch until it thickens, then chill in molds. 3.Stuffed Cantaloupe Jelly: Prepare a gelatin mixture and pour it into a hollowed-out, sealed cantaloupe, chilling it overnight to create a "melon cake" that can be sliced. And the finally then You can eat it and Sell it to the Merchant or Customer with Who people you known. Summations Notes: Cantaloupe pudding jelly is a refreshing summer dessert created by blending fresh cantaloupe into a strained juice, then simmering it with sugar, lemon juice, and gelatin or agar-agar. It is often poured back into the hollowed-out melon shell and chilled until firm, resulting in a vibrant orange, jelly-like pudding. Where can i you me buy it, Where to Buy, Where to find it: Internet Online, Supermarkets. Widely available from street food stalls, especially in durian-growing regions like, and at markets. Online: Easily ordered from platforms like Abcdefg in various grades and sizes. Key Additional Tips Profit Useful Benefit Available Nutrition : Beta-carotene, found in cantaloupes as vitamin A, may help prevent asthma later in life. Choline, an antioxidant found in cantaloupes, may also help reduce inflammation in people with asthma. Lower blood pressure. The fiber, potassium, and vitamin C present in cantaloupes are important nutrients for your heart health. And the finally then You can eat it and Sell it to the Merchant or Customer with Who people you Know Knew known.
ClickMeSeeAllFull
ClickMeSeeOnMoreDetail
ClickMeSeeOnMorePictureImage
ClickMeSeeOnMoreVideo
Fruit: Processer Processed Processing food Menu: 7.Cantaloupe Tart
Method: All Works: Cantaloupe Tart
Method: How to make made cook: Recipe Procedure: Cantaloupe Tart Step 1: Basic Tart Dough Ingredients: All-purpose flour: 125 - 180 grams, Salted or unsalted butter (cold): 75 - 90 grams, Icing sugar: 30 - 60 grams, Egg yolk: 1 (size 2), Salt: 1/4 teaspoon. Key Preparation Methods Directions Instructions : 1. Mix the flour and butter: Sift the all-purpose flour and icing sugar into a mixing bowl. Add the cold butter, cut into small pieces. Crush the butter: Use a pastry blender or a fork to rub the butter into the flour until it resembles coarse sand or wet sand. 2. Add the egg: Add the egg yolk and gently knead until the dough forms a ball (do not overmix or knead for too long, as this will make the dough sticky). Rest the dough: Wrap the dough in plastic wrap and refrigerate for at least 30-60 minutes to allow the butter to set. 3. Line the tart pan: Roll the dough to about 3 mm thick. Line the greased tart pans with the dough, then prick the bottom with a fork to prevent it from puffing up during baking. 4. Baking the dough: Bake at 170-180 degrees Celsius for 12-15 minutes, or until golden brown and fragrant. Summation Notes: To make a crispy and buttery shortcrust pastry, start by combining the all-purpose flour, icing sugar, and salt. Then, crumble the cold butter into the flour mixture until it resembles coarse sand. Add the egg yolk and gently knead until the dough forms. Wrap in plastic and refrigerate for at least 30 minutes to 1 hour before lining the tart pan and baking. Tips for Delicious Tart Cold Butter: Using cold butter will make the tart crust crispy and flaky. Gently Knead: Don't knead for too long to prevent the dough from becoming sticky. Rest the Dough: Refrigerating helps the dough maintain its shape and prevents it from shrinking during baking. Step 2: For Filling Tart Ingredients (for approximately 10-15 pieces): Ready-made egg tart shells: 10-15 pieces; Whipped cream (dairy): 150 ml; Fresh milk: 100 ml; Egg yolks (size 2 chicken eggs): 2-3; Granulated sugar: 40-50 grams (adjustable); Vanilla extract: 1/2 teaspoon; Salt: a pinch. Key Preparation Methods Directions Instructions : 1. Prepare the tart shells: Arrange the ready-made tart cups in a baking tray and let them sit at room temperature.Make the custard: Mix the fresh milk, whipping cream, granulated sugar, salt, and vanilla extract. Stir until the sugar dissolves. 2. Add the eggs: Add the egg yolks and gently stir to combine (do not beat until very frothy). Strain the mixture: Strain the custard through a sieve 1-2 times to ensure a smooth and creamy texture. 3. Filling the tart cups: Pour the custard mixture into the tart cups until almost full (about 3/4 of the cup). 4. Baking: Bake at 180-200 degrees Celsius using both top and bottom heat for 20-30 minutes, or until the top turns golden brown. Summation Notes: Making delicious egg tarts like those from famous shops is easy. Simply mix whipping cream, fresh milk, egg yolks, sugar, and vanilla extract. Stir well, then strain. Pour into ready-made tart shells and bake at 180-200 degrees Celsius (top and bottom heat) for approximately 20-30 minutes, until the top is golden brown and the custard is soft and fluffy. Tips for Deliciousness: Strain the ingredients: Do not skip the straining step to ensure a smooth tart surface. Baking temperature: If using an air fryer, use a temperature of 180-200 degrees Celsius and bake for approximately 10-15 minutes. Let it cool slightly before serving: Allow the tart to cool slightly after baking. This will help the custard set and taste even better. And the finally then You can eat it and Sell it to the Merchant or Customer with Who people you known. Where can i you me buy it, Where to Buy, Where to find it: Internet Online, Supermarkets. Widely available from street food stalls, especially in durian-growing regions like, and at markets. Online: Easily ordered from platforms like Abcdefg in various grades and sizes. Key Additional Tips Profit Useful Benefit Available Nutrition : Beta-carotene, found in cantaloupes as vitamin A, may help prevent asthma later in life. Choline, an antioxidant found in cantaloupes, may also help reduce inflammation in people with asthma. Lower blood pressure. The fiber, potassium, and vitamin C present in cantaloupes are important nutrients for your heart health. And the finally then You can eat it and Sell it to the Merchant or Customer with Who people you Know Knew known.
ClickMeSeeAllFull
ClickMeSeeOnMoreDetail
ClickMeSeeOnMorePictureImage
ClickMeSeeOnMoreVideo
Fruit: Processer Processed Processing food Menu: 8.Cantaloupe Puff Pastry
Method: All Works: Cantaloupe Puff Pastry
Method: How to make made cook: Recipe Procedure: Cantaloupe Puff Pastry Step 1: Basic Puff Pastry The Dough ingredients: 250 grams all-purpose flour, 125-150 grams salted butter (frozen) (cut into small pieces), 100-120 ml water, 1/2 teaspoon granulated sugar (optional), 1/4 teaspoon salt. Key Preparation Methods Directions Instructions : 1. Puff Pastry Dough Preparation: Combine flour, salt, and sugar. Add the chilled butter and use a pastry cutter or fork to mash the butter into the flour until it resembles coarse sand. 2. Add cold water: Gradually add the very cold water, mixing until it forms a ball (do not mix for too long, as this will make the dough sticky and the butter will melt). 3. Chilling (Important): Gather the dough into a ball, wrap it in plastic wrap, and refrigerate for at least 1-2 hours. 4. Rolling and Folding (Repeat 4-6 times): 4.1. Place the dough on a floured surface. 4.2. Roll the dough into a rectangle. 4.3. Fold the dough like a letter (fold the left and right sides towards the center, or fold in three sections). 4.4. Rotate the dough 90 degrees and repeat the rolling and folding process. 4.5. Note: If the butter is softened, refrigerate it before repeating. 4.6. Using: Once folded, refrigerate for another 30 minutes before cutting into desired shapes. Brush with egg yolk and bake at 200°C-220°C until the dough is puffed up and golden brown. Summary Summation Notes: To make crispy, layered puff pastry, alternate between rolling the dough and folding in cold butter to create layers of steam during baking. The main ingredients are all-purpose flour/bread flour, very cold butter, ice-cold water, and salt. The key is to keep the butter cold to achieve a crispy, flaky texture and beautiful layers. Tips for Delicious: The dough must be very cold before baking so that the butter melts in the oven and creates layers of dough. Step 2: Ready-made puff pastry (available at supermarkets), cantaloupe, granulated sugar (to taste according to the sweetness of the fruit), cornstarch (for making a thick filling), 1 egg (for brushing the puff pastry). Key Preparation Methods Directions Instructions : 1. Prepare the filling: Sauté the chopped fruit with sugar and cornstarch in a pan over low heat until thickened. Let it cool. 2. Prepare the dough: Take the frozen puff pastry out to thaw and cut it into square sheets of the desired size. 3. Wrapping the puff pastry: Spoon the fruit filling into the center of the pastry sheet. Fold the corners of the pastry inwards to form a triangle or square shape. Use a fork to press the edges of the pastry firmly. 4. Baking: Brush the puff pastry with beaten egg for a nice golden color. Bake at 190-200°C for 15-20 minutes, or until the puffs are puffed up and golden brown. Summary Summation Notes: Making fruit puffs is quick and easy using frozen puff pastry. Cut the pastry into sheets, place your prepared or chopped fruit filling (such as apples or strawberries) in the center, fold the pastry over it, brush with egg wash, and bake at 200°C until the puffs are puffed up and golden brown. Tips for Deliciousness: The powder puff should be kept very cold when used to make the powder layer crisp and fluffy, and brushing with egg wash will help the powder adhere better. And the finally then You can eat it and Sell it to the Merchant or Customer with Who people you known. Where can i you me buy it, Where to Buy, Where to find it: Internet Online, Supermarkets. Widely available from street food stalls, especially in durian-growing regions like, and at markets. Online: Easily ordered from platforms like Abcdefg in various grades and sizes. Key Additional Tips Profit Useful Benefit Available Nutrition : Beta-carotene, found in cantaloupes as vitamin A, may help prevent asthma later in life. Choline, an antioxidant found in cantaloupes, may also help reduce inflammation in people with asthma. Lower blood pressure. The fiber, potassium, and vitamin C present in cantaloupes are important nutrients for your heart health. And the finally then You can eat it and Sell it to the Merchant or Customer with Who people you Know Knew known.
ClickMeSeeAllFull
ClickMeSeeOnMoreDetail
ClickMeSeeOnMorePictureImage
ClickMeSeeOnMoreVideo
Fruit: Processer Processed Processing food Menu: 9.Cantaloupe Croissant
Method: All Works: Cantaloupe Croissant
Method: How to make made cook: Recipe Procedure: Cantaloupe Croissant Ingredients: Flour: 500 grams bread flour or French flour T55; Yeast: 10-12 grams instant yeast; Sugar: 50-60 grams granulated sugar; Salt: 10 grams salt; Liquids: 150 ml ice-cold milk, 150 ml cold water (or all milk); Butter: 40-50 grams softened unsalted butter for mixing; Butter for layering: 200-250 grams butter sheet (82% or higher); Filling: Cantaloupe. Key Preparation Methods Directions Instructions : 1. Detailed Instructions for Mixing and Kneading the Dough: Combine flour, sugar, salt, yeast, milk, and softened butter. Knead until smooth and forms a ball (it doesn't need to form a thin film). First Proofing: Roll out the dough into a rectangle, wrap in plastic, and refrigerate overnight (or at least 2-4 hours) to allow the dough to relax. 2. Prepare the lock-in butter: Roll out the unsalted butter into a small square, slightly smaller than the chilled dough. Lamination: Place the butter in the center of the dough, fold the dough over it to completely enclose the butter, roll into a long sheet, and fold into three layers (letter fold). Chill for 30 minutes. Repeat the rolling and folding process three more times. 3. Cutting and Rolling (Shaping): Roll the dough into a thin sheet, cut into triangles, place the filling at the base and roll from the base to the top. Final Proofing: Let the rolled croissants rest at room temperature for about (1)- (2) hours until the dough expands to twice its size. 4. Baking: Brush the top with an egg and milk mixture (egg wash) and bake at 180-190 degrees Celsius for 15-20 minutes, or until golden brown. Summary Summation Notes: How to make homemade stuffed croissant dough: Start by mixing flour, yeast, milk and butter, knead until combined and let the dough rise. Then roll out the dough to wrap the pastry butter (Lock-in), fold 3 times, chill and roll alternately to make layers (Lamination), cut into triangles, add filling, roll up, let the dough rest one last time, brush with egg and bake at (180)-(190) degrees Celsius until golden brown and crispy. Tips for Deliciousness: Temperature is Crucial: Always roll out the dough while it's cool. If the dough is too soft, the butter will melt, preventing the croissants from forming the correct layers. Filling: For chocolate bar filling, place it before rolling. For cream or jam filling, it's best to pipe the filling after baking. Resting the Dough: Refrigerating overnight will help the dough set properly. And the finally then You can eat it and Sell it to the Merchant or Customer with Who people you known. Where can i you me buy it, Where to Buy, Where to find it: Internet Online, Supermarkets. Widely available from street food stalls, especially in durian-growing regions like, and at markets. Online: Easily ordered from platforms like Abcdefg in various grades and sizes. Key Additional Tips Profit Useful Benefit Available Nutrition : Beta-carotene, found in cantaloupes as vitamin A, may help prevent asthma later in life. Choline, an antioxidant found in cantaloupes, may also help reduce inflammation in people with asthma. Lower blood pressure. The fiber, potassium, and vitamin C present in cantaloupes are important nutrients for your heart health. And the finally then You can eat it and Sell it to the Merchant or Customer with Who people you Know Knew known.
ClickMeSeeAllFull
ClickMeSeeOnMoreDetail
ClickMeSeeOnMorePictureImage
ClickMeSeeOnMoreVideo
Fruit: Processer Processed Processing food Menu: 10.Cantaloupe Pie
Method: All Works: Cantaloupe Pie
Method: How to make made cook: Recipe Procedure: Cantaloupe Pie Step 1: For The Dough Ingredients: Easy homemade puff pastry recipe and method. Main ingredients: All-purpose flour: 300 grams, Pastry margarine (or cold butter): 200 grams, (for rolling) very cold unsalted butter (diced): 35 grams, granulated sugar: 10 grams, salt: 1/2 teaspoon, very cold tea: 135 ml. Key Preparation Methods Directions Instructions : 1. Dough: Sift the flour and salt together. Add the diced cold butter. Knead or blend until the dough resembles coarse sand. Add the ice-cold water and knead just until combined, don't overknead. Resting time: Gather the dough into a ball, wrap in plastic wrap, and refrigerate for at least 30 minutes to 1 hour. 2. Prepare the butter: Roll out the pastry margarine into a square sheet about 1 cm thick and about (4x5) inches in size. Chill it and set aside. 3. Lamination: Roll out the rested dough into a long sheet. Place a slice of butter in the center. Fold the dough over the butter, ensuring it's completely covered. Roll the dough out further and fold it into three layers. Repeat 3-4 times. Chill the dough in the refrigerator for 15-20 minutes between folding sessions to prevent the butter from melting. 4. 20 minutes during folding to prevent the butter from melting: Once folded, roll the dough to your desired thickness and line a pie crust or cut into slices for making pie crusts. Summary Summation Notes: This basic shortcrust pastry recipe, which results in a crispy and delicious pie crust, includes 300 grams of all-purpose flour, 200 grams of chilled unsalted butter, diced, 100-130 ml of ice-cold water, 1 tablespoon of granulated sugar, and 1/2 teaspoon of salt. The key is to combine the butter and flour until it resembles sand. Cream the butter and flour together until it has a coarse, breadcrumb-like texture. Add the ice-cold water to gather the flour. Chill for at least one hour before rolling out to achieve a crispy, crumbly pie crust that won't melt. Tips for Deliciousness: Tips for the perfect pie crust: Use ice-cold butter: Cold butter creates an air layer, resulting in a crumbly pie crust. Use ice-cold water: To keep the butter cool throughout the mixing process. Don't overmix: Knead the dough just until combined. Over-kneading will make the pie crust tough. Rest the dough in the refrigerator: Chilling helps the dough relax and makes it easier to roll out. Step 2: For Filling sauce 2 cups sliced cantaloupe, 1/2 - 1 cup granulated sugar (adjust to the sweetness of the cantaloupe), 2 tablespoons cornstarch (to thicken the cream), 1 cup whipped cream or cream cheese (for mixing with the cream), crushed crackers mixed with melted butter (for the pie base). Key Preparation Methods Directions Instructions : 1. Make the pie base: Crush the crackers and mix with melted butter. Press the mixture into the pie pan and refrigerate until the base sets. 2. Make the cantaloupe filling: Blend the cantaloupe until smooth. Then simmer it in a pan over low heat. Add sugar and cornstarch, and simmer until thickened (reducing moisture). Let it cool completely. Make the cream: Whip the cream until fluffy. Then add the cooled cantaloupe filling and gently fold until combined to create a smooth, orange-colored cantaloupe cream. 3. Assembly: Pour the cantaloupe cream filling into the prepared pie crust. Decorate with fresh cantaloupe slices or chilled whipped cream. Refrigerate the pie for at least 2-3 hours, or until the filling has set, before slicing and serving. 4. Baking: Brush the top with an egg and milk mixture (egg wash) and bake at 180-190 degrees Celsius for 15-20 minutes, or until golden brown. Summary Summation Notes: To make Cantaloupe Cream Pie, start by blending the cantaloupe flesh and simmering it over low to medium heat with sugar until it thickens into a jam. Strain out any coarse pulp or simmer until smooth. Mix this with cream cheese or whipped cream and beat until fluffy and smooth. Spoon the mixture into a pie crust-lined mold and let it chill completely before serving. Tips for Deliciousness: For an even smoother texture, strain the blended cantaloupe through a fine-mesh sieve before simmering. And the finally then You can eat it and Sell it to the Merchant or Customer with Who people you known. Where can i you me buy it, Where to Buy, Where to find it: Internet Online, Supermarkets. Widely available from street food stalls, especially in durian-growing regions like, and at markets. Online: Easily ordered from platforms like Abcdefg in various grades and sizes. Key Additional Tips Profit Useful Benefit Available Nutrition : Beta-carotene, found in cantaloupes as vitamin A, may help prevent asthma later in life. Choline, an antioxidant found in cantaloupes, may also help reduce inflammation in people with asthma. Lower blood pressure. The fiber, potassium, and vitamin C present in cantaloupes are important nutrients for your heart health. And the finally then You can eat it and Sell it to the Merchant or Customer with Who people you Know Knew known.
ClickMeSeeAllFull
ClickMeSeeOnMoreDetail
ClickMeSeeOnMorePictureImage
ClickMeSeeOnMoreVideo
Fruit: Processer Processed Processing food Menu: 1.Melon Milk WipeCream Smoothie Shake
Method: All Works: Melon Milk WipeCream Smoothie Shake
Method: How to make made cook: Recipe Procedure: Melon Milk WipeCream Smoothie Shake Materials Ingredients: (for 1-2 glasses): 1 cup ripe cantaloupe flesh (sliced), 100 ml coconut cream, 50 ml fresh milk, 50 ml sweetened condensed milk (adjust to taste), 50 ml evaporated milk, 20 ml honey or syrup (omit if you prefer less sweetness), 1 glass of ice (22 oz glass), a pinch of salt, 2-3 pandan leaves (for blending or simmering with coconut cream). Key Preparation Directions Instructions Methods: 1. Prepare the flesh: Peel the cantaloupe, remove the seeds, and cut the flesh into small pieces for easy blending. 2. Prepare the coconut milk (with pandan leaf aroma): Put the coconut milk/fresh milk in a pot with pandan leaves, palm sugar, and salt. Simmer over low heat until the sugar dissolves. Let it cool. 2. Blend: Put the cantaloupe flesh, prepared coconut milk, condensed milk, evaporated milk, and ice into a blender. 3. Blend until smooth: Blend all ingredients until smooth and well combined. 4. Serving: Pour into a glass. You can top it with small pieces of cantaloupe for added flavor. Summary Summation Notes: How to make a refreshing and creamy Thai melon smoothie with coconut milk, fresh milk, and pandan leaves. It's easy to make: simply blend ripe Thai melon flesh, coconut milk (or fresh milk), condensed milk, evaporated milk, simple syrup, salt, and ice until smooth. The result is a sweet and creamy drink with a fragrant pandan aroma. Perfect for selling or enjoying at home during the summer. Tips for Deliciousness: Tips for enhanced flavor and aroma: If using fresh milk instead of coconut milk, you can use coconut-flavored fresh milk or coconut water. Sweetness: Taste before blending to adjust the sweetness of the condensed milk to your liking. Chilling: Using very chilled or frozen cantaloupe will help create a thicker, more creamy smoothie. And the finally then You can eat it and Sell it to the Merchant or Customer with Who people you Know Knew known, i hope you have fun and enjoy it. Where can i you me buy it, Where to Buy, Where to find it: Internet Online, Supermarkets. Widely available from street food stalls, especially in durian-growing regions like, and at markets. Online: Easily ordered from platforms like Abcdefg in various grades and sizes. Key Additional Tips Profit Useful Benefit Available Nutrition : Beta-carotene, found in Melon, cantaloupes as vitamin A, may help prevent asthma later in life. Choline, an antioxidant found in cantaloupes, may also help reduce inflammation in people with asthma. Lower blood pressure. The fiber, potassium, and vitamin C present in cantaloupes are important nutrients for your heart health. And the finally then You can eat it and Sell it to the Merchant or Customer with Who people you Know Knew known, i hope you have fun and enjoy it.
ClickMeSeeAllFull
ClickMeSeeOnMoreDetail
ClickMeSeeOnMorePictureImage
ClickMeSeeOnMoreVideo
Fruit: Processer Processed Processing food Menu: 2.Melon Yogurt
Method: All Works: Melon Yogurt
Method: How to make made cook: Recipe Procedure: Melon Yogurt Path 1: Yogurt Standard Classic Original: Materials Ingredients: Unsweetened fresh milk (Full Fat): 1 liter (pasteurized or UHT milk recommended), Plain yogurt (starter culture): 2-3 tablespoons (recommended to use a formula that specifies live microorganisms, such as Bulgarian yogurt), 1-4 cups finely grated melon, 1-4 cups shredded melon, 1-4 cups diced melon, Select option, if you like want it(1/2-4 cups or glasses of coconut milk, 1/2-4 teaspoons sugar, 1/2-4 teaspoons honey, 1/2-4 teaspoons syrup, 1/2-4 teaspoons salt.)! Key Preparation Directions Instructions Methods: 1. Warm the milk: Pour the fresh milk and ingredients into a pot and heat over low heat until it reaches approximately 40-45°C (if you don't have a thermometer, dip your finger in and it should feel hot but tolerable). Do not let it boil, as this will kill the bacteria. 2. Mixing the starter culture: Scoop plain yogurt into the warm milk and stir gently until the yogurt dissolves and mixes with the milk. 3. Incubating the yogurt: Pour the mixture into a container with a tight-fitting lid (sterilized glass containers are recommended). Incubate it in a warm place, such as in a covered rice cooker (without turning on the heat), or wrap it in a towel and keep it in a cool, shaded area for about 6-12 hours. 4.Check and refrigerate: Once the yogurt has set (to your desired level of sourness), refrigerate for at least 2-3 hours to allow it to firm up before serving. Summary Summation Notes: Making your own traditional yogurt is easy. Simply warm 1 liter of unsweetened fresh milk (about 40-45°C), mix with 2-3 tablespoons of plain yogurt starter, stir well, pour into a container, cover, and incubate in a warm place (such as a styrofoam box or oven) for 6-12 hours until set. Then refrigerate before serving. You'll get smooth, creamy yogurt. Tips for Deliciousness: Tips for making delicious Greek yogurt: Strain the finished yogurt through a cheesecloth for about 1-3 hours to remove the whey, resulting in a thick and viscous texture. Storing starter culture: Divide the finished yogurt into 2-3 tablespoons, place in an airtight container, and refrigerate as a starter for future use. Cleanliness: All utensils should be sterilized with hot water before use to prevent unwanted bacteria. Part 2: Yogurt New Version: Materials Ingredients: 1 cup ripe cantaloupe (soft and fragrant), 1 cup plain yogurt (Greek yogurt is smoother), 1 cup honey or condensed milk (to taste), vanilla extract (optional), 1/2-4 teaspoon salt(if You like want, Select option). Key Preparation Directions Instructions Methods: 1. Prepare the cantaloupe: Peel, remove the seeds, wash thoroughly, and cut the cantaloupe flesh into small pieces. Blend: Put the cantaloupe flesh, yogurt, and honey/condensed milk into a blender and blend until smooth and creamy. 2. Taste and adjust the flavor: Taste the dish. If you prefer it sweeter, you can add honey to your liking. 3. Refrigeration: Pour into a container with a lid and refrigerate for about 1-2 hours to allow the yogurt to set and be thoroughly chilled. 4. Serving: Spoon into a bowl, top with diced, fragrant cantaloupe, and enjoy! Summary Summation Notes: Making homemade cantaloupe yogurt is easy! Simply blend ripe cantaloupe flesh with plain yogurt, add sweetener to taste, and chill until set. Serve with diced cantaloupe for a refreshing and healthy dessert with a smooth texture and unique aroma. Tips for Deliciousness: Tip: For a smooth, creamy texture like Greek yogurt, strain the blended yogurt through a cheesecloth and refrigerate for 3-6 hours to remove the whey. And the finally then You can eat it and Sell it to the Merchant or Customer with Who people you Know Knew known, i hope you have fun and enjoy it. Where can i you me buy it, Where to Buy, Where to find it: Internet Online, Supermarkets. Widely available from street food stalls, especially in durian-growing regions like, and at markets. Online: Easily ordered from platforms like Abcdefg in various grades and sizes. Key Additional Tips Profit Useful Benefit Available Nutrition : Beta-carotene, found in Melon, cantaloupes as vitamin A, may help prevent asthma later in life. Choline, an antioxidant found in cantaloupes, may also help reduce inflammation in people with asthma. Lower blood pressure. The fiber, potassium, and vitamin C present in cantaloupes are important nutrients for your heart health. And the finally then You can eat it and Sell it to the Merchant or Customer with Who people you Know Knew known, i hope you have fun and enjoy it.
ClickMeSeeAllFull
ClickMeSeeOnMoreDetail
ClickMeSeeOnMorePictureImage
ClickMeSeeOnMoreVideo
Fruit: Processer Processed Processing food Menu: 3.Melon Pudding Jelly
Method: All Works: Melon Pudding Jelly
Method: How to make made cook: Recipe Procedure: Melon Pudding Jelly Materials Ingredients: 500 ml of ripe Melon pulp (mashed and diced), fresh milk or coconut milk, or a combination of both, granulated sugar or palm sugar (to taste), agar powder or gelatin (for making pudding), a pinch of salt. Key Preparation Directions Instructions Methods: 1. Prepare the Melon: Peel the Melon, remove the seeds, mash some of the flesh finely, and dice the rest into small cubes. 2. Mix the ingredients: Combine coconut milk, fresh milk, sugar, and agar powder/gelatin in a pot. Stir until dissolved. 2. Heat the mixture over low heat, stirring constantly until it begins to boil and thicken (be careful not to let it curdle). Then add the mashed Melon and mix well, then turn off the heat. 3. Pour into molds: Spoon the mixture into the prepared containers. Refrigerate for about 1-2 hours, or until the pudding sets. 4. Serving: Garnish with diced Melon and drizzle with fresh coconut milk for added richness as desired. Summary Summation Notes: To make soft and creamy Melon pudding, mix mashed Melon with fresh milk, coconut milk, sugar, and agar/gelatin powder. Heat until dissolved and well combined. Pour into molds and refrigerate until set. Serve with diced Melon pieces. A refreshing and delicious treat! And the finally then You can eat it and Sell it to the Merchant or Customer with Who people you Know Knew known, i hope you have fun and enjoy it. Where can i you me buy it, Where to Buy, Where to find it: Internet Online, Supermarkets. Widely available from street food stalls, especially in durian-growing regions like, and at markets. Online: Easily ordered from platforms like Abcdefg in various grades and sizes. Key Additional Tips Profit Useful Benefit Available Nutrition : Beta-carotene, found in Melon, cantaloupes as vitamin A, may help prevent asthma later in life. Choline, an antioxidant found in cantaloupes, may also help reduce inflammation in people with asthma. Lower blood pressure. The fiber, potassium, and vitamin C present in cantaloupes are important nutrients for your heart health. And the finally then You can eat it and Sell it to the Merchant or Customer with Who people you Know Knew known, i hope you have fun and enjoy it.
ClickMeSeeAllFull
ClickMeSeeOnMoreDetail
ClickMeSeeOnMorePictureImage
ClickMeSeeOnMoreVideo
Fruit: Processer Processed Processing food Menu: 4.Melon Ice Scream Milk Cone
Method: All Works: Melon Ice Scream Milk Cone
Method: How to make made cook: Recipe Procedure: Melon Ice Scream Milk Cone Step 1: For The Cone Ice Scream: Materials Ingredients: 1 cup all-purpose flour, 1/2 cup granulated sugar, 2 eggs, 3 tablespoons melted butter, 1/4 cup milk, 1 teaspoon vanilla extract (optional), 1/4 teaspoon salt, waffle maker or non-stick pan, ice cream cone maker. Key Preparation Directions Instructions Methods: 1. Mix the flour: Beat the eggs with the sugar until the sugar dissolves. Add the melted butter, milk, salt, and vanilla extract. Stir well. Sift the flour: Sift the all-purpose flour into the egg mixture and beat until smooth and lump-free. 2. Baking the batter: Preheat the waffle cone maker. Pour about 1-2 tablespoons of batter into the center of the waffle maker, cover, and bake for about 1-2 minutes, or until golden brown. 3. Rolling the cone: Once cooked, quickly remove the pancake and roll it with a cone mold while it's still hot (if it cools, the pancake will become crispy and cannot be rolled). 4. Cooling: Let the ice cream cones cool completely on a wire rack until crispy. Ready to serve. Summary Summation Notes: Here's how to easily make crispy homemade ice cream cones (waffle cones): Beat together eggs, sugar, melted butter, milk, and vanilla extract. Sift in all-purpose flour and mix until smooth. Pour batter onto a waffle cone maker, bake until golden brown (1-2 minutes), then quickly roll into a cone shape with a cone mold while still hot. Let cool until crispy. Tip: If you don't have a waffle cone maker, you can use a flat, non-stick pan instead. Use low heat and spread the batter as thinly as possible. Step 2: For The Filling Ice Scream: 300-400 grams of ripe cantaloupe flesh (sliced), 250-500 ml of coconut milk, 80-150 grams of palm sugar or granulated sugar (adjust to taste), 1/4 - 1/2 teaspoon of salt, 1-2 tablespoons of cornstarch (optional, for thickening). Key Preparation Directions Instructions Methods: 1. Prepare the coconut milk sauce: Combine coconut milk, palm sugar, and salt in a saucepan and simmer until well combined. For a thicker consistency, add cornstarch dissolved in water and simmer until slightly thickened. Let it cool completely. 2. Blend the cantaloupe flesh: Put the chopped cantaloupe flesh into a blender, add the chilled coconut milk, and blend until smooth and well combined. 3. Freezing: Pour the blended mixture into a container or ice cream mold, close the lid tightly, and freeze overnight, or until solid. 4. Serving: Scoop the frozen ice cream into balls or remove it from the molds. Garnish with diced cantaloupe for added flavor. Summation Notes: This recipe for sweet and creamy Thai melon ice cream is easy. Simply blend 250-400 grams of ripe Thai melon flesh with 500 ml of coconut milk that has been simmered with palm sugar and salt. Freeze until set. Most recipes emphasize the rich aroma and creaminess of the coconut milk and the smooth texture of the blended Thai melon. Tip: If you don't have an ice cream maker, freeze it and then churn it, or use a fork to scrape it every 1-2 hours to keep the ice cream smooth and prevent it from becoming too icy. And the finally then You can eat it and Sell it to the Merchant or Customer with Who people you Know Knew known, i hope you have fun and enjoy it. Where can i you me buy it, Where to Buy, Where to find it: Internet Online, Supermarkets. Widely available from street food stalls, especially in durian-growing regions like, and at markets. Online: Easily ordered from platforms like Abcdefg in various grades and sizes. Key Additional Tips Profit Useful Benefit Available Nutrition : Beta-carotene, found in Melon, cantaloupes as vitamin A, may help prevent asthma later in life. Choline, an antioxidant found in cantaloupes, may also help reduce inflammation in people with asthma. Lower blood pressure. The fiber, potassium, and vitamin C present in cantaloupes are important nutrients for your heart health. And the finally then You can eat it and Sell it to the Merchant or Customer with Who people you Know Knew known, i hope you have fun and enjoy it.
ClickMeSeeAllFull
ClickMeSeeOnMoreDetail
ClickMeSeeOnMorePictureImage
ClickMeSeeOnMoreVideo
Fruit: Processer Processed Processing food Menu: 5.Melon Ice Cream Sandwiches
Method: All Works: Melon Ice Cream Sandwiches
Method: How to make made cook: Recipe Procedure: Melon Ice Cream Sandwiches Step 1: For The Sandwiches Ice Scream: Materials Ingredients: 250 grams all-purpose flour, 16 grams baking powder (1 tablespoon + 1 teaspoon), 150-170 grams granulated sugar (adjust to taste), 1/4 teaspoon salt, 3 medium eggs, 128 grams evaporated milk (or fresh milk), 43-50 grams rice bran oil or melted butter, 1-2 teaspoons vanilla extract. Key Preparation Directions Instructions Methods: 1. Dry ingredients: Sift the all-purpose flour, baking powder, and salt together into a mixing bowl. Liquid ingredients: In another bowl, beat the eggs with the granulated sugar until the sugar dissolves. Add the evaporated milk, rice bran oil, and vanilla extract and mix well. 2. Combine ingredients: Pour the liquid ingredients into the bowl of dry ingredients. Gently fold with a whisk until the mixture is well combined and there are no lumps of flour (do not overmix as this will make the dough sticky). Rest the dough: Cover with plastic wrap and let the dough rest for about 30 minutes to allow it to set. 3. Baking Waffles: Preheat the waffle maker. Lightly grease the mold with vegetable oil. Pour the batter into the mold, filling it completely. Cover and bake for about 2-3 minutes, or until the indicator light goes out and the waffles are golden brown. 4. Cool: Place the cooked waffles on a wire rack to prevent them from becoming soggy due to condensation. Summary Summation Notes: To make crispy on the outside, soft on the inside homemade waffles, start by mixing the dry ingredients (all-purpose flour, baking powder, sugar, salt) with the liquid ingredients (milk, eggs, oil/melted butter). Gently fold until smooth. Grease the waffle iron and preheat it. Pour the batter into the waffle iron and bake for about 2-3 minutes, or until golden brown and crispy. Let cool on a wire rack before serving with toppings. Tip: To keep waffles soft for longer: Use melted butter instead of vegetable oil for a more fragrant result. To keep waffles crispy for longer: Let them cool completely on a wire rack before serving. Storage: If not consumed immediately, store in an airtight container for 2-3 days or freeze and reheat before eating. Popular toppings: Ice cream, honey, chocolate sauce, fresh fruit (bananas, strawberries). Step 2: For The Filling Ice Scream: Two waffles (homemade or pre-made), one scoop of your favorite ice cream (vanilla, chocolate), and toppings (such as chocolate chips, nuts, or sprinkles). Key Preparation Directions Instructions Methods: 1. Prepare the waffle wafers: Chill the waffles in the freezer for about 15 minutes to make them crispy and less likely to break. 2. Prepare the ice cream: Let the ice cream soften slightly, but not completely runny. 2. Assembly: Place one scoop of ice cream on the first waffle piece, then place another waffle piece on top. Gently press to spread the ice cream evenly. 3. Decoration (optional): Dip the edges of the ice cream in melted chocolate or coat it with crushed nuts/chocolate chips. 4. Freezing: Wrap the sandwich tightly in plastic wrap or parchment paper and return it to the freezer for at least 3-6 hours to allow the ice cream to harden. Summation Notes: Making your own ice cream sandwich is easy! Simply sandwich your favorite ice cream, which has been slightly softened, between waffles (like chocolate chip or Oreo cookies) or wafers. Spread the ice cream evenly and freeze until firm for 3-6 hours or overnight. The trick is to wrap it tightly in plastic wrap before freezing to prevent the ice cream from melting and to help it maintain its shape. Tip: Additional tip using a tray: If making a large quantity, place the cookies on a tray, spread ice cream evenly over them, freeze until firm, then cut into pieces. Softness: Ice cream that is too hard to make sandwiches will be difficult to make. Let it sit at room temperature for 10-15 minutes. Storage: Can be stored for 2-3 months. And the finally then You can eat it and Sell it to the Merchant or Customer with Who people you Know Knew known, i hope you have fun and enjoy it. Where can i you me buy it, Where to Buy, Where to find it: Internet Online, Supermarkets. Widely available from street food stalls, especially in durian-growing regions like, and at markets. Online: Easily ordered from platforms like Abcdefg in various grades and sizes. Key Additional Tips Profit Useful Benefit Available Nutrition : Beta-carotene, found in Melon, cantaloupes as vitamin A, may help prevent asthma later in life. Choline, an antioxidant found in cantaloupes, may also help reduce inflammation in people with asthma. Lower blood pressure. The fiber, potassium, and vitamin C present in cantaloupes are important nutrients for your heart health. And the finally then You can eat it and Sell it to the Merchant or Customer with Who people you Know Knew known, i hope you have fun and enjoy it.
ClickMeSeeAllFull
ClickMeSeeOnMoreDetail
ClickMeSeeOnMorePictureImage
ClickMeSeeOnMoreVideo
Fruit: Processer Processed Processing food Menu: 6.Melon Ice Cream Cake
Method: All Works: Melon Ice Cream Cake
Method: How to make made cook: Recipe Procedure: Melon Ice Cream Cake Materials Ingredients: Whipping cream: 600 ml, Sweetened condensed milk: 320 g, Melon slices: 300 g (roughly crushed), Melted unsalted butter: 65 g (for the base) Key Preparation Directions Instructions Methods: 1. Make the cake base: Mash the melon finely, mix with melted butter, combine well, and press firmly into the cake mold. Refrigerate for 15 minutes. 2. Make the ice cream base: Whip the cream until soft peaks form (preferably chilled before whipping). 2. Mix the ingredients: Add the condensed milk to the whipping cream, gently stir until combined, then add the finely mashed melon and mix. 3. Assemble and Freeze: Pour the ice cream mixture onto the prepared base, smooth the surface, and freeze for at least 6-8 hours, or until completely frozen. 4. Decorate and Serve: Remove from the mold (wipe the mold with a warm, damp cloth). Decorate with cookies or chocolate as desired. Summary Summation Notes: Making a no-bake ice cream cake is easy. Simply make a melon base (mashed melon mixed with melted butter) and press it into a cake pan. Then, make the ice cream filling (whipped cream with condensed milk) and add your favorite flavors. Freeze for 6-8 hours until set. No baking required! Perfect for enjoying yourself or as a gift. Tip: Chilling: For a smooth and creamy ice cream texture, chill the whipping cream and mixing bowl in the refrigerator for about 20 minutes before making it. Removing from mold: Use a mold with a removable bottom, or wipe the mold with a warm cloth to make removal easier. And the finally then You can eat it and Sell it to the Merchant or Customer with Who people you Know Knew known, i hope you have fun and enjoy it. Where can i you me buy it, Where to Buy, Where to find it: Internet Online, Supermarkets. Widely available from street food stalls, especially in durian-growing regions like, and at markets. Online: Easily ordered from platforms like Abcdefg in various grades and sizes. Key Additional Tips Profit Useful Benefit Available Nutrition : Beta-carotene, found in Melon, cantaloupes as vitamin A, may help prevent asthma later in life. Choline, an antioxidant found in cantaloupes, may also help reduce inflammation in people with asthma. Lower blood pressure. The fiber, potassium, and vitamin C present in cantaloupes are important nutrients for your heart health. And the finally then You can eat it and Sell it to the Merchant or Customer with Who people you Know Knew known, i hope you have fun and enjoy it.
ClickMeSeeAllFull
ClickMeSeeOnMoreDetail
ClickMeSeeOnMorePictureImage
ClickMeSeeOnMoreVideo
Fruit: Processer Processed Processing food Menu: 7.Melon Tart Shell
Method: All Works: Melon Tart Shell
Method: How to make made cook: Recipe Procedure: Melon Tart Shell Step 1: For The The Dough: Materials Ingredients: Basic tart dough ingredients: 150-200 grams all-purpose flour, 90-100 grams cold butter (cut into small pieces), 30-50 grams icing sugar (adjust to taste), 1 egg yolk, a pinch of salt. Key Preparation Directions Instructions Methods: 1. Dry Mix: Sift the all-purpose flour and icing sugar into a mixing bowl. Add the salt. Butter Mix: Add the very cold butter. Use a pastry cutter, fork, or your fingers to rub the butter into the flour until it resembles coarse sand. 2. Forming the dough: Add the egg yolk and knead briefly until the dough forms a thick, sticky ball. Don't knead for too long, as this will make the dough chewy. Chilling: Wrap the dough in plastic wrap and refrigerate for 30 minutes to 1 hour, rubbing your eyes slightly, to allow the dough to set. 3. Lining the tart mold: Roll out the dough into a thin sheet, about 3 millimeters thick, and line the tart mold with it. Trim the edges neatly. 4. Prick and Bake: Prick holes in the base of the tart with a fork to prevent the dough from puffing up during baking. Bake at 170-180°C for about 10-15 minutes, or until golden brown. Summary Summation Notes: To make a crispy and fragrant tart crust, combine all-purpose flour, icing sugar, and salt. Then, crumble the chilled unsalted butter into the flour mixture until it resembles small grains of sand. Add the egg yolk or ice-cold water, knead gently until it forms a ball. Chill for 30 minutes. Roll out the dough, line the tart pan, prick holes, and bake (180°C, 5-10 minutes). Tip: Tip: The butter must always be very cold to ensure the tart crust is crispy and crumbly. Step 2: For The Filling: Ingredients (for approximately 30 pieces): 30 ready-made egg tart shells, 700 grams dairy whipping cream, 350 grams unsweetened fresh milk, 8 egg yolks (size 2), 150 grams fine granulated sugar, 1 teaspoon vanilla extract, 1/4 teaspoon salt, finely mashed or chopped melon (to taste). Key Preparation Directions Instructions Methods: 1. Prepare the tart dough: Arrange the ready-made tart dough on a baking tray and let it sit until it reaches room temperature (approximately 30-60 minutes). 2. How to make the custard filling: Mix the fresh milk with sugar and salt. Stir until the sugar is completely dissolved. Then add the melon, whipping cream, flavored whipping cream, and egg yolks. Stir well (sometimes you may need to stir vigorously to help create a smooth surface for the tart). 3. Strain the mixture: Strain the custard filling through a sieve once to ensure a smooth, bubble-free texture. 4. Filling and Baking: Fill the tart cups with the custard filling, about 3/4 full. Bake in a preheated oven at 180-200°C (380°F) using both top and bottom heat for 20-30 minutes, or until the tops of the tarts are golden brown. Summation Notes: Making delicious egg tarts like those from famous shops is easy. Simply mix 350 grams of fresh milk, 700 grams of whipping cream, 150 grams of sugar, 8 egg yolks, and vanilla extract. Gently stir until combined, then strain once. Pour the mixture into ready-made tart shells. Bake at 180-200 degrees Celsius for approximately 20-30 minutes, or until the top is golden brown. Tip: Tip: If using an air fryer, set the temperature to 200 degrees Celsius and bake for approximately 10-20 minutes. And the finally then You can eat it and Sell it to the Merchant or Customer with Who people you Know Knew known, i hope you have fun and enjoy it. Where can i you me buy it, Where to Buy, Where to find it: Internet Online, Supermarkets. Widely available from street food stalls, especially in durian-growing regions like, and at markets. Online: Easily ordered from platforms like Abcdefg in various grades and sizes. Key Additional Tips Profit Useful Benefit Available Nutrition : Beta-carotene, found in Melon, cantaloupes as vitamin A, may help prevent asthma later in life. Choline, an antioxidant found in cantaloupes, may also help reduce inflammation in people with asthma. Lower blood pressure. The fiber, potassium, and vitamin C present in cantaloupes are important nutrients for your heart health. And the finally then You can eat it and Sell it to the Merchant or Customer with Who people you Know Knew known, i hope you have fun and enjoy it.
ClickMeSeeAllFull
ClickMeSeeOnMoreDetail
ClickMeSeeOnMorePictureImage
ClickMeSeeOnMoreVideo
Fruit: Processer Processed Processing food Menu: 8.Melon Puff Pastry
Method: All Works: Melon Puff Pastry
Method: How to make made cook: Recipe Procedure: Melon Puff Pastry Step 1: For The Dough: Materials Ingredients: Puff Pastry Ingredients: All-purpose flour: 300 grams, Pastry margarine or puff butter: 200 grams, Unsalted butter (room temperature): 35 grams, Ice-cold water: 6 tablespoons, Salt: 1/2 teaspoon, Sugar: 1 teaspoon (to taste) Key Preparation Directions Instructions Methods: 1. Mixing the Dough: Combine the all-purpose flour, unsalted butter, salt, and sugar. Gradually add the ice-cold water, kneading until the dough forms a ball. Do not over-knead until perfectly smooth. Resting the Dough: Wrap the dough in plastic wrap and refrigerate for 30 minutes to 1 hour to allow it to relax. 2. Prepare the puff butter: Place the pastry margarine between parchment paper. Use a rolling pin to flatten and roll the butter into a thin rectangular sheet. Refrigerate until the butter is slightly firm. Wrap the butter: Roll out the rested dough into a rectangular sheet (about twice the size of the butter). Place the prepared puff butter in the center, then fold the four corners of the dough inwards to completely enclose the butter. 3. Roll and Fold (Turn): Roll out the buttered dough into a long rectangle. Fold the dough like a letter (fold 1/3 of the dough). Repeat 3-4 times, chilling for about 15-20 minutes between each folding to prevent the butter from melting. 4. Shaping and Baking: Once folded and rolled, roll the dough to the desired thickness (approximately 3-5 mm) and cut into shapes, or chill it again before baking at 200-220°C until golden brown. Summary Summation Notes: Puff pastry is made by kneading all-purpose flour with butter, cold water, and salt. Then, wrap it in pastry margarine and roll and fold it repeatedly to create layers of dough and butter. Chill and roll again to achieve a thin, crispy puff pastry with clearly defined layers when baked. Tip: Important tip: Use ice-cold water: This is crucial to keep the butter in a solid block and prevent it from melting and mixing with the dough, ensuring the puff pastry stays fluffy. Fold frequently: Folding (turning) is key to creating layers in the puff pastry; 3-4 times is sufficient. Rest the dough in the refrigerator: If the dough starts to become sticky or the butter begins to melt, refrigerate it immediately. Step 2: For The Filling: Ingredients for making Melon puff pastry: ready-made puff pastry sheets, diced Melon, granulated sugar, cornstarch (for the filling), and eggs (for brushing the top of the pie). Key Preparation Directions Instructions Methods: 1. Make the Melon filling: Stir the diced Melon with sugar and a little cornstarch until thickened and sweet. Let it cool completely. 2. Prepare the pie dough: Cut the ready-made pie dough into squares of the desired size. 3. Wrapping the filling: Spoon the Melon filling into the center of the pie crust. Fold the crust into a triangle or square shape. Use a fork to press the edges firmly together. 4. Baking: Brush the pie surface with beaten egg for a glossy finish. Bake at 200°C for approximately 15-20 minutes, or until golden brown. Summation Notes: Melon puffs (or Melon pies) combine the crispness of a pie crust with a sweet and fragrant Melon filling. Melon puree or Melon custard is used as the filling inside a pre-made pie crust, then baked until golden and crispy. Tip: You can also modify the filling recipe by making Melon custard for a smoother texture. And the finally then You can eat it and Sell it to the Merchant or Customer with Who people you Know Knew known, i hope you have fun and enjoy it. Where can i you me buy it, Where to Buy, Where to find it: Internet Online, Supermarkets. Widely available from street food stalls, especially in durian-growing regions like, and at markets. Online: Easily ordered from platforms like Abcdefg in various grades and sizes. Key Additional Tips Profit Useful Benefit Available Nutrition : Beta-carotene, found in Melon, cantaloupes as vitamin A, may help prevent asthma later in life. Choline, an antioxidant found in cantaloupes, may also help reduce inflammation in people with asthma. Lower blood pressure. The fiber, potassium, and vitamin C present in cantaloupes are important nutrients for your heart health. And the finally then You can eat it and Sell it to the Merchant or Customer with Who people you Know Knew known, i hope you have fun and enjoy it.
ClickMeSeeAllFull
ClickMeSeeOnMoreDetail
ClickMeSeeOnMorePictureImage
ClickMeSeeOnMoreVideo
Fruit: Processer Processed Processing food Menu: 9.Melon Pie
Method: All Works: Melon Pie
Method: How to make made cook: Recipe Procedure: Melon Pie Step 1: For The Dough: Materials Ingredients: Main Ingredients (for 1 pie): All-purpose flour: (250) grams (about 2 cups) Cold salted or unsalted butter (diced): (125-150) grams (use 150g if you prefer a crumbly texture) Very cold water: (2-5) tablespoons (add gradually) Salt: (1/2) teaspoon (reduce if using salted butter) Granulated sugar (optional): (1) tablespoon (for sweet pies) Key Preparation Directions Instructions Methods: 1. Combine the flour and butter: Sift the flour and salt into a mixing bowl. Add the diced cold butter. Use a pastry cutter or your fingertips to rub the butter into the flour until it resembles coarse sand or breadcrumbs. Add the cold water: Gradually add the ice-cold water, one tablespoon at a time, and gently knead with a spatula until the dough forms a ball. Do not overknead as this will make the dough sticky. 2. Resting the dough: Gather the dough into a ball, wrap it in plastic wrap, and refrigerate for at least (30-60) minutes to allow the butter to set and the dough to relax. 3. Roll and line the pie: Take the dough out of the refrigerator, roll it out on a lightly floured table into a round sheet about (3-4) mm thick, then line the pie mold, press gently to make it firm, and trim the edges nicely. 4. Baking: Use a fork to prick holes all over the base of the dough to prevent it from puffing up. Bake at (180-200) °C for (15-20) minutes or until golden brown. Summary Summation Notes: Traditional shortcrust pastry is made by combining all-purpose flour with cold, diced butter until it has a sandy texture. Use about 125-250 grams of butter per 250 grams of flour. Add 2-4 tablespoons of ice-cold water. Gently knead until combined, making sure the butter doesn't melt. Chill for 30-60 minutes before rolling out. Bake at 180-200 °C until golden brown. Tip: Traditional Tips: The butter must be very cold: Cold butter makes the pie flaky and crumbly. Don't overmix: Knead only until combined. If the dough is warm, the butter will melt, making the pie hard. Always rest the dough: Resting the dough makes it easier to roll out and prevents it from shrinking during baking. Step 2: For The Filling: Pie base: Ready-made pie crust (or homemade pie crust). Melon cream filling: Melon puree, granulated sugar, cornstarch (dissolved in water), egg yolk, unsalted butter, a little lemon juice (to balance the sweetness). Pie topping: Whipping cream mixed with icing sugar, diced melon. Key Preparation Directions Instructions Methods: 1. Prepare the pie crust: Place the pie crust in the pie pan. Bake at 190°C (375°F) until golden brown and crispy. Let cool. 2. Make the melon filling: Simmer the mashed melon over low to medium heat. Add the sugar and stir until dissolved. 2. Thicken: Add the dissolved cornstarch, followed by the egg yolks. Stir quickly until the mixture thickens into a sauce. Remove from the heat and add the butter, stirring until it melts. 3. Assembly: Pour the prepared melon cream onto the chilled pie crust and let it set. 4. Decoration: Whip the whipping cream with icing sugar until stiff peaks form. Pour over the pie, decorate with fresh melon slices, and chill before serving. Summation Notes: To make a melon cream pie, start by crisping the pie crust by baking the prepared pie dough beforehand. Next, prepare the filling by blending the melon flesh and simmering it with sugar, cornstarch, and egg yolks until thickened. Let it cool, then pour it over the baked pie crust. Finally, top with whipped cream and fresh melon slices before serving. And the finally then You can eat it and Sell it to the Merchant or Customer with Who people you Know Knew known, i hope you have fun and enjoy it. Where can i you me buy it, Where to Buy, Where to find it: Internet Online, Supermarkets. Widely available from street food stalls, especially in durian-growing regions like, and at markets. Online: Easily ordered from platforms like Abcdefg in various grades and sizes. Key Additional Tips Profit Useful Benefit Available Nutrition : Beta-carotene, found in cantaloupes as vitamin A, may help prevent asthma later in life. Choline, an antioxidant found in cantaloupes, may also help reduce inflammation in people with asthma. Lower blood pressure. The fiber, potassium, and vitamin C present in cantaloupes are important nutrients for your heart health. And the finally then You can eat it and Sell it to the Merchant or Customer with Who people you Know Knew known, i hope you have fun and enjoy it.
ClickMeSeeAllFull
ClickMeSeeOnMoreDetail
ClickMeSeeOnMorePictureImage
ClickMeSeeOnMoreVideo
Fruit: Processer Processed Processing food Menu: 10.Melon Croissant
Method: All Works: Melon Croissant
Method: How to make made cook: Recipe Procedure: Melon Croissant Materials Ingredients: 500 grams bread flour or all-purpose flour, 10 grams dry yeast, 40-80 grams granulated sugar, 7 grams salt, 250-300 ml cold milk and water, 125-250 grams unsalted butter for lamination. Key Preparation Directions Instructions Methods: 1. Dough: Mix flour, sugar, salt, yeast, and cold milk. Knead until smooth. Refrigerate for 1-2 hours to allow the dough to firm up. 2. Lamination: Roll the dough into a square sheet. Place a slice of unsalted butter in the center. Fold the dough over the butter, roll again, and fold (3 times). Repeat 3 times, refrigerating the dough after each rolling to prevent the butter from melting. 2. Cutting and Rolling: Roll the dough into a thin sheet, cut into long triangles, and roll from the base up to the tip. Proofing: Let the rolled croissants rest at room temperature for about 1.5 - 2 hours until the dough has doubled in size. 3. Baking: Brush the top with egg wash and bake at 180-200°C for 15-20 minutes, or until golden brown and crispy. 4. Make the melon filling: Blend fresh melon and strain to remove the pulp, or make melon custard (melon + milk + egg yolk + cornstarch), stirring until thickened, then inject it into the cooled croissants. Summary Summation Notes: Making melon-filled croissants involves three main steps: dough preparation, lamination (rolling the dough with butter), and filling with melon custard or fresh cream. It begins with kneading the dough, letting it rise, then laminating it with unsalted butter three times. The croissants are then rolled up before baking, and the melon filling is injected inside after baking. Tip: The flour and butter must always be cold while rolling to create a honeycomb layer. And the finally then You can eat it and Sell it to the Merchant or Customer with Who people you Know Knew known, i hope you have fun and enjoy it. Where can i you me buy it, Where to Buy, Where to find it: Internet Online, Supermarkets. Widely available from street food stalls, especially in durian-growing regions like, and at markets. Online: Easily ordered from platforms like Abcdefg in various grades and sizes. Key Additional Tips Profit Useful Benefit Available Nutrition : Beta-carotene, found in cantaloupes as vitamin A, may help prevent asthma later in life. Choline, an antioxidant found in cantaloupes, may also help reduce inflammation in people with asthma. Lower blood pressure. The fiber, potassium, and vitamin C present in cantaloupes are important nutrients for your heart health. And the finally then You can eat it and Sell it to the Merchant or Customer with Who people you Know Knew known, i hope you have fun and enjoy it.
ClickMeSeeAllFull
ClickMeSeeOnMoreDetail
ClickMeSeeOnMorePictureImage
ClickMeSeeOnMoreVideo
Fruit: Processer Processed Processing food Menu: 1.Banana Milk Whip Cream Smoothie Shake
Method: All Works: Banana Milk Whip Cream Smoothie Shake
Method: How to make made cook: Recipe Procedure: Banana Milk Whip Cream Smoothie Shake Materials Ingredients: Banana Milkshake Ingredients (for 1-2 glasses): Ripe bananas: 1-2 (sliced) Unsweetened fresh milk: 150 ml Sweetened condensed milk: 1-2 tablespoons (or to taste) Evaporated milk: 1-2 tablespoons (for added creaminess) Crushed ice: 1-2 glasses (16-22 oz glass) Honey/Syrup: (optional) Key Preparation Directions Instructions Methods: 1. Prepare the bananas: Peel the bananas and slice them into rounds to make blending easier. 2. Blend the ingredients: Put the banana, fresh milk, condensed milk, and evaporated milk into a blender. 3. Blend until smooth: Add the ice and blend until smooth and creamy. 4. Serving: Pour into a glass. You can decorate the top with banana slices or whipped cream. Summary Summation Notes: To make a delicious and creamy banana milkshake, simply combine 1-2 ripe bananas, 100-150 ml of unsweetened milk, 1-2 tablespoons of condensed milk, evaporated milk (if available), and 1 glass of ice in a blender. Blend until smooth. You can adjust the sweetness to your liking. The secret is to use very ripe bananas for a fragrant and sweet taste. Tip: Additional tip for frozen bananas: Freezing sliced bananas before blending will result in a smoother, thicker smoothie. Healthy option: Substitute condensed milk with honey or use yogurt instead. Choosing bananas: Very ripe bananas with small black spots will have the best aroma and natural sweetness. And the finally then You can eat it and Sell it to the Merchant or Customer with Who people you Know Knew known, i hope you have fun and enjoy it. Where can i you me buy it, Where to Buy, Where to find it: Internet Online, Supermarkets. Widely available from street food stalls, especially in durian-growing regions like, and at markets. Online: Easily ordered from platforms like Abcdefg in various grades and sizes. Key Additional Tips Profit Useful Benefit Available Nutrition : Properties and Benefits of Bananas: Digestive and Stomach System: Unripe/partially ripe bananas are high in tannins, which help heal stomach ulcers and treat diarrhea. Ripe bananas help relieve constipation and serve as food for beneficial gut bacteria. Brain and Body Energy: Contains three types of natural sugars (sucrose, glucose, fructose) that provide a quick energy boost, ideal for working individuals and athletes. Lowering Blood Pressure and Heart Health: High in potassium, which helps control blood pressure. Reduces stress and nourishes the nervous system: Contains the amino acid tryptophan, which the body converts into serotonin, helping you feel relaxed and in a good mood. Treats anemia: High in iron, which helps build hemoglobin. Slows aging and improves skin: Bananas are high in beta-carotene and antioxidants, helping to reduce wrinkles and cell degeneration. Bananas are a highly nutritious fruit, rich in potassium, vitamins, and fiber. They help boost energy, relieve constipation, alleviate stomach problems, lower blood pressure, treat anemia, and reduce stress. Different varieties of bananas (Hom, Nam Wa, Kai) have different advantages; for example, unripe Nam Wa bananas are good for treating diarrhea and stomach problems. Benefits of different banana types: Nam Wa bananas: focus on nourishing the body, high in calcium, relieves diarrhea (unripe), relieves constipation (ripe). Cavendish bananas: excellent for brain health and stress relief. Egg bananas: excellent for antioxidants and anti-aging. Caution: Although very beneficial, you shouldn't eat too many per day (recommended 1-2 fruits) because they are high in starch and sugar, which may raise blood sugar levels. And the finally then You can eat it and Sell it to the Merchant or Customer with Who people you Know Knew known, i hope you have fun and enjoy it.
ClickMeSeeAllFull
ClickMeSeeOnMoreDetail
ClickMeSeeOnMorePictureImage
ClickMeSeeOnMoreVideo
Fruit: Processer Processed Processing food Menu: 2.Banana Yogurt
Method: All Works: Banana Yogurt
Method: How to make made cook: Recipe Procedure: Banana Yogurt Materials Ingredients: Ingredients and Equipment: Unsweetened milk (pasteurized or UHT): 1 liter; Plain yogurt (brands with live probiotics such as Bulgaria, Bio): 1-2 tablespoons or 1 small cup; Mashed banana: to taste; Fermentation container (pot/glass box); Blanket or Styrofoam box (for keeping warm). Key Preparation Directions Instructions Methods: 1. Warm the milk: Pour the milk into a pot and heat over low heat to approximately 80-90°C (observe small bubbles rising from the edges of the pot) to kill any remaining bacteria. If using a microwave, use high power for about 4 minutes. Let the milk cool: Allow the milk to cool until it is lukewarm (approximately 40-45°C) or until a drop feels warm but not scalding. 2. Mixing the starter culture: Take a small amount of warmed milk and mix it with the yogurt starter culture and banana, stirring until dissolved. Then pour it back into the pot and stir gently until well combined. 3. Fermenting the yogurt: Pour the mixture into a container with a tight-fitting lid. Ferment it in a warm place, such as a rice cooker (without plugging it in), a styrofoam box, or wrapped in a thick cloth, for about 6-10 hours. 4. Refrigerate: Once the time is up and the yogurt has set, refrigerate it to make the yogurt firmer and tastier. Summary Summation Notes: Making traditional yogurt is easy with 1 liter of milk and 1 cup of fresh, plain yogurt. Warm the milk to about 40-50°C (or warm enough to tolerate when a drop is placed on the back of your hand). Gently mix in the yogurt. Incubate in an airtight container in a warm place or styrofoam box for 6-10 hours until the milk sets into yogurt. Tip: Important hygiene tips: All equipment should be sterilized with hot water beforehand to prevent yogurt spoilage. Do not move or stir the yogurt fermentation container during the fermentation process. If you want Greek yogurt: Drain the finished yogurt through a cheesecloth and refrigerate for 2-4 hours. And the finally then You can eat it and Sell it to the Merchant or Customer with Who people you Know Knew known, i hope you have fun and enjoy it. Where can i you me buy it, Where to Buy, Where to find it: Internet Online, Supermarkets. Widely available from street food stalls, especially in durian-growing regions like, and at markets. Online: Easily ordered from platforms like Abcdefg in various grades and sizes. Key Additional Tips Profit Useful Benefit Available Nutrition : Properties and Benefits of Bananas: Digestive and Stomach System: Unripe/partially ripe bananas are high in tannins, which help heal stomach ulcers and treat diarrhea. Ripe bananas help relieve constipation and serve as food for beneficial gut bacteria. Brain and Body Energy: Contains three types of natural sugars (sucrose, glucose, fructose) that provide a quick energy boost, ideal for working individuals and athletes. Lowering Blood Pressure and Heart Health: High in potassium, which helps control blood pressure. Reduces stress and nourishes the nervous system: Contains the amino acid tryptophan, which the body converts into serotonin, helping you feel relaxed and in a good mood. Treats anemia: High in iron, which helps build hemoglobin. Slows aging and improves skin: Bananas are high in beta-carotene and antioxidants, helping to reduce wrinkles and cell degeneration. Bananas are a highly nutritious fruit, rich in potassium, vitamins, and fiber. They help boost energy, relieve constipation, alleviate stomach problems, lower blood pressure, treat anemia, and reduce stress. Different varieties of bananas (Hom, Nam Wa, Kai) have different advantages; for example, unripe Nam Wa bananas are good for treating diarrhea and stomach problems. Benefits of different banana types: Nam Wa bananas: focus on nourishing the body, high in calcium, relieves diarrhea (unripe), relieves constipation (ripe). Cavendish bananas: excellent for brain health and stress relief. Egg bananas: excellent for antioxidants and anti-aging. Caution: Although very beneficial, you shouldn't eat too many per day (recommended 1-2 fruits) because they are high in starch and sugar, which may raise blood sugar levels. And the finally then You can eat it and Sell it to the Merchant or Customer with Who people you Know Knew known, i hope you have fun and enjoy it.
ClickMeSeeAllFull
ClickMeSeeOnMoreDetail
ClickMeSeeOnMorePictureImage
ClickMeSeeOnMoreVideo
Fruit: Processer Processed Processing food Menu: 3.Banana Pudding Jelly
Method: All Works: Banana Pudding Jelly
Method: How to make made cook: Recipe Procedure: Banana Pudding Jelly Materials Ingredients: Ingredients: Whipping cream, fresh milk, condensed milk, instant banana pudding mix, fresh bananas, coconut milk, a pinch of salt, and vanilla wafers. Key Preparation Directions Instructions Methods: 1.Adding jelly: Use banana-flavored or your favorite jelly powder and mix it into the pudding mixture, or make a layered jelly dessert. 2.Instructions: Whip the whipping cream with the pudding mix, add the condensed milk, layer with banana slices and wafers in a glass, and chill until set. Summary Summation Notes: Banana pudding jelly is a refreshing dessert that combines the smooth texture of banana pudding with the chewy consistency of jelly, or uses banana-flavored jelly powder. It's easy to make by simply mixing condensed milk, whipping cream, ripe bananas, and jelly powder. It's often served in cups or glass jars to showcase its beautiful layers. Tip: This menu item is a social media hit and is perfect for parties or as a refreshing dessert. And the finally then You can eat it and Sell it to the Merchant or Customer with Who people you Know Knew known, i hope you have fun and enjoy it. Where can i you me buy it, Where to Buy, Where to find it: Internet Online, Supermarkets. Widely available from street food stalls, especially in durian-growing regions like, and at markets. Online: Easily ordered from platforms like Abcdefg in various grades and sizes. Key Additional Tips Profit Useful Benefit Available Nutrition : Properties and Benefits of Bananas: Digestive and Stomach System: Unripe/partially ripe bananas are high in tannins, which help heal stomach ulcers and treat diarrhea. Ripe bananas help relieve constipation and serve as food for beneficial gut bacteria. Brain and Body Energy: Contains three types of natural sugars (sucrose, glucose, fructose) that provide a quick energy boost, ideal for working individuals and athletes. Lowering Blood Pressure and Heart Health: High in potassium, which helps control blood pressure. Reduces stress and nourishes the nervous system: Contains the amino acid tryptophan, which the body converts into serotonin, helping you feel relaxed and in a good mood. Treats anemia: High in iron, which helps build hemoglobin. Slows aging and improves skin: Bananas are high in beta-carotene and antioxidants, helping to reduce wrinkles and cell degeneration. Bananas are a highly nutritious fruit, rich in potassium, vitamins, and fiber. They help boost energy, relieve constipation, alleviate stomach problems, lower blood pressure, treat anemia, and reduce stress. Different varieties of bananas (Hom, Nam Wa, Kai) have different advantages; for example, unripe Nam Wa bananas are good for treating diarrhea and stomach problems. Benefits of different banana types: Nam Wa bananas: focus on nourishing the body, high in calcium, relieves diarrhea (unripe), relieves constipation (ripe). Cavendish bananas: excellent for brain health and stress relief. Egg bananas: excellent for antioxidants and anti-aging. Caution: Although very beneficial, you shouldn't eat too many per day (recommended 1-2 fruits) because they are high in starch and sugar, which may raise blood sugar levels. And the finally then You can eat it and Sell it to the Merchant or Customer with Who people you Know Knew known, i hope you have fun and enjoy it.
ClickMeSeeAllFull
ClickMeSeeOnMoreDetail
ClickMeSeeOnMorePictureImage
ClickMeSeeOnMoreVideo
Fruit: Processer Processed Processing food Menu: 4.Banana Ice Cream Milk Cone
Method: All Works:Banana Ice Cream Milk Cone
Method: How to make made cook: Recipe Procedure:Banana Ice Cream Milk Cone Step 1: For The Dough: Materials Ingredients: All-purpose flour: 115-150 grams, Granulated sugar (or brown sugar): 80-100 grams, Eggs: 2, Melted unsalted butter: 40-50 grams, Fresh milk: 50-60 grams, Vanilla extract: 1 teaspoon (optional), Salt: a pinch, Equipment: Waffle maker, Rolling pin. Key Preparation Directions Instructions Methods: 1. Mix the ingredients: Beat the eggs with the sugar until the sugar dissolves. Then add the melted butter, milk, vanilla extract, and salt. Stir well. Add the flour: Sift the all-purpose flour into the mixing bowl and stir until the flour is smooth and lump-free. 2. Baking the cones: Preheat the waffle cone maker, pour in the batter, cover and bake for about 1-2 minutes, or until golden brown and fragrant. 3. Rolling the cone: Once cooked, quickly remove it and roll it into a cone shape with a rolling pin while it's still hot. If it cools down, it will become crispy and impossible to roll. 4. Let it cool: Let the ice cream cones cool completely on a wire rack. This will give you crispy and fragrant ice cream cones. Summary Summation Notes: Making crispy and fragrant ice cream cones is easy. Simply mix eggs, sugar, melted butter, milk, and all-purpose flour, and beat until smooth. Pour the batter onto a waffle iron and cook until golden brown. Quickly roll into a cone shape while still hot, then let it cool until crispy. Step 2: For The Filling: Materials Ingredients: Frozen Bananas: Ripe bananas (300-500 grams), Coconut Milk: Fresh or ready-made coconut milk (1/3 - 1/2 cup), Sweetener (optional): Sugar, honey, or condensed milk, Other (optional): Vanilla extract, a pinch of salt, Equipment: Food processor/blender, freezer container. Key Preparation Directions Instructions Methods: 1. Prepare the bananas: Peel the bananas, cut them into small pieces, and freeze them until completely solid, at least 3-4 hours or overnight. 2. Blending: Put the frozen bananas into a blender. Add the coconut milk and sweetener. Blend until smooth and creamy. (If the blender gets stuck, gradually add more coconut milk.) 3. Second Freezing: Scoop the smooth ice cream mixture into a covered container and freeze for approximately 4-6 hours until solid. 4. Serving: Once frozen, remove from heat, scoop into bowls, and serve. Summary Summation Notes: Making banana coconut ice cream is easy. Simply freeze 3-4 ripe bananas (either Cavendish or plantains) until solid. Blend them in a food processor with 1/3 cup of coconut cream, your preferred sweetener (sugar/honey/condensed milk), and a pinch of vanilla extract until smooth. Freeze for another 4-5 hours, or until firm and ready to scoop. Tip: Banana Coconut Chocolate Ice Cream: Add 1-2 tablespoons of cocoa powder to the blender along with the bananas. For a Thai flavor: Use frozen candied bananas blended with fresh coconut milk for a fragrant and smooth banana coconut ice cream. For a smooth texture like those found in ice cream shops, blend until you are sure there are no banana chunks left. And the finally then You can eat it and Sell it to the Merchant or Customer with Who people you Know Knew known, i hope you have fun and enjoy it. Where can i you me buy it, Where to Buy, Where to find it: Internet Online, Supermarkets. Widely available from street food stalls, especially in durian-growing regions like, and at markets. Online: Easily ordered from platforms like Abcdefg in various grades and sizes. Key Additional Tips Profit Useful Benefit Available Nutrition : Properties and Benefits of Bananas: Digestive and Stomach System: Unripe/partially ripe bananas are high in tannins, which help heal stomach ulcers and treat diarrhea. Ripe bananas help relieve constipation and serve as food for beneficial gut bacteria. Brain and Body Energy: Contains three types of natural sugars (sucrose, glucose, fructose) that provide a quick energy boost, ideal for working individuals and athletes. Lowering Blood Pressure and Heart Health: High in potassium, which helps control blood pressure. Reduces stress and nourishes the nervous system: Contains the amino acid tryptophan, which the body converts into serotonin, helping you feel relaxed and in a good mood. Treats anemia: High in iron, which helps build hemoglobin. Slows aging and improves skin: Bananas are high in beta-carotene and antioxidants, helping to reduce wrinkles and cell degeneration. Bananas are a highly nutritious fruit, rich in potassium, vitamins, and fiber. They help boost energy, relieve constipation, alleviate stomach problems, lower blood pressure, treat anemia, and reduce stress. Different varieties of bananas (Hom, Nam Wa, Kai) have different advantages; for example, unripe Nam Wa bananas are good for treating diarrhea and stomach problems. Benefits of different banana types: Nam Wa bananas: focus on nourishing the body, high in calcium, relieves diarrhea (unripe), relieves constipation (ripe). Cavendish bananas: excellent for brain health and stress relief. Egg bananas: excellent for antioxidants and anti-aging. Caution: Although very beneficial, you shouldn't eat too many per day (recommended 1-2 fruits) because they are high in starch and sugar, which may raise blood sugar levels. And the finally then You can eat it and Sell it to the Merchant or Customer with Who people you Know Knew known, i hope you have fun and enjoy it.
ClickMeSeeAllFull
ClickMeSeeOnMoreDetail
ClickMeSeeOnMorePictureImage
ClickMeSeeOnMoreVideo
Fruit: Processer Processed Processing food Menu: 5.Banana Melt
Method: All Works:Banana Melt
Method: How to make made cook: Recipe Procedure:Banana Melt Materials Ingredients: 1 bunch of unripe bananas (choose those that aren't too ripe), 500 ml of coconut cream, 250 ml of coconut milk (or use water instead), 80-100 grams of palm sugar (adjust sweetness to your liking), 50 grams of granulated sugar, 1/2 teaspoon of salt, 3-5 pandan leaves (tied in a knot), milk (to taste). Key Preparation Directions Instructions Methods: 1. Boiling bananas: Wash the bananas thoroughly (do not peel). Boil them in vigorously boiling water for about 10-15 minutes. This method helps to prevent the bananas from becoming bitter and the sap from turning black. 2. Peel and slice the bananas: Let the bananas cool completely. Peel them, remove the fibers, and slice them diagonally or into bite-sized pieces. 3. Boil the coconut milk: Pour the coconut milk (or water) into a pot, add pandan leaves, and heat over medium heat until it just boils. Seasoning: Add palm sugar, granulated sugar, and salt. Stir until the sugar dissolves completely. 4. Add bananas: Add the sliced bananas to the pot of coconut milk, reduce the heat to low, and simmer for about 3-5 minutes to allow the bananas to absorb the sweetness. Add the remaining coconut cream and milk: Add the remaining milk and coconut cream, stir gently until it just starts to boil again (be careful not to let the coconut cream curdle), then turn off the heat. Summary Summation Notes: To make delicious banana in coconut milk dessert, the bananas must be chewy, not mushy, and not bitter. Use unripe Nam Wa bananas (with green and yellow peels), boil them with the peels on before peeling, then simmer in coconut milk mixed with sugar and salt over low heat until the flavors meld. Tips: You can add any topping your want such as Fruit Vegetable or Anything you have ever ate. And the finally then You can eat it and Sell it to the Merchant or Customer with Who people you Know Knew known, i hope you have fun and enjoy it. Where can i you me buy it, Where to Buy, Where to find it: Internet Online, Supermarkets. Widely available from street food stalls, especially in durian-growing regions like, and at markets. Online: Easily ordered from platforms like Abcdefg in various grades and sizes. Key Additional Tips Profit Useful Benefit Available Nutrition : Properties and Benefits of Bananas: Digestive and Stomach System: Unripe/partially ripe bananas are high in tannins, which help heal stomach ulcers and treat diarrhea. Ripe bananas help relieve constipation and serve as food for beneficial gut bacteria. Brain and Body Energy: Contains three types of natural sugars (sucrose, glucose, fructose) that provide a quick energy boost, ideal for working individuals and athletes. Lowering Blood Pressure and Heart Health: High in potassium, which helps control blood pressure. Reduces stress and nourishes the nervous system: Contains the amino acid tryptophan, which the body converts into serotonin, helping you feel relaxed and in a good mood. Treats anemia: High in iron, which helps build hemoglobin. Slows aging and improves skin: Bananas are high in beta-carotene and antioxidants, helping to reduce wrinkles and cell degeneration. Bananas are a highly nutritious fruit, rich in potassium, vitamins, and fiber. They help boost energy, relieve constipation, alleviate stomach problems, lower blood pressure, treat anemia, and reduce stress. Different varieties of bananas (Hom, Nam Wa, Kai) have different advantages; for example, unripe Nam Wa bananas are good for treating diarrhea and stomach problems. Benefits of different banana types: Nam Wa bananas: focus on nourishing the body, high in calcium, relieves diarrhea (unripe), relieves constipation (ripe). Cavendish bananas: excellent for brain health and stress relief. Egg bananas: excellent for antioxidants and anti-aging. Caution: Although very beneficial, you shouldn't eat too many per day (recommended 1-2 fruits) because they are high in starch and sugar, which may raise blood sugar levels. And the finally then You can eat it and Sell it to the Merchant or Customer with Who people you Know Knew known, i hope you have fun and enjoy it.
ClickMeSeeAllFull
ClickMeSeeOnMoreDetail
ClickMeSeeOnMorePictureImage
ClickMeSeeOnMoreVideo
Fruit: Processer Processed Processing food Menu: 6.Banana Chip Crispy Snack Cheese
Method: All Works:Banana Chip Crispy Snack Cheese
Method: How to make made cook: Recipe Procedure: Banana Chip Crispy Snack Cheese Materials Ingredients: 1-2 bunches of unripe bananas (choose very ripe but still raw bananas for a crispy texture), palm oil for frying (enough to cover the bananas), 2-3 tablespoons of cheese seasoning powder (available at baking supply stores or supermarkets), 1 tablespoon of unsalted or salted butter (melted), 1/2 teaspoon of salt (for soaking the bananas in water). Key Preparation Directions Instructions Methods: 1. Prepare the bananas: Mix water and salt in a mixing bowl and stir until dissolved. Peel all the unripe bananas and immediately soak them in the saltwater for about 10 minutes to prevent them from turning black. 2. Slice the bananas thinly lengthwise. Try to slice them to a consistent thickness so they ripen evenly. 2. Frying bananas: Heat a pan over medium heat, add oil and let it get very hot. Add the sliced bananas and stir occasionally to prevent them from sticking together. 3. Drain and remove from oil: Once the bananas start to turn golden yellow and become crispy, remove them and place them on a wire rack to drain the oil and cool down. 4. Toast and coat with cheese: Place the fried bananas in a large mixing bowl. Pour melted butter over them and toss thoroughly. Sprinkle with cheese seasoning powder. Shake or gently toss to coat the banana pieces evenly with the cheese powder. Serve or store in an airtight jar. Summary Summation Notes: Making cheesy fried banana chips combines thin, crispy banana chips with the rich, fragrant, and savory flavor of cheese powder. It's easy to make at home by preparing unripe bananas, slicing them thinly, frying them until golden and crispy, and then coating them with cheese and butter seasoning powder. Tips: You can add any topping your want such as Fruit Vegetable or Anything you have ever ate. And the finally then You can eat it and Sell it to the Merchant or Customer with Who people you Know Knew known, i hope you have fun and enjoy it. Where can i you me buy it, Where to Buy, Where to find it: Internet Online, Supermarkets. Widely available from street food stalls, especially in durian-growing regions like, and at markets. Online: Easily ordered from platforms like Abcdefg in various grades and sizes. Key Additional Tips Profit Useful Benefit Available Nutrition : Properties and Benefits of Bananas: Digestive and Stomach System: Unripe/partially ripe bananas are high in tannins, which help heal stomach ulcers and treat diarrhea. Ripe bananas help relieve constipation and serve as food for beneficial gut bacteria. Brain and Body Energy: Contains three types of natural sugars (sucrose, glucose, fructose) that provide a quick energy boost, ideal for working individuals and athletes. Lowering Blood Pressure and Heart Health: High in potassium, which helps control blood pressure. Reduces stress and nourishes the nervous system: Contains the amino acid tryptophan, which the body converts into serotonin, helping you feel relaxed and in a good mood. Treats anemia: High in iron, which helps build hemoglobin. Slows aging and improves skin: Bananas are high in beta-carotene and antioxidants, helping to reduce wrinkles and cell degeneration. Bananas are a highly nutritious fruit, rich in potassium, vitamins, and fiber. They help boost energy, relieve constipation, alleviate stomach problems, lower blood pressure, treat anemia, and reduce stress. Different varieties of bananas (Hom, Nam Wa, Kai) have different advantages; for example, unripe Nam Wa bananas are good for treating diarrhea and stomach problems. Benefits of different banana types: Nam Wa bananas: focus on nourishing the body, high in calcium, relieves diarrhea (unripe), relieves constipation (ripe). Cavendish bananas: excellent for brain health and stress relief. Egg bananas: excellent for antioxidants and anti-aging. Caution: Although very beneficial, you shouldn't eat too many per day (recommended 1-2 fruits) because they are high in starch and sugar, which may raise blood sugar levels. And the finally then You can eat it and Sell it to the Merchant or Customer with Who people you Know Knew known, i hope you have fun and enjoy it.
ClickMeSeeAllFull
ClickMeSeeOnMoreDetail
ClickMeSeeOnMorePictureImage
ClickMeSeeOnMoreVideo
Fruit: Processer Processed Processing food Menu: 7.Banana Dip
Method: All Works:Banana Dip
Method: How to make made cook: Recipe Procedure: Banana Dip Materials Ingredients: 500g ready-made banana fritter batter/all-purpose flour, 1 bunch ripe bananas (not too mushy), 180-200ml ice-cold water, 100-150ml coconut milk (for added aroma and richness), 3 tablespoons roasted white sesame seeds, grated white coconut (optional), vegetable oil for frying (palm oil is best). Key Preparation Directions Instructions Methods: 1. Mixing the batter: Pour the ready-made flour mix into a mixing bowl. Gradually add the ice-cold water and coconut milk, stirring until the flour dissolves and there are no lumps. Flavoring and seasoning: Add the roasted white sesame seeds and grated coconut, and mix well. 2. Prepare the bananas: Peel the bananas and slice them lengthwise into 3-4 pieces per banana, or you can cut them in half crosswise and flatten them with your hands. 3. Frying Bananas: Heat a pan with enough oil to cover the bananas over medium-high heat. Once the oil is hot, dip the bananas in flour and then fry them. 4. Drain the oil: Fry the bananas until they turn golden brown and the batter is crispy. Remove them and let them drain on a wire rack; this will help keep them crispy for longer. Summary Summation Notes: Making fried bananas using pre-made batter is easy. Simply prepare a ready-made banana fritter batter (such as Bai Yok or Goki brand), mix it with ice-cold water, coconut milk, and white sesame seeds. Then, dip sliced bananas into the batter and fry in hot oil until golden brown and crispy. That's all it takes to make delicious fried bananas! Tips: You can add any topping your want such as Fruit Vegetable or Anything you have ever ate. And the finally then You can eat it and Sell it to the Merchant or Customer with Who people you Know Knew known, i hope you have fun and enjoy it. Where can i you me buy it, Where to Buy, Where to find it: Internet Online, Supermarkets. Widely available from street food stalls, especially in durian-growing regions like, and at markets. Online: Easily ordered from platforms like Abcdefg in various grades and sizes. Key Additional Tips Profit Useful Benefit Available Nutrition : Properties and Benefits of Bananas: Digestive and Stomach System: Unripe/partially ripe bananas are high in tannins, which help heal stomach ulcers and treat diarrhea. Ripe bananas help relieve constipation and serve as food for beneficial gut bacteria. Brain and Body Energy: Contains three types of natural sugars (sucrose, glucose, fructose) that provide a quick energy boost, ideal for working individuals and athletes. Lowering Blood Pressure and Heart Health: High in potassium, which helps control blood pressure. Reduces stress and nourishes the nervous system: Contains the amino acid tryptophan, which the body converts into serotonin, helping you feel relaxed and in a good mood. Treats anemia: High in iron, which helps build hemoglobin. Slows aging and improves skin: Bananas are high in beta-carotene and antioxidants, helping to reduce wrinkles and cell degeneration. Bananas are a highly nutritious fruit, rich in potassium, vitamins, and fiber. They help boost energy, relieve constipation, alleviate stomach problems, lower blood pressure, treat anemia, and reduce stress. Different varieties of bananas (Hom, Nam Wa, Kai) have different advantages; for example, unripe Nam Wa bananas are good for treating diarrhea and stomach problems. Benefits of different banana types: Nam Wa bananas: focus on nourishing the body, high in calcium, relieves diarrhea (unripe), relieves constipation (ripe). Cavendish bananas: excellent for brain health and stress relief. Egg bananas: excellent for antioxidants and anti-aging. Caution: Although very beneficial, you shouldn't eat too many per day (recommended 1-2 fruits) because they are high in starch and sugar, which may raise blood sugar levels. And the finally then You can eat it and Sell it to the Merchant or Customer with Who people you Know Knew known, i hope you have fun and enjoy it.
ClickMeSeeAllFull
ClickMeSeeOnMoreDetail
ClickMeSeeOnMorePictureImage
ClickMeSeeOnMoreVideo
Fruit: Processer Processed Processing food Menu: 8.Banana Puff Pastry
Method: All Works:Banana Puff Pastry
Method: How to make made cook: Recipe Procedure: Banana Puff Pastry Step 1: For The Dough: Materials Ingredients: 300-350 grams all-purpose flour 200-250 grams pastry margarine or unsalted butter 150-180 ml ice-cold water 1 teaspoon salt 30-50 grams granulated sugar (for sprinkling) Key Preparation Directions Instructions Methods: 1. Mixing the dough: Combine the flour and salt, make a well in the center, and gradually add the cold water. Knead until you form a dough. Let it rest for 15-20 minutes. 2. Roll out the dough and butter: Roll out the dough into a rectangular sheet. Place the rolled-out pastry butter in the center, then fold the dough over the butter to completely enclose it. 3. Folding: Roll the buttered dough into a long sheet, then fold it like a letter (fold 3 times). Repeat the rolling and folding process about 3-4 times. (Refrigerate the dough for 15 minutes between folding if the butter melts.) 4. Baking: Roll out the dough to the desired thickness, cut into shapes, and bake at 190-200°C until puffed up and golden brown. Summary Summation Notes: To make light and crispy puff pastry, mix all-purpose flour, cold water, salt, and unsalted butter together. Roll out the dough, wrapping it around the pastry butter (folding the dough several times), then bake at a preheated temperature until golden brown and crispy. The key is to use very cold butter to create clearly defined layers of dough. Tips: If you don't have pastry butter, use very cold unsalted butter and mix in some flour before rolling to help the dough separate more easily. Step 2: For The Filling: Materials Ingredients: Ready-made puff pastry (available at supermarkets) Bananas (grown tom yum, dried bananas, or plantains) Eggs (for brushing the top) Sugar/chocolate/butter (optional) Key Preparation Directions Instructions Methods: 1. Prepare the dough: Take a pre-made puff pastry sheet and let it soften slightly at room temperature, then cut it into square pieces of the desired size. 2. Filling: Place the banana slices in the center of the pastry. If you prefer it sweeter, you can add chocolate as well. 3. Wrapping the puff: Fold the dough in half tightly, then use a fork to press the edges together for a neat crease. 4. Baking/Frying: Baking: Brush the puff pastry with egg wash. Bake at approximately 180-200 degrees Celsius for about 15-20 minutes, or until puffed up and golden brown. Frying: Fry in hot oil over medium heat until golden and crispy. Summary Summation Notes: The easiest and most popular way to make banana puffs is to use ready-made puff pastry, wrap ripe bananas (either Cavendish or plantains), and then bake or fry until golden brown and crispy. For added flavor, brush with egg wash before baking for a beautiful color. It's a quick and easy snack to make. Additional tips: If you don't have an oven, you can use an air fryer instead, or sauté the bananas with butter and sugar before wrapping them for added sweetness and aroma. And the finally then You can eat it and Sell it to the Merchant or Customer with Who people you Know Knew known, i hope you have fun and enjoy it. Where can i you me buy it, Where to Buy, Where to find it: Internet Online, Supermarkets. Widely available from street food stalls, especially in durian-growing regions like, and at markets. Online: Easily ordered from platforms like Abcdefg in various grades and sizes. Key Additional Tips Profit Useful Benefit Available Nutrition : Properties and Benefits of Bananas: Digestive and Stomach System: Unripe/partially ripe bananas are high in tannins, which help heal stomach ulcers and treat diarrhea. Ripe bananas help relieve constipation and serve as food for beneficial gut bacteria. Brain and Body Energy: Contains three types of natural sugars (sucrose, glucose, fructose) that provide a quick energy boost, ideal for working individuals and athletes. Lowering Blood Pressure and Heart Health: High in potassium, which helps control blood pressure. Reduces stress and nourishes the nervous system: Contains the amino acid tryptophan, which the body converts into serotonin, helping you feel relaxed and in a good mood. Treats anemia: High in iron, which helps build hemoglobin. Slows aging and improves skin: Bananas are high in beta-carotene and antioxidants, helping to reduce wrinkles and cell degeneration. Bananas are a highly nutritious fruit, rich in potassium, vitamins, and fiber. They help boost energy, relieve constipation, alleviate stomach problems, lower blood pressure, treat anemia, and reduce stress. Different varieties of bananas (Hom, Nam Wa, Kai) have different advantages; for example, unripe Nam Wa bananas are good for treating diarrhea and stomach problems. Benefits of different banana types: Nam Wa bananas: focus on nourishing the body, high in calcium, relieves diarrhea (unripe), relieves constipation (ripe). Cavendish bananas: excellent for brain health and stress relief. Egg bananas: excellent for antioxidants and anti-aging. Caution: Although very beneficial, you shouldn't eat too many per day (recommended 1-2 fruits) because they are high in starch and sugar, which may raise blood sugar levels. And the finally then You can eat it and Sell it to the Merchant or Customer with Who people you Know Knew known, i hope you have fun and enjoy it.
ClickMeSeeAllFull
ClickMeSeeOnMoreDetail
ClickMeSeeOnMorePictureImage
ClickMeSeeOnMoreVideo
Fruit: Processer Processed Processing food Menu: 9.Banana Grill
Method: All Works:Banana Grill
Method: How to make made cook: Recipe Procedure: Banana Grill Materials Ingredients: For the bananas: 1 bunch of unripe bananas. For the coconut milk sauce: 250 ml coconut cream, 150 g palm sugar (or jaggery), 40 g granulated sugar (adjust to taste), 1/2 teaspoon salt, 2-3 pandan leaves (tied together). Key Preparation Directions Instructions Methods: 1.Prepare the bananas: Peel the bananas and slice them into bite-sized pieces. Grilling method: Grill them over charcoal on low heat (or use an air fryer/oven at approximately 160-170 degrees Celsius), turning them over until the banana slices are dry and fragrant. 2. Pressing Method: When the bananas start to ripen, place them in a plastic bag and use a bottle or flat container to press them flat. Then grill them for a short time until slightly browned. 3. Slice the grilled bananas into bite-sized pieces, arrange them on a plate, and pour the coconut milk over them generously. Alternatively, you can serve the sauce separately for dipping. 4. Place a pot over medium heat. Add the coconut cream, palm sugar, granulated sugar, and salt. Add the pandan leaves and simmer together to enhance the aroma. Stir until the sugar is completely dissolved. Continue simmering over low heat for about 15-20 minutes, or until the coconut cream thickens. Set aside. Summary Summation Notes: Making delicious and fragrant grilled bananas is easy. Simply choose unripe bananas (greenish-yellow peel), grill them over low heat until fragrant, flatten them, and pour a rich, creamy coconut milk sauce over them. That's all it takes to serve! Additional tips: You can add any topping your want such as Fruit Vegetable or Anything you have ever ate. And the finally then You can eat it and Sell it to the Merchant or Customer with Who people you Know Knew known, i hope you have fun and enjoy it. Where can i you me buy it, Where to Buy, Where to find it: Internet Online, Supermarkets. Widely available from street food stalls, especially in durian-growing regions like, and at markets. Online: Easily ordered from platforms like Abcdefg in various grades and sizes. Key Additional Tips Profit Useful Benefit Available Nutrition : Properties and Benefits of Bananas: Digestive and Stomach System: Unripe/partially ripe bananas are high in tannins, which help heal stomach ulcers and treat diarrhea. Ripe bananas help relieve constipation and serve as food for beneficial gut bacteria. Brain and Body Energy: Contains three types of natural sugars (sucrose, glucose, fructose) that provide a quick energy boost, ideal for working individuals and athletes. Lowering Blood Pressure and Heart Health: High in potassium, which helps control blood pressure. Reduces stress and nourishes the nervous system: Contains the amino acid tryptophan, which the body converts into serotonin, helping you feel relaxed and in a good mood. Treats anemia: High in iron, which helps build hemoglobin. Slows aging and improves skin: Bananas are high in beta-carotene and antioxidants, helping to reduce wrinkles and cell degeneration. Bananas are a highly nutritious fruit, rich in potassium, vitamins, and fiber. They help boost energy, relieve constipation, alleviate stomach problems, lower blood pressure, treat anemia, and reduce stress. Different varieties of bananas (Hom, Nam Wa, Kai) have different advantages; for example, unripe Nam Wa bananas are good for treating diarrhea and stomach problems. Benefits of different banana types: Nam Wa bananas: focus on nourishing the body, high in calcium, relieves diarrhea (unripe), relieves constipation (ripe). Cavendish bananas: excellent for brain health and stress relief. Egg bananas: excellent for antioxidants and anti-aging. Caution: Although very beneficial, you shouldn't eat too many per day (recommended 1-2 fruits) because they are high in starch and sugar, which may raise blood sugar levels. And the finally then You can eat it and Sell it to the Merchant or Customer with Who people you Know Knew known, i hope you have fun and enjoy it.
ClickMeSeeAllFull
ClickMeSeeOnMoreDetail
ClickMeSeeOnMorePictureImage
ClickMeSeeOnMoreVideo
Fruit: Processer Processed Processing food Menu: 10.Banana Croissant
Method: All Works:Banana Croissant
Method: How to make made cook: Recipe Procedure: Banana Croissant Materials Ingredients: Bread flour (high protein): 500 grams Sugar: 40-80 grams (to taste) Dry yeast: 10-11 grams Unsweetened fresh milk (cold): 150 grams Cold water: 155 grams Salt: ½ - 1 teaspoon Unsalted butter (for mixing into the dough): 80 grams Unsalted butter (dry butter for folding the dough): 250-325 grams Mashed and semi-ripe bananas, sliced as desired Key Preparation Directions Instructions Methods: 1. Prepare the dough: Combine flour, yeast, sugar, salt, fresh milk, cold water, and butter in a mixer. Knead until well combined. Refrigerate the dough for 1-2 hours. 2. Lamination: Roll the dough into a square sheet. Place a piece of unsalted butter (flattened) in the center. Fold the dough over the butter, roll again, and fold in three. Repeat 3-4 times. Refrigerate each time you fold. Refrigerate: Wrap the dough in plastic wrap and refrigerate, rubbing your eyes, for 60 minutes to allow the gluten to relax. 3. Shaping and Filling: Roll out the buttered dough into a thin sheet. Cut into triangles. Place the banana filling, chocolate filling, or other filling at the base, then roll from the wide side to the pointed top. 4. Proofing: Place the dough on a baking sheet and let it rise at room temperature or in a proofing room until it doubles in size. Brushing and Baking: Brush the croissants with an egg wash (a mixture of egg and a little water). Bake at 200°C (10-12 minutes) or until golden brown. Summary Summation Notes: To make filled croissants (such as those with chocolate or custard), start by preparing the dough (bread flour, yeast, milk). Roll it out and alternately fold it with butter (lamination) 3-4 times to create a crispy layer. Shape it into a triangle, place the filling at the base, and roll it up. Proof the dough until it rises. Brush with an egg and milk mixture and bake at 180-200°C (approximately 15-20 minutes). Additional tips: Using Butter: Use high-fat butter (82% or more dry butter) to ensure the dough layers are crispy and don't tear easily. Cold Circulation: At every stage of rolling the dough, ensure the butter doesn't melt completely to allow the croissants to rise in layers. Filling: If using a liquid cream filling, pipe it in after the croissants have been baked and cooled. And the finally then You can eat it and Sell it to the Merchant or Customer with Who people you Know Knew known, i hope you have fun and enjoy it. Where can i you me buy it, Where to Buy, Where to find it: Internet Online, Supermarkets. Widely available from street food stalls, especially in durian-growing regions like, and at markets. Online: Easily ordered from platforms like Abcdefg in various grades and sizes. Key Additional Tips Profit Useful Benefit Available Nutrition : Properties and Benefits of Bananas: Digestive and Stomach System: Unripe/partially ripe bananas are high in tannins, which help heal stomach ulcers and treat diarrhea. Ripe bananas help relieve constipation and serve as food for beneficial gut bacteria. Brain and Body Energy: Contains three types of natural sugars (sucrose, glucose, fructose) that provide a quick energy boost, ideal for working individuals and athletes. Lowering Blood Pressure and Heart Health: High in potassium, which helps control blood pressure. Reduces stress and nourishes the nervous system: Contains the amino acid tryptophan, which the body converts into serotonin, helping you feel relaxed and in a good mood. Treats anemia: High in iron, which helps build hemoglobin. Slows aging and improves skin: Bananas are high in beta-carotene and antioxidants, helping to reduce wrinkles and cell degeneration. Bananas are a highly nutritious fruit, rich in potassium, vitamins, and fiber. They help boost energy, relieve constipation, alleviate stomach problems, lower blood pressure, treat anemia, and reduce stress. Different varieties of bananas (Hom, Nam Wa, Kai) have different advantages; for example, unripe Nam Wa bananas are good for treating diarrhea and stomach problems. Benefits of different banana types: Nam Wa bananas: focus on nourishing the body, high in calcium, relieves diarrhea (unripe), relieves constipation (ripe). Cavendish bananas: excellent for brain health and stress relief. Egg bananas: excellent for antioxidants and anti-aging. Caution: Although very beneficial, you shouldn't eat too many per day (recommended 1-2 fruits) because they are high in starch and sugar, which may raise blood sugar levels. And the finally then You can eat it and Sell it to the Merchant or Customer with Who people you Know Knew known, i hope you have fun and enjoy it.
ClickMeSeeAllFull
ClickMeSeeOnMoreDetail
ClickMeSeeOnMorePictureImage
ClickMeSeeOnMoreVideo
Fruit: Processer Processed Processing food Menu: 1.Mango Dried Paste Roll
Method: All Works:Mango Dried Paste Roll
Method: How to make made cook: Recipe Procedure: Mango Dried Paste Roll Materials Ingredients: 2-3 kilograms of ripe mangoes (any variety you like, such as Nam Dok Mai) 100-200 grams of granulated sugar (adjust according to the sweetness of the mangoes) 1-2 teaspoons of salt Optional: Coconut cream (for added richness), lime juice (for added sourness) Key Preparation Directions Instructions Methods: 1. Prepare the mango pulp: Wash the mangoes thoroughly, peel and slice off the flesh. Blend until smooth and creamy. 2. Stirring the Mango: Pour the blended mango pulp into a brass or Teflon pan. Heat over low heat, add salt and sugar. Simmer until thickened: Stir continuously until the mango pulp boils, thickens, and begins to separate from the pan. (Add lime juice if you prefer it sour; add coconut milk if you prefer it creamy.) 3. Drying: Once stirred, let it cool down, then spread it into a thin sheet on a plastic sheet or tray lightly greased with vegetable oil. Sun-drying: Place in the sun for about 1-2 days until the mango is completely dry, chewy, and doesn't stick to your hands. 4. Storage: Peel the dried mango, roll or cut it into pieces, and store it in an airtight jar. Summary Summation Notes: To make delicious and chewy mango paste (som lim), simply peel ripe mangoes and blend the flesh until smooth. Cook with salt and sugar over low heat until thickened. Then, spread into thin sheets and sun-dry for 1-2 days until completely dry. The result is a sweet and sour mango paste that can be stored for a long time. Additional tips: No-Sun Recipe: If there's no sun, you can spread the mixture on a tray and bake it in an oven or air fryer on low heat until dry. Choosing Mangoes: Using very ripe mangoes will give a sweet taste. If you prefer a sweet and sour taste, blend a mixture of ripe and sour mangoes together. And the finally then You can eat it and Sell it to the Merchant or Customer with Who people you Know Knew known, i hope you have fun and enjoy it. Where can i you me buy it, Where to Buy, Where to find it: Internet Online, Supermarkets. Widely available from street food stalls, especially in durian-growing regions like, and at markets. Online: Easily ordered from platforms like Abcdefg in various grades and sizes. Caution Warning: Diabetic patients should limit their intake of ripe mangoes because they are high in sugar. Eating too much unripe mango may irritate the stomach. Key Additional Tips Profit Useful Benefit Available Nutrition : Benefits of Mangoes Based on Ripeness: Unripe Mangoes: Very high in Vitamin C, helping prevent scurvy; relieves heatstroke and thirst; helps lower cholesterol; and contains Vitamin A, which helps improve eyesight. Ripe Mangoes: A source of antioxidants (Vitamin C, Vitamin A, Beta-carotene) that help slow aging and nourish the skin; high in fiber, aiding digestion and excretion; and helps nourish the heart. Other health benefits: Immune system boost: Vitamin C and other nutrients help boost immunity. Aids digestion: The fiber in mangoes helps relieve constipation and acts as a natural laxative. Eye health: High in vitamin A and beta-carotene, which help maintain good eyesight and reduce the risk of eye diseases. Cancer prevention: Polyphenols in mangoes may help reduce the risk of certain types of cancer. Mangoes are a highly nutritious fruit, rich in vitamins C and A and dietary fiber. They help boost immunity, improve eyesight, and aid digestion. Unripe mangoes can help relieve heatstroke and reduce bleeding gums, while ripe mangoes nourish the skin and slow down aging. However, they should be consumed in moderation due to their sugar content. And the finally then You can eat it and Sell it to the Merchant or Customer with Who people you Know Knew known, i hope you have fun and enjoy it.
ClickMeSeeAllFull
ClickMeSeeOnMoreDetail
ClickMeSeeOnMorePictureImage
ClickMeSeeOnMoreVideo
Fruit: Processer Processed Processing food Menu: 2.Mango Milk Whip Cream Smoothie Shake
Method: All Works:Mango Milk Whip Cream Smoothie Shake
Method: How to make made cook: Recipe Procedure: Mango Milk Whip Cream Smoothie Shake Materials Ingredients: Ripe mango: 1 piece (Nam Dok Mai mango recommended for sweetness and aroma) Fresh milk: 100 ml (or use plant-based milk as preferred) Condensed milk: 40-50 ml (adjust sweetness to your liking) Ice: 1 measuring cup (16 oz) Evaporated milk: 40 ml (add for creaminess) Salt: a pinch (to balance the flavors) Coconut milk: to taste Syrup: to taste Key Preparation Directions Instructions Methods: 1. Prepare the ingredients: Peel the ripe mango and cut out only the flesh. If you want to use it for decoration, set aside some mango flesh in cubes. 2. Blend: Put ripe mango, fresh milk, condensed milk, evaporated milk, salt, and ice into a blender. 3. Blend until smooth: Blend at high speed until the mixture is smooth, fine, and well combined. 4. Serving: Pour into a glass, perhaps drizzle a little fresh milk on top and garnish with diced mango pieces. Summary Summation Notes: To make a delicious, creamy, and smooth mango milkshake, it's easy! Simply blend one ripe mango (sliced) with 100 ml of fresh milk, 50 ml of condensed milk, and one cup of ice until smooth. Pour into a glass and enjoy. You can enhance the flavor by adding a pinch of salt, or add coconut milk for a Hong Kong-style mango milkshake. Additional tips: Hong Kong-style creamy smoothie: Blend the mango with ice until smooth, then blend the coconut milk with ice separately. When pouring into a glass, top with the blended coconut milk. Healthy recipe: Replace condensed milk with honey and use plain yogurt. Frozen mango: Freezing ripe mango before blending will result in a thicker smoothie texture. And the finally then You can eat it and Sell it to the Merchant or Customer with Who people you Know Knew known, i hope you have fun and enjoy it. Where can i you me buy it, Where to Buy, Where to find it: Internet Online, Supermarkets. Widely available from street food stalls, especially in durian-growing regions like, and at markets. Online: Easily ordered from platforms like Abcdefg in various grades and sizes. Caution Warning: Diabetic patients should limit their intake of ripe mangoes because they are high in sugar. Eating too much unripe mango may irritate the stomach. Key Additional Tips Profit Useful Benefit Available Nutrition : Benefits of Mangoes Based on Ripeness: Unripe Mangoes: Very high in Vitamin C, helping prevent scurvy; relieves heatstroke and thirst; helps lower cholesterol; and contains Vitamin A, which helps improve eyesight. Ripe Mangoes: A source of antioxidants (Vitamin C, Vitamin A, Beta-carotene) that help slow aging and nourish the skin; high in fiber, aiding digestion and excretion; and helps nourish the heart. Other health benefits: Immune system boost: Vitamin C and other nutrients help boost immunity. Aids digestion: The fiber in mangoes helps relieve constipation and acts as a natural laxative. Eye health: High in vitamin A and beta-carotene, which help maintain good eyesight and reduce the risk of eye diseases. Cancer prevention: Polyphenols in mangoes may help reduce the risk of certain types of cancer. Mangoes are a highly nutritious fruit, rich in vitamins C and A and dietary fiber. They help boost immunity, improve eyesight, and aid digestion. Unripe mangoes can help relieve heatstroke and reduce bleeding gums, while ripe mangoes nourish the skin and slow down aging. However, they should be consumed in moderation due to their sugar content. And the finally then You can eat it and Sell it to the Merchant or Customer with Who people you Know Knew known, i hope you have fun and enjoy it.
ClickMeSeeAllFull
ClickMeSeeOnMoreDetail
ClickMeSeeOnMorePictureImage
ClickMeSeeOnMoreVideo
Fruit: Processer Processed Processing food Menu: 3.Mango Yogurt
Method: All Works:Mango Yogurt
Method: How to make made cook: Recipe Procedure: Mango Yogurt Materials Ingredients: 100% pure cow's milk: 1 liter (pasteurized or UHT) Plain yogurt: 2-3 tablespoons (must be a formula that states it contains "live microorganisms" or probiotics) Finely blended fruit: as desired Equipment: Pot for warming milk, thermometer (if available), container with lid for incubation, thermos or styrofoam box Key Preparation Directions Instructions Methods: 1. Warm the milk (sterilize): Pour the fresh milk into a pot. Heat over low heat until it reaches approximately 80-90°C (or until small bubbles appear around the edges of the pot). Stir constantly to prevent the milk from burning and sticking to the bottom of the pot. Let the milk cool: Remove the milk from the heat and let it cool to approximately 40-50°C (it should feel warm to the touch). 2. Preparing the starter culture: In a small cup, scoop one ladle of warmed milk into a bowl and mix it with plain yogurt and your desired fruit. Stir until dissolved, then pour back into the large pot of milk. Gently stir to combine thoroughly. 3. Fermenting the yogurt: Pour the mixture into a clean, dry container and seal tightly. Fermentation method: Place the container in a thermos, styrofoam box, or turn off the oven to maintain a constant temperature. Fermentation time: Leave at room temperature or in a warm place for 8-12 hours (the longer it ferments, the more sour the taste will be). 4. Refrigerate: Once the time is up and the yogurt has set, refrigerate for at least 2-3 hours before serving to allow the yogurt to firm up. Summary Summation Notes: To make a delicious, creamy, and smooth mango milkshake, it's easy! Simply blend one ripe mango (sliced) with 100 ml of fresh milk, 50 ml of condensed milk, and one cup of ice until smooth. Pour into a glass and enjoy. You can enhance the flavor by adding a pinch of salt, or add coconut milk for a Hong Kong-style mango milkshake. Additional tips: Smooth yogurt: Do not move the container while fermenting to allow the microorganisms to work fully. If too runny: This may be due to an unfresh starter culture or an unsuitable fermentation temperature. For Greek yogurt: Strain the yogurt to remove excess water using a cheesecloth or fine sieve. Refrigerate for 2-4 hours. For subsequent batches: You can use 2-3 tablespoons of the finished homemade yogurt as a starter culture. And the finally then You can eat it and Sell it to the Merchant or Customer with Who people you Know Knew known, i hope you have fun and enjoy it. Where can i you me buy it, Where to Buy, Where to find it: Internet Online, Supermarkets. Widely available from street food stalls, especially in durian-growing regions like, and at markets. Online: Easily ordered from platforms like Abcdefg in various grades and sizes. Caution Warning: Diabetic patients should limit their intake of ripe mangoes because they are high in sugar. Eating too much unripe mango may irritate the stomach. Key Additional Tips Profit Useful Benefit Available Nutrition : Benefits of Mangoes Based on Ripeness: Unripe Mangoes: Very high in Vitamin C, helping prevent scurvy; relieves heatstroke and thirst; helps lower cholesterol; and contains Vitamin A, which helps improve eyesight. Ripe Mangoes: A source of antioxidants (Vitamin C, Vitamin A, Beta-carotene) that help slow aging and nourish the skin; high in fiber, aiding digestion and excretion; and helps nourish the heart. Other health benefits: Immune system boost: Vitamin C and other nutrients help boost immunity. Aids digestion: The fiber in mangoes helps relieve constipation and acts as a natural laxative. Eye health: High in vitamin A and beta-carotene, which help maintain good eyesight and reduce the risk of eye diseases. Cancer prevention: Polyphenols in mangoes may help reduce the risk of certain types of cancer. Mangoes are a highly nutritious fruit, rich in vitamins C and A and dietary fiber. They help boost immunity, improve eyesight, and aid digestion. Unripe mangoes can help relieve heatstroke and reduce bleeding gums, while ripe mangoes nourish the skin and slow down aging. However, they should be consumed in moderation due to their sugar content. And the finally then You can eat it and Sell it to the Merchant or Customer with Who people you Know Knew known, i hope you have fun and enjoy it.
ClickMeSeeAllFull
ClickMeSeeOnMoreDetail
ClickMeSeeOnMorePictureImage
ClickMeSeeOnMoreVideo
Fruit: Processer Processed Processing food Menu: 4.Mango Pudding Jelly
Method: All Works:Mango Pudding Jelly
Method: How to make made cook: Recipe Procedure: Mango Pudding Jelly Materials Ingredients: 2-3 ripe mangoes (Nam Dok Mai or Mahachanok variety) (mashed) 600 ml unsweetened fresh milk or milk mixed with coconut milk 1-2 teaspoons agar powder (according to your preferred firmness) 50-100 grams granulated sugar (adjust according to the sweetness of the mango) Diced mango pieces (for topping) Key Preparation Directions Instructions Methods: 1. Prepare the pudding batter: Blend the ripe mango until smooth and creamy. Mix and cook: Combine fresh milk (or coconut milk) with sugar and agar powder. Heat over low heat, stirring constantly until dissolved and no lumps form. Once it simmers gently, turn off the heat. 2. Mango mixture: Add the blended mango pulp to the still hot milk mixture and stir until smooth and creamy. 3. Pour into molds and refrigerate: Pour the pudding into cups or molds, let it cool, then refrigerate for about 2 hours, or until it sets. 4. Serving: Garnish with diced ripe mango or drizzle with condensed milk for added richness. Summary Summation Notes: Make a smooth, creamy, and refreshing mango pudding easily by blending ripe mango pulp with fresh milk/coconut milk, sugar, and agar powder or gelatin. Simmer until dissolved, pour into molds, and refrigerate until set. Serve with diced mango pieces. A popular recipe uses 600 ml of fresh milk, 2 ripe mangoes, 1 teaspoon of agar powder, and 50 grams of sugar. Additional tips: Texture: For a smoother texture, use gelatin powder instead of agar powder. Sweetness: If the mango is already very sweet, reduce the amount of sugar. Mango Sauce: Blend the mango with a little syrup to make a richer sauce. And the finally then You can eat it and Sell it to the Merchant or Customer with Who people you Know Knew known, i hope you have fun and enjoy it. Where can i you me buy it, Where to Buy, Where to find it: Internet Online, Supermarkets. Widely available from street food stalls, especially in durian-growing regions like, and at markets. Online: Easily ordered from platforms like Abcdefg in various grades and sizes. Caution Warning: Diabetic patients should limit their intake of ripe mangoes because they are high in sugar. Eating too much unripe mango may irritate the stomach. Key Additional Tips Profit Useful Benefit Available Nutrition : Benefits of Mangoes Based on Ripeness: Unripe Mangoes: Very high in Vitamin C, helping prevent scurvy; relieves heatstroke and thirst; helps lower cholesterol; and contains Vitamin A, which helps improve eyesight. Ripe Mangoes: A source of antioxidants (Vitamin C, Vitamin A, Beta-carotene) that help slow aging and nourish the skin; high in fiber, aiding digestion and excretion; and helps nourish the heart. Other health benefits: Immune system boost: Vitamin C and other nutrients help boost immunity. Aids digestion: The fiber in mangoes helps relieve constipation and acts as a natural laxative. Eye health: High in vitamin A and beta-carotene, which help maintain good eyesight and reduce the risk of eye diseases. Cancer prevention: Polyphenols in mangoes may help reduce the risk of certain types of cancer. Mangoes are a highly nutritious fruit, rich in vitamins C and A and dietary fiber. They help boost immunity, improve eyesight, and aid digestion. Unripe mangoes can help relieve heatstroke and reduce bleeding gums, while ripe mangoes nourish the skin and slow down aging. However, they should be consumed in moderation due to their sugar content. And the finally then You can eat it and Sell it to the Merchant or Customer with Who people you Know Knew known, i hope you have fun and enjoy it.
ClickMeSeeAllFull
ClickMeSeeOnMoreDetail
ClickMeSeeOnMorePictureImage
ClickMeSeeOnMoreVideo
Fruit: Processer Processed Processing food Menu: 4.Mango Ice Scream Milk Cone
Method: All Works:Mango Ice Scream Milk Cone
Method: How to make made cook: Recipe Procedure: Mango Ice Scream Milk Cone Step 1: For The Dough: Materials Ingredients: All-purpose flour: 115 grams Granulated sugar: 100 grams (or reduce if you don't like it sweet) Eggs: 2 Fresh milk: 60 grams Melted butter: 40 grams Vanilla extract: 1 teaspoon Salt: 1/4 teaspoon Key Preparation Directions Instructions Methods: 1. Mix: Beat the eggs, sugar, and vanilla extract until the sugar is completely dissolved. Add flour: Sift the all-purpose flour into the mixture, followed by the salt and milk. Stir until smooth. Add butter: Add the melted butter and stir again until well combined. 2. Making the cone: Preheat the waffle cone maker. Scoop about 1-1.5 tablespoons of batter and pour it into the center. Baking: Cover the machine and wait until the cone is golden brown (about 1-2 minutes). 3. Rolling: Quickly roll it into a cone while it's still hot (it will break if it cools). Use a stainless steel cone to help roll it and press the end firmly. 4. Cooling: Let cool completely on a wire rack until crispy, then store immediately in an airtight container to maintain crispness. Summary Summation Notes: To make crispy and fragrant ice cream cones (waffle cones) at home, beat 2 eggs with 100 grams of sugar until dissolved. Add vanilla extract, 40 grams of melted butter, and 60 grams of fresh milk, and mix well. Sift 115 grams of all-purpose flour, add a pinch of salt, and beat until smooth. Pour the batter into a hot waffle cone maker and cook for 1-2 minutes until golden brown. Quickly roll into a cone shape while still hot. Additional tips: If you don't have a waffle cone maker, you can use a non-stick pan to make a thin sheet and quickly roll it up. For an extra aroma, you can add 1-2 tablespoons of cocoa powder to the mixture. Step 2: For The Filling: Materials Ingredients: 300-400 grams of ripe mango pulp (frozen) 250 grams of whipping cream (dairy type) 30-50 grams of condensed milk (adjustable) (Optional) 1 teaspoon of gelatin (helps to make the ice cream smooth and prevents ice crystals) (Optional) 2-3 drops of yellow food coloring Key Preparation Directions Instructions Methods: 1.Prepare the mango: Peel and slice ripe mangoes, then freeze them until solid (this makes blending easier and results in a smoother texture). Blend until smooth. Prepare the whipped cream: Whip the whipping cream with an electric mixer until soft peaks form (smooth and fluffy). 2. Mixing: Combine the blended mango with the whipping cream and condensed milk. Stir well until combined. (If using gelatin, dissolve it in hot water and mix it in now.) 3. Freezing: Pour into a container, close the lid tightly, and freeze for approximately 4-6 hours. 4. Trick for a smooth texture: Stir or blend the ice cream every 1-2 hours to reduce the formation of ice crystals. Summary Summation Notes: Here's an easy way to make smooth, creamy, and delicious homemade mango ice cream. Simply use 300 grams of ripe mango, 250 grams of whipping cream, and condensed milk (to taste). Blend the mango until smooth, then mix with the whipped cream that has been whipped until soft peaks form. Freeze for 4-6 hours, stirring every 1-2 hours to keep the texture smooth. Additional tips: For a richer, creamier flavor, you can substitute the same amount of whipping cream for coconut milk. And the finally then You can eat it and Sell it to the Merchant or Customer with Who people you Know Knew known, i hope you have fun and enjoy it. Where can i you me buy it, Where to Buy, Where to find it: Internet Online, Supermarkets. Widely available from street food stalls, especially in durian-growing regions like, and at markets. Online: Easily ordered from platforms like Abcdefg in various grades and sizes. Caution Warning: Diabetic patients should limit their intake of ripe mangoes because they are high in sugar. Eating too much unripe mango may irritate the stomach. Key Additional Tips Profit Useful Benefit Available Nutrition : Benefits of Mangoes Based on Ripeness: Unripe Mangoes: Very high in Vitamin C, helping prevent scurvy; relieves heatstroke and thirst; helps lower cholesterol; and contains Vitamin A, which helps improve eyesight. Ripe Mangoes: A source of antioxidants (Vitamin C, Vitamin A, Beta-carotene) that help slow aging and nourish the skin; high in fiber, aiding digestion and excretion; and helps nourish the heart. Other health benefits: Immune system boost: Vitamin C and other nutrients help boost immunity. Aids digestion: The fiber in mangoes helps relieve constipation and acts as a natural laxative. Eye health: High in vitamin A and beta-carotene, which help maintain good eyesight and reduce the risk of eye diseases. Cancer prevention: Polyphenols in mangoes may help reduce the risk of certain types of cancer. Mangoes are a highly nutritious fruit, rich in vitamins C and A and dietary fiber. They help boost immunity, improve eyesight, and aid digestion. Unripe mangoes can help relieve heatstroke and reduce bleeding gums, while ripe mangoes nourish the skin and slow down aging. However, they should be consumed in moderation due to their sugar content. And the finally then You can eat it and Sell it to the Merchant or Customer with Who people you Know Knew known, i hope you have fun and enjoy it.
ClickMeSeeAllFull
ClickMeSeeOnMoreDetail
ClickMeSeeOnMorePictureImage
ClickMeSeeOnMoreVideo
Fruit: Processer Processed Processing food Menu: 6.Mango Ice Cream Sandwiches
Method: All Works:Mango Ice Cream Sandwiches
Method: How to make made cook: Recipe Procedure: Mango Ice Cream Sandwiches Step 1: For The Dough: Materials Ingredients: All-purpose flour ( 130 g), granulated sugar (30 g), baking powder (6 g), egg (1 ), evaporated milk (180 g), and melted butter (50 g). Key Preparation Directions Instructions Methods: 1. Soft Waffle Recipe (Recommended for serving with ice cream): Mix the dry ingredients (flour, sugar, baking powder, salt) and liquid ingredients (milk, eggs, melted butter) separately first, then pour them together and mix well. 2. Resting the batter: Letting the batter rest for about 30 minutes will help make the waffles softer and more fragrant. 3. Baking: Preheat the oven. Lightly grease the oven with butter or oil. Pour the batter into the oven, filling it evenly. Cover and bake until the oven light goes out or the batter turns golden brown. 4. Belgian Waffles: Made with bread flour for a chewy texture and a crispy exterior while remaining soft on the inside. Summary Summation Notes: Making homemade waffles is easy! Simply combine 130g all-purpose flour, 30g granulated sugar, 6g baking powder, 1 egg, 180g evaporated milk, and 50g melted butter. Mix until smooth and let it rest for 30 minutes. Then, pour the batter into a greased waffle maker and bake until golden brown and crispy, about 1-3 minutes. Serve immediately. Additional tips: Do not overmix the batter, as this will make the waffles chewy. Use a whisk to mix the ingredients just enough so there are no lumps of batter. Step 2: For The Filling: Materials Ingredients: 300-400 grams of ripe mango pulp (frozen) 250 grams of whipping cream (dairy type) 30-50 grams of condensed milk (adjustable) (Optional) 1 teaspoon of gelatin (helps to make the ice cream smooth and prevents ice crystals) (Optional) 2-3 drops of yellow food coloring Key Preparation Directions Instructions Methods: 1.Prepare the mango: Peel and slice ripe mangoes, then freeze them until solid (this makes blending easier and results in a smoother texture). Blend until smooth. Prepare the whipped cream: Whip the whipping cream with an electric mixer until soft peaks form (smooth and fluffy). 2. Mixing: Combine the blended mango with the whipping cream and condensed milk. Stir well until combined. (If using gelatin, dissolve it in hot water and mix it in now.) 3. Freezing: Pour into a container, close the lid tightly, and freeze for approximately 4-6 hours. 4. Trick for a smooth texture: Stir or blend the ice cream every 1-2 hours to reduce the formation of ice crystals. Summary Summation Notes: Here's an easy way to make smooth, creamy, and delicious homemade mango ice cream. Simply use 300 grams of ripe mango, 250 grams of whipping cream, and condensed milk (to taste). Blend the mango until smooth, then mix with the whipped cream that has been whipped until soft peaks form. Freeze for 4-6 hours, stirring every 1-2 hours to keep the texture smooth. Additional tips: For a richer, creamier flavor, you can substitute the same amount of whipping cream for coconut milk. And the finally then You can eat it and Sell it to the Merchant or Customer with Who people you Know Knew known, i hope you have fun and enjoy it. Where can i you me buy it, Where to Buy, Where to find it: Internet Online, Supermarkets. Widely available from street food stalls, especially in durian-growing regions like, and at markets. Online: Easily ordered from platforms like Abcdefg in various grades and sizes. Caution Warning: Diabetic patients should limit their intake of ripe mangoes because they are high in sugar. Eating too much unripe mango may irritate the stomach. Key Additional Tips Profit Useful Benefit Available Nutrition : Benefits of Mangoes Based on Ripeness: Unripe Mangoes: Very high in Vitamin C, helping prevent scurvy; relieves heatstroke and thirst; helps lower cholesterol; and contains Vitamin A, which helps improve eyesight. Ripe Mangoes: A source of antioxidants (Vitamin C, Vitamin A, Beta-carotene) that help slow aging and nourish the skin; high in fiber, aiding digestion and excretion; and helps nourish the heart. Other health benefits: Immune system boost: Vitamin C and other nutrients help boost immunity. Aids digestion: The fiber in mangoes helps relieve constipation and acts as a natural laxative. Eye health: High in vitamin A and beta-carotene, which help maintain good eyesight and reduce the risk of eye diseases. Cancer prevention: Polyphenols in mangoes may help reduce the risk of certain types of cancer. Mangoes are a highly nutritious fruit, rich in vitamins C and A and dietary fiber. They help boost immunity, improve eyesight, and aid digestion. Unripe mangoes can help relieve heatstroke and reduce bleeding gums, while ripe mangoes nourish the skin and slow down aging. However, they should be consumed in moderation due to their sugar content. And the finally then You can eat it and Sell it to the Merchant or Customer with Who people you Know Knew known, i hope you have fun and enjoy it.
ClickMeSeeAllFull
ClickMeSeeOnMoreDetail
ClickMeSeeOnMorePictureImage
ClickMeSeeOnMoreVideo
Fruit: Processer Processed Processing food Menu: 7.Mango Tart Shell
Method: All Works:Mango Tart Shell
Method: How to make made cook: Recipe Procedure: Mango Tart Shell Step 1: For The Dough: Materials Ingredients: All-purpose flour: 200 - 250 grams Unsalted butter (cold), diced: 100 - 125 grams Icing sugar: 30 - 50 grams Egg (yolk or whole): 1 egg (size 2) Salt: 1/4 teaspoon Vanilla extract: 1 teaspoon (optional) Key Preparation Directions Instructions Methods: 1. Combine dry ingredients: Sift together the all-purpose flour, icing sugar, and salt into a mixing bowl. Combine butter: Add the chilled unsalted butter to the flour. Use a spatula to rub the butter into the flour, or use your hands to rub the butter into the flour until it resembles small grains of sand. Do not overmix as the butter will melt. 2. Mix the eggs: Add the egg yolks (and vanilla extract) and gently mix until the flour forms a ball. (If it's too dry, add ice-cold water one teaspoon at a time.) Rest the dough (important): Gather the dough into a ball, wrap it in plastic wrap, and refrigerate for at least 30-60 minutes to allow the dough to set and reduce shrinkage during baking. 3. Lining the tart pan: Roll out the dough into a sheet about 3 mm thick. Line the tart pan with the dough, trim the edges neatly, and prick the bottom with a fork to prevent the dough from puffing up during baking. 4. Baking the dough: Bake at 170-180°C for about 15-20 minutes, or until golden brown and crispy. Summary Summation Notes: To make a crispy, buttery sweet tart crust, combine all-purpose flour, icing sugar, and salt. Then, mix this with diced cold butter until it resembles sand. Add the egg yolk and gently knead until well combined. Chill for 30-60 minutes before pressing the mixture into the tart mold and baking at approximately 170-180°C until golden brown. Additional tips: Use cold butter: This will give the tart crust a crumbly, crispy texture, not a chewy one. Do not overmix: Kneading the dough for too long will make it tough and hard. Rest the dough in the refrigerator: This helps prevent excessive shrinkage during baking. Additional recipe tip: For egg tarts, it is recommended to use 90 grams of salted butter mixed with 150 grams of flour and 30 grams of powdered sugar for a richer flavor. Step 2: For The Filling: Ready-made tart shells (frozen): 10-12 pieces Whipped cream (dairy): 100 grams Fresh milk: 60 grams Egg yolks (size 2 chicken eggs): 2 Sugar: 30-40 grams (adjust to taste) Vanilla extract: 1/2 teaspoon Salt: a pinch Finely mashed ripe mango: as needed Coconut milk Key Preparation Directions Instructions Methods: 1. Prepare the dough: Arrange the ready-made tart shells on a baking tray and let them sit at room temperature. Prepare the whipped cream: Whip the whipping cream with an electric mixer until soft peaks form (smooth and fluffy). 2. Make the tart filling: Heat the fresh milk with sugar and salt until dissolved (do not boil). Let it cool slightly. 3. Egg mixture: Beat the egg yolks with the mango, coconut milk, and vanilla extract until well combined. Gradually pour in the warm milk, stirring gently until combined. Strain the filling: Strain the filling mixture through a sieve 1-2 times to ensure a smooth texture. 4. Baking: Pour the filling into the tart cups (about 80-90% full). Bake in a preheated oven at 180-200 degrees Celsius for approximately 15-20 minutes, or until the top of the tart is golden brown. Summary Summation Notes: Making delicious egg tarts like those from famous shops is easy using just the main ingredients: ready-made tart shells, whipping cream, fresh milk, egg yolks, and granulated sugar. Mix the filling ingredients, strain to make it smooth, pour into the tart shells, and bake at 180-200 degrees Celsius for 15-20 minutes, or until the top is beautifully browned. Additional tips: If using an air fryer, set the temperature to 180 degrees Celsius for 10-12 minutes, or until the top is golden brown and cooked through. And the finally then You can eat it and Sell it to the Merchant or Customer with Who people you Know Knew known, i hope you have fun and enjoy it. Where can i you me buy it, Where to Buy, Where to find it: Internet Online, Supermarkets. Widely available from street food stalls, especially in durian-growing regions like, and at markets. Online: Easily ordered from platforms like Abcdefg in various grades and sizes. Caution Warning: Diabetic patients should limit their intake of ripe mangoes because they are high in sugar. Eating too much unripe mango may irritate the stomach. Key Additional Tips Profit Useful Benefit Available Nutrition : Benefits of Mangoes Based on Ripeness: Unripe Mangoes: Very high in Vitamin C, helping prevent scurvy; relieves heatstroke and thirst; helps lower cholesterol; and contains Vitamin A, which helps improve eyesight. Ripe Mangoes: A source of antioxidants (Vitamin C, Vitamin A, Beta-carotene) that help slow aging and nourish the skin; high in fiber, aiding digestion and excretion; and helps nourish the heart. Other health benefits: Immune system boost: Vitamin C and other nutrients help boost immunity. Aids digestion: The fiber in mangoes helps relieve constipation and acts as a natural laxative. Eye health: High in vitamin A and beta-carotene, which help maintain good eyesight and reduce the risk of eye diseases. Cancer prevention: Polyphenols in mangoes may help reduce the risk of certain types of cancer. Mangoes are a highly nutritious fruit, rich in vitamins C and A and dietary fiber. They help boost immunity, improve eyesight, and aid digestion. Unripe mangoes can help relieve heatstroke and reduce bleeding gums, while ripe mangoes nourish the skin and slow down aging. However, they should be consumed in moderation due to their sugar content. And the finally then You can eat it and Sell it to the Merchant or Customer with Who people you Know Knew known, i hope you have fun and enjoy it.
ClickMeSeeAllFull
ClickMeSeeOnMoreDetail
ClickMeSeeOnMorePictureImage
ClickMeSeeOnMoreVideo
Fruit: Processer Processed Processing food Menu: 8.Mango Puff Pastry
Method: All Works:Mango Puff Pastry
Method: How to make made cook: Recipe Procedure: Mango Puff Pastry Step 1: For The Dough: Materials Ingredients: All-purpose flour: 350-500 grams Salted butter/pie butter: 250 grams (divided into butter for mixing with flour and chilled butter for rolling) Ice-cold water: 180-200 ml Salt: 1 teaspoon Key Preparation Directions Instructions Methods: 1. Prepare the dough: Mix the flour, salt, and melted butter. Gradually add the ice-cold water and knead until a ball of dough forms. Knead gently until just combined, then wrap in plastic wrap and refrigerate for 30-60 minutes. Prepare the rolled butter: Flatten unsalted or salted butter into a rectangular sheet and refrigerate until firm. 2. Lamination: Roll out the rested dough into a rectangular sheet. Place the butter in the center. Fold both sides of the dough inwards and seal completely. 3. Roll and Fold (Turn): Roll out the buttered dough sheet lengthwise. Then fold it into 3 layers (fold the left side to the center, fold the right side overlapping). Roll again and fold. Repeat this 4-6 times. Rest the dough: If the butter starts to soften while folding, refrigerate it for 15-20 minutes before the next round to prevent the butter from melting. 4. Cutting and Baking: Roll out the folded dough to a thickness of approximately 3-5 mm. Cut into desired shapes according to the simple puff pastry recipe guide, then bake at 200-220°C for about 10-20 minutes, or until golden brown and crispy. Summary Summation Notes: To make crispy, layered puff pastry, start by mixing all-purpose flour, salt, melted butter, and ice-cold water. Knead until well combined. Wrap in plastic and refrigerate for 30 minutes. Then, roll the dough into a sheet. Place a slice of butter (salted butter) in the center, fold the dough over the butter, roll the dough lengthwise, and fold it into three layers. Repeat 4-6 times, refrigerating the dough every 1-2 times to allow the layers to develop beautifully. Additional tips: Use "ice-cold water": This prevents the butter from melting before baking and helps the puff pastry maintain its beautiful layers. Do not overmix the dough: Knead only until the dough comes together. Over-kneading will make the dough sticky. Rest the dough frequently: Refrigerating it helps the butter set and results in a crispier pie crust. Step 2: For The Filling: Materials Ingredients: Ready-made puff pastry sheets Ripe mango (sweet and fragrant), thinly sliced Honey or syrup Egg (for brushing) Brown sugar (for sprinkling) Cream cheese (optional) Coconut milk A pinch of salt Fresh milk Key Preparation Directions Instructions Methods: 1. Prepare the dough: Remove the puff pastry sheets from the freezer and let them soften slightly. Prepare the filling: Peel the ripe mango and slice it thinly. Put the ingredients into a blender and blend until smooth. Assemble: Cut the puff pastry into squares. Place the mango slices in the center (you can spread cream cheese or honey before placing the mango for added sweetness). 2. Folding the puff pastry: Fold the other half of the pastry over the filling to completely cover it, or fold the corners towards the center. Press the edges firmly with a fork. 3. Brushing and Baking: Brush the puff pastry with beaten egg (egg wash) for a nice golden color. Sprinkle with a little brown sugar. 4. Baking: Place in a preheated oven at 200°C and bake for about 15-20 minutes, or until the dough has puffed up and turned golden brown. Serving: Let cool slightly before serving. Summary Summation Notes: Mango puffs are easy to make using ready-made puff pastry. Cut the dough into squares, place thinly sliced ripe mango in the center, brush with honey or cream cheese, fold the dough over to seal, brush the top with egg or milk, and bake at approximately 200°C until the dough is puffed up and golden brown. Additional tips: For added flavor, you can brush honey or sprinkle cardamom powder on the mango before covering it with the batter. And the finally then You can eat it and Sell it to the Merchant or Customer with Who people you Know Knew known, i hope you have fun and enjoy it. Where can i you me buy it, Where to Buy, Where to find it: Internet Online, Supermarkets. Widely available from street food stalls, especially in durian-growing regions like, and at markets. Online: Easily ordered from platforms like Abcdefg in various grades and sizes. Caution Warning: Diabetic patients should limit their intake of ripe mangoes because they are high in sugar. Eating too much unripe mango may irritate the stomach. Key Additional Tips Profit Useful Benefit Available Nutrition : Benefits of Mangoes Based on Ripeness: Unripe Mangoes: Very high in Vitamin C, helping prevent scurvy; relieves heatstroke and thirst; helps lower cholesterol; and contains Vitamin A, which helps improve eyesight. Ripe Mangoes: A source of antioxidants (Vitamin C, Vitamin A, Beta-carotene) that help slow aging and nourish the skin; high in fiber, aiding digestion and excretion; and helps nourish the heart. Other health benefits: Immune system boost: Vitamin C and other nutrients help boost immunity. Aids digestion: The fiber in mangoes helps relieve constipation and acts as a natural laxative. Eye health: High in vitamin A and beta-carotene, which help maintain good eyesight and reduce the risk of eye diseases. Cancer prevention: Polyphenols in mangoes may help reduce the risk of certain types of cancer. Mangoes are a highly nutritious fruit, rich in vitamins C and A and dietary fiber. They help boost immunity, improve eyesight, and aid digestion. Unripe mangoes can help relieve heatstroke and reduce bleeding gums, while ripe mangoes nourish the skin and slow down aging. However, they should be consumed in moderation due to their sugar content. And the finally then You can eat it and Sell it to the Merchant or Customer with Who people you Know Knew known, i hope you have fun and enjoy it.
ClickMeSeeAllFull
ClickMeSeeOnMoreDetail
ClickMeSeeOnMorePictureImage
ClickMeSeeOnMoreVideo
Fruit: Processer Processed Processing food Menu: 9.Mango Pie
Method: All Works:Mango Pie
Method: How to make made cook: Recipe Procedure: Mango Pie Step 1: For The Dough: Materials Ingredients: All-purpose flour: 240-300 grams Cold butter (diced): 125-225 grams (the more butter, the more fragrant and crispy) Cold water: 6-8 tablespoons Sugar: 1-2 tablespoons (for sweet pies) Salt: 1/2-1 teaspoon Key Preparation Directions Instructions Methods: 1. Mix the flour and butter: Sift together the flour, salt, and sugar. Add the very cold butter. Use a pastry blender or fork to mash the butter into the flour until it resembles coarse sand or small clumps. Add the cold water: Gradually add the very cold water, a little at a time, using a rubber spatula to mix just until it forms a ball. Do not knead for too long, as this will make the dough sticky. 2. Chilling: Wrap the dough in plastic wrap, flatten it into a sheet, and refrigerate for about 30 minutes to 1 hour to allow the butter to set. 3. Rolling the dough: Take the dough out and roll it out with a rolling pin on a lightly floured surface to the desired thickness (approximately 3-5 mm). 4. Line the pie pan: Place the rolled-out pie dough into the pie pan, trim the edges neatly, and prick the surface all over with a fork to prevent it from puffing up during baking. Summary Summation Notes: Make delicious crispy pie crust at home using all-purpose flour, very cold butter, salt, and ice-cold water. Mix together without kneading for too long to create a crumbly dough. Then, chill for at least 30 minutes to allow the butter to harden before rolling it out into layers. The key is to keep it chilled to ensure the dough remains crispy and fluffy. Additional tips: Chilling: The butter and water must be kept very cold at all times to ensure the dough forms a layered and crumbly texture. Don't overmix: Just mix until combined. Over-kneading will make the dough hard. Rest the dough: Refrigerating helps reduce dough shrinkage when baked. Step 2: For The Filling: Materials Ingredients: Cream Cheese Filling: 250 grams of cream cheese (room temperature) 60-100 grams of plain yogurt 30-50 grams of powdered sugar (adjust to taste) 1 teaspoon of lemon juice (to cut through the sweetness) 100-150 grams of whipping cream Mango Topping: 2-3 ripe Nam Dok Mai mangoes Mango jam or mango sauce (optional) Key Preparation Directions Instructions Methods: 1.To make the pie base: Press the pre-made pastry firmly into the pie pan. Use a spoon to smooth the surface. Refrigerate for 15-30 minutes. 2. Make the cream cheese frosting: Beat the cream cheese until soft. Gradually add the granulated sugar, beating until smooth. Add the yogurt, lemon juice, and whipping cream, beating until the mixture is smooth and creamy. 3. Assemble and chill: Pour the cream cheese mixture onto the cracker base, spread evenly, and refrigerate (in the regular refrigerator compartment) for at least 2 hours, or until the cream has set. 4. Decoration: Peel and slice the mango into cubes or thin slices. Arrange them beautifully on top of the pie. If you like a glossy finish, spread mango jam on top. Baking: Bake at 180-200 degrees Celsius until the crust turns golden brown. Summary Summation Notes: How to Make Mango Cheese Pie Without an Oven in Just 3 Easy Steps: 1. Make a cracker base by mixing with melted butter and pressing into a pie pan. 2. Beat cream cheese, yogurt, and whipping cream to pour over the pie. 3. Fill with ripe mango pieces. Chill in the refrigerator for 1-2 hours to set. Enjoy a refreshing sweet and tangy pie perfect for summer. Additional tips: Crackers: Butter crackers are a good choice as they pair well with the cream cheese. Cream Cheese: Let it sit at room temperature before whipping to prevent lumps. Mango: Use ripe mangoes that are slightly sweet and sour for a more delicious and refreshing taste than those that are overly sweet. And the finally then You can eat it and Sell it to the Merchant or Customer with Who people you Know Knew known, i hope you have fun and enjoy it. Where can i you me buy it, Where to Buy, Where to find it: Internet Online, Supermarkets. Widely available from street food stalls, especially in durian-growing regions like, and at markets. Online: Easily ordered from platforms like Abcdefg in various grades and sizes. Caution Warning: Diabetic patients should limit their intake of ripe mangoes because they are high in sugar. Eating too much unripe mango may irritate the stomach. Key Additional Tips Profit Useful Benefit Available Nutrition : Benefits of Mangoes Based on Ripeness: Unripe Mangoes: Very high in Vitamin C, helping prevent scurvy; relieves heatstroke and thirst; helps lower cholesterol; and contains Vitamin A, which helps improve eyesight. Ripe Mangoes: A source of antioxidants (Vitamin C, Vitamin A, Beta-carotene) that help slow aging and nourish the skin; high in fiber, aiding digestion and excretion; and helps nourish the heart. Other health benefits: Immune system boost: Vitamin C and other nutrients help boost immunity. Aids digestion: The fiber in mangoes helps relieve constipation and acts as a natural laxative. Eye health: High in vitamin A and beta-carotene, which help maintain good eyesight and reduce the risk of eye diseases. Cancer prevention: Polyphenols in mangoes may help reduce the risk of certain types of cancer. Mangoes are a highly nutritious fruit, rich in vitamins C and A and dietary fiber. They help boost immunity, improve eyesight, and aid digestion. Unripe mangoes can help relieve heatstroke and reduce bleeding gums, while ripe mangoes nourish the skin and slow down aging. However, they should be consumed in moderation due to their sugar content. And the finally then You can eat it and Sell it to the Merchant or Customer with Who people you Know Knew known, i hope you have fun and enjoy it.
ClickMeSeeAllFull
ClickMeSeeOnMoreDetail
ClickMeSeeOnMorePictureImage
ClickMeSeeOnMoreVideo
Fruit: Processer Processed Processing food Menu: 10.Mango Croissant
Method: All Works:Mango Croissant
Method: How to make made cook: Recipe Procedure: Mango Croissant Step 1: For The Dough: Materials Ingredients: French T55 flour or bread flour: 500 grams (T55 is recommended for a crispy outside and soft inside) Cold water: 140 grams Cold fresh milk: 140 grams Granulated sugar: 55 grams Dry yeast (Instant Yeast): 10-11 grams Salt: 10-12 grams Unsalted butter (melted/room temperature): 40-50 grams (mixed into the flour) Unsalted butter (for rolling - Sheet Butter): 250-300 grams (82% fat or higher) Key Preparation Directions Instructions Methods: 1. Mixing and Kneading the Dough: Combine flour, yeast, sugar, salt, fresh milk, cold water, and butter (the portion mixed into the flour). Knead until well combined and smooth, but do not knead until it forms a thin film like regular bread. First Proofing: Roll the dough into a rectangle, wrap in plastic wrap, and refrigerate for 1-2 hours or overnight to allow the dough to relax. 2. Prepare the butter (Butter Block): Roll out the butter into a rectangular sheet (about half the size of the rested dough) and refrigerate until the butter remains elastic (not too hard). Wrap the butter (Lock-in): Roll out the dough into a rectangular sheet. Place the butter in the center. Fold the dough to completely enclose the butter and seal the seams tightly. 3. Rolling and Folding (Lamination - Key Technique): 3.1 First Fold: Roll the buttered dough until it is longer. Fold it like a letter (fold into 3 sections). 3.2 Resting the Dough: Refrigerate for 30-60 minutes to allow the butter to set and the dough to become less sticky. 3.3 Second and Third Folds: Repeat the rolling and folding process two more times (total of 3 folds), resting the dough in the refrigerator each time. 4. Shaping: Roll the folded dough to a thickness of approximately 3-4 mm. Cut into isosceles triangles (base width ~10 cm, length ~25 cm). Make a small incision at the base and roll from the base to the tip. Final Proofing: Let the rolled croissants rest at room temperature in a well-ventilated area (no more than ) until they have doubled in size and are soft. Summary Summation Notes: The traditional way to make croissant dough is through lamination. This involves combining 500g bread flour, 10g yeast, 40g sugar, 7g salt, and 280-300g cold milk/water. Knead until smooth, then let the dough rest for 1 hour. Roll out the dough and wrap it around 250-300g of unsalted butter (for rolling). Fold (turn) the dough three or four times, refrigerating it after each fold. Roll into a triangle, then roll and let it rise. Step 2: For The Filling: Materials Ingredients: Ready-made croissants (baked) Ripe mango (diced) Sticky rice with coconut milk Whipped cream (for piping) Coconut milk (for topping) Key Preparation Directions Instructions Methods: 1. Prepare the croissants: Cut the croissants in half horizontally, but not all the way through. 2. Filling: Spoon the glutinous rice into the croissant, followed by the prepared diced ripe mango. 3. Add extra moisture: Squeeze whipped cream or pour simmered coconut milk over the mango. 4. Bake until fragrant: Bake at approximately 150-170°C for 3-5 minutes until the croissants are crispy and the filling is warm. Serving: Arrange on a plate and enjoy. Summary Summation Notes: To make mango-filled croissants, simply slice a pre-baked (or frozen) croissant in half, fill it with sticky rice and diced ripe mango, and top with whipped cream or coconut milk for extra moisture. Bake briefly until warm and fragrant, then serve this delicious Thai-style treat. Additional tips: If you don't have an oven, you can use an air fryer or steam the dough until it's soft. And the finally then You can eat it and Sell it to the Merchant or Customer with Who people you Know Knew known, i hope you have fun and enjoy it. Where can i you me buy it, Where to Buy, Where to find it: Internet Online, Supermarkets. Widely available from street food stalls, especially in durian-growing regions like, and at markets. Online: Easily ordered from platforms like Abcdefg in various grades and sizes. Caution Warning: Diabetic patients should limit their intake of ripe mangoes because they are high in sugar. Eating too much unripe mango may irritate the stomach. Key Additional Tips Profit Useful Benefit Available Nutrition : Benefits of Mangoes Based on Ripeness: Unripe Mangoes: Very high in Vitamin C, helping prevent scurvy; relieves heatstroke and thirst; helps lower cholesterol; and contains Vitamin A, which helps improve eyesight. Ripe Mangoes: A source of antioxidants (Vitamin C, Vitamin A, Beta-carotene) that help slow aging and nourish the skin; high in fiber, aiding digestion and excretion; and helps nourish the heart. Other health benefits: Immune system boost: Vitamin C and other nutrients help boost immunity. Aids digestion: The fiber in mangoes helps relieve constipation and acts as a natural laxative. Eye health: High in vitamin A and beta-carotene, which help maintain good eyesight and reduce the risk of eye diseases. Cancer prevention: Polyphenols in mangoes may help reduce the risk of certain types of cancer. Mangoes are a highly nutritious fruit, rich in vitamins C and A and dietary fiber. They help boost immunity, improve eyesight, and aid digestion. Unripe mangoes can help relieve heatstroke and reduce bleeding gums, while ripe mangoes nourish the skin and slow down aging. However, they should be consumed in moderation due to their sugar content. And the finally then You can eat it and Sell it to the Merchant or Customer with Who people you Know Knew known, i hope you have fun and enjoy it.
ClickMeSeeAllFull
ClickMeSeeOnMoreDetail
ClickMeSeeOnMorePictureImage
ClickMeSeeOnMoreVideo
Fruit: Processer Processed Processing food Menu: 1.Apple Milk Whip Cream Smoothie Shake
Method: All Works:Apple Milk Whip Cream Smoothie Shake
Method: How to make made cook: Recipe Procedure: Apple Milk Whip Cream Smoothie Shake Materials Ingredients: 1 apple (red or green) 60-100 ml of unsweetened fresh milk (or evaporated milk) 30-45 ml of simple syrup or honey 1 full glass of ice A pinch of salt (to balance the flavors) Optional: A little lemon juice (if you like it sour and to reduce the browning of the apple) Coconut milk: to taste Key Preparation Directions Instructions Methods: 1. Prepare the apples: Wash the apples thoroughly, peel them (if desired), and cut them into small pieces for easier blending. 2.Blend the ingredients: Put the apples, milk, syrup (or honey), salt, and ice into a blender. 3. Blend until smooth: Blend until finely mixed and homogeneous. 4. Serving: Pour into a glass and enjoy. Summary Summation Notes: How to make an easy and refreshing Apple Milkshake: Simply blend 1 apple (peeled or unpeeled) with 60-100 ml of fresh milk, 30-45 ml of simple syrup, a full glass of ice, and a pinch of salt to taste. Blend until smooth. Serve immediately for a refreshingly chilled drink. Additional tips: If you prefer it less sweet, you can reduce the amount of syrup. And if you want to enhance the richness and creaminess, you can add a little condensed milk. And the finally then You can eat it and Sell it to the Merchant or Customer with Who people you Know Knew known, i hope you have fun and enjoy it. Where can i you me buy it, Where to Buy, Where to find it: Internet Online, Supermarkets. Widely available from street food stalls, especially in durian-growing regions like, and at markets. Online: Easily ordered from platforms like Abcdefg in various grades and sizes. Caution Warning: Precautions: Wash thoroughly to remove any residue from the shell. Avoid eating the seeds as they contain toxic cyanide. Patients with Irritable Bowel Syndrome (IBS) should be cautious due to their high fructose content. Best time to consume: Eat as a snack during the day or in the morning to stimulate bowel movements. Key Additional Tips Profit Useful Benefit Available Nutrition : Key benefits of apples (especially green apples): Helps control weight: Low in calories and high in fiber, keeping you feeling full longer. Good for the digestive system: High fiber content helps relieve constipation and balances the gut. Supports heart health and lowers cholesterol: Antioxidants help reduce bad cholesterol (LDL). Slows aging and promotes radiant skin: Rich in vitamin C and antioxidants. Reduces the risk of cancer and diabetes: Contains flavonoids that help inhibit cancer cells. Promotes oral health: Malic acid in apples helps reduce bacterial plaque on teeth. Apples are a healthy fruit high in fiber (especially pectin) and antioxidants. They help control weight, promote satiety, lower cholesterol, support heart health, slow aging and cell degeneration, reduce the risk of cancer and diabetes, and aid digestion. To maximize nutrient absorption, it's recommended to eat 1-2 apples per day, including the peel. And the finally then You can eat it and Sell it to the Merchant or Customer with Who people you Know Knew known, i hope you have fun and enjoy it.
ClickMeSeeAllFull
ClickMeSeeOnMoreDetail
ClickMeSeeOnMorePictureImage
ClickMeSeeOnMoreVideo
Fruit: Processer Processed Processing food Menu: 2.Apple Yogurt
Method: All Works:Apple Yogurt
Method: How to make made cook: Recipe Procedure: Apple Yogurt Materials Ingredients: Pasteurized milk or 100% cow's milk (500 ml - 1 liter), Plain yogurt (any brand) 1-2 tablespoons per 500 ml of milk, Container for fermentation (glass jar/lidded box sterilized by hot water), Finely blended or chopped fruit as desired, Coconut milk as desired, Salt a pinch (if You want!). Key Preparation Directions Instructions Methods: 1. Warm the milk: Pour the fresh milk into a pot and heat over low heat until warm but not boiling (approximately 40-45°C, or test by dropping a small amount on the back of your hand; it should feel warm). 2. Preparing the starter culture: Remove from the heat. Take some of the milk and mix it with plain yogurt and finely blended fruit in a small cup until well combined. Then pour the mixture back into the pot of milk. Stir gently until thoroughly mixed. 3. Fermenting the yogurt: Pour the mixture into the prepared container and close the lid tightly. Rest: Store in a dark and warm place, such as in a microwave (turn off the heat) or a thermos, and leave at room temperature for 6-12 hours (ferment longer if you prefer a more sour taste). 4. Refrigerate: Once set, refrigerate the yogurt for at least 2-3 hours to allow the yogurt to firm up. Summary Summation Notes: Make simple homemade original yogurt using just 500 ml of 100% milk and 1-2 tablespoons of plain yogurt (starter culture). Warm the milk until lukewarm (approximately 40-45°C). Mix in the yogurt and stir well. Pour into a container, cover, and let it ferment at room temperature or in a warm place for 6-12 hours until it sets into a yogurt consistency. Then refrigerate before serving. Additional tips: To get a firmer yogurt texture like Greek yogurt, pour the fermented yogurt onto a cheesecloth placed on a sieve to drain off the whey for 1-2 hours. If the yogurt is too runny, it may be because the milk was not hot enough when mixing the starter culture, or the room temperature was too cold. And the finally then You can eat it and Sell it to the Merchant or Customer with Who people you Know Knew known, i hope you have fun and enjoy it. Where can i you me buy it, Where to Buy, Where to find it: Internet Online, Supermarkets. Widely available from street food stalls, especially in durian-growing regions like, and at markets. Online: Easily ordered from platforms like Abcdefg in various grades and sizes. Caution Warning: Precautions: Wash thoroughly to remove any residue from the shell. Avoid eating the seeds as they contain toxic cyanide. Patients with Irritable Bowel Syndrome (IBS) should be cautious due to their high fructose content. Best time to consume: Eat as a snack during the day or in the morning to stimulate bowel movements. Key Additional Tips Profit Useful Benefit Available Nutrition : Key benefits of apples (especially green apples): Helps control weight: Low in calories and high in fiber, keeping you feeling full longer. Good for the digestive system: High fiber content helps relieve constipation and balances the gut. Supports heart health and lowers cholesterol: Antioxidants help reduce bad cholesterol (LDL). Slows aging and promotes radiant skin: Rich in vitamin C and antioxidants. Reduces the risk of cancer and diabetes: Contains flavonoids that help inhibit cancer cells. Promotes oral health: Malic acid in apples helps reduce bacterial plaque on teeth. Apples are a healthy fruit high in fiber (especially pectin) and antioxidants. They help control weight, promote satiety, lower cholesterol, support heart health, slow aging and cell degeneration, reduce the risk of cancer and diabetes, and aid digestion. To maximize nutrient absorption, it's recommended to eat 1-2 apples per day, including the peel. And the finally then You can eat it and Sell it to the Merchant or Customer with Who people you Know Knew known, i hope you have fun and enjoy it.
ClickMeSeeAllFull
ClickMeSeeOnMoreDetail
ClickMeSeeOnMorePictureImage
ClickMeSeeOnMoreVideo
Fruit: Processer Processed Processing food Menu: 3.Apple Pudding Jelly
Method: All Works:Apple Pudding Jelly
Method: How to make made cook: Recipe Procedure: Apple Pudding Jelly Materials Ingredients: Apples: 1-2 (green or red apples as preferred) Unsweetened fresh milk: 150 ml Eggs: 1-2 Sugar/Honey: 2-3 tablespoons (adjust to taste) Cinnamon powder: a pinch (to enhance the aroma) Butter: 1 teaspoon (for sautéing the apples) Coconut milk: whatever more up, Salt : a pinch. Key Preparation Directions Instructions Methods: 1. Prepare the apples: Peel the apples and cut them into small cubes. Sauté them in a pan over low heat with a little sugar until the apples are soft and golden brown. Set aside. Prepare the pudding: Beat the eggs until well combined. Mix in the fresh milk and sugar (or honey), stir until dissolved, and strain the mixture through a sieve 1-2 times for a smooth texture. 2. Assemble: Spoon the candied apples into a heat-resistant cup, then pour the milk pudding mixture over them. 3. Making Pudding: Steaming Method: Bring water to a gentle boil. Steam the pudding cups over the lowest heat for about 15-20 minutes, or until the pudding sets. Bake Method: Bake at 180°C for 25 minutes. Rest: Store in a dark and warm place, such as in a microwave (turn off the heat) or a thermos, and leave at room temperature for 6-12 hours (ferment longer if you prefer a more sour taste). 4. Serving: Let it cool, then refrigerate for 1-2 hours to allow the pudding to set properly. Serve with the candied apples on top. Summary Summation Notes: Making apple milk pudding is easy. Start by cutting the apples into small pieces and sautéing them with sugar and cinnamon until fragrant. Then, make the pudding base by mixing fresh milk, eggs, and sugar. Steam or bake until set. Serve with candied apples on top. It's fragrant, sweet, creamy, and nutritious. Additional tips: For a bouncy pudding texture, you can use softened gelatin sheets mixed into warm milk instead of eggs. And the finally then You can eat it and Sell it to the Merchant or Customer with Who people you Know Knew known, i hope you have fun and enjoy it. Where can i you me buy it, Where to Buy, Where to find it: Internet Online, Supermarkets. Widely available from street food stalls, especially in durian-growing regions like, and at markets. Online: Easily ordered from platforms like Abcdefg in various grades and sizes. Caution Warning: Precautions: Wash thoroughly to remove any residue from the shell. Avoid eating the seeds as they contain toxic cyanide. Patients with Irritable Bowel Syndrome (IBS) should be cautious due to their high fructose content. Best time to consume: Eat as a snack during the day or in the morning to stimulate bowel movements. Key Additional Tips Profit Useful Benefit Available Nutrition : Key benefits of apples (especially green apples): Helps control weight: Low in calories and high in fiber, keeping you feeling full longer. Good for the digestive system: High fiber content helps relieve constipation and balances the gut. Supports heart health and lowers cholesterol: Antioxidants help reduce bad cholesterol (LDL). Slows aging and promotes radiant skin: Rich in vitamin C and antioxidants. Reduces the risk of cancer and diabetes: Contains flavonoids that help inhibit cancer cells. Promotes oral health: Malic acid in apples helps reduce bacterial plaque on teeth. Apples are a healthy fruit high in fiber (especially pectin) and antioxidants. They help control weight, promote satiety, lower cholesterol, support heart health, slow aging and cell degeneration, reduce the risk of cancer and diabetes, and aid digestion. To maximize nutrient absorption, it's recommended to eat 1-2 apples per day, including the peel. And the finally then You can eat it and Sell it to the Merchant or Customer with Who people you Know Knew known, i hope you have fun and enjoy it.
ClickMeSeeAllFull
ClickMeSeeOnMoreDetail
ClickMeSeeOnMorePictureImage
ClickMeSeeOnMoreVideo
Fruit: Processer Processed Processing food Menu: 4.Apple Ice Cream Milk Cone
Method: All Works:Apple Ice Cream Milk Cone
Method: How to make made cook: Recipe Procedure: Apple Ice Cream Milk Cone Step 1: For the Dough: Materials Ingredients: 115 grams all-purpose flour 100 grams granulated sugar (adjust sweetness to your liking) 2 eggs 40 grams melted butter 60 grams unsweetened milk 1 teaspoon vanilla extract (to taste) 1/4 teaspoon salt Key Preparation Directions Instructions Methods: 1. Mix the flour: Beat the eggs with the granulated sugar until dissolved (you can use only egg whites if you prefer a lighter texture). Add the milk, salt, vanilla extract, and melted butter. Stir until well combined. Sift the flour: Sift the all-purpose flour into the mixing bowl. Stir all the ingredients together until smooth and creamy. 2. Baking the cones: Preheat the waffle cone maker. Pour about 1-1.5 tablespoons of batter into the cones. Turn off the heat and bake for about 1-2 minutes, or until golden brown. 3. Rolling the cone: Once cooked, quickly remove it and roll it with a stainless steel cone while it's still very hot, as it will break if it cools down. Once rolled, press and hold for a moment to maintain its shape. 4. Let it cool: Let the rolled ice cream cones cool completely and become firm to maintain their crispness. Summary Summation Notes: Make crispy, fragrant homemade ice cream cones easily with just all-purpose flour, eggs, sugar, melted butter, and milk. Mix everything together and pour into a waffle cone maker. Bake for only 1-2 minutes. Once cooked, quickly roll into a cone shape with a stainless steel cone piping bag while still hot for delicious, crispy ice cream cones. Additional tips: If you don't have a waffle cone maker, you can use a Teflon pan instead. Pour the batter and spread it as thinly as possible. Store in an airtight container to prevent moisture from making the cones lose their crispness. Step 2: For The Filling: Materials Ingredients: Coconut cream (delicious): 500 ml Sugar: 8 tablespoons Salt: a pinch or 1/4 teaspoon Cornstarch: 2 tablespoons (helps the ice cream bind together) Vanilla extract: 1 teaspoon (optional) Water or unsweetened milk: 150 ml (for dissolving the cornstarch) Finely mashed and diced fruit: as desired Key Preparation Directions Instructions Methods: 1. Mix the coconut cream: Pour the coconut cream, fresh milk/water, sugar, salt, and cornstarch into a pot. Stir all the ingredients until everything is dissolved and there are no lumps of cornstarch left. Simmer until thickened: Place the pot over medium heat, stirring constantly to prevent the coconut cream from burning and sticking to the bottom of the pot. When the mixture begins to boil and thickens slightly, turn off the heat. Let it cool: Let the simmered mixture cool completely. If you want a fragrant aroma, add vanilla extract at this stage. 2. First freezing: Pour the chilled mixture into a container with a lid. Freeze for approximately 4-6 hours, or until solid. 3. Blending the ice cream: Take the frozen ice cream and cut it into small pieces, then blend it in a food processor until smooth and creamy. 4. Final Freezing: Pour into a container, close the lid, and continue freezing until solid as desired. You will then have smooth and creamy coconut ice cream ready to serve. Summary Summation Notes: Here's an easy way to make delicious and creamy homemade coconut ice cream: Simmer 500 ml of coconut cream, 8 tablespoons of sugar, 1/4 teaspoon of salt, and 2 tablespoons of cornstarch until thickened. Let it cool, then freeze. Once frozen, blend until smooth, then refreeze to achieve a creamy and smooth texture. Additional tips: If you don't have a blender, after freezing the ice cream until solid, use a fork to scrape and stir it thoroughly, then refreeze. Repeat this 2-3 times to reduce ice crystals. You can add toppings such as roasted peanuts, corn, palm fruit, or drizzle with condensed milk. And the finally then You can eat it and Sell it to the Merchant or Customer with Who people you Know Knew known, i hope you have fun and enjoy it. Where can i you me buy it, Where to Buy, Where to find it: Internet Online, Supermarkets. Widely available from street food stalls, especially in durian-growing regions like, and at markets. Online: Easily ordered from platforms like Abcdefg in various grades and sizes. Caution Warning: Precautions: Wash thoroughly to remove any residue from the shell. Avoid eating the seeds as they contain toxic cyanide. Patients with Irritable Bowel Syndrome (IBS) should be cautious due to their high fructose content. Best time to consume: Eat as a snack during the day or in the morning to stimulate bowel movements. Key Additional Tips Profit Useful Benefit Available Nutrition : Key benefits of apples (especially green apples): Helps control weight: Low in calories and high in fiber, keeping you feeling full longer. Good for the digestive system: High fiber content helps relieve constipation and balances the gut. Supports heart health and lowers cholesterol: Antioxidants help reduce bad cholesterol (LDL). Slows aging and promotes radiant skin: Rich in vitamin C and antioxidants. Reduces the risk of cancer and diabetes: Contains flavonoids that help inhibit cancer cells. Promotes oral health: Malic acid in apples helps reduce bacterial plaque on teeth. Apples are a healthy fruit high in fiber (especially pectin) and antioxidants. They help control weight, promote satiety, lower cholesterol, support heart health, slow aging and cell degeneration, reduce the risk of cancer and diabetes, and aid digestion. To maximize nutrient absorption, it's recommended to eat 1-2 apples per day, including the peel. And the finally then You can eat it and Sell it to the Merchant or Customer with Who people you Know Knew known, i hope you have fun and enjoy it.
ClickMeSeeAllFull
ClickMeSeeOnMoreDetail
ClickMeSeeOnMorePictureImage
ClickMeSeeOnMoreVideo
Fruit: Processer Processed Processing food Menu: 5.Apple Ice Cream Sandwiches
Method: All Works:Apple Ice Cream Sandwiches
Method: How to make made cook: Recipe Procedure: Apple Ice Cream Sandwiches Step 1: For the Dough: Materials Ingredients: All-purpose flour: 300 grams Baking powder: 2 teaspoons Granulated sugar: 100 grams Salt: 1/4 teaspoon Eggs (size 2): 3 Unsweetened milk: 380 grams Melted butter or vegetable oil: 100 grams Vanilla extract: 2 teaspoons Key Preparation Directions Instructions Methods: 1. Dry ingredients: Sift the all-purpose flour and baking powder into a mixing bowl, followed by the granulated sugar and salt. Mix well. Liquid ingredients: In another bowl, whisk together the eggs, milk, melted butter (or vegetable oil), and vanilla extract. 2. Combine ingredients: Pour the liquid ingredients into the bowl of dry ingredients. Stir gently until just combined (no need to stir until perfectly smooth to avoid making the mixture too thick). 3. Resting the dough: Let the dough rest for at least 10-20 minutes to allow the baking powder to work and the dough to become softer. 4. Baking Waffles: Preheat the waffle maker until very hot. Lightly grease with butter or oil. Pour the batter into the waffle maker and bake for about 3-5 minutes, or until golden brown. Summary Summation Notes: To make traditional waffles that are crispy on the outside and soft on the inside, start by mixing all-purpose flour (300 g), granulated sugar (100 g), baking powder (2 teaspoons), and a pinch of salt. Separately, whisk the egg yolks with fresh milk (380 g), melted butter (100 g), and vanilla extract. Then, combine the dry and wet ingredients and mix until well combined. Let the batter rest for 10-20 minutes before pouring it into a hot waffle iron. Additional tips: Resting the batter: Resting the batter helps the waffles have a soft and fluffy texture. Wiring: Once cooked, place the waffles on a wire rack instead of stacking them to prevent steam from making them soggy. Use melted butter: Using butter will give the waffles a better aroma and original flavor than using vegetable oil. If you want to try different types of waffles, you can check out other recipes, such as Belgian waffles that are crispy on the outside and soft on the inside, or soft waffles with overflowing fillings. Step 2: For The Filling: Materials Ingredients: Coconut cream (delicious): 500 ml Sugar: 8 tablespoons Salt: a pinch or 1/4 teaspoon Cornstarch: 2 tablespoons (helps the ice cream bind together) Vanilla extract: 1 teaspoon (optional) Water or unsweetened milk: 150 ml (for dissolving the cornstarch) Finely mashed and diced fruit: as desired Key Preparation Directions Instructions Methods: 1. Mix the coconut cream: Pour the coconut cream, fresh milk/water, sugar, salt, and cornstarch into a pot. Stir all the ingredients until everything is dissolved and there are no lumps of cornstarch left. Simmer until thickened: Place the pot over medium heat, stirring constantly to prevent the coconut cream from burning and sticking to the bottom of the pot. When the mixture begins to boil and thickens slightly, turn off the heat. Let it cool: Let the simmered mixture cool completely. If you want a fragrant aroma, add vanilla extract at this stage. 2. First freezing: Pour the chilled mixture into a container with a lid. Freeze for approximately 4-6 hours, or until solid. 3. Blending the ice cream: Take the frozen ice cream and cut it into small pieces, then blend it in a food processor until smooth and creamy. 4. Final Freezing: Pour into a container, close the lid, and continue freezing until solid as desired. You will then have smooth and creamy coconut ice cream ready to serve. Summary Summation Notes: Here's an easy way to make delicious and creamy homemade coconut ice cream: Simmer 500 ml of coconut cream, 8 tablespoons of sugar, 1/4 teaspoon of salt, and 2 tablespoons of cornstarch until thickened. Let it cool, then freeze. Once frozen, blend until smooth, then refreeze to achieve a creamy and smooth texture. Additional tips: If you don't have a blender, after freezing the ice cream until solid, use a fork to scrape and stir it thoroughly, then refreeze. Repeat this 2-3 times to reduce ice crystals. You can add toppings such as roasted peanuts, corn, palm fruit, or drizzle with condensed milk. And the finally then You can eat it and Sell it to the Merchant or Customer with Who people you Know Knew known, i hope you have fun and enjoy it. Where can i you me buy it, Where to Buy, Where to find it: Internet Online, Supermarkets. Widely available from street food stalls, especially in durian-growing regions like, and at markets. Online: Easily ordered from platforms like Abcdefg in various grades and sizes. Caution Warning: Precautions: Wash thoroughly to remove any residue from the shell. Avoid eating the seeds as they contain toxic cyanide. Patients with Irritable Bowel Syndrome (IBS) should be cautious due to their high fructose content. Best time to consume: Eat as a snack during the day or in the morning to stimulate bowel movements. Key Additional Tips Profit Useful Benefit Available Nutrition : Key benefits of apples (especially green apples): Helps control weight: Low in calories and high in fiber, keeping you feeling full longer. Good for the digestive system: High fiber content helps relieve constipation and balances the gut. Supports heart health and lowers cholesterol: Antioxidants help reduce bad cholesterol (LDL). Slows aging and promotes radiant skin: Rich in vitamin C and antioxidants. Reduces the risk of cancer and diabetes: Contains flavonoids that help inhibit cancer cells. Promotes oral health: Malic acid in apples helps reduce bacterial plaque on teeth. Apples are a healthy fruit high in fiber (especially pectin) and antioxidants. They help control weight, promote satiety, lower cholesterol, support heart health, slow aging and cell degeneration, reduce the risk of cancer and diabetes, and aid digestion. To maximize nutrient absorption, it's recommended to eat 1-2 apples per day, including the peel. And the finally then You can eat it and Sell it to the Merchant or Customer with Who people you Know Knew known, i hope you have fun and enjoy it.
ClickMeSeeAllFull
ClickMeSeeOnMoreDetail
ClickMeSeeOnMorePictureImage
ClickMeSeeOnMoreVideo
Fruit: Processer Processed Processing food Menu: 6.Apple Ice Cream Cake
Method: All Works:Apple Ice Cream Cake
Method: How to make made cook: Recipe Procedure: Apple Ice Cream Cake Step 1: For the Dough: Materials Ingredients: Prepare the ingredients: cake flour (100 grams), baking powder (1 teaspoon), eggs (3), granulated sugar (80 grams), milk/vegetable oil (40 grams), vanilla extract. Key Preparation Directions Instructions Methods: 1. Preheat oven: Set the oven to 175°C (395°F). Prepare the baking pan by greasing it with butter and lining it with parchment paper. Separate eggs: Separate the egg whites and yolks. Mix egg yolks: Beat the egg yolks with half of the sugar, followed by the oil and vanilla extract. Sift in the cake flour and baking powder and mix until smooth. Beat egg whites (meringue): Beat the egg whites until they begin to foam. Gradually add the remaining sugar and continue beating until soft to stiff peaks form. 2. Folding: Scoop 1/3 of the egg white mixture into the egg yolk mixture and gently fold until combined. Then, combine this with the remaining egg white mixture, folding quickly and gently until a smooth, uniform batter is formed. 3. Baking: Shape the mold as desired, such as four overlapping circles. Pour the mixture into the mold, leaving some space for the ice cream. Gently tap the mold 1-2 times to remove air bubbles. Bake for approximately 30-40 minutes. 4. Cooling the Cake: Once baked, remove from the oven and let it cool on a wire rack before decorating. Scoop ice cream into the empty spaces of the cake, press and smooth the ice cream firmly, or let it melt for a while to allow the ice cream to set. Smooth the surface evenly. Decorate with your favorite toppings on top of the ice cream. Then refrigerate for 1-4 hours to allow the ice cream to set. It is then ready to eat and sell. Summary Summation Notes: Basic cake making (such as chiffon or sponge cake) starts with preparing the ingredients (cake flour, eggs, sugar, baking powder, butter/oil). Beat the egg whites with sugar until stiff peaks form. Combine the liquid ingredients and egg yolks. Sift in the flour and gently fold it in. Bake at 150-180°C for 25-40 minutes, or until risen and cooked through. Additional tips: Sift the flour: Sifting the flour helps create a light and fluffy cake texture without lumps. Don't overbeat the egg whites: If they're too stiff, they'll be difficult to mix and the cake might be dry. Preheat the oven: Preheat the oven for at least 10-15 minutes. Tip: For beginners, we recommend trying a fresh milk cake or a rice cooker cake, which are easier to make. Step 2: For The Filling: Materials Ingredients: Coconut cream (delicious): 500 ml Sugar: 8 tablespoons Salt: a pinch or 1/4 teaspoon Cornstarch: 2 tablespoons (helps the ice cream bind together) Vanilla extract: 1 teaspoon (optional) Water or unsweetened milk: 150 ml (for dissolving the cornstarch) Finely mashed and diced fruit: as desired Key Preparation Directions Instructions Methods: 1. Mix the coconut cream: Pour the coconut cream, fresh milk/water, sugar, salt, and cornstarch into a pot. Stir all the ingredients until everything is dissolved and there are no lumps of cornstarch left. Simmer until thickened: Place the pot over medium heat, stirring constantly to prevent the coconut cream from burning and sticking to the bottom of the pot. When the mixture begins to boil and thickens slightly, turn off the heat. Let it cool: Let the simmered mixture cool completely. If you want a fragrant aroma, add vanilla extract at this stage. 2. First freezing: Pour the chilled mixture into a container with a lid. Freeze for approximately 4-6 hours, or until solid. 3. Blending the ice cream: Take the frozen ice cream and cut it into small pieces, then blend it in a food processor until smooth and creamy. 4. Final Freezing: Pour into a container, close the lid, and continue freezing until solid as desired. You will then have smooth and creamy coconut ice cream ready to serve. Summary Summation Notes: Here's an easy way to make delicious and creamy homemade coconut ice cream: Simmer 500 ml of coconut cream, 8 tablespoons of sugar, 1/4 teaspoon of salt, and 2 tablespoons of cornstarch until thickened. Let it cool, then freeze. Once frozen, blend until smooth, then refreeze to achieve a creamy and smooth texture. Additional tips: If you don't have a blender, after freezing the ice cream until solid, use a fork to scrape and stir it thoroughly, then refreeze. Repeat this 2-3 times to reduce ice crystals. You can add toppings such as roasted peanuts, corn, palm fruit, or drizzle with condensed milk. And the finally then You can eat it and Sell it to the Merchant or Customer with Who people you Know Knew known, i hope you have fun and enjoy it. Where can i you me buy it, Where to Buy, Where to find it: Internet Online, Supermarkets. Widely available from street food stalls, especially in durian-growing regions like, and at markets. Online: Easily ordered from platforms like Abcdefg in various grades and sizes. Caution Warning: Precautions: Wash thoroughly to remove any residue from the shell. Avoid eating the seeds as they contain toxic cyanide. Patients with Irritable Bowel Syndrome (IBS) should be cautious due to their high fructose content. Best time to consume: Eat as a snack during the day or in the morning to stimulate bowel movements. Key Additional Tips Profit Useful Benefit Available Nutrition : Key benefits of apples (especially green apples): Helps control weight: Low in calories and high in fiber, keeping you feeling full longer. Good for the digestive system: High fiber content helps relieve constipation and balances the gut. Supports heart health and lowers cholesterol: Antioxidants help reduce bad cholesterol (LDL). Slows aging and promotes radiant skin: Rich in vitamin C and antioxidants. Reduces the risk of cancer and diabetes: Contains flavonoids that help inhibit cancer cells. Promotes oral health: Malic acid in apples helps reduce bacterial plaque on teeth. Apples are a healthy fruit high in fiber (especially pectin) and antioxidants. They help control weight, promote satiety, lower cholesterol, support heart health, slow aging and cell degeneration, reduce the risk of cancer and diabetes, and aid digestion. To maximize nutrient absorption, it's recommended to eat 1-2 apples per day, including the peel. And the finally then You can eat it and Sell it to the Merchant or Customer with Who people you Know Knew known, i hope you have fun and enjoy it.
ClickMeSeeAllFull
ClickMeSeeOnMoreDetail
ClickMeSeeOnMorePictureImage
ClickMeSeeOnMoreVideo
Fruit: Processer Processed Processing food Menu: 7.Apple Tart Shell
Method: All Works:Apple Tart Shell
Method: How to make made cook: Recipe Procedure: Apple Tart Shell Step 1: For the Dough: Materials Ingredients: All-purpose flour:125-240 grams Unsalted butter (very cold):125 grams Icing sugar:30-40 grams (helps create a smoother texture than granulated sugar) Egg yolk (size 2):1 Salt:1/4 teaspoon Very cold water (if needed): 1-2 tablespoons (if the dough is too dry) Key Preparation Directions Instructions Methods: 1. Combine dry ingredients: Sift together the all-purpose flour, icing sugar, and salt into a large mixing bowl. Cut the butter: Cut the chilled unsalted butter into cubes and add it to the flour mixture. Use a pastry blender or fork to mash the butter into the flour until it resembles coarse sand or small peas. 2. Add egg yolk: Add the egg yolk and gently mix with a rubber spatula until combined, without kneading by hand. Knead for too long, as this will make the dough sticky and hard. Rest the dough: Wrap the dough in plastic wrap and refrigerate, rubbing your eyes. 30-60 minutes. No butter is needed; the dough will set crisply without much fuss while baking. 3. Rolling and lining the tart mold: Remove the dough from the refrigerator. Roll the dough on a lightly floured surface to a thickness of approximately 3 millimeters, then line the tart molds. Trim the edges neatly. Prick with a fork: Use a fork to prick the bottom of the tart dough all over (to prevent it from puffing up). Pour the filling into the center of the dough, smooth the top of the filling, and then refrigerate for another minute before baking. 4. Baking: Bake at 180-200 degrees Celsius for approximately 10-15 minutes, or until the dough is cooked and golden brown. Summary Summation Notes: For shortcrust tart dough, emphasize the coolness of the butter and avoid over-kneading to achieve a crispy texture. Combine 125-240 grams of all-purpose flour, 30-40 grams of powdered sugar, 125 grams of very cold unsalted butter, a pinch of salt, and 1 egg yolk. Knead until just combined. Wrap in plastic and refrigerate for 30 minutes to 2 hours before rolling out the dough, lining the tart pan, piercing with a fork, and baking at 180-200°C. Additional tips: The butter must be very cold: The most important tip is that the butter must not melt while kneading, so that the dough remains crumbly and crispy. Rest the dough: Refrigerating helps to minimize shrinkage of the dough when it goes into the oven. Step 2: For The Filling: Materials Ingredients: Dairy whipping cream: 300 grams Fresh milk: 100-150 grams Egg yolks (large chicken eggs): 4 Sugar: 50-70 grams (adjust sweetness to your liking) Vanilla extract: 1 teaspoon Salt: 1/4 teaspoon Finely mashed fruit: to taste Coconut milk: to taste Tart shells Ready-made tart shells: 15-20 pieces Key Preparation Directions Instructions Methods: 1. Prepare the filling: Combine whipping cream, fresh milk, granulated sugar, salt, and vanilla extract in a saucepan over low heat. Stir until the sugar dissolves; do not let it boil. Let it cool. Mix the eggs: Beat the egg yolks until broken, then pour in the cooled cream mixture. Gently stir to combine. Strain: Strain the filling mixture through a sieve 1-2 times for a smooth texture. 2. Assembly: Arrange the ready-made tart shells on a baking tray. Pour the tart filling into the cups, filling them about 80-90% full. 3. Baking: Preheat oven to 200°C. Bake the tart for approximately 15-20 minutes, or until the top is golden brown. 4. Let it cool and serve: Remove from heat and let it rest. The pastry will become crispy and the filling will set deliciously. Summary Summation Notes: Making delicious egg tarts like those from famous shops is easy using just the basic ingredients: ready-made tart shells, whipping cream, fresh milk, egg yolks, and sugar. Mix the filling ingredients together, strain to make it smooth, pour into the tart shells, and bake at 180-200°C for 15-20 minutes, or until the top is beautifully browned. Additional tips: Richer aroma: Using real dairy whipping cream will result in a smoother texture and aroma. Portuguese-style burnt top: If using an air fryer, bake at 180°C for 15 minutes, then continue baking at 200°C for another 5 minutes to brown the top. Crispy crust: Bake the plain tart shell for about 5 minutes first, then pour in the filling and bake a second time. And the finally then You can eat it and Sell it to the Merchant or Customer with Who people you Know Knew known, i hope you have fun and enjoy it. Where can i you me buy it, Where to Buy, Where to find it: Internet Online, Supermarkets. Widely available from street food stalls, especially in durian-growing regions like, and at markets. Online: Easily ordered from platforms like Abcdefg in various grades and sizes. Caution Warning: Precautions: Wash thoroughly to remove any residue from the shell. Avoid eating the seeds as they contain toxic cyanide. Patients with Irritable Bowel Syndrome (IBS) should be cautious due to their high fructose content. Best time to consume: Eat as a snack during the day or in the morning to stimulate bowel movements. Key Additional Tips Profit Useful Benefit Available Nutrition : Key benefits of apples (especially green apples): Helps control weight: Low in calories and high in fiber, keeping you feeling full longer. Good for the digestive system: High fiber content helps relieve constipation and balances the gut. Supports heart health and lowers cholesterol: Antioxidants help reduce bad cholesterol (LDL). Slows aging and promotes radiant skin: Rich in vitamin C and antioxidants. Reduces the risk of cancer and diabetes: Contains flavonoids that help inhibit cancer cells. Promotes oral health: Malic acid in apples helps reduce bacterial plaque on teeth. Apples are a healthy fruit high in fiber (especially pectin) and antioxidants. They help control weight, promote satiety, lower cholesterol, support heart health, slow aging and cell degeneration, reduce the risk of cancer and diabetes, and aid digestion. To maximize nutrient absorption, it's recommended to eat 1-2 apples per day, including the peel. And the finally then You can eat it and Sell it to the Merchant or Customer with Who people you Know Knew known, i hope you have fun and enjoy it.
ClickMeSeeAllFull
ClickMeSeeOnMoreDetail
ClickMeSeeOnMorePictureImage
ClickMeSeeOnMoreVideo
Fruit: Processer Processed Processing food Menu: 8.Apple Puff Pastry
Method: All Works:Apple Puff Pastry
Method: How to make made cook: Recipe Procedure: Apple Puff Pastry Step 1: For the Dough: Materials Ingredients: All-purpose flour: 350-500 grams Salted butter/pie butter: 250 grams (divided into butter for mixing with flour and chilled butter for rolling) Ice-cold water: 180-200 ml Salt: 1 teaspoon Key Preparation Directions Instructions Methods: 1. Prepare the dough: Mix the flour, salt, and melted butter. Gradually add the ice-cold water and knead until a ball of dough forms. Knead gently until just combined, then wrap in plastic wrap and refrigerate for 30-60 minutes. Prepare the rolled butter: Flatten unsalted or salted butter into a rectangular sheet. Refrigerate until firm. Lamination: Roll out the rested dough into a rectangular sheet. Place the buttered sheet in the center. Pour the filling over the butter. Fold both sides of the dough towards the center and seal completely. 2. Roll and Fold (Turn): Roll out the buttered dough sheet lengthwise. Then fold it into three layers (fold the left side to the center, then fold the right side over). Roll again and fold. Repeat this 4-6 times. 30-60 minutes. No butter is needed; the dough will set crisply without much fuss while baking. 3. Resting the dough: If the butter starts to soften while folding the dough, refrigerate it for 15-20 minutes before the next step to prevent it from melting. 4. Cutting and Baking: Roll out the folded dough to a thickness of approximately 3-5 mm. Cut into desired shapes according to the simple puff pastry recipe guide, then bake at 200-220°C for about 10-20 minutes, or until golden brown and crispy. Summary Summation Notes: To make crispy, layered puff pastry, start by mixing all-purpose flour, salt, melted butter, and ice-cold water. Knead until well combined. Wrap in plastic and refrigerate for 30 minutes. Then, roll the dough into a sheet. Place a slice of butter (salted butter) in the center, fold the dough over the butter, roll the dough lengthwise, and fold it into three layers. Repeat 4-6 times, refrigerating the dough every 1-2 times to allow the layers to develop beautifully. Additional tips: Use "ice-cold water": This prevents the butter from melting before baking and helps the puff pastry maintain its beautiful layers. Do not overmix the dough: Knead only until the dough comes together. Over-kneading will make the dough sticky. Rest the dough frequently: Refrigerating it helps the butter set and results in a crispier pie crust. Step 2: For The Filling: Materials Ingredients: Ready-made puff pastry sheets 2-3 apples (diced) 40 grams unsalted butter 5 tablespoons granulated sugar (or brown sugar) 1 teaspoon cinnamon powder (to taste) 1 tablespoon lemon juice (to prevent apples from browning) 1 egg (for brushing the pie) Key Preparation Directions Instructions Methods: 1. Make the apple filling: Heat a pan and add butter. Once the butter has melted, add the diced apples, sugar, and cinnamon powder. Sauté until the apples are softened and the flavors have blended. Then squeeze in a little lemon juice. Let it cool. 2. Prepare the pie dough: If using frozen dough, let it thaw and cut it into squares of the desired size. 3. Wrapping the pie: Spoon the cooled apple filling into the center of the pastry sheet. Fold the corners of the pastry inwards to form a triangle or square, then use a fork to press the edges tightly shut. 4. Baking the Pie: Preheat the oven to 200°C - 220°C. Arrange the puff pastry on a baking sheet lined with parchment paper. Brush the surface of the pie with egg wash (for a nice color). Bake for approximately 15-20 minutes, or until the pastry is puffed up and golden brown. Summary Summation Notes: Making apple puffs is easy using ready-made puff pastry sheets. Wrap a filling of apples sautéed in butter, sugar, and cinnamon, cover with another sheet of pie dough, and press the edges firmly. Brush with egg wash before baking at 200-220°C for about 15-20 minutes, or until crispy, puffed up, and golden brown. Additional tips: The filling must be cold: You must wait for the apple filling to cool down before wrapping it; otherwise, the pie crust will melt and won't taste good. Brushing with egg wash: Brushing with egg wash mixed with a little water will help the pie have a golden, appetizing color. And the finally then You can eat it and Sell it to the Merchant or Customer with Who people you Know Knew known, i hope you have fun and enjoy it. Where can i you me buy it, Where to Buy, Where to find it: Internet Online, Supermarkets. Widely available from street food stalls, especially in durian-growing regions like, and at markets. Online: Easily ordered from platforms like Abcdefg in various grades and sizes. Caution Warning: Precautions: Wash thoroughly to remove any residue from the shell. Avoid eating the seeds as they contain toxic cyanide. Patients with Irritable Bowel Syndrome (IBS) should be cautious due to their high fructose content. Best time to consume: Eat as a snack during the day or in the morning to stimulate bowel movements. Key Additional Tips Profit Useful Benefit Available Nutrition : Key benefits of apples (especially green apples): Helps control weight: Low in calories and high in fiber, keeping you feeling full longer. Good for the digestive system: High fiber content helps relieve constipation and balances the gut. Supports heart health and lowers cholesterol: Antioxidants help reduce bad cholesterol (LDL). Slows aging and promotes radiant skin: Rich in vitamin C and antioxidants. Reduces the risk of cancer and diabetes: Contains flavonoids that help inhibit cancer cells. Promotes oral health: Malic acid in apples helps reduce bacterial plaque on teeth. Apples are a healthy fruit high in fiber (especially pectin) and antioxidants. They help control weight, promote satiety, lower cholesterol, support heart health, slow aging and cell degeneration, reduce the risk of cancer and diabetes, and aid digestion. To maximize nutrient absorption, it's recommended to eat 1-2 apples per day, including the peel. And the finally then You can eat it and Sell it to the Merchant or Customer with Who people you Know Knew known, i hope you have fun and enjoy it.
ClickMeSeeAllFull
ClickMeSeeOnMoreDetail
ClickMeSeeOnMorePictureImage
ClickMeSeeOnMoreVideo
Fruit: Processer Processed Processing food Menu: 9.Apple Pie
Method: All Works:Apple Pie
Method: How to make made cook: Recipe Procedure: Apple Pie Pie Crust Ingredients For the Dough: Materials Ingredients: All-purpose flour: 250 grams Salted butter (very cold): 100 grams Granulated sugar: 1-2 tablespoons (optional) Very cold water: 2-3 tablespoons (add gradually) Baking powder/Salt: a pinch Apple Filling Ingredients For The Filling: Materials Ingredients: Apples: 3-4 apples (peeled and thinly sliced) Brown/white sugar: 5 tablespoons Unsalted butter: 40 grams Cinnamon powder: 1/2 teaspoon Lemon juice: 2-3 teaspoons Key Preparation Directions Instructions Methods: 1. Make the pie dough: Sift together the flour, baking powder, and salt. Chop the cold butter into the flour mixture until it resembles sand. Gradually add the cold water and knead until combined (do not overmix or the butter will melt). Form the dough into a ball, wrap it in plastic wrap, and refrigerate for 30 minutes. 2. Make the apple filling: Sauté the apples, butter, sugar, lemon juice, and cinnamon in a pan over medium heat until the apples are softened and the water has evaporated. Let it cool. 3. Pie Crust: Divide the dough into two parts (base and lid). Roll out the first part of the dough and line the greased pie pan. Pierce the dough all over with a fork. 4. Filling and Baking: Place the apple filling inside. Roll out another portion of dough to cover it, trim the edges neatly, and brush the top with an egg and milk mixture. Baking: Bake at 200-220 degrees Celsius for approximately 15-30 minutes, or until the dough is golden brown and crispy. Summary Summation Notes: To make homemade apple pie, start by making the pie crust. Combine all-purpose flour, cold butter, and sugar. Knead until well combined, then chill for 30-60 minutes. Sauté the chopped apples with butter, sugar, and cinnamon until dry. Line a pie pan with the crust, add the filling, cover with another layer of crust, brush with egg wash, and bake at approximately 200-220°C until the crust is golden brown and crispy. Additional tips: Tip: The butter must be very cold for a crumbly pie crust. If you don't have an oven, you can use pre-made puff pastry sheets instead. And the finally then You can eat it and Sell it to the Merchant or Customer with Who people you Know Knew known, i hope you have fun and enjoy it. Where can i you me buy it, Where to Buy, Where to find it: Internet Online, Supermarkets. Widely available from street food stalls, especially in durian-growing regions like, and at markets. Online: Easily ordered from platforms like Abcdefg in various grades and sizes. Caution Warning: Precautions: Wash thoroughly to remove any residue from the shell. Avoid eating the seeds as they contain toxic cyanide. Patients with Irritable Bowel Syndrome (IBS) should be cautious due to their high fructose content. Best time to consume: Eat as a snack during the day or in the morning to stimulate bowel movements. Key Additional Tips Profit Useful Benefit Available Nutrition : Key benefits of apples (especially green apples): Helps control weight: Low in calories and high in fiber, keeping you feeling full longer. Good for the digestive system: High fiber content helps relieve constipation and balances the gut. Supports heart health and lowers cholesterol: Antioxidants help reduce bad cholesterol (LDL). Slows aging and promotes radiant skin: Rich in vitamin C and antioxidants. Reduces the risk of cancer and diabetes: Contains flavonoids that help inhibit cancer cells. Promotes oral health: Malic acid in apples helps reduce bacterial plaque on teeth. Apples are a healthy fruit high in fiber (especially pectin) and antioxidants. They help control weight, promote satiety, lower cholesterol, support heart health, slow aging and cell degeneration, reduce the risk of cancer and diabetes, and aid digestion. To maximize nutrient absorption, it's recommended to eat 1-2 apples per day, including the peel. And the finally then You can eat it and Sell it to the Merchant or Customer with Who people you Know Knew known, i hope you have fun and enjoy it.
ClickMeSeeAllFull
ClickMeSeeOnMoreDetail
ClickMeSeeOnMorePictureImage
ClickMeSeeOnMoreVideo
Fruit: Processer Processed Processing food Menu: 10.Apple Croissant
Method: All Works:Apple Croissant
Method: How to make made cook: Recipe Procedure: Apple Croissant Step 1: For the Dough: Materials Ingredients: Bread Flour: 500 grams (helps to strengthen the structure) Instant Yeast: 10 grams Sugar: 40-60 grams Salt: 7-10 grams Cold unsweetened milk or cold water: 250-275 milliliters Good quality unsalted butter (for rolling): 250 grams (sliced) Key Preparation Directions Instructions Methods: 1. Dough Preparation (Détrempe) 1.1 Combine flour, yeast, sugar, salt, and milk in a mixing bowl. Knead until well combined and smooth (about 5-10 minutes). 1.2 Roll the dough into a rectangle, wrap tightly in plastic wrap, and refrigerate overnight (or at least 2-4 hours) to allow the dough to relax and the yeast to activate slowly. 1.3 Butter Preparation (Beurrage) Roll the chilled unsalted butter between parchment paper into a uniform square. 1.4 Chill the butter until it sets but is still somewhat elastic (not hard enough to break). 2. Folding and Laminating the Dough - A Crucial Step 2.1 Wrapping the Butter: Roll out the chilled dough into a rectangle about twice the size of the butter. Place the butter in the center and fold the dough to completely enclose it. 2.2 Turning: Roll the butter-wrapped dough into a long sheet and fold it like a letter (fold into 3 sections). Repeat 3 times, chilling the dough after each fold to prevent the butter from melting. 2.3 Final Chilling: Rest the dough for 1-2 hours. 2.4 Shaping Roll the dough into a thin rectangular sheet, about 3-4 mm thick. 2.5 Cut the dough into triangles with a base width of about 8-10 cm. 2.6 Roll from the base to the tip (stretch the dough slightly while rolling) and set aside. 3. Proofing Let the shaped croissants rest at room temperature (no more than 26°C) until the dough doubles in size (approximately 1.5 - 2 hours), being careful to prevent the butter from melting. Make a slit in the top, bottom, or end of each croissant to insert the filling. 4. Baking Brush the top with an egg wash (mixed egg and milk). Bake at 190°C - 200°C for 15-20 minutes, or until golden brown. Summary Summation Notes: Making authentic croissants that are crispy on the outside, soft on the inside, fragrant with butter, and have beautiful layers requires patience and techniques for folding the dough (lamination), along with temperature control to prevent the butter from melting. The key is to rest the dough in the refrigerator to allow the butter to solidify throughout the rolling process. Additional tips: Cold storage: Do this in an air-conditioned room or use a marble table to maintain the butter's temperature. Quality butter: Use European butter with a high butterfat content (82% or higher). Dough resting: If the dough becomes stubborn or the butter starts to melt, immediately put it in the refrigerator. Step 2: For The Filling: Materials Ingredients: Croissant (premade) Mozzarella cheese (sliced or grated) Ham (as desired) Mayonnaise (optional for added richness) Apple (blended/mashed) A pinch of salt Coconut milk (as desired) Egg (for brushing the surface for a glossy finish) Key Preparation Directions Instructions Methods: Part 1: How to Make Cheese-Filled Croissants (Method 1: Ready-to-Eat) Prepare the croissants: Cut the croissants in half lengthwise, but not all the way through. Filling: Spread a thin layer of mayonnaise inside. Place the ham, followed by mozzarella cheese, mashed apples, salt, and coconut milk, sprinkled over everything. Baking: Place in an air fryer or oven at 170-200 degrees Celsius for 5-10 minutes, or until the cheese is melted and the croissants are crispy. Part 2: How to Make Cheese Croissants (Method 2: Using Fresh Puff Pastry) Unfold the puff pastry sheet and cut into triangles. Place the cheese, ham, mashed apples, salt, and coconut milk on the base of the pastry. Roll from the base up to the pointed end. Brush the top with egg yolk and bake at 200°C until golden brown. Summary Summation Notes: Making cheese (and ham) croissants is easy using pre-made croissants or puff pastry. Cut the croissant in half, place ham and mozzarella cheese in the center, brush with egg or mayonnaise, and bake in an air fryer at 170-200°C for about 5-10 minutes, or until the cheese is melted and the crust is crispy. Additional tips: Tips for deliciousness: Using mozzarella cheese will give it a stretchy texture. You can sprinkle with parsley or oregano to add aroma. If you don't have an oven, you can toast it in a pan until the cheese melts. And the finally then You can eat it and Sell it to the Merchant or Customer with Who people you Know Knew known, i hope you have fun and enjoy it. Where can i you me buy it, Where to Buy, Where to find it: Internet Online, Supermarkets. Widely available from street food stalls, especially in durian-growing regions like, and at markets. Online: Easily ordered from platforms like Abcdefg in various grades and sizes. Caution Warning: Precautions: Wash thoroughly to remove any residue from the shell. Avoid eating the seeds as they contain toxic cyanide. Patients with Irritable Bowel Syndrome (IBS) should be cautious due to their high fructose content. Best time to consume: Eat as a snack during the day or in the morning to stimulate bowel movements. Key Additional Tips Profit Useful Benefit Available Nutrition : Key benefits of apples (especially green apples): Helps control weight: Low in calories and high in fiber, keeping you feeling full longer. Good for the digestive system: High fiber content helps relieve constipation and balances the gut. Supports heart health and lowers cholesterol: Antioxidants help reduce bad cholesterol (LDL). Slows aging and promotes radiant skin: Rich in vitamin C and antioxidants. Reduces the risk of cancer and diabetes: Contains flavonoids that help inhibit cancer cells. Promotes oral health: Malic acid in apples helps reduce bacterial plaque on teeth. Apples are a healthy fruit high in fiber (especially pectin) and antioxidants. They help control weight, promote satiety, lower cholesterol, support heart health, slow aging and cell degeneration, reduce the risk of cancer and diabetes, and aid digestion. To maximize nutrient absorption, it's recommended to eat 1-2 apples per day, including the peel. And the finally then You can eat it and Sell it to the Merchant or Customer with Who people you Know Knew known, i hope you have fun and enjoy it.
ClickMeSeeAllFull
ClickMeSeeOnMoreDetail
ClickMeSeeOnMorePictureImage
ClickMeSeeOnMoreVideo
Vegetable: Processer Processed Processing food Menu: 1.Corn Milk Whip Cream Smoothie Shake
Method: All Works:Corn Milk Whip Cream Smoothie Shake
Method: How to make made cook: Recipe Procedure: Corn Milk Whip Cream Smoothie Shake Materials Ingredients: Ingredients: 1/2 ear of boiled corn, sliced; 1/2 cup fresh milk; 1 tablespoon condensed milk; 1/2 tablespoon honey (optional); a pinch of salt; 1 cup ice. Key Preparation Directions Instructions Methods: 1. Instructions: Put all the ingredients into a blender and blend until smooth and creamy. Pour into a glass and enjoy. Summary Summation Notes: Sweet and creamy corn smoothie is an easy-to-make and nutritious drink. Simply blend 1/2-1 ear of cooked corn with 1/2 cup of fresh milk, 1 tablespoon of condensed milk, a pinch of salt, and 1 glass of ice until smooth. You can add pieces of corn on top for extra flavor. Additional tips: Tips for deliciousness and richness: Using slightly warm, cooked sweet corn will make blending easier and enhance the aroma. Thick recipe: Freeze the corn milk before blending for a smoothie-like texture without needing a lot of ice. Decoration: Enhance the presentation by drizzling with condensed milk and sprinkling with cornflakes. This recipe offers a naturally sweet and creamy taste, perfect as a healthy drink or a source of income. And the finally then You can eat it and Sell it to the Merchant or Customer with Who people you Know Knew known, i hope you have fun and enjoy it. Where can i you me buy it, Where to Buy, Where to find it: Internet Online, Supermarkets. Widely available from street food stalls, especially in durian-growing regions like, and at markets. Online: Easily ordered from platforms like Abcdefg in various grades and sizes. Caution Warning: Precautions: Recommended serving size: Consume one ear of corn per day, or approximately 100 grams, to avoid excessive carbohydrate intake and the risk of obesity. Those who should be cautious: Diabetics should control their intake, those with weakened digestive systems, and those with stage 3 or higher kidney disease should avoid it. Hygiene: Choose freshly cooked corn to avoid mold. Key Additional Tips Profit Useful Benefit Available Nutrition : Eye health: High in lutein and zeaxanthin, which help prevent macular degeneration and reduce the risk of cataracts. Digestive system and excretion: High in fiber, promoting healthy bowel movements and preventing constipation. Brain and heart health: Nutrients in corn support brain health, improve memory, and help lower cholesterol, preventing cardiovascular disease. Energy and nutrient source: Provides high energy from complex carbohydrates, rich in protein and essential vitamins. Antioxidants: Help slow cell degeneration and reduce the risk of certain types of cancer. Corn is a highly nutritious grain, rich in fiber, vitamins B1 and B5, vitamin C, and antioxidants (lutein and zeaxanthin). It offers notable benefits in supporting eye health, improving digestive function, nourishing the brain, boosting energy, and helping to control blood sugar levels when consumed in appropriate amounts. And the finally then You can eat it and Sell it to the Merchant or Customer with Who people you Know Knew known, i hope you have fun and enjoy it.
ClickMeSeeAllFull
ClickMeSeeOnMoreDetail
ClickMeSeeOnMorePictureImage
ClickMeSeeOnMoreVideo
Vegetable: Processer Processed Processing food Menu: 2.Corn Yogurt
Method: All Works:Corn Yogurt
Method: How to make made cook: Recipe Procedure: Corn Yogurt Materials Ingredients: Fresh milk (to taste), 2 ears of sweet corn (kernels removed), 1-2 cups water (for blending), 2-3 tablespoons plain yogurt (with live probiotics) or yogurt starter, sugar or a pinch of salt (to taste). Blender, cheesecloth, saucepan, container with lid for fermentation. Key Preparation Directions Instructions Methods: 1. Extracting corn milk: Blend the corn kernels with water until smooth. Strain the mixture through a cheesecloth to obtain only the corn milk. 2. Sterilizing the milk: Heat the corn milk and fresh milk over low heat until hot (approximately 85-90 degrees Celsius) to kill unwanted bacteria and stabilize the proteins. Stir constantly to prevent sticking to the bottom of the pot. Let it cool: Allow the heated corn milk to cool down to approximately 40-45 degrees Celsius (warm enough to touch with your finger). Very important: If it's not cool enough or too hot, the microorganisms will not be active. 3. Mixing the starter culture: Scoop the plain yogurt into the corn milk and gently stir to combine. Incubating the yogurt: Pour into a container with a lid and incubate in a warm place (such as a thermos or a darkened oven) for 8-12 hours until the yogurt sets. 4. Storage: Refrigerate the yogurt before consuming. This will result in a smoother and firmer texture. Summary Summation Notes: To make delicious homemade corn yogurt, prepare fresh corn milk (corn + water) and fresh milk. Heat to sterilize, then let it cool to about 40-45 degrees Celsius. Mix in yogurt starter culture and let it ferment for about 8-12 hours. The result will be a smooth, naturally sweet and fragrant corn yogurt. Additional tips: Tip: To achieve a thicker consistency like Greek yogurt, strain the fermented yogurt through a cheesecloth again to separate out the whey. And the finally then You can eat it and Sell it to the Merchant or Customer with Who people you Know Knew known, i hope you have fun and enjoy it. Where can i you me buy it, Where to Buy, Where to find it: Internet Online, Supermarkets. Widely available from street food stalls, especially in durian-growing regions like, and at markets. Online: Easily ordered from platforms like Abcdefg in various grades and sizes. Caution Warning: Precautions: Recommended serving size: Consume one ear of corn per day, or approximately 100 grams, to avoid excessive carbohydrate intake and the risk of obesity. Those who should be cautious: Diabetics should control their intake, those with weakened digestive systems, and those with stage 3 or higher kidney disease should avoid it. Hygiene: Choose freshly cooked corn to avoid mold. Key Additional Tips Profit Useful Benefit Available Nutrition : Eye health: High in lutein and zeaxanthin, which help prevent macular degeneration and reduce the risk of cataracts. Digestive system and excretion: High in fiber, promoting healthy bowel movements and preventing constipation. Brain and heart health: Nutrients in corn support brain health, improve memory, and help lower cholesterol, preventing cardiovascular disease. Energy and nutrient source: Provides high energy from complex carbohydrates, rich in protein and essential vitamins. Antioxidants: Help slow cell degeneration and reduce the risk of certain types of cancer. Corn is a highly nutritious grain, rich in fiber, vitamins B1 and B5, vitamin C, and antioxidants (lutein and zeaxanthin). It offers notable benefits in supporting eye health, improving digestive function, nourishing the brain, boosting energy, and helping to control blood sugar levels when consumed in appropriate amounts. And the finally then You can eat it and Sell it to the Merchant or Customer with Who people you Know Knew known, i hope you have fun and enjoy it.
ClickMeSeeAllFull
ClickMeSeeOnMoreDetail
ClickMeSeeOnMorePictureImage
ClickMeSeeOnMoreVideo
Vegetable: Processer Processed Processing food Menu: 3.Corn Pudding
Method: All Works:Corn Pudding
Method: How to make made cook: Recipe Procedure: Corn Pudding Materials Ingredients: Sweet corn (kernels) 1-2 ears, unsweetened fresh milk 2-3 cups, granulated sugar 1/4 - 1/2 cup (to taste), gelatin sheets/powder or agar powder 1-2 teaspoons (for setting), whipping cream (if desired), a pinch of salt. Key Preparation Directions Instructions Methods: 1. Prepare the corn: Blend the corn kernels with fresh milk until smooth. Strain the mixture: Strain the blended corn through a sieve or cheesecloth to obtain only the corn milk. (Press the corn pulp dry for a more fragrant flavor.) 2. Mixing the ingredients: Pour the corn milk into a pot. Add the granulated sugar and the agar/gelatin powder (soaked in water until softened). Stir until dissolved. Heating: Place the pot over low heat, stirring constantly until the mixture boils and begins to thicken (approximately 10-15 minutes). 3. Pour into molds: Remove from the heat and pour into prepared glasses or molds. Let cool slightly, then refrigerate: Refrigerate for approximately 3-6 hours, or until the pudding has set into a smooth and creamy consistency. 4. Serving: Garnish with boiled sweet corn kernels or drizzle with fresh milk before serving. Summary Summation Notes: How to make delicious and creamy homemade corn pudding: Simply blend sweet corn with fresh milk, strain, and heat over medium heat, mixing in gelatin or agar powder until thickened. Stir over low heat until boiling, pour into molds, and refrigerate for 3-6 hours until set. Serve with corn kernels on top. Additional tips: - And the finally then You can eat it and Sell it to the Merchant or Customer with Who people you Know Knew known, i hope you have fun and enjoy it. Where can i you me buy it, Where to Buy, Where to find it: Internet Online, Supermarkets. Widely available from street food stalls, especially in durian-growing regions like, and at markets. Online: Easily ordered from platforms like Abcdefg in various grades and sizes. Caution Warning: Precautions: Recommended serving size: Consume one ear of corn per day, or approximately 100 grams, to avoid excessive carbohydrate intake and the risk of obesity. Those who should be cautious: Diabetics should control their intake, those with weakened digestive systems, and those with stage 3 or higher kidney disease should avoid it. Hygiene: Choose freshly cooked corn to avoid mold. Key Additional Tips Profit Useful Benefit Available Nutrition : Eye health: High in lutein and zeaxanthin, which help prevent macular degeneration and reduce the risk of cataracts. Digestive system and excretion: High in fiber, promoting healthy bowel movements and preventing constipation. Brain and heart health: Nutrients in corn support brain health, improve memory, and help lower cholesterol, preventing cardiovascular disease. Energy and nutrient source: Provides high energy from complex carbohydrates, rich in protein and essential vitamins. Antioxidants: Help slow cell degeneration and reduce the risk of certain types of cancer. Corn is a highly nutritious grain, rich in fiber, vitamins B1 and B5, vitamin C, and antioxidants (lutein and zeaxanthin). It offers notable benefits in supporting eye health, improving digestive function, nourishing the brain, boosting energy, and helping to control blood sugar levels when consumed in appropriate amounts. And the finally then You can eat it and Sell it to the Merchant or Customer with Who people you Know Knew known, i hope you have fun and enjoy it.
ClickMeSeeAllFull
ClickMeSeeOnMoreDetail
ClickMeSeeOnMorePictureImage
ClickMeSeeOnMoreVideo
Vegetable: Processer Processed Processing food Menu: 4.Corn Ice Cream Milk Cone
Method: All Works:Corn Ice Cream Milk Cone
Method: How to make made cook: Recipe Procedure: Corn Ice Cream Milk Cone Step 1: For The Dough Materials Ingredients: Ingredients (for approximately 10-14 cones) Eggs (size 2-3): 2 eggs Sugar (or brown sugar): 100 grams (1/2 cup) Melted unsalted butter: 40-50 grams (or rice bran oil) Unsweetened fresh milk: 60 grams (4 tablespoons) All-purpose flour: 115 grams (approximately 1 cup) Vanilla extract: 1 teaspoon Salt: 1/4 teaspoon Key Preparation Directions Instructions Methods: 1. Prepare the ingredients: Beat the eggs with the sugar until dissolved. Add the vanilla extract, melted butter, and fresh milk. Stir well. 2. Mix the flour: Sift the wheat flour and salt into the wet ingredients. Gently whisk with a hand whisk until smooth and well combined (do not overmix). Let the dough rest for about 10 minutes. 3. Baking Waffles: Preheat the waffle cone maker. Use an ice cream scoop to place batter in the center of the waffle maker. Bake for approximately 1.5 - 3 minutes, or until golden brown and crispy. 4. Rolling the cone: (Important step) Quickly remove the waffle sheet from the oven and immediately roll it around the plastic cone while it's still hot. Roll tightly from one side to the other to prevent any holes at the bottom of the cone. Let it cool: Hold the cone for a moment to allow the batter to set and become crispy. Let it cool completely on a surface. Summary Summation Notes: Making crispy and fragrant homemade waffle cones is easy. Simply mix eggs, sugar, melted butter, milk, and all-purpose flour, whisking until smooth. Bake in a waffle maker until golden brown, then quickly roll into a cone shape using a waffle iron while still hot. This will give you delicious, crispy ice cream cones that can be stored for a long time. Additional tips: The key to keeping them crispy for longer is to work quickly while the waffles are still hot. If they get too cold, they won't roll properly and will break. Wear cloth gloves while rolling to protect your fingertips from the heat. Once completely cool, store them immediately in an airtight container to maintain their crispness. Step 2: For The Filling Materials Ingredients: 150-200 grams of cooked sweet corn (sliced), 180 milliliters of unsweetened fresh milk, 150 milliliters of evaporated milk, 45 grams of granulated sugar (adjust to taste), a pinch of salt (optional), 1 egg yolk for added richness. Key Preparation Directions Instructions Methods: 1. Prepare the ingredients: Blend the cooked corn with fresh milk until smooth. Strain through a sieve for a smoother texture, or leave it unstrained if you prefer corn kernels. 2. Mix and simmer: Pour the blended mixture into a pot. Add the evaporated milk, sugar, and salt. Heat over low heat, stirring constantly, until the sugar dissolves and the mixture begins to thicken (be careful not to let it boil). 3. Let it cool: Turn off the heat and let the mixture cool to room temperature. 4. Freezing: Pour into a container, cover with a lid or plastic wrap, and freeze in the freezer to achieve a smooth texture. After about 1-2 hours, remove and stir or blend again to prevent ice crystals. Repeat this process 2-3 times, then freeze completely. Summary Summation Notes: Making homemade corn and milk ice cream is easy. Simply blend cooked corn with fresh milk, evaporated milk, sugar, and a pinch of salt. Strain out the corn kernels (or leave them in for a crunchy texture) and freeze until set. It's recommended to blend or stir every 1-2 hours to maintain a smooth texture. Additional tips: You can use whipping cream instead of some of the milk to make the ice cream smoother and creamier. If you don't have an ice cream maker, you can finely shred corn and mix it in instead. And the finally then You can eat it and Sell it to the Merchant or Customer with Who people you Know Knew known, i hope you have fun and enjoy it. Where can i you me buy it, Where to Buy, Where to find it: Internet Online, Supermarkets. Widely available from street food stalls, especially in durian-growing regions like, and at markets. Online: Easily ordered from platforms like Abcdefg in various grades and sizes. Caution Warning: Precautions: Recommended serving size: Consume one ear of corn per day, or approximately 100 grams, to avoid excessive carbohydrate intake and the risk of obesity. Those who should be cautious: Diabetics should control their intake, those with weakened digestive systems, and those with stage 3 or higher kidney disease should avoid it. Hygiene: Choose freshly cooked corn to avoid mold. Key Additional Tips Profit Useful Benefit Available Nutrition : Eye health: High in lutein and zeaxanthin, which help prevent macular degeneration and reduce the risk of cataracts. Digestive system and excretion: High in fiber, promoting healthy bowel movements and preventing constipation. Brain and heart health: Nutrients in corn support brain health, improve memory, and help lower cholesterol, preventing cardiovascular disease. Energy and nutrient source: Provides high energy from complex carbohydrates, rich in protein and essential vitamins. Antioxidants: Help slow cell degeneration and reduce the risk of certain types of cancer. Corn is a highly nutritious grain, rich in fiber, vitamins B1 and B5, vitamin C, and antioxidants (lutein and zeaxanthin). It offers notable benefits in supporting eye health, improving digestive function, nourishing the brain, boosting energy, and helping to control blood sugar levels when consumed in appropriate amounts. And the finally then You can eat it and Sell it to the Merchant or Customer with Who people you Know Knew known, i hope you have fun and enjoy it.
ClickMeSeeAllFull
ClickMeSeeOnMoreDetail
ClickMeSeeOnMorePictureImage
ClickMeSeeOnMoreVideo
Vegetable: Processer Processed Processing food Menu: 5.Corn Ice Cream Sandwiches
Method: All Works:Corn Ice Cream Sandwiches
Method: How to make made cook: Recipe Procedure: Corn Ice Cream Sandwiches Step 1: For The Dough Materials Ingredients: All-purpose flour: (260) grams (or cake flour) Cornstarch: (60) grams (for crispness) Baking powder: (2) teaspoons Salt: (1/2) teaspoon Eggs (size 2): (2) eggs Sugar: (130) grams (can be reduced) Unsweetened milk: (360) ml Melted salted butter: (80) grams (or vegetable oil) Vanilla extract: (1) teaspoon Key Preparation Directions Instructions Methods: 1. Combine dry ingredients: Sift together the all-purpose flour, cornstarch, and baking powder in a large mixing bowl. Combine liquid ingredients: In another bowl, beat the eggs with the sugar and salt until the sugar dissolves. Add the milk, vanilla extract, and melted butter. Stir the mixture until well combined. 2. Combine: Pour the liquid mixture into the flour bowl. Whisk gently with a hand whisk until no lumps of flour are visible (be careful not to overmix, as this will make the waffles tough). Rest the batter (optional): Let the batter rest for about (15-30) minutes to allow the waffles to become fluffier. 3. Baking the waffles: Preheat the waffle maker, lightly butter the pan, pour in the batter, bake on medium heat for about (2-3) minutes, or until the waffles are golden brown. 4. Serving: Remove from heat and let cool on a wire rack to maintain crispness. Serve with ice cream, honey, or fresh fruit. Summary Summation Notes: To make crispy on the outside, soft on the inside, sweet and creamy milk waffles, simply sift together the all-purpose flour ((260) g), baking powder ((2) tsp.), and cornstarch ((60) g). Mix in the eggs ((2) eggs, sugar ((130) g), salt, fresh milk ((360) ml), and melted butter ((80) g). Stir until combined. Pour into a waffle maker and bake until golden brown. Additional tips: For longer-lasting crispness, increase the proportion of cornstarch and use vegetable oil instead of butter. Storage: Fresh waffles should be consumed within 2-3 days. They may harden if stored in the refrigerator; reheat immediately. Step 2: For The Filling Materials Ingredients: 150-200 grams of cooked sweet corn (sliced), 180 milliliters of unsweetened fresh milk, 150 milliliters of evaporated milk, 45 grams of granulated sugar (adjust to taste), a pinch of salt (optional), 1 egg yolk for added richness. Key Preparation Directions Instructions Methods: 1. Prepare the ingredients: Blend the cooked corn with fresh milk until smooth. Strain through a sieve for a smoother texture, or leave it unstrained if you prefer corn kernels. 2. Mix and simmer: Pour the blended mixture into a pot. Add the evaporated milk, sugar, and salt. Heat over low heat, stirring constantly, until the sugar dissolves and the mixture begins to thicken (be careful not to let it boil). 3. Let it cool: Turn off the heat and let the mixture cool to room temperature. 4. Freezing: Place the waffle in the mold, pour the filling onto the waffle, and cover with another waffle on top. Alternatively, pour the filling into a container, cover with a lid or plastic wrap, and freeze until smooth. After about 1-2 hours, remove and stir or blend again to prevent ice crystals from forming. Repeat this process 2-3 times, then freeze until completely solid. Spoon the filling into the bottom waffle, cover with another waffle, and serve immediately. Summary Summation Notes: Making homemade corn and milk ice cream is easy. Simply blend cooked corn with fresh milk, evaporated milk, sugar, and a pinch of salt. Strain out the corn kernels (or leave them in for a crunchy texture) and freeze until set. It's recommended to blend or stir every 1-2 hours to maintain a smooth texture. Additional tips: You can use whipping cream instead of some of the milk to make the ice cream smoother and creamier. If you don't have an ice cream maker, you can finely shred corn and mix it in instead. And the finally then You can eat it and Sell it to the Merchant or Customer with Who people you Know Knew known, i hope you have fun and enjoy it. Where can i you me buy it, Where to Buy, Where to find it: Internet Online, Supermarkets. Widely available from street food stalls, especially in durian-growing regions like, and at markets. Online: Easily ordered from platforms like Abcdefg in various grades and sizes. Caution Warning: Precautions: Recommended serving size: Consume one ear of corn per day, or approximately 100 grams, to avoid excessive carbohydrate intake and the risk of obesity. Those who should be cautious: Diabetics should control their intake, those with weakened digestive systems, and those with stage 3 or higher kidney disease should avoid it. Hygiene: Choose freshly cooked corn to avoid mold. Key Additional Tips Profit Useful Benefit Available Nutrition : Eye health: High in lutein and zeaxanthin, which help prevent macular degeneration and reduce the risk of cataracts. Digestive system and excretion: High in fiber, promoting healthy bowel movements and preventing constipation. Brain and heart health: Nutrients in corn support brain health, improve memory, and help lower cholesterol, preventing cardiovascular disease. Energy and nutrient source: Provides high energy from complex carbohydrates, rich in protein and essential vitamins. Antioxidants: Help slow cell degeneration and reduce the risk of certain types of cancer. Corn is a highly nutritious grain, rich in fiber, vitamins B1 and B5, vitamin C, and antioxidants (lutein and zeaxanthin). It offers notable benefits in supporting eye health, improving digestive function, nourishing the brain, boosting energy, and helping to control blood sugar levels when consumed in appropriate amounts. And the finally then You can eat it and Sell it to the Merchant or Customer with Who people you Know Knew known, i hope you have fun and enjoy it.
ClickMeSeeAllFull
ClickMeSeeOnMoreDetail
ClickMeSeeOnMorePictureImage
ClickMeSeeOnMoreVideo
Vegetable: Processer Processed Processing food Menu: 6.Corn Butter Cheese Milk
Method: All Works:Corn Butter Cheese Milk
Method: How to make made cook: Recipe Procedure: Corn Butter Cheese Milk Materials Ingredients: 400 grams of cooked corn (kernels removed), fresh milk (to taste), 50 grams of melted unsalted butter, 3-4 tablespoons of evaporated milk, 1-2 tablespoons of sugar (to taste), a pinch of salt, mozzarella cheese (to taste). Key Preparation Directions Instructions Methods: 1. Mixing: Place the cooked corn kernels in a mixing bowl, followed by melted butter, evaporated milk, sugar, and salt. Mix all the ingredients together until well combined. 2. First round of cheese addition: Add about half of the mozzarella cheese to the corn and mix it in. 3. Baking in cups: Spoon the mixture into heat-resistant cups or baking molds. 4. Topping: Sprinkle the remaining mozzarella cheese generously over the top. Baking: Bake in a preheated oven at (180-200) degrees Celsius or in an air fryer for approximately 5-10 minutes, or until the cheese is melted and golden brown to your liking. Summary Summation Notes: Make delicious, fragrant, creamy, and cheesy baked corn easily by tossing cooked corn with unsalted butter, evaporated milk, sugar, and a pinch of salt. Generously sprinkle with mozzarella cheese and bake or air fry until the cheese melts and turns golden brown. Enjoy the sweet, creamy, and delicious treat! Additional tips: You can use salted butter instead of unsalted butter, but reduce the amount of salt. You can add condensed milk if you prefer a sweeter and richer flavor. If you don't have an oven, you can melt the cheese in a pan and cover it. And the finally then You can eat it and Sell it to the Merchant or Customer with Who people you Know Knew known, i hope you have fun and enjoy it. Where can i you me buy it, Where to Buy, Where to find it: Internet Online, Supermarkets. Widely available from street food stalls, especially in durian-growing regions like, and at markets. Online: Easily ordered from platforms like Abcdefg in various grades and sizes. Caution Warning: Precautions: Recommended serving size: Consume one ear of corn per day, or approximately 100 grams, to avoid excessive carbohydrate intake and the risk of obesity. Those who should be cautious: Diabetics should control their intake, those with weakened digestive systems, and those with stage 3 or higher kidney disease should avoid it. Hygiene: Choose freshly cooked corn to avoid mold. Key Additional Tips Profit Useful Benefit Available Nutrition : Eye health: High in lutein and zeaxanthin, which help prevent macular degeneration and reduce the risk of cataracts. Digestive system and excretion: High in fiber, promoting healthy bowel movements and preventing constipation. Brain and heart health: Nutrients in corn support brain health, improve memory, and help lower cholesterol, preventing cardiovascular disease. Energy and nutrient source: Provides high energy from complex carbohydrates, rich in protein and essential vitamins. Antioxidants: Help slow cell degeneration and reduce the risk of certain types of cancer. Corn is a highly nutritious grain, rich in fiber, vitamins B1 and B5, vitamin C, and antioxidants (lutein and zeaxanthin). It offers notable benefits in supporting eye health, improving digestive function, nourishing the brain, boosting energy, and helping to control blood sugar levels when consumed in appropriate amounts. And the finally then You can eat it and Sell it to the Merchant or Customer with Who people you Know Knew known, i hope you have fun and enjoy it.
ClickMeSeeAllFull
ClickMeSeeOnMoreDetail
ClickMeSeeOnMorePictureImage
ClickMeSeeOnMoreVideo
Vegetable: Processer Processed Processing food Menu: 7.Corn Tart Shell
Method: All Works:Corn Tart Shell
Method: How to make made cook: Recipe Procedure: Corn Tart Shell Step 1: For The Dough: Materials Ingredients: Tart Dough Ingredients (for approximately 10 pieces): All-purpose flour: 125 grams, Unsalted butter (very cold): 75 grams, Icing sugar: 30 grams, Salt: 1/4 teaspoon, Egg yolk (size 2): 1 Key Preparation Directions Instructions Methods: 1. Dry ingredients: Sift the all-purpose flour and powdered sugar into a mixing bowl. 2. Butter mixture: Add the very cold butter. Use a pastry cutter, fork, or your fingertips to incorporate the butter into the flour until it resembles coarse sand or small peas. 2. Kneading the dough: Add the egg yolk and gently knead until the dough forms a ball (be careful not to knead too vigorously as this will make the dough hard). 3. Resting the dough: Wrap the dough in plastic wrap and refrigerate for at least 30 minutes to allow the butter to set. 4. Shaping: Roll out the dough to a thickness of about 3 millimeters, then line the tart molds with it. Trim the edges neatly. Summary Summation Notes: This easy recipe for fragrant, buttery, and crumbly shortcrust tart dough involves combining 125 grams of all-purpose flour, 75 grams of cold unsalted butter, 30 grams of powdered sugar, 1/4 teaspoon of salt, and 1 egg yolk. Gently knead until a ball forms, then refrigerate for 30 minutes before pressing into tart molds. Additional tips: Butter must be cold: Very cold butter will make the tart crust crispy and flaky, not hard and dry. Don't over-knead: Don't rub or knead the dough for too long, as this will develop gluten, making the tart chewy instead of flaky. Freezeable: If making extra, the wrapped dough can be frozen and stored for months. Step 2: For The Filling: Materials Ingredients: Ready-made tart crusts: 12-15 pieces; Real whipping cream (Dairy Cream): 200 grams; Unsweetened fresh milk: 150 grams; Granulated sugar: 60-70 grams (adjust to taste); Egg yolks: 3-4 (size 2); Vanilla extract: 1/2-1 teaspoon; Salt: 1/4 teaspoon (a pinch) Key Preparation Directions Instructions Methods: 1. Prepare the ingredients: Heat the fresh milk with sugar and a pinch of salt until the sugar dissolves (do not boil). Let it cool slightly. 2. Egg preparation: Beat the egg yolks until well combined, then pour in the warm milk mixture, followed by the whipping cream and vanilla extract and Corn. Gently stir to avoid creating too many air bubbles. Strain: Strain the mixture through a sieve 1-2 times to ensure a smooth and soft tart crust. 3. Filling the molds: Pour the egg filling mixture into the ready-made pie crusts, filling them about 90% full. 4. Baking: Preheat oven to (200-220) degrees Celsius, top and bottom heat. Bake for approximately (15-20) minutes, or until the tart tops are beautifully browned. Summary Summation Notes: Homemade egg tart recipe, smooth and soft texture, sweet aroma, beautifully browned top, easy to make yourself with the main ingredients being fresh milk, corn, whipping cream and egg yolks, using ready-made tart shells, baked at a temperature of (200-220) degrees Celsius for about (15-20) minutes, resulting in a crispy outside and soft inside egg tart. Additional tips: Filtering: Filtering the egg mixture will help make the tart smooth and free of air bubbles. Beautiful burnt top: Use high heat for the last (5) minutes to get the Portuguese style tart top. Use dairy cream: Real whipping cream (Dairy) will give a richer flavor and a smoother texture than non-dairy. And the finally then You can eat it and Sell it to the Merchant or Customer with Who people you Know Knew known, i hope you have fun and enjoy it. Where can i you me buy it, Where to Buy, Where to find it: Internet Online, Supermarkets. Widely available from street food stalls, especially in durian-growing regions like, and at markets. Online: Easily ordered from platforms like Abcdefg in various grades and sizes. Caution Warning: Precautions: Recommended serving size: Consume one ear of corn per day, or approximately 100 grams, to avoid excessive carbohydrate intake and the risk of obesity. Those who should be cautious: Diabetics should control their intake, those with weakened digestive systems, and those with stage 3 or higher kidney disease should avoid it. Hygiene: Choose freshly cooked corn to avoid mold. Key Additional Tips Profit Useful Benefit Available Nutrition : Eye health: High in lutein and zeaxanthin, which help prevent macular degeneration and reduce the risk of cataracts. Digestive system and excretion: High in fiber, promoting healthy bowel movements and preventing constipation. Brain and heart health: Nutrients in corn support brain health, improve memory, and help lower cholesterol, preventing cardiovascular disease. Energy and nutrient source: Provides high energy from complex carbohydrates, rich in protein and essential vitamins. Antioxidants: Help slow cell degeneration and reduce the risk of certain types of cancer. Corn is a highly nutritious grain, rich in fiber, vitamins B1 and B5, vitamin C, and antioxidants (lutein and zeaxanthin). It offers notable benefits in supporting eye health, improving digestive function, nourishing the brain, boosting energy, and helping to control blood sugar levels when consumed in appropriate amounts. And the finally then You can eat it and Sell it to the Merchant or Customer with Who people you Know Knew known, i hope you have fun and enjoy it.
ClickMeSeeAllFull
ClickMeSeeOnMoreDetail
ClickMeSeeOnMorePictureImage
ClickMeSeeOnMoreVideo
Vegetable: Processer Processed Processing food Menu: 8.Corn Puff Pastry
Method: All Works:Corn Puff Pastry
Method: How to make made cook: Recipe Procedure: Corn Puff Pastry Step 1: For The Dough: Materials Ingredients: All-purpose flour: 300 grams; Unsalted butter (diced and chilled): 250 grams (divided into 2 parts: 50 grams for mixing into the dough and 200 grams for rolling); Salt: 1/2 teaspoon; Ice-cold water: 150 milliliters. Key Preparation Directions Instructions Methods: 1. Mix and knead the flour: Sift the flour and salt together into a mixing bowl. Then add the cold butter (50 grams) and use your fingertips to rub the butter into the flour until it forms a crumbly, sand-like consistency (do not let the butter melt completely). Gradually add the ice-cold water and knead the mixture until it forms a ball, but not until perfectly smooth. Then shape into a ball, wrap in plastic wrap, and refrigerate for 30 minutes. 2. Prepare the butter for rolling. Place the remaining butter (200 grams) on parchment paper. Use a rolling pin to flatten and roll the butter into a square sheet. Wrap in parchment paper and refrigerate to allow the butter to set. 3. Roll and Fold the Dough: Take the chilled dough and roll it into a rectangular sheet slightly wider than the butter sheet. Place the butter sheet in the center of the dough, then fold both sides of the dough inward to completely enclose the butter (like an envelope). Use a rolling pin to roll the dough lengthwise, then fold the dough inward towards the center into three sections (fold left over right, fold right over left). Wrap with plastic wrap and refrigerate for 20 minutes. Repeat this process (roll-fold-refrigerate) about 4-5 times to create dozens of thin layers of dough. 4. Shaping and Baking: Once the time is up, roll the dough to a thickness of approximately 3-4 millimeters. Cut into various shapes (e.g., butterfly pies, sausage pies). Summary Summation Notes: Puff pastry is made by kneading flour with water, wrapping it in butter, then rolling and folding it repeatedly to create thin layers. When baked, the melted butter pushes the layers of dough together, resulting in a fluffy, crispy, and beautifully layered pastry. Additional tips: The key to success: Keep it cool. It should be done in a cool room, and you should use very cold hands or utensils at all times to prevent the butter from melting and seeping into the dough before baking. Step 2: For The Filling: Materials Ingredients: 1 cup sliced cooked corn, 1/2 cup unsweetened milk, 1/4 cup whipping cream (or evaporated milk), 2-3 tablespoons granulated sugar, a pinch of salt, 1 tablespoon cornstarch (dissolved in a little water), Frozen puff pastry or bread with the crusts removed, 1 egg (for brushing the top) Key Preparation Directions Instructions Methods: 1. Make the filling: Combine all ingredients (except the dissolved cornstarch) in a pot over low heat. Stir until it begins to boil. Gradually pour in the cornstarch mixture, stirring until the mixture thickens. Turn off the heat and let it cool. 2. Shaping: Flatten a sheet of pie dough or bread. Spoon the corn filling into the center. Fold the dough over to form a triangle or square, then use a fork to press the edges shut. 3. Baking: Lightly brush the puff pastry with egg wash. Place in an air fryer at 170°C for 10-15 minutes, or until golden brown and crispy (or fry in oil until golden). Summary Summation Notes: Making easy corn puffs at home using an air fryer or pan, with pre-made pie crust or bread, results in crispy puffs with a fragrant, creamy corn filling. Additional tips: - And the finally then You can eat it and Sell it to the Merchant or Customer with Who people you Know Knew known, i hope you have fun and enjoy it. Where can i you me buy it, Where to Buy, Where to find it: Internet Online, Supermarkets. Widely available from street food stalls, especially in durian-growing regions like, and at markets. Online: Easily ordered from platforms like Abcdefg in various grades and sizes. Caution Warning: Precautions: Recommended serving size: Consume one ear of corn per day, or approximately 100 grams, to avoid excessive carbohydrate intake and the risk of obesity. Those who should be cautious: Diabetics should control their intake, those with weakened digestive systems, and those with stage 3 or higher kidney disease should avoid it. Hygiene: Choose freshly cooked corn to avoid mold. Key Additional Tips Profit Useful Benefit Available Nutrition : Eye health: High in lutein and zeaxanthin, which help prevent macular degeneration and reduce the risk of cataracts. Digestive system and excretion: High in fiber, promoting healthy bowel movements and preventing constipation. Brain and heart health: Nutrients in corn support brain health, improve memory, and help lower cholesterol, preventing cardiovascular disease. Energy and nutrient source: Provides high energy from complex carbohydrates, rich in protein and essential vitamins. Antioxidants: Help slow cell degeneration and reduce the risk of certain types of cancer. Corn is a highly nutritious grain, rich in fiber, vitamins B1 and B5, vitamin C, and antioxidants (lutein and zeaxanthin). It offers notable benefits in supporting eye health, improving digestive function, nourishing the brain, boosting energy, and helping to control blood sugar levels when consumed in appropriate amounts. And the finally then You can eat it and Sell it to the Merchant or Customer with Who people you Know Knew known, i hope you have fun and enjoy it.
ClickMeSeeAllFull
ClickMeSeeOnMoreDetail
ClickMeSeeOnMorePictureImage
ClickMeSeeOnMoreVideo
Vegetable: Processer Processed Processing food Menu: 9.Corn Pie
Method: All Works:Corn Pie
Method: How to make made cook: Recipe Procedure: Corn Pie Step 1: For The Dough: Shortcrust pie crust Dough: Materials Ingredients: How to make shortcrust pie crust (for tarts/fruit pies): This is an easy-to-make crust that is crumbly and crispy, perfect for fruit tarts or crispy pies. Ingredients: 250 grams all-purpose flour, 65 grams very cold butter, 60 grams shortening, 1 tablespoon icing sugar, 1/4 teaspoon salt, 50 grams cold water. Key Preparation Directions Instructions Methods: 1. Sift the flour, salt, and sugar together. 2. Cut the cold butter into small pieces and mix it with the flour. Use a fork or pastry cutter to mash it until it resembles sand. 3. Gradually add the ice-cold water and gently knead until the dough forms a ball. Do not knead for too long, as the dough will become sticky. 4. Wrap in plastic wrap and refrigerate for 30-60 minutes before ironing. Layered Pie Dough: Materials Ingredients: How to make Layered Pie Dough (for chicken pie/butterfly pie): The dough will be crispy and fluffy in layers from rolling and folding: Ingredients: 240 grams all-purpose flour, 125 grams very cold unsalted butter, 60 grams very cold water, 1/8 teaspoon salt, 10 grams granulated sugar. Key Preparation Directions Instructions Methods: 1. Combine the flour, salt, and sugar, then add the chilled diced butter and mash it until the butter is evenly distributed into small pieces. 2. Add ice-cold water, knead until well combined, wrap in plastic and refrigerate for 1 hour. 3. Take the dough out, knead and roll it into a square sheet. Fold it into three layers, repeating 3-4 times. (Refrigerate the dough each time you feel the butter starting to melt.) Summary Summation Notes: There are two main types of pie dough: layered pie dough (crispy and light in layers) and shortcrust pastry (crispy, buttery, and fragrant). The key is that the butter and water must be very cold to ensure a crispy crust. The basic ingredients are all-purpose flour, unsalted butter, salt, and ice-cold water. Additional tips: Temperature: Everything must be very cold! If the room is hot, use ice water. Dough resting: Always chill the dough before baking to prevent shrinkage. Step 2: For The Filling: Materials Ingredients: Shortcrust pie crust Dough and Layered Pie Dough: Available at most supermarkets. (Egg yolk: 1 egg (for brushing the pie surface for a glossy finish)) 1 cup sweet corn kernels (cooked or uncooked), 100-150 ml unsweetened milk, condensed milk/sugar to taste, 1-2 tablespoons salted butter, 1-2 tablespoons cornstarch (dissolved in water), a pinch of salt. Key Preparation Directions Instructions Methods: 1. Combine fresh milk, boiled corn, butter, sugar, and salt in a pot or pan over low to medium heat. Stir until the milk begins to boil. Gradually pour in the cornstarch dissolved in water, stirring continuously until the filling thickens and becomes smooth. Turn off the heat and let the filling cool before wrapping. 2. Thaw the pastry: Remove the puff pastry sheets from the freezer and let them sit at room temperature for about 15-20 minutes until they are slightly softened but still cool (do not let them become mushy). 3. Filling: Cut or divide the pie dough to fit the prepared pie pan, approximately the same size as the pan. Spoon the filling into the center of each piece. Fold and seal: Fold the dough in half to match the shape of the pan (or place another piece of dough on top to form a lid). Use a fork to prick and press along all edges of the dough to seal it tightly and prevent the filling from leaking out during baking. Venting: Lightly score the top of the dough with a sharp knife 2-3 times to allow steam to escape during baking. 4. Baking and brushing the pie crust: Dip a brush in beaten egg yolk and lightly brush the entire surface of the pie crust (this will give it a beautiful shine). Baking: Preheat the oven to 180-200 degrees Celsius (using both top and bottom heating elements) and bake for approximately 15-20 minutes, or until the pie crust is puffed up and golden brown. Remove from the oven and let it cool on a wire rack before serving. Summary Summation Notes: Making delicious, fluffy, and crispy puff pastry pies is easy. Simply prepare your favorite filling, wrap it in ready-made puff pastry sheets, brush with egg yolk, and bake at 180-200 degrees Celsius until golden brown. Additional tips: For a richer, creamier filling, you can mix whipping cream with fresh milk. And the finally then You can eat it and Sell it to the Merchant or Customer with Who people you Know Knew known, i hope you have fun and enjoy it. Where can i you me buy it, Where to Buy, Where to find it: Internet Online, Supermarkets. Widely available from street food stalls, especially in durian-growing regions like, and at markets. Online: Easily ordered from platforms like Abcdefg in various grades and sizes. Caution Warning: Precautions: Recommended serving size: Consume one ear of corn per day, or approximately 100 grams, to avoid excessive carbohydrate intake and the risk of obesity. Those who should be cautious: Diabetics should control their intake, those with weakened digestive systems, and those with stage 3 or higher kidney disease should avoid it. Hygiene: Choose freshly cooked corn to avoid mold. Key Additional Tips Profit Useful Benefit Available Nutrition : Eye health: High in lutein and zeaxanthin, which help prevent macular degeneration and reduce the risk of cataracts. Digestive system and excretion: High in fiber, promoting healthy bowel movements and preventing constipation. Brain and heart health: Nutrients in corn support brain health, improve memory, and help lower cholesterol, preventing cardiovascular disease. Energy and nutrient source: Provides high energy from complex carbohydrates, rich in protein and essential vitamins. Antioxidants: Help slow cell degeneration and reduce the risk of certain types of cancer. Corn is a highly nutritious grain, rich in fiber, vitamins B1 and B5, vitamin C, and antioxidants (lutein and zeaxanthin). It offers notable benefits in supporting eye health, improving digestive function, nourishing the brain, boosting energy, and helping to control blood sugar levels when consumed in appropriate amounts. And the finally then You can eat it and Sell it to the Merchant or Customer with Who people you Know Knew known, i hope you have fun and enjoy it.
ClickMeSeeAllFull
ClickMeSeeOnMoreDetail
ClickMeSeeOnMorePictureImage
ClickMeSeeOnMoreVideo
Vegetable: Processer Processed Processing food Menu: 10.Corn Cream Custard Croissant
Method: All Works:Corn Cream Custard Croissant
Method: How to make made cook: Recipe Procedure: Corn Cream Custard Croissant Step 1: For The Dough: Shortcrust pie crust Dough: Materials Ingredients: Ingredients for the dough (Yields: approximately 10-12 pieces): French T55 flour or bread flour (unbleached): 500 grams; Ice-cold milk: 140 grams; Ice-cold water: 140 grams; Sugar: 55 grams; Instant yeast: 11 grams; Salt: 12 grams; Unsalted butter (room temperature): 40 grams (Note: It is common practice to add butter during the kneading stage to make the dough softer). Ingredients for rolling out the layers (Lock-in Butter): Unsalted sheet butter (or Touage Butter): 250 grams (82% or more butterfat). Key Preparation Directions Instructions Methods: 1. Mixing the dough: Combine flour, yeast, sugar, and salt in a mixing bowl. Then pour in the cold milk and ice water. Knead until a ball forms. Add the unsalted butter and continue kneading until smooth and elastic. First resting period: Gather the dough into a ball, wrap it in plastic wrap, and refrigerate (in the regular compartment) for 30-60 minutes to allow it to soften. 2. Prepare the butter: Roll out the butter into a square approximately 18 x 18 centimeters. Refrigerate until ready to shape (Lock-in): Roll out the rested dough to a size larger than the butter. Place the butter in the center and fold the dough from all four sides over the butter, ensuring it is completely covered (do not let the butter leak out). 3. Lamination: Roll the dough into a long strip in one direction. Fold the dough into three sections (fold in thirds). Wrap in plastic wrap and refrigerate for 30-45 minutes to prevent the butter from melting. Repeat the "roll and fold in thirds" step two more times, refrigerating the dough after each fold. 4. Cutting and Rolling: Roll the dough into a thin sheet, about 3-4 millimeters thick. Cut into triangular shapes (base approximately 9 cm wide, height 20 cm). Place your desired filling in the center of the base, then roll from the base up to the top. Let it rise for about 2-3 hours. Summary Summation Notes: To make fluffy, crispy on the outside, and soft on the inside butter croissants, you need key ingredients: flour and butter, along with techniques for rolling and folding the dough (lamination) to create layers. Additional tips: - Step 2: For The Filling: Materials Ingredients: 1 cup cooked sweet corn kernels, 1.5 tablespoons unsalted butter, 2 tablespoons evaporated milk or whipping cream, 1-2 teaspoons granulated sugar (adjust to taste), a pinch of salt (a tip of a teaspoon). Optional: 1 tablespoon mayonnaise and cheddar cheese if you prefer a savory or creamy filling. Ready-made croissant dough (available at supermarkets like Makro or Villa Market) or frozen croissant dough. Key Preparation Directions Instructions Methods: 1. Sautéing the Corn: Heat a pan over low heat, add butter and melt, then add the cooked sweet corn. Stir well. Season with: evaporated milk, sugar, and salt. Continue stirring until the mixture thickens and becomes well combined. Taste and adjust seasoning as needed. Let cool completely. 2. Cutting the dough: Take the croissant dough, let it thaw, and cut it into triangles. Filling: Spoon about 1 teaspoon of chilled corn filling onto the base of each triangle, then roll from the base up towards the pointed tip. 3. Resting the dough: Arrange the dough on a baking tray and let it rest at room temperature for about 1-2 hours, or until it has doubled in size. 4. Brushing: Lightly brush the surface of the croissants with a mixture of egg and milk for a nice color. Baking: Bake in a preheated oven at 190°C for 12-15 minutes, or until golden brown. Summary Summation Notes: Making "Corn-Filled Croissants" involves three main parts: preparing the croissant dough (pre-made dough can be used for speed), making the sweet and fragrant corn filling, and assembling the croissants. Bake until crispy on the outside and soft on the inside. Additional tips: (If you don't have time to make the dough yourself, you can use ready-made puff pastry, cut and roll it instead.) And the finally then You can eat it and Sell it to the Merchant or Customer with Who people you Know Knew known, i hope you have fun and enjoy it. Where can i you me buy it, Where to Buy, Where to find it: Internet Online, Supermarkets. Widely available from street food stalls, especially in durian-growing regions like, and at markets. Online: Easily ordered from platforms like Abcdefg in various grades and sizes. Caution Warning: Precautions: Recommended serving size: Consume one ear of corn per day, or approximately 100 grams, to avoid excessive carbohydrate intake and the risk of obesity. Those who should be cautious: Diabetics should control their intake, those with weakened digestive systems, and those with stage 3 or higher kidney disease should avoid it. Hygiene: Choose freshly cooked corn to avoid mold. Key Additional Tips Profit Useful Benefit Available Nutrition : Eye health: High in lutein and zeaxanthin, which help prevent macular degeneration and reduce the risk of cataracts. Digestive system and excretion: High in fiber, promoting healthy bowel movements and preventing constipation. Brain and heart health: Nutrients in corn support brain health, improve memory, and help lower cholesterol, preventing cardiovascular disease. Energy and nutrient source: Provides high energy from complex carbohydrates, rich in protein and essential vitamins. Antioxidants: Help slow cell degeneration and reduce the risk of certain types of cancer. Corn is a highly nutritious grain, rich in fiber, vitamins B1 and B5, vitamin C, and antioxidants (lutein and zeaxanthin). It offers notable benefits in supporting eye health, improving digestive function, nourishing the brain, boosting energy, and helping to control blood sugar levels when consumed in appropriate amounts. And the finally then You can eat it and Sell it to the Merchant or Customer with Who people you Know Knew known, i hope you have fun and enjoy it.
ClickMeSeeAllFull
ClickMeSeeOnMoreDetail
ClickMeSeeOnMorePictureImage
ClickMeSeeOnMoreVideo
Vegetable: Processer Processed Processing food Menu: 1.Cashew Nut Milk Whip Cream Smoothie Shake
Method: All Works:Cashew Nut Milk Whip Cream Smoothie Shake
Method: How to make made cook: Recipe Procedure: Cashew Nut Milk Whip Cream Smoothie Shake Materials Ingredients: Ingredients (for a 16-22 oz glass): Raw or unsalted roasted cashews: 2-3 tablespoons; Frozen or sliced ripe mango: 1 large fruit (e.g., Nam Dok Mai or Mahachanok); Unsweetened fresh milk: 100-150 ml (adjust consistency to your liking); Condensed milk: 1-2 tablespoons (or substitute with honey/syrup for sweetness); A pinch of salt: a teaspoon (helps enhance the sweet and creamy flavor); Crushed ice: 1 cup. Key Preparation Directions Instructions Methods: 1. Prepare the cashew nuts: Soak the cashew nuts in very warm water for about 15-30 minutes (or soak in room temperature water for 2 hours or more) until softened, then drain the water. 2. Blend the ingredients: Put the cashew nuts, ripe mango, fresh milk, condensed milk, and salt into a blender. 3. Blend until smooth: Blend all ingredients together until smooth and creamy. Then add crushed ice and continue blending until the smoothie is smooth and consistent. 4. Serving: Pour into a glass, garnish with diced mango pieces or sprinkle with coarsely chopped cashews, and enjoy immediately. Summary Summation Notes: Making a cashew nut milk smoothie (or mango cashew smoothie) is a very easy and creamy drink. Simply soak the cashew nuts in water until softened, then blend them with ripe mango, fresh milk, and ice. The result is a sweet, rich, and delicious smoothie that's also healthy. Additional tips: Tip: If you prefer a refreshing, tangy taste, you can squeeze in a little lemon juice. This will make the smoothie taste even better. And the finally then You can eat it and Sell it to the Merchant or Customer with Who people you Know Knew known, i hope you have fun and enjoy it. Where can i you me buy it, Where to Buy, Where to find it: Internet Online, Supermarkets. Widely available from street food stalls, especially in durian-growing regions like, and at markets. Online: Easily ordered from platforms like Abcdefg in various grades and sizes. Caution Warning: Precautions: Appropriate dosage: Consume about a handful (or approximately 15-20 pieces) per day to avoid excessive energy intake. Avoid processed ingredients: Choose naturally baked varieties without added salt or sugar for maximum benefit. Key Additional Tips Profit Useful Benefit Available Nutrition : Cardiovascular health: Rich in monounsaturated and polyunsaturated fats, which help lower bad cholesterol (LDL) and increase good cholesterol (HDL) in the bloodstream. Blood sugar control: Low glycemic index and high in fiber, helping slow sugar absorption and reducing the risk of diabetes. Eye health: Contains lutein and zeaxanthin, which help protect the eyes from blue light and reduce the risk of macular degeneration. Strengthens bones: Contains magnesium, phosphorus, and copper, which play an important role in increasing bone density and preventing osteoporosis. Nourishes the brain: Rich in B vitamins and various minerals that support nervous system function and memory. Cashew nuts are a super healthy nut, rich in healthy fats (HDL), protein, iron, and antioxidants. They help support heart health, control blood sugar levels, and strengthen bones. They should be consumed in moderation to control calorie intake. And the finally then You can eat it and Sell it to the Merchant or Customer with Who people you Know Knew known, i hope you have fun and enjoy it.
ClickMeSeeAllFull
ClickMeSeeOnMoreDetail
ClickMeSeeOnMorePictureImage
ClickMeSeeOnMoreVideo
Vegetable: Processer Processed Processing food Menu: 2.Cashew Nut Yogurt
Method: All Works:Cashew Nut Yogurt
Method: How to make made cook: Recipe Procedure: Cashew Nut Yogurt Materials Ingredients: Pasteurized fresh milk (plain): (500 - 1000) milliliters (choose full-fat for a smooth and delicious texture) Natural yogurt: (1 - 2) tablespoons (use one with live microorganisms or probiotics) Cashew nuts (finely ground): 4 tablespoons - 1 cup Container with lid: such as a heat-resistant glass box or thermos. Key Preparation Directions Instructions Methods: 1. Warm the milk: Pour the fresh milk into a pot over low to medium heat, stirring constantly until the temperature is approximately (40-45) degrees Celsius or just lukewarm (if you can dip your finger in and it's not so hot as to burn your hand), then turn off the heat. 2. Preparing the starter culture: Scoop the plain yogurt and all the remaining ingredients into a small bowl. Gradually add warm milk to each bowl, stirring until dissolved, then pour back into the pot of milk. Gently stir to combine. Pour into the prepared container and seal tightly. 3. Fermenting the yogurt: Place the container in a warm place (e.g., in a sealed thermos or a closed cabinet) at room temperature for about (8 - 12) hours to allow the microorganisms to work. 4. Refrigerate: Once the fermentation time is complete and the yogurt has thickened, taste it (if you prefer it more sour, you can continue fermenting). Then refrigerate. This will allow the yogurt to set and stop the fermentation process, making it ready to eat. Summary Summation Notes: Making homemade yogurt is very easy! Just use fresh milk and plain yogurt (as a starter), mix them together and let it ferment in a warm place for about (8-12) hours until it thickens into a yogurt consistency. Additional tips: If you prefer a firmer, Greek-style texture, you can strain the whey out of the yogurt after making it through cheesecloth for about (2-3) hours. And the finally then You can eat it and Sell it to the Merchant or Customer with Who people you Know Knew known, i hope you have fun and enjoy it. Where can i you me buy it, Where to Buy, Where to find it: Internet Online, Supermarkets. Widely available from street food stalls, especially in durian-growing regions like, and at markets. Online: Easily ordered from platforms like Abcdefg in various grades and sizes. Caution Warning: Precautions: Appropriate dosage: Consume about a handful (or approximately 15-20 pieces) per day to avoid excessive energy intake. Avoid processed ingredients: Choose naturally baked varieties without added salt or sugar for maximum benefit. Key Additional Tips Profit Useful Benefit Available Nutrition : Cardiovascular health: Rich in monounsaturated and polyunsaturated fats, which help lower bad cholesterol (LDL) and increase good cholesterol (HDL) in the bloodstream. Blood sugar control: Low glycemic index and high in fiber, helping slow sugar absorption and reducing the risk of diabetes. Eye health: Contains lutein and zeaxanthin, which help protect the eyes from blue light and reduce the risk of macular degeneration. Strengthens bones: Contains magnesium, phosphorus, and copper, which play an important role in increasing bone density and preventing osteoporosis. Nourishes the brain: Rich in B vitamins and various minerals that support nervous system function and memory. Cashew nuts are a super healthy nut, rich in healthy fats (HDL), protein, iron, and antioxidants. They help support heart health, control blood sugar levels, and strengthen bones. They should be consumed in moderation to control calorie intake. And the finally then You can eat it and Sell it to the Merchant or Customer with Who people you Know Knew known, i hope you have fun and enjoy it.
ClickMeSeeAllFull
ClickMeSeeOnMoreDetail
ClickMeSeeOnMorePictureImage
ClickMeSeeOnMoreVideo
Vegetable: Processer Processed Processing food Menu: 3.Cashew Nut Pudding Jelly
Method: All Works:Cashew Nut Pudding Jelly
Method: How to make made cook: Recipe Procedure: Cashew Nut Pudding Jelly Materials Ingredients: 1 cup raw cashews (soaked in warm water for at least 2 hours or overnight), 1 cup almond milk, soy milk, or cashew milk, 2-3 tablespoons sweetener such as honey, maple syrup, or coconut sugar (adjust as needed), 1 teaspoon vanilla extract, a pinch of salt (to enhance the flavor), and plain milk as desired. Additional ingredients (chocolate recipe/topping): If you want to make chocolate pudding, you can add 2-3 tablespoons of cocoa powder or 2 tablespoons of chia seeds to give it a chia pudding-like texture. Key Preparation Directions Instructions Methods: 1. Blend until smooth: Add cashew nuts, plant-based milk, sweetener, vanilla, and salt to a blender. Blend at high speed until smooth and creamy. (If too thick, add more milk, one tablespoon at a time.) 2. Adjust the flavor: Taste and adjust the sweetness to your liking. If you want a chocolate flavor, add cocoa powder and blend it in at this stage. 3. Chilling: Pour the mixture into the prepared cups or glasses. Cover with lids or plastic wrap and refrigerate in the regular refrigerator compartment for at least 3-4 hours, or overnight until it sets into a pudding-like consistency. 4. Serving: Before eating, you can garnish with fresh fruit such as strawberries, sliced bananas, or crunchy granola. Summary Summation Notes: Cashew pudding is a smooth and creamy vegan dessert that's easy to make without eggs or gelatin. Simply soak cashews in water, blend them with plant-based milk, sweetener, and vanilla extract, then chill until set. Additional tips: For more recipes and tips, please visit Creamy Cashew Pudding (Detoxinista) or Chocolate Pudding Recipe (Bon Appétit). And the finally then You can eat it and Sell it to the Merchant or Customer with Who people you Know Knew known, i hope you have fun and enjoy it. Where can i you me buy it, Where to Buy, Where to find it: Internet Online, Supermarkets. Widely available from street food stalls, especially in durian-growing regions like, and at markets. Online: Easily ordered from platforms like Abcdefg in various grades and sizes. Caution Warning: Precautions: Appropriate dosage: Consume about a handful (or approximately 15-20 pieces) per day to avoid excessive energy intake. Avoid processed ingredients: Choose naturally baked varieties without added salt or sugar for maximum benefit. Key Additional Tips Profit Useful Benefit Available Nutrition : Cardiovascular health: Rich in monounsaturated and polyunsaturated fats, which help lower bad cholesterol (LDL) and increase good cholesterol (HDL) in the bloodstream. Blood sugar control: Low glycemic index and high in fiber, helping slow sugar absorption and reducing the risk of diabetes. Eye health: Contains lutein and zeaxanthin, which help protect the eyes from blue light and reduce the risk of macular degeneration. Strengthens bones: Contains magnesium, phosphorus, and copper, which play an important role in increasing bone density and preventing osteoporosis. Nourishes the brain: Rich in B vitamins and various minerals that support nervous system function and memory. Cashew nuts are a super healthy nut, rich in healthy fats (HDL), protein, iron, and antioxidants. They help support heart health, control blood sugar levels, and strengthen bones. They should be consumed in moderation to control calorie intake. And the finally then You can eat it and Sell it to the Merchant or Customer with Who people you Know Knew known, i hope you have fun and enjoy it.
ClickMeSeeAllFull
ClickMeSeeOnMoreDetail
ClickMeSeeOnMorePictureImage
ClickMeSeeOnMoreVideo
Vegetable: Processer Processed Processing food Menu: 4.Cashew Nut Bake Butter Cheese Milk
Method: All Works:Cashew Nut Bake Butter Cheese Milk
Method: How to make made cook: Recipe Procedure: Cashew Nut Bake Butter Cheese Milk Materials Ingredients: 500 grams of raw cashews, 100 grams of unsalted butter (melted), 4-5 tablespoons of unsweetened milk, 3-4 tablespoons of cheese seasoning powder (or cheddar cheese powder), 1/2 teaspoon of salt, grated Parmesan or mozzarella cheese (for topping), chopped parsley (for garnish). Key Preparation Directions Instructions Methods: 1. Prepare the nuts: Wash the raw cashews thoroughly and pat them dry. 2. Make the cheese sauce: In a mixing bowl, combine melted butter, milk, cheese seasoning powder, and salt. Stir until smooth. 3. Toss the cashews: Add the cashews to the cheese sauce and toss until evenly coated. 2. Preparation for baking: Line a baking tray with parchment paper, then spread the coated cashew nuts evenly, making sure they don't overlap too thickly. First baking (butter baking): Preheat the oven to 150°C for 15 minutes. Once the time is up, remove and let them cool slightly. 3. Second Baking (Cheese Baking): Sprinkle grated Parmesan or mozzarella cheese over the cashews. Bake for another 5 minutes at 180°C (360°F) or until the cheese is melted and golden brown. 4. Serving: Remove from the heat, sprinkle with chopped parsley for added color, and let cool. The cashews will be crispy and fully coated with cheese, ready to eat. Summary Summation Notes: Baked Cashew Nuts with Milk, Butter, and Cheese is a delicious snack that perfectly combines the richness of cashews, the aroma of milk, and the intense flavor of cheese. It's easy to make; simply coat the cashews in a milk and cheese sauce and bake until crispy and fragrant. You can follow the steps below. Additional tips: (Additional tip: If using an air fryer, bake at 160°C for about 10 minutes, shaking the tray occasionally. Then sprinkle with cheese and continue baking at 180°C for another 2 minutes until the cheese is melted and beautiful.) And the finally then You can eat it and Sell it to the Merchant or Customer with Who people you Know Knew known, i hope you have fun and enjoy it. Where can i you me buy it, Where to Buy, Where to find it: Internet Online, Supermarkets. Widely available from street food stalls, especially in durian-growing regions like, and at markets. Online: Easily ordered from platforms like Abcdefg in various grades and sizes. Caution Warning: Precautions: Appropriate dosage: Consume about a handful (or approximately 15-20 pieces) per day to avoid excessive energy intake. Avoid processed ingredients: Choose naturally baked varieties without added salt or sugar for maximum benefit. Key Additional Tips Profit Useful Benefit Available Nutrition : Cardiovascular health: Rich in monounsaturated and polyunsaturated fats, which help lower bad cholesterol (LDL) and increase good cholesterol (HDL) in the bloodstream. Blood sugar control: Low glycemic index and high in fiber, helping slow sugar absorption and reducing the risk of diabetes. Eye health: Contains lutein and zeaxanthin, which help protect the eyes from blue light and reduce the risk of macular degeneration. Strengthens bones: Contains magnesium, phosphorus, and copper, which play an important role in increasing bone density and preventing osteoporosis. Nourishes the brain: Rich in B vitamins and various minerals that support nervous system function and memory. Cashew nuts are a super healthy nut, rich in healthy fats (HDL), protein, iron, and antioxidants. They help support heart health, control blood sugar levels, and strengthen bones. They should be consumed in moderation to control calorie intake. And the finally then You can eat it and Sell it to the Merchant or Customer with Who people you Know Knew known, i hope you have fun and enjoy it.
ClickMeSeeAllFull
ClickMeSeeOnMoreDetail
ClickMeSeeOnMorePictureImage
ClickMeSeeOnMoreVideo
Vegetable: Processer Processed Processing food Menu: 5.Cashew Nut Roast
Method: All Works:Cashew Nut Roast
Method: How to make made cook: Recipe Procedure: Cashew Nut Roast Materials Ingredients: Raw cashew nuts (as needed) Salt (as needed) Water (as needed) Oil (for frying) Key Preparation Directions Instructions Methods: 1. Traditional Dry Roasting Method (in a Pan): Heat a non-stick pan over low heat. Add the cashew nuts and roast, stirring constantly to prevent burning. Seasoning: When the cashew nuts begin to turn golden yellow, sprinkle with salt. Continue roasting for another 1-2 minutes to coat the nuts evenly with salt. Turn off the heat and let them cool. Spread them on a plate to cool; this will make them crispier and more delicious. 2. Air Fryer Method (Convenient and Fast): Preheat: Set the temperature to 150 degrees Celsius. Baking: Place the cashew nuts on a rack and bake for approximately 25 minutes, shaking them every 5 minutes to ensure even browning. Seasoning: Once cooked, remove from the air fryer, place in a mixing bowl, sprinkle with salt, and toss to coat while still hot. 3. Crispy Frying Method (Crisps the longest): Boiling: Boil the cashew nuts in boiling water for 5 minutes (this helps them stay crispy longer), then drain thoroughly. Frying: Heat oil over medium-low heat. Add the cashew nuts and fry, stirring constantly, until golden brown. Salting: Remove from oil and drain. Sprinkle with salt and toss while hot. Summary Summation Notes: Making delicious, crispy, and perfectly salted roasted cashews is easy. Simply prepare 500 grams of raw (shelled) cashews and 1-2 tablespoons of salt. Additional tips: After roasting/frying, let the cashew nuts cool completely before storing them in an airtight container to maintain their crispness and deliciousness for longer. And the finally then You can eat it and Sell it to the Merchant or Customer with Who people you Know Knew known, i hope you have fun and enjoy it. Where can i you me buy it, Where to Buy, Where to find it: Internet Online, Supermarkets. Widely available from street food stalls, especially in durian-growing regions like, and at markets. Online: Easily ordered from platforms like Abcdefg in various grades and sizes. Caution Warning: Precautions: Appropriate dosage: Consume about a handful (or approximately 15-20 pieces) per day to avoid excessive energy intake. Avoid processed ingredients: Choose naturally baked varieties without added salt or sugar for maximum benefit. Key Additional Tips Profit Useful Benefit Available Nutrition : Cardiovascular health: Rich in monounsaturated and polyunsaturated fats, which help lower bad cholesterol (LDL) and increase good cholesterol (HDL) in the bloodstream. Blood sugar control: Low glycemic index and high in fiber, helping slow sugar absorption and reducing the risk of diabetes. Eye health: Contains lutein and zeaxanthin, which help protect the eyes from blue light and reduce the risk of macular degeneration. Strengthens bones: Contains magnesium, phosphorus, and copper, which play an important role in increasing bone density and preventing osteoporosis. Nourishes the brain: Rich in B vitamins and various minerals that support nervous system function and memory. Cashew nuts are a super healthy nut, rich in healthy fats (HDL), protein, iron, and antioxidants. They help support heart health, control blood sugar levels, and strengthen bones. They should be consumed in moderation to control calorie intake. And the finally then You can eat it and Sell it to the Merchant or Customer with Who people you Know Knew known, i hope you have fun and enjoy it.
ClickMeSeeAllFull
ClickMeSeeOnMoreDetail
ClickMeSeeOnMorePictureImage
ClickMeSeeOnMoreVideo
Vegetable: Processer Processed Processing food Menu: 6.Cashew Nut Ice Cream Milk Cone
Method: All Works:Cashew Nut Ice Cream Milk Cone
Method: How to make made cook: Recipe Procedure: Cashew Nut Ice Cream Milk Cone Step 1: For the Dough: Materials Ingredients: All-purpose flour: 1/2 cup, White granulated sugar: 1/2 cup, Eggs (size 2 or 3): 2, Melted unsalted butter (cooled): 1/4 cup, Milk or evaporated milk: 3 tablespoons, Vanilla extract: 1/2 teaspoon, Salt: 1/8 teaspoon Key Preparation Directions Instructions Methods: 1. Prepare the liquid mixture: Crack the eggs into a mixing bowl, add the granulated sugar and salt. Beat until the sugar dissolves and the eggs are slightly fluffy. Add the flavoring and milk: Add the melted butter, vanilla extract, and fresh milk. Stir until well combined. 2. Add the flour: Gradually sift the all-purpose flour into the mixture. Use a whisk to mix until smooth and uniform, with no lumps of flour. 3. Baking: Pour the batter into the waffle cone maker, close the lid, and bake until golden brown and fragrant. 4. Rolling the cone: Once the batter is cooked, quickly remove the hot batter sheet from the pan. Place a wooden rolling pin on the edge of the batter and quickly roll it into a cone shape. Press the end shut. Let it cool. You will get a crispy and delicious ice cream cone. Summary Summation Notes: Making ice cream cones (waffle cones) at home is easy with just seven main ingredients: 2 eggs, 1/2 cup granulated sugar, 1/4 cup melted butter, 3 tablespoons fresh milk/evaporated milk, 1/2 teaspoon vanilla extract, a pinch of salt, and 1/2 cup all-purpose flour. Additional tips: If you don't have a waffle cone maker, you can use a non-stick pan over low heat. Pour the batter into a pan and spread it thinly. Wait until it's golden brown, then flip it over. While it's still very hot, roll it into a cone. Step 2: For The Filling: Materials Ingredients: Raw cashew nuts (1.5 cups) (soaked in hot water overnight or boiled until softened (6-8) minutes), ripe mango flesh (2 cups) (diced and frozen), thick coconut milk or plant-based milk (such as almond milk/soy milk) (1 cup), maple syrup or honey (1/2 cup) (adjust to taste depending on the sweetness of the mango), vanilla extract (1 teaspoon) and a pinch of salt. Key Preparation Directions Instructions Methods: 1. Blend the main ingredient: Blend the softened, boiled cashew nuts with coconut milk or plant-based milk until smooth. 2. Blend the mango pulp: Combine the frozen ripe mango pulp, syrup, vanilla extract, and salt in a blender and blend until smooth. 3. Freezing: Pour the mixture into a container with a tight-fitting lid and freeze for about (4-5) hours. 4. Preventing Ice Crystals (Important): During the first (2) hours, take it out and stir with a fork or use a hand mixer every (30) minutes to keep the ice cream smooth. Summary Summation Notes: This vegan cashew ice cream recipe is smooth and creamy, easy to make without a blender, and offers a perfect blend of rich, nutty cashew flavor and the sweet and tangy taste of mango. Additional tips: - And the finally then You can eat it and Sell it to the Merchant or Customer with Who people you Know Knew known, i hope you have fun and enjoy it. Where can i you me buy it, Where to Buy, Where to find it: Internet Online, Supermarkets. Widely available from street food stalls, especially in durian-growing regions like, and at markets. Online: Easily ordered from platforms like Abcdefg in various grades and sizes. Caution Warning: Precautions: Appropriate dosage: Consume about a handful (or approximately 15-20 pieces) per day to avoid excessive energy intake. Avoid processed ingredients: Choose naturally baked varieties without added salt or sugar for maximum benefit. Key Additional Tips Profit Useful Benefit Available Nutrition : Cardiovascular health: Rich in monounsaturated and polyunsaturated fats, which help lower bad cholesterol (LDL) and increase good cholesterol (HDL) in the bloodstream. Blood sugar control: Low glycemic index and high in fiber, helping slow sugar absorption and reducing the risk of diabetes. Eye health: Contains lutein and zeaxanthin, which help protect the eyes from blue light and reduce the risk of macular degeneration. Strengthens bones: Contains magnesium, phosphorus, and copper, which play an important role in increasing bone density and preventing osteoporosis. Nourishes the brain: Rich in B vitamins and various minerals that support nervous system function and memory. Cashew nuts are a super healthy nut, rich in healthy fats (HDL), protein, iron, and antioxidants. They help support heart health, control blood sugar levels, and strengthen bones. They should be consumed in moderation to control calorie intake. And the finally then You can eat it and Sell it to the Merchant or Customer with Who people you Know Knew known, i hope you have fun and enjoy it.
ClickMeSeeAllFull
ClickMeSeeOnMoreDetail
ClickMeSeeOnMorePictureImage
ClickMeSeeOnMoreVideo
Vegetable: Processer Processed Processing food Menu: 7.Cashew Nut Ice Cream Sandwiches
Method: All Works:Cashew Nut Ice Cream Sandwiches
Method: How to make made cook: Recipe Procedure: Cashew Nut Ice Cream Sandwiches Step 1: For the Dough: Materials Ingredients: Ingredients (for 5-7 pieces): 250 grams all-purpose flour, 2 teaspoons baking powder, 1/4 teaspoon salt, 3 large eggs, 100 grams granulated sugar, 380 milliliters unsweetened milk, 100 grams melted unsalted butter (or use vegetable oil), 2 teaspoons vanilla extract. Key Preparation Directions Instructions Methods: 1. Prepare the dry ingredients: Sift together the all-purpose flour and baking powder, followed by the salt. Set aside. 2. Combine the wet ingredients: In another mixing bowl, beat the eggs with the sugar and vanilla extract until the sugar dissolves. Add the milk and melted butter and stir until well combined. 3. Mixing the batter: Pour the liquid mixture into the bowl of flour. Gradually use a whisk to mix until smooth and lump-free. It's recommended to let the batter rest in the refrigerator for about 15-20 minutes; this will help the waffles become softer and fluffier. 4. Baking Waffles: Lightly butter the waffle iron. Spoon the batter into the waffle iron, shaping it as desired, or pour the batter directly into the waffle iron (be careful not to overfill). Cover and bake for about 3-4 minutes, or until golden brown. Remove and let cool on a wire rack to maintain a crispy exterior and soft interior. Place the ice cream in the center of one waffle and cover with another waffle. Refrigerate to set. Once the waffle and ice cream have set to your liking, serve. Summary Summation Notes: Making delicious, fluffy, and creamy milk waffles is easy! Simply prepare all-purpose flour, fresh milk, eggs, and melted butter. Mix everything together until smooth, let the batter rest for 15 minutes, then pour it into a greased waffle maker and cook until golden brown. Additional tips: - Step 2: For The Filling: Materials Ingredients: Raw cashew nuts (1.5 cups) (soaked in hot water overnight or boiled until softened (6-8) minutes), ripe mango flesh (2 cups) (diced and frozen), thick coconut milk or plant-based milk (such as almond milk/soy milk) (1 cup), maple syrup or honey (1/2 cup) (adjust to taste depending on the sweetness of the mango), vanilla extract (1 teaspoon) and a pinch of salt. Key Preparation Directions Instructions Methods: 1. Blend the main ingredient: Blend the softened, boiled cashew nuts with coconut milk or plant-based milk until smooth. 2. Blend the mango pulp: Combine the frozen ripe mango pulp, syrup, vanilla extract, and salt in a blender and blend until smooth. 3. Freezing: Pour the mixture into a container with a tight-fitting lid and freeze for about (4-5) hours. 4. Preventing Ice Crystals (Important): During the first (2) hours, take it out and stir with a fork or use a hand mixer every (30) minutes to keep the ice cream smooth. Summary Summation Notes: This vegan cashew ice cream recipe is smooth and creamy, easy to make without a blender, and offers a perfect blend of rich, nutty cashew flavor and the sweet and tangy taste of mango. Additional tips: - And the finally then You can eat it and Sell it to the Merchant or Customer with Who people you Know Knew known, i hope you have fun and enjoy it. Where can i you me buy it, Where to Buy, Where to find it: Internet Online, Supermarkets. Widely available from street food stalls, especially in durian-growing regions like, and at markets. Online: Easily ordered from platforms like Abcdefg in various grades and sizes. Caution Warning: Precautions: Appropriate dosage: Consume about a handful (or approximately 15-20 pieces) per day to avoid excessive energy intake. Avoid processed ingredients: Choose naturally baked varieties without added salt or sugar for maximum benefit. Key Additional Tips Profit Useful Benefit Available Nutrition : Cardiovascular health: Rich in monounsaturated and polyunsaturated fats, which help lower bad cholesterol (LDL) and increase good cholesterol (HDL) in the bloodstream. Blood sugar control: Low glycemic index and high in fiber, helping slow sugar absorption and reducing the risk of diabetes. Eye health: Contains lutein and zeaxanthin, which help protect the eyes from blue light and reduce the risk of macular degeneration. Strengthens bones: Contains magnesium, phosphorus, and copper, which play an important role in increasing bone density and preventing osteoporosis. Nourishes the brain: Rich in B vitamins and various minerals that support nervous system function and memory. Cashew nuts are a super healthy nut, rich in healthy fats (HDL), protein, iron, and antioxidants. They help support heart health, control blood sugar levels, and strengthen bones. They should be consumed in moderation to control calorie intake. And the finally then You can eat it and Sell it to the Merchant or Customer with Who people you Know Knew known, i hope you have fun and enjoy it.
ClickMeSeeAllFull
ClickMeSeeOnMoreDetail
ClickMeSeeOnMorePictureImage
ClickMeSeeOnMoreVideo
Vegetable: Processer Processed Processing food Menu: 8.Cashew Nut Tart Shell
Method: All Works:Cashew Nut Tart Shell
Method: How to make made cook: Recipe Procedure: Cashew Nut Tart Shell Step 1: For the Dough: Materials Ingredients: Ingredients (for 6-8 pieces) Tart Dough Ingredients All-purpose flour: 150 g Unsalted butter (softened at room temperature): 75 g Icing sugar: 40 g Eggs (size 2): 1-2 eggs (beaten lightly) Vanilla extract: 1-2 teaspoons Salt: 1-8 teaspoons Milk Filling Ingredients Unsweetened fresh milk: 120 ml Evaporated milk: 40 ml Egg (size 2): 1 Sugar: 30 g (adjust as needed) Vanilla extract: 1-2 teaspoons Roasted cashews: finely ground (to taste) Key Preparation Directions Instructions Methods: 1. Sift together the all-purpose flour, icing sugar, and salt. 2. Add the butter and use your hands or a fork to knead the butter and flour together until it resembles granulated sand. Add the egg and vanilla extract and continue kneading until it forms a ball. Then wrap it in plastic wrap and refrigerate for 30 minutes. 3. Roll the dough into a thin sheet about 1/4 inch wide. Line the tart pan with the dough. Prick the bottom of the dough with a fork. 4. Bake at 180 degrees Celsius for about 10 minutes (without filling), then remove and let it cool. Summary Summation Notes: Milk tarts are easy to make by preparing a crispy, buttery tart crust and a smooth, creamy milk filling. You can choose to use a Hong Kong-style milk tart recipe with just the right amount of sweetness, or adjust the quantity of the tart crusts... Additional tips: - Step 2: For The Filling: Materials Ingredients: Ingredients (for 6-8 pieces) Tart Dough Ingredients All-purpose flour: 150 g Unsalted butter (softened at room temperature): 75 g Icing sugar: 40 g Eggs (size 2): 1-2 eggs (beaten lightly) Vanilla extract: 1-2 teaspoons Salt: 1-8 teaspoons Milk Filling Ingredients Unsweetened fresh milk: 120 ml Evaporated milk: 40 ml Egg (size 2): 1 Sugar: 30 g (adjust as needed) Vanilla extract: 1-2 teaspoons Roasted cashews: finely ground (to taste) Key Preparation Directions Instructions Methods: 1. Combine fresh milk, evaporated milk, sugar, vanilla extract, and cashew nuts in a pot over low heat. Stir until the sugar dissolves. Turn off the heat and let it cool slightly. 2. Beat the eggs until lightly broken. Gradually pour the warm milk mixture into the beaten eggs, stirring until well combined. 3. Strain the mixture through a fine-mesh sieve 1-2 times to ensure a smooth texture and remove air bubbles. 4. Assembly and Baking: 4.1 Pour the fresh milk filling mixture into the prepared tart shells. 4.2 Bake in a preheated oven at 175-180 degrees Celsius (top and bottom heat) for 15-20 minutes. 4.3 Observe until the tart filling has set and turned a beautiful golden color. Remove from the oven and let cool. Refrigerating before serving will enhance the refreshing taste. Summary Summation Notes: Milk tarts are easy to make by preparing a crispy, buttery tart crust and a smooth, creamy milk filling. You can choose to use a Hong Kong-style milk tart recipe with just the right amount of sweetness, or adjust the quantity of the tart crusts... Additional tips: - And the finally then You can eat it and Sell it to the Merchant or Customer with Who people you Know Knew known, i hope you have fun and enjoy it. Where can i you me buy it, Where to Buy, Where to find it: Internet Online, Supermarkets. Widely available from street food stalls, especially in durian-growing regions like, and at markets. Online: Easily ordered from platforms like Abcdefg in various grades and sizes. Caution Warning: Precautions: Appropriate dosage: Consume about a handful (or approximately 15-20 pieces) per day to avoid excessive energy intake. Avoid processed ingredients: Choose naturally baked varieties without added salt or sugar for maximum benefit. Key Additional Tips Profit Useful Benefit Available Nutrition : Cardiovascular health: Rich in monounsaturated and polyunsaturated fats, which help lower bad cholesterol (LDL) and increase good cholesterol (HDL) in the bloodstream. Blood sugar control: Low glycemic index and high in fiber, helping slow sugar absorption and reducing the risk of diabetes. Eye health: Contains lutein and zeaxanthin, which help protect the eyes from blue light and reduce the risk of macular degeneration. Strengthens bones: Contains magnesium, phosphorus, and copper, which play an important role in increasing bone density and preventing osteoporosis. Nourishes the brain: Rich in B vitamins and various minerals that support nervous system function and memory. Cashew nuts are a super healthy nut, rich in healthy fats (HDL), protein, iron, and antioxidants. They help support heart health, control blood sugar levels, and strengthen bones. They should be consumed in moderation to control calorie intake. And the finally then You can eat it and Sell it to the Merchant or Customer with Who people you Know Knew known, i hope you have fun and enjoy it.
ClickMeSeeAllFull
ClickMeSeeOnMoreDetail
ClickMeSeeOnMorePictureImage
ClickMeSeeOnMoreVideo
Vegetable: Processer Processed Processing food Menu: 9.Cashew Nut Puff Pastry
Method: All Works:Cashew Nut Puff Pastry
Method: How to make made cook: Recipe Procedure: Cashew Nut Puff Pastry Step 1: For the Dough: Materials Ingredients: All-purpose flour: 350 g. Unsalted butter (melted): 30 g. Very cold water: 180 ml. Salt: (1) teaspoon. Butter layer mixture (for rolling): Pastry margarine or pie butter: 250 g. Filling (choose as desired): Savory filling: Chicken, BBQ pork, tuna. Sweet filling: Pineapple, taro paste, apple. Key Preparation Directions Instructions Methods: 1. Dough preparation: Combine all-purpose flour, salt, melted unsalted butter, and ice-cold water in a mixing bowl. Knead until smooth and well-formed. Wrap in plastic wrap and refrigerate for 30 minutes. 2. Prepare the butter: Roll or pound the pie butter into a flat rectangular sheet. Refrigerate until the butter is slightly set (but not too soft). 3. Laminating: Take the rested dough and roll it into a rectangle about twice the size of the butter. Place the butter in the center, then fold both sides of the dough over the butter, completely sealing the seam. Use a rolling pin to roll the dough lengthwise, then fold it into three sections (folding the left and right sides towards each other). Wrap in plastic and refrigerate for 20 minutes. Repeat the "rolling and folding" process 3-4 times to create layers of dough. 4. Shaping and Filling: Roll out the dough to a thickness of about 0.5 cm. Use a circular cutter to cut out circles. Spoon the filling into the center. Lightly brush the edges with water. Fold in half to form a semicircle, square, or other desired shape. Press the edges together with a fork to seal. Baking: Brush the puff pastry tops with a light egg yolk and milk mixture for a beautiful shine. Bake at 200°C for approximately 15-20 minutes, or until golden brown and crispy. Summary Summation Notes: Making puff pastry is easy. Simply prepare the outer dough and butter for rolling. Roll and fold the dough alternately to create a crispy, fluffy layer. Cut into circles, add the filling, fold in half, and bake until golden brown and fragrant. Additional tips: - Step 2: For The Filling: Materials Ingredients: Savory Puff Filling (Chicken / Tuna / Mushroom Cashew) This style of filling has a savory, spiced flavor that pairs well with the crispy puff pastry. Ingredients: coarsely chopped roasted cashews (100) grams; cooked meat or finely chopped vegetables such as cooked chicken, button mushrooms, or carrots (150) grams; finely chopped onion (50) grams; butter (1) tablespoon; fresh milk or whipped cream (3) tablespoons; salt and black pepper (for seasoning). Key Preparation Directions Instructions Methods: 1. Heat a pan over medium heat, add butter and let it melt. Then add the chopped onion and sauté until translucent. 2. Add the chopped meat or vegetables and stir-fry until well combined. 3. Add fresh milk and season with salt and black pepper. 4. Turn off the heat, then add the cashew nuts and mix well. (Let the filling cool completely before wrapping it in puff pastry.) Step 2.1: For The Filling: Materials Ingredients: Sweet Puff Filling (Caramel / Cashew Cream) A rich, creamy sweet filling with a caramel aroma, perfect for a sweet snack. Ingredients: Roasted cashews, coarsely chopped (150) grams, unsalted butter (2) tablespoons, brown sugar or coconut sugar (5) tablespoons, evaporated milk (2) tablespoons, cornstarch (1) teaspoon (dissolved in a little water to thicken the filling). Key Preparation Directions Instructions Methods: 1. Heat a pan over low heat. Add butter, brown sugar, and evaporated milk. Simmer until the mixture melts, combines, and begins to thicken. 2. Add the cornstarch dissolved in water and stir quickly until the sauce thickens. 3. Turn off the heat, add the cashew nuts and toss to coat them completely with the sauce. (Let them cool completely before using them as a filling.) Summary Summation Notes: When making cashew nut filling for puff pastries (such as chicken puffs, mushroom puffs, or sweet puffs), coarsely chopped cashews are typically used as the main ingredient to achieve a crunchy texture and a nutty aroma. Additional tips: Cashew nuts should be roasted or toasted until golden brown and fragrant before using them as filling. Coarsely chopping or grinding the cashew nuts will help prevent the filling from easily separating when cutting the puff pastry. For ideas on ready-made puff pastry, you can find more information in the vegan dessert recipe guide. And the finally then You can eat it and Sell it to the Merchant or Customer with Who people you Know Knew known, i hope you have fun and enjoy it. Where can i you me buy it, Where to Buy, Where to find it: Internet Online, Supermarkets. Widely available from street food stalls, especially in durian-growing regions like, and at markets. Online: Easily ordered from platforms like Abcdefg in various grades and sizes. Caution Warning: Precautions: Appropriate dosage: Consume about a handful (or approximately 15-20 pieces) per day to avoid excessive energy intake. Avoid processed ingredients: Choose naturally baked varieties without added salt or sugar for maximum benefit. Key Additional Tips Profit Useful Benefit Available Nutrition : Cardiovascular health: Rich in monounsaturated and polyunsaturated fats, which help lower bad cholesterol (LDL) and increase good cholesterol (HDL) in the bloodstream. Blood sugar control: Low glycemic index and high in fiber, helping slow sugar absorption and reducing the risk of diabetes. Eye health: Contains lutein and zeaxanthin, which help protect the eyes from blue light and reduce the risk of macular degeneration. Strengthens bones: Contains magnesium, phosphorus, and copper, which play an important role in increasing bone density and preventing osteoporosis. Nourishes the brain: Rich in B vitamins and various minerals that support nervous system function and memory. Cashew nuts are a super healthy nut, rich in healthy fats (HDL), protein, iron, and antioxidants. They help support heart health, control blood sugar levels, and strengthen bones. They should be consumed in moderation to control calorie intake. And the finally then You can eat it and Sell it to the Merchant or Customer with Who people you Know Knew known, i hope you have fun and enjoy it.
ClickMeSeeAllFull
ClickMeSeeOnMoreDetail
ClickMeSeeOnMorePictureImage
ClickMeSeeOnMoreVideo
Vegetable: Processer Processed Processing food Menu: 10.Cashew Nut Croissant
Method: All Works: Cashew Nut Croissant
Method: How to make made cook: Recipe Procedure: Cashew Nut Croissant Step 1: For the Dough: Materials Ingredients: 500 grams of bread flour or French flour (T55), 10 grams of yeast, 275 milliliters of cold unsweetened milk, and 250 grams of unsalted butter for rolling. Egg (for brushing the top) Key Preparation Directions Instructions Methods: 1. Kneading the Dough: 1.1 Mix flour, yeast, sugar, salt, milk, and a little butter. Knead until smooth and well combined. 1.2 Gather the dough into a ball, wrap it in plastic wrap, and refrigerate for 1-2 hours or overnight. 2. Lamination & Tourage: 2.1 Roll the dough into a rectangular sheet. Place the unsalted butter (pounded and rolled into a sheet) in the center. 2.2 Fold the dough to completely enclose the butter. Roll the dough into a long sheet, then fold it again like an envelope (Single Fold). 2.3 Repeat this rolling and folding process 2-3 more times, refrigerating the dough for 30 minutes between rounds to prevent the butter from melting. 3. Filling and Shaping 3.1 Roll the dough into a thin sheet about 1/4 cm thick. Cut into isosceles triangles. 3.2 Place your desired filling at the base of each triangle, such as chocolate bars, almond cream, or custard cream. 3.3 Roll the dough from the base to the pointed end, then bend the ends inwards to form a crescent shape. 4. Resting and Baking: 4.1 Let the dough rest at room temperature or in a proofing cabinet until it rises to about 1.5 - 2 times its original size. 4.2 Lightly brush the top with an egg and milk mixture. Bake at 190-200 degrees Celsius for about 15-20 minutes, or until golden brown and crispy. Summary Summation Notes: - Additional tips: - Step 2: For The Filling: Materials Ingredients: Savory Puff Filling (Chicken / Tuna / Mushroom Cashew) This style of filling has a savory, spiced flavor that pairs well with the crispy puff pastry. Ingredients: coarsely chopped roasted cashews (100) grams; cooked meat or finely chopped vegetables such as cooked chicken, button mushrooms, or carrots (150) grams; finely chopped onion (50) grams; butter (1) tablespoon; fresh milk or whipped cream (3) tablespoons; salt and black pepper (for seasoning). Key Preparation Directions Instructions Methods: 1. Heat a pan over medium heat, add butter and let it melt. Then add the chopped onion and sauté until translucent. 2. Add the chopped meat or vegetables and stir-fry until well combined. 3. Add fresh milk and season with salt and black pepper. 4. Turn off the heat, then add the cashew nuts and mix well. (Let the filling cool completely before wrapping it in puff pastry.) Step 2.1: For The Filling: Materials Ingredients: Sweet Puff Filling (Caramel / Cashew Cream) A rich, creamy sweet filling with a caramel aroma, perfect for a sweet snack. Ingredients: Roasted cashews, coarsely chopped (150) grams, unsalted butter (2) tablespoons, brown sugar or coconut sugar (5) tablespoons, evaporated milk (2) tablespoons, cornstarch (1) teaspoon (dissolved in a little water to thicken the filling). Key Preparation Directions Instructions Methods: 1. Heat a pan over low heat. Add butter, brown sugar, and evaporated milk. Simmer until the mixture melts, combines, and begins to thicken. 2. Add the cornstarch dissolved in water and stir quickly until the sauce thickens. 3. Turn off the heat, add the cashew nuts and toss to coat them completely with the sauce. (Let them cool completely before using them as a filling.) Summary Summation Notes: When making cashew nut filling for puff pastries (such as chicken puffs, mushroom puffs, or sweet puffs), coarsely chopped cashews are typically used as the main ingredient to achieve a crunchy texture and a nutty aroma. Additional tips: Cashew nuts should be roasted or toasted until golden brown and fragrant before using them as filling. Coarsely chopping or grinding the cashew nuts will help prevent the filling from easily separating when cutting the puff pastry. For ideas on ready-made puff pastry, you can find more information in the vegan dessert recipe guide. And the finally then You can eat it and Sell it to the Merchant or Customer with Who people you Know Knew known, i hope you have fun and enjoy it. Where can i you me buy it, Where to Buy, Where to find it: Internet Online, Supermarkets. Widely available from street food stalls, especially in durian-growing regions like, and at markets. Online: Easily ordered from platforms like Abcdefg in various grades and sizes. Caution Warning: Precautions: Appropriate dosage: Consume about a handful (or approximately 15-20 pieces) per day to avoid excessive energy intake. Avoid processed ingredients: Choose naturally baked varieties without added salt or sugar for maximum benefit. Key Additional Tips Profit Useful Benefit Available Nutrition : Cardiovascular health: Rich in monounsaturated and polyunsaturated fats, which help lower bad cholesterol (LDL) and increase good cholesterol (HDL) in the bloodstream. Blood sugar control: Low glycemic index and high in fiber, helping slow sugar absorption and reducing the risk of diabetes. Eye health: Contains lutein and zeaxanthin, which help protect the eyes from blue light and reduce the risk of macular degeneration. Strengthens bones: Contains magnesium, phosphorus, and copper, which play an important role in increasing bone density and preventing osteoporosis. Nourishes the brain: Rich in B vitamins and various minerals that support nervous system function and memory. Cashew nuts are a super healthy nut, rich in healthy fats (HDL), protein, iron, and antioxidants. They help support heart health, control blood sugar levels, and strengthen bones. They should be consumed in moderation to control calorie intake. And the finally then You can eat it and Sell it to the Merchant or Customer with Who people you Know Knew known, i hope you have fun and enjoy it.
ClickMeSeeAllFull
ClickMeSeeOnMoreDetail
ClickMeSeeOnMorePictureImage
ClickMeSeeOnMoreVideo
Vegetable: Processer Processed Processing food Menu: 1.Almond Nut Milk Whip Cream Smoothie Shake
Method: All Works: Almond Nut Milk Whip Cream Smoothie Shake
Method: How to make made cook: Recipe Procedure: Almond Nut Milk Whip Cream Smoothie Shake Materials Ingredients: Ingredients: 1 cup raw almonds, 2-3 cups water (for soaking almonds), 3 cups warm boiled water/drinking water (for the first blending), 3 ounces unsweetened milk (adjust to your liking), 1-2 tablespoons simple syrup or honey (for added sweetness), a pinch of salt (a teaspoon to enhance the flavor), 1-2 cups crushed ice. Key Preparation Directions Instructions Methods: 1. Soaking Almonds: Wash the almonds thoroughly and soak them in water for 8-12 hours, or overnight. Once the kernels have swollen, rinse them again with clean water. (It is recommended to remove the brown outer skin for a smoother appearance.) 2. First blending: Put the soaked almonds into a blender, add clean water, and blend at high speed until smooth and creamy. 3. Filter out the solids: Pour the mixture through a cheesecloth or strainer bag, squeezing out only the concentrated almond milk. (This portion can be stored in the refrigerator for later consumption.) 4. Make an almond milk smoothie: Pour the prepared almond milk (about 4-5 ounces) into a blender along with the fresh milk, syrup, salt, and ice. Blend until smooth. Pour into a glass and drink immediately. Summary Summation Notes: Making a delicious and smooth almond milk smoothie is easy. Simply soak almonds in water overnight, then blend them with clean water until smooth. Strain out the pulp, then blend the resulting almond milk with fresh milk and ice. The result will be a fragrant, creamy, and perfectly balanced flavor. Additional tips: - And the finally then You can eat it and Sell it to the Merchant or Customer with Who people you Know Knew known, i hope you have fun and enjoy it. Where can i you me buy it, Where to Buy, Where to find it: Internet Online, Supermarkets. Widely available from street food stalls, especially in durian-growing regions like, and at markets. Online: Easily ordered from platforms like Abcdefg in various grades and sizes. Caution Warning: Precautions: - Key Additional Tips Profit Useful Benefit Available Nutrition : Almonds are a superfood rich in healthy fats, vitamin E, protein, and antioxidants. Their main benefits include helping to control blood sugar levels, lowering bad cholesterol (LDL), promoting heart health, and aiding in weight management when consumed in appropriate amounts. Lower cholesterol and support heart health: Rich in monounsaturated fats, which help lower levels of bad cholesterol (LDL) in the blood vessels, reducing the risk of heart disease. Control blood sugar: High in magnesium, which aids in insulin function and controls blood sugar levels, preventing diabetes. Aid in weight management: Although high in calories, eating almonds as a snack helps you feel full longer, reducing cravings between meals. Nourishes the brain and eyes: High in vitamin E and omega-3, it helps strengthen the nervous system, prevent memory loss, and slow down macular degeneration. Antioxidant and anti-aging: The vitamin E in almonds acts as an antioxidant, protecting body cells and nourishing the skin. Recommended daily intake: For maximum benefit and to avoid weight gain, consume approximately one handful, or about 23-24 pieces, per day (approximately 160-170 kilocalories). Choose the naturally baked version, without added salt or butter. And the finally then You can eat it and Sell it to the Merchant or Customer with Who people you Know Knew known, i hope you have fun and enjoy it.
ClickMeSeeAllFull
ClickMeSeeOnMoreDetail
ClickMeSeeOnMorePictureImage
ClickMeSeeOnMoreVideo
Vegetable: Processer Processed Processing food Menu: 2.Almond Nut Yogurt
Method: All Works: Almond Nut Yogurt
Method: How to make made cook: Recipe Procedure: Almond Nut Yogurt Materials Ingredients: Almond milk: 2 cups (choose unsweetened) Unsweetened fresh milk (or pasteurized cow's milk): 1 cup Yogurt starter: 3-4 tablespoons (use any brand of plain yogurt without added gelatin) Finely ground almonds (to a granulated powder size) (optional) Key Preparation Directions Instructions Methods: 1. Warm the milk: Pour the almond milk and fresh milk together into a pot. Heat over low heat until the milk is warm (test the temperature by dipping a clean finger in; it should be lukewarm, not hot enough to burn your finger). Then turn off the heat. 2. Mixing the starter culture: Scoop the yogurt starter into a small bowl with all the remaining ingredients, then add a little of the prepared warm milk. Stir until the yogurt is well dissolved. Then pour everything back into the pot of milk and stir gently until smooth. 3. Pour into a container: Pour the milk mixture into a glass or ceramic container with a tight-fitting lid. If you prefer a Greek yogurt-like texture, you can line the container with cheesecloth to separate the whey protein. 4. Fermentation Process: Seal the container tightly and store it in a warm, draft-free place (such as a sealed oven or cupboard) for 8-12 hours to allow the microorganisms to fully activate. Refrigeration: Once the fermentation time is complete and the yogurt has set and has a slightly sour taste, refrigerate it for another 3-4 hours before serving to allow the yogurt to set even better. Summary Summation Notes: Making almond milk yogurt is a blend of almond milk and fresh milk to create a smooth, creamy texture and provide the benefits of both the nuts and the milk. It's quick to prepare and ready to eat after just letting it ferment overnight. Additional tips: Tip: For a thicker yogurt texture, pour it into a cheesecloth and hang it in the refrigerator for 1-2 hours to allow the whey to drip out. This will result in a richer, creamier Greek yogurt. And the finally then You can eat it and Sell it to the Merchant or Customer with Who people you Know Knew known, i hope you have fun and enjoy it. Where can i you me buy it, Where to Buy, Where to find it: Internet Online, Supermarkets. Widely available from street food stalls, especially in durian-growing regions like, and at markets. Online: Easily ordered from platforms like Abcdefg in various grades and sizes. Caution Warning: Precautions: - Key Additional Tips Profit Useful Benefit Available Nutrition : Almonds are a superfood rich in healthy fats, vitamin E, protein, and antioxidants. Their main benefits include helping to control blood sugar levels, lowering bad cholesterol (LDL), promoting heart health, and aiding in weight management when consumed in appropriate amounts. Lower cholesterol and support heart health: Rich in monounsaturated fats, which help lower levels of bad cholesterol (LDL) in the blood vessels, reducing the risk of heart disease. Control blood sugar: High in magnesium, which aids in insulin function and controls blood sugar levels, preventing diabetes. Aid in weight management: Although high in calories, eating almonds as a snack helps you feel full longer, reducing cravings between meals. Nourishes the brain and eyes: High in vitamin E and omega-3, it helps strengthen the nervous system, prevent memory loss, and slow down macular degeneration. Antioxidant and anti-aging: The vitamin E in almonds acts as an antioxidant, protecting body cells and nourishing the skin. Recommended daily intake: For maximum benefit and to avoid weight gain, consume approximately one handful, or about 23-24 pieces, per day (approximately 160-170 kilocalories). Choose the naturally baked version, without added salt or butter. And the finally then You can eat it and Sell it to the Merchant or Customer with Who people you Know Knew known, i hope you have fun and enjoy it.
ClickMeSeeAllFull
ClickMeSeeOnMoreDetail
ClickMeSeeOnMorePictureImage
ClickMeSeeOnMoreVideo
Vegetable: Processer Processed Processing food Menu: 3.Almond Nut Pudding
Method: All Works: Almond Nut Pudding
Method: How to make made cook: Recipe Procedure: Almond Nut Pudding Materials Ingredients: Almond milk (unsweetened): \(500\) ml Whipping cream: \(100\) ml Gelatin sheets: \(4\) - \(5\) sheets or gelatin powder: \(1.5\) tablespoons Honey or granulated sugar: \(2\) tablespoons Almond extract: \(\frac{1}{2}\) teaspoons (for a stronger aroma) A pinch of salt (to taste) Fresh milk (to taste) Finely ground almonds (to taste) Additional: Roasted soybean powder (kinako) or fresh fruit for garnish Key Preparation Directions Instructions Methods: 1. Prepare the gelatin: Soak the gelatin sheets in ice water (mixed with ice) for about (5) - (10) minutes until softened. (If using gelatin powder, mix with a little water and let it swell.) 2. Making Almond Milk: Pour almond milk, whipping cream, honey (or sugar), salt, ground almonds, and plain milk into a pot. Heat over medium-low heat, stirring gently until it starts to steam (be careful not to let it boil, as the milk will curdle). Turn off the heat. 3. Mix everything together: Squeeze all the water out of the gelatin sheets. Add to the pot of warm almond milk. Stir until the gelatin is completely dissolved. Add the almond flavoring and stir well. Strain the pudding: Pour the mixture through a fine-mesh sieve (1) - (2) once to ensure a smooth, bubble-free pudding. 4. Chill: Scoop into prepared cups or molds, let cool for a while, then refrigerate (regular compartment) for at least (2) - (3) hours until set. Summary Summation Notes: Making almond pudding (milk tofu/blanchamnèe style) uses only 5 main ingredients: almond milk, whipping cream, gelatin, honey (or sugar), and almond extract. The preparation and chilling time is approximately 2-3 hours. Additional tips: Once the pudding has set, you can drizzle it with syrup, honey, or sprinkle it with kinako (roasted soybean flour) before serving. And the finally then You can eat it and Sell it to the Merchant or Customer with Who people you Know Knew known, i hope you have fun and enjoy it. Where can i you me buy it, Where to Buy, Where to find it: Internet Online, Supermarkets. Widely available from street food stalls, especially in durian-growing regions like, and at markets. Online: Easily ordered from platforms like Abcdefg in various grades and sizes. Caution Warning: Precautions: - Key Additional Tips Profit Useful Benefit Available Nutrition : Almonds are a superfood rich in healthy fats, vitamin E, protein, and antioxidants. Their main benefits include helping to control blood sugar levels, lowering bad cholesterol (LDL), promoting heart health, and aiding in weight management when consumed in appropriate amounts. Lower cholesterol and support heart health: Rich in monounsaturated fats, which help lower levels of bad cholesterol (LDL) in the blood vessels, reducing the risk of heart disease. Control blood sugar: High in magnesium, which aids in insulin function and controls blood sugar levels, preventing diabetes. Aid in weight management: Although high in calories, eating almonds as a snack helps you feel full longer, reducing cravings between meals. Nourishes the brain and eyes: High in vitamin E and omega-3, it helps strengthen the nervous system, prevent memory loss, and slow down macular degeneration. Antioxidant and anti-aging: The vitamin E in almonds acts as an antioxidant, protecting body cells and nourishing the skin. Recommended daily intake: For maximum benefit and to avoid weight gain, consume approximately one handful, or about 23-24 pieces, per day (approximately 160-170 kilocalories). Choose the naturally baked version, without added salt or butter. And the finally then You can eat it and Sell it to the Merchant or Customer with Who people you Know Knew known, i hope you have fun and enjoy it.
ClickMeSeeAllFull
ClickMeSeeOnMoreDetail
ClickMeSeeOnMorePictureImage
ClickMeSeeOnMoreVideo
Vegetable: Processer Processed Processing food Menu: 4.Almond Nut Bake Butter Cheese Milk
Method: All Works: Almond Nut Bake Butter Cheese Milk
Method: How to make made cook: Recipe Procedure: Almond Nut Bkae Butter Cheese Milk Materials Ingredients: Almonds: (To taste) (Sliced or shelled) Butter (unsalted or salted): 1-2 tablespoons Evaporated milk: 1-2 tablespoons (for added richness) Sugar: 1 teaspoon (adjust to taste) Salt: A pinch (optional if using salted butter) (Optional) Mozzarella cheese or sweetened condensed milk Fresh milk: (To taste) Key Preparation Directions Instructions Methods: 1. Steaming or roasting almonds: Steam or roast the almonds for about 5-10 minutes until soft. 2. Mixing: Place the almonds in a mixing bowl. Add the butter and mix while the almonds are still warm to allow the butter to melt. 3. Seasoning: Add evaporated milk, sugar, fresh milk, and salt. Mix well and taste to your liking. 4. Baked Cheese (for the Almond Baked Cheese recipe): Place the coated almonds in a heat-resistant bowl. Sprinkle with mozzarella cheese and bake in an oven or air fryer until the cheese is melted. Summary Summation Notes: Buttered baked almonds (or almonds coated in butter) are an easy-to-make snack that is fragrant, sweet, buttery, and salty, with the authentic taste of almonds. They are easy to make at home, or you can add cheese for extra deliciousness. Additional tips: - And the finally then You can eat it and Sell it to the Merchant or Customer with Who people you Know Knew known, i hope you have fun and enjoy it. Where can i you me buy it, Where to Buy, Where to find it: Internet Online, Supermarkets. Widely available from street food stalls, especially in durian-growing regions like, and at markets. Online: Easily ordered from platforms like Abcdefg in various grades and sizes. Caution Warning: Precautions: - Key Additional Tips Profit Useful Benefit Available Nutrition : Almonds are a superfood rich in healthy fats, vitamin E, protein, and antioxidants. Their main benefits include helping to control blood sugar levels, lowering bad cholesterol (LDL), promoting heart health, and aiding in weight management when consumed in appropriate amounts. Lower cholesterol and support heart health: Rich in monounsaturated fats, which help lower levels of bad cholesterol (LDL) in the blood vessels, reducing the risk of heart disease. Control blood sugar: High in magnesium, which aids in insulin function and controls blood sugar levels, preventing diabetes. Aid in weight management: Although high in calories, eating almonds as a snack helps you feel full longer, reducing cravings between meals. Nourishes the brain and eyes: High in vitamin E and omega-3, it helps strengthen the nervous system, prevent memory loss, and slow down macular degeneration. Antioxidant and anti-aging: The vitamin E in almonds acts as an antioxidant, protecting body cells and nourishing the skin. Recommended daily intake: For maximum benefit and to avoid weight gain, consume approximately one handful, or about 23-24 pieces, per day (approximately 160-170 kilocalories). Choose the naturally baked version, without added salt or butter. And the finally then You can eat it and Sell it to the Merchant or Customer with Who people you Know Knew known, i hope you have fun and enjoy it.
ClickMeSeeAllFull
ClickMeSeeOnMoreDetail
ClickMeSeeOnMorePictureImage
ClickMeSeeOnMoreVideo
Vegetable: Processer Processed Processing food Menu: 5.Almond Nut Ice Cream Milk Cone
Method: All Works: Almond Nut Ice Cream Milk Cone
Method: How to make made cook: Recipe Procedure: Almond Nut Ice Cream Milk Cone Step 1: For The Dough: Materials Ingredients: All-purpose flour: (13 - 23) cups; Eggs (size 2): 2; Sugar: (12) cups; Melted unsalted butter: (14) cups; Evaporated milk or fresh milk: 3 tablespoons; Vanilla extract: (12) teaspoons; Salt: (18) teaspoons. Key Preparation Directions Instructions Methods: 1. Mix the ingredients: Beat the eggs and granulated sugar until the sugar dissolves. Add the melted butter, milk, vanilla extract, and salt. Stir well. Add the flour: Sift the all-purpose flour into the mixing bowl. Gently fold until smooth and lump-free. Let the dough rest for about 10-15 minutes. 2. Baking the batter: Spoon the batter into the center of a lightly oiled waffle cone maker. Close the lid and cook until the batter is golden brown. 3. Rolling the cone: Use an ice cream cone rolling tool, place it on the edge of the batter, and quickly roll it into a cone shape while it's still hot. (If left to cool, the batter will become crispy and crack.) 4. Let it cool: Press the tip of the cone down for about 10-15 seconds until it holds its shape. Let it cool completely on a wire rack. You will then have a crispy and delicious ice cream cone ready to scoop in. Summary Summation Notes: Making ice cream cones (waffle cones) is easy. Simply mix flour, sugar, eggs, butter, and milk, whisk until well combined, then pour the mixture onto a waffle maker (or a non-stick pan). Roll it into a thin sheet, fry until golden brown and crispy, then quickly roll it into a cone while still hot, before the batter hardens. Additional tips: - Step 2: For The Filling: Materials Ingredients: Whipping cream 250 ml, unsweetened fresh milk 150 ml, sweetened condensed milk 3-4 tablespoons (adjust to taste), vanilla extract 1 teaspoon, almond extract 1/2 teaspoon, coarsely chopped roasted almonds 1/2 cup (for mixing into the ice cream and for topping), a pinch of salt: 1/8 teaspoon (to balance the sweetness). Coconut milk: (to taste) Key Preparation Directions Instructions Methods: 1. Prepare the almonds: Bake or roast the almonds over low heat until golden and fragrant. Let them cool completely. 2. Prepare the ingredients: Combine whipping cream, fresh milk, condensed milk, vanilla extract, salt, coconut milk, and almond extract in a blender or mixing bowl. Stir well and taste for sweetness. Blend until fluffy. (If using an electric mixer): Use an electric mixer or whisk to beat all the ingredients until fluffy and smooth. Add the almond pieces: Add the prepared roasted almonds and stir to distribute evenly throughout the ice cream. 3. First Freezing: Pour the mixture into a container with a tight-fitting lid. Freeze for approximately 1-2 hours, or until the mixture begins to set. Freeze and Stir: Remove from the freezer and use a fork or spoon to stir the ice cream until well combined (this step prevents ice cream from forming ice crystals). Repeat this process every hour for about 3-4 rounds. 4. Final Freezing Step: Close the lid tightly and freeze overnight until the ice cream is fully solid. Scoop and serve, garnished with toasted almonds. Summary Summation Notes: Making delicious and rich homemade almond ice cream is easy, even without an ice cream maker. Start by blending the milk and whipping cream together. Add vanilla extract and finely ground almonds. Then freeze, stirring hourly to keep it smooth. Garnish with crunchy toasted almonds before serving. Additional tips: For a healthier plant-based ice cream recipe, you can substitute homemade almond milk for cow's milk, adjusting the amount to your desired consistency. And the finally then You can eat it and Sell it to the Merchant or Customer with Who people you Know Knew known, i hope you have fun and enjoy it. Where can i you me buy it, Where to Buy, Where to find it: Internet Online, Supermarkets. Widely available from street food stalls, especially in durian-growing regions like, and at markets. Online: Easily ordered from platforms like Abcdefg in various grades and sizes. Caution Warning: Precautions: - Key Additional Tips Profit Useful Benefit Available Nutrition : Almonds are a superfood rich in healthy fats, vitamin E, protein, and antioxidants. Their main benefits include helping to control blood sugar levels, lowering bad cholesterol (LDL), promoting heart health, and aiding in weight management when consumed in appropriate amounts. Lower cholesterol and support heart health: Rich in monounsaturated fats, which help lower levels of bad cholesterol (LDL) in the blood vessels, reducing the risk of heart disease. Control blood sugar: High in magnesium, which aids in insulin function and controls blood sugar levels, preventing diabetes. Aid in weight management: Although high in calories, eating almonds as a snack helps you feel full longer, reducing cravings between meals. Nourishes the brain and eyes: High in vitamin E and omega-3, it helps strengthen the nervous system, prevent memory loss, and slow down macular degeneration. Antioxidant and anti-aging: The vitamin E in almonds acts as an antioxidant, protecting body cells and nourishing the skin. Recommended daily intake: For maximum benefit and to avoid weight gain, consume approximately one handful, or about 23-24 pieces, per day (approximately 160-170 kilocalories). Choose the naturally baked version, without added salt or butter. And the finally then You can eat it and Sell it to the Merchant or Customer with Who people you Know Knew known, i hope you have fun and enjoy it.
ClickMeSeeAllFull
ClickMeSeeOnMoreDetail
ClickMeSeeOnMorePictureImage
ClickMeSeeOnMoreVideo
Vegetable: Processer Processed Processing food Menu: 6.Almond Nut Ice Cream Sandwiches
Method: All Works: Almond Nut Ice Cream Sandwiches
Method: How to make made cook: Recipe Procedure: Almond Nut Ice Cream Sandwiches Step 1: For The Dough: Materials Ingredients: All-purpose flour: 260 grams (approximately 18 tablespoons) Cornstarch: 60 grams (approximately 4 tablespoons) Unsweetened milk: 360 milliliters (approximately 36 tablespoons) Eggs: 2 Sugar: Less sweet (optional) Melted salted butter: 80 grams (approximately 8 tablespoons) Baking powder: 10 grams (approximately 2 teaspoons) Vanilla extract: 1 teaspoon Key Preparation Directions Instructions Methods: 1. Prepare the dry ingredients: Sift together the all-purpose flour, cornstarch, and baking powder. Set aside. 2. Prepare the liquid mixture: In another bowl, beat the eggs with the sugar and vanilla extract until the sugar dissolves. Then add the milk and melted butter. Stir all the ingredients together until well combined. 3. Mixing the flour: Pour the liquid mixture into the prepared bowl of flour. Use a whisk to mix until the flour is smooth and lump-free. 4. Baking Waffles: Preheat the waffle maker, lightly butter the pan, pour in the batter, cover, and bake for about 2-3 minutes, or until golden brown. Remove 2 waffles from the maker and let them cool. Then, place them in your prepared waffle iron or container. Fill the waffle with ice cream, cover with another waffle (optional), and freeze for about 10 minutes to 1 day to allow the ice cream to set. Then, serve. Summary Summation Notes: Making delicious and rich homemade almond ice cream is easy, even without an ice cream maker. Start by blending the milk and whipping cream together. Add vanilla extract and finely ground almonds. Then freeze, stirring hourly to keep it smooth. Garnish with crunchy toasted almonds before serving. Additional tips: - Step 2: For The Filling: Materials Ingredients: Whipping cream 250 ml, unsweetened fresh milk 150 ml, sweetened condensed milk 3-4 tablespoons (adjust to taste), vanilla extract 1 teaspoon, almond extract 1/2 teaspoon, coarsely chopped roasted almonds 1/2 cup (for mixing into the ice cream and for topping), a pinch of salt: 1/8 teaspoon (to balance the sweetness). Coconut milk: (to taste) Key Preparation Directions Instructions Methods: 1. Prepare the almonds: Bake or roast the almonds over low heat until golden and fragrant. Let them cool completely. 2. Prepare the ingredients: Combine whipping cream, fresh milk, condensed milk, vanilla extract, salt, coconut milk, and almond extract in a blender or mixing bowl. Stir well and taste for sweetness. Blend until fluffy. (If using an electric mixer): Use an electric mixer or whisk to beat all the ingredients until fluffy and smooth. Add the almond pieces: Add the prepared roasted almonds and stir to distribute evenly throughout the ice cream. 3. First Freezing: Pour the mixture into a container with a tight-fitting lid. Freeze for approximately 1-2 hours, or until the mixture begins to set. Freeze and Stir: Remove from the freezer and use a fork or spoon to stir the ice cream until well combined (this step prevents ice cream from forming ice crystals). Repeat this process every hour for about 3-4 rounds. 4. Final Freezing Step: Close the lid tightly and freeze overnight until the ice cream is fully solid. Scoop and serve, garnished with toasted almonds. Summary Summation Notes: Making delicious and rich homemade almond ice cream is easy, even without an ice cream maker. Start by blending the milk and whipping cream together. Add vanilla extract and finely ground almonds. Then freeze, stirring hourly to keep it smooth. Garnish with crunchy toasted almonds before serving. Additional tips: For a healthier plant-based ice cream recipe, you can substitute homemade almond milk for cow's milk, adjusting the amount to your desired consistency. And the finally then You can eat it and Sell it to the Merchant or Customer with Who people you Know Knew known, i hope you have fun and enjoy it. Where can i you me buy it, Where to Buy, Where to find it: Internet Online, Supermarkets. Widely available from street food stalls, especially in durian-growing regions like, and at markets. Online: Easily ordered from platforms like Abcdefg in various grades and sizes. Caution Warning: Precautions: - Key Additional Tips Profit Useful Benefit Available Nutrition : Almonds are a superfood rich in healthy fats, vitamin E, protein, and antioxidants. Their main benefits include helping to control blood sugar levels, lowering bad cholesterol (LDL), promoting heart health, and aiding in weight management when consumed in appropriate amounts. Lower cholesterol and support heart health: Rich in monounsaturated fats, which help lower levels of bad cholesterol (LDL) in the blood vessels, reducing the risk of heart disease. Control blood sugar: High in magnesium, which aids in insulin function and controls blood sugar levels, preventing diabetes. Aid in weight management: Although high in calories, eating almonds as a snack helps you feel full longer, reducing cravings between meals. Nourishes the brain and eyes: High in vitamin E and omega-3, it helps strengthen the nervous system, prevent memory loss, and slow down macular degeneration. Antioxidant and anti-aging: The vitamin E in almonds acts as an antioxidant, protecting body cells and nourishing the skin. Recommended daily intake: For maximum benefit and to avoid weight gain, consume approximately one handful, or about 23-24 pieces, per day (approximately 160-170 kilocalories). Choose the naturally baked version, without added salt or butter. And the finally then You can eat it and Sell it to the Merchant or Customer with Who people you Know Knew known, i hope you have fun and enjoy it.
ClickMeSeeAllFull
ClickMeSeeOnMoreDetail
ClickMeSeeOnMorePictureImage
ClickMeSeeOnMoreVideo
Vegetable: Processer Processed Processing food Menu: 7.Almond Nut Tart Shell
Method: All Works: Almond Nut Tart Shell
Method: How to make made cook: Recipe Procedure: Almond Nut Tart Shell Step 1: For The Dough: Materials Ingredients: Ingredients (for an 8-9 inch tart pan) Tart dough ingredients: 150 grams all-purpose flour, 1-150 grams granulated sugar (to taste), 120 grams unsalted butter (or margarine), 2 eggs, 1 teaspoon baking powder, a pinch of salt Key Preparation Directions Instructions Methods: 1. Sift the flour and baking powder together and set aside. Cream the butter, sugar, and salt together until light and fluffy. Then add the eggs and beat until well combined. 2. Add the sifted flour mixture and gently mix until it forms a dough. 3. Place the dough into the tart pan (a pan with a removable bottom is recommended), spread it evenly, and push it up to the sides of the pan. 4. Bake in a preheated oven at 190°C (375°F) for 8-15 minutes, or until the tart crust is lightly golden. Remove and let cool. Summary Summation Notes: Making Almond Milk Tart (Portuguese style) is a fragrant, sweet, creamy, and crispy dessert that's easy. Simply mix the pie crust and bake until set. Then, simmer fresh milk, butter, and sugar, top with almonds, and bake until golden brown. Additional tips: - Step 2: For The Filling: Materials Ingredients: 150 grams of sliced or halved almonds, 150 milliliters of fresh milk (or plain milk), 100 grams of granulated sugar, 100 grams of unsalted butter, a pinch of salt. Key Preparation Directions Instructions Methods: 1. Place a pot over medium heat. Add the fresh milk, sugar, salt, and butter. Stir constantly until the mixture boils and begins to thicken. 2. Add the almond seeds and stir to combine. Then turn off the heat. 3. Immediately pour the almond milk filling onto the baked tart shells before the filling hardens. Return the tarts to the oven at the same temperature for about 5 minutes, or until the almond topping turns a beautiful golden brown. 4. Let it cool and serve. Remove from the oven, let the tart cool completely, cut into slices, and serve immediately. Summary Summation Notes: Making almond milk tart (Portuguese style) is easy. It's a fragrant, sweet, creamy, and crispy dessert. Simply mix the pie crust and bake until set. Then simmer milk, butter, and sugar, top with almonds, and bake until golden brown. Additional tips: - And the finally then You can eat it and Sell it to the Merchant or Customer with Who people you Know Knew known, i hope you have fun and enjoy it. Where can i you me buy it, Where to Buy, Where to find it: Internet Online, Supermarkets. Widely available from street food stalls, especially in durian-growing regions like, and at markets. Online: Easily ordered from platforms like Abcdefg in various grades and sizes. Caution Warning: Precautions: - Key Additional Tips Profit Useful Benefit Available Nutrition : Almonds are a superfood rich in healthy fats, vitamin E, protein, and antioxidants. Their main benefits include helping to control blood sugar levels, lowering bad cholesterol (LDL), promoting heart health, and aiding in weight management when consumed in appropriate amounts. Lower cholesterol and support heart health: Rich in monounsaturated fats, which help lower levels of bad cholesterol (LDL) in the blood vessels, reducing the risk of heart disease. Control blood sugar: High in magnesium, which aids in insulin function and controls blood sugar levels, preventing diabetes. Aid in weight management: Although high in calories, eating almonds as a snack helps you feel full longer, reducing cravings between meals. Nourishes the brain and eyes: High in vitamin E and omega-3, it helps strengthen the nervous system, prevent memory loss, and slow down macular degeneration. Antioxidant and anti-aging: The vitamin E in almonds acts as an antioxidant, protecting body cells and nourishing the skin. Recommended daily intake: For maximum benefit and to avoid weight gain, consume approximately one handful, or about 23-24 pieces, per day (approximately 160-170 kilocalories). Choose the naturally baked version, without added salt or butter. And the finally then You can eat it and Sell it to the Merchant or Customer with Who people you Know Knew known, i hope you have fun and enjoy it.
ClickMeSeeAllFull
ClickMeSeeOnMoreDetail
ClickMeSeeOnMorePictureImage
ClickMeSeeOnMoreVideo
Vegetable: Processer Processed Processing food Menu: 8.Almond Nut Puff Pastry
Method: All Works: Almond Nut Puff Pastry
Method: How to make made cook: Recipe Procedure: Almond Nut Puff Pastry Step 1: For The Dough: Materials Ingredients: Ingredients: 300 grams all-purpose flour, 35 grams cold unsalted butter (for kneading), 200 grams pastry margarine or butter for rolling, 1/2 teaspoon salt, 150 milliliters ice-cold water. Key Preparation Directions Instructions Methods: 1. Flour preparation: Sift the flour and salt together. Add the chilled unsalted butter and knead until combined. Gradually add and knead with cold water until the dough is smooth and forms a ball. 2. Chill the dough: Wrap it in plastic wrap and refrigerate for 1 hour. 3. Rolling and Folding: Take the chilled dough and roll it into a square sheet. Place a sheet of pastry margarine in the center. Fold the dough over the margarine, covering it completely. Roll the dough into a long sheet and fold it into three sections. (Repeat this step 3-4 times. Let the dough rest in the refrigerator for 20 minutes between rolling sessions.) 4. Shaping: Once the dough is ready, roll it into a thin sheet, cut it into pieces, and fill it with your preferred filling. Then bake at 200-220 degrees Celsius until golden brown and puffed up. Summary Summation Notes: - Additional tips: - Step 2: For The Filling: Materials Ingredients: Almond flour (or almond powder): 1/2 cup unsalted butter (softened at room temperature): 1/4 cup granulated sugar: 1/3 cup large egg (size 2): 1 vanilla extract: 1/2 teaspoon salt: a pinch fresh milk: (to taste) Other ingredients: Ready-made puff pastry: 1 box (approximately 2 sheets) Egg yolk for brushing (mixed with 1 teaspoon water): 1 sliced almonds (for topping) Icing sugar (for decoration) Key Preparation Directions Instructions Methods: 1. Make the almond filling: Beat together the unsalted butter and granulated sugar until light and fluffy. Add the egg and vanilla extract and beat until well combined. Then add the almond flour, Milk and salt. Use a spatula to fold in until smooth and creamy. Set aside. 2. Prepare the puff pastry: Take a pre-made puff pastry sheet out of the refrigerator and let it thaw until soft but still cool. Cut it into pieces of your desired size (e.g., 4 x 4 inch squares). 3. Shaping the puff pastry: Spoon about 1 teaspoon of almond filling onto the center of each pastry sheet. Brush the edges of the pastry with egg yolk, then fold it into a triangle (or place another layer of pastry on top). Use a fork to press the edges of the pastry shut to prevent the filling from leaking out. 4. Decorating and Baking: Brush the puff pastry with a mixture of egg yolk and water. Sprinkle with sliced almonds. Bake in a preheated oven at 190°C (top and bottom heat) for approximately 15-20 minutes, or until the puffs are beautifully puffed up and golden brown. Serving: Let cool on a wire rack, then sprinkle with powdered sugar before serving. Summary Summation Notes: Make delicious and easy almond puff pastry at home using ready-made puff pastry (such as Pepperidge Farm) mixed with a sweet and fragrant almond cream filling (Frangipane). Bake until the pastry is light, crispy, and golden brown. Follow these steps: Additional tips: An air fryer can be used instead of an oven. Set the temperature to 180 degrees Celsius and bake for approximately 10-15 minutes (monitor the color of the dough). If you prefer a French style, you can cut the croissant in half, spread with almond filling, and re-bake it to create an almond croissant. And the finally then You can eat it and Sell it to the Merchant or Customer with Who people you Know Knew known, i hope you have fun and enjoy it. Where can i you me buy it, Where to Buy, Where to find it: Internet Online, Supermarkets. Widely available from street food stalls, especially in durian-growing regions like, and at markets. Online: Easily ordered from platforms like Abcdefg in various grades and sizes. Caution Warning: Precautions: - Key Additional Tips Profit Useful Benefit Available Nutrition : Almonds are a superfood rich in healthy fats, vitamin E, protein, and antioxidants. Their main benefits include helping to control blood sugar levels, lowering bad cholesterol (LDL), promoting heart health, and aiding in weight management when consumed in appropriate amounts. Lower cholesterol and support heart health: Rich in monounsaturated fats, which help lower levels of bad cholesterol (LDL) in the blood vessels, reducing the risk of heart disease. Control blood sugar: High in magnesium, which aids in insulin function and controls blood sugar levels, preventing diabetes. Aid in weight management: Although high in calories, eating almonds as a snack helps you feel full longer, reducing cravings between meals. Nourishes the brain and eyes: High in vitamin E and omega-3, it helps strengthen the nervous system, prevent memory loss, and slow down macular degeneration. Antioxidant and anti-aging: The vitamin E in almonds acts as an antioxidant, protecting body cells and nourishing the skin. Recommended daily intake: For maximum benefit and to avoid weight gain, consume approximately one handful, or about 23-24 pieces, per day (approximately 160-170 kilocalories). Choose the naturally baked version, without added salt or butter. And the finally then You can eat it and Sell it to the Merchant or Customer with Who people you Know Knew known, i hope you have fun and enjoy it.
ClickMeSeeAllFull
ClickMeSeeOnMoreDetail
ClickMeSeeOnMorePictureImage
ClickMeSeeOnMoreVideo
Vegetable: Processer Processed Processing food Menu: 9.Almond Nut Croissant
Method: All Works: Almond Nut Croissant
Method: How to make made cook: Recipe Procedure: Almond Nut Croissant Step 1: For The Dough: Materials Ingredients: Flour: 500 grams of French T55 flour or all-purpose flour (unbleached). Liquid: 140 grams of cold milk + 140 grams of cold water. Sugar: 50 grams of granulated sugar. Yeast: 10 grams of instant yeast. Salt: 10 grams of salt. Butter for mixing in the dough: 30 grams of unsalted butter (room temperature). Butter for rolling in layers: 250 grams of unsalted sheet butter. Key Preparation Directions Instructions Methods: 1. Knead the dough by combining flour, sugar, yeast, salt, fresh milk, and cold water. Knead until it forms a ball. Then add 30 grams of butter (at room temperature) and continue kneading until smooth. Form the dough into a ball, wrap it in plastic wrap, and refrigerate (or freeze) for about 1-2 hours to allow the dough to relax and slow down the yeast activity. Prepare the lock-in butter: Roll 250 grams of unsalted butter into a square sheet on parchment paper. Refrigerate the butter until it remains elastic (not too hard or too soft). 2. Rolling and Folding the Dough (Lamination - the key to making croissants): Take the chilled dough and roll it into a square sheet. Place a slice of butter in the center, then fold the dough from all four sides to completely enclose the butter. Roll the dough into a long sheet and then perform a single fold (fold 3 times). Repeat this process 3 times. After each fold, always refrigerate the dough for about 30 minutes to prevent the butter from melting and seeping through the dough. Cutting and Rolling (Shaping) Roll out the finished dough to a thickness of approximately (3 - 4) millimeters. Cut into isosceles triangles, roll from the base of the triangle up to the pointed tip, pull the end slightly to get a beautiful teardrop shape. 3. Final Proofing: Let the rolled croissants rest at warm room temperature or in a proofing box at a temperature of around 27 - 28°C for about 2 hours. Observe that the dough has risen to about 2 times its original size and the dough is soft and bouncy to the touch. Cut the center of the dough to insert the desired filling, then add the filling and use a fork to crimp the edges of the dough to close the filling. 4. Baking: Brush the tops of the croissants with a little egg and milk mixture. Bake at (190 - 200°C) for (15 - 18) minutes, or until the crust is golden brown and crispy Summary Summation Notes: - Additional tips: - Step 2: For The Filling: Materials Ingredients: 4 baked croissants (60-70 grams each), 50 grams unsalted butter (room temperature), 50 grams powdered sugar or icing sugar, 1 egg (size 2 or 3), 50 grams almond flour, 2-3 tablespoons unsweetened milk (or mix into the cream/use for brushing the croissants), 1/2 teaspoon vanilla extract, sliced almonds (for topping), simple syrup (50 ml water mixed with 50 grams of sugar, heat until dissolved), icing sugar (for decoration). Key Preparation Directions Instructions Methods: 1. Prepare the almond cream: Beat the butter and sugar until slightly fluffy. Add the eggs and vanilla extract and beat until well combined. Then add the almond powder and milk and beat until smooth and well combined to make almond cream. Cut the croissant: Cut the croissant in half horizontally (like a sandwich), but not all the way through. 2. Filling: Lightly brush the inside of the croissant with syrup or sweetener for moisture. Then pipe or spoon the almond cream into the center. Topping: Close the croissant, spread a thin layer of almond cream on top, and sprinkle with sliced almonds. 3. Baking: Preheat oven to 175-180 degrees Celsius for 12-15 minutes, or until the almond slices are golden brown and crispy. 4. Decoration: Remove from the oven, let it cool slightly, then sprinkle with powdered sugar before serving. Summary Summation Notes: Making almond milk croissants involves slicing a pre-baked croissant in half, spreading it with sweet and moist almond cream, and infusing it with the rich flavor of fresh milk before baking it again until crispy on the outside and soft on the inside. Follow the simple steps below! Additional tips: Tip for best results: We recommend using croissants baked the day before (they will be perfectly dry) as they will absorb the almond cream better than freshly baked croissants. And the finally then You can eat it and Sell it to the Merchant or Customer with Who people you Know Knew known, i hope you have fun and enjoy it. Where can i you me buy it, Where to Buy, Where to find it: Internet Online, Supermarkets. Widely available from street food stalls, especially in durian-growing regions like, and at markets. Online: Easily ordered from platforms like Abcdefg in various grades and sizes. Caution Warning: Precautions: - Key Additional Tips Profit Useful Benefit Available Nutrition : Almonds are a superfood rich in healthy fats, vitamin E, protein, and antioxidants. Their main benefits include helping to control blood sugar levels, lowering bad cholesterol (LDL), promoting heart health, and aiding in weight management when consumed in appropriate amounts. Lower cholesterol and support heart health: Rich in monounsaturated fats, which help lower levels of bad cholesterol (LDL) in the blood vessels, reducing the risk of heart disease. Control blood sugar: High in magnesium, which aids in insulin function and controls blood sugar levels, preventing diabetes. Aid in weight management: Although high in calories, eating almonds as a snack helps you feel full longer, reducing cravings between meals. Nourishes the brain and eyes: High in vitamin E and omega-3, it helps strengthen the nervous system, prevent memory loss, and slow down macular degeneration. Antioxidant and anti-aging: The vitamin E in almonds acts as an antioxidant, protecting body cells and nourishing the skin. Recommended daily intake: For maximum benefit and to avoid weight gain, consume approximately one handful, or about 23-24 pieces, per day (approximately 160-170 kilocalories). Choose the naturally baked version, without added salt or butter. And the finally then You can eat it and Sell it to the Merchant or Customer with Who people you Know Knew known, i hope you have fun and enjoy it.
ClickMeSeeAllFull
ClickMeSeeOnMoreDetail
ClickMeSeeOnMorePictureImage
ClickMeSeeOnMoreVideo
Vegetable: Processer Processed Processing food Menu: 10.Almond Nut Roast
Method: All Works: Almond Nut Roast
Method: How to make made cook: Recipe Procedure: Almond Nut Roast Part 1: For The Fried: Materials Ingredients: 200-300 grams of raw almonds (shelled), 1-1.5 teaspoons of salt (adjust to taste), 2-3 tablespoons of water, a non-stick pan (or air fryer/oven). Key Preparation Directions Instructions Methods: 1. Dissolve the salt: Mix water with the salt in a bowl and stir until the salt is completely dissolved. 2. Mixing: Place the raw almonds in a pan (do not turn on the heat yet). Then pour in the dissolved salt water and mix thoroughly until the almonds are evenly moistened. 3. Roast over low heat: Turn on the stove to the lowest heat setting and begin roasting the almonds slowly to allow the water to evaporate. Be careful not to burn them: Stir and flip them constantly to prevent the bottom of the pan from burning. Once all the water has evaporated, the salt will beautifully coat the surface of the almonds. 4. Check for doneness: Continue roasting until the almonds are light yellow and fragrant (approximately 10-15 minutes). Let cool: Transfer to a plate or tray and spread the almonds out to cool. The heat from the almonds will make them crispy and delicious. Summary Summation Notes: Making delicious, crispy, and flavorful salted roasted almonds is easy in a pan in just 10-15 minutes. All you need are the basic ingredients: raw almonds, salt, and water. Roast over low heat until completely dry, and you'll have a healthy and enjoyable snack. Additional tips: Once the almonds have completely cooled, store them immediately in an airtight jar or container to prevent moisture and maintain their crispness. If you prefer to bake them in an oven, mix the almonds with salt and water, arrange them on a baking tray, and bake at 150-160 degrees Celsius for 15-20 minutes, stirring every 5 minutes. Part 2: For The Baked: Materials Ingredients: 200-250 grams of raw almonds (shelled), 1-1.5 teaspoons of salt (adjust to taste), 2-3 tablespoons of water. Key Preparation Directions Instructions Methods: 1. Prepare the brine: Mix salt and water in a pot. Heat over medium heat until boiling, stirring until the salt is completely dissolved. Then turn off the heat. 2. Mixing: Place the raw almonds in the brine and mix thoroughly. Let it sit for about 15-20 minutes to allow the brine to penetrate the almonds. Drain: Remove the almonds and let them drain or spread them on paper towels to remove excess oil. 3. Baking in the oven: Preheat the oven to 150°C. Arrange the almonds on a baking sheet lined with parchment paper, making sure they don't overlap too much. Bake using both top and bottom heat for 12-15 minutes. About halfway through (approximately 7-8 minutes), remove the tray and shake or flip the almonds to ensure they cook evenly and become crispy. 4. Let it cool: Once baked, remove the almonds from the oven and let them cool completely. This will ensure they are perfectly crisp. Then, store them in an airtight jar for long-term enjoyment. Summary Summation Notes: Making delicious, crispy, nutty, and perfectly salted roasted almonds at home is easy by simply coating them in brine before roasting. The preparation and cooking time is no more than 40 minutes. Here are the steps and ingredients: Additional tips: If using an air fryer, set the temperature to 160°C and bake for approximately 8-10 minutes, removing the basket and shaking it every 3 minutes to prevent burning. And the finally then You can eat it and Sell it to the Merchant or Customer with Who people you Know Knew known, i hope you have fun and enjoy it. Where can i you me buy it, Where to Buy, Where to find it: Internet Online, Supermarkets. Widely available from street food stalls, especially in durian-growing regions like, and at markets. Online: Easily ordered from platforms like Abcdefg in various grades and sizes. Caution Warning: Precautions: - Key Additional Tips Profit Useful Benefit Available Nutrition : Almonds are a superfood rich in healthy fats, vitamin E, protein, and antioxidants. Their main benefits include helping to control blood sugar levels, lowering bad cholesterol (LDL), promoting heart health, and aiding in weight management when consumed in appropriate amounts. Lower cholesterol and support heart health: Rich in monounsaturated fats, which help lower levels of bad cholesterol (LDL) in the blood vessels, reducing the risk of heart disease. Control blood sugar: High in magnesium, which aids in insulin function and controls blood sugar levels, preventing diabetes. Aid in weight management: Although high in calories, eating almonds as a snack helps you feel full longer, reducing cravings between meals. Nourishes the brain and eyes: High in vitamin E and omega-3, it helps strengthen the nervous system, prevent memory loss, and slow down macular degeneration. Antioxidant and anti-aging: The vitamin E in almonds acts as an antioxidant, protecting body cells and nourishing the skin. Recommended daily intake: For maximum benefit and to avoid weight gain, consume approximately one handful, or about 23-24 pieces, per day (approximately 160-170 kilocalories). Choose the naturally baked version, without added salt or butter. And the finally then You can eat it and Sell it to the Merchant or Customer with Who people you Know Knew known, i hope you have fun and enjoy it.
ClickMeSeeAllFull
ClickMeSeeOnMoreDetail
ClickMeSeeOnMorePictureImage
ClickMeSeeOnMoreVideo
Vegetable: Processer Processed Processing food Menu: 1.Pistachio nut Milk Whip Cream Smoothie Shake
Method: All Works: Pistachio nut Milk Whip Cream Smoothie Shake
Method: How to make made cook: Recipe Procedure: Method: All Works: Pistachio Milk Whip Cream Smoothie Shake Materials Ingredients: Ingredients (for a 16 oz glass): Roasted pistachios (shelled): 2 tablespoons (choose unsalted) Pistachio milk: 30 ml (for added creaminess) Unsweetened fresh milk: 60 ml Sweetened condensed milk: 20-30 ml (adjust sweetness to your liking) Syrup: 15 ml (omit if you prefer less sweetness) Crushed ice: 1 glass (16 oz) Topping: Coarsely crushed pistachios for garnish Key Preparation Directions Instructions Methods: 1. Prepare the nuts: Take about 1 tablespoon of pistachios and coarsely grind them to make the nut mixture. 2. Blend: Add the blended pistachios, pistachio milk, fresh milk, condensed milk, syrup, and crushed ice to a blender. 3. Blend until smooth: Blend at high speed until all ingredients are smooth and homogeneous. 4. Serving: Pour into a glass, garnish with coarsely crushed pistachios or whipped cream for decoration, and enjoy immediately. Summary Summation Notes: This pistachio milkshake is fragrant, creamy, and delicious. It's easy to make; simply blend pistachios, fresh milk, condensed milk, and ice until smooth. Perfect for making at home or selling to start a business. Additional tips: - And the finally then You can eat it and Sell it to the Merchant or Customer with Who people you Know Knew known, i hope you have fun and enjoy it. Where can i you me buy it, Where to Buy, Where to find it: Internet Online, Supermarkets. Widely available from street food stalls, especially in durian-growing regions like, and at markets. Online: Easily ordered from platforms like Abcdefg in various grades and sizes. Caution Warning: Precautions: Patients with kidney disease should be cautious when consuming pistachios due to their high potassium content. They should choose naturally roasted pistachios, without added salt or sugar, to prevent excessive sodium intake. Key Additional Tips Profit Useful Benefit Available Nutrition : Heart health: Packed with healthy unsaturated fats that help lower bad cholesterol (LDL) and increase good cholesterol (HDL), reducing the risk of heart disease. Weight control: High in protein and fiber, promoting satiety and reducing cravings and snacking. Blood sugar control: Low glycemic index (GI), preventing blood sugar spikes and reducing the risk of diabetes. Eye health: It's one of the few types of beans high in lutein and zeaxanthin, which help protect the eyes from blue light. Good for digestion: The fiber acts as a prebiotic, stimulating bowel function and balancing the digestive system. Recommended daily intake: For maximum benefit and to avoid excess calories, consume approximately one handful, or no more than 49 pieces (approximately 42-56 grams), per day. Pistachios are rich in protein, fiber, and healthy fats. They offer significant benefits in weight management, heart health, lowering LDL cholesterol, controlling blood sugar levels, and contain lutein to support eye health. They are considered a great, easily digestible, and energy-efficient healthy snack. And the finally then You can eat it and Sell it to the Merchant or Customer with Who people you Know Knew known, i hope you have fun and enjoy it.
ClickMeSeeAllFull
ClickMeSeeOnMoreDetail
ClickMeSeeOnMorePictureImage
ClickMeSeeOnMoreVideo
Vegetable: Processer Processed Processing food Menu: 2.Pistachio Nut Yogurt
Method: All Works: Pistachio Nut Yogurt
Method: How to make made cook: Recipe Procedure: Method: All Works: Pistachio Nut Yogurt Materials Ingredients: 1 cup plain Greek yogurt, 1-2 tablespoons roasted pistachios (roughly chopped), 1 teaspoon pure honey, 1/2 cup fresh fruit such as bananas or berries (diced). Key Preparation Directions Instructions Methods: 1. Prepare the yogurt base: Spoon Greek yogurt into a cup or bowl. Use a spoon to smooth the top for a beautiful, even finish. 2. Enhance the flavor: Drizzle honey evenly over the yogurt. 3. Final step: Garnish with coarsely ground or finely ground pistachios. 4. Arrange the toppings: Place the prepared sliced fresh fruit on top. Ready to serve. Summary Summation Notes: There are two main ways to make pistachio yogurt: pistachio-flavored yogurt (using blended pistachios mixed into the yogurt) and pistachio-topped yogurt (regular yogurt with pistachios sprinkled on top). The most popular recipe is the Premium Yogurt Bowl, which has the following steps and ingredients. Additional tips: Pistachio Cream Recipe: If you want to transform the yogurt into a completely pistachio flavor, you can blend the pistachios with a little salt and olive oil to make a pistachio paste, then gently fold this paste into the yogurt. And the finally then You can eat it and Sell it to the Merchant or Customer with Who people you Know Knew known, i hope you have fun and enjoy it. Where can i you me buy it, Where to Buy, Where to find it: Internet Online, Supermarkets. Widely available from street food stalls, especially in durian-growing regions like, and at markets. Online: Easily ordered from platforms like Abcdefg in various grades and sizes. Caution Warning: Precautions: Patients with kidney disease should be cautious when consuming pistachios due to their high potassium content. They should choose naturally roasted pistachios, without added salt or sugar, to prevent excessive sodium intake. Key Additional Tips Profit Useful Benefit Available Nutrition : Heart health: Packed with healthy unsaturated fats that help lower bad cholesterol (LDL) and increase good cholesterol (HDL), reducing the risk of heart disease. Weight control: High in protein and fiber, promoting satiety and reducing cravings and snacking. Blood sugar control: Low glycemic index (GI), preventing blood sugar spikes and reducing the risk of diabetes. Eye health: It's one of the few types of beans high in lutein and zeaxanthin, which help protect the eyes from blue light. Good for digestion: The fiber acts as a prebiotic, stimulating bowel function and balancing the digestive system. Recommended daily intake: For maximum benefit and to avoid excess calories, consume approximately one handful, or no more than 49 pieces (approximately 42-56 grams), per day. Pistachios are rich in protein, fiber, and healthy fats. They offer significant benefits in weight management, heart health, lowering LDL cholesterol, controlling blood sugar levels, and contain lutein to support eye health. They are considered a great, easily digestible, and energy-efficient healthy snack. And the finally then You can eat it and Sell it to the Merchant or Customer with Who people you Know Knew known, i hope you have fun and enjoy it.
ClickMeSeeAllFull
ClickMeSeeOnMoreDetail
ClickMeSeeOnMorePictureImage
ClickMeSeeOnMoreVideo
Vegetable: Processer Processed Processing food Menu: 3.Pistachio Nut Pudding
Method: All Works: Pistachio Nut Pudding
Method: How to make made cook: Recipe Procedure: Method: All Works: Pistachio Nut Pudding Materials Ingredients: 1/2 cup fresh or roasted pistachios (unsalted), shelled; 1/2 cup unsweetened milk; 1/2 cup whipping cream; 1/4 cup granulated sugar (to taste); 2 sheets gelatin or 1 teaspoon gelatin powder (soaked in water until softened); 1/2 teaspoon vanilla extract; a pinch of salt. Coconut milk: (to taste) Key Preparation Directions Instructions Methods: 1. Prepare the pistachios: Grind the pistachios in a dry grinder until finely ground and smooth (or use ready-made pistachio butter). 2. Cook the mixture: Heat a pot over medium heat. Add the fresh milk, coconut milk, whipping cream, sugar, and the ground pistachios. Stir until steam starts to rise (do not let it boil). 2. Mix the gelatin: Turn off the heat, add the vanilla extract, salt, and the softened gelatin. Stir until the gelatin is completely dissolved. 3. Strain the mixture: Strain the mixture through a fine-mesh sieve 1-2 times to ensure a smooth and creamy pudding texture. 4. Chilling: Pour into the prepared glasses or molds. Let it cool slightly, then refrigerate for about 3-4 hours until the pudding sets. Summary Summation Notes: Pistachio pudding is easy to make by combining fresh milk, whipping cream, and finely ground pistachio paste. Simmer with sugar, then add gelatin to set, or use chia seeds for a healthier option. Chill until set before serving. Additional tips: - And the finally then You can eat it and Sell it to the Merchant or Customer with Who people you Know Knew known, i hope you have fun and enjoy it. Where can i you me buy it, Where to Buy, Where to find it: Internet Online, Supermarkets. Widely available from street food stalls, especially in durian-growing regions like, and at markets. Online: Easily ordered from platforms like Abcdefg in various grades and sizes. Caution Warning: Precautions: Patients with kidney disease should be cautious when consuming pistachios due to their high potassium content. They should choose naturally roasted pistachios, without added salt or sugar, to prevent excessive sodium intake. Key Additional Tips Profit Useful Benefit Available Nutrition : Heart health: Packed with healthy unsaturated fats that help lower bad cholesterol (LDL) and increase good cholesterol (HDL), reducing the risk of heart disease. Weight control: High in protein and fiber, promoting satiety and reducing cravings and snacking. Blood sugar control: Low glycemic index (GI), preventing blood sugar spikes and reducing the risk of diabetes. Eye health: It's one of the few types of beans high in lutein and zeaxanthin, which help protect the eyes from blue light. Good for digestion: The fiber acts as a prebiotic, stimulating bowel function and balancing the digestive system. Recommended daily intake: For maximum benefit and to avoid excess calories, consume approximately one handful, or no more than 49 pieces (approximately 42-56 grams), per day. Pistachios are rich in protein, fiber, and healthy fats. They offer significant benefits in weight management, heart health, lowering LDL cholesterol, controlling blood sugar levels, and contain lutein to support eye health. They are considered a great, easily digestible, and energy-efficient healthy snack. And the finally then You can eat it and Sell it to the Merchant or Customer with Who people you Know Knew known, i hope you have fun and enjoy it.
ClickMeSeeAllFull
ClickMeSeeOnMoreDetail
ClickMeSeeOnMorePictureImage
ClickMeSeeOnMoreVideo
Vegetable: Processer Processed Processing food Menu: 4.Pistachio Nut Roast
Method: All Works: Pistachio Nut Roast
Method: How to make made cook: Recipe Procedure: Method: All Works: Pistachio Nut Roast Part 1: For The Fried: Materials Ingredients: Pistachios (shelled) (500) grams, salt (1 - 1.5) teaspoons, water (1 - 2) tablespoons (to dissolve the salt and coat the nuts), vegetable oil or unsalted butter (1) teaspoon (optional). Key Preparation Directions Instructions Methods: 1. Place the pan on the stove over the lowest heat (without oil). 2. Add the pistachios to the pan and roast, stirring constantly until the nuts are heated through and fragrant. 3. Dissolve a little salt in water and quickly sprinkle it into the pan. Stir quickly to coat the beans with salt until dry. 4. Turn off the heat, remove from the stove, and continue stirring for a while until the pan cools down. This will keep the peanuts crispy and prevent them from burning. Summary Summation Notes: Once the beans have completely cooled, pack them into airtight glass jars (can maintain their crispness for (1 - 2) months). Store at room temperature, away from sunlight and moisture. Additional tips: Making delicious, crispy, and flavorful salted roasted pistachios is easy, whether you use an oven or a pan. Part 2: For The Baked: Materials Ingredients: 500 grams of fresh pistachios (shelled), 2-3 tablespoons of water, 1-1.5 tablespoons of salt or sea salt (adjust amount as needed). Key Preparation Directions Instructions Methods: 1. Preheat oven: Preheat oven to (150 - 160) °C. Mix salt: Place pistachios in a mixing bowl. Lightly moisten the surface with water, then sprinkle with salt and toss until salt coats all the nuts. Arrange on baking tray: Spread the nuts evenly on the baking tray, avoiding overlapping them too thickly. 2. Bake the nuts: Put them in the oven for about (10 - 15) minutes, watching to prevent them from burning. (It is recommended to take them out and stir or shake the tray at minute (7 - 8) to ensure they are cooked and crispy all over.) 3. Let it cool: Once the time is up, remove from the oven and let it cool completely. The nuts will become crispier. 4. Storage: Once the beans have cooled, they can be stored in an airtight jar or container for a long time. Summary Summation Notes: Making salted roasted pistachios is easy and can be done at home with just three main ingredients: raw pistachios, water, and salt. The preparation and roasting process takes no more than 20 minutes, resulting in crunchy, fragrant, and perfectly salty pistachios. Additional tips: To make the beans more fragrant and salty, you can replace the water with egg white (1) beaten and mix with the beans and salt before baking. This will help the salt adhere better to the beans and add a glossy appearance. And the finally then You can eat it and Sell it to the Merchant or Customer with Who people you Know Knew known, i hope you have fun and enjoy it. Where can i you me buy it, Where to Buy, Where to find it: Internet Online, Supermarkets. Widely available from street food stalls, especially in durian-growing regions like, and at markets. Online: Easily ordered from platforms like Abcdefg in various grades and sizes. Caution Warning: Precautions: Patients with kidney disease should be cautious when consuming pistachios due to their high potassium content. They should choose naturally roasted pistachios, without added salt or sugar, to prevent excessive sodium intake. Key Additional Tips Profit Useful Benefit Available Nutrition : Heart health: Packed with healthy unsaturated fats that help lower bad cholesterol (LDL) and increase good cholesterol (HDL), reducing the risk of heart disease. Weight control: High in protein and fiber, promoting satiety and reducing cravings and snacking. Blood sugar control: Low glycemic index (GI), preventing blood sugar spikes and reducing the risk of diabetes. Eye health: It's one of the few types of beans high in lutein and zeaxanthin, which help protect the eyes from blue light. Good for digestion: The fiber acts as a prebiotic, stimulating bowel function and balancing the digestive system. Recommended daily intake: For maximum benefit and to avoid excess calories, consume approximately one handful, or no more than 49 pieces (approximately 42-56 grams), per day. Pistachios are rich in protein, fiber, and healthy fats. They offer significant benefits in weight management, heart health, lowering LDL cholesterol, controlling blood sugar levels, and contain lutein to support eye health. They are considered a great, easily digestible, and energy-efficient healthy snack. And the finally then You can eat it and Sell it to the Merchant or Customer with Who people you Know Knew known, i hope you have fun and enjoy it.
ClickMeSeeAllFull
ClickMeSeeOnMoreDetail
ClickMeSeeOnMorePictureImage
ClickMeSeeOnMoreVideo
Vegetable: Processer Processed Processing food Menu: 5.Pistachio nut Ice Cream Milk Cone
Method: All Works: Pistachio nut Ice Cream Milk Cone
Method: How to make made cook: Recipe Procedure: Method: All Works: Pistachio nut Ice Cream Milk Cone Step 1: For The Dough: Materials Ingredients: 115 grams all-purpose flour, 100 grams granulated sugar, 60 grams fresh milk, 40 grams melted butter, 2 large eggs, 1 teaspoon vanilla extract, 1/4 teaspoon salt. Key Preparation Directions Instructions Methods: 1. Mix the ingredients: Combine the eggs, sugar, and vanilla extract. Whisk together with a hand whisk until the sugar is completely dissolved. 2. Add flour and liquid: Sift the all-purpose flour and salt into a mixing bowl, followed by the milk and melted butter. Beat until the batter is smooth and creamy. 3. Baking the waffles: Scoop about 1-1.5 tablespoons of batter and pour it into the waffle cone maker. Close the lid and bake until golden brown. 4. Rolling into a cone: Once cooked, quickly remove from the oven and roll immediately while the waffle is still hot, using a stainless steel cone as the core for rolling. Let it cool down; the cone will harden and retain its shape. Summary Summation Notes: Making ice cream cones (waffle cones) is easy with just seven simple ingredients: all-purpose flour, butter, eggs, sugar, milk, vanilla extract, and salt. Mix them together, pour the batter into a waffle iron, and quickly roll it into a cone while still hot. The result is a crispy, delicious ice cream cone with a lovely buttery aroma. Additional tips: Roll them up while they're still hot, because if you let them cool down, they will harden and crack immediately. Once the base has cooled and set its shape, store them in an airtight container immediately to prevent air from entering and maintain their crispness for longer. Step 2: For The Filling: Materials Ingredients: 100-150 grams raw pistachios (unsalted), 2 cups chilled heavy whipping cream, 1/2 cup sweetened condensed milk (adjust to taste), 1 teaspoon vanilla extract, a pinch of salt (omit if using salted roasted pistachios), coconut milk (to taste), fresh milk (to taste). Key Preparation Directions Instructions Methods: 1. Prepare the pistachios: Blend the pistachios in a food processor until they start to become a creamy paste. You can reserve some pistachios to coarsely chop and add at the end to improve the texture. 2. Whipping the cream: Whip the chilled cream with an electric mixer until soft peaks form (the cream should be smooth, fluffy, and firm). 3. Mix the ingredients: Gradually pour the condensed milk, vanilla extract, fresh milk, coconut milk, and blended pistachio pieces into the whipping cream. Then, gently fold with a rubber spatula until well combined. 4. Add more nuts (if desired): Add the coarsely chopped pistachios and gently stir to distribute evenly throughout the frozen ice cream. Pour the mixture into an airtight container and freeze for at least 6-8 hours, or overnight until set. Summary Summation Notes: Making delicious, smooth, and creamy homemade pistachio ice cream is easy and doesn't require an ice cream maker. The most popular and convenient recipe is the no-churn method. Additional tips: - And the finally then You can eat it and Sell it to the Merchant or Customer with Who people you Know Knew known, i hope you have fun and enjoy it. Where can i you me buy it, Where to Buy, Where to find it: Internet Online, Supermarkets. Widely available from street food stalls, especially in durian-growing regions like, and at markets. Online: Easily ordered from platforms like Abcdefg in various grades and sizes. Caution Warning: Precautions: Patients with kidney disease should be cautious when consuming pistachios due to their high potassium content. They should choose naturally roasted pistachios, without added salt or sugar, to prevent excessive sodium intake. Key Additional Tips Profit Useful Benefit Available Nutrition : Heart health: Packed with healthy unsaturated fats that help lower bad cholesterol (LDL) and increase good cholesterol (HDL), reducing the risk of heart disease. Weight control: High in protein and fiber, promoting satiety and reducing cravings and snacking. Blood sugar control: Low glycemic index (GI), preventing blood sugar spikes and reducing the risk of diabetes. Eye health: It's one of the few types of beans high in lutein and zeaxanthin, which help protect the eyes from blue light. Good for digestion: The fiber acts as a prebiotic, stimulating bowel function and balancing the digestive system. Recommended daily intake: For maximum benefit and to avoid excess calories, consume approximately one handful, or no more than 49 pieces (approximately 42-56 grams), per day. Pistachios are rich in protein, fiber, and healthy fats. They offer significant benefits in weight management, heart health, lowering LDL cholesterol, controlling blood sugar levels, and contain lutein to support eye health. They are considered a great, easily digestible, and energy-efficient healthy snack. And the finally then You can eat it and Sell it to the Merchant or Customer with Who people you Know Knew known, i hope you have fun and enjoy it.
ClickMeSeeAllFull
ClickMeSeeOnMoreDetail
ClickMeSeeOnMorePictureImage
ClickMeSeeOnMoreVideo
Vegetable: Processer Processed Processing food Menu: 6.Pistachio nut Ice Cream Sandwiches
Method: All Works: Pistachio nut Ice Cream Sandwiches
Method: How to make made cook: Recipe Procedure: Method: All Works: Pistachio nut Ice Cream Sandwiches Step 1: For The Dough: Materials Ingredients: All-purpose flour: 260 grams, Cornstarch: 60 grams (helps keep crispy), Baking powder: 10 grams (about 2 teaspoons), Salt: 1/2 teaspoon, Eggs: 2, Unsweetened milk: 360 milliliters, Sugar: (to taste), Melted salted butter: 80 grams, Vanilla extract: 1 teaspoon. Key Preparation Directions Instructions Methods: 1. Prepare the dry ingredients: Sift together the all-purpose flour, cornstarch, and baking powder. Set aside. 2. Prepare the liquid ingredients: In another bowl, combine the eggs, granulated sugar, salt, and vanilla extract. Whisk with a hand whisk until the sugar dissolves. Add the milk and melted butter and mix well. 2. Mix the flour: Pour the liquid mixture into the bowl of dry ingredients. Gently fold until smooth and lump-free. 3. Resting the dough: Cover the bowl with plastic wrap and refrigerate for about 30 minutes to allow the dough to set. 4. Baking Waffles: Preheat the waffle iron, lightly butter the mold, pour in the batter, cover, and bake for about 2-3 minutes, or until golden brown. Prepare two waffles. Place a scoop of ice cream in the center of each base waffle, filling it completely. Cover the top waffle with the ice cream. Freeze to allow the ice cream to set, about 30 minutes to 1 day, then serve. Summary Summation Notes: Make delicious, crispy on the outside, soft on the inside milk waffles easily without a stand mixer. Start by mixing the flour, baking powder, and salt together. Beat the eggs, sugar, milk, and melted butter together until smooth. Pour the liquid batter into the flour mixture and stir until smooth. Let the batter rest for 30 minutes, then pour into the waffle iron and bake until golden brown. Additional tips: - Step 2: For The Filling: Materials Ingredients: 100-150 grams raw pistachios (unsalted), 2 cups chilled heavy whipping cream, 1/2 cup sweetened condensed milk (adjust to taste), 1 teaspoon vanilla extract, a pinch of salt (omit if using salted roasted pistachios), coconut milk (to taste), fresh milk (to taste). Key Preparation Directions Instructions Methods: 1. Prepare the pistachios: Blend the pistachios in a food processor until they start to become a creamy paste. You can reserve some pistachios to coarsely chop and add at the end to improve the texture. 2. Whipping the cream: Whip the chilled cream with an electric mixer until soft peaks form (the cream should be smooth, fluffy, and firm). 3. Mix the ingredients: Gradually pour the condensed milk, vanilla extract, fresh milk, coconut milk, and blended pistachio pieces into the whipping cream. Then, gently fold with a rubber spatula until well combined. 4. Add more nuts (if desired): Add the coarsely chopped pistachios and gently stir to distribute evenly throughout the frozen ice cream. Pour the mixture into an airtight container and freeze for at least 6-8 hours, or overnight until set. Summary Summation Notes: Making delicious, smooth, and creamy homemade pistachio ice cream is easy and doesn't require an ice cream maker. The most popular and convenient recipe is the no-churn method. Additional tips: - And the finally then You can eat it and Sell it to the Merchant or Customer with Who people you Know Knew known, i hope you have fun and enjoy it. Where can i you me buy it, Where to Buy, Where to find it: Internet Online, Supermarkets. Widely available from street food stalls, especially in durian-growing regions like, and at markets. Online: Easily ordered from platforms like Abcdefg in various grades and sizes. Caution Warning: Precautions: Patients with kidney disease should be cautious when consuming pistachios due to their high potassium content. They should choose naturally roasted pistachios, without added salt or sugar, to prevent excessive sodium intake. Key Additional Tips Profit Useful Benefit Available Nutrition : Heart health: Packed with healthy unsaturated fats that help lower bad cholesterol (LDL) and increase good cholesterol (HDL), reducing the risk of heart disease. Weight control: High in protein and fiber, promoting satiety and reducing cravings and snacking. Blood sugar control: Low glycemic index (GI), preventing blood sugar spikes and reducing the risk of diabetes. Eye health: It's one of the few types of beans high in lutein and zeaxanthin, which help protect the eyes from blue light. Good for digestion: The fiber acts as a prebiotic, stimulating bowel function and balancing the digestive system. Recommended daily intake: For maximum benefit and to avoid excess calories, consume approximately one handful, or no more than 49 pieces (approximately 42-56 grams), per day. Pistachios are rich in protein, fiber, and healthy fats. They offer significant benefits in weight management, heart health, lowering LDL cholesterol, controlling blood sugar levels, and contain lutein to support eye health. They are considered a great, easily digestible, and energy-efficient healthy snack. And the finally then You can eat it and Sell it to the Merchant or Customer with Who people you Know Knew known, i hope you have fun and enjoy it.
ClickMeSeeAllFull
ClickMeSeeOnMoreDetail
ClickMeSeeOnMorePictureImage
ClickMeSeeOnMoreVideo
Vegetable: Processer Processed Processing food Menu: 7.Pistachio Nut Tart Shell
Method: All Works: Pistachio Nut Tart Shell
Method: How to make made cook: Recipe Procedure: Method: All Works: Pistachio Nut Tart Shell Materials Ingredients: Part 1: For The Dough: Tart Dough (Pâte Sucrée) 120 grams all-purpose flour 60 grams unsalted butter (chilled and cut into cubes) 40 grams icing sugar A pinch of salt 1 egg (approximately 30-35 grams) Part 2: For The Filling: Pistachio Frangipane Filling 60 grams roasted, unsalted pistachios (finely ground into paste) 50 grams unsalted butter (room temperature) (a pinch) granulated sugar 1 egg (room temperature) 1 tablespoon cornstarch 1/2 teaspoon vanilla extract Fresh milk (to taste) Coconut milk (to taste) Salt (a pinch) Part 3: For The Topping: Topping (Decoration) Roughly chopped pistachios Fresh strawberries or raspberries Key Preparation Directions Instructions Methods: 1. Make the tart base: Combine all-purpose flour, icing sugar, and salt. Add cold butter and use your hands or a food processor to crumble it into a sandy texture. Add the egg and knead until it forms a ball. Wrap in plastic wrap and refrigerate for 1-2 hours. 2. Preparing the tart crust: Roll out the dough to a thickness of about 3 millimeters. Line a tart pan (20-22 cm diameter) with the dough. Prick the bottom of the dough all over with a fork. Refrigerate for another 20 minutes. 3. Prepare the pistachio filling: Beat the unsalted butter and granulated sugar until light and fluffy. Add the pistachio paste, vanilla extract, coconut milk, fresh milk, salt, and egg. Continue beating until well combined, then gradually add the cornstarch and stir until smooth and creamy. 4. Baking the Tart: Spread the pistachio cream evenly onto the tart base. Bake at 175°C (350°F) for 25-30 minutes, or until the filling is set and golden brown. Remove and let cool completely. Decorating: Pipe more pistachio cream or sauce on top (optional). Garnish with coarsely chopped pistachios and fresh fruit. Serve. Summary Summation Notes: Making a delicious "Pistachio Tart" involves three main parts: the tart crust (Pâte Sucrée), the pistachio frangipane filling, and pistachio sauce for garnish. Additional tips: - And the finally then You can eat it and Sell it to the Merchant or Customer with Who people you Know Knew known, i hope you have fun and enjoy it. Where can i you me buy it, Where to Buy, Where to find it: Internet Online, Supermarkets. Widely available from street food stalls, especially in durian-growing regions like, and at markets. Online: Easily ordered from platforms like Abcdefg in various grades and sizes. Caution Warning: Precautions: Patients with kidney disease should be cautious when consuming pistachios due to their high potassium content. They should choose naturally roasted pistachios, without added salt or sugar, to prevent excessive sodium intake. Key Additional Tips Profit Useful Benefit Available Nutrition : Heart health: Packed with healthy unsaturated fats that help lower bad cholesterol (LDL) and increase good cholesterol (HDL), reducing the risk of heart disease. Weight control: High in protein and fiber, promoting satiety and reducing cravings and snacking. Blood sugar control: Low glycemic index (GI), preventing blood sugar spikes and reducing the risk of diabetes. Eye health: It's one of the few types of beans high in lutein and zeaxanthin, which help protect the eyes from blue light. Good for digestion: The fiber acts as a prebiotic, stimulating bowel function and balancing the digestive system. Recommended daily intake: For maximum benefit and to avoid excess calories, consume approximately one handful, or no more than 49 pieces (approximately 42-56 grams), per day. Pistachios are rich in protein, fiber, and healthy fats. They offer significant benefits in weight management, heart health, lowering LDL cholesterol, controlling blood sugar levels, and contain lutein to support eye health. They are considered a great, easily digestible, and energy-efficient healthy snack. And the finally then You can eat it and Sell it to the Merchant or Customer with Who people you Know Knew known, i hope you have fun and enjoy it.
ClickMeSeeAllFull
ClickMeSeeOnMoreDetail
ClickMeSeeOnMorePictureImage
ClickMeSeeOnMoreVideo
Vegetable: Processer Processed Processing food Menu: 8.Pistachio Nut Bake Butter Cheese Milk
Method: All Works: Pistachio Nut Bake Butter Cheese Milk
Method: How to make made cook: Recipe Procedure: Method: All Works: Pistachio Nut Bake Butter Cheese Milk Materials Ingredients: Fresh pistachios (shelled), 1 cup melted unsalted butter, 1-2 tablespoons cheese powder (such as Parmesan or Cheddar), a pinch of salt (if using unsalted butter), other seasonings to taste (such as paprika or oregano), fresh milk (to taste), coconut milk (to taste). Key Preparation Directions Instructions Methods: 1. Prepare the nuts: Spread the pistachios on a baking sheet. Preheat oven to (175°C) and bake for about (5-7) minutes, until the nuts are fragrant and have released their moisture. 2. Mix the butter and cheese: Place the roasted pistachios in a mixing bowl. Pour the melted butter over them and toss to coat the nuts evenly. 3. Cheese coating: Sprinkle cheese powder, salt, milk, coconut milk, and other seasonings onto the nuts, then toss to coat them thoroughly with the cheese. 4. Second baking: Place the coated nuts back on the baking sheet. Bake at (150°C) for (5 - 10) minutes to allow the cheese to melt and coat the nuts, making them crispy and fragrant (be sure to watch the oven to prevent burning). Let cool: Remove from the oven and let cool completely on the baking sheet. The cheese will set and become crispy and delicious. You can store them in an airtight jar for later consumption. Summary Summation Notes: Baked pistachios with butter and cheese are made by coating pistachios in butter and cheese before baking them. This results in a nutty, salty, savory flavor with a fragrant buttery and cheesy texture. It's easy to make at home using the steps below. Additional tips: - And the finally then You can eat it and Sell it to the Merchant or Customer with Who people you Know Knew known, i hope you have fun and enjoy it. Where can i you me buy it, Where to Buy, Where to find it: Internet Online, Supermarkets. Widely available from street food stalls, especially in durian-growing regions like, and at markets. Online: Easily ordered from platforms like Abcdefg in various grades and sizes. Caution Warning: Precautions: Patients with kidney disease should be cautious when consuming pistachios due to their high potassium content. They should choose naturally roasted pistachios, without added salt or sugar, to prevent excessive sodium intake. Key Additional Tips Profit Useful Benefit Available Nutrition : Heart health: Packed with healthy unsaturated fats that help lower bad cholesterol (LDL) and increase good cholesterol (HDL), reducing the risk of heart disease. Weight control: High in protein and fiber, promoting satiety and reducing cravings and snacking. Blood sugar control: Low glycemic index (GI), preventing blood sugar spikes and reducing the risk of diabetes. Eye health: It's one of the few types of beans high in lutein and zeaxanthin, which help protect the eyes from blue light. Good for digestion: The fiber acts as a prebiotic, stimulating bowel function and balancing the digestive system. Recommended daily intake: For maximum benefit and to avoid excess calories, consume approximately one handful, or no more than 49 pieces (approximately 42-56 grams), per day. Pistachios are rich in protein, fiber, and healthy fats. They offer significant benefits in weight management, heart health, lowering LDL cholesterol, controlling blood sugar levels, and contain lutein to support eye health. They are considered a great, easily digestible, and energy-efficient healthy snack. And the finally then You can eat it and Sell it to the Merchant or Customer with Who people you Know Knew known, i hope you have fun and enjoy it.
ClickMeSeeAllFull
ClickMeSeeOnMoreDetail
ClickMeSeeOnMorePictureImage
ClickMeSeeOnMoreVideo
Vegetable: Processer Processed Processing food Menu: 9.Pistachio Nut Toast Grill
Method: All Works: Pistachio Nut Toast Grill
Method: How to make made cook: Recipe Procedure: Method: All Works: Pistachio Nut Toast Grill Step 1: For The Dough: Materials Ingredients: Bread: Thick slices of bread or toast (2 slices) Pistachio sauce: 2-3 tablespoons Butter: 1 tablespoon Cheese: Grated mozzarella or cheddar cheese slices Condensed milk: For topping Additional toppings: Coarsely crushed pistachios for sprinkling Key Preparation Directions Instructions Methods: 1. Prepare the bread: Spread butter evenly on both the inside and outside of the bread slices. Toast until crispy: Grill the bread in a pan over low heat until golden brown and crispy on both sides, or toast it in a toaster. 2. Spread the pistachio sauce: Once the bread is warm, spread the pistachio sauce all over it. 3. Add the cheese: Place the cheese on the first slice of bread, then place the second slice on top. Turn the heat to low and cover the pan, simmering for 1-2 minutes until the cheese is melted and gooey. 4. Serving suggestion: Cut into bite-sized pieces, drizzle with condensed milk and sprinkle with coarsely crushed pistachios on top. Summary Summation Notes: Transform ordinary bread into a luxurious treat in just 5 minutes! Simply spread butter on slices of bread and toast until crispy. Then, spread with creamy pistachio sauce, top with melted cheese, and drizzle with condensed milk. The result is a perfectly balanced combination of crispness, nutty aroma, and the salty richness of the cheese. Additional tips: - Step 2: For The Filling: Materials Ingredients: 50-60 grams of roasted, shelled pistachios (heat beforehand to release oil and aroma), 2-3 tablespoons unsalted butter, 1-2 cloves finely chopped garlic, 1/2 cup heavy cream, cheese (1/4 cup grated Parmesan and 2-3 tablespoons mozzarella), salt and coarsely ground black pepper (to taste). Coconut milk (to taste) Fresh milk (to taste) Key Preparation Directions Instructions Methods: 1. Prepare the nuts: Grind or blend the pistachios until they start to thicken into a creamy paste (pistachio paste). 2. Sauté the aromatic ingredients: Heat a pan over low heat, add the butter and melt it, then add the minced garlic and sauté until fragrant (be careful not to burn the garlic). 2. Simmer the sauce: Add the crushed pistachio paste and sauté with butter. Then add the whipping cream, fresh milk, and coconut milk. Stir well and let it simmer gently. 3. Melt the cheese: Reduce the heat to the lowest setting, add the Parmesan and mozzarella cheese, and stir constantly until the cheese is melted and smoothly incorporated into the sauce. 4. Seasoning: Taste and season with salt and black pepper to taste. Turn off the heat and remove from the stove. Serve over steak or toss with pasta. Summary Summation Notes: To make a baked pistachio butter cheese sauce (perfect for serving with steak or pasta), blend the pistachios until smooth. Sauté them with butter, garlic, and whipping cream. Season with salt and pepper, then add Parmesan or mozzarella cheese for extra richness and flavor. Additional tips: - And the finally then You can eat it and Sell it to the Merchant or Customer with Who people you Know Knew known, i hope you have fun and enjoy it. Where can i you me buy it, Where to Buy, Where to find it: Internet Online, Supermarkets. Widely available from street food stalls, especially in durian-growing regions like, and at markets. Online: Easily ordered from platforms like Abcdefg in various grades and sizes. Caution Warning: Precautions: Patients with kidney disease should be cautious when consuming pistachios due to their high potassium content. They should choose naturally roasted pistachios, without added salt or sugar, to prevent excessive sodium intake. Key Additional Tips Profit Useful Benefit Available Nutrition : Heart health: Packed with healthy unsaturated fats that help lower bad cholesterol (LDL) and increase good cholesterol (HDL), reducing the risk of heart disease. Weight control: High in protein and fiber, promoting satiety and reducing cravings and snacking. Blood sugar control: Low glycemic index (GI), preventing blood sugar spikes and reducing the risk of diabetes. Eye health: It's one of the few types of beans high in lutein and zeaxanthin, which help protect the eyes from blue light. Good for digestion: The fiber acts as a prebiotic, stimulating bowel function and balancing the digestive system. Recommended daily intake: For maximum benefit and to avoid excess calories, consume approximately one handful, or no more than 49 pieces (approximately 42-56 grams), per day. Pistachios are rich in protein, fiber, and healthy fats. They offer significant benefits in weight management, heart health, lowering LDL cholesterol, controlling blood sugar levels, and contain lutein to support eye health. They are considered a great, easily digestible, and energy-efficient healthy snack. And the finally then You can eat it and Sell it to the Merchant or Customer with Who people you Know Knew known, i hope you have fun and enjoy it.
ClickMeSeeAllFull
ClickMeSeeOnMoreDetail
ClickMeSeeOnMorePictureImage
ClickMeSeeOnMoreVideo
Vegetable: Processer Processed Processing food Menu: 10.Pistachio Nut Croissant
Method: All Works: Pistachio Nut Croissant
Method: How to make made cook: Recipe Procedure: Method: All Works: Pistachio Nut Croissant Step 1: For The Dough: Materials Ingredients: 250 grams all-purpose flour (or T55 French flour), 1 teaspoon dry yeast, 1 tablespoon granulated sugar, 1/2 teaspoon salt, 80 milliliters warm milk, 60 milliliters cold water, 125 grams unsalted butter (for the dough layers). Key Preparation Directions Instructions Methods: 1. Dough preparation: Combine yeast, sugar, warm milk, and cold water. Add flour and salt and knead until a ball forms. Add butter and continue kneading until smooth. Refrigerate for 1 hour. 2. Rolling and folding the butter layers: Roll the dough into a square sheet. Place the unsalted butter in the center. Fold the dough over the butter, covering it completely. Roll the dough lengthwise and fold it into three layers. Repeat this process three times (refrigerate the dough for 20 minutes between rounds), then chill overnight. 3. Cutting and Rolling: Roll the dough into a thin sheet, cut into triangles, and roll from the base up to the pointed tip. Resting: Arrange the dough on a baking tray and let it rise at room temperature until it doubles in size. Brush the tops with a mixture of egg yolk and a little milk. 4. Baking: Place in an oven preheated to 190-200 degrees Celsius for the first 10 minutes, then reduce the temperature to 170-180 degrees Celsius and bake for another 15-20 minutes until golden brown and crispy. Summary Summation Notes: Making filled croissants involves three main steps: dough lamination, shaping and baking, and filling. Detailed recipes and instructions are available below. Additional tips: - Step 2: For The Filling: Materials Ingredients: Beat egg yolks (to taste) Sugar (a pinch) Salt (a pinch) Cornstarch (to taste) Fresh milk (to taste) Coconut milk (to taste) Chocolate (to taste) Key Preparation Directions Instructions Methods: 1. Custard or fresh milk cream filling (for filling after baking): Whisk egg yolks, sugar, cornstarch, salt, coconut milk, pistachio and fresh milk over medium heat until thickened. Let cool. Whip into whipped cream until smooth. Put the cream in a piping bag, make a hole in the bottom of the croissant, and pipe the filling inside. 2. Chocolate filling (fill before baking): Place dark chocolate batons on the triangular dough before rolling and baking, or use Nutella to pipe the filling after baking. Summary Summation Notes: Making filled croissants involves three main steps: dough lamination, shaping and baking, and filling. Detailed recipes and instructions are available below. Additional tips: - And the finally then You can eat it and Sell it to the Merchant or Customer with Who people you Know Knew known, i hope you have fun and enjoy it. Where can i you me buy it, Where to Buy, Where to find it: Internet Online, Supermarkets. Widely available from street food stalls, especially in durian-growing regions like, and at markets. Online: Easily ordered from platforms like Abcdefg in various grades and sizes. Caution Warning: Precautions: Patients with kidney disease should be cautious when consuming pistachios due to their high potassium content. They should choose naturally roasted pistachios, without added salt or sugar, to prevent excessive sodium intake. Key Additional Tips Profit Useful Benefit Available Nutrition : Heart health: Packed with healthy unsaturated fats that help lower bad cholesterol (LDL) and increase good cholesterol (HDL), reducing the risk of heart disease. Weight control: High in protein and fiber, promoting satiety and reducing cravings and snacking. Blood sugar control: Low glycemic index (GI), preventing blood sugar spikes and reducing the risk of diabetes. Eye health: It's one of the few types of beans high in lutein and zeaxanthin, which help protect the eyes from blue light. Good for digestion: The fiber acts as a prebiotic, stimulating bowel function and balancing the digestive system. Recommended daily intake: For maximum benefit and to avoid excess calories, consume approximately one handful, or no more than 49 pieces (approximately 42-56 grams), per day. Pistachios are rich in protein, fiber, and healthy fats. They offer significant benefits in weight management, heart health, lowering LDL cholesterol, controlling blood sugar levels, and contain lutein to support eye health. They are considered a great, easily digestible, and energy-efficient healthy snack. And the finally then You can eat it and Sell it to the Merchant or Customer with Who people you Know Knew known, i hope you have fun and enjoy it.
ClickMeSeeAllFull
ClickMeSeeOnMoreDetail
ClickMeSeeOnMorePictureImage
ClickMeSeeOnMoreVideo
Vegetable: Processer Processed Processing food Menu: 1.Chestnut Milk Whip Cream Smoothie Shake
Method: All Works: Chestnut Milk Whip Cream Smoothie Shake
Method: How to make made cook: Recipe Procedure: Method: All Works: Chestnut Milk Whip Cream Smoothie Shake Materials Ingredients: Boiled and peeled chestnuts: 10-15 pieces; Unsweetened fresh milk: 60 ml (adjust to your liking); Sweetened condensed milk: 1-2 tablespoons (adjust sweetness as needed); Evaporated milk: 1 tablespoon (for added richness); Crushed ice: 1 cup; Coconut milk: (to taste); Salt: (a pinch) Key Preparation Directions Instructions Methods: 1. Prepare the chestnuts: Place the boiled chestnuts, which have been peeled and the membrane removed, into a blender. 2. Add the ingredients: Add fresh milk, condensed milk, evaporated milk, salt, coconut milk, and crushed ice in that order. 3. Blend: Use the smoothie mode or blend at the highest speed until the chestnut mixture is smooth and blended seamlessly with the ice. 4. Serving: Pour into a glass. You can garnish the top with small diced chestnuts for a more appealing presentation. Summary Summation Notes: Chestnut Milkshake is easy to make in just 5 minutes! It's fragrant, creamy, and delicious. Simply prepare boiled chestnuts, fresh milk, condensed milk, and ice. Blend everything together until smooth for a delightful and nutritious drink. Additional tips: Enhance the aroma: You can add a little vanilla or caramel syrup while blending. Healthy option: You can use oat milk, almond milk, or substitute honey for sweetness. And the finally then You can eat it and Sell it to the Merchant or Customer with Who people you Know Knew known, i hope you have fun and enjoy it. Where can i you me buy it, Where to Buy, Where to find it: Internet Online, Supermarkets. Widely available from street food stalls, especially in durian-growing regions like, and at markets. Online: Easily ordered from platforms like Abcdefg in various grades and sizes. Caution Warning: Precautions: Chestnuts are rich in vitamins, minerals, and dietary fiber. They help nourish the heart, control blood sugar levels, and strengthen the digestive system. In traditional Chinese medicine, they are also considered a fruit that nourishes the kidneys and stomach. Key Additional Tips Profit Useful Benefit Available Nutrition : In addition, it offers the following benefits: Helps control blood sugar levels: It has a low glycemic index and is rich in fiber, which helps slow down carbohydrate absorption, making it suitable for diabetics. Supports cardiovascular health: Contains folate, potassium, and healthy fats, helping reduce the risk of heart disease and control blood pressure. Improves digestive system function: High in fiber, it acts as a prebiotic, increasing beneficial bacteria in the gut and reducing constipation. Strengthens bones and teeth: Rich in iron, calcium, magnesium, and phosphorus, helping to increase bone density. Helps control weight: Although it's primarily a starch-based plant, its high fiber content helps you feel full longer. And the finally then You can eat it and Sell it to the Merchant or Customer with Who people you Know Knew known, i hope you have fun and enjoy it.
ClickMeSeeAllFull
ClickMeSeeOnMoreDetail
ClickMeSeeOnMorePictureImage
ClickMeSeeOnMoreVideo
Vegetable: Processer Processed Processing food Menu: 2.Chestnut Yogurt
Method: All Works: Chestnut Yogurt
Method: How to make made cook: Recipe Procedure: Method: All Works: Chestnut Yogurt Materials Ingredients: Plain yogurt or Greek yogurt (150) grams (adjust as needed) Finely ground chestnut paste (Chestnut Paste / Crème de Marrons) (3)-(4) tablespoons Honey or condensed milk (for added sweetness) Optional toppings: chopped walnuts, almonds or cinnamon powder Key Preparation Directions Instructions Methods: 1. Prepare the chestnuts: If using boiled chestnuts, peel them and mash them together with syrup or sugar and vanilla extract in a blender until smooth (or you can buy ready-made canned chestnuts). 2. Mix the yogurt: Spoon the yogurt into a bowl, then add the mashed chestnuts. 3. Mix well: Gently stir with a spoon to distribute the chestnuts evenly throughout the yogurt until it turns a light brown color. 4. Seasoning: Taste and adjust sweetness with honey to your liking. Garnish: Sprinkle with chopped nuts or cinnamon powder for a crunchy texture. Chill for about 30 minutes before serving for a refreshing taste. Summary Summation Notes: Chestnut yogurt is a dessert that perfectly combines the sweet and creamy flavor of chestnuts with the mild tartness of yogurt. It's easy to make, both homemade and using pre-mixed versions, simply by preparing the main ingredients: chestnut puree and plain yogurt. Additional tips: - And the finally then You can eat it and Sell it to the Merchant or Customer with Who people you Know Knew known, i hope you have fun and enjoy it. Where can i you me buy it, Where to Buy, Where to find it: Internet Online, Supermarkets. Widely available from street food stalls, especially in durian-growing regions like, and at markets. Online: Easily ordered from platforms like Abcdefg in various grades and sizes. Caution Warning: Precautions: Chestnuts are rich in vitamins, minerals, and dietary fiber. They help nourish the heart, control blood sugar levels, and strengthen the digestive system. In traditional Chinese medicine, they are also considered a fruit that nourishes the kidneys and stomach. Key Additional Tips Profit Useful Benefit Available Nutrition : In addition, it offers the following benefits: Helps control blood sugar levels: It has a low glycemic index and is rich in fiber, which helps slow down carbohydrate absorption, making it suitable for diabetics. Supports cardiovascular health: Contains folate, potassium, and healthy fats, helping reduce the risk of heart disease and control blood pressure. Improves digestive system function: High in fiber, it acts as a prebiotic, increasing beneficial bacteria in the gut and reducing constipation. Strengthens bones and teeth: Rich in iron, calcium, magnesium, and phosphorus, helping to increase bone density. Helps control weight: Although it's primarily a starch-based plant, its high fiber content helps you feel full longer. And the finally then You can eat it and Sell it to the Merchant or Customer with Who people you Know Knew known, i hope you have fun and enjoy it.
ClickMeSeeAllFull
ClickMeSeeOnMoreDetail
ClickMeSeeOnMorePictureImage
ClickMeSeeOnMoreVideo
Vegetable: Processer Processed Processing food Menu: 3.Chestnut Pudding
Method: All Works: Chestnut Pudding
Method: How to make made cook: Recipe Procedure: Method: All Works: Chestnut Pudding Materials Ingredients: Roasted chestnuts, peeled: blended finely (to taste) Unsweetened fresh milk: 200 ml (or your preferred milk formula) Egg yolks: 2 Cornstarch: 1 tablespoon Sugar or condensed milk: 1-2 tablespoons (adjust to your liking) A pinch of salt Vanilla extract (if available): 1/2 teaspoon Coconut milk: (to taste) Key Preparation Directions Instructions Methods: 1. Prepare the chestnuts: Put the peeled chestnuts into a blender, add a little fresh milk, and blend until smooth. 2. Combine all ingredients: Add fresh milk, egg yolks, cornstarch, sugar, salt, coconut milk, and vanilla extract. Beat until well combined and the sugar dissolves. 3. Steaming the pudding: Pour the mixture into heat-resistant cups. Steam over boiling water on low heat for approximately (15 - 20) minutes (cover the pot with cheesecloth to prevent condensation from dripping onto the pudding). 4. Let it cool: Once cooked, remove from heat and let it cool. Refrigerating before serving will help the pudding set and taste even better. Summary Summation Notes: Making delicious, smooth, and naturally sweet corn pudding is easy. Simply blend sweet corn with milk, strain to obtain only the liquid, mix in egg yolks and cornstarch, then steam until cooked and set. You can follow the steps below. Additional tips: - And the finally then You can eat it and Sell it to the Merchant or Customer with Who people you Know Knew known, i hope you have fun and enjoy it. Where can i you me buy it, Where to Buy, Where to find it: Internet Online, Supermarkets. Widely available from street food stalls, especially in durian-growing regions like, and at markets. Online: Easily ordered from platforms like Abcdefg in various grades and sizes. Caution Warning: Precautions: Chestnuts are rich in vitamins, minerals, and dietary fiber. They help nourish the heart, control blood sugar levels, and strengthen the digestive system. In traditional Chinese medicine, they are also considered a fruit that nourishes the kidneys and stomach. Key Additional Tips Profit Useful Benefit Available Nutrition : In addition, it offers the following benefits: Helps control blood sugar levels: It has a low glycemic index and is rich in fiber, which helps slow down carbohydrate absorption, making it suitable for diabetics. Supports cardiovascular health: Contains folate, potassium, and healthy fats, helping reduce the risk of heart disease and control blood pressure. Improves digestive system function: High in fiber, it acts as a prebiotic, increasing beneficial bacteria in the gut and reducing constipation. Strengthens bones and teeth: Rich in iron, calcium, magnesium, and phosphorus, helping to increase bone density. Helps control weight: Although it's primarily a starch-based plant, its high fiber content helps you feel full longer. And the finally then You can eat it and Sell it to the Merchant or Customer with Who people you Know Knew known, i hope you have fun and enjoy it.
ClickMeSeeAllFull
ClickMeSeeOnMoreDetail
ClickMeSeeOnMorePictureImage
ClickMeSeeOnMoreVideo
Vegetable: Processer Processed Processing food Menu: 4.Chestnut Roast
Method: All Works: Chestnut Roast
Method: How to make made cook: Recipe Procedure: Method: All Works: Chestnut Roast Materials Ingredients: Raw chestnuts (choose those that are firm, dense, and heavy), fine salt or coarse salt, water (for sprinkling before roasting), and a sharp knife. Key Preparation Directions Instructions Methods: 1. Prepare the chestnuts: Wash the chestnuts to remove any dirt and dry them thoroughly. Score the shell: Use a sharp knife to score the chestnut shell in a cross shape (\(X\)) on the convex side, or make long lines on the smooth side. Be careful not to cut too deep into the flesh. 2. Salting: Place the chestnuts in a mixing bowl, lightly moisten them with water, then sprinkle with salt and toss to coat the shells thoroughly. 3. Roasting Process: 3.1 For oven: Arrange chestnuts on a tray (cross-shaped side up) and bake at 200°C for 20-30 minutes. 3.2 For air fryer: Use 200°C for 15-20 minutes. 4. Let them cool: Remove from the heat, lightly mist the hot chestnuts with water (this tip helps to peel the shells more easily), and let them cool slightly. Summary Summation Notes: Making delicious salted roasted chestnuts like those from famous shops is easy at home using either an oven or an air fryer. The most important thing is to always score the shells in a cross shape beforehand to prevent them from exploding and to make peeling easier. Additional tips: - And the finally then You can eat it and Sell it to the Merchant or Customer with Who people you Know Knew known, i hope you have fun and enjoy it. Where can i you me buy it, Where to Buy, Where to find it: Internet Online, Supermarkets. Widely available from street food stalls, especially in durian-growing regions like, and at markets. Online: Easily ordered from platforms like Abcdefg in various grades and sizes. Caution Warning: Precautions: Chestnuts are rich in vitamins, minerals, and dietary fiber. They help nourish the heart, control blood sugar levels, and strengthen the digestive system. In traditional Chinese medicine, they are also considered a fruit that nourishes the kidneys and stomach. Key Additional Tips Profit Useful Benefit Available Nutrition : In addition, it offers the following benefits: Helps control blood sugar levels: It has a low glycemic index and is rich in fiber, which helps slow down carbohydrate absorption, making it suitable for diabetics. Supports cardiovascular health: Contains folate, potassium, and healthy fats, helping reduce the risk of heart disease and control blood pressure. Improves digestive system function: High in fiber, it acts as a prebiotic, increasing beneficial bacteria in the gut and reducing constipation. Strengthens bones and teeth: Rich in iron, calcium, magnesium, and phosphorus, helping to increase bone density. Helps control weight: Although it's primarily a starch-based plant, its high fiber content helps you feel full longer. And the finally then You can eat it and Sell it to the Merchant or Customer with Who people you Know Knew known, i hope you have fun and enjoy it.
ClickMeSeeAllFull
ClickMeSeeOnMoreDetail
ClickMeSeeOnMorePictureImage
ClickMeSeeOnMoreVideo
Vegetable: Processer Processed Processing food Menu: 5.Chestnut Bake Butter Cheese Milk
Method: All Works: Chestnut Bake Butter Cheese Milk
Method: How to make made cook: Recipe Procedure: Method: All Works: Chestnut Bake Butter Cheese Milk Materials Ingredients: Fresh chestnuts (choose firm, not shriveled, and mold-free), melted unsalted butter (amount to taste), a pinch of salt (if using unsalted butter), brown sugar or honey (if you prefer a sweeter taste) Fresh milk (to taste), coconut milk (to taste) Cheese (to taste) Key Preparation Directions Instructions Methods: 1. Prepare the chestnuts: Wash the chestnuts thoroughly to remove any dirt and dry them completely. Score the shell: Use a sharp knife or paring knife to make a cross-shaped (X) cut in the smooth side of the chestnut, being careful not to cut too deep into the flesh (this step is very important to prevent the chestnuts from exploding). 2. Soaking: Soak the scored chestnuts in warm water for about 20 minutes. Drain and pat dry. Baking: Air fryer: Set the temperature to (180 - 200°C) for (20 - 25) minutes. Oven: Set the temperature to (200°C) and bake for (25 - 30) minutes, placing the chestnuts with the cross-slits facing up. 3. Butter Coating: Peel the chestnuts and place them in a mixing bowl. Pour in melted butter, milk, coconut milk, cheese, a pinch of salt, and sugar. Mix thoroughly until all chestnuts are coated. 4. Second baking and resting: Bake again for 1-10 minutes to allow the flavors to set. Remove from the oven and serve immediately. Summary Summation Notes: Making delicious salted roasted chestnuts like those from famous shops is easy at home using either an oven or an air fryer. The most important thing is to always score the shells in a cross shape beforehand to prevent them from exploding and to make peeling easier. Additional tips: - And the finally then You can eat it and Sell it to the Merchant or Customer with Who people you Know Knew known, i hope you have fun and enjoy it. Where can i you me buy it, Where to Buy, Where to find it: Internet Online, Supermarkets. Widely available from street food stalls, especially in durian-growing regions like, and at markets. Online: Easily ordered from platforms like Abcdefg in various grades and sizes. Caution Warning: Precautions: Chestnuts should be peeled while they are still warm, because if they cool down, the shell will harden and stick to the flesh. Key Additional Tips Profit Useful Benefit Available Nutrition : In addition, it offers the following benefits: Helps control blood sugar levels: It has a low glycemic index and is rich in fiber, which helps slow down carbohydrate absorption, making it suitable for diabetics. Supports cardiovascular health: Contains folate, potassium, and healthy fats, helping reduce the risk of heart disease and control blood pressure. Improves digestive system function: High in fiber, it acts as a prebiotic, increasing beneficial bacteria in the gut and reducing constipation. Strengthens bones and teeth: Rich in iron, calcium, magnesium, and phosphorus, helping to increase bone density. Helps control weight: Although it's primarily a starch-based plant, its high fiber content helps you feel full longer. And the finally then You can eat it and Sell it to the Merchant or Customer with Who people you Know Knew known, i hope you have fun and enjoy it.
ClickMeSeeAllFull
ClickMeSeeOnMoreDetail
ClickMeSeeOnMorePictureImage
ClickMeSeeOnMoreVideo
Vegetable: Processer Processed Processing food Menu: 6.Chestnut Toast
Method: All Works: Chestnut Toast
Method: How to make made cook: Recipe Procedure: Method: All Works: Chestnut Toast Materials Ingredients: 2 slices of bread (thick slices for toasting), 2-3 tablespoons unsalted butter (room temperature), 2-3 tablespoons finely mashed cooked chestnuts, 1-2 tablespoons condensed milk (adjust to taste), 1-2 tablespoons whipping cream (for a smooth texture), Fresh milk (to taste), Coconut milk (to taste), Cheese (to taste), A pinch of salt, A pinch of sugar for topping. Key Preparation Directions Instructions Methods: 1. Prepare the chestnut sauce: Blend the chestnuts until finely mashed. Mix with evaporated milk or condensed milk, cheese, coconut milk, fresh milk, salt, and whipping cream. Stir until smooth and thick. Bake at 100-200°C for 1-20 minutes. Check the sauce to ensure it has set, for example, when the cheese melts and becomes stretchy. Let it cool. 2. Buttering: Spread butter evenly on both sides of the bread slices. 3. Toasting the bread: Heat a pan over low heat. Place the bread in the pan and toast until golden brown and crispy on both sides. 4. Topping and Assembling: Cut the bread into bite-sized pieces, pour the prepared chestnut sauce over it, and drizzle with condensed milk on top to your liking. Summary Summation Notes: Transform ordinary toast into something extraordinary! "Chestnut Butter Milk Toast" is easy to make at home in just 5 minutes. Its highlight is the fragrant, sweet, and creamy chestnut filling that perfectly complements the crispy outside and soft, buttery inside of the bread. Additional tips: You can sprinkle a little chopped almonds or cocoa powder on top to add another dimension to the flavor. And the finally then You can eat it and Sell it to the Merchant or Customer with Who people you Know Knew known, i hope you have fun and enjoy it. Where can i you me buy it, Where to Buy, Where to find it: Internet Online, Supermarkets. Widely available from street food stalls, especially in durian-growing regions like, and at markets. Online: Easily ordered from platforms like Abcdefg in various grades and sizes. Caution Warning: Precautions: Chestnuts should be peeled while they are still warm, because if they cool down, the shell will harden and stick to the flesh. Key Additional Tips Profit Useful Benefit Available Nutrition : In addition, it offers the following benefits: Helps control blood sugar levels: It has a low glycemic index and is rich in fiber, which helps slow down carbohydrate absorption, making it suitable for diabetics. Supports cardiovascular health: Contains folate, potassium, and healthy fats, helping reduce the risk of heart disease and control blood pressure. Improves digestive system function: High in fiber, it acts as a prebiotic, increasing beneficial bacteria in the gut and reducing constipation. Strengthens bones and teeth: Rich in iron, calcium, magnesium, and phosphorus, helping to increase bone density. Helps control weight: Although it's primarily a starch-based plant, its high fiber content helps you feel full longer. And the finally then You can eat it and Sell it to the Merchant or Customer with Who people you Know Knew known, i hope you have fun and enjoy it.
ClickMeSeeAllFull
ClickMeSeeOnMoreDetail
ClickMeSeeOnMorePictureImage
ClickMeSeeOnMoreVideo
Vegetable: Processer Processed Processing food Menu: 7.Chestnut Tart Shell
Method: All Works: Chestnut Tart Shell
Method: How to make made cook: Recipe Procedure: Method: All Works: Chestnut Tart Shell Step 1: For The Dough: Materials Ingredients: All-purpose flour: 150 grams; Cold butter (diced): 100 grams; Icing sugar: 40 grams; Finely ground almonds: 40 grams; Egg: 30 grams; Salt: 1/4 teaspoon. Key Preparation Directions Instructions Methods: 1. Sift the flour and icing sugar together. Add the very cold butter and use your hands or a fork to knead the butter into the flour until it melts and becomes coarse like sand. 2. Add the ground almonds, salt, and egg. Knead until it forms a ball. 3. Wrap it in plastic wrap and refrigerate for about 30-45 minutes. 4. Roll out the dough and place it in a tart mold. Prick the bottom of the tart all over with a fork and place the filling on top. Bake at 180°C for 15-20 minutes, or until golden brown. Let cool before serving. Summary Summation Notes: Making a chestnut tart (Mont Blanc style) can be divided into three main parts: the tart crust, the almond filling (or chestnut cream), and the chestnut cream for topping. You can follow these simple steps. Additional tips: - Step 2: For The Filling: Materials Ingredients: All-purpose flour: 150 grams; Cold butter (diced): 100 grams; Icing sugar: 40 grams; Finely ground almonds: 40 grams; Egg: 30 grams; Salt: 1/4 teaspoon. Key Preparation Directions Instructions Methods: 1. Whip the whipping cream until stiff peaks form. 2. Gently fold (1/3) of the whipping cream into a bowl of chestnut puree, fresh milk, coconut milk, salt, cheese, egg, and rum. Whisk until smooth and well combined. 3. Transfer the chestnut cream into a piping bag and refrigerate. 4. Assemble the tart base by piping the chestnut cream onto it in a mountain shape (or pipe it in spaghetti-like lines, overlapping until full). Decorate with marrons glacés or sprinkle with a little powdered sugar on top. Summary Summation Notes: Making a chestnut tart (Mont Blanc style) can be divided into three main parts: the tart crust, the almond filling (or chestnut cream), and the chestnut cream for topping. You can follow these simple steps. Additional tips: - And the finally then You can eat it and Sell it to the Merchant or Customer with Who people you Know Knew known, i hope you have fun and enjoy it. Where can i you me buy it, Where to Buy, Where to find it: Internet Online, Supermarkets. Widely available from street food stalls, especially in durian-growing regions like, and at markets. Online: Easily ordered from platforms like Abcdefg in various grades and sizes. Caution Warning: Precautions: Chestnuts should be peeled while they are still warm, because if they cool down, the shell will harden and stick to the flesh. Key Additional Tips Profit Useful Benefit Available Nutrition : In addition, it offers the following benefits: Helps control blood sugar levels: It has a low glycemic index and is rich in fiber, which helps slow down carbohydrate absorption, making it suitable for diabetics. Supports cardiovascular health: Contains folate, potassium, and healthy fats, helping reduce the risk of heart disease and control blood pressure. Improves digestive system function: High in fiber, it acts as a prebiotic, increasing beneficial bacteria in the gut and reducing constipation. Strengthens bones and teeth: Rich in iron, calcium, magnesium, and phosphorus, helping to increase bone density. Helps control weight: Although it's primarily a starch-based plant, its high fiber content helps you feel full longer. And the finally then You can eat it and Sell it to the Merchant or Customer with Who people you Know Knew known, i hope you have fun and enjoy it.
ClickMeSeeAllFull
ClickMeSeeOnMoreDetail
ClickMeSeeOnMorePictureImage
ClickMeSeeOnMoreVideo
Vegetable: Processer Processed Processing food Menu: 8.Chestnut Croissant
Method: All Works: Chestnut Croissant
Method: How to make made cook: Recipe Procedure: Method: All Works: Chestnut Croissant Step 1: For The Dough: Materials Ingredients: Ingredients (for approximately 10-12 croissants): Flour: 500 grams all-purpose flour (unbleached) or T55 French flour; Liquid: 140 grams cold milk and 140 grams cold water; Yeast: 2 teaspoons instant dry yeast (approximately 7-8 grams); Seasoning: 50 grams granulated sugar and 1 teaspoon salt; Butter for mixing in the dough: 50 grams unsalted butter at room temperature; Butter for making layers (Roll-in Butter): 250 grams unsalted butter (82% or higher butterfat content). Key Preparation Directions Instructions Methods: 1. How to Make Dough: Mixing the Dough: Combine flour, yeast, sugar, and salt in a mixing bowl. Mix well. Add cold water, cold milk, and 50 grams of unsalted butter. Kneading the Dough: Knead all the ingredients until smooth and well combined (be careful not to overknead the dough until it's hot). The dough will be very elastic. First Resting Period: Gather the dough into a ball, wrap it in plastic wrap, and refrigerate for about 1-2 hours (or overnight to allow the yeast to activate and the dough to relax). 2. Prepare the lock-in butter: Place 250 grams of unsalted butter on parchment paper. Use a rolling pin to flatten and roll the butter into a square approximately 15x15 cm. Refrigerate to allow the butter to set but still remain flexible and foldable, not hard and cracking. 3. Lamination: This is a crucial step that creates the fluffy, crispy honeycomb-like texture of the dough. Take the rested dough and roll it into a rectangular sheet about twice the width of the butter sheet. Place the prepared butter sheet in the center. Fold the two sides of the dough over the butter, covering it completely and preventing any butter from oozing out. Rolling: Roll the dough containing the butter into a long sheet about 5 millimeters thick. Folding: Fold the dough into three folds (fold the first section towards the center and the third section on top). Wrap in plastic and refrigerate for 30-45 minutes. Repeat: Roll the dough into a long sheet and fold it into three folds two more times (for a total of three folds). Refrigerate the dough after each folding to prevent the butter from melting and to allow the dough to relax. 4. Shaping: Once all steps are complete, let the dough rest for the final time in the refrigerator for at least 1 hour. Roll it into a thin sheet about 3 millimeters thick. Cut it into isosceles triangles from the base to the top, then roll them up from the base into a crescent shape. Let it rise until it doubles in size. Brush lightly with egg before baking at 180-200°C for about 15-20 minutes. Then let it cool. Summary Summation Notes: The key to making croissant dough is alternating layers of flour and butter. The main ingredients are simply wheat flour, yeast, butter, sugar, milk, and salt. The dough is kneaded, rested, laminated with butter, folded, and then cut and shaped. Additional tips: - Step 2: For The Filling: Materials Ingredients: Ingredients (for 4-6 croissants): 150 ml dairy whipping cream, 50 ml unsweetened milk, 2-3 tablespoons icing sugar (adjust sweetness to your liking), 1/2 teaspoon vanilla extract. Cheese (optional) Coconut milk (optional) Salt (a pinch) Ground chestnuts (optional) Key Preparation Directions Instructions Methods: 1. Pour whipping cream, fresh milk, icing sugar, cheese, coconut milk, salt, chestnuts, and vanilla extract into a mixing bowl. 2. Using an electric mixer or whisk, beat the mixture at medium speed until stiff peaks form, smooth and fluffy. Then refrigerate for about 15 minutes, and then bake at 100-200°C, or boil and stir until the mixture sets, such as melting the cheese and incorporating it into the other ingredients. Then refrigerate for about 1-20 minutes. 3. Use chopsticks or a sharp knife to poke holes in the bottom or sides of the croissant (or you can slice the croissant in half lengthwise). 4. Spoon the fresh cream into a piping bag and pipe the cream filling into the croissant, allowing a small amount of cream to ooze out. Sprinkle with icing sugar or decorate with fresh fruit (such as strawberries) and serve. Summary Summation Notes: Fresh cream-filled croissants are easy to make. Simply bake or warm the croissants until crispy on the outside and soft on the inside. Then, whip a smooth fresh cream filling until fluffy and pipe it into the croissants. It's a delicious dessert with a perfect blend of buttery and creamy flavors. Additional tips: If using frozen croissants, let them thaw at room temperature. Brush them lightly with a mixture of egg yolk and fresh milk. And the finally then You can eat it and Sell it to the Merchant or Customer with Who people you Know Knew known, i hope you have fun and enjoy it. Where can i you me buy it, Where to Buy, Where to find it: Internet Online, Supermarkets. Widely available from street food stalls, especially in durian-growing regions like, and at markets. Online: Easily ordered from platforms like Abcdefg in various grades and sizes. Caution Warning: Precautions: Chestnuts should be peeled while they are still warm, because if they cool down, the shell will harden and stick to the flesh. Key Additional Tips Profit Useful Benefit Available Nutrition : In addition, it offers the following benefits: Helps control blood sugar levels: It has a low glycemic index and is rich in fiber, which helps slow down carbohydrate absorption, making it suitable for diabetics. Supports cardiovascular health: Contains folate, potassium, and healthy fats, helping reduce the risk of heart disease and control blood pressure. Improves digestive system function: High in fiber, it acts as a prebiotic, increasing beneficial bacteria in the gut and reducing constipation. Strengthens bones and teeth: Rich in iron, calcium, magnesium, and phosphorus, helping to increase bone density. Helps control weight: Although it's primarily a starch-based plant, its high fiber content helps you feel full longer. And the finally then You can eat it and Sell it to the Merchant or Customer with Who people you Know Knew known, i hope you have fun and enjoy it.
ClickMeSeeAllFull
ClickMeSeeOnMoreDetail
ClickMeSeeOnMorePictureImage
ClickMeSeeOnMoreVideo
Vegetable: Processer Processed Processing food Menu: 9.Chestnut Ice Cream Milk Cone
Method: All Works: Chestnut Ice Cream Milk Cone
Method: How to make made cook: Recipe Procedure: Method: All Works: Chestnut Ice Cream Milk Cone Step 1: For The Dough: Materials Ingredients: All-purpose flour: 1/2 cups, granulated sugar: 1/3 cups, egg: 1, melted unsalted butter: 2 tablespoons, milk: 3 tablespoons, vanilla extract: 1/2 teaspoons, salt: a pinch. Key Preparation Directions Instructions Methods: 1. Flour preparation: Beat the eggs, sugar, and salt together until well combined. Add the milk and vanilla extract and stir well. 2. Flour and butter: Sift the all-purpose flour into the mixture and stir until smooth and lump-free. Then add the melted butter and stir again until well combined. 2. Pouring batter into the pan: Heat a non-stick pan over low heat, lightly grease with butter. Spoon in about 1-2 tablespoons of batter and use a spoon or spatula to spread it into a thin circle. 3. Bake until cooked: Wait until the dough turns golden brown. Use a spatula to lift the dough out of the oven. 4. Rolling into a cone: While the dough sheet is still hot (be careful of the heat), quickly place it on a cone-shaped rolling cone (or use any other household utensil). Press the pointed end firmly in place and let it sit for a while until the cone hardens and becomes crispy. Summary Summation Notes: Making homemade ice cream cones is easy using a non-stick pan or waffle maker. The main ingredients include all-purpose flour, eggs, sugar, milk, and melted butter. Mix these ingredients together, pour into the pan to create a thin, crispy batter, and quickly roll into a cone shape before it sets. Additional tips: - Step 2: For The Filling: Materials Ingredients: Boiled and mashed chestnuts: 200 grams; Whipping cream (chilled): 250 milliliters; Unsweetened fresh milk (room temperature): 100 milliliters; Egg yolks: 2; Granulated sugar (or icing sugar): 50-60 grams; Vanilla extract: 1 teaspoon; Salt: a pinch. Coconut milk (taste) Key Preparation Directions Instructions Methods: 1. Prepare the egg mixture: Beat the egg yolks with granulated sugar and salt in a mixing bowl until the eggs are fluffy and pale yellow. Add the chestnut mixture: Add the finely mashed chestnuts and vanilla extract to the egg yolk mixture. Use a whisk to mix all the ingredients together until smooth. Add the coconut milk and milk: Gradually add the fresh milk and coconut milk, stirring again until well combined. 2. Whip the cream: In another bowl, whip the cream with an electric mixer until soft peaks form (the cream should be smooth but still flowing). Gently fold in: Gradually add the whipped cream to the chestnut mixture, using a spatula to gently fold until smooth and well combined. 3. Freezing: Pour the ice cream mixture into a container with a tight-fitting lid. Freeze for approximately 4-5 hours. 4. Smooth Texture: After the first hour, remove the ice cream and use a fork or hand mixer to stir the ice cream until smooth and prevent ice crystals from forming. Repeat this 2-3 times to achieve a smoother and more even texture. Summary Summation Notes: Smooth and creamy chestnut ice cream can be easily made without an ice cream maker. Simply mix chestnut cream with whipping cream and egg yolks, then freeze for a rich, homemade ice cream with a fragrant chestnut flavor. Additional tips: You can enhance the aroma and slow down the melting of the ice cream slightly by adding 1 teaspoon of rum. And the finally then You can eat it and Sell it to the Merchant or Customer with Who people you Know Knew known, i hope you have fun and enjoy it. Where can i you me buy it, Where to Buy, Where to find it: Internet Online, Supermarkets. Widely available from street food stalls, especially in durian-growing regions like, and at markets. Online: Easily ordered from platforms like Abcdefg in various grades and sizes. Caution Warning: Precautions: Chestnuts should be peeled while they are still warm, because if they cool down, the shell will harden and stick to the flesh. Key Additional Tips Profit Useful Benefit Available Nutrition : In addition, it offers the following benefits: Helps control blood sugar levels: It has a low glycemic index and is rich in fiber, which helps slow down carbohydrate absorption, making it suitable for diabetics. Supports cardiovascular health: Contains folate, potassium, and healthy fats, helping reduce the risk of heart disease and control blood pressure. Improves digestive system function: High in fiber, it acts as a prebiotic, increasing beneficial bacteria in the gut and reducing constipation. Strengthens bones and teeth: Rich in iron, calcium, magnesium, and phosphorus, helping to increase bone density. Helps control weight: Although it's primarily a starch-based plant, its high fiber content helps you feel full longer. And the finally then You can eat it and Sell it to the Merchant or Customer with Who people you Know Knew known, i hope you have fun and enjoy it.
ClickMeSeeAllFull
ClickMeSeeOnMoreDetail
ClickMeSeeOnMorePictureImage
ClickMeSeeOnMoreVideo
Vegetable: Processer Processed Processing food Menu: 10.Chestnut Ice Cream Waffle Sandwiches
Method: All Works: Chestnut Ice Cream Waffle Sandwiches
Method: How to make made cook: Recipe Procedure: Method: All Works: Chestnut Ice Cream Waffle Sandwiches Step 1: For The Dough: Materials Ingredients: All-purpose flour: 300 g, Baking powder: 2 tsp, Salt: (1 tsp, 4 tsp), Eggs (size 2): 3, Sugar: 100 g (adjust sweetness as needed), Unsweetened milk: 380 g, Vegetable oil (or melted butter): 100 g, Vanilla extract: 2 tsp Key Preparation Directions Instructions Methods: 1. Prepare the dry ingredients: Sift together the all-purpose flour and baking powder. Add the salt, mix well, and set aside. 2. Prepare the liquid mixture: In another mixing bowl, beat the eggs with the sugar and vanilla extract until the sugar dissolves. Add the milk and vegetable oil (or melted butter) and stir until well combined. 3. Mixing the flour: Gradually pour the liquid mixture into the bowl of flour, gently folding it in with a whisk until smooth and lump-free. Let the dough rest for about 10-15 minutes. 4. Baking Waffles: Lightly grease and heat the waffle iron. Pour the batter into the waffle iron, cover, and bake for 3-5 minutes, or until golden brown. Remove and let cool on a wire rack to maintain crispness. Place the waffles in your desired waffle iron, fill with ice cream, and top with another waffle. Refrigerate to allow the ice cream to set, or enjoy immediately. Summary Summation Notes: This recipe is for milk waffles, crispy on the outside and soft on the inside. It's easy to make, no mixer needed, perfect for making at home for yourself or selling to start a business. Additional tips: - Step 2: For The Filling: Materials Ingredients: Boiled and mashed chestnuts: 200 grams; Whipping cream (chilled): 250 milliliters; Unsweetened fresh milk (room temperature): 100 milliliters; Egg yolks: 2; Granulated sugar (or icing sugar): 50-60 grams; Vanilla extract: 1 teaspoon; Salt: a pinch. Coconut milk (taste) Key Preparation Directions Instructions Methods: 1. Prepare the egg mixture: Beat the egg yolks with granulated sugar and salt in a mixing bowl until the eggs are fluffy and pale yellow. Add the chestnut mixture: Add the finely mashed chestnuts and vanilla extract to the egg yolk mixture. Use a whisk to mix all the ingredients together until smooth. Add the coconut milk and milk: Gradually add the fresh milk and coconut milk, stirring again until well combined. 2. Whip the cream: In another bowl, whip the cream with an electric mixer until soft peaks form (the cream should be smooth but still flowing). Gently fold in: Gradually add the whipped cream to the chestnut mixture, using a spatula to gently fold until smooth and well combined. 3. Freezing: Pour the ice cream mixture into a container with a tight-fitting lid. Freeze for approximately 4-5 hours. 4. Smooth Texture: After the first hour, remove the ice cream and use a fork or hand mixer to stir the ice cream until smooth and prevent ice crystals from forming. Repeat this 2-3 times to achieve a smoother and more even texture. Summary Summation Notes: Smooth and creamy chestnut ice cream can be easily made without an ice cream maker. Simply mix chestnut cream with whipping cream and egg yolks, then freeze for a rich, homemade ice cream with a fragrant chestnut flavor. Additional tips: You can enhance the aroma and slow down the melting of the ice cream slightly by adding 1 teaspoon of rum. And the finally then You can eat it and Sell it to the Merchant or Customer with Who people you Know Knew known, i hope you have fun and enjoy it. Where can i you me buy it, Where to Buy, Where to find it: Internet Online, Supermarkets. Widely available from street food stalls, especially in durian-growing regions like, and at markets. Online: Easily ordered from platforms like Abcdefg in various grades and sizes. Caution Warning: Precautions: Chestnuts should be peeled while they are still warm, because if they cool down, the shell will harden and stick to the flesh. Key Additional Tips Profit Useful Benefit Available Nutrition : In addition, it offers the following benefits: Helps control blood sugar levels: It has a low glycemic index and is rich in fiber, which helps slow down carbohydrate absorption, making it suitable for diabetics. Supports cardiovascular health: Contains folate, potassium, and healthy fats, helping reduce the risk of heart disease and control blood pressure. Improves digestive system function: High in fiber, it acts as a prebiotic, increasing beneficial bacteria in the gut and reducing constipation. Strengthens bones and teeth: Rich in iron, calcium, magnesium, and phosphorus, helping to increase bone density. Helps control weight: Although it's primarily a starch-based plant, its high fiber content helps you feel full longer. And the finally then You can eat it and Sell it to the Merchant or Customer with Who people you Know Knew known, i hope you have fun and enjoy it.
ClickMeSeeAllFull
ClickMeSeeOnMoreDetail
ClickMeSeeOnMorePictureImage
ClickMeSeeOnMoreVideo
Vegetable: Processer Processed Processing food Menu: 1.Peanuts Roast
Method: All Works: Peanuts Roast
Method: How to make made cook: Recipe Procedure: Method: All Works: Peanuts Roast Materials Ingredients: 500 grams of raw peanuts (shelled), 1-2 tablespoons of salt (adjust to taste), a little water (for mixing the salt). Key Preparation Directions Instructions Methods: 1. Prepare the peanuts: Wash the peanuts 1-2 times and drain them thoroughly. Dissolve the salt: Mix a small amount of salt with water and stir until dissolved (or you can sprinkle the dry salt directly onto the peanuts while roasting). 2. Start roasting: Place the peanuts in a pan (a Teflon or thick-bottomed pan is recommended) and heat over low to medium heat. Roast until cooked: Stir frequently and continue roasting without stopping. If using salted water, gradually pour it in. Continue roasting until the water has evaporated and the peanuts begin to release their aroma. 3. Observe the doneness: The beans are cooked when they make a clear, resonant sound when hitting the pan, the outer shell peels off, and the inside of the bean turns golden yellow (approximately 15-20 minutes). 4. Let it cool: Turn off the heat, transfer the beans to a container, and let them cool. This will make them crispier and tastier. After that, crush the shells and sift them to remove any remaining shells. Store in an airtight jar for long-term consumption. Summary Summation Notes: Making delicious, crispy, and perfectly salted roasted peanuts is easy. Simply heat a pan over low to medium heat and roast the raw peanuts with the salt. Adding the salt while roasting helps distribute the heat evenly, resulting in evenly cooked, beautifully browned peanuts without burning, and allowing the salty flavor to infuse into the peanuts. Additional tips: They should only be roasted over low heat to prevent the nuts from burning and becoming bitter. And the finally then You can eat it and Sell it to the Merchant or Customer with Who people you Know Knew known, i hope you have fun and enjoy it. Where can i you me buy it, Where to Buy, Where to find it: Internet Online, Supermarkets. Widely available from street food stalls, especially in durian-growing regions like, and at markets. Online: Easily ordered from platforms like Abcdefg in various grades and sizes. Caution Warning: Precautions: Peanuts are high in caloriesand fat, so they should be consumed in moderation (about a handful per day). Choose boiled or roasted peanuts that are not heavily seasoned with salt or sugar. Also, be mindful of mold (aflatoxin) by choosing fresh peanuts and storing them in a dry place. Key Additional Tips Profit Useful Benefit Available Nutrition : Peanuts are a grain rich in protein, healthy fats, vitamins, and minerals. They offer notable benefits in supporting brain and nervous system health, controlling blood sugar levels, are rich in antioxidants, and may help reduce the risk of heart disease. Enhances brain function: Contains choline and B vitamins, which nourish the nervous system, improve memory, and support eye health. High in protein and keeps you feeling full longer: A good source of plant-based protein and high in fiber, aiding digestion. When consumed in moderation, it helps you feel full for longer and control appetite. Heart-healthy: Rich in unsaturated fats, which help lower bad cholesterol (LDL) levels and reduce the risk of cardiovascular disease. Blood sugar control: Low glycemic index and high in magnesium, making it ideal for those who want to manage their blood sugar. Rich in antioxidants: The red seed coat (pericarp) is high in antioxidants, helping to slow cell aging. And the finally then You can eat it and Sell it to the Merchant or Customer with Who people you Know Knew known, i hope you have fun and enjoy it.
ClickMeSeeAllFull
ClickMeSeeOnMoreDetail
ClickMeSeeOnMorePictureImage
ClickMeSeeOnMoreVideo
Vegetable: Processer Processed Processing food Menu: 2.Peanuts Toast
Method: All Works: Peanuts Toast
Method: How to make made cook: Recipe Procedure: Method: All Works: Peanuts Toast Step 1: For The Dough: Materials Ingredients: Bread slices (choose thick slices, 1-10 cm, for a great texture), butter (salted or unsalted, as preferred), condensed milk, a little sugar (for topping), a little salt (for topping). Key Preparation Directions Instructions Methods: 1. Prepare the butter: Let the butter soften at room temperature. Then, spread the butter generously on both sides of the bread slices. (Tip for a moist texture) 2. Toasting the bread: Heat a non-stick pan over low heat. Place the bread in the pan and toast until golden brown and crispy. Flip and toast the other side until evenly cooked. 3. Drizzle with milk and sugar: Place the bread on a plate, pour the sauce over it, then drizzle with condensed milk and sprinkle with sugar or salt to your liking. 4. Serving suggestion: Slice into bite-sized pieces and serve while hot. Summary Summation Notes: How to make delicious, crispy on the outside, soft on the inside buttered and condensed milk toast like those from famous shops. It's easy and takes only 5 minutes! Simply spread butter generously, toast on a pan until golden and crispy, then drizzle with condensed milk and sprinkle with sugar to your liking. Additional tips: - Step 2: For The Filling: Materials Ingredients: Fresh milk (100) ml. Whipping cream (70) ml. (to increase richness and creaminess) Sweetened condensed milk (50) ml. (adjust as desired) Cornstarch (1) tablespoon. (can use custard instead) Icing sugar 15-20 g. (adjust as desired) Vanilla extract 1/2 teaspoon. (to add fragrance) Fresh milk (as desired) Coconut milk (as desired) Salt (a little) Cheese (as desired) Key Preparation Directions Instructions Methods: 1. Mix the cornstarch with a little fresh milk in a pot. Stir until the cornstarch dissolves and there are no lumps. 2. Pour the remaining milk, whipping cream, coconut milk, cheese, salt, and condensed milk into a bowl and stir until well combined. 3. Place the pot over low heat and stir continuously with a whisk until the sauce thickens and begins to simmer. Then turn off the heat. 4. Let it cool slightly before pouring it over steamed bread, toast, or brownies. Summary Summation Notes: Make a simple and creamy milk sauce for bread or brownies in just 5 minutes with this easy recipe. The main ingredients are: 100 ml unsweetened milk, 70 ml whipping cream, 50 ml condensed milk, plus coconut milk, cheese, salt, and 1 tablespoon cornstarch. Additional tips: - And the finally then You can eat it and Sell it to the Merchant or Customer with Who people you Know Knew known, i hope you have fun and enjoy it. Where can i you me buy it, Where to Buy, Where to find it: Internet Online, Supermarkets. Widely available from street food stalls, especially in durian-growing regions like, and at markets. Online: Easily ordered from platforms like Abcdefg in various grades and sizes. Caution Warning: Precautions: Peanuts are high in caloriesand fat, so they should be consumed in moderation (about a handful per day). Choose boiled or roasted peanuts that are not heavily seasoned with salt or sugar. Also, be mindful of mold (aflatoxin) by choosing fresh peanuts and storing them in a dry place. Key Additional Tips Profit Useful Benefit Available Nutrition : Peanuts are a grain rich in protein, healthy fats, vitamins, and minerals. They offer notable benefits in supporting brain and nervous system health, controlling blood sugar levels, are rich in antioxidants, and may help reduce the risk of heart disease. Enhances brain function: Contains choline and B vitamins, which nourish the nervous system, improve memory, and support eye health. High in protein and keeps you feeling full longer: A good source of plant-based protein and high in fiber, aiding digestion. When consumed in moderation, it helps you feel full for longer and control appetite. Heart-healthy: Rich in unsaturated fats, which help lower bad cholesterol (LDL) levels and reduce the risk of cardiovascular disease. Blood sugar control: Low glycemic index and high in magnesium, making it ideal for those who want to manage their blood sugar. Rich in antioxidants: The red seed coat (pericarp) is high in antioxidants, helping to slow cell aging. And the finally then You can eat it and Sell it to the Merchant or Customer with Who people you Know Knew known, i hope you have fun and enjoy it.
ClickMeSeeAllFull
ClickMeSeeOnMoreDetail
ClickMeSeeOnMorePictureImage
ClickMeSeeOnMoreVideo
Vegetable: Processer Processed Processing food Menu: 3.Peanuts Bake Butter Cheese Milk
Method: All Works: Peanuts Bake Butter Cheese Milk
Method: How to make made cook: Recipe Procedure: Method: All Works: Peanuts Bake Butter Cheese Milk Materials Ingredients: 1-2 cups boiled or roasted peanuts, 1-2 tablespoons butter (salted or unsalted), 2-3 tablespoons evaporated milk, 1-2 tablespoons condensed milk (adjust to taste), mozzarella cheese (to taste), a pinch of salt (if using unsalted butter), fresh milk (to taste), coconut milk (to taste). Key Preparation Directions Instructions Methods: 1. Mix the beans: Place the cooked or roasted beans in a mixing bowl. Add butter, evaporated milk, condensed milk, fresh milk, coconut milk, and salt. Mix well. 2. Add cheese: Add a little mozzarella cheese and mix it in, or you can save it to sprinkle on top as you prefer. 3. Melt and Bake: Place the beans in a heat-resistant bowl, generously sprinkle with mozzarella cheese, and microwave (medium-high power, 1-2 minutes) or air fryer (180°C, approximately 5 minutes) until the cheese is melted and gooey. 4. Serving: Remove from the oven and serve hot for the ultimate cheesy, sweet, and creamy experience. Summary Summation Notes: Make delicious, gooey, fragrant, sweet, and creamy buttered milk and cheese roasted nuts easily in under 15 minutes using this method. Additional tips: - And the finally then You can eat it and Sell it to the Merchant or Customer with Who people you Know Knew known, i hope you have fun and enjoy it. Where can i you me buy it, Where to Buy, Where to find it: Internet Online, Supermarkets. Widely available from street food stalls, especially in durian-growing regions like, and at markets. Online: Easily ordered from platforms like Abcdefg in various grades and sizes. Caution Warning: Precautions: Peanuts are high in caloriesand fat, so they should be consumed in moderation (about a handful per day). Choose boiled or roasted peanuts that are not heavily seasoned with salt or sugar. Also, be mindful of mold (aflatoxin) by choosing fresh peanuts and storing them in a dry place. Key Additional Tips Profit Useful Benefit Available Nutrition : Peanuts are a grain rich in protein, healthy fats, vitamins, and minerals. They offer notable benefits in supporting brain and nervous system health, controlling blood sugar levels, are rich in antioxidants, and may help reduce the risk of heart disease. Enhances brain function: Contains choline and B vitamins, which nourish the nervous system, improve memory, and support eye health. High in protein and keeps you feeling full longer: A good source of plant-based protein and high in fiber, aiding digestion. When consumed in moderation, it helps you feel full for longer and control appetite. Heart-healthy: Rich in unsaturated fats, which help lower bad cholesterol (LDL) levels and reduce the risk of cardiovascular disease. Blood sugar control: Low glycemic index and high in magnesium, making it ideal for those who want to manage their blood sugar. Rich in antioxidants: The red seed coat (pericarp) is high in antioxidants, helping to slow cell aging. And the finally then You can eat it and Sell it to the Merchant or Customer with Who people you Know Knew known, i hope you have fun and enjoy it.
ClickMeSeeAllFull
ClickMeSeeOnMoreDetail
ClickMeSeeOnMorePictureImage
ClickMeSeeOnMoreVideo
Vegetable: Processer Processed Processing food Menu: 4.Peanuts Yogurt
Method: All Works: Peanuts Yogurt
Method: How to make made cook: Recipe Procedure: Method: All Works: Peanuts Yogurt Materials Ingredients: 1,000 ml unsweetened fresh milk (pasteurized or UHT) 1 cup plain yogurt (approximately 135 g) *Tip: Must use yogurt with live cultures and no added flavorings or gelatin. 2-3 tablespoons sweetened condensed milk (optional, if you prefer it sweeter) Finely ground roasted peanuts (to taste) Whipped cream (to taste) Coconut milk (to taste) Fresh milk (to taste) Salt (a pinch) Key Preparation Directions Instructions Methods: 1. Warm the milk: Pour fresh milk and condensed milk (if available) into a pot. Heat over low heat until just warm (approximately 43-45 degrees Celsius, or just warm to the touch). Do not let it boil. Then turn off the heat. 2. Preparing the starter culture: Scoop plain yogurt into a bowl. Take a small amount of warmed milk and mix it with the yogurt until dissolved. Pour this mixture back into the large pot of milk and gently stir until smooth. Packaging: Pour the milk mixture into glass bottles or cartons with airtight lids (sterilize with hot water beforehand). 3. Fermenting the yogurt: Place the container in a warm place (such as an ice chest, styrofoam box, or wrapped in a thick cloth) for 8-12 hours, or until the milk solids thicken. Refrigerating: Once the time is up, refrigerate the yogurt for at least 3-4 hours to allow it to fully set and stop the fermentation process. 4. Combine the finely ground peanuts, coconut milk, fresh milk, whipped cream, a pinch of salt, and yogurt in a bowl. Simmer and stir until well combined. It can be served immediately or chilled for 1 minute to 1 hour before serving. Summary Summation Notes: Making homemade yogurt is easy! Simply mix plain milk with natural yogurt (as a starter culture), heat to the appropriate temperature, and let it ferment overnight to allow the microorganisms to grow. You'll get smooth, creamy yogurt that's safe and preservative-free. Additional tips: Greek Yogurt: For a thick, creamy Greek-style yogurt, strain the yogurt through a cheesecloth or sieve and refrigerate for 6-8 hours to allow all the whey to drip out. And the finally then You can eat it and Sell it to the Merchant or Customer with Who people you Know Knew known, i hope you have fun and enjoy it. Where can i you me buy it, Where to Buy, Where to find it: Internet Online, Supermarkets. Widely available from street food stalls, especially in durian-growing regions like, and at markets. Online: Easily ordered from platforms like Abcdefg in various grades and sizes. Caution Warning: Precautions: Peanuts are high in caloriesand fat, so they should be consumed in moderation (about a handful per day). Choose boiled or roasted peanuts that are not heavily seasoned with salt or sugar. Also, be mindful of mold (aflatoxin) by choosing fresh peanuts and storing them in a dry place. Key Additional Tips Profit Useful Benefit Available Nutrition : Peanuts are a grain rich in protein, healthy fats, vitamins, and minerals. They offer notable benefits in supporting brain and nervous system health, controlling blood sugar levels, are rich in antioxidants, and may help reduce the risk of heart disease. Enhances brain function: Contains choline and B vitamins, which nourish the nervous system, improve memory, and support eye health. High in protein and keeps you feeling full longer: A good source of plant-based protein and high in fiber, aiding digestion. When consumed in moderation, it helps you feel full for longer and control appetite. Heart-healthy: Rich in unsaturated fats, which help lower bad cholesterol (LDL) levels and reduce the risk of cardiovascular disease. Blood sugar control: Low glycemic index and high in magnesium, making it ideal for those who want to manage their blood sugar. Rich in antioxidants: The red seed coat (pericarp) is high in antioxidants, helping to slow cell aging. And the finally then You can eat it and Sell it to the Merchant or Customer with Who people you Know Knew known, i hope you have fun and enjoy it.
ClickMeSeeAllFull
ClickMeSeeOnMoreDetail
ClickMeSeeOnMorePictureImage
ClickMeSeeOnMoreVideo
Vegetable: Processer Processed Processing food Menu: 5.Peanuts Pudding
Method: All Works: Peanuts Pudding
Method: How to make made cook: Recipe Procedure: Method: All Works: Peanuts Pudding Materials Ingredients: 3/4 cup smooth peanut butter, 3/4 cup fresh milk (or plant-based milk such as soy/oat milk), 3 tablespoons cornstarch, 1/2 cup granulated sugar (to taste), 1/4 teaspoon salt, 1/2 teaspoon vanilla extract, 2 tablespoons unsalted butter Roasted peanuts (optional) Coconut milk (optional) Key Preparation Directions Instructions Methods: 1. Mix the dry ingredients: Combine the cornstarch, sugar, and salt in a medium-sized pot. Add a little fresh milk and stir until the cornstarch is dissolved and there are no lumps. 2. Making the pudding: Pour the remaining milk and coconut milk into a pot. Heat over medium heat, stirring constantly, until it begins to boil and thicken (approximately 5 minutes). 3. Add peanut butter: Remove from heat, add butter, peanut butter, roasted peanuts, and vanilla extract. Stir all ingredients together until smooth and well combined. 4. Chill: Pour into cups or glass jars, let it cool, then refrigerate for about (2-3) hours or overnight until the pudding sets. Summary Summation Notes: Making peanut pudding is quick and easy with this Western-style peanut butter pudding recipe, which takes only 10 minutes to prepare. Simply blend the ingredients until smooth and chill until set. Additional tips: - And the finally then You can eat it and Sell it to the Merchant or Customer with Who people you Know Knew known, i hope you have fun and enjoy it. Where can i you me buy it, Where to Buy, Where to find it: Internet Online, Supermarkets. Widely available from street food stalls, especially in durian-growing regions like, and at markets. Online: Easily ordered from platforms like Abcdefg in various grades and sizes. Caution Warning: Precautions: Peanuts are high in caloriesand fat, so they should be consumed in moderation (about a handful per day). Choose boiled or roasted peanuts that are not heavily seasoned with salt or sugar. Also, be mindful of mold (aflatoxin) by choosing fresh peanuts and storing them in a dry place. Key Additional Tips Profit Useful Benefit Available Nutrition : Peanuts are a grain rich in protein, healthy fats, vitamins, and minerals. They offer notable benefits in supporting brain and nervous system health, controlling blood sugar levels, are rich in antioxidants, and may help reduce the risk of heart disease. Enhances brain function: Contains choline and B vitamins, which nourish the nervous system, improve memory, and support eye health. High in protein and keeps you feeling full longer: A good source of plant-based protein and high in fiber, aiding digestion. When consumed in moderation, it helps you feel full for longer and control appetite. Heart-healthy: Rich in unsaturated fats, which help lower bad cholesterol (LDL) levels and reduce the risk of cardiovascular disease. Blood sugar control: Low glycemic index and high in magnesium, making it ideal for those who want to manage their blood sugar. Rich in antioxidants: The red seed coat (pericarp) is high in antioxidants, helping to slow cell aging. And the finally then You can eat it and Sell it to the Merchant or Customer with Who people you Know Knew known, i hope you have fun and enjoy it.
ClickMeSeeAllFull
ClickMeSeeOnMoreDetail
ClickMeSeeOnMorePictureImage
ClickMeSeeOnMoreVideo
Vegetable: Processer Processed Processing food Menu: 6.Peanuts Milk Whip Cream Smoothie Shake
Method: All Works: Peanuts Milk Whip Cream Smoothie Shake
Method: How to make made cook: Recipe Procedure: Method: All Works: Peanuts Milk Whip Cream Smoothie Shake Materials Ingredients: 1 cup roasted peanuts (unsalted), 1.5 cups unsweetened fresh milk, 1.5 cups boiled water, 2-3 tablespoons sweetened condensed milk (adjust to taste), 1-2 tablespoons simple syrup (or use honey), a pinch of salt (a pinch), 1-2 cups finely crushed ice, coconut milk (to taste), whipped cream (to taste). Key Preparation Directions Instructions Methods: 1. Prepare the peanuts: Wash the roasted peanuts thoroughly, then soak them in water for about 3-4 hours to soften them. Drain the water completely. 2. First blending: Put the prepared peanuts into the blender. Add boiled water and fresh milk. Blend at high speed until the peanut mixture is smooth and well combined. 3. Seasoning: Add condensed milk, syrup, coconut milk, whipped cream, and a pinch of salt. Blend again until well combined. 4. Blend and serve: Add crushed ice and blend at high speed until smooth. Pour into a glass and enjoy. Summary Summation Notes: Transform peanuts into your favorite drink! It's easy to make at home! A peanut milk smoothie is fragrant, creamy, and delicious, rich in protein and healthy fats. It's perfect for breakfast or as an energizing drink throughout the day. Additional tips: Sprinkle with your favorite toppings, such as chopped fruits and vegetables or chocolate. And the finally then You can eat it and Sell it to the Merchant or Customer with Who people you Know Knew known, i hope you have fun and enjoy it. Where can i you me buy it, Where to Buy, Where to find it: Internet Online, Supermarkets. Widely available from street food stalls, especially in durian-growing regions like, and at markets. Online: Easily ordered from platforms like Abcdefg in various grades and sizes. Caution Warning: Precautions: Peanuts are high in caloriesand fat, so they should be consumed in moderation (about a handful per day). Choose boiled or roasted peanuts that are not heavily seasoned with salt or sugar. Also, be mindful of mold (aflatoxin) by choosing fresh peanuts and storing them in a dry place. Key Additional Tips Profit Useful Benefit Available Nutrition : Peanuts are a grain rich in protein, healthy fats, vitamins, and minerals. They offer notable benefits in supporting brain and nervous system health, controlling blood sugar levels, are rich in antioxidants, and may help reduce the risk of heart disease. Enhances brain function: Contains choline and B vitamins, which nourish the nervous system, improve memory, and support eye health. High in protein and keeps you feeling full longer: A good source of plant-based protein and high in fiber, aiding digestion. When consumed in moderation, it helps you feel full for longer and control appetite. Heart-healthy: Rich in unsaturated fats, which help lower bad cholesterol (LDL) levels and reduce the risk of cardiovascular disease. Blood sugar control: Low glycemic index and high in magnesium, making it ideal for those who want to manage their blood sugar. Rich in antioxidants: The red seed coat (pericarp) is high in antioxidants, helping to slow cell aging. And the finally then You can eat it and Sell it to the Merchant or Customer with Who people you Know Knew known, i hope you have fun and enjoy it.
ClickMeSeeAllFull
ClickMeSeeOnMoreDetail
ClickMeSeeOnMorePictureImage
ClickMeSeeOnMoreVideo
Vegetable: Processer Processed Processing food Menu: 7.Peanuts Tart Shell
Method: All Works: Peanuts Tart Shell
Method: How to make made cook: Recipe Procedure: Method: All Works: Peanuts Tart Shell Step 1: For The Dough: Materials Ingredients: All-purpose flour: 150 grams, Icing sugar: (to taste), Salted butter (chilled): 115 grams, Salt: 1/4 teaspoon, Ice-cold water: 30 milliliters Key Preparation Directions Instructions Methods: 1. Flour preparation: Sift together the flour, icing sugar, and salt. Add the cold butter and use a fork or pastry cutter to incorporate the butter into the flour until it resembles coarse sand. 2. Kneading the dough: Gradually add the ice-cold water and gently knead until the dough forms a ball (be careful not to add too much water). 3. Resting the dough: Wrap the dough in plastic wrap and refrigerate for at least 30-60 minutes. 4. Shaping: Roll the dough into a thin sheet, about 3 millimeters thick. Cut out circles and line the tart molds. Prick the bottom of the dough all over with a fork to prevent it from puffing up during baking. Summary Summation Notes: There are two main ways to make delicious egg tart crust that is crispy on the outside, flaky on the inside, and fragrant with butter: shortcrust pastry, which is easy to make and has a cookie-like texture, and puff pastry, which results in a crispy, light, layered texture. Additional tips: Sprinkle with your favorite toppings, such as chopped fruits and vegetables or chocolate to taste. Step 2: For The Filling: Materials Ingredients: Fresh milk (unsweetened): 120 ml, Evaporated milk: 50 ml, Egg yolks (size 2 chicken eggs): 3, Sugar: (to taste) grams, Vanilla extract: 1/2 teaspoons, Salt: a pinch Coconut milk (to taste) Cheese (to taste) Roasted peanuts: finely ground (to taste) Key Preparation Directions Instructions Methods: 1. Dissolve the sugar: Combine fresh milk, evaporated milk, granulated sugar, salt, coconut milk, cheese, nuts, and vanilla extract. Stir until the sugar is partially dissolved (you can slightly heat it over a pot of hot water to speed up the sugar dissolution process). 2. Add the egg: Let the milk cool slightly, then add the egg yolk and gently stir to combine, being careful to avoid creating too many air bubbles. 3. Pour the strained custard into the prepared tart cups (fill about 3/4 of the cup). 4. Bake in a preheated oven at 180-200 degrees Celsius for approximately 15-20 minutes, or until the top of the tart starts to turn a beautiful golden brown. Remove from the oven and let it cool on a wire rack (it can be eaten immediately). Summary Summation Notes: There are two main ways to make delicious egg tart crust that is crispy on the outside, flaky on the inside, and fragrant with butter: shortcrust pastry, which is easy to make and has a cookie-like texture, and puff pastry, which results in a crispy, light, layered texture. Additional tips: (Optional) Strain the custard mixture through a fine-mesh sieve 1-2 times for a smooth texture. And the finally then You can eat it and Sell it to the Merchant or Customer with Who people you Know Knew known, i hope you have fun and enjoy it. Where can i you me buy it, Where to Buy, Where to find it: Internet Online, Supermarkets. Widely available from street food stalls, especially in durian-growing regions like, and at markets. Online: Easily ordered from platforms like Abcdefg in various grades and sizes. Caution Warning: Precautions: Peanuts are high in caloriesand fat, so they should be consumed in moderation (about a handful per day). Choose boiled or roasted peanuts that are not heavily seasoned with salt or sugar. Also, be mindful of mold (aflatoxin) by choosing fresh peanuts and storing them in a dry place. Key Additional Tips Profit Useful Benefit Available Nutrition : Peanuts are a grain rich in protein, healthy fats, vitamins, and minerals. They offer notable benefits in supporting brain and nervous system health, controlling blood sugar levels, are rich in antioxidants, and may help reduce the risk of heart disease. Enhances brain function: Contains choline and B vitamins, which nourish the nervous system, improve memory, and support eye health. High in protein and keeps you feeling full longer: A good source of plant-based protein and high in fiber, aiding digestion. When consumed in moderation, it helps you feel full for longer and control appetite. Heart-healthy: Rich in unsaturated fats, which help lower bad cholesterol (LDL) levels and reduce the risk of cardiovascular disease. Blood sugar control: Low glycemic index and high in magnesium, making it ideal for those who want to manage their blood sugar. Rich in antioxidants: The red seed coat (pericarp) is high in antioxidants, helping to slow cell aging. And the finally then You can eat it and Sell it to the Merchant or Customer with Who people you Know Knew known, i hope you have fun and enjoy it.
ClickMeSeeAllFull
ClickMeSeeOnMoreDetail
ClickMeSeeOnMorePictureImage
ClickMeSeeOnMoreVideo
Vegetable: Processer Processed Processing food Menu: 8.Peanuts Croissant
Method: All Works: Peanuts Croissant
Method: How to make made cook: Recipe Procedure: Method: All Works: Peanuts Croissant Step 1: For The Dough: Materials Ingredients: Dough ingredients (for 8-10 croissants): 250 grams bread flour (or French flour T55), 140 grams ice-cold unsweetened milk, 5 grams instant yeast, granulated sugar (to taste), 5 grams salt, 25 grams unsalted butter (for mixing into the dough), 125 grams unsalted butter (for making the butter layer or roll-in butter). Key Preparation Directions Instructions Methods: 1. Dough preparation: Combine flour, yeast, sugar, and salt. Add milk and unsalted butter. Knead until the mixture is well combined and the dough starts to feel smooth (it doesn't need to be as smooth and elastic as regular bread). First resting period: Gather the dough into a ball, wrap it in plastic wrap, and refrigerate for 1-2 hours. 2. Prepare the butter: Roll out 125 grams of unsalted butter into a square sheet. Wrap it in parchment paper and refrigerate until the butter is flexible (it should be able to be bent without cracking or becoming too liquid). Laminating the butter: Take the dough out and roll it into a square sheet. Place the butter sheet in the center, then fold the dough from all four sides inward to completely enclose the butter. 3. Folding the Dough (Turn): Roll the buttered dough into a long sheet, then fold it into three sections (like a letter fold). Refrigerate the dough for 30-45 minutes. Repeat this process three times. (This step will create alternating thin layers of butter and dough.) Cutting and Shaping: Roll the folded dough to a thickness of approximately 3-4 millimeters. Cut into triangles, then roll from the base to the top. 4. Final resting period: Arrange the croissants on a baking tray and let them rest at room temperature or in a proofing cabinet until they double in size. Then, make a hole in the bottom of each croissant, pipe in the filling, and fold the edges together to seal. Before baking, brush the tops lightly with an egg and milk mixture. Baking: Bake at 190-200 degrees Celsius for 15-20 minutes, or until golden brown and crispy. They are ready to eat immediately. Summary Summation Notes: Making croissants with beautiful layers, a crispy exterior, and a soft interior, requires techniques for kneading and laminating the butter. The principle involves alternating layers of dough and butter, requiring careful temperature control to prevent the butter from melting during the process. The basic steps can be followed as follows: Additional tips: Tip for delicious results: Temperature is paramount. Be careful not to let the butter melt and seep out while rolling the dough. If you feel the dough starting to soften or the butter becoming runny, immediately put it back in the refrigerator. Step 2: For The Filling: Materials Ingredients: Fresh milk (unsweetened): 120 ml, Evaporated milk: 50 ml, Egg yolks (size 2 chicken eggs): 3, Sugar: (to taste) grams, Vanilla extract: 1/2 teaspoons, Salt: a pinch Coconut milk (to taste) Cheese (to taste) Roasted peanuts: finely ground (to taste) Key Preparation Directions Instructions Methods: 1. Dissolve the sugar: Combine fresh milk, evaporated milk, granulated sugar, salt, coconut milk, cheese, nuts, and vanilla extract. Stir until the sugar is partially dissolved (you can slightly heat it over a pot of hot water to speed up the sugar dissolution process). 2. Add the egg: Let the milk cool slightly, then add the egg yolk and gently stir to combine, being careful to avoid creating too many air bubbles. 3. Pour the strained custard into the holes or center of the prepared croissants (as desired). 4. Bake in a preheated oven at 180-200 degrees Celsius for approximately 15-20 minutes, or until the top of the tart starts to turn a beautiful golden brown. Remove from the oven and let it cool on a wire rack (it can be eaten immediately). Summary Summation Notes: There are two main ways to make delicious croissant dough that's crispy on the outside, soft on the inside, and fragrant with butter: shortcrust, which is easy to make and has a cookie-like texture, and puff pastry, which results in a crispy, light, and layered texture. Additional tips: (Optional) Strain the custard mixture through a fine-mesh sieve 1-2 times for a smooth texture. And the finally then You can eat it and Sell it to the Merchant or Customer with Who people you Know Knew known, i hope you have fun and enjoy it. Where can i you me buy it, Where to Buy, Where to find it: Internet Online, Supermarkets. Widely available from street food stalls, especially in durian-growing regions like, and at markets. Online: Easily ordered from platforms like Abcdefg in various grades and sizes. Caution Warning: Precautions: Peanuts are high in caloriesand fat, so they should be consumed in moderation (about a handful per day). Choose boiled or roasted peanuts that are not heavily seasoned with salt or sugar. Also, be mindful of mold (aflatoxin) by choosing fresh peanuts and storing them in a dry place. Key Additional Tips Profit Useful Benefit Available Nutrition : Peanuts are a grain rich in protein, healthy fats, vitamins, and minerals. They offer notable benefits in supporting brain and nervous system health, controlling blood sugar levels, are rich in antioxidants, and may help reduce the risk of heart disease. Enhances brain function: Contains choline and B vitamins, which nourish the nervous system, improve memory, and support eye health. High in protein and keeps you feeling full longer: A good source of plant-based protein and high in fiber, aiding digestion. When consumed in moderation, it helps you feel full for longer and control appetite. Heart-healthy: Rich in unsaturated fats, which help lower bad cholesterol (LDL) levels and reduce the risk of cardiovascular disease. Blood sugar control: Low glycemic index and high in magnesium, making it ideal for those who want to manage their blood sugar. Rich in antioxidants: The red seed coat (pericarp) is high in antioxidants, helping to slow cell aging. And the finally then You can eat it and Sell it to the Merchant or Customer with Who people you Know Knew known, i hope you have fun and enjoy it.
ClickMeSeeAllFull
ClickMeSeeOnMoreDetail
ClickMeSeeOnMorePictureImage
ClickMeSeeOnMoreVideo
Vegetable: Processer Processed Processing food Menu: 9.Peanuts Ice Cream Cone
Method: All Works: Peanuts Ice Cream Cone
Method: How to make made cook: Recipe Procedure: Method: All Works: Peanuts Ice Cream Cone Step 1: For The Dough: Materials Ingredients: All-purpose flour: 13 cups (or approximately 45-50 grams) Eggs (size 2): 2 Sugar: 12 cups Melted unsalted butter: 14 cups (approximately 40 grams) Fresh milk or evaporated milk: 3 tablespoons Vanilla extract: 12 - 1 teaspoon Salt: 18 teaspoons Key Preparation Directions Instructions Methods: 1. Mix the batter: Combine the eggs, sugar, and vanilla extract. Whisk with a hand whisk until the sugar is well dissolved and combined. 2. Add the remaining ingredients: Add the melted butter, milk, and salt (most people would consider this the regular all-purpose flour) to a mixing bowl. Beat until the batter is smooth and creamy. 3. Baking the waffles: Pour the batter into a waffle cone maker (or a Thai rolled wafer maker), close the lid, and bake until the batter is cooked, golden brown, and fragrant. 4. Roll into a cone: Quickly remove the waffle from the oven, place it on a cone roller, and squeeze the ends to seal tightly. Let it cool until crispy and firm. Scoop ice cream onto the cone and enjoy immediately. Summary Summation Notes: Making your own ice cream cones is easy at home! Simply mix the flour, eggs, and butter together, pour into a waffle cone maker, roll out the batter until golden brown and crispy, then quickly roll it into a cone shape before it cools down. Additional tips: Once the dough has cooled, immediately store it in an airtight container or box to prevent air from entering and maintain its crispness. Step 2: For The Filling: Materials Ingredients: Peanut butter (smooth type): (1) cup whipping cream (chilled dairy whipping cream): (2) cups sweetened condensed milk: (12) to (34) cups (adjust as desired) Vanilla extract: (1) teaspoon Salt: (14) teaspoons Coarsely ground roasted peanuts: For topping (amount as desired) Coconut milk (as desired) Fresh milk (as desired) Key Preparation Directions Instructions Methods: 1. Combine the main ingredients: In a mixing bowl, combine peanut butter, condensed milk, vanilla extract, coconut milk, fresh milk, and salt. Use a whisk to mix all ingredients until smooth and well combined. 2. Whipping the cream: In another mixing bowl (preferably chilled), whip the cream with an electric mixer until soft peaks to stiff peaks form. 3. Fold together: Scoop about 1/3 of the whipped cream into the peanut butter mixture. Gently fold with a spatula until combined. Then, gradually add the remaining cream and continue folding until smooth and well combined. 4. Freezing: Pour the ice cream mixture into a container with a tight-fitting lid. Sprinkle with crushed roasted peanuts. Freeze for at least (6) - (8) hours or overnight until the ice cream is set. Summary Summation Notes: Make easy homemade peanut ice cream without an ice cream maker! Simply blend peanut butter with whipping cream and condensed milk, then freeze. You'll get smooth, creamy ice cream with a rich peanut flavor. Additional tips: Sprinkle with your favorite toppings, such as chopped fruits and vegetables or chocolate to taste. And the finally then You can eat it and Sell it to the Merchant or Customer with Who people you Know Knew known, i hope you have fun and enjoy it. Where can i you me buy it, Where to Buy, Where to find it: Internet Online, Supermarkets. Widely available from street food stalls, especially in durian-growing regions like, and at markets. Online: Easily ordered from platforms like Abcdefg in various grades and sizes. Caution Warning: Precautions: Peanuts are high in caloriesand fat, so they should be consumed in moderation (about a handful per day). Choose boiled or roasted peanuts that are not heavily seasoned with salt or sugar. Also, be mindful of mold (aflatoxin) by choosing fresh peanuts and storing them in a dry place. Key Additional Tips Profit Useful Benefit Available Nutrition : Peanuts are a grain rich in protein, healthy fats, vitamins, and minerals. They offer notable benefits in supporting brain and nervous system health, controlling blood sugar levels, are rich in antioxidants, and may help reduce the risk of heart disease. Enhances brain function: Contains choline and B vitamins, which nourish the nervous system, improve memory, and support eye health. High in protein and keeps you feeling full longer: A good source of plant-based protein and high in fiber, aiding digestion. When consumed in moderation, it helps you feel full for longer and control appetite. Heart-healthy: Rich in unsaturated fats, which help lower bad cholesterol (LDL) levels and reduce the risk of cardiovascular disease. Blood sugar control: Low glycemic index and high in magnesium, making it ideal for those who want to manage their blood sugar. Rich in antioxidants: The red seed coat (pericarp) is high in antioxidants, helping to slow cell aging. And the finally then You can eat it and Sell it to the Merchant or Customer with Who people you Know Knew known, i hope you have fun and enjoy it.
ClickMeSeeAllFull
ClickMeSeeOnMoreDetail
ClickMeSeeOnMorePictureImage
ClickMeSeeOnMoreVideo
Vegetable: Processer Processed Processing food Menu: 10.Peanuts Ice Cream Waffle Sandwiches
Method: All Works: Peanuts Ice Cream Waffle Sandwiches
Method: How to make made cook: Recipe Procedure: Method: All Works: Peanuts Ice Cream Waffle Sandwiches Step 1: For The Dough: Materials Ingredients: All-purpose flour: 200 grams, Unsweetened milk (slightly warm): 180 grams, Eggs (size 2): 2, Sugar: 1-100 grams (adjust to taste), Melted butter: 50 grams, Baking powder: 1.5 teaspoons, Vanilla extract: 1 teaspoon, Salt: 1/4 teaspoon Key Preparation Directions Instructions Methods: 1. Combine dry ingredients: Sift the all-purpose flour and baking powder into a mixing bowl. Add the granulated sugar and salt and mix well. 2. Mix the liquid ingredients: In another bowl, whisk together the beaten eggs, unsweetened milk, melted butter, and vanilla extract. 3. Combine ingredients: Pour the liquid ingredients into the flour bowl. Whisk with a hand whisk until smooth and lump-free. (You can let the dough rest for 15-20 minutes to allow it to set.) 4. Baking Waffles: Preheat the waffle iron, lightly butter it, pour in the batter, cover, and bake for 3-5 minutes, or until golden brown. Place the waffle in a separate pan to form the base, fill with ice cream, and top with another waffle. Serve immediately or refrigerate for 1 minute to 4 hours to set. Summary Summation Notes: This easy milk waffle recipe results in a crispy exterior and a soft, fragrant interior. You can make it at home with just the main ingredients: all-purpose flour, fresh milk, eggs, and butter. Mix everything together, pour into a waffle maker, and bake for approximately 3-5 minutes. It's ready to serve immediately! Additional tips: Once the dough has cooled, immediately store it in an airtight container or box to prevent air from entering and maintain its crispness. Step 2: For The Filling: Materials Ingredients: Peanut butter (smooth type): (1) cup whipping cream (chilled dairy whipping cream): (2) cups sweetened condensed milk: (12) to (34) cups (adjust as desired) Vanilla extract: (1) teaspoon Salt: (14) teaspoons Coarsely ground roasted peanuts: For topping (amount as desired) Coconut milk (as desired) Fresh milk (as desired) Key Preparation Directions Instructions Methods: 1. Combine the main ingredients: In a mixing bowl, combine peanut butter, condensed milk, vanilla extract, coconut milk, fresh milk, and salt. Use a whisk to mix all ingredients until smooth and well combined. 2. Whipping the cream: In another mixing bowl (preferably chilled), whip the cream with an electric mixer until soft peaks to stiff peaks form. 3. Fold together: Scoop about 1/3 of the whipped cream into the peanut butter mixture. Gently fold with a spatula until combined. Then, gradually add the remaining cream and continue folding until smooth and well combined. 4. Freezing: Pour the ice cream mixture into a container with a tight-fitting lid. Sprinkle with crushed roasted peanuts. Freeze for at least (6) - (8) hours or overnight until the ice cream is set. Summary Summation Notes: Make easy homemade peanut ice cream without an ice cream maker! Simply blend peanut butter with whipping cream and condensed milk, then freeze. You'll get smooth, creamy ice cream with a rich peanut flavor. Additional tips: Sprinkle with your favorite toppings, such as chopped fruits and vegetables or chocolate to taste. And the finally then You can eat it and Sell it to the Merchant or Customer with Who people you Know Knew known, i hope you have fun and enjoy it. Where can i you me buy it, Where to Buy, Where to find it: Internet Online, Supermarkets. Widely available from street food stalls, especially in durian-growing regions like, and at markets. Online: Easily ordered from platforms like Abcdefg in various grades and sizes. Caution Warning: Precautions: Peanuts are high in caloriesand fat, so they should be consumed in moderation (about a handful per day). Choose boiled or roasted peanuts that are not heavily seasoned with salt or sugar. Also, be mindful of mold (aflatoxin) by choosing fresh peanuts and storing them in a dry place. Key Additional Tips Profit Useful Benefit Available Nutrition : Peanuts are a grain rich in protein, healthy fats, vitamins, and minerals. They offer notable benefits in supporting brain and nervous system health, controlling blood sugar levels, are rich in antioxidants, and may help reduce the risk of heart disease. Enhances brain function: Contains choline and B vitamins, which nourish the nervous system, improve memory, and support eye health. High in protein and keeps you feeling full longer: A good source of plant-based protein and high in fiber, aiding digestion. When consumed in moderation, it helps you feel full for longer and control appetite. Heart-healthy: Rich in unsaturated fats, which help lower bad cholesterol (LDL) levels and reduce the risk of cardiovascular disease. Blood sugar control: Low glycemic index and high in magnesium, making it ideal for those who want to manage their blood sugar. Rich in antioxidants: The red seed coat (pericarp) is high in antioxidants, helping to slow cell aging. And the finally then You can eat it and Sell it to the Merchant or Customer with Who people you Know Knew known, i hope you have fun and enjoy it.
ClickMeSeeAllFull
ClickMeSeeOnMoreDetail
ClickMeSeeOnMorePictureImage
ClickMeSeeOnMoreVideo
Vegetable: Processer Processed Processing food Menu: 1.Golden Bean Nuts Mung Snack Roast
Method: All Works: Golden Bean Nuts Mung Snack Roast
Method: How to make made cook: Recipe Procedure: Method: All Works: Golden Bean Nuts Mung Snack Roast Materials Ingredients: 500 grams of split mung beans (golden beans), 1-2 teaspoons of salt (adjust to taste), a little vegetable oil (for coating the pan to prevent the beans from sticking). Key Preparation Directions Instructions Methods: 1. Prepare the beans: Rinse the split mung beans thoroughly 3-4 times until the water runs clear. Soak them in water for about 3-5 hours, or overnight, to allow the beans to absorb water. 2. Steaming the beans: Drain the soaked beans and place them in a cheesecloth or steamer. Steam over vigorously boiling water for about 15-20 minutes, or until cooked but not mushy. Drying: Spread the steamed beans on a tray and let them cool and dry completely. 3. Salted Roasting: Heat a pan over low heat, add the peanuts and roast, stirring constantly to prevent burning. Sprinkle a little salt water and continue roasting until the peanuts are dry, crispy, and have a beautiful golden color. 4. Let it cool: Remove and place on paper towels to drain excess oil. Once the beans are completely cool, transfer them to an airtight container. Summary Summation Notes: Making salted roasted mung beans (split mung beans) is easy. Start by washing and soaking the beans until soft. Steam them until cooked. Then, roast them in a pan over low heat until crispy. Season with salt for a savory and delicious taste. They're fun to chew and can be stored for a long time. Additional tips: - And the finally then You can eat it and Sell it to the Merchant or Customer with Who people you Know Knew known, i hope you have fun and enjoy it. Where can i you me buy it, Where to Buy, Where to find it: Internet Online, Supermarkets. Widely available from street food stalls, especially in durian-growing regions like, and at markets. Online: Easily ordered from platforms like Abcdefg in various grades and sizes. Caution Warning: Precautions: - Key Additional Tips Profit Useful Benefit Available Nutrition : Mung beans (hulled mung beans) are rich in protein, complex carbohydrates, and high in fiber. They help control blood sugar levels, promote healthy digestion, lower cholesterol, and are an excellent source of energy for those looking to manage their weight. High in protein, low in fat: Contains protein similar to meat but is much easier to digest. It's cholesterol-free and low in saturated fat. Helps control blood sugar: A slow-absorbing complex carbohydrate that helps maintain blood sugar levels and reduces the risk of diabetes. Good for digestion: High in fiber, it helps prevent constipation, detoxifies the intestines, and lowers cholesterol in the blood. Rich in vitamins and minerals: Contains folate, B vitamins, calcium, and iron, which help nourish the nervous system and prevent anemia. And the finally then You can eat it and Sell it to the Merchant or Customer with Who people you Know Knew known, i hope you have fun and enjoy it.
ClickMeSeeAllFull
ClickMeSeeOnMoreDetail
ClickMeSeeOnMorePictureImage
ClickMeSeeOnMoreVideo
Vegetable: Processer Processed Processing food Menu: 2.Golden Bean Nuts Mung Snack Toast
Method: All Works: Golden Bean Nuts Mung Snack Toast
Method: How to make made cook: Recipe Procedure: Method: All Works: Golden Bean Nuts Mung Snack Toast Materials Ingredients: Thick slices of bread (or thick-sliced loaf of bread), butter (salted or unsalted, as preferred), condensed milk, slices of cheese (mozzarella or cheddar cheese), roasted peanuts (finely ground into powder). Key Preparation Directions Instructions Methods: 1. Prepare the bread: Spread butter evenly on both sides of each slice of bread. 2. Toasting the bread: Heat a non-stick pan over low heat. Place the bread in the pan and toast until golden brown and fragrant. Flip and toast the other side until crispy. 3. Add cheese and golden beans: Place a slice of cheese on top of the bread and sprinkle with powdered golden beans. Cover the pan for about 1-2 minutes to allow the cheese to melt and become gooey. 4. Drizzle with condensed milk: Place the bread on a plate and drizzle with condensed milk to your liking (you can add a little sugar for extra crunch). Serve immediately. Summary Summation Notes: Make delicious, crispy on the outside, soft on the inside, cheesy buttered toast in just a few minutes. Start by spreading butter all over the bread slices. Toast them in a pan or toaster until golden and crispy. Then top with a slice of cheese, drizzle with plenty of condensed milk, and torch or bake until the cheese is melted and gooey. Additional tips: - And the finally then You can eat it and Sell it to the Merchant or Customer with Who people you Know Knew known, i hope you have fun and enjoy it. Where can i you me buy it, Where to Buy, Where to find it: Internet Online, Supermarkets. Widely available from street food stalls, especially in durian-growing regions like, and at markets. Online: Easily ordered from platforms like Abcdefg in various grades and sizes. Caution Warning: Precautions: - Key Additional Tips Profit Useful Benefit Available Nutrition : Mung beans (hulled mung beans) are rich in protein, complex carbohydrates, and high in fiber. They help control blood sugar levels, promote healthy digestion, lower cholesterol, and are an excellent source of energy for those looking to manage their weight. High in protein, low in fat: Contains protein similar to meat but is much easier to digest. It's cholesterol-free and low in saturated fat. Helps control blood sugar: A slow-absorbing complex carbohydrate that helps maintain blood sugar levels and reduces the risk of diabetes. Good for digestion: High in fiber, it helps prevent constipation, detoxifies the intestines, and lowers cholesterol in the blood. Rich in vitamins and minerals: Contains folate, B vitamins, calcium, and iron, which help nourish the nervous system and prevent anemia. And the finally then You can eat it and Sell it to the Merchant or Customer with Who people you Know Knew known, i hope you have fun and enjoy it.
ClickMeSeeAllFull
ClickMeSeeOnMoreDetail
ClickMeSeeOnMorePictureImage
ClickMeSeeOnMoreVideo
Vegetable: Processer Processed Processing food Menu: 3.Golden Bean Nuts Mung Snack Bake
Method: All Works: Golden Bean Nuts Mung Snack Bake
Method: How to make made cook: Recipe Procedure: Method: All Works: Golden Bean Nuts Mung Snack Bake Materials Ingredients: 250 grams of split mung beans (hulled), 30 grams of unsalted butter, 50 milliliters of evaporated milk, 2-3 tablespoons of condensed milk (adjust to taste), mozzarella cheese (amount to taste), a pinch of salt. Key Preparation Directions Instructions Methods: 1. Prepare the mung beans: Wash the mung beans thoroughly and soak them in warm water for about 3-4 hours. Then steam them until soft and tender (approximately 15-20 minutes). Let them drain. 2. Sautéing the ingredients: Heat a pan over low heat, add butter and melt, then add the steamed mung beans, evaporated milk, and condensed milk. Stir and mix well until the mung beans begin to clump together. Taste and adjust the sweetness and creaminess to your liking. Add a pinch of salt to balance the flavors, then turn off the heat. 3. Bake with Cheese: Spoon the sautéed beans into a heat-resistant bowl and sprinkle generously with mozzarella cheese. 4. Baking: Bake in an oven at 180°C for approximately 5-8 minutes, or use an air fryer (180°C for 5 minutes) until the cheese melts and turns golden brown. Ready to serve. Summary Summation Notes: Making baked mung beans with cheese, butter, and milk is a perfect combination of the sweet and creamy flavors of mung beans (hulled split mung beans) and the salty, buttery, and stretchy cheese. It's easy to make: simply steam the mung beans, sauté them with butter and milk, then bake until the cheese is melted and gooey. Additional tips: - And the finally then You can eat it and Sell it to the Merchant or Customer with Who people you Know Knew known, i hope you have fun and enjoy it. Where can i you me buy it, Where to Buy, Where to find it: Internet Online, Supermarkets. Widely available from street food stalls, especially in durian-growing regions like, and at markets. Online: Easily ordered from platforms like Abcdefg in various grades and sizes. Caution Warning: Precautions: - Key Additional Tips Profit Useful Benefit Available Nutrition : Mung beans (hulled mung beans) are rich in protein, complex carbohydrates, and high in fiber. They help control blood sugar levels, promote healthy digestion, lower cholesterol, and are an excellent source of energy for those looking to manage their weight. High in protein, low in fat: Contains protein similar to meat but is much easier to digest. It's cholesterol-free and low in saturated fat. Helps control blood sugar: A slow-absorbing complex carbohydrate that helps maintain blood sugar levels and reduces the risk of diabetes. Good for digestion: High in fiber, it helps prevent constipation, detoxifies the intestines, and lowers cholesterol in the blood. Rich in vitamins and minerals: Contains folate, B vitamins, calcium, and iron, which help nourish the nervous system and prevent anemia. And the finally then You can eat it and Sell it to the Merchant or Customer with Who people you Know Knew known, i hope you have fun and enjoy it.
ClickMeSeeAllFull
ClickMeSeeOnMoreDetail
ClickMeSeeOnMorePictureImage
ClickMeSeeOnMoreVideo
Vegetable: Processer Processed Processing food Menu: 4.Golden Bean Nuts Mung Snack Melt
Method: All Works: Golden Bean Nuts Mung Snack Melt
Method: How to make made cook: Recipe Procedure: Method: All Works: Golden Bean Nuts Mung Snack Melt Materials Ingredients: Roasted mung beans (hulled split mung beans): 1 cup Coconut cream: 1 cup Coconut milk: 1.5 cups (you can use water mixed with coconut cream instead) Palm sugar (or jaggery): 1/2 cup (adjust to taste) Granulated sugar: 1-2 tablespoons Salt: 1/2 teaspoon Pandan leaves: 3-4 leaves (tied in a knot) Milk: to taste Whipped cream: to taste Key Preparation Directions Instructions Methods: 1. Boiling the coconut milk: Pour the thin coconut milk into a pot, add the pandan leaves, and heat over medium heat until the coconut milk is warm (do not let it boil vigorously or it will curdle). 2. Seasoning: Add coconut sugar, granulated sugar, and salt. Stir until the sugar dissolves completely. Taste and adjust seasoning as desired. 3. Add the peanuts and coconut cream: Add the roasted peanuts, followed by the fresh coconut cream, fresh milk, and whipped cream. Stir well and wait until it simmers gently. Turn off the heat immediately (to prevent the coconut cream from separating). 4. Serving: Scoop into a bowl and enjoy warm, or add crushed ice for a refreshing treat. Summary Summation Notes: Mung bean in coconut milk (split mung beans cooked in coconut milk) is an easy-to-make traditional Thai dessert. It's fragrant, creamy, and perfectly sweet, and rich in protein. You can follow the steps below to make it. Additional tips: You can add any toppings you like such as bread fruit vegetable slice or cheese powder and marshmallow snack. And the finally then You can eat it and Sell it to the Merchant or Customer with Who people you Know Knew known, i hope you have fun and enjoy it. Where can i you me buy it, Where to Buy, Where to find it: Internet Online, Supermarkets. Widely available from street food stalls, especially in durian-growing regions like, and at markets. Online: Easily ordered from platforms like Abcdefg in various grades and sizes. Caution Warning: Precautions: - Key Additional Tips Profit Useful Benefit Available Nutrition : Mung beans (hulled mung beans) are rich in protein, complex carbohydrates, and high in fiber. They help control blood sugar levels, promote healthy digestion, lower cholesterol, and are an excellent source of energy for those looking to manage their weight. High in protein, low in fat: Contains protein similar to meat but is much easier to digest. It's cholesterol-free and low in saturated fat. Helps control blood sugar: A slow-absorbing complex carbohydrate that helps maintain blood sugar levels and reduces the risk of diabetes. Good for digestion: High in fiber, it helps prevent constipation, detoxifies the intestines, and lowers cholesterol in the blood. Rich in vitamins and minerals: Contains folate, B vitamins, calcium, and iron, which help nourish the nervous system and prevent anemia. And the finally then You can eat it and Sell it to the Merchant or Customer with Who people you Know Knew known, i hope you have fun and enjoy it.
ClickMeSeeAllFull
ClickMeSeeOnMoreDetail
ClickMeSeeOnMorePictureImage
ClickMeSeeOnMoreVideo
Vegetable: Processer Processed Processing food Menu: 5.Golden Bean Nuts Mung Snack Pudding
Method: All Works: Golden Bean Nuts Mung Snack Pudding
Method: How to make made cook: Recipe Procedure: Method: All Works: Golden Bean Nuts Mung Snack Pudding Materials Ingredients: Steamed mung beans (hulled mung beans): 100 grams; Unsweetened fresh milk or soy milk (tofu): 400 milliliters; Whipping cream: 50 milliliters (for a thicker consistency, fresh milk can be used instead); Agar powder: 1 teaspoon (for a bouncy, crunchy texture) or Gelatin powder: 1.5 teaspoons (for a smooth, bouncy texture that melts in your mouth); Sugar: 40-50 grams (adjust to taste); Salt: 1/4 teaspoon; Vanilla extract: 1/2 teaspoon, Coconut Milk: to taste Key Preparation Directions Instructions Methods: 1. Preparing the mung beans: Wash the mung beans thoroughly and soak them in warm water for about 3-4 hours. Then steam them over high heat for about 20 minutes until the beans are soft and tender. Let them cool. 2. Blend the ingredients: Put the steamed mung beans, fresh milk, coconut milk, and whipping cream into a blender. Blend until smooth and well combined. 3. Prepare the pudding mixture: Pour the blended mixture into a pot. Add granulated sugar, agar powder (or gelatin), salt, and vanilla extract. Stir until the agar powder dissolves. 4. Heat: Place the pot over low heat, stirring constantly to prevent the beans from sticking to the bottom. Bring to a gentle simmer (do not boil), then turn off the heat. Pour into molds or serving bowls, let cool, and then refrigerate for 2-3 hours until set. Summary Summation Notes: Mung bean pudding is a smooth, creamy, and easy-to-make dessert. Simply blend steamed mung beans with fresh milk, add agar powder or gelatin, and chill until set. This recipe offers a delicately sweet flavor and is packed with protein. Additional tips: Strain and chill: Strain the mixture once through a fine-mesh sieve to ensure a smooth pudding texture. And the finally then You can eat it and Sell it to the Merchant or Customer with Who people you Know Knew known, i hope you have fun and enjoy it. Where can i you me buy it, Where to Buy, Where to find it: Internet Online, Supermarkets. Widely available from street food stalls, especially in durian-growing regions like, and at markets. Online: Easily ordered from platforms like Abcdefg in various grades and sizes. Caution Warning: Precautions: - Key Additional Tips Profit Useful Benefit Available Nutrition : Mung beans (hulled mung beans) are rich in protein, complex carbohydrates, and high in fiber. They help control blood sugar levels, promote healthy digestion, lower cholesterol, and are an excellent source of energy for those looking to manage their weight. High in protein, low in fat: Contains protein similar to meat but is much easier to digest. It's cholesterol-free and low in saturated fat. Helps control blood sugar: A slow-absorbing complex carbohydrate that helps maintain blood sugar levels and reduces the risk of diabetes. Good for digestion: High in fiber, it helps prevent constipation, detoxifies the intestines, and lowers cholesterol in the blood. Rich in vitamins and minerals: Contains folate, B vitamins, calcium, and iron, which help nourish the nervous system and prevent anemia. And the finally then You can eat it and Sell it to the Merchant or Customer with Who people you Know Knew known, i hope you have fun and enjoy it.
ClickMeSeeAllFull
ClickMeSeeOnMoreDetail
ClickMeSeeOnMorePictureImage
ClickMeSeeOnMoreVideo
Vegetable: Processer Processed Processing food Menu: 6.Golden Bean Nuts Mung Snack Smoothie
Method: All Works: Golden Bean Nuts Mung Snack Smoothie
Method: How to make made cook: Recipe Procedure: Method: All Works: Golden Bean Nuts Mung Snack Smoothie Materials Ingredients: 1/2 cup steamed mung beans, 150 ml unsweetened fresh milk (or soy milk), 2-3 tablespoons sweetened condensed milk (adjust to taste), 1 tablespoon simple syrup (omit if you prefer less sweetness), a pinch of salt (a pinch), 1-2 cups finely crushed ice, roasted mung beans for topping. Key Preparation Directions Instructions Methods: 1. Prepare the beans: Wash the mung beans thoroughly, soak them in water for 3-4 hours, then steam them until soft. Let them cool slightly. 2. Blend: Add steamed mung beans, fresh milk, condensed milk, syrup, salt, and crushed ice to a blender. 3. Smooth texture: Blend at high speed until all ingredients are smooth and well combined. 4. Serving: Pour into a glass, garnish with crispy roasted peanuts, and enjoy immediately. Summary Summation Notes: A blended mung bean and milk drink is an easy-to-make, healthy beverage rich in protein. Start by blending steamed mung beans with fresh milk, condensed milk, and ice until smooth. You can top it with crispy roasted mung beans for added crunch. Additional tips: You can add any toppings you like such as bread fruit vegetable slice or cheese powder and marshmallow snack. And the finally then You can eat it and Sell it to the Merchant or Customer with Who people you Know Knew known, i hope you have fun and enjoy it. Where can i you me buy it, Where to Buy, Where to find it: Internet Online, Supermarkets. Widely available from street food stalls, especially in durian-growing regions like, and at markets. Online: Easily ordered from platforms like Abcdefg in various grades and sizes. Caution Warning: Precautions: - Key Additional Tips Profit Useful Benefit Available Nutrition : Mung beans (hulled mung beans) are rich in protein, complex carbohydrates, and high in fiber. They help control blood sugar levels, promote healthy digestion, lower cholesterol, and are an excellent source of energy for those looking to manage their weight. High in protein, low in fat: Contains protein similar to meat but is much easier to digest. It's cholesterol-free and low in saturated fat. Helps control blood sugar: A slow-absorbing complex carbohydrate that helps maintain blood sugar levels and reduces the risk of diabetes. Good for digestion: High in fiber, it helps prevent constipation, detoxifies the intestines, and lowers cholesterol in the blood. Rich in vitamins and minerals: Contains folate, B vitamins, calcium, and iron, which help nourish the nervous system and prevent anemia. And the finally then You can eat it and Sell it to the Merchant or Customer with Who people you Know Knew known, i hope you have fun and enjoy it.
ClickMeSeeAllFull
ClickMeSeeOnMoreDetail
ClickMeSeeOnMorePictureImage
ClickMeSeeOnMoreVideo
Vegetable: Processer Processed Processing food Menu: 7.Golden Bean Nuts Mung Snack Tart
Method: All Works: Golden Bean Nuts Mung Snack Tart
Method: How to make made cook: Recipe Procedure: Method: All Works: Golden Bean Nuts Mung Snack Tart Setp 1:For The Dough: Materials Ingredients: 150 grams all-purpose flour, 80 grams unsalted butter (very cold), 30 grams icing sugar, a pinch of salt, 1 egg (room temperature), 1/2 teaspoon vanilla extract. Key Preparation Directions Instructions Methods: 1. Sift together the flour, icing sugar, and salt. Add the very cold butter and use a pastry cutter to incorporate the butter into the flour until it resembles coarse sand. 2. Add the eggs and vanilla extract. Knead until a ball forms (be careful not to chop the nuts or knead for too long, or the dough will become sticky). 3. Chill the dough in the refrigerator for about 30 minutes. Remove the dough and line the tart molds with it. Prick the bottom of the dough all over with a fork to prevent it from puffing up during baking. 4. Shape the mung bean paste filling into small balls and place them in the prepared tart shells. Bake at 180 degrees Celsius for approximately 15-20 minutes, or until the edges of the tart shells turn golden brown. Remove from the oven and let cool on a wire rack. Serve immediately. Summary Summation Notes: Making mung bean tarts is a fusion of Thai sweetness and a crispy Western-style tart crust. It's made by stirring a smooth mung bean filling and pouring it into ready-made or homemade tart shells. The tarts are then baked until golden and crispy, resulting in a delicious and perfectly balanced treat. Additional tips: You can add any toppings you like such as bread fruit vegetable slice or cheese powder and marshmallow snack. Setp 2: For The Filling: Materials Ingredients: 150 grams of mung beans (shelled), 100 grams of granulated sugar (adjust sweetness to your liking), 150 grams of smoked coconut milk or thick coconut cream, 1/4 teaspoon of salt. Key Preparation Directions Instructions Methods: 1. Wash the shelled mung beans thoroughly until the water runs clear, then soak them in water for about 3-4 hours. 2. Drain the soaked beans, place them in a cheesecloth, and steam over high heat for about 20-30 minutes until soft and tender. 3. Blend or mash the cooked beans until smooth. Then, put them into a pan (a Teflon pan is recommended) along with the coconut milk, sugar, and salt. 4. Turn on low heat and stir the mixture continuously until the beans begin to clump together and no longer stick to the pan. Let it cool completely. Summary Summation Notes: Making mung bean tarts is a fusion of Thai sweetness and a crispy Western-style tart crust. It's made by stirring a smooth mung bean filling and pouring it into ready-made or homemade tart shells. The tarts are then baked until golden and crispy, resulting in a delicious and perfectly balanced treat. Additional tips: You can add any toppings you like such as bread fruit vegetable slice or cheese powder and marshmallow snack. And the finally then You can eat it and Sell it to the Merchant or Customer with Who people you Know Knew known, i hope you have fun and enjoy it. Where can i you me buy it, Where to Buy, Where to find it: Internet Online, Supermarkets. Widely available from street food stalls, especially in durian-growing regions like, and at markets. Online: Easily ordered from platforms like Abcdefg in various grades and sizes. Caution Warning: Precautions: - Key Additional Tips Profit Useful Benefit Available Nutrition : Mung beans (hulled mung beans) are rich in protein, complex carbohydrates, and high in fiber. They help control blood sugar levels, promote healthy digestion, lower cholesterol, and are an excellent source of energy for those looking to manage their weight. High in protein, low in fat: Contains protein similar to meat but is much easier to digest. It's cholesterol-free and low in saturated fat. Helps control blood sugar: A slow-absorbing complex carbohydrate that helps maintain blood sugar levels and reduces the risk of diabetes. Good for digestion: High in fiber, it helps prevent constipation, detoxifies the intestines, and lowers cholesterol in the blood. Rich in vitamins and minerals: Contains folate, B vitamins, calcium, and iron, which help nourish the nervous system and prevent anemia. And the finally then You can eat it and Sell it to the Merchant or Customer with Who people you Know Knew known, i hope you have fun and enjoy it.
ClickMeSeeAllFull
ClickMeSeeOnMoreDetail
ClickMeSeeOnMorePictureImage
ClickMeSeeOnMoreVideo
Vegetable: Processer Processed Processing food Menu: 7.Golden Bean Nuts Mung Snack BunBao
Method: All Works: Golden Bean Nuts Mung Snack BunBao
Method: How to make made cook: Recipe Procedure: Method: All Works: Golden Bean Nuts Mung Snack BunBao Setp 1: For The Filling: Materials Ingredients: 250 grams of split mung beans (hulled), 150 grams of granulated sugar (adjust sweetness as needed), 200 milliliters of coconut milk, 2-3 tablespoons of vegetable oil (or shortening), 1/4 teaspoon of salt. Key Preparation Directions Instructions Methods: 1. Prepare the mung bean filling: Wash the split mung beans thoroughly and soak them in water for 3-4 hours. Steam them until soft and tender. Then blend or mash them until smooth. 2. Making the filling: Put the mashed beans in a pan, add coconut milk, sugar, salt, and vegetable oil. Stir over medium-low heat in the same direction until the bean mixture separates and doesn't stick to the pan. Let it cool, then shape into desired-sized round balls. Summary Summation Notes: Making delicious, soft, fluffy, and beautifully white mung bean buns is easy and involves two main parts: stirring the mung bean filling to a smooth, sweet, and creamy consistency, and making the bun dough so it stays soft even overnight. You can prepare and shape the buns according to the recipe below. Additional tips: You can add any toppings you like such as bread fruit vegetable slice or cheese powder and marshmallow snack. Setp 1:For The Dough: Materials Ingredients: 300 grams all-purpose flour or steamed bun flour, 150-160 milliliters water, 1 teaspoon instant yeast, 40 grams granulated sugar, 1 teaspoon baking powder, 20 grams shortening or vegetable oil, a pinch of salt. Key Preparation Directions Instructions Methods: 1. Making the steamed bun dough: Mix the yeast, sugar, and water together and let it rest for 5 minutes. In a mixing bowl, add the flour, baking powder, and salt. Pour in the yeast mixture and knead until well combined. Add the shortening and continue kneading until the dough is smooth, soft, and no longer sticky. 2. Resting and Shaping the Dough: Cover the dough with a damp cloth and let it rest for 45-60 minutes until it doubles in size. Divide the dough into equal portions, roll out any air bubbles, flatten each portion, and wrap the prepared mung bean filling completely inside. 3. Steaming the buns: Place the buns on parchment paper and let the dough rest for another 15-20 minutes. Bring water to a rolling boil. Steam the buns over medium heat for about 10-12 minutes. (Once cooked, remove them immediately to prevent the skin from wrinkling.) Then and eat it away if you want. Summary Summation Notes: Making delicious, soft, fluffy, and beautifully white mung bean buns is easy and involves two main parts: stirring the mung bean filling to a smooth, sweet, and creamy consistency, and making the bun dough so it stays soft even overnight. You can prepare and shape the buns according to the recipe below. Additional tips: You can add any toppings you like such as bread fruit vegetable slice or cheese powder and marshmallow snack. And the finally then You can eat it and Sell it to the Merchant or Customer with Who people you Know Knew known, i hope you have fun and enjoy it. Where can i you me buy it, Where to Buy, Where to find it: Internet Online, Supermarkets. Widely available from street food stalls, especially in durian-growing regions like, and at markets. Online: Easily ordered from platforms like Abcdefg in various grades and sizes. Caution Warning: Precautions: - Key Additional Tips Profit Useful Benefit Available Nutrition : Mung beans (hulled mung beans) are rich in protein, complex carbohydrates, and high in fiber. They help control blood sugar levels, promote healthy digestion, lower cholesterol, and are an excellent source of energy for those looking to manage their weight. High in protein, low in fat: Contains protein similar to meat but is much easier to digest. It's cholesterol-free and low in saturated fat. Helps control blood sugar: A slow-absorbing complex carbohydrate that helps maintain blood sugar levels and reduces the risk of diabetes. Good for digestion: High in fiber, it helps prevent constipation, detoxifies the intestines, and lowers cholesterol in the blood. Rich in vitamins and minerals: Contains folate, B vitamins, calcium, and iron, which help nourish the nervous system and prevent anemia. And the finally then You can eat it and Sell it to the Merchant or Customer with Who people you Know Knew known, i hope you have fun and enjoy it.
ClickMeSeeAllFull
ClickMeSeeOnMoreDetail
ClickMeSeeOnMorePictureImage
ClickMeSeeOnMoreVideo
Vegetable: Processer Processed Processing food Menu: 9.Golden Bean Nuts Mung Snack Paprika
Method: All Works: Golden Bean Nuts Mung Snack Paprika
Method: How to make made cook: Recipe Procedure: Method: All Works: Golden Bean Nuts Mung Snack Paprika Materials Ingredients: 500 grams of split mung beans (hulled), 1-2 tablespoons of paprika powder (adjust to taste), 1 teaspoon of seasoning powder (such as Ros Dee or barbecue powder), 1/2 teaspoon of salt, 1-2 tablespoons of unsalted butter or vegetable oil (for coating the beans), 1-2 teaspoons of sugar (adjust to taste). Key Preparation Directions Instructions Methods: 1. Prepare the beans: Wash the mung beans thoroughly until the water runs clear, then soak them in water for about 3-4 hours, or overnight to allow the beans to absorb water. Steam the beans: Drain the soaked beans, place them in a cheesecloth, and steam them in a steamer over medium heat for about 20 minutes until the beans are cooked (be careful not to overcook them). Remove and let them cool and dry completely. 2. Roast or deep-fry until crispy: Roasting (healthier): Deep-fry the peanuts in a non-stick pan over low heat, stirring constantly until dry and crispy. Deep-frying: Heat enough oil to cover the peanuts in a pan over medium-low heat. Deep-fry the peanuts until golden brown and crispy. Remove and drain excess oil. 3. Seasoning: While the nuts are still warm, add a little unsalted butter or vegetable oil and toss to coat. Then add paprika powder, seasoning powder, and salt. Toss until well combined. 4. Let it cool: Allow it to cool completely, then immediately store it in an airtight jar or container to maintain its crispness. Summary Summation Notes: Making paprika-roasted mung beans is easy. Soak split mung beans (mung beans) in water until soft, steam them until cooked, and then dry them. Next, roast or fry them until crispy. Toss them with a little butter or oil to help the paprika and salt adhere better to the beans. Additional tips: You can add any toppings you like such as bread fruit vegetable slice or cheese powder and marshmallow snack. And the finally then You can eat it and Sell it to the Merchant or Customer with Who people you Know Knew known, i hope you have fun and enjoy it. Where can i you me buy it, Where to Buy, Where to find it: Internet Online, Supermarkets. Widely available from street food stalls, especially in durian-growing regions like, and at markets. Online: Easily ordered from platforms like Abcdefg in various grades and sizes. Caution Warning: Precautions: - Key Additional Tips Profit Useful Benefit Available Nutrition : Mung beans (hulled mung beans) are rich in protein, complex carbohydrates, and high in fiber. They help control blood sugar levels, promote healthy digestion, lower cholesterol, and are an excellent source of energy for those looking to manage their weight. High in protein, low in fat: Contains protein similar to meat but is much easier to digest. It's cholesterol-free and low in saturated fat. Helps control blood sugar: A slow-absorbing complex carbohydrate that helps maintain blood sugar levels and reduces the risk of diabetes. Good for digestion: High in fiber, it helps prevent constipation, detoxifies the intestines, and lowers cholesterol in the blood. Rich in vitamins and minerals: Contains folate, B vitamins, calcium, and iron, which help nourish the nervous system and prevent anemia. And the finally then You can eat it and Sell it to the Merchant or Customer with Who people you Know Knew known, i hope you have fun and enjoy it.
ClickMeSeeAllFull
ClickMeSeeOnMoreDetail
ClickMeSeeOnMorePictureImage
ClickMeSeeOnMoreVideo
Vegetable: Processer Processed Processing food Menu: 10.Golden Bean Nuts Mung Snack SauceMix
Method: All Works: Golden Bean Nuts Mung Snack SauceMix
Method: How to make made cook: Recipe Procedure: Method: All Works: Golden Bean Nuts Mung Snack SauceMix Materials Ingredients: 500 grams split mung beans, 1 liter vegetable oil (for frying), a pinch of salt (for sprinkling), 1 tablespoon gochujang (Korean chili paste), 1.5 tablespoons Korean soy sauce (or light soy sauce), 2 tablespoons honey (or corn syrup), 1 teaspoon rice vinegar, 1 tablespoon finely chopped Chinese garlic, toasted white sesame seeds (for garnish). Key Preparation Directions Instructions Methods: 1. Preparing and Frying the Beans: Wash the beans thoroughly 3-4 times, then soak them in water for about 1-2 hours. Drain the beans completely. Heat oil in a pan over low heat, add the beans and fry, stirring constantly, for about 20-30 minutes until crispy. Remove and drain excess oil. Sprinkle with a little salt and let cool completely. 2. Make the Korean BBQ sauce: Combine gochujang, light soy sauce, honey, vinegar, and minced garlic in a bowl. Stir well. Pour the sauce mixture into a pan (no need to add oil). Simmer over low heat until the sauce boils and thickens. 3. Roasting the Sauce-Coated Peanuts: Pour the prepared fried peanuts into the pan with the sauce. Use a spatula to quickly and evenly coat the peanuts with the sauce. Continue roasting over the lowest heat until the sauce dries and adheres beautifully to the peanuts. Turn off the heat, sprinkle with toasted white sesame seeds, and let cool completely before storing in an airtight container. Summary Summation Notes: Making Korean BBQ-style roasted peanuts is easy. Start by frying the peanuts until crispy, then drain off excess oil. Next, simmer the sauce mixture (gochujang, light soy sauce, honey, garlic) until thickened. Add the peanuts and toss to the sauce, then roast over low heat until the sauce coats each peanut completely. Additional tips: You can add any toppings you like such as bread fruit vegetable slice or cheese powder and marshmallow snack. And the finally then You can eat it and Sell it to the Merchant or Customer with Who people you Know Knew known, i hope you have fun and enjoy it. Where can i you me buy it, Where to Buy, Where to find it: Internet Online, Supermarkets. Widely available from street food stalls, especially in durian-growing regions like, and at markets. Online: Easily ordered from platforms like Abcdefg in various grades and sizes. Caution Warning: Precautions: - Key Additional Tips Profit Useful Benefit Available Nutrition : Mung beans (hulled mung beans) are rich in protein, complex carbohydrates, and high in fiber. They help control blood sugar levels, promote healthy digestion, lower cholesterol, and are an excellent source of energy for those looking to manage their weight. High in protein, low in fat: Contains protein similar to meat but is much easier to digest. It's cholesterol-free and low in saturated fat. Helps control blood sugar: A slow-absorbing complex carbohydrate that helps maintain blood sugar levels and reduces the risk of diabetes. Good for digestion: High in fiber, it helps prevent constipation, detoxifies the intestines, and lowers cholesterol in the blood. Rich in vitamins and minerals: Contains folate, B vitamins, calcium, and iron, which help nourish the nervous system and prevent anemia. And the finally then You can eat it and Sell it to the Merchant or Customer with Who people you Know Knew known, i hope you have fun and enjoy it.
ClickMeSeeAllFull
ClickMeSeeOnMoreDetail
ClickMeSeeOnMorePictureImage
ClickMeSeeOnMoreVideo
Vegetable: Processer Processed Processing food Menu: 1.Green Pea Bean Nut Snack Roast
Method: All Works: Green Pea Bean Nut Snack Roast
Method: How to make made cook: Recipe Procedure: Method: All Works: Green Pea Bean Nut Snack Roast Materials Ingredients: 300 grams of sweet peas (or green peas), 1/4 teaspoon of salt, 1 teaspoon of olive oil (or vegetable oil), a pinch of black pepper (to taste). Part 1: Method (Pan-Roasted Recipe): Key Preparation Directions Instructions Methods: 1.This recipe is quick, yields a fragrant roasted aroma, and has a salty, savory flavor. Prepare the peanuts: Wash them thoroughly, remove the strings from the pods, and drain well. 2. Heat the pan: Place a pan over medium-high heat. Add a little oil. Once the oil is very hot, add the peas. 3. Salted Roasted Beans: Stir-fry quickly for about 3-5 minutes until the beans begin to cook and turn a nice color. Then sprinkle with salt and pepper and stir-fry to coat evenly. Serve on a plate. Part 2:Method (Bake Air Fryer Recipe): Key Preparation Directions Instructions Methods: 1.This recipe results in a crispy texture that's enjoyable to chew and makes a great snack. Prepare the peas: Wash the peas thoroughly, remove the ends and fibers from the sides, then pat them dry completely. 2. Mixing: Place the peas in a mixing bowl, add olive oil, salt, and pepper, and mix well. 3. Baking: Place the beans in an air fryer and bake at 200 degrees Celsius for approximately 7-10 minutes. 4. Shake: Pull out the basket and shake to turn the nuts over, then bake for another 3 minutes until crispy. Summary Summation Notes: Making salted roasted peas is an easy and healthy snack. You can choose to make them either dry-roasted (using an air fryer) or pan-roasted Chinese style, which results in a fragrant and crispy exterior with a soft interior. Additional tips: You can add any toppings you like such as bread fruit vegetable slice or cheese powder and marshmallow snack. And the finally then You can eat it and Sell it to the Merchant or Customer with Who people you Know Knew known, i hope you have fun and enjoy it. Where can i you me buy it, Where to Buy, Where to find it: Internet Online, Supermarkets. Widely available from street food stalls, especially in durian-growing regions like, and at markets. Online: Easily ordered from platforms like Abcdefg in various grades and sizes. Caution Warning: Precautions: Peas are high in purines, which may decrease the body's ability to excrete uric acid. People with gout or kidney problems should consult a doctor before consuming them. Key Additional Tips Profit Useful Benefit Available Nutrition : Peas are a rich source of plant-based protein and fiber, as well as vitamins and antioxidants. They offer significant benefits in helping control blood sugar levels, improving eyesight, promoting healthy digestion, and providing a feeling of fullness, making them ideal for those looking to manage their weight. Control blood sugar levels: Low glycemic index and rich in fiber help slow the absorption of sugar into the bloodstream, preventing insulin resistance, which is beneficial for diabetics. Support weight loss: High protein and fiber content helps reduce the hunger hormone (ghrelin), promoting satiety and reducing snacking. Improve bowel function: High fiber content stimulates bowel activity and relieves constipation. Nourishes eyes and skin: Rich in beta-carotene and vitamin A, it helps nourish eyesight and slow down cell degeneration. Builds muscle: A source of easily digestible plant-based protein (pea protein) containing essential amino acids, helping to repair and build muscle mass as a potential substitute for meat. Peas are high in purines, which may decrease the body's ability to excrete uric acid. People with gout or kidney problems should consult a doctor before consuming them. And the finally then You can eat it and Sell it to the Merchant or Customer with Who people you Know Knew known, i hope you have fun and enjoy it.
ClickMeSeeAllFull
ClickMeSeeOnMoreDetail
ClickMeSeeOnMorePictureImage
ClickMeSeeOnMoreVideo
Vegetable: Processer Processed Processing food Menu: 2.Green Pea Bean Nut Crispy Snack Paprika
Method: All Works: Green Pea Bean Nut Crispy Snack Paprika
Method: How to make made cook: Recipe Procedure: Method: All Works: Green Pea Bean Nut Crispy Snack Paprika Materials Ingredients: 200-250 grams of frozen sweet peas or green peas (stems and fibers removed), 1-1.5 teaspoons olive oil or vegetable oil, 1/2 to 1 teaspoon paprika powder (smoked paprika can be used), 1/4 teaspoon salt, 1/4 teaspoon garlic powder (adjust to taste), a pinch of black pepper. Key Preparation Directions Instructions Methods: 1. Prepare the peas: Wash the peas thoroughly. If using frozen peas, thaw them and pat them dry as much as possible. Moisture will make it difficult for the peas to remain crisp. 2. Tossing: Place the peas in a mixing bowl. Add olive oil and toss to coat thoroughly. Add paprika powder, salt, garlic powder, and black pepper. Toss until the seasonings coat the peas evenly. 3. Crispy Baking (Air Fryer): Preheat air fryer to 200°C. Place the peas in a strainer (be careful not to overcrowd them). Bake for about 7 minutes, then remove and shake or stir to distribute. Bake for another 10 minutes, then shake again. Bake for the final time for about 3 minutes, or until the peas are crispy as desired. 4. Crispy Baking (Oven): Preheat oven to 175°C. Spread the peas evenly on a baking sheet. Bake for approximately 15-20 minutes, checking and stirring every 5 minutes to prevent burning and ensure even crispness. Cool: Remove the crispy peas from the oven and let them cool completely on a wire rack. This will enhance their crispness. Then serve or store in an airtight container. Summary Summation Notes: To make crispy paprika-flavored roasted peas, toss the peas with olive oil, season with paprika powder, salt, and garlic powder. Then bake or fry in an air fryer at 175-200°C for about 15-20 minutes, or until dry, crispy, and fragrant. Serve as a delicious snack. Additional tips: You can add any toppings you like such as bread fruit vegetable slice or cheese powder and marshmallow snack. And the finally then You can eat it and Sell it to the Merchant or Customer with Who people you Know Knew known, i hope you have fun and enjoy it. Where can i you me buy it, Where to Buy, Where to find it: Internet Online, Supermarkets. Widely available from street food stalls, especially in durian-growing regions like, and at markets. Online: Easily ordered from platforms like Abcdefg in various grades and sizes. Caution Warning: Precautions: Peas are high in purines, which may decrease the body's ability to excrete uric acid. People with gout or kidney problems should consult a doctor before consuming them. Key Additional Tips Profit Useful Benefit Available Nutrition : Peas are a rich source of plant-based protein and fiber, as well as vitamins and antioxidants. They offer significant benefits in helping control blood sugar levels, improving eyesight, promoting healthy digestion, and providing a feeling of fullness, making them ideal for those looking to manage their weight. Control blood sugar levels: Low glycemic index and rich in fiber help slow the absorption of sugar into the bloodstream, preventing insulin resistance, which is beneficial for diabetics. Support weight loss: High protein and fiber content helps reduce the hunger hormone (ghrelin), promoting satiety and reducing snacking. Improve bowel function: High fiber content stimulates bowel activity and relieves constipation. Nourishes eyes and skin: Rich in beta-carotene and vitamin A, it helps nourish eyesight and slow down cell degeneration. Builds muscle: A source of easily digestible plant-based protein (pea protein) containing essential amino acids, helping to repair and build muscle mass as a potential substitute for meat. Peas are high in purines, which may decrease the body's ability to excrete uric acid. People with gout or kidney problems should consult a doctor before consuming them. And the finally then You can eat it and Sell it to the Merchant or Customer with Who people you Know Knew known, i hope you have fun and enjoy it.
ClickMeSeeAllFull
ClickMeSeeOnMoreDetail
ClickMeSeeOnMorePictureImage
ClickMeSeeOnMoreVideo
Vegetable: Processer Processed Processing food Menu: 3.Green Pea Bean Nut Crispy Snack Wasabi
Method: All Works: Green Pea Bean Nut Crispy Snack Wasabi
Method: How to make made cook: Recipe Procedure: Method: All Works: Green Pea Bean Nut Crispy Snack Wasabi Materials Ingredients: 2 cups dried roasted peas (or shelled peas), 2-3 tablespoons all-purpose flour, 1-1.5 teaspoons wasabi powder (adjust to taste), 1/2 teaspoon seasoning (such as MSG or salt), 1 tablespoon vegetable oil, a little water for brushing the flour to stick. Key Preparation Directions Instructions Methods: 1. Prepare the peas: Wash the peas thoroughly and pat them dry. 2. Coating: Place the peas in a mixing bowl, add vegetable oil and mix thoroughly. Then sprinkle with wheat flour, wasabi powder, and seasoning powder, and mix until the peas are evenly coated. (If the flour is too dry, lightly sprinkle with water.) 3. Crispy Baking: 3.1. Using an air fryer: Place the nuts in the air fryer, set the temperature to 200°C (395°F) for approximately 7 minutes. Remove and shake, then bake for another 10 minutes. Shake again, then bake for another 3 minutes until crispy. 3.2. Using an oven: Arrange the nuts on a baking tray. Bake at 150°C (395°F) for approximately 20-25 minutes, stirring every 5 minutes until the nuts are crispy. 4. Let it cool: Once crispy, remove from the oven and let it cool completely. The nuts will become even crispier. Store in an airtight jar to maintain their crispness. Summary Summation Notes: Making delicious crispy wasabi-roasted peas is easy! Simply coat dried peas with wheat flour, wasabi powder, and light soy sauce, then bake or roast over low heat until crispy. The result is a pungent, nose-tingling snack that's perfect for munching on. Additional tips: You can add any toppings you like such as bread fruit vegetable slice or cheese powder and marshmallow snack. And the finally then You can eat it and Sell it to the Merchant or Customer with Who people you Know Knew known, i hope you have fun and enjoy it. Where can i you me buy it, Where to Buy, Where to find it: Internet Online, Supermarkets. Widely available from street food stalls, especially in durian-growing regions like, and at markets. Online: Easily ordered from platforms like Abcdefg in various grades and sizes. Caution Warning: Precautions: Peas are high in purines, which may decrease the body's ability to excrete uric acid. People with gout or kidney problems should consult a doctor before consuming them. Key Additional Tips Profit Useful Benefit Available Nutrition : Peas are a rich source of plant-based protein and fiber, as well as vitamins and antioxidants. They offer significant benefits in helping control blood sugar levels, improving eyesight, promoting healthy digestion, and providing a feeling of fullness, making them ideal for those looking to manage their weight. Control blood sugar levels: Low glycemic index and rich in fiber help slow the absorption of sugar into the bloodstream, preventing insulin resistance, which is beneficial for diabetics. Support weight loss: High protein and fiber content helps reduce the hunger hormone (ghrelin), promoting satiety and reducing snacking. Improve bowel function: High fiber content stimulates bowel activity and relieves constipation. Nourishes eyes and skin: Rich in beta-carotene and vitamin A, it helps nourish eyesight and slow down cell degeneration. Builds muscle: A source of easily digestible plant-based protein (pea protein) containing essential amino acids, helping to repair and build muscle mass as a potential substitute for meat. Peas are high in purines, which may decrease the body's ability to excrete uric acid. People with gout or kidney problems should consult a doctor before consuming them. And the finally then You can eat it and Sell it to the Merchant or Customer with Who people you Know Knew known, i hope you have fun and enjoy it.
ClickMeSeeAllFull
ClickMeSeeOnMoreDetail
ClickMeSeeOnMorePictureImage
ClickMeSeeOnMoreVideo
Vegetable: Processer Processed Processing food Menu: 4.Green Pea Bean Nut Crispy Snack BBQBarbeque
Method: All Works: Green Pea Bean Nut Crispy Snack BBQBarbeque
Method: How to make made cook: Recipe Procedure: Method: All Works: Green Pea Bean Nut Crispy Snack BBQBarbeque Materials Ingredients: 200-250 grams of fresh or frozen peas, 1 teaspoon of vegetable oil or olive oil, 1-1.5 tablespoons of barbecue seasoning (adjust to taste), a pinch of salt. Key Preparation Directions Instructions Methods: 1. Blanching to preserve color: Bring water to a boil, blanch the peas for about 30-60 seconds, then immediately remove and immerse in ice-cold water. This will help keep the peas crisp and vibrant green. Drain well afterwards. 2. Mixing: Place the peas in a mixing bowl, add vegetable oil and mix thoroughly. Add barbecue seasoning and a pinch of salt, then mix well. 3. Crispy Baking: Place the peas in the air fryer, spreading them out so they don't overlap. Bake at 180-200 degrees Celsius for approximately 7-10 minutes. In the first round, remove the rack, shake or stir the peas to flip them over, then bake for another 5-10 minutes, or until the peas are dry and crispy as desired. 4. Let it cool: Place the roasted nuts on a surface and let them cool completely. This will make them even crispier. They can be stored in an airtight container for several days. Summary Summation Notes: Making crispy barbecue-flavored roasted peas is easy using an air fryer or oven. Simply blanch the peas until golden brown, toss with oil and barbecue seasoning, then bake until dry and crispy. The entire process, from preparation to cooking, takes no more than 45 minutes, resulting in a crunchy and intensely flavorful snack. Additional tips: Dry thoroughly: Moisture is the arch-enemy of crispness. Before baking, pat the nuts completely dry with paper towels or a clean cloth. How to check for crispness: Immediately after baking, the nuts may still be slightly soft. Try taking them out and letting them air dry for 1 minute; they will become crispy. If they are still not crispy, bake them for another 2-3 minutes at a time on low heat. And the finally then You can eat it and Sell it to the Merchant or Customer with Who people you Know Knew known, i hope you have fun and enjoy it. Where can i you me buy it, Where to Buy, Where to find it: Internet Online, Supermarkets. Widely available from street food stalls, especially in durian-growing regions like, and at markets. Online: Easily ordered from platforms like Abcdefg in various grades and sizes. Caution Warning: Precautions: Peas are high in purines, which may decrease the body's ability to excrete uric acid. People with gout or kidney problems should consult a doctor before consuming them. Key Additional Tips Profit Useful Benefit Available Nutrition : Peas are a rich source of plant-based protein and fiber, as well as vitamins and antioxidants. They offer significant benefits in helping control blood sugar levels, improving eyesight, promoting healthy digestion, and providing a feeling of fullness, making them ideal for those looking to manage their weight. Control blood sugar levels: Low glycemic index and rich in fiber help slow the absorption of sugar into the bloodstream, preventing insulin resistance, which is beneficial for diabetics. Support weight loss: High protein and fiber content helps reduce the hunger hormone (ghrelin), promoting satiety and reducing snacking. Improve bowel function: High fiber content stimulates bowel activity and relieves constipation. Nourishes eyes and skin: Rich in beta-carotene and vitamin A, it helps nourish eyesight and slow down cell degeneration. Builds muscle: A source of easily digestible plant-based protein (pea protein) containing essential amino acids, helping to repair and build muscle mass as a potential substitute for meat. Peas are high in purines, which may decrease the body's ability to excrete uric acid. People with gout or kidney problems should consult a doctor before consuming them. And the finally then You can eat it and Sell it to the Merchant or Customer with Who people you Know Knew known, i hope you have fun and enjoy it.
ClickMeSeeAllFull
ClickMeSeeOnMoreDetail
ClickMeSeeOnMorePictureImage
ClickMeSeeOnMoreVideo
Vegetable: Processer Processed Processing food Menu: 5.Green Pea Bean Nut Crispy Snack SauceMix
Method: All Works: Green Pea Bean Nut Crispy Snack SauceMix
Method: How to make made cook: Recipe Procedure: Method: All Works: Green Pea Bean Nut Crispy Snack SauceMix Materials Ingredients: Fresh green peas (shelled): 200 grams; Vegetable oil (for coating): 1 tablespoon; Gochujang (Korean chili sauce): 1 tablespoon; Corn syrup (Korean syrup): 1 tablespoon; Soy sauce (Japanese soy sauce): 1 teaspoon; Garlic juice or finely chopped garlic: 1 teaspoon; Sesame oil: 1/2 teaspoon; Toasted white sesame seeds (for garnish) Key Preparation Directions Instructions Methods: 1. Prepare the peas: Wash the peas thoroughly, pat them dry, toss them lightly with vegetable oil, and place them in an air fryer at 130°C for 15-20 minutes, or until dry and crispy (shake them every 5 minutes). 2. Make the Korean sauce: Combine gochujang, corn syrup, soy sauce, and minced garlic in a small bowl. Microwave on low heat for 15-20 seconds until it boils and thickens, then stir well. 3. Toss: Place the roasted peas into a bowl with the sauce. Pour in the sesame oil and toss to coat the peas evenly with the sauce. 4. Baking and Coating the Peanuts: Bake the sauce-coated peanuts in an air fryer at 120°C for another 5-7 minutes, or until the sauce is dry and firmly coated on the peanuts. Serving suggestion: Let cool completely (the peanuts will become crispier when cooled). Garnish with toasted white sesame seeds. Summary Summation Notes: To make delicious and crispy Korean-style roasted peas, start by blanching the peas and draining them thoroughly. Bake or roast them until dry and crispy. Then, toss them with a sweet, savory, and spicy Korean sauce and bake again until the sauce is completely coated. This is an easy-to-make snack with a rich flavor. Additional tips: Dry thoroughly: Moisture is the arch-enemy of crispness. Before baking, pat the nuts completely dry with paper towels or a clean cloth. How to check for crispness: Immediately after baking, the nuts may still be slightly soft. Try taking them out and letting them air dry for 1 minute; they will become crispy. If they are still not crispy, bake them for another 2-3 minutes at a time on low heat. And the finally then You can eat it and Sell it to the Merchant or Customer with Who people you Know Knew known, i hope you have fun and enjoy it. Where can i you me buy it, Where to Buy, Where to find it: Internet Online, Supermarkets. Widely available from street food stalls, especially in durian-growing regions like, and at markets. Online: Easily ordered from platforms like Abcdefg in various grades and sizes. Caution Warning: Precautions: Peas are high in purines, which may decrease the body's ability to excrete uric acid. People with gout or kidney problems should consult a doctor before consuming them. Key Additional Tips Profit Useful Benefit Available Nutrition : Peas are a rich source of plant-based protein and fiber, as well as vitamins and antioxidants. They offer significant benefits in helping control blood sugar levels, improving eyesight, promoting healthy digestion, and providing a feeling of fullness, making them ideal for those looking to manage their weight. Control blood sugar levels: Low glycemic index and rich in fiber help slow the absorption of sugar into the bloodstream, preventing insulin resistance, which is beneficial for diabetics. Support weight loss: High protein and fiber content helps reduce the hunger hormone (ghrelin), promoting satiety and reducing snacking. Improve bowel function: High fiber content stimulates bowel activity and relieves constipation. Nourishes eyes and skin: Rich in beta-carotene and vitamin A, it helps nourish eyesight and slow down cell degeneration. Builds muscle: A source of easily digestible plant-based protein (pea protein) containing essential amino acids, helping to repair and build muscle mass as a potential substitute for meat. Peas are high in purines, which may decrease the body's ability to excrete uric acid. People with gout or kidney problems should consult a doctor before consuming them. And the finally then You can eat it and Sell it to the Merchant or Customer with Who people you Know Knew known, i hope you have fun and enjoy it.
ClickMeSeeAllFull
ClickMeSeeOnMoreDetail
ClickMeSeeOnMorePictureImage
ClickMeSeeOnMoreVideo
Vegetable: Processer Processed Processing food Menu: 6.Green Pea Bean Nut Crispy Snack Dip
Method: All Works: Green Pea Bean Nut Crispy Snack Dip
Method: How to make made cook: Recipe Procedure: Method: All Works: Green Pea Bean Nut Crispy Snack Dip Materials Ingredients: 200 grams of fresh or frozen peas, ½ cup all-purpose flour, 1-2 tablespoons cornstarch (for longer crispness), 1 chilled egg, ¼ - ½ cup salt, ½ teaspoon pepper, ¼ teaspoon vegetable oil for frying. Key Preparation Directions Instructions Methods: 1. Prepare the beans: Wash the peas, remove the stems (if using large pods, cut them into bite-sized pieces), and drain. 2. Prepare the batter: In a mixing bowl, combine the wheat flour, cornstarch, salt, and pepper. Crack the egg into the bowl. Gradually pour in the ice-cold water, stirring constantly until the batter reaches the desired consistency—not too runny or too thick. 3. Mixing: Coat the peas thoroughly in the flour mixture. 4. Frying: Heat oil in a pan over medium-high heat. Once the oil is very hot, add the peas and fry (you can fry them in small clusters or individually). Fry until the batter is cooked and golden brown and crispy. Drain excess oil: Remove from the pan, arrange on a plate, and serve. Summary Summation Notes: Breaded and fried peas are easy to make by mixing wheat flour, cornstarch, egg, and ice-cold water. Season with salt and pepper. Coat the peas thoroughly in the batter and fry in hot oil until golden brown and crispy. Serve with plum sauce, ketchup, or chili sauce. Additional tips: Dry thoroughly: Moisture is the arch-enemy of crispness. Before baking, pat the nuts completely dry with paper towels or a clean cloth. How to check for crispness: Immediately after baking, the nuts may still be slightly soft. Try taking them out and letting them air dry for 1 minute; they will become crispy. If they are still not crispy, bake them for another 2-3 minutes at a time on low heat. And the finally then You can eat it and Sell it to the Merchant or Customer with Who people you Know Knew known, i hope you have fun and enjoy it. Where can i you me buy it, Where to Buy, Where to find it: Internet Online, Supermarkets. Widely available from street food stalls, especially in durian-growing regions like, and at markets. Online: Easily ordered from platforms like Abcdefg in various grades and sizes. Caution Warning: Precautions: Peas are high in purines, which may decrease the body's ability to excrete uric acid. People with gout or kidney problems should consult a doctor before consuming them. Key Additional Tips Profit Useful Benefit Available Nutrition : Peas are a rich source of plant-based protein and fiber, as well as vitamins and antioxidants. They offer significant benefits in helping control blood sugar levels, improving eyesight, promoting healthy digestion, and providing a feeling of fullness, making them ideal for those looking to manage their weight. Control blood sugar levels: Low glycemic index and rich in fiber help slow the absorption of sugar into the bloodstream, preventing insulin resistance, which is beneficial for diabetics. Support weight loss: High protein and fiber content helps reduce the hunger hormone (ghrelin), promoting satiety and reducing snacking. Improve bowel function: High fiber content stimulates bowel activity and relieves constipation. Nourishes eyes and skin: Rich in beta-carotene and vitamin A, it helps nourish eyesight and slow down cell degeneration. Builds muscle: A source of easily digestible plant-based protein (pea protein) containing essential amino acids, helping to repair and build muscle mass as a potential substitute for meat. Peas are high in purines, which may decrease the body's ability to excrete uric acid. People with gout or kidney problems should consult a doctor before consuming them. And the finally then You can eat it and Sell it to the Merchant or Customer with Who people you Know Knew known, i hope you have fun and enjoy it.
ClickMeSeeAllFull
ClickMeSeeOnMoreDetail
ClickMeSeeOnMorePictureImage
ClickMeSeeOnMoreVideo
Vegetable: Processer Processed Processing food Menu: 7.Green Pea Bean Nut Crispy Snack Cheese
Method: All Works: Green Pea Bean Nut Crispy Snack Cheese
Method: How to make made cook: Recipe Procedure: Method: All Works: Green Pea Bean Nut Crispy Snack Cheese Materials Ingredients: 200-300 grams of fresh green peas (choose plump pods or use frozen peas, thawed and patted dry), 1-2 tablespoons olive oil, 1-2 tablespoons cheese powder (or use grated Parmesan cheese), 1/4 teaspoon salt, a pinch of black pepper (to taste), paprika or other seasonings (to enhance the flavor as desired). Key Preparation Directions Instructions Methods: 1.Preparing the peas: Wash the peas thoroughly, remove the ends and all the fibrous strands from the pods. Then blanch them in boiling water for about 1-2 minutes, and immediately immerse them in ice-cold water to preserve their green color and maintain crispness. Drain and pat dry with paper towels. (The peas must be completely dry to be crispy when baked.) Seasoning: Place the peas in a mixing bowl, add olive oil, salt, and ground pepper, and gently toss to combine. First Baking: Arrange the peas on the rack of your air fryer or baking tray, trying to spread them out so they don't overlap too much. 2. Setting the temperature: For air fryers: Use 200°C and bake for approximately 7-10 minutes. For ovens: Use 175°C and bake for approximately 15-20 minutes. 3. Add the cheese: Once the beans are cooked and crispy (check and shake the sieve every 5 minutes), remove them and sprinkle with powdered cheese or Parmesan cheese. Toss to coat the beans with the cheese. 4. Continue baking until crispy: Return to the oven and bake for another 2-3 minutes until the cheese is melted and the nuts are crispy. Let cool: Remove from the oven and let cool completely. The nuts will become crispier. Serve or store in an airtight container for longer shelf life. Summary Summation Notes: Crispy baked cheesy peas are easy to make. Simply wash and pat dry the peas, toss with olive oil, salt, and cheese powder, then bake in an air fryer or oven at 170-180°C for about 15-20 minutes until crispy. The result is a crunchy, enjoyable snack that you can easily make at home. Additional tips: Dry thoroughly: Moisture is the arch-enemy of crispness. Before baking, pat the nuts completely dry with paper towels or a clean cloth. How to check for crispness: Immediately after baking, the nuts may still be slightly soft. Try taking them out and letting them air dry for 1 minute; they will become crispy. If they are still not crispy, bake them for another 2-3 minutes at a time on low heat. Drying the peas thoroughly before baking is the most important step. If the peas are too moist, they will be chewy and not crispy. You can adjust the flavor by sprinkling them with barbecue powder or wing zabb powder instead of cheese powder. And the finally then You can eat it and Sell it to the Merchant or Customer with Who people you Know Knew known, i hope you have fun and enjoy it. Where can i you me buy it, Where to Buy, Where to find it: Internet Online, Supermarkets. Widely available from street food stalls, especially in durian-growing regions like, and at markets. Online: Easily ordered from platforms like Abcdefg in various grades and sizes. Caution Warning: Precautions: Peas are high in purines, which may decrease the body's ability to excrete uric acid. People with gout or kidney problems should consult a doctor before consuming them. Key Additional Tips Profit Useful Benefit Available Nutrition : Peas are a rich source of plant-based protein and fiber, as well as vitamins and antioxidants. They offer significant benefits in helping control blood sugar levels, improving eyesight, promoting healthy digestion, and providing a feeling of fullness, making them ideal for those looking to manage their weight. Control blood sugar levels: Low glycemic index and rich in fiber help slow the absorption of sugar into the bloodstream, preventing insulin resistance, which is beneficial for diabetics. Support weight loss: High protein and fiber content helps reduce the hunger hormone (ghrelin), promoting satiety and reducing snacking. Improve bowel function: High fiber content stimulates bowel activity and relieves constipation. Nourishes eyes and skin: Rich in beta-carotene and vitamin A, it helps nourish eyesight and slow down cell degeneration. Builds muscle: A source of easily digestible plant-based protein (pea protein) containing essential amino acids, helping to repair and build muscle mass as a potential substitute for meat. Peas are high in purines, which may decrease the body's ability to excrete uric acid. People with gout or kidney problems should consult a doctor before consuming them. And the finally then You can eat it and Sell it to the Merchant or Customer with Who people you Know Knew known, i hope you have fun and enjoy it.
ClickMeSeeAllFull
ClickMeSeeOnMoreDetail
ClickMeSeeOnMorePictureImage
ClickMeSeeOnMoreVideo
Vegetable: Processer Processed Processing food Menu: 8.Green Pea Bean Nut Crispy Snack Bake
Method: All Works: Green Pea Bean Nut Crispy Snack Bake
Method: How to make made cook: Recipe Procedure: Method: All Works: Green Pea Bean Nut Crispy Snack Bake Materials Ingredients: 200 grams of sweet peas (washed and stemmed), 2 tablespoons unsalted butter, 2 tablespoons evaporated milk, 1/4 teaspoon salt, 40-50 grams grated mozzarella cheese (adjust to taste), 1 tablespoon grated Parmesan cheese (for garnish to add aroma). Key Preparation Directions Instructions Methods: 1. Prepare the peas: Bring water to a boil, add a pinch of salt, blanch the peas for about 30-45 seconds, then immediately remove and immerse in ice-cold water to retain their vibrant green color and crispness. Drain thoroughly. 2. Butter coating: Heat a pan over low heat, add butter and melt, then add evaporated milk. 3. Dry roasting: Add the drained peas to the pan and toss to coat them evenly with the buttermilk sauce. Roast over low heat until the sauce has completely evaporated and the peas begin to become crispy. 4. Baked Cheese (with Stretchy Cheese): Place the peas in a heat-resistant baking dish. Sprinkle mozzarella cheese evenly over the top. Bake in an oven or air fryer at 180°C for about 3-5 minutes, or until the cheese is melted and golden brown. Serving suggestion: Remove from the oven, sprinkle with a little Parmesan cheese, and enjoy while hot for a deliciously stretchy cheese experience. Summary Summation Notes: Making crispy baked mozzarella peas with butter, milk, and cheesy goodness is easy. Simply blanch the peas until crunchy, toss them with butter and fresh milk, then toast until dry and crispy. Finally, top with mozzarella cheese and bake until the cheese melts into beautiful strands. Additional tips: Dry thoroughly: Moisture is the arch-enemy of crispness. Before baking, pat the nuts completely dry with paper towels or a clean cloth. How to check for crispness: Immediately after baking, the nuts may still be slightly soft. Try taking them out and letting them air dry for 1 minute; they will become crispy. If they are still not crispy, bake them for another 2-3 minutes at a time on low heat. Drying the peas thoroughly before baking is the most important step. If the peas are too moist, they will be chewy and not crispy. You can adjust the flavor by sprinkling them with barbecue powder or wing zabb powder instead of cheese powder. And the finally then You can eat it and Sell it to the Merchant or Customer with Who people you Know Knew known, i hope you have fun and enjoy it. Where can i you me buy it, Where to Buy, Where to find it: Internet Online, Supermarkets. Widely available from street food stalls, especially in durian-growing regions like, and at markets. Online: Easily ordered from platforms like Abcdefg in various grades and sizes. Caution Warning: Precautions: Peas are high in purines, which may decrease the body's ability to excrete uric acid. People with gout or kidney problems should consult a doctor before consuming them. Key Additional Tips Profit Useful Benefit Available Nutrition : Peas are a rich source of plant-based protein and fiber, as well as vitamins and antioxidants. They offer significant benefits in helping control blood sugar levels, improving eyesight, promoting healthy digestion, and providing a feeling of fullness, making them ideal for those looking to manage their weight. Control blood sugar levels: Low glycemic index and rich in fiber help slow the absorption of sugar into the bloodstream, preventing insulin resistance, which is beneficial for diabetics. Support weight loss: High protein and fiber content helps reduce the hunger hormone (ghrelin), promoting satiety and reducing snacking. Improve bowel function: High fiber content stimulates bowel activity and relieves constipation. Nourishes eyes and skin: Rich in beta-carotene and vitamin A, it helps nourish eyesight and slow down cell degeneration. Builds muscle: A source of easily digestible plant-based protein (pea protein) containing essential amino acids, helping to repair and build muscle mass as a potential substitute for meat. Peas are high in purines, which may decrease the body's ability to excrete uric acid. People with gout or kidney problems should consult a doctor before consuming them. And the finally then You can eat it and Sell it to the Merchant or Customer with Who people you Know Knew known, i hope you have fun and enjoy it.
ClickMeSeeAllFull
ClickMeSeeOnMoreDetail
ClickMeSeeOnMorePictureImage
ClickMeSeeOnMoreVideo
Vegetable: Processer Processed Processing food Menu: 9.Green Pea Bean Nut Crispy Snack Toast
Method: All Works: Green Pea Bean Nut Crispy Snack Toast
Method: How to make made cook: Recipe Procedure: Method: All Works: Green Pea Bean Nut Crispy Snack Toast Step 1: For The Dough: Materials Ingredients: 2 slices of bread (whole wheat or white bread), 1-2 tablespoons peanut butter or crushed roasted peas, 1 tablespoon unsalted butter, 2-3 tablespoons unsweetened milk, cheese (grated mozzarella or cheddar cheese slices), crispy roasted peas/crushed roasted nuts (for topping). Key Preparation Directions Instructions Methods: 1. Spread peanut butter and nut cream filling: Take one slice of bread and spread it evenly with peanut butter and nut cream filling. For a crunchy texture, you can sprinkle coarsely crushed baked peas on top. 2. Add cheese: Place a slice of cheese or sprinkle grated cheese on top of the peanut butter-spread bread. 3. Spread butter: Place another slice of bread on top, then spread a thin layer of unsalted butter on the outside of both slices. 3. Baking or grilling: Pan-fry over low heat or bake in the oven until the bread is golden brown and the cheese is melted. 4. Drizzle with milk: While the bread is still warm after removing it from the heat, drizzle a little unsweetened fresh milk over it until it's moist. Sprinkle with crushed peas before serving. Summary Summation Notes: Making delicious and fragrant grilled bananas is easy. Simply choose unripe bananas (greenish-yellow peel), grill them over low heat until fragrant, flatten them, and pour a rich, creamy coconut milk sauce over them. That's all it takes to serve! Additional tips: You can add any topping your want such as Fruit Vegetable or Anything you have ever ate. Step 2: For The Filling: Materials Ingredients: 2 slices of bread (whole wheat or white bread), 1-2 tablespoons peanut butter or crushed roasted peas, 1 tablespoon unsalted butter, 2-3 tablespoons unsweetened milk, cheese (grated mozzarella or cheddar cheese slices), crispy roasted peas/crushed roasted nuts (for topping). Key Preparation Directions Instructions Methods: 1. Boiling the peas: Bring a pot of water to a boil, add a pinch of salt, and blanch the peas for about 3 minutes until tender and bright green. Remove and immerse in ice water to preserve the color, then drain and set aside. 2. Sautéing: Heat a pan over low heat, melt the butter, then add the onion and garlic and sauté until translucent and fragrant. 3. Mix and blend: Put the peas and sautéed ingredients into a blender. Add the milk (or cream) and mint leaves. Blend until smooth. 4. Simmer: Pour the mixture back into the pot, reduce heat, and simmer until lukewarm. Season with salt and pepper to taste. Turn off the heat and serve. Summary Summation Notes: Pea purée is easy to make by boiling peas until tender, then blending them with butter, milk, or cream. Season with salt and pepper. It can be used as a sauce for steaks, pasta, or as a light soup. Additional tips: You can add any topping your want such as Fruit Vegetable or Anything you have ever ate. And the finally then You can eat it and Sell it to the Merchant or Customer with Who people you Know Knew known, i hope you have fun and enjoy it. Where can i you me buy it, Where to Buy, Where to find it: Internet Online, Supermarkets. Widely available from street food stalls, especially in durian-growing regions like, and at markets. Online: Easily ordered from platforms like Abcdefg in various grades and sizes. Caution Warning: Precautions: Peas are high in purines, which may decrease the body's ability to excrete uric acid. People with gout or kidney problems should consult a doctor before consuming them. Key Additional Tips Profit Useful Benefit Available Nutrition : Peas are a rich source of plant-based protein and fiber, as well as vitamins and antioxidants. They offer significant benefits in helping control blood sugar levels, improving eyesight, promoting healthy digestion, and providing a feeling of fullness, making them ideal for those looking to manage their weight. Control blood sugar levels: Low glycemic index and rich in fiber help slow the absorption of sugar into the bloodstream, preventing insulin resistance, which is beneficial for diabetics. Support weight loss: High protein and fiber content helps reduce the hunger hormone (ghrelin), promoting satiety and reducing snacking. Improve bowel function: High fiber content stimulates bowel activity and relieves constipation. Nourishes eyes and skin: Rich in beta-carotene and vitamin A, it helps nourish eyesight and slow down cell degeneration. Builds muscle: A source of easily digestible plant-based protein (pea protein) containing essential amino acids, helping to repair and build muscle mass as a potential substitute for meat. Peas are high in purines, which may decrease the body's ability to excrete uric acid. People with gout or kidney problems should consult a doctor before consuming them. And the finally then You can eat it and Sell it to the Merchant or Customer with Who people you Know Knew known, i hope you have fun and enjoy it.
ClickMeSeeAllFull
ClickMeSeeOnMoreDetail
ClickMeSeeOnMorePictureImage
ClickMeSeeOnMoreVideo
Vegetable: Processer Processed Processing food Menu: 10.Green Pea Bean Nut Crispy Snack Melt
Method: All Works: Green Pea Bean Nut Crispy Snack Melt
Method: How to make made cook: Recipe Procedure: Method: All Works: Green Pea Bean Nut Crispy Snack Melt Materials Ingredients: 1 cup green peas (or sweet peas, cut into pieces), 2 cups thin coconut milk, 1 cup thick coconut milk, 1-2 to 3-4 cups palm sugar (adjust to taste), 1-2 teaspoons salt. Key Preparation Directions Instructions Methods: 1.Prepare the peas: Wash the peas thoroughly. If using fresh pea pods, cut them into bite-sized pieces. Blanch them in boiling water for about 1-2 minutes, then remove and immerse in ice-cold water to keep them green and crisp. Drain well. 2.Boiling the coconut milk: Pour the coconut milk into a pot and heat over medium heat until it begins to boil (be careful not to let it curdle). Then add the palm sugar and salt, and stir until the sugar dissolves completely. 3.Add the peas: Once the coconut milk boils again, add the prepared peas and simmer for a short time to allow the sweetness to infuse into the peas (approximately 2-3 minutes). 4.Add the coconut cream: Reduce the heat to low, then add the coconut cream. Stir gently until well combined. Once it simmers slightly, turn off the heat immediately to prevent the coconut cream from separating. Serving suggestion: Ladle into bowls and enjoy immediately, either warm or with ice for a refreshing treat. Summary Summation Notes: To make pea curry (usually using green peas or sweet peas), boil the peas until cooked, then simmer with coconut milk, palm sugar, and salt. Season to taste for a sweet, creamy, and well-balanced flavor. It's an easy-to-make and nutritious adapted Thai dessert. Additional tips: You can add any topping your want such as Fruit Vegetable or Anything you have ever ate. And the finally then You can eat it and Sell it to the Merchant or Customer with Who people you Know Knew known, i hope you have fun and enjoy it. Where can i you me buy it, Where to Buy, Where to find it: Internet Online, Supermarkets. Widely available from street food stalls, especially in durian-growing regions like, and at markets. Online: Easily ordered from platforms like Abcdefg in various grades and sizes. Caution Warning: Precautions: Peas are high in purines, which may decrease the body's ability to excrete uric acid. People with gout or kidney problems should consult a doctor before consuming them. Key Additional Tips Profit Useful Benefit Available Nutrition : Peas are a rich source of plant-based protein and fiber, as well as vitamins and antioxidants. They offer significant benefits in helping control blood sugar levels, improving eyesight, promoting healthy digestion, and providing a feeling of fullness, making them ideal for those looking to manage their weight. Control blood sugar levels: Low glycemic index and rich in fiber help slow the absorption of sugar into the bloodstream, preventing insulin resistance, which is beneficial for diabetics. Support weight loss: High protein and fiber content helps reduce the hunger hormone (ghrelin), promoting satiety and reducing snacking. Improve bowel function: High fiber content stimulates bowel activity and relieves constipation. Nourishes eyes and skin: Rich in beta-carotene and vitamin A, it helps nourish eyesight and slow down cell degeneration. Builds muscle: A source of easily digestible plant-based protein (pea protein) containing essential amino acids, helping to repair and build muscle mass as a potential substitute for meat. Peas are high in purines, which may decrease the body's ability to excrete uric acid. People with gout or kidney problems should consult a doctor before consuming them. And the finally then You can eat it and Sell it to the Merchant or Customer with Who people you Know Knew known, i hope you have fun and enjoy it.
ClickMeSeeAllFull
ClickMeSeeOnMoreDetail
ClickMeSeeOnMorePictureImage
ClickMeSeeOnMoreVideo
Vegetable: Processer Processed Processing food Menu: 1.Broad Bean Nut Roast
Method: All Works: Broad Bean Nut Roast
Method: How to make made cook: Recipe Procedure: Method: All Works: Broad Bean Nut Roast Materials Ingredients: Dried broad beans (shelled), clean water (for soaking), vegetable oil (for frying), salt (for seasoning). Key Preparation Directions Instructions Methods: 1. Prepare the beans: Soak the dried broad beans in water for about 6-8 hours, or overnight, until the beans are fully swollen and softened. 2. Shelling: Use a sharp knife to lightly score the shell of the bean, creating a slit. This will allow the bean to open beautifully when fried and remain crispy all the way to the inside. 3. Frying the peanuts: Heat vegetable oil in a pan over medium-low heat until it's enough to cover the peanuts. Once the oil is hot, add the peanuts and stir constantly until they are cooked, golden brown, and crispy. Then remove them and let them drain on paper towels. 4. Salting and Roasting: Place the fried peanuts in a pan (no oil needed) over low heat. Add salt to taste and toss to coat the peanuts with salt and release their aroma. Turn off the heat, let them cool completely, and then store in an airtight container. Summary Summation Notes: Making salted roasted (or baked) broad beans is easy. Simply soak the beans in water until softened, remove the shells, and then fry or roast them in a pan over low heat until crispy. Finally, toss with salt for a savory and nutty flavor – a perfect and enjoyable snack. Additional tips: You can add any topping your want such as Fruit Vegetable or Anything you have ever ate. And the finally then You can eat it and Sell it to the Merchant or Customer with Who people you Know Knew known, i hope you have fun and enjoy it. Where can i you me buy it, Where to Buy, Where to find it: Internet Online, Supermarkets. Widely available from street food stalls, especially in durian-growing regions like, and at markets. Online: Easily ordered from platforms like Abcdefg in various grades and sizes. Caution Warning: Precautions: Patients with G6PD deficiency (also known as fava bean allergy) should absolutely avoid consuming fava beans, as it may cause severe hemolysis (breakdown of red blood cells). Key Additional Tips Profit Useful Benefit Available Nutrition : Broad beans are a highly nutritious grain, rich in protein, fiber, iron, and folate. Their key benefits include muscle building, supporting nervous system and brain function, preventing anemia, and helping control blood sugar levels. They are suitable as a snack or for use in cooking. High in protein and fiber: A good source of plant-based protein, promoting satiety and improving digestion, preventing constipation. Nourishes blood: High in iron, helping prevent and alleviate anemia. Supports brain function: Rich in B vitamins and choline, which contribute to a healthy nervous system and improved memory. Controls blood sugar and cholesterol levels: The fiber in beans slows the absorption of sugar into the bloodstream and helps reduce bad cholesterol (LDL). And the finally then You can eat it and Sell it to the Merchant or Customer with Who people you Know Knew known, i hope you have fun and enjoy it.
ClickMeSeeAllFull
ClickMeSeeOnMoreDetail
ClickMeSeeOnMorePictureImage
ClickMeSeeOnMoreVideo
Vegetable: Processer Processed Processing food Menu: 2.Broad Bean Nut Paprika
Method: All Works: Broad Bean Nut Paprika
Method: How to make made cook: Recipe Procedure: Method: All Works: Broad Bean Nut Paprika Materials Ingredients: 200 grams of broad beans (raw, shelled, or pre-fried), 1-2 tablespoons of paprika powder (adjust to taste), 1 teaspoon of seasoning powder (such as Ros Dee, Knorr, or cheese seasoning), 1/2 teaspoon of salt, vegetable oil (for lightly coating the pan if using raw beans). Key Preparation Directions Instructions Methods: 1. Prepare the beans: If using raw broad beans, wash them thoroughly, drain, and then fry in hot oil over medium heat until golden brown and crispy. Remove and drain excess oil. (Skip this step if using pre-fried broad beans.) 2. Mix the seasoning: In a small bowl, combine the paprika powder, salt, and seasoning powder. Prepare for roasting the peanuts: Heat a pan over low heat and roast the peanuts briefly to remove moisture and distribute the heat evenly. 3. Toss: Turn off the heat (or use the lowest heat setting), then pour the paprika powder mixture onto the beans. Quickly toss or shake the pan to coat the beans evenly with the seasoning. 4. Let it cool: Transfer to a plate and let it cool completely. This will keep the peanuts crispy for longer. Then store in an airtight jar or container. Summary Summation Notes: Paprika-roasted broad beans are an easy and nutritious snack. Simply bake or deep-fry broad beans until crispy, then toss with paprika powder, salt, and your favorite seasonings. Roast over low heat until fragrant. The result is a spicy, crunchy, and enjoyable snack. Additional tips: You can add any topping your want such as Fruit Vegetable or Anything you have ever ate. And the finally then You can eat it and Sell it to the Merchant or Customer with Who people you Know Knew known, i hope you have fun and enjoy it. Where can i you me buy it, Where to Buy, Where to find it: Internet Online, Supermarkets. Widely available from street food stalls, especially in durian-growing regions like, and at markets. Online: Easily ordered from platforms like Abcdefg in various grades and sizes. Caution Warning: Precautions: Patients with G6PD deficiency (also known as fava bean allergy) should absolutely avoid consuming fava beans, as it may cause severe hemolysis (breakdown of red blood cells). Key Additional Tips Profit Useful Benefit Available Nutrition : Broad beans are a highly nutritious grain, rich in protein, fiber, iron, and folate. Their key benefits include muscle building, supporting nervous system and brain function, preventing anemia, and helping control blood sugar levels. They are suitable as a snack or for use in cooking. High in protein and fiber: A good source of plant-based protein, promoting satiety and improving digestion, preventing constipation. Nourishes blood: High in iron, helping prevent and alleviate anemia. Supports brain function: Rich in B vitamins and choline, which contribute to a healthy nervous system and improved memory. Controls blood sugar and cholesterol levels: The fiber in beans slows the absorption of sugar into the bloodstream and helps reduce bad cholesterol (LDL). And the finally then You can eat it and Sell it to the Merchant or Customer with Who people you Know Knew known, i hope you have fun and enjoy it.
ClickMeSeeAllFull
ClickMeSeeOnMoreDetail
ClickMeSeeOnMorePictureImage
ClickMeSeeOnMoreVideo
Vegetable: Processer Processed Processing food Menu: 3.Broad Bean Nut Cheese
Method: All Works: Broad Bean Nut Cheese
Method: How to make made cook: Recipe Procedure: Method: All Works: Broad Bean Nut Cheese Materials Ingredients: Crispy baked or fried broad beans: 200 grams; Cheese powder: 2-3 tablespoons; Melted unsalted butter: 1 tablespoon (or use olive oil for brushing/coating the beans); Paprika powder or a pinch of salt (to balance the flavors): to taste. Key Preparation Directions Instructions Methods: 1. Prepare the beans: Place the roasted broad beans in a large mixing bowl (if the beans are too large, you can break them into smaller pieces). 2. Coating the peanuts: Drizzle melted butter over the peanuts and gently toss to ensure the butter coats the peanuts evenly. 3. Coat with cheese powder: Gradually sprinkle the cheese powder onto the nuts, tossing or shaking the bowl to ensure the cheese powder coats each nut evenly. (Add more cheese powder if you prefer a stronger flavor.) 4. Serving: Sprinkle with paprika powder for color and to cut through the richness. Serve immediately. Summary Summation Notes: Making roasted broad beans with cheese powder takes no more than 15 minutes. Simply toss pre-baked crispy broad beans with melted butter and cheese powder, season to taste. It's a delicious and easy homemade snack. Additional tips: You can add any topping your want such as Fruit Vegetable or Anything you have ever ate. And the finally then You can eat it and Sell it to the Merchant or Customer with Who people you Know Knew known, i hope you have fun and enjoy it. Where can i you me buy it, Where to Buy, Where to find it: Internet Online, Supermarkets. Widely available from street food stalls, especially in durian-growing regions like, and at markets. Online: Easily ordered from platforms like Abcdefg in various grades and sizes. Caution Warning: Precautions: Patients with G6PD deficiency (also known as fava bean allergy) should absolutely avoid consuming fava beans, as it may cause severe hemolysis (breakdown of red blood cells). Key Additional Tips Profit Useful Benefit Available Nutrition : Broad beans are a highly nutritious grain, rich in protein, fiber, iron, and folate. Their key benefits include muscle building, supporting nervous system and brain function, preventing anemia, and helping control blood sugar levels. They are suitable as a snack or for use in cooking. High in protein and fiber: A good source of plant-based protein, promoting satiety and improving digestion, preventing constipation. Nourishes blood: High in iron, helping prevent and alleviate anemia. Supports brain function: Rich in B vitamins and choline, which contribute to a healthy nervous system and improved memory. Controls blood sugar and cholesterol levels: The fiber in beans slows the absorption of sugar into the bloodstream and helps reduce bad cholesterol (LDL). And the finally then You can eat it and Sell it to the Merchant or Customer with Who people you Know Knew known, i hope you have fun and enjoy it.
ClickMeSeeAllFull
ClickMeSeeOnMoreDetail
ClickMeSeeOnMorePictureImage
ClickMeSeeOnMoreVideo
Vegetable: Processer Processed Processing food Menu: 4.Broad Bean Nut Wasabi
Method: All Works: Broad Bean Nut Wasabi
Method: How to make made cook: Recipe Procedure: Method: All Works: Broad Bean Nut Wasabi Materials Ingredients: Dried broad beans (shelled): 200 grams; Vegetable oil (for frying): enough to cover the beans; Authentic wasabi powder or wasabi seasoning powder: 1-2 tablespoons (adjust to your liking); Salt: 1/2 teaspoon; Powdered sugar: 1 teaspoon (to balance the flavors); Sesame oil: 1/2 teaspoon (helps the wasabi powder adhere to the beans and adds aroma). Key Preparation Directions Instructions Methods: 1. Prepare the beans: Soak the dried broad beans in water for about 3-4 hours to soften them slightly. Then rinse thoroughly and drain completely. 2. Frying the beans: Heat oil in a pan over medium heat. Once the oil is hot, add the beans and stir frequently until golden brown and crispy. Remove and drain excess oil. 3. Mix in the wasabi powder: While the soybeans are still hot, pour them into a mixing bowl (the heat will help the seasoning adhere better). Add sesame oil and mix thoroughly. 4. Seasoning: Sprinkle wasabi powder, salt, and powdered sugar over the peanuts. Shake or toss quickly until the seasoning coats the peanuts evenly. Let cool: Let the peanuts cool completely before serving or storing in an airtight jar to maintain crispness. Summary Summation Notes: To make delicious, crispy, and intensely flavorful wasabi-roasted broad beans, start by frying the broad beans until crispy. Then, while the beans are still hot, toss them with the wasabi seasoning mixture. This ensures the seasoning coats the beans well, allowing the flavor to penetrate. This recipe is quick and easy. Additional tips: You can add any topping your want such as Fruit Vegetable or Anything you have ever ate. And the finally then You can eat it and Sell it to the Merchant or Customer with Who people you Know Knew known, i hope you have fun and enjoy it. Where can i you me buy it, Where to Buy, Where to find it: Internet Online, Supermarkets. Widely available from street food stalls, especially in durian-growing regions like, and at markets. Online: Easily ordered from platforms like Abcdefg in various grades and sizes. Caution Warning: Precautions: Patients with G6PD deficiency (also known as fava bean allergy) should absolutely avoid consuming fava beans, as it may cause severe hemolysis (breakdown of red blood cells). Key Additional Tips Profit Useful Benefit Available Nutrition : Broad beans are a highly nutritious grain, rich in protein, fiber, iron, and folate. Their key benefits include muscle building, supporting nervous system and brain function, preventing anemia, and helping control blood sugar levels. They are suitable as a snack or for use in cooking. High in protein and fiber: A good source of plant-based protein, promoting satiety and improving digestion, preventing constipation. Nourishes blood: High in iron, helping prevent and alleviate anemia. Supports brain function: Rich in B vitamins and choline, which contribute to a healthy nervous system and improved memory. Controls blood sugar and cholesterol levels: The fiber in beans slows the absorption of sugar into the bloodstream and helps reduce bad cholesterol (LDL). And the finally then You can eat it and Sell it to the Merchant or Customer with Who people you Know Knew known, i hope you have fun and enjoy it.
ClickMeSeeAllFull
ClickMeSeeOnMoreDetail
ClickMeSeeOnMorePictureImage
ClickMeSeeOnMoreVideo
Vegetable: Processer Processed Processing food Menu: 5.Broad Bean Nut Bake
Method: All Works: Broad Bean Nut Bake
Method: How to make made cook: Recipe Procedure: Method: All Works: Broad Bean Nut Bake Materials Ingredients: Crispy roasted (or fried) broad beans: 200 g (available at general supermarkets) Unsalted butter: 30 g Sweetened condensed milk: 1–2 tbsp (adjust to taste) Cheese powder: 2–3 tbsp Shredded mozzarella or cheddar cheese: 40–50 g A pinch of salt: a small amount (tip of a teaspoon) Key Preparation Directions Instructions Methods: 1. Prepare the butter-milk sauce: Place the butter in a container and microwave for about 10–15 seconds until melted. Then, add the sweetened condensed milk and salt, and stir until well combined. 2. Coat the beans: Pour the crispy roasted broad beans into a mixing bowl, drizzle the prepared butter-milk sauce over them, and toss until the beans are thoroughly coated. 3. Add cheese: Sprinkle on the cheese seasoning powder and shredded cheese, then toss everything together again. Bake until fragrant and crispy: Place the coated nuts on a tray lined with parchment paper. Bake in an oven or air fryer at 180°C for approximately 5–7 minutes, or until the cheese is melted and gooey and the aroma is released. 4. Let it cool: Remove from the heat and let it rest for a moment to allow the cheese to set and the nuts to become crispy; it is then ready to eat. Summary Summation Notes: Butter, milk, and cheese-baked broad beans are a delicious twist on a satisfying, savory-sweet snack. The dish is easily prepared by tossing roasted or fried crispy broad beans with a butter, milk, and cheese sauce, then baking them again until the cheese melts and thoroughly coats the beans. Additional tips: You can add any topping your want such as Fruit Vegetable or Anything you have ever ate. And the finally then You can eat it and Sell it to the Merchant or Customer with Who people you Know Knew known, i hope you have fun and enjoy it. Where can i you me buy it, Where to Buy, Where to find it: Internet Online, Supermarkets. Widely available from street food stalls, especially in durian-growing regions like, and at markets. Online: Easily ordered from platforms like Abcdefg in various grades and sizes. Caution Warning: Precautions: Patients with G6PD deficiency (also known as fava bean allergy) should absolutely avoid consuming fava beans, as it may cause severe hemolysis (breakdown of red blood cells). Key Additional Tips Profit Useful Benefit Available Nutrition : Broad beans are a highly nutritious grain, rich in protein, fiber, iron, and folate. Their key benefits include muscle building, supporting nervous system and brain function, preventing anemia, and helping control blood sugar levels. They are suitable as a snack or for use in cooking. High in protein and fiber: A good source of plant-based protein, promoting satiety and improving digestion, preventing constipation. Nourishes blood: High in iron, helping prevent and alleviate anemia. Supports brain function: Rich in B vitamins and choline, which contribute to a healthy nervous system and improved memory. Controls blood sugar and cholesterol levels: The fiber in beans slows the absorption of sugar into the bloodstream and helps reduce bad cholesterol (LDL). And the finally then You can eat it and Sell it to the Merchant or Customer with Who people you Know Knew known, i hope you have fun and enjoy it.
ClickMeSeeAllFull
ClickMeSeeOnMoreDetail
ClickMeSeeOnMorePictureImage
ClickMeSeeOnMoreVideo
Vegetable: Processer Processed Processing food Menu: 6.Broad Bean Nut BBQBarbeque
Method: All Works: Broad Bean Nut BBQBarbeque
Method: How to make made cook: Recipe Procedure: Method: All Works: Broad Bean Nut BBQBarbeque Materials Ingredients: 200g raw dried fava beans or crispy roasted fava beans (available at leading supermarkets); 2–3 tablespoons barbecue seasoning powder (adjust to taste); 1–2 teaspoons vegetable oil or melted butter (to help the seasoning adhere to the beans); a pinch of salt (optional, if more saltiness is desired). Key Preparation Directions Instructions Methods: 1. Prepare the crispy beans: Fry the raw broad beans in very hot oil over medium heat until golden and crispy. Alternatively, to reduce oil usage, roast them at 180°C for 15–20 minutes. Then, set them aside to drain any excess oil and cool down. 2. Toast until combined: Place a pan over the lowest heat and toast the crispy broad beans briefly to remove any moisture. 3. Coat and season: Lightly drizzle with vegetable oil or melted butter and toss to coat evenly. Immediately sprinkle with barbecue seasoning powder. Continue to roast gently over low heat for about 1–2 minutes until fragrant, then turn off the heat. 4. Let cool: Remove from the heat and let cool completely; the beans will become crisp. Then, serve or store in an airtight jar for later consumption. Summary Summation Notes: You can easily make your own BBQ-flavored roasted broad beans. Simply start with crispy roasted or fried broad beans, toss them with a little oil or butter to coat the surface, and sprinkle with rich BBQ seasoning powder. Then, roast them over low heat until fragrant—and you have a delicious snack ready to enjoy. Additional tips: You can add any topping your want such as Fruit Vegetable or Anything you have ever ate. And the finally then You can eat it and Sell it to the Merchant or Customer with Who people you Know Knew known, i hope you have fun and enjoy it. Where can i you me buy it, Where to Buy, Where to find it: Internet Online, Supermarkets. Widely available from street food stalls, especially in durian-growing regions like, and at markets. Online: Easily ordered from platforms like Abcdefg in various grades and sizes. Caution Warning: Precautions: Patients with G6PD deficiency (also known as fava bean allergy) should absolutely avoid consuming fava beans, as it may cause severe hemolysis (breakdown of red blood cells). Key Additional Tips Profit Useful Benefit Available Nutrition : Broad beans are a highly nutritious grain, rich in protein, fiber, iron, and folate. Their key benefits include muscle building, supporting nervous system and brain function, preventing anemia, and helping control blood sugar levels. They are suitable as a snack or for use in cooking. High in protein and fiber: A good source of plant-based protein, promoting satiety and improving digestion, preventing constipation. Nourishes blood: High in iron, helping prevent and alleviate anemia. Supports brain function: Rich in B vitamins and choline, which contribute to a healthy nervous system and improved memory. Controls blood sugar and cholesterol levels: The fiber in beans slows the absorption of sugar into the bloodstream and helps reduce bad cholesterol (LDL). And the finally then You can eat it and Sell it to the Merchant or Customer with Who people you Know Knew known, i hope you have fun and enjoy it.
ClickMeSeeAllFull
ClickMeSeeOnMoreDetail
ClickMeSeeOnMorePictureImage
ClickMeSeeOnMoreVideo
Vegetable: Processer Processed Processing food Menu: 7.Broad Bean Nut SauceMix
Method: All Works: Broad Bean Nut SauceMix
Method: How to make made cook: Recipe Procedure: Method: All Works: Broad Bean Nut SauceMix Materials Ingredients: Dried/crispy-fried broad beans: 1 cup; Gochujang (Korean chili paste): 1 tablespoon; Soy sauce (shoyu): 1 teaspoon; Honey or corn syrup (Korean syrup): 1 teaspoon; Rice vinegar: 0.5 teaspoon (adjust to taste); Sesame oil: 0.5 teaspoon; Finely minced garlic: 1/2 teaspoon; Toasted white sesame seeds (for garnish): 1 teaspoon. Key Preparation Directions Instructions Methods: 1. Prepare the beans: If using raw broad beans, wash them thoroughly and drain well. Use a knife to make a small slit in the center of the skin, then fry them in hot oil over medium heat until crispy and cooked through. Remove from the oil and set aside to drain (or use ready-made fried broad beans for convenience and speed). 2. Make the Korean sauce: Combine gochujang, soy sauce, honey, rice vinegar, and minced garlic in a small bowl. 3. Cook the sauce: Place a pan over low heat, pour in the sauce mixture, and simmer until it boils and becomes aromatic (approximately 30 seconds to 1 minute). 4. Toss: Turn off the heat, then quickly toss the crispy fried broad beans with the sauce until thoroughly coated. Garnish: Add a dash of sesame oil and sprinkle with roasted white sesame seeds, then toss once more. Transfer to a plate and let the beans cool; this ensures they remain crispy and delicious. Summary Summation Notes: Making Korean-style Gochujang Broad Beans is simple: just fry the broad beans until crispy and toss them in a Gochujang sauce that offers a delicious balance of sweet, spicy, and salty flavors. They are a delightful, crunchy snack—perfect for munching on their own or pairing with drinks. Additional tips: You can add any topping your want such as Fruit Vegetable or Anything you have ever ate. And the finally then You can eat it and Sell it to the Merchant or Customer with Who people you Know Knew known, i hope you have fun and enjoy it. Where can i you me buy it, Where to Buy, Where to find it: Internet Online, Supermarkets. Widely available from street food stalls, especially in durian-growing regions like, and at markets. Online: Easily ordered from platforms like Abcdefg in various grades and sizes. Caution Warning: Precautions: Patients with G6PD deficiency (also known as fava bean allergy) should absolutely avoid consuming fava beans, as it may cause severe hemolysis (breakdown of red blood cells). Key Additional Tips Profit Useful Benefit Available Nutrition : Broad beans are a highly nutritious grain, rich in protein, fiber, iron, and folate. Their key benefits include muscle building, supporting nervous system and brain function, preventing anemia, and helping control blood sugar levels. They are suitable as a snack or for use in cooking. High in protein and fiber: A good source of plant-based protein, promoting satiety and improving digestion, preventing constipation. Nourishes blood: High in iron, helping prevent and alleviate anemia. Supports brain function: Rich in B vitamins and choline, which contribute to a healthy nervous system and improved memory. Controls blood sugar and cholesterol levels: The fiber in beans slows the absorption of sugar into the bloodstream and helps reduce bad cholesterol (LDL). And the finally then You can eat it and Sell it to the Merchant or Customer with Who people you Know Knew known, i hope you have fun and enjoy it.
ClickMeSeeAllFull
ClickMeSeeOnMoreDetail
ClickMeSeeOnMorePictureImage
ClickMeSeeOnMoreVideo
Vegetable: Processer Processed Processing food Menu: 8.Broad Bean Nut Dip
Method: All Works: Broad Bean Nut Dip
Method: How to make made cook: Recipe Procedure: Method: All Works: Broad Bean Nut Dip Materials Ingredients: 1 cup boiled, peeled fava beans; 1 cup crispy frying flour mix; ½ cup ice-cold water; 1 egg (helps the batter become fluffier and more aromatic); salt and ground pepper (to season the batter); RosDee seasoning powder or cheese powder (for sprinkling); vegetable oil for frying. Key Preparation Directions Instructions Methods: 1. Prepare the batter: Combine the crispy frying flour, egg, salt, and pepper. Gradually add ice-cold water and stir until the mixture is smooth and uniform (the consistency should be thick enough to coat the back of a spoon, not too runny). 2. Coating the beans: Place the boiled, peeled broad beans into the bowl of flour and toss until they are thoroughly coated. 3. Frying: Place a pan over medium heat and add enough oil to submerge the beans. Wait until the oil is very hot, then add the beans in small batches, stirring frequently to prevent them from sticking together. 4. Drain off excess oil: Fry until the batter turns a golden, crispy, and appetizing color. Remove and place on a wire rack or paper towels to drain. Seasoning: Sprinkle with seasoning powder or salt to taste while the beans are still hot; toss to coat evenly. Ready to serve. Summary Summation Notes: Making delicious, long-lasting crispy batter-fried fava beans is simple: peel the boiled beans, coat them in a batter made with crispy-fry flour and ice-cold water, and deep-fry them in very hot oil until golden and crisp. You can sprinkle them with salt or seasoning powder for extra flavor right away. Additional tips: You can add any topping your want such as Fruit Vegetable or Anything you have ever ate. And the finally then You can eat it and Sell it to the Merchant or Customer with Who people you Know Knew known, i hope you have fun and enjoy it. Where can i you me buy it, Where to Buy, Where to find it: Internet Online, Supermarkets. Widely available from street food stalls, especially in durian-growing regions like, and at markets. Online: Easily ordered from platforms like Abcdefg in various grades and sizes. Caution Warning: Precautions: Patients with G6PD deficiency (also known as fava bean allergy) should absolutely avoid consuming fava beans, as it may cause severe hemolysis (breakdown of red blood cells). Key Additional Tips Profit Useful Benefit Available Nutrition : Broad beans are a highly nutritious grain, rich in protein, fiber, iron, and folate. Their key benefits include muscle building, supporting nervous system and brain function, preventing anemia, and helping control blood sugar levels. They are suitable as a snack or for use in cooking. High in protein and fiber: A good source of plant-based protein, promoting satiety and improving digestion, preventing constipation. Nourishes blood: High in iron, helping prevent and alleviate anemia. Supports brain function: Rich in B vitamins and choline, which contribute to a healthy nervous system and improved memory. Controls blood sugar and cholesterol levels: The fiber in beans slows the absorption of sugar into the bloodstream and helps reduce bad cholesterol (LDL). And the finally then You can eat it and Sell it to the Merchant or Customer with Who people you Know Knew known, i hope you have fun and enjoy it.
ClickMeSeeAllFull
ClickMeSeeOnMoreDetail
ClickMeSeeOnMorePictureImage
ClickMeSeeOnMoreVideo
Vegetable: Processer Processed Processing food Menu: 9.Broad Bean Nut Toast
Method: All Works: Broad Bean Nut Toast
Method: How to make made cook: Recipe Procedure: Method: All Works: Broad Bean Nut Toast Materials Ingredients: Thick-sliced bread; salted or unsalted fresh butter; coarsely mashed boiled fava beans; sweetened condensed milk; shredded mozzarella or cheddar cheese slices; granulated sugar (optional). Key Preparation Directions Instructions Methods: 1. Prepare the filling: Coarsely mash the boiled broad beans. Season with a little salt or sweetened condensed milk to taste, then set aside. 2. Add the filling: Slice the bread down the middle (without cutting all the way through) to create a pocket for the filling, or sandwich the broad bean filling between two slices of bread. Apply butter: Spread butter evenly over both the front and back of the bread. 3. Toast the bread: Toast the bread in a pan over low heat, or use an oven or air fryer. Flip it over until the outside is golden brown and crispy. 4. Add cheese and milk: Once the bread starts to crisp up, place mozzarella cheese or a cheese slice on top and drizzle generously with sweetened condensed milk. Allow the cheese to melt: Cover the pan or place it in the oven briefly until the cheese is melted and gooey. Remove, cut into bite-sized pieces, and serve. Summary Summation Notes: Buttered toast with fava bean filling, milk, and cheese is a dish that perfectly blends the rich, creamy sweetness of butter, milk, and cheese with the flavor of fava beans. It is easily prepared by spreading mashed fava beans inside the bread, generously coating it with butter, and toasting it until crisp on the outside and soft on the inside, before drizzling it with condensed milk and topping it with gooey, melted cheese. Additional tips: You can add any topping your want such as Fruit Vegetable or Anything you have ever ate. And the finally then You can eat it and Sell it to the Merchant or Customer with Who people you Know Knew known, i hope you have fun and enjoy it. Where can i you me buy it, Where to Buy, Where to find it: Internet Online, Supermarkets. Widely available from street food stalls, especially in durian-growing regions like, and at markets. Online: Easily ordered from platforms like Abcdefg in various grades and sizes. Caution Warning: Precautions: Patients with G6PD deficiency (also known as fava bean allergy) should absolutely avoid consuming fava beans, as it may cause severe hemolysis (breakdown of red blood cells). Key Additional Tips Profit Useful Benefit Available Nutrition : Broad beans are a highly nutritious grain, rich in protein, fiber, iron, and folate. Their key benefits include muscle building, supporting nervous system and brain function, preventing anemia, and helping control blood sugar levels. They are suitable as a snack or for use in cooking. High in protein and fiber: A good source of plant-based protein, promoting satiety and improving digestion, preventing constipation. Nourishes blood: High in iron, helping prevent and alleviate anemia. Supports brain function: Rich in B vitamins and choline, which contribute to a healthy nervous system and improved memory. Controls blood sugar and cholesterol levels: The fiber in beans slows the absorption of sugar into the bloodstream and helps reduce bad cholesterol (LDL). And the finally then You can eat it and Sell it to the Merchant or Customer with Who people you Know Knew known, i hope you have fun and enjoy it.
ClickMeSeeAllFull
ClickMeSeeOnMoreDetail
ClickMeSeeOnMorePictureImage
ClickMeSeeOnMoreVideo
Vegetable: Processer Processed Processing food Menu: 10.Broad Bean Nut Melt
Method: All Works: Broad Bean Nut Melt
Method: How to make made cook: Recipe Procedure: Method: All Works: Broad Bean Nut Melt Materials Ingredients: 500g dried peeled fava beans, 4 cups thin coconut milk, 2 cups thick coconut milk, 1½ cups white granulated sugar or coconut sugar (adjust to taste), ½ teaspoon salt, 3–4 knotted pandan leaves. Key Preparation Directions Instructions Methods: 1. Prepare the beans: Rinse the dried fava beans thoroughly and soak them in water overnight, or for at least 4–6 hours, to soften them. 2. Boil the beans: Place the soaked beans in a pot and cook over medium heat. Add pandan leaves for aroma. Boil until the beans are tender (add more water if the liquid dries up), then remove from the heat and set aside. 3. Prepare the coconut milk mixture: Place a pot on the stove and add the thin coconut milk and pandan leaves. Once it begins to simmer (do not let it boil vigorously or separate into oil), add the granulated sugar and salt, then stir until the sugar dissolves. 4. Combine and simmer: Add the cooked broad beans to the pot containing the thin coconut milk. Simmer over low heat for about 10 minutes to allow the coconut milk to infuse the beans. Add the thick coconut cream: Pour in the thick coconut cream and stir gently until heated through and just beginning to bubble. Turn off the heat and serve immediately. Summary Summation Notes: Buttered toast with fava bean filling, milk, and cheese is a dish that perfectly blends the rich, creamy sweetness of butter, milk, and cheese with the flavor of fava beans. It is easily prepared by spreading mashed fava beans inside the bread, generously coating it with butter, and toasting it until crisp on the outside and soft on the inside, before drizzling it with condensed milk and topping it with gooey, melted cheese. Additional tips: You can add any topping your want such as Fruit Vegetable or Anything you have ever ate. And the finally then You can eat it and Sell it to the Merchant or Customer with Who people you Know Knew known, i hope you have fun and enjoy it. Where can i you me buy it, Where to Buy, Where to find it: Internet Online, Supermarkets. Widely available from street food stalls, especially in durian-growing regions like, and at markets. Online: Easily ordered from platforms like Abcdefg in various grades and sizes. Caution Warning: Precautions: Patients with G6PD deficiency (also known as fava bean allergy) should absolutely avoid consuming fava beans, as it may cause severe hemolysis (breakdown of red blood cells). Key Additional Tips Profit Useful Benefit Available Nutrition : Broad beans are a highly nutritious grain, rich in protein, fiber, iron, and folate. Their key benefits include muscle building, supporting nervous system and brain function, preventing anemia, and helping control blood sugar levels. They are suitable as a snack or for use in cooking. High in protein and fiber: A good source of plant-based protein, promoting satiety and improving digestion, preventing constipation. Nourishes blood: High in iron, helping prevent and alleviate anemia. Supports brain function: Rich in B vitamins and choline, which contribute to a healthy nervous system and improved memory. Controls blood sugar and cholesterol levels: The fiber in beans slows the absorption of sugar into the bloodstream and helps reduce bad cholesterol (LDL). And the finally then You can eat it and Sell it to the Merchant or Customer with Who people you Know Knew known, i hope you have fun and enjoy it.
ClickMeSeeAllFull
ClickMeSeeOnMoreDetail
ClickMeSeeOnMorePictureImage
ClickMeSeeOnMoreVideo
Vegetable: Processer Processed Processing food Menu: 1.Potato FrenchFries
Method: All Works: Potato FrenchFries
Method: How to make made cook: Recipe Procedure: Method: All Works: Potato FrenchFries Materials Ingredients: 2–3 large potatoes; 2–3 tablespoons crispy frying flour or cornstarch (for coating before frying to ensure long-lasting crispiness); vegetable oil (for frying); a pinch of salt. Key Preparation Directions Instructions Methods: 1. Prepare the potatoes: Peel the potatoes and cut them into sticks approximately 1 cm thick (avoid cutting them too thin). Rinse off the starch: Wash the cut potatoes in clean water twice to remove starch and sap, then soak them in ice-cold water for about 30 minutes; this helps make the French fries crispier. 2. Parboil: Boil the potatoes in rapidly boiling water (adding a little salt is optional) for about 3–5 minutes—just until the surface looks translucent but the potato isn't mushy—then remove and let drain. Dry thoroughly: Use paper towels or a clean cloth to pat the potatoes completely dry (this step is crucial; if the potatoes are wet, they won't turn out crispy). Coat with flour (optional): Toss the dried potatoes in a light coating of crispy frying flour or cornstarch, then shake off any excess. 3. First frying (medium heat): Heat a pan with enough oil to cover the potatoes over medium heat. Once the oil is hot, add the potatoes and fry for about 4-5 minutes, until lightly golden brown and cooked through. Remove and let them cool. Second frying (high heat): Increase the heat and fry the potatoes again for about 1-2 minutes, until golden brown and crispy on the outside. Remove and drain excess oil. 4. Seasoning: Sprinkle with fine salt while the french fries are still hot, or toss with seasoning powder—such as cheese, paprika, or seaweed—according to your preference. Summary Summation Notes: Making delicious French fries—crispy on the outside and soft on the inside—is easy. Start by cutting the potatoes, washing off excess starch, and boiling them until just cooked. Next, pat them completely dry before frying them twice: the first fry cooks the inside, while the second creates a crispy exterior. That’s all it takes to have hot, ready-to-eat French fries. Additional tips: You can add any topping your want such as Fruit Vegetable or Anything you have ever ate. And the finally then You can eat it and Sell it to the Merchant or Customer with Who people you Know Knew known, i hope you have fun and enjoy it. Where can i you me buy it, Where to Buy, Where to find it: Internet Online, Supermarkets. Widely available from street food stalls, especially in durian-growing regions like, and at markets. Online: Easily ordered from platforms like Abcdefg in various grades and sizes. Caution Warning: Precautions: Caution: To maximize benefits, opt for boiled, steamed, or baked potatoes instead of fried ones to avoid excess fat and calories. Key Additional Tips Profit Useful Benefit Available Nutrition : Potatoes are a high-energy source of complex carbohydrates that are free from fat and cholesterol. Rich in Vitamin C, potassium, Vitamin B6, and antioxidants, they help regulate blood sugar levels, support the digestive system, and boost the body's immune system. Key nutrients and benefits of potatoes include: being rich in nutrients—serving as a source of Vitamin C, potassium, and Vitamin B6, which support the nervous system and heart function—and containing antioxidants that help reduce the risk of chronic diseases. Helps control blood sugar levels: When potatoes are cooked and allowed to cool, resistant starch forms; this acts similarly to dietary fiber, aiding in weight and blood sugar management. Improves digestive system function: The dietary fiber content in potatoes supports healthy bowel function. And the finally then You can eat it and Sell it to the Merchant or Customer with Who people you Know Knew known, i hope you have fun and enjoy it.
ClickMeSeeAllFull
ClickMeSeeOnMoreDetail
ClickMeSeeOnMorePictureImage
ClickMeSeeOnMoreVideo
Vegetable: Processer Processed Processing food Menu: 2.Potato Grill
Method: All Works: Potato Grill
Method: How to make made cook: Recipe Procedure: Method: All Works: Potato Grill Materials Ingredients: Medium or large potatoes; vegetable oil or olive oil (for coating); butter; salt and ground black pepper; other seasonings such as paprika or oregano powder (optional). Key Preparation Directions Instructions Methods: 1. Prepare the potatoes: Wash the potatoes thoroughly. You may choose whether or not to peel them (if leaving the skin on, scrub them clean). Then, cut them into bite-sized cubes, slices, or halves. 2. Cook the inside: Boil the potatoes in salted water for about 5–7 minutes to ensure the interior becomes soft and fluffy (this step helps them cook faster when grilling). Dry thoroughly: Remove the potatoes, let them drain, and use paper towels to pat them completely dry. 3. Toss: Place the potatoes in a mixing bowl. Add vegetable oil or melted butter and toss until the potatoes are evenly coated. Then, add salt, pepper, and seasoning powder. 4. Grilling/Roasting: If using a gas or charcoal grill, place the potatoes on the grate over medium-low heat and turn frequently until the exterior is golden and crispy. If using an oven or air fryer, roast at 200°C for 15–20 minutes until beautifully golden. Summary Summation Notes: Making delicious roasted or grilled potatoes—crispy on the outside and soft on the inside—is easy: simply boil them until just cooked, then grill or roast them until the skin is charred, and season with salt and butter. You can follow the steps below. Additional tips: You can add any topping your want such as Fruit Vegetable or Anything you have ever ate. And the finally then You can eat it and Sell it to the Merchant or Customer with Who people you Know Knew known, i hope you have fun and enjoy it. Where can i you me buy it, Where to Buy, Where to find it: Internet Online, Supermarkets. Widely available from street food stalls, especially in durian-growing regions like, and at markets. Online: Easily ordered from platforms like Abcdefg in various grades and sizes. Caution Warning: Precautions: Caution: To maximize benefits, opt for boiled, steamed, or baked potatoes instead of fried ones to avoid excess fat and calories. Key Additional Tips Profit Useful Benefit Available Nutrition : Potatoes are a high-energy source of complex carbohydrates that are free from fat and cholesterol. Rich in Vitamin C, potassium, Vitamin B6, and antioxidants, they help regulate blood sugar levels, support the digestive system, and boost the body's immune system. Key nutrients and benefits of potatoes include: being rich in nutrients—serving as a source of Vitamin C, potassium, and Vitamin B6, which support the nervous system and heart function—and containing antioxidants that help reduce the risk of chronic diseases. Helps control blood sugar levels: When potatoes are cooked and allowed to cool, resistant starch forms; this acts similarly to dietary fiber, aiding in weight and blood sugar management. Improves digestive system function: The dietary fiber content in potatoes supports healthy bowel function. And the finally then You can eat it and Sell it to the Merchant or Customer with Who people you Know Knew known, i hope you have fun and enjoy it.
ClickMeSeeAllFull
ClickMeSeeOnMoreDetail
ClickMeSeeOnMorePictureImage
ClickMeSeeOnMoreVideo
Vegetable: Processer Processed Processing food Menu: 3.Potato Chip
Method: All Works: Potato Chip
Method: How to make made cook: Recipe Procedure: Method: All Works: Potato Chip Materials Ingredients: Potatoes (choose large ones, peeled), vinegar (helps maintain crispiness), vegetable oil for frying, fine salt (for seasoning). Key Preparation Directions Instructions Methods: 1. Slice the potatoes: Use a knife or a slicer to cut the potatoes into thin, uniform slices. Rinse off the starch: Wash the sliced potatoes in water 2–3 times until the water runs clear; this prevents the slices from burning during frying. 2. Tip for crispiness: Soak the potatoes in water mixed with a little vinegar for about 10 minutes, then remove and drain. Pat the potato slices dry with kitchen paper towels or let them air-dry completely (excess moisture causes them to absorb oil and prevents crispiness). 3. Frying: Heat enough oil in a pan over medium-low heat. Once the oil is hot, add the potatoes and stir frequently to ensure they cook and crisp evenly. 4. Drain and season: Once the potatoes turn golden yellow and are perfectly crispy, remove them and let them drain. Sprinkle with fine salt, toss to combine, and serve. Summary Summation Notes: To make delicious homemade potato chips, start by slicing the potatoes thinly, rinsing them to remove excess starch, and soaking them in a mixture of water and vinegar for about 10 minutes. Pat them completely dry before frying in very hot oil over medium heat until golden and crispy. Additional tips: You can add any topping your want such as Fruit Vegetable or Anything you have ever ate. And the finally then You can eat it and Sell it to the Merchant or Customer with Who people you Know Knew known, i hope you have fun and enjoy it. Where can i you me buy it, Where to Buy, Where to find it: Internet Online, Supermarkets. Widely available from street food stalls, especially in durian-growing regions like, and at markets. Online: Easily ordered from platforms like Abcdefg in various grades and sizes. Caution Warning: Precautions: Caution: To maximize benefits, opt for boiled, steamed, or baked potatoes instead of fried ones to avoid excess fat and calories. Key Additional Tips Profit Useful Benefit Available Nutrition : Potatoes are a high-energy source of complex carbohydrates that are free from fat and cholesterol. Rich in Vitamin C, potassium, Vitamin B6, and antioxidants, they help regulate blood sugar levels, support the digestive system, and boost the body's immune system. Key nutrients and benefits of potatoes include: being rich in nutrients—serving as a source of Vitamin C, potassium, and Vitamin B6, which support the nervous system and heart function—and containing antioxidants that help reduce the risk of chronic diseases. Helps control blood sugar levels: When potatoes are cooked and allowed to cool, resistant starch forms; this acts similarly to dietary fiber, aiding in weight and blood sugar management. Improves digestive system function: The dietary fiber content in potatoes supports healthy bowel function. And the finally then You can eat it and Sell it to the Merchant or Customer with Who people you Know Knew known, i hope you have fun and enjoy it.
ClickMeSeeAllFull
ClickMeSeeOnMoreDetail
ClickMeSeeOnMorePictureImage
ClickMeSeeOnMoreVideo
Vegetable: Processer Processed Processing food Menu: 4.Potato Dip
Method: All Works: Potato Dip
Method: How to make made cook: Recipe Procedure: Method: All Works: Potato Dip Materials Ingredients: Potatoes: 500g (peeled and cut into sticks or pieces as desired); Crispy frying flour: 100g; Rice flour: 20g (for extra crispiness); Ice-cold water: approx. 100–120ml; Salt: 1/2 tsp (mixed into the flour); Vegetable oil: for frying; Seasoning powder: cheese, paprika, or seaweed (for tossing/shaking to add flavor). Key Preparation Directions Instructions Methods: 1. Prepare the potatoes: Cut the potatoes into sticks approximately 1 centimeter thick. Rinse them in water 1–2 times to remove the starch, then soak them in salted water for 10–15 minutes. 2. Boil the potatoes: Boil the potatoes in rapidly boiling water for about 3–5 minutes (do not let them become mushy). Remove them, plunge into cold water to stop the cooking process, then let them drain thoroughly and pat dry with a paper towel. 3. Prepare the batter: Combine crispy frying flour, rice flour, salt, and ice-cold water. Stir until the mixture reaches the consistency of sweetened condensed milk; do not let it become too runny. 4. Frying: Coat the potatoes thoroughly in the batter. Heat oil in a pan over medium-low heat. Once the oil is very hot, fry the potatoes until golden and crispy. Remove and drain off the excess oil. Seasoning: For a bolder flavor, place the hot fried potatoes in a container and immediately shake them with your choice of seasoning powders. Summary Summation Notes: To make delicious, crispy, and non-greasy battered potatoes, start by slicing the potatoes and soaking them in salt water to remove the starch. Pat them dry, then boil until just cooked. Next, coat them in crispy frying batter mixed with ice-cold water, and fry in very hot oil over medium heat until golden and crispy. Additional tips: You can add any topping your want such as Fruit Vegetable or Anything you have ever ate. And the finally then You can eat it and Sell it to the Merchant or Customer with Who people you Know Knew known, i hope you have fun and enjoy it. Where can i you me buy it, Where to Buy, Where to find it: Internet Online, Supermarkets. Widely available from street food stalls, especially in durian-growing regions like, and at markets. Online: Easily ordered from platforms like Abcdefg in various grades and sizes. Caution Warning: Precautions: Caution: To maximize benefits, opt for boiled, steamed, or baked potatoes instead of fried ones to avoid excess fat and calories. Key Additional Tips Profit Useful Benefit Available Nutrition : Potatoes are a high-energy source of complex carbohydrates that are free from fat and cholesterol. Rich in Vitamin C, potassium, Vitamin B6, and antioxidants, they help regulate blood sugar levels, support the digestive system, and boost the body's immune system. Key nutrients and benefits of potatoes include: being rich in nutrients—serving as a source of Vitamin C, potassium, and Vitamin B6, which support the nervous system and heart function—and containing antioxidants that help reduce the risk of chronic diseases. Helps control blood sugar levels: When potatoes are cooked and allowed to cool, resistant starch forms; this acts similarly to dietary fiber, aiding in weight and blood sugar management. Improves digestive system function: The dietary fiber content in potatoes supports healthy bowel function. And the finally then You can eat it and Sell it to the Merchant or Customer with Who people you Know Knew known, i hope you have fun and enjoy it.
ClickMeSeeAllFull
ClickMeSeeOnMoreDetail
ClickMeSeeOnMorePictureImage
ClickMeSeeOnMoreVideo
Vegetable: Processer Processed Processing food Menu: 5.Potato Toast
Method: All Works: Potato Toast
Method: How to make made cook: Recipe Procedure: Method: All Works: Potato Toast Materials Ingredients: Potato filling ingredients: 200g finely mashed boiled potatoes, 2 tbsp mayonnaise, ¼ tsp salt, a pinch of ground pepper. Bread ingredients: Thick-sliced bread or soft buns. Toasting and topping ingredients: Salted butter, sweetened condensed milk, shredded mozzarella cheese. Key Preparation Directions Instructions Methods: 1. Prepare the potato filling: Combine the boiled, finely mashed potatoes with mayonnaise, salt, and pepper. Mix until smooth and set aside. 2. Assembly: Spread the prepared potato filling evenly over the bread, then sprinkle with mozzarella cheese to taste. Top with another slice of bread. 3. Toast the bread: Place a pan over low heat and melt the butter. Add the bread and toast it, pressing down gently so the bread makes full contact with the pan. 4. Butter and flip: Flip the bread over, add a little more butter, and toast until golden brown and crispy, with the cheese inside melted and stretchy. Drizzle with milk and serve: Transfer the bread to a plate, generously drizzle with sweetened condensed milk, cut in half, and serve. Summary Summation Notes: Make butter, condensed milk, and cheese-filled potato toast using a super simple recipe that can be prepared at home in a frying pan. Start by boiling and mashing the potatoes, seasoning them to perfection, then wrapping the mixture with cheese and bread. Finally, toast it in a hot pan, slather with plenty of butter, and drizzle with luscious sweetened condensed milk. Additional tips: You can add any topping your want such as Fruit Vegetable or Anything you have ever ate. And the finally then You can eat it and Sell it to the Merchant or Customer with Who people you Know Knew known, i hope you have fun and enjoy it. Where can i you me buy it, Where to Buy, Where to find it: Internet Online, Supermarkets. Widely available from street food stalls, especially in durian-growing regions like, and at markets. Online: Easily ordered from platforms like Abcdefg in various grades and sizes. Caution Warning: Precautions: Caution: To maximize benefits, opt for boiled, steamed, or baked potatoes instead of fried ones to avoid excess fat and calories. Key Additional Tips Profit Useful Benefit Available Nutrition : Potatoes are a high-energy source of complex carbohydrates that are free from fat and cholesterol. Rich in Vitamin C, potassium, Vitamin B6, and antioxidants, they help regulate blood sugar levels, support the digestive system, and boost the body's immune system. Key nutrients and benefits of potatoes include: being rich in nutrients—serving as a source of Vitamin C, potassium, and Vitamin B6, which support the nervous system and heart function—and containing antioxidants that help reduce the risk of chronic diseases. Helps control blood sugar levels: When potatoes are cooked and allowed to cool, resistant starch forms; this acts similarly to dietary fiber, aiding in weight and blood sugar management. Improves digestive system function: The dietary fiber content in potatoes supports healthy bowel function. And the finally then You can eat it and Sell it to the Merchant or Customer with Who people you Know Knew known, i hope you have fun and enjoy it.
ClickMeSeeAllFull
ClickMeSeeOnMoreDetail
ClickMeSeeOnMorePictureImage
ClickMeSeeOnMoreVideo
Vegetable: Processer Processed Processing food Menu: 6.Potato Melt
Method: All Works: Potato Melt
Method: How to make made cook: Recipe Procedure: Method: All Works: Potato Melt Materials Ingredients: 2 potatoes (cut into bite-sized cubes), 250 ml fresh or boxed coconut milk, 100 g granulated sugar, ½ tsp salt, 2–3 pandan leaves (tied into a knot), clear lime water (for soaking the potatoes to prevent them from becoming mushy). Key Preparation Directions Instructions Methods: 1. Prepare the potatoes: Peel and wash the potatoes thoroughly, then cut them into bite-sized cubes. Soak them in clear lime water for about 10 minutes, then rinse well with fresh water. 2. Boil the potatoes: Bring water to a boil, add the potatoes, and cook until tender (approximately 10–15 minutes). Then, remove them and set aside to drain. 3. Prepare the coconut milk mixture: Place a pot over medium heat and add the coconut milk, granulated sugar, salt, and pandan leaves. Stir until the sugar dissolves and the coconut milk begins to boil (be careful not to let the coconut milk separate). 4. Mix everything together: Add the boiled potatoes to the pot of coconut milk, stir gently to combine, and simmer over low heat for about 5 minutes to allow the coconut milk to soak into the potatoes. Then turn off the heat and serve: Ladle into bowls and enjoy warm, or add crushed ice for a refreshing treat. Summary Summation Notes: Potato in Coconut Milk (*Man Farang Buat Chi*) is a simple yet delicious Thai fusion dessert. The process involves boiling potatoes until tender, then simmering them in syrup to firm up the texture slightly before topping with a rich, sweet, and salty coconut milk sauce. It is delightful whether served hot or with ice. Additional tips: You can add any topping your want such as Fruit Vegetable or Anything you have ever ate. And the finally then You can eat it and Sell it to the Merchant or Customer with Who people you Know Knew known, i hope you have fun and enjoy it. Where can i you me buy it, Where to Buy, Where to find it: Internet Online, Supermarkets. Widely available from street food stalls, especially in durian-growing regions like, and at markets. Online: Easily ordered from platforms like Abcdefg in various grades and sizes. Caution Warning: Precautions: Caution: To maximize benefits, opt for boiled, steamed, or baked potatoes instead of fried ones to avoid excess fat and calories. Key Additional Tips Profit Useful Benefit Available Nutrition : Potatoes are a high-energy source of complex carbohydrates that are free from fat and cholesterol. Rich in Vitamin C, potassium, Vitamin B6, and antioxidants, they help regulate blood sugar levels, support the digestive system, and boost the body's immune system. Key nutrients and benefits of potatoes include: being rich in nutrients—serving as a source of Vitamin C, potassium, and Vitamin B6, which support the nervous system and heart function—and containing antioxidants that help reduce the risk of chronic diseases. Helps control blood sugar levels: When potatoes are cooked and allowed to cool, resistant starch forms; this acts similarly to dietary fiber, aiding in weight and blood sugar management. Improves digestive system function: The dietary fiber content in potatoes supports healthy bowel function. And the finally then You can eat it and Sell it to the Merchant or Customer with Who people you Know Knew known, i hope you have fun and enjoy it.
ClickMeSeeAllFull
ClickMeSeeOnMoreDetail
ClickMeSeeOnMorePictureImage
ClickMeSeeOnMoreVideo
Vegetable: Processer Processed Processing food Menu: 7.Potato Roast
Method: All Works: Potato Roast
Method: How to make made cook: Recipe Procedure: Method: All Works: Potato Roast Materials Ingredients: 500g potatoes (or baby potatoes), 1–2 tsp salt (for boiling and seasoning), 1–2 tbsp unsalted butter, 1 tbsp vegetable oil, ground pepper (to taste), minced garlic or chopped spring onions (for garnish). Key Preparation Directions Instructions Methods: 1. Prepare the potatoes: Wash the potatoes thoroughly (no need to peel) and cut them into bite-sized pieces. 2. Boil the potatoes: Bring water to a boil and add salt. Boil the potatoes for about 5–10 minutes until tender but not mushy, then remove them and set aside to drain. 3. Salt-roasting: Place a pan over medium heat and add vegetable oil and butter. Once the butter has melted, add the potatoes and sauté. 4. Seasoning: Sauté until the potato skins turn golden and crispy. Sprinkle with salt and pepper, then toss well. Serving: Turn off the heat and garnish with fried garlic or chopped spring onions as desired. Summary Summation Notes: To make delicious salt-roasted potatoes, the key step is to boil them until tender before roasting them with salt and butter; this yields a texture that is slightly crisp on the outside and soft and fluffy on the inside. The entire process takes approximately 30–40 minutes. Additional tips: You can add any topping your want such as Fruit Vegetable or Anything you have ever ate. And the finally then You can eat it and Sell it to the Merchant or Customer with Who people you Know Knew known, i hope you have fun and enjoy it. Where can i you me buy it, Where to Buy, Where to find it: Internet Online, Supermarkets. Widely available from street food stalls, especially in durian-growing regions like, and at markets. Online: Easily ordered from platforms like Abcdefg in various grades and sizes. Caution Warning: Precautions: Caution: To maximize benefits, opt for boiled, steamed, or baked potatoes instead of fried ones to avoid excess fat and calories. Key Additional Tips Profit Useful Benefit Available Nutrition : Potatoes are a high-energy source of complex carbohydrates that are free from fat and cholesterol. Rich in Vitamin C, potassium, Vitamin B6, and antioxidants, they help regulate blood sugar levels, support the digestive system, and boost the body's immune system. Key nutrients and benefits of potatoes include: being rich in nutrients—serving as a source of Vitamin C, potassium, and Vitamin B6, which support the nervous system and heart function—and containing antioxidants that help reduce the risk of chronic diseases. Helps control blood sugar levels: When potatoes are cooked and allowed to cool, resistant starch forms; this acts similarly to dietary fiber, aiding in weight and blood sugar management. Improves digestive system function: The dietary fiber content in potatoes supports healthy bowel function. And the finally then You can eat it and Sell it to the Merchant or Customer with Who people you Know Knew known, i hope you have fun and enjoy it.
ClickMeSeeAllFull
ClickMeSeeOnMoreDetail
ClickMeSeeOnMorePictureImage
ClickMeSeeOnMoreVideo
Vegetable: Processer Processed Processing food Menu: 8.Potato Bake
Method: All Works: Potato Bake
Method: How to make made cook: Recipe Procedure: Method: All Works: Potato Bake Materials Ingredients: 2–3 potatoes (scrubbed clean), 2–3 tablespoons salted butter, 2–3 tablespoons fresh milk, shredded mozzarella or cheddar cheese, salt and ground pepper (to taste), oregano or crispy fried bacon (for topping). Key Preparation Directions Instructions Methods: 1. Prepare the potatoes: Slice the potatoes into rounds (without cutting all the way through) or score them with a knife. Boil in boiling water for 10 minutes, or microwave for about 5–7 minutes until tender. 2. Buttering: Let it cool slightly, then brush melted butter and fresh milk all over, ensuring it seeps into the scored grooves. Sprinkle with salt and pepper. 3. Bake with cheese: Place in an oven or air fryer at 180°C and bake for about 10 minutes. Once the potato skin starts to turn golden, remove it to add cheese and oregano on top, then bake for another 3–5 minutes until the cheese is melted and gooey. Summary Summation Notes: Buttery, cheesy baked potato is an easy-to-make dish that is rich, creamy, and aromatic; it can be prepared using either an air fryer or a conventional oven. There are two popular versions of this recipe—"sliced or halved" and "mashed"—with the preparation steps outlined below. Additional tips: You can add any topping your want such as Fruit Vegetable or Anything you have ever ate. And the finally then You can eat it and Sell it to the Merchant or Customer with Who people you Know Knew known, i hope you have fun and enjoy it. Where can i you me buy it, Where to Buy, Where to find it: Internet Online, Supermarkets. Widely available from street food stalls, especially in durian-growing regions like, and at markets. Online: Easily ordered from platforms like Abcdefg in various grades and sizes. Caution Warning: Precautions: Caution: To maximize benefits, opt for boiled, steamed, or baked potatoes instead of fried ones to avoid excess fat and calories. Key Additional Tips Profit Useful Benefit Available Nutrition : Potatoes are a high-energy source of complex carbohydrates that are free from fat and cholesterol. Rich in Vitamin C, potassium, Vitamin B6, and antioxidants, they help regulate blood sugar levels, support the digestive system, and boost the body's immune system. Key nutrients and benefits of potatoes include: being rich in nutrients—serving as a source of Vitamin C, potassium, and Vitamin B6, which support the nervous system and heart function—and containing antioxidants that help reduce the risk of chronic diseases. Helps control blood sugar levels: When potatoes are cooked and allowed to cool, resistant starch forms; this acts similarly to dietary fiber, aiding in weight and blood sugar management. Improves digestive system function: The dietary fiber content in potatoes supports healthy bowel function. And the finally then You can eat it and Sell it to the Merchant or Customer with Who people you Know Knew known, i hope you have fun and enjoy it.
ClickMeSeeAllFull
ClickMeSeeOnMoreDetail
ClickMeSeeOnMorePictureImage
ClickMeSeeOnMoreVideo
Vegetable: Processer Processed Processing food Menu: 9.Potato SouceMix
Method: All Works: Potato SouceMix
Method: How to make made cook: Recipe Procedure: Method: All Works: Potato SouceMix Materials Ingredients: Potato ingredients: 3 potatoes (cut into bite-sized cubes), 1 teaspoon salt (for boiling), 2 tablespoons vegetable oil (for sautéing). Korean BBQ sauce ingredients: 3 tablespoons ketchup, 1 tablespoon gochujang (Korean chili paste), 2 tablespoons Korean light soy sauce (or regular soy sauce), 1.5 tablespoons honey (or brown sugar), 1 tablespoon finely minced garlic, 1 teaspoon sesame oil. Key Preparation Directions Instructions Methods: 1. Prepare the potatoes: Bring salted water to a boil. Add the diced potatoes and boil for 5–7 minutes until cooked but not mushy. Then, remove them from the water, let them drain, and pat them dry. 2. Sauté the potatoes: Place a pan over medium heat and add vegetable oil. Once the oil is very hot, add the potatoes and sauté or fry them until the exterior is golden and crispy; remove and set aside. 3. Make the sauce: Using the same pan (with a little oil remaining), sauté the minced garlic until fragrant. Reduce the heat to low, then add the ketchup, gochujang, light soy sauce, and honey. Simmer until the mixture boils and thickens. Turn off the heat, add a few drops of sesame oil, and stir to combine. 4. Toss: Toss the fried potatoes with the Korean BBQ sauce until they are thoroughly coated, then transfer to a plate and serve immediately. Summary Summation Notes: To make Korean-style BBQ roasted potatoes, start by boiling the potatoes until cooked, then pan-roast them until the exterior is crispy. Finally, toss them in a Korean-style BBQ sauce that has been simmered down to coat the potatoes thoroughly, creating a perfectly balanced blend of sweet, spicy, and savory flavors. Additional tips: You can add any topping your want such as Fruit Vegetable or Anything you have ever ate. And the finally then You can eat it and Sell it to the Merchant or Customer with Who people you Know Knew known, i hope you have fun and enjoy it. Where can i you me buy it, Where to Buy, Where to find it: Internet Online, Supermarkets. Widely available from street food stalls, especially in durian-growing regions like, and at markets. Online: Easily ordered from platforms like Abcdefg in various grades and sizes. Caution Warning: Precautions: Caution: To maximize benefits, opt for boiled, steamed, or baked potatoes instead of fried ones to avoid excess fat and calories. Key Additional Tips Profit Useful Benefit Available Nutrition : Potatoes are a high-energy source of complex carbohydrates that are free from fat and cholesterol. Rich in Vitamin C, potassium, Vitamin B6, and antioxidants, they help regulate blood sugar levels, support the digestive system, and boost the body's immune system. Key nutrients and benefits of potatoes include: being rich in nutrients—serving as a source of Vitamin C, potassium, and Vitamin B6, which support the nervous system and heart function—and containing antioxidants that help reduce the risk of chronic diseases. Helps control blood sugar levels: When potatoes are cooked and allowed to cool, resistant starch forms; this acts similarly to dietary fiber, aiding in weight and blood sugar management. Improves digestive system function: The dietary fiber content in potatoes supports healthy bowel function. And the finally then You can eat it and Sell it to the Merchant or Customer with Who people you Know Knew known, i hope you have fun and enjoy it.
ClickMeSeeAllFull
ClickMeSeeOnMoreDetail
ClickMeSeeOnMorePictureImage
ClickMeSeeOnMoreVideo
Vegetable: Processer Processed Processing food Menu: 10.Potato SeaweedKelp
Method: All Works: Potato SeaweedKelp
Method: How to make made cook: Recipe Procedure: Method: All Works: Potato SeaweedKelp Materials Ingredients: 2–3 medium-sized potatoes; 2–3 tablespoons seasoned seaweed sheets (torn into small pieces) or seaweed seasoning powder; 1–2 tablespoons unsalted butter; 1 tablespoon vegetable oil or olive oil; 1 teaspoon Japanese soy sauce (shoyu); a pinch of salt and black pepper. Key Preparation Directions Instructions Methods: 1. Prepare the potatoes: Peel and wash them thoroughly, then cut into bite-sized cubes or wedges. Soak in salted water for 10 minutes, then pat dry. 2. Boil until just cooked: Boil the potatoes in boiling water for about 5–7 minutes until tender (but not mushy), then remove and drain. 3. Pan-roasting: Heat oil and butter in a pan over medium heat. Add the potatoes and roast until the outer surface turns golden and crispy. 4. Seasoning: Season with soy sauce, black pepper, and a pinch of salt; stir to combine. Adding the seaweed: Turn off the heat, then toss in the seaweed and mix thoroughly with the hot potatoes. It is now ready to serve. Summary Summation Notes: Pan-roasted potatoes with seaweed (or stir-fried potatoes with seaweed) is an easy-to-make Japanese-style dish featuring a distinctive seaweed aroma, with a total preparation and cooking time of no more than 25 minutes. Additional tips: You can add any topping your want such as Fruit Vegetable or Anything you have ever ate. And the finally then You can eat it and Sell it to the Merchant or Customer with Who people you Know Knew known, i hope you have fun and enjoy it. Where can i you me buy it, Where to Buy, Where to find it: Internet Online, Supermarkets. Widely available from street food stalls, especially in durian-growing regions like, and at markets. Online: Easily ordered from platforms like Abcdefg in various grades and sizes. Caution Warning: Precautions: Caution: To maximize benefits, opt for boiled, steamed, or baked potatoes instead of fried ones to avoid excess fat and calories. Key Additional Tips Profit Useful Benefit Available Nutrition : Potatoes are a high-energy source of complex carbohydrates that are free from fat and cholesterol. Rich in Vitamin C, potassium, Vitamin B6, and antioxidants, they help regulate blood sugar levels, support the digestive system, and boost the body's immune system. Key nutrients and benefits of potatoes include: being rich in nutrients—serving as a source of Vitamin C, potassium, and Vitamin B6, which support the nervous system and heart function—and containing antioxidants that help reduce the risk of chronic diseases. Helps control blood sugar levels: When potatoes are cooked and allowed to cool, resistant starch forms; this acts similarly to dietary fiber, aiding in weight and blood sugar management. Improves digestive system function: The dietary fiber content in potatoes supports healthy bowel function. And the finally then You can eat it and Sell it to the Merchant or Customer with Who people you Know Knew known, i hope you have fun and enjoy it.
ClickMeSeeAllFull
ClickMeSeeOnMoreDetail
ClickMeSeeOnMorePictureImage
ClickMeSeeOnMoreVideo
Vegetable: Processer Processed Processing food Menu: 1.Pumpkin Roast
Method: All Works: Pumpkin Roast
Method: How to make made cook: Recipe Procedure: Method: All Works: Pumpkin Roast Materials Ingredients: 1 cup fully matured pumpkin, cut into bite-sized cubes; ½ teaspoon fine salt (adjust to taste); 1–2 tablespoons vegetable oil for sautéing. Key Preparation Directions Instructions Methods: 1. Boil the pumpkin: Boil the pumpkin in boiling water for about 5–7 minutes until cooked but still holding its shape (not mushy). Remove and set aside to drain. 2. Salt-roasting: Place a pan over medium heat and add a little vegetable oil. Once the pan is hot, add the pumpkin and stir-fry. 3. Season: Sprinkle with fine salt and stir-fry gently until the pumpkin flesh begins to dry out and the outer surface is slightly charred. Turn off the heat and serve. Summary Summation Notes: Salt-roasted pumpkin is prepared in two main ways: roasting the pumpkin flesh to serve as a snack or side dish, or roasting the pumpkin seeds. If you want to roast the flesh until it is tender yet chewy—with a perfect balance of sweet and salty flavors—cut it into cubes, boil until just cooked (avoid overcooking until mushy), and then roast it with oil and salt until sufficiently dry. Additional tips: You can add any topping your want such as Fruit Vegetable or Anything you have ever ate. Where can i you me buy it, Where to Buy, Where to find it: Internet Online, Supermarkets. Widely available from street food stalls, especially in durian-growing regions like, and at markets. Online: Easily ordered from platforms like Abcdefg in various grades and sizes. Caution Warning: Precautions: Pumpkin is high in starch and potassium; patients with diabetes or kidney disease should consume it in limited quantities. Key Additional Tips Profit Useful Benefit Available Nutrition : Pumpkin is rich in Vitamin A, beta-carotene, and fiber; it supports eye health, boosts the immune system, and aids digestion. It is low in calories yet keeps you feeling full for longer, making it ideal for those looking to manage their weight. Eye health: High in Vitamin A, it helps protect the eyes and reduce retinal degeneration. Weight management: As a high-fiber complex carbohydrate, it promotes satiety and reduces fat absorption. Immune support: Antioxidants like beta-carotene help slow aging and lower the risk of cancer. Skin health: Rich in Vitamins C and E, it helps keep skin soft and hydrated while reducing the appearance of wrinkles. And the finally then You can eat it and Sell it to the Merchant or Customer with Who people you Know Knew known, i hope you have fun and enjoy it.
ClickMeSeeAllFull
ClickMeSeeOnMoreDetail
ClickMeSeeOnMorePictureImage
ClickMeSeeOnMoreVideo
Vegetable: Processer Processed Processing food Menu: 2.Pumpkin Seed Roast
Method: All Works: Pumpkin Seed Roast
Method: How to make made cook: Recipe Procedure: Method: All Works: Pumpkin Seed Roast Materials Ingredients: 1 cup fresh pumpkin seeds (cleaned and separated from the pulp), olive oil or vegetable oil, and ½–1 teaspoon salt. Key Preparation Directions Instructions Methods: 1. Prepare the seeds: Wash the pumpkin seeds and pat them completely dry. 2. Mix: Toss the pumpkin seeds thoroughly with vegetable oil and salt. 3. Roast until crisp: Roast in a pan over low heat, stirring constantly to prevent burning, until the seeds turn yellow and crisp; alternatively, roast in an oven at 180°C for approximately 15–20 minutes. Summary Summation Notes: Salt-roasted pumpkin is prepared in two main ways: roasting the pumpkin flesh to serve as a snack or side dish, or roasting the pumpkin seeds. If you want to roast the flesh until it is tender yet chewy—with a perfect balance of sweet and salty flavors—cut it into cubes, boil until just cooked (avoid overcooking until mushy), and then roast it with oil and salt until sufficiently dry. Additional tips: You can add any topping your want such as Fruit Vegetable or Anything you have ever ate. Where can i you me buy it, Where to Buy, Where to find it: Internet Online, Supermarkets. Widely available from street food stalls, especially in durian-growing regions like, and at markets. Online: Easily ordered from platforms like Abcdefg in various grades and sizes. Caution Warning: Precautions: Pumpkin is high in starch and potassium; patients with diabetes or kidney disease should consume it in limited quantities. Key Additional Tips Profit Useful Benefit Available Nutrition : Pumpkin is rich in Vitamin A, beta-carotene, and fiber; it supports eye health, boosts the immune system, and aids digestion. It is low in calories yet keeps you feeling full for longer, making it ideal for those looking to manage their weight. Eye health: High in Vitamin A, it helps protect the eyes and reduce retinal degeneration. Weight management: As a high-fiber complex carbohydrate, it promotes satiety and reduces fat absorption. Immune support: Antioxidants like beta-carotene help slow aging and lower the risk of cancer. Skin health: Rich in Vitamins C and E, it helps keep skin soft and hydrated while reducing the appearance of wrinkles. And the finally then You can eat it and Sell it to the Merchant or Customer with Who people you Know Knew known, i hope you have fun and enjoy it.
ClickMeSeeAllFull
ClickMeSeeOnMoreDetail
ClickMeSeeOnMorePictureImage
ClickMeSeeOnMoreVideo
Vegetable: Processer Processed Processing food Menu: 3.Pumpkin Grill
Method: All Works: Pumpkin Grill
Method: How to make made cook: Recipe Procedure: Method: All Works: Pumpkin Grill Materials Ingredients: Pumpkin (to taste), Vegetable oil (for brushing), 1/2 teaspoon salt, Black pepper (to taste). Key Preparation Directions Instructions Methods: 1. Preparing the pumpkin: Wash the pumpkin thoroughly, remove the pulp and seeds, and cut it into bite-sized pieces without peeling off the skin (roasted pumpkin skin is edible and nutritious). 2. Seasoning: Toss the pumpkin pieces with a little olive oil or vegetable oil, then sprinkle with salt and coarsely ground black pepper. 3. Grilling (Grill pan or charcoal grill): Grill on a grill pan or over a charcoal grill using medium heat. Grill for approximately 5–7 minutes per side until the pumpkin flesh is tender and attractive char marks have formed. Summary Summation Notes: You can easily prepare grilled or roasted pumpkin by slicing it into pieces about 1–2 centimeters thick and marinating them with olive oil, salt, and pepper. Grill the slices in a pan or over a charcoal fire at medium heat for 10–15 minutes until they are golden brown and aromatic, or cook them in an air fryer at 170°C for 15–20 minutes. Additional tips: You can add any topping your want such as Fruit Vegetable or Anything you have ever ate. Where can i you me buy it, Where to Buy, Where to find it: Internet Online, Supermarkets. Widely available from street food stalls, especially in durian-growing regions like, and at markets. Online: Easily ordered from platforms like Abcdefg in various grades and sizes. Caution Warning: Precautions: Pumpkin is high in starch and potassium; patients with diabetes or kidney disease should consume it in limited quantities. Key Additional Tips Profit Useful Benefit Available Nutrition : Pumpkin is rich in Vitamin A, beta-carotene, and fiber; it supports eye health, boosts the immune system, and aids digestion. It is low in calories yet keeps you feeling full for longer, making it ideal for those looking to manage their weight. Eye health: High in Vitamin A, it helps protect the eyes and reduce retinal degeneration. Weight management: As a high-fiber complex carbohydrate, it promotes satiety and reduces fat absorption. Immune support: Antioxidants like beta-carotene help slow aging and lower the risk of cancer. Skin health: Rich in Vitamins C and E, it helps keep skin soft and hydrated while reducing the appearance of wrinkles. And the finally then You can eat it and Sell it to the Merchant or Customer with Who people you Know Knew known, i hope you have fun and enjoy it.
ClickMeSeeAllFull
ClickMeSeeOnMoreDetail
ClickMeSeeOnMorePictureImage
ClickMeSeeOnMoreVideo
Vegetable: Processer Processed Processing food Menu: 4.Pumpkin Stack Chips
Method: All Works: Pumpkin Stack Chips
Method: How to make made cook: Recipe Procedure: Method: All Works: Pumpkin Stack Chips Materials Ingredients: 500g fully mature pumpkin (firm, sweet, and creamy flesh), 150g crispy frying flour, 1 tablespoon rice flour (helps maintain crispiness), clear lime water (for soaking the pumpkin), 150–180ml ice-cold water, a pinch of salt, palm oil (for frying). Key Preparation Directions Instructions Methods: 1. Prepare the pumpkin: Peel the pumpkin, remove the seeds and fibrous pulp, and cut the flesh into bite-sized strips or thin slices. Soak in clear lime water: Submerge the pumpkin pieces in clear lime water for approximately 15–20 minutes; this firms up the flesh and ensures it remains crisp rather than turning mushy during frying. Afterward, rinse with plain water and set aside to drain. 2. Prepare the batter: Combine the crispy frying flour, rice flour, and salt. Pour in ice-cold water and stir until the flour is fully dissolved and the mixture is smooth and free of lumps. 3. Coating and Frying: Toss the pumpkin pieces in the bowl of flour. Heat palm oil in a pan—using enough to fully submerge the pieces—over medium-high heat until the oil is very hot. 4. Fry the pumpkin in small batches, ensuring the pan isn't overcrowded, and stir frequently to prevent the pieces from sticking together. Fry until golden brown and crispy, then remove and set aside to drain the oil. Summary Summation Notes: To make delicious and long-lasting crispy fried pumpkin, start by slicing the pumpkin into thin, uniform pieces. Soak them in clear lime water to enhance crispiness, coat them with seasoned crispy frying flour, and fry in very hot oil until golden and crisp. Finally, set them aside to drain the excess oil. Additional tips: You can add any topping your want such as Fruit Vegetable or Anything you have ever ate. Where can i you me buy it, Where to Buy, Where to find it: Internet Online, Supermarkets. Widely available from street food stalls, especially in durian-growing regions like, and at markets. Online: Easily ordered from platforms like Abcdefg in various grades and sizes. Caution Warning: Precautions: Pumpkin is high in starch and potassium; patients with diabetes or kidney disease should consume it in limited quantities. Key Additional Tips Profit Useful Benefit Available Nutrition : Pumpkin is rich in Vitamin A, beta-carotene, and fiber; it supports eye health, boosts the immune system, and aids digestion. It is low in calories yet keeps you feeling full for longer, making it ideal for those looking to manage their weight. Eye health: High in Vitamin A, it helps protect the eyes and reduce retinal degeneration. Weight management: As a high-fiber complex carbohydrate, it promotes satiety and reduces fat absorption. Immune support: Antioxidants like beta-carotene help slow aging and lower the risk of cancer. Skin health: Rich in Vitamins C and E, it helps keep skin soft and hydrated while reducing the appearance of wrinkles. And the finally then You can eat it and Sell it to the Merchant or Customer with Who people you Know Knew known, i hope you have fun and enjoy it.
ClickMeSeeAllFull
ClickMeSeeOnMoreDetail
ClickMeSeeOnMorePictureImage
ClickMeSeeOnMoreVideo
Vegetable: Processer Processed Processing food Menu: 5.Pumpkin Dip
Method: All Works: Pumpkin Dip
Method: How to make made cook: Recipe Procedure: Method: All Works: Pumpkin Dip Materials Ingredients: 500g pumpkin, cut into pieces (approx. 1/2-inch thick); 200g crispy frying flour; 2 tbsp rice flour (helps the batter stay crispy longer); 1 tsp baking powder; 1/2 tsp salt; clear lime water (for soaking the pumpkin to prevent it from becoming mushy); 150–200ml ice-cold water (add gradually); vegetable oil for frying. Key Preparation Directions Instructions Methods: 1. Prepare the pumpkin: Peel the pumpkin, remove the seeds and fibrous pulp, and cut the flesh into bite-sized, thick pieces. Soak the pieces in clear lime water for about 15–20 minutes to help the flesh retain its shape and prevent it from becoming mushy. Afterward, rinse thoroughly with water and set aside to drain. 2. Prepare the batter: Combine the crispy frying flour, rice flour, baking powder, and salt. Gradually add ice-cold water and stir until the mixture is well blended and smooth—neither too thick nor too runny. 3. Frying the pumpkin: Heat enough vegetable oil in a pan to deep-fry, using medium-high heat. Coat the pumpkin thoroughly in the batter, then carefully drop it into the oil to fry. 4. Let it crisp up: Fry until the pumpkin is cooked and the batter turns golden yellow and crispy. Remove from the pan, let the excess oil drain, and arrange on a serving plate. Summary Summation Notes: To make delicious, crispy-on-the-outside, soft-on-the-inside battered pumpkin, simply slice the pumpkin into pieces about 0.5 inches thick. Coat them in a batter made from crispy frying flour, rice flour, baking powder, salt, and ice-cold water. Fry in very hot oil until golden and crispy, then let the excess oil drain off before serving. Additional tips: You can add any topping your want such as Fruit Vegetable or Anything you have ever ate. Where can i you me buy it, Where to Buy, Where to find it: Internet Online, Supermarkets. Widely available from street food stalls, especially in durian-growing regions like, and at markets. Online: Easily ordered from platforms like Abcdefg in various grades and sizes. Caution Warning: Precautions: Pumpkin is high in starch and potassium; patients with diabetes or kidney disease should consume it in limited quantities. Key Additional Tips Profit Useful Benefit Available Nutrition : Pumpkin is rich in Vitamin A, beta-carotene, and fiber; it supports eye health, boosts the immune system, and aids digestion. It is low in calories yet keeps you feeling full for longer, making it ideal for those looking to manage their weight. Eye health: High in Vitamin A, it helps protect the eyes and reduce retinal degeneration. Weight management: As a high-fiber complex carbohydrate, it promotes satiety and reduces fat absorption. Immune support: Antioxidants like beta-carotene help slow aging and lower the risk of cancer. Skin health: Rich in Vitamins C and E, it helps keep skin soft and hydrated while reducing the appearance of wrinkles. And the finally then You can eat it and Sell it to the Merchant or Customer with Who people you Know Knew known, i hope you have fun and enjoy it.
ClickMeSeeAllFull
ClickMeSeeOnMoreDetail
ClickMeSeeOnMorePictureImage
ClickMeSeeOnMoreVideo
Vegetable: Processer Processed Processing food Menu: 6.Pumpkin Toast
Method: All Works: Pumpkin Toast
Method: How to make made cook: Recipe Procedure: Method: All Works: Pumpkin Toast Materials Ingredients: 150g finely mashed steamed pumpkin; 2–3 tbsp sweetened condensed milk; 1–2 tbsp fresh milk or whipping cream; a pinch of salt; 2 slices of loaf bread (crusts removed or thick, soft slices); 1–2 tbsp butter (unsalted or salted, as preferred); 1–2 slices of Cheddar cheese or shredded Mozzarella cheese. Key Preparation Directions Instructions Methods: 1. Prepare the pumpkin filling: Combine the steamed, mashed pumpkin with sweetened condensed milk, fresh milk, and salt. Stir until smooth and creamy. (You can cook the mixture in a pan over low heat for about 5 minutes to thicken it, or use it fresh as a spread.) 2. Assembly: Spread the pumpkin cream evenly over a slice of bread. Then, sprinkle with mozzarella cheese or place a cheese slice on top, and cover with another slice of bread. 3. Toast the bread: Place a pan over low heat, lightly grease it with butter, and toast the sandwich bread. 4. Add butter for aroma: Spread a thin layer of butter on the top side of the bread. Wait until the bottom surface turns golden and crispy and the cheese begins to melt, then flip it over. Toast until both sides are beautifully golden brown and the cheese is gooey. To serve: Cut diagonally, arrange on a plate, and drizzle with sweetened condensed milk if desired. Summary Summation Notes: You can easily make pumpkin-filled butter, condensed milk, and cheese toast by blending pumpkin puree with sweetened condensed milk and whipping cream until smooth. Spread the mixture onto bread, add a layer of mozzarella cheese, and toast in a pan until the bread is crispy on the outside and rich with butter, with the cheese melting perfectly into the sweet, creamy pumpkin filling. Additional tips: You can add any topping your want such as Fruit Vegetable or Anything you have ever ate. Where can i you me buy it, Where to Buy, Where to find it: Internet Online, Supermarkets. Widely available from street food stalls, especially in durian-growing regions like, and at markets. Online: Easily ordered from platforms like Abcdefg in various grades and sizes. Caution Warning: Precautions: Pumpkin is high in starch and potassium; patients with diabetes or kidney disease should consume it in limited quantities. Key Additional Tips Profit Useful Benefit Available Nutrition : Pumpkin is rich in Vitamin A, beta-carotene, and fiber; it supports eye health, boosts the immune system, and aids digestion. It is low in calories yet keeps you feeling full for longer, making it ideal for those looking to manage their weight. Eye health: High in Vitamin A, it helps protect the eyes and reduce retinal degeneration. Weight management: As a high-fiber complex carbohydrate, it promotes satiety and reduces fat absorption. Immune support: Antioxidants like beta-carotene help slow aging and lower the risk of cancer. Skin health: Rich in Vitamins C and E, it helps keep skin soft and hydrated while reducing the appearance of wrinkles. And the finally then You can eat it and Sell it to the Merchant or Customer with Who people you Know Knew known, i hope you have fun and enjoy it.
ClickMeSeeAllFull
ClickMeSeeOnMoreDetail
ClickMeSeeOnMorePictureImage
ClickMeSeeOnMoreVideo
Vegetable: Processer Processed Processing food Menu: 7.Pumpkin Bake
Method: All Works: Pumpkin Bake
Method: How to make made cook: Recipe Procedure: Method: All Works: Pumpkin Bake Materials Ingredients: Fully ripened pumpkin, cut into bite-sized pieces; 1–2 tablespoons unsalted butter; 2–3 tablespoons fresh milk (plain) or evaporated milk; a pinch of salt; granulated sugar or sweetened condensed milk (adjust sweetness to taste); Mozzarella cheese (amount as desired). Key Preparation Directions Instructions Methods: 1. Prepare the pumpkin: Steam the pumpkin over high heat for about 10–15 minutes until tender but not mushy. 2. Seasoning: Transfer the pumpkin to a mixing bowl, then add the butter, fresh milk, salt, and granulated sugar. Mix lightly and taste, adjusting the sweetness and richness to your preference. 3. Bake with cheese: Spoon the pumpkin into a baking dish and sprinkle mozzarella cheese evenly over the top. 4. Bake until golden brown: Place in an oven at 200°C for approximately 10–12 minutes, or until the cheese has melted and turned a beautiful golden brown (if using an air fryer, cook at 180°C for about 8–10 minutes). Summary Summation Notes: You can easily make butter, milk, and cheese-baked pumpkin by first steaming the pumpkin until tender, then mixing it with butter and fresh milk while seasoning to taste. Finally, top it generously with mozzarella cheese and bake—or cook in an air fryer—until the cheese melts into a gooey, beautifully golden layer. Additional tips: You can add any topping your want such as Fruit Vegetable or Anything you have ever ate. Where can i you me buy it, Where to Buy, Where to find it: Internet Online, Supermarkets. Widely available from street food stalls, especially in durian-growing regions like, and at markets. Online: Easily ordered from platforms like Abcdefg in various grades and sizes. Caution Warning: Precautions: Pumpkin is high in starch and potassium; patients with diabetes or kidney disease should consume it in limited quantities. Key Additional Tips Profit Useful Benefit Available Nutrition : Pumpkin is rich in Vitamin A, beta-carotene, and fiber; it supports eye health, boosts the immune system, and aids digestion. It is low in calories yet keeps you feeling full for longer, making it ideal for those looking to manage their weight. Eye health: High in Vitamin A, it helps protect the eyes and reduce retinal degeneration. Weight management: As a high-fiber complex carbohydrate, it promotes satiety and reduces fat absorption. Immune support: Antioxidants like beta-carotene help slow aging and lower the risk of cancer. Skin health: Rich in Vitamins C and E, it helps keep skin soft and hydrated while reducing the appearance of wrinkles. And the finally then You can eat it and Sell it to the Merchant or Customer with Who people you Know Knew known, i hope you have fun and enjoy it.
ClickMeSeeAllFull
ClickMeSeeOnMoreDetail
ClickMeSeeOnMorePictureImage
ClickMeSeeOnMoreVideo
Vegetable: Processer Processed Processing food Menu: 8.Pumpkin Melt
Method: All Works: Pumpkin Melt
Method: How to make made cook: Recipe Procedure: Method: All Works: Pumpkin Melt Materials Ingredients: 500g mature pumpkin; 250–500ml coconut milk (adjust quantity to taste); 250–400ml water; 100–170g coconut sugar (adjust sweetness to taste); ¼–½ tsp salt; 3–4 pandan leaves; clear lime water (for soaking the pumpkin). Key Preparation Directions Instructions Methods: 1. Prepare the pumpkin: Partially peel the pumpkin and cut it into evenly sized pieces. Soak the pieces in clear lime water for about 20–30 minutes to help the flesh hold its shape and prevent it from becoming mushy during boiling. Then, remove the pumpkin, rinse thoroughly with clean water, and set aside to drain. 2. Prepare the coconut milk mixture: Place a pot on the stove and add the thin coconut milk (or plain water) along with the knotted pandan leaves. Then, add the coconut sugar and salt, stirring until the sugar has completely dissolved. 3. Add the pumpkin: Once the coconut milk begins to boil, add the pumpkin. Cook over medium-low heat, skimming off any foam regularly. 4. Cook until done: Continue cooking until the pumpkin begins to soften and change color (adjust the level of softness to your preference). Then, add the thick coconut milk and stir gently to combine. Once it starts to boil again, turn off the heat to prevent the coconut milk from separating. Summary Summation Notes: To make delicious *Buat Fak Thong* (pumpkin in coconut milk) with perfectly intact pumpkin pieces and rich, aromatic coconut milk, start by cutting the pumpkin into bite-sized pieces. Soak them in clear lime water for 20 minutes, then rinse. Place the coconut milk on the stove and add pandan leaves, coconut sugar, and salt. Once boiling, add the pumpkin and cook until tender. Remove from heat and serve immediately. Additional tips: You can add any topping your want such as Fruit Vegetable or Anything you have ever ate. Where can i you me buy it, Where to Buy, Where to find it: Internet Online, Supermarkets. Widely available from street food stalls, especially in durian-growing regions like, and at markets. Online: Easily ordered from platforms like Abcdefg in various grades and sizes. Caution Warning: Precautions: Pumpkin is high in starch and potassium; patients with diabetes or kidney disease should consume it in limited quantities. Key Additional Tips Profit Useful Benefit Available Nutrition : Pumpkin is rich in Vitamin A, beta-carotene, and fiber; it supports eye health, boosts the immune system, and aids digestion. It is low in calories yet keeps you feeling full for longer, making it ideal for those looking to manage their weight. Eye health: High in Vitamin A, it helps protect the eyes and reduce retinal degeneration. Weight management: As a high-fiber complex carbohydrate, it promotes satiety and reduces fat absorption. Immune support: Antioxidants like beta-carotene help slow aging and lower the risk of cancer. Skin health: Rich in Vitamins C and E, it helps keep skin soft and hydrated while reducing the appearance of wrinkles. And the finally then You can eat it and Sell it to the Merchant or Customer with Who people you Know Knew known, i hope you have fun and enjoy it.
ClickMeSeeAllFull
ClickMeSeeOnMoreDetail
ClickMeSeeOnMorePictureImage
ClickMeSeeOnMoreVideo
Vegetable: Processer Processed Processing food Menu: 9.Pumpkin Fried Crispy on Cheese Powder
Method: All Works: Pumpkin Fried Crispy on Cheese Powder
Method: How to make made cook: Recipe Procedure: Method: All Works: Pumpkin Fried Crispy on Cheese Powder Materials Ingredients: Pumpkin—either semi-ripe or fully ripe (peeled or unpeeled)—cut into bite-sized cubes, slices, or strips; unsalted butter or oil for roasting; a pinch of salt; and ready-made cheese powder (amount to taste). Key Preparation Directions Instructions Methods: 1. Prepare the pumpkin: Wash the pumpkin and cut it into bite-sized pieces. Steam or boil until tender but not mushy (approximately 5–15 minutes). 2. Soak in cold water for approximately 1–10 minutes. Then, pat dry thoroughly and coat or dust with flour. 3. Pan-roasting: Heat a pan with a little butter over low to medium heat. Add the pumpkin and cook, turning the pieces over, until the outer surface begins to dry and turns a beautiful yellow color. 4. Pan-roasting: Heat a pan with a little butter over low to medium heat. Add the pumpkin and cook, turning the pieces over, until the outer surface begins to dry out and turns a beautiful yellow color. Summary Summation Notes: To make delicious, savory cheese-coated pumpkin, start by cutting the pumpkin into pieces and cooking them. Then, sauté or fry the pieces until the surface is dry and crispy before tossing them with cheese powder. It is a simple and easy snack to prepare. Additional tips: You can add any topping your want such as Fruit Vegetable or Anything you have ever ate. Where can i you me buy it, Where to Buy, Where to find it: Internet Online, Supermarkets. Widely available from street food stalls, especially in durian-growing regions like, and at markets. Online: Easily ordered from platforms like Abcdefg in various grades and sizes. Caution Warning: Precautions: Pumpkin is high in starch and potassium; patients with diabetes or kidney disease should consume it in limited quantities. Key Additional Tips Profit Useful Benefit Available Nutrition : Pumpkin is rich in Vitamin A, beta-carotene, and fiber; it supports eye health, boosts the immune system, and aids digestion. It is low in calories yet keeps you feeling full for longer, making it ideal for those looking to manage their weight. Eye health: High in Vitamin A, it helps protect the eyes and reduce retinal degeneration. Weight management: As a high-fiber complex carbohydrate, it promotes satiety and reduces fat absorption. Immune support: Antioxidants like beta-carotene help slow aging and lower the risk of cancer. Skin health: Rich in Vitamins C and E, it helps keep skin soft and hydrated while reducing the appearance of wrinkles. And the finally then You can eat it and Sell it to the Merchant or Customer with Who people you Know Knew known, i hope you have fun and enjoy it.
ClickMeSeeAllFull
ClickMeSeeOnMoreDetail
ClickMeSeeOnMorePictureImage
ClickMeSeeOnMoreVideo
Vegetable: Processer Processed Processing food Menu: 10.Pumpkin Seed on Cheese Powder
Method: All Works: Pumpkin Seed on Cheese Powder
Method: How to make made cook: Recipe Procedure: Method: All Works: Pumpkin Seed on Cheese Powder Materials Ingredients: 1 cup raw pumpkin seeds (shelled or thoroughly washed), 1 teaspoon olive oil or melted butter, a pinch of salt, 1–2 tablespoons cheese powder. Key Preparation Directions Instructions Methods: 1. Prepare the seeds: Wash the pumpkin seeds thoroughly, remove the fibrous pulp, and let them dry completely. 2. Oil coating: Toss the pumpkin seeds with olive oil or melted butter and a little salt. 3. Toast until crispy: Place a pan over low heat and toast the pumpkin seeds until golden, crispy, and fragrant (or roast in the oven at 160°C for approximately 10–15 minutes). 4. Toss with cheese powder: Turn off the heat, remove from the stove, and let cool slightly. Then, quickly add the cheese powder and toss immediately while the pumpkin seeds are still hot to ensure the powder coats them evenly. Summary Summation Notes: To make crispy, delicious cheese-flavored roasted pumpkin seeds, start by preparing the ingredients: wash the pumpkin seeds, roast or bake them, and then toss them with cheese powder. Additional tips: You can add any topping your want such as Fruit Vegetable or Anything you have ever ate. Where can i you me buy it, Where to Buy, Where to find it: Internet Online, Supermarkets. Widely available from street food stalls, especially in durian-growing regions like, and at markets. Online: Easily ordered from platforms like Abcdefg in various grades and sizes. Caution Warning: Precautions: Pumpkin is high in starch and potassium; patients with diabetes or kidney disease should consume it in limited quantities. Key Additional Tips Profit Useful Benefit Available Nutrition : Pumpkin is rich in Vitamin A, beta-carotene, and fiber; it supports eye health, boosts the immune system, and aids digestion. It is low in calories yet keeps you feeling full for longer, making it ideal for those looking to manage their weight. Eye health: High in Vitamin A, it helps protect the eyes and reduce retinal degeneration. Weight management: As a high-fiber complex carbohydrate, it promotes satiety and reduces fat absorption. Immune support: Antioxidants like beta-carotene help slow aging and lower the risk of cancer. Skin health: Rich in Vitamins C and E, it helps keep skin soft and hydrated while reducing the appearance of wrinkles. And the finally then You can eat it and Sell it to the Merchant or Customer with Who people you Know Knew known, i hope you have fun and enjoy it.
ClickMeSeeAllFull
ClickMeSeeOnMoreDetail
ClickMeSeeOnMorePictureImage
ClickMeSeeOnMoreVideo
Vegetable: Processer Processed Processing food Menu: 1.Yam Grill
Method: All Works: Yam Grill
Method: How to make made cook: Recipe Procedure: Method: All Works: Yam Grill Materials Ingredients: Sweet potatoes (full-sized), stove, grilling rack. Key Preparation Directions Instructions Methods: 1. Wash the sweet potatoes: Rinse thoroughly and pat dry. Prepare the grill: Light the charcoal to achieve medium heat, or lightly oil the grill grate. 2. Place the sweet potatoes: Place the whole sweet potatoes on the rack. 3. Flip over: Grill for approximately 20–45 minutes, turning every 15 minutes to ensure even cooking. 4. Check for doneness: Look for a charred skin and soft, tender flesh inside; it is then ready. Summary Summation Notes: Making delicious and juicy grilled sweet potatoes is easy. Simply wash and clean the sweet potatoes, then grill or bake them over charcoal using medium heat, turning them frequently until they are cooked through and tender. Additional tips: You can add any topping your want such as Fruit Vegetable or Anything you have ever ate. Where can i you me buy it, Where to Buy, Where to find it: Internet Online, Supermarkets. Widely available from street food stalls, especially in durian-growing regions like, and at markets. Online: Easily ordered from platforms like Abcdefg in various grades and sizes. Caution Warning: Precautions: Individuals with kidney stones should exercise caution regarding consumption, as sweet potatoes are high in oxalate. Additionally, excessive intake may lead to bloating or an excessive intake of starch. Key Additional Tips Profit Useful Benefit Available Nutrition : Sweet potatoes are rich in Vitamin A (from beta-carotene), Vitamin C, potassium, and dietary fiber. They help regulate blood sugar levels, prevent heart disease, and reduce the risk of cancer. The fiber content stimulates the digestive system and promotes a feeling of fullness, making them an excellent choice for those looking to manage their weight. Blood sugar control: With a low-to-moderate Glycemic Index (GI), it helps maintain stable blood sugar levels when consumed in appropriate amounts. Eye health support: High in beta-carotene—which the body converts into Vitamin A—it supports vision and reduces the risk of macular degeneration. Immune system support and antioxidant properties: Vitamin C and anthocyanins (abundant in purple sweet potatoes) help slow aging and reduce the risk of colon cancer. Digestive and excretory health: Dietary fiber adds bulk to the stool and helps prevent constipation. And the finally then You can eat it and Sell it to the Merchant or Customer with Who people you Know Knew known, i hope you have fun and enjoy it.
ClickMeSeeAllFull
ClickMeSeeOnMoreDetail
ClickMeSeeOnMorePictureImage
ClickMeSeeOnMoreVideo
Vegetable: Processer Processed Processing food Menu: 2.Yam Roast Salt
Method: All Works: Yam Roast Salt
Method: How to make made cook: Recipe Procedure: Method: All Works: Yam Roast Salt Materials Ingredients: 500 g sweet potatoes (peeled and cut into cubes or bite-sized pieces), 1.5 tsp salt, water (for boiling) Key Preparation Directions Instructions Methods: 1. Boil the sweet potatoes: Place the sweet potatoes in a pot, add enough water to cover them, and add a little salt. Boil for about 15–20 minutes until tender. 2. Drain: Pour off all the water and let the sweet potatoes drain until the surface is slightly dry. 3. Dry-roasting with salt: Place a pan over low to medium heat and dry-roast the remaining salt until fragrant. Then, add the sweet potatoes and toss them with the salt. 4. Dry-roast: Stir and roast gently until the salt adheres to the sweet potato pieces and the surface looks beautifully dry and taut. Turn off the heat and serve. Summary Summation Notes: To make simple salt-roasted sweet potatoes, prepare 500g of sweet potatoes, 1–2 teaspoons of salt, and a little water. Wash the sweet potatoes and cut them into bite-sized pieces, then boil them with the salt until tender. Finally, roast them in a pan until completely dry. Additional tips: You can add any topping your want such as Fruit Vegetable or Anything you have ever ate. Where can i you me buy it, Where to Buy, Where to find it: Internet Online, Supermarkets. Widely available from street food stalls, especially in durian-growing regions like, and at markets. Online: Easily ordered from platforms like Abcdefg in various grades and sizes. Caution Warning: Precautions: Individuals with kidney stones should exercise caution regarding consumption, as sweet potatoes are high in oxalate. Additionally, excessive intake may lead to bloating or an excessive intake of starch. Key Additional Tips Profit Useful Benefit Available Nutrition : Sweet potatoes are rich in Vitamin A (from beta-carotene), Vitamin C, potassium, and dietary fiber. They help regulate blood sugar levels, prevent heart disease, and reduce the risk of cancer. The fiber content stimulates the digestive system and promotes a feeling of fullness, making them an excellent choice for those looking to manage their weight. Blood sugar control: With a low-to-moderate Glycemic Index (GI), it helps maintain stable blood sugar levels when consumed in appropriate amounts. Eye health support: High in beta-carotene—which the body converts into Vitamin A—it supports vision and reduces the risk of macular degeneration. Immune system support and antioxidant properties: Vitamin C and anthocyanins (abundant in purple sweet potatoes) help slow aging and reduce the risk of colon cancer. Digestive and excretory health: Dietary fiber adds bulk to the stool and helps prevent constipation. And the finally then You can eat it and Sell it to the Merchant or Customer with Who people you Know Knew known, i hope you have fun and enjoy it.
ClickMeSeeAllFull
ClickMeSeeOnMoreDetail
ClickMeSeeOnMorePictureImage
ClickMeSeeOnMoreVideo
Vegetable: Processer Processed Processing food Menu: 3.Yam Roasted on in Cheese Powder
Method: All Works: Yam Roasted on in Cheese Powder
Method: How to make made cook: Recipe Procedure: Method: All Works: Yam Roasted on in Cheese Powder Materials Ingredients: 500g sweet potatoes (peeled and cut into bite-sized sticks), 2–3 tablespoons cheese powder (adjust to taste), 1 tablespoon vegetable oil or melted butter (for coating the sweet potatoes), a pinch of salt. Key Preparation Directions Instructions Methods: 1. Prepare the sweet potatoes: Wash the cut sweet potatoes thoroughly and pat them completely dry. Then, toss them with a light coating of vegetable oil or melted butter and a little salt. 2. Cook: Roast in an air fryer or oven at 200°C for 25–30 minutes until the inside is tender and the skin begins to char and crisp up. 3. Toss with cheese powder: Place the cooked sweet potatoes in a mixing bowl. Add the cheese powder while the sweet potatoes are still hot, and toss until the powder melts and evenly coats the pieces. 4. Serve: Spoon onto a plate and enjoy as a delicious snack. Summary Summation Notes: To make delicious cheese-dusted sweet potatoes that are crispy yet tender, start by preparing the main ingredients: sweet potatoes and cheese seasoning powder. Cut the sweet potatoes into strips, then bake or fry them until cooked and crispy. Finally, toss them thoroughly with the cheese powder and serve immediately. Additional tips: You can add any topping your want such as Fruit Vegetable or Anything you have ever ate. Where can i you me buy it, Where to Buy, Where to find it: Internet Online, Supermarkets. Widely available from street food stalls, especially in durian-growing regions like, and at markets. Online: Easily ordered from platforms like Abcdefg in various grades and sizes. Caution Warning: Precautions: Individuals with kidney stones should exercise caution regarding consumption, as sweet potatoes are high in oxalate. Additionally, excessive intake may lead to bloating or an excessive intake of starch. Key Additional Tips Profit Useful Benefit Available Nutrition : Sweet potatoes are rich in Vitamin A (from beta-carotene), Vitamin C, potassium, and dietary fiber. They help regulate blood sugar levels, prevent heart disease, and reduce the risk of cancer. The fiber content stimulates the digestive system and promotes a feeling of fullness, making them an excellent choice for those looking to manage their weight. Blood sugar control: With a low-to-moderate Glycemic Index (GI), it helps maintain stable blood sugar levels when consumed in appropriate amounts. Eye health support: High in beta-carotene—which the body converts into Vitamin A—it supports vision and reduces the risk of macular degeneration. Immune system support and antioxidant properties: Vitamin C and anthocyanins (abundant in purple sweet potatoes) help slow aging and reduce the risk of colon cancer. Digestive and excretory health: Dietary fiber adds bulk to the stool and helps prevent constipation. And the finally then You can eat it and Sell it to the Merchant or Customer with Who people you Know Knew known, i hope you have fun and enjoy it.
ClickMeSeeAllFull
ClickMeSeeOnMoreDetail
ClickMeSeeOnMorePictureImage
ClickMeSeeOnMoreVideo
Vegetable: Processer Processed Processing food Menu: 4.Yam Roasted on in Seaweed Powder
Method: All Works: Yam Roasted on in Seaweed Powder
Method: How to make made cook: Recipe Procedure: Method: All Works: Yam Roasted on in Seaweed Powder Materials Ingredients: 2–3 sweet potatoes (peeled and cut into sticks or bite-sized pieces), 1–2 tablespoons vegetable oil, a pinch of salt, and seasoned seaweed powder (to taste). Key Preparation Directions Instructions Methods: 1. Wash the cut sweet potatoes thoroughly and pat them completely dry. Toss the sweet potatoes with vegetable oil and a little salt until evenly coated. 2. Bake in an air fryer or oven at approximately 180°C for 20–25 minutes (flipping halfway through) until the sweet potatoes are golden and crispy. 3. Transfer to a mixing bowl and quickly sprinkle the seaweed powder over it while it is still hot. 4. Toss until the seaweed powder evenly coats the sweet potato pieces, then serve as an enjoyable snack. Summary Summation Notes: To make crispy, delicious seaweed-seasoned roasted sweet potatoes at home, simply prepare the main ingredients—sweet potatoes, seaweed powder, and vegetable oil—and roast or pan-roast them until they are cooked and crispy. Additional tips: You can add any topping your want such as Fruit Vegetable or Anything you have ever ate. Where can i you me buy it, Where to Buy, Where to find it: Internet Online, Supermarkets. Widely available from street food stalls, especially in durian-growing regions like, and at markets. Online: Easily ordered from platforms like Abcdefg in various grades and sizes. Caution Warning: Precautions: Individuals with kidney stones should exercise caution regarding consumption, as sweet potatoes are high in oxalate. Additionally, excessive intake may lead to bloating or an excessive intake of starch. Key Additional Tips Profit Useful Benefit Available Nutrition : Sweet potatoes are rich in Vitamin A (from beta-carotene), Vitamin C, potassium, and dietary fiber. They help regulate blood sugar levels, prevent heart disease, and reduce the risk of cancer. The fiber content stimulates the digestive system and promotes a feeling of fullness, making them an excellent choice for those looking to manage their weight. Blood sugar control: With a low-to-moderate Glycemic Index (GI), it helps maintain stable blood sugar levels when consumed in appropriate amounts. Eye health support: High in beta-carotene—which the body converts into Vitamin A—it supports vision and reduces the risk of macular degeneration. Immune system support and antioxidant properties: Vitamin C and anthocyanins (abundant in purple sweet potatoes) help slow aging and reduce the risk of colon cancer. Digestive and excretory health: Dietary fiber adds bulk to the stool and helps prevent constipation. And the finally then You can eat it and Sell it to the Merchant or Customer with Who people you Know Knew known, i hope you have fun and enjoy it.
ClickMeSeeAllFull
ClickMeSeeOnMoreDetail
ClickMeSeeOnMorePictureImage
ClickMeSeeOnMoreVideo
Vegetable: Processer Processed Processing food Menu: 5.Yam Roasted on in Wasabi Powder
Method: All Works: Yam Roasted on in Wasabi Powder
Method: How to make made cook: Recipe Procedure: Method: All Works: Yam Roasted on in Wasabi Powder Materials Ingredients: 200g sweet potato (cut into bite-sized cubes), 1–2 tsp olive oil (for roasting or coating), 1–2 tsp wasabi powder (adjust to taste based on desired pungency), a little water (to dissolve the wasabi powder), a pinch of salt. Key Preparation Directions Instructions Methods: 1. Wash and peel the sweet potatoes (peeling is optional), then cut them into evenly sized cubes so they cook at the same rate. Toss the sweet potatoes with olive oil and a little salt until evenly coated. 2. Place a pan over medium-low heat and cook the sweet potato pieces, turning them frequently, until they are tender and the exterior develops a beautiful golden-brown char (alternatively, roast in the oven at 180°C for about 20–25 minutes until cooked and crispy). 3. Gradually mix the wasabi powder with water, stirring until it forms a thick, uniform paste; do not make it too runny. 4. Once the roasted sweet potatoes are cooked, turn off the heat or transfer them to a mixing bowl. While they are still hot, pour in the prepared wasabi mixture and toss quickly until evenly coated; then, serve. Summary Summation Notes: Making wasabi-dusted roasted sweet potatoes is simple: gather the main ingredients—diced sweet potatoes, olive oil, and wasabi powder. Toss the sweet potatoes in oil, then roast or pan-fry them until cooked and crispy. Finally, mix the wasabi powder with a little water and toss the mixture thoroughly with the sweet potatoes. Additional tips: You can add any topping your want such as Fruit Vegetable or Anything you have ever ate. Where can i you me buy it, Where to Buy, Where to find it: Internet Online, Supermarkets. Widely available from street food stalls, especially in durian-growing regions like, and at markets. Online: Easily ordered from platforms like Abcdefg in various grades and sizes. Caution Warning: Precautions: Individuals with kidney stones should exercise caution regarding consumption, as sweet potatoes are high in oxalate. Additionally, excessive intake may lead to bloating or an excessive intake of starch. Key Additional Tips Profit Useful Benefit Available Nutrition : Sweet potatoes are rich in Vitamin A (from beta-carotene), Vitamin C, potassium, and dietary fiber. They help regulate blood sugar levels, prevent heart disease, and reduce the risk of cancer. The fiber content stimulates the digestive system and promotes a feeling of fullness, making them an excellent choice for those looking to manage their weight. Blood sugar control: With a low-to-moderate Glycemic Index (GI), it helps maintain stable blood sugar levels when consumed in appropriate amounts. Eye health support: High in beta-carotene—which the body converts into Vitamin A—it supports vision and reduces the risk of macular degeneration. Immune system support and antioxidant properties: Vitamin C and anthocyanins (abundant in purple sweet potatoes) help slow aging and reduce the risk of colon cancer. Digestive and excretory health: Dietary fiber adds bulk to the stool and helps prevent constipation. And the finally then You can eat it and Sell it to the Merchant or Customer with Who people you Know Knew known, i hope you have fun and enjoy it.
ClickMeSeeAllFull
ClickMeSeeOnMoreDetail
ClickMeSeeOnMorePictureImage
ClickMeSeeOnMoreVideo
Vegetable: Processer Processed Processing food Menu: 6.Yam Dip Flour Fried
Method: All Works: Yam Dip Flour Fried
Method: How to make made cook: Recipe Procedure: Method: All Works: Yam Dip Flour Fried Materials Ingredients: 1 kg sweet potatoes (peeled and cut into bite-sized strips), 300 g crispy frying flour (or ready-made batter mix), 150 g rice flour, 150 ml coconut cream, 500 ml clear lime water (or ice-cold water), 300 g granulated sugar, 2 tsp salt, white sesame seeds and grated coconut (to taste), and vegetable oil for frying. Key Preparation Directions Instructions Methods: 1. Prepare the sweet potatoes: Peel and thoroughly wash the sweet potatoes, then cut them into thick, long strips. Prepare the batter: Combine crispy frying flour, rice flour, sugar, and salt in a mixing bowl. Add the coconut cream and clear lime water, then stir well until the sugar has completely dissolved. 2. Add the extras: Add the white sesame seeds and grated coconut to the batter mixture, and stir until evenly distributed. 3. Set up the pan: Add vegetable oil to the pan and heat over medium heat. 4. Coat and fry: Coat the sweet potato pieces thoroughly in the prepared batter, then drop them into hot oil and fry until golden brown and crispy. Remove and set aside to drain the excess oil. Summary Summation Notes: To make delicious sweet potato fritters that are crispy on the outside and soft on the inside, simply prepare the main ingredients—sweet potatoes, crispy frying batter, and coconut milk—and follow the easy recipe and steps below. Additional tips: You can add any topping your want such as Fruit Vegetable or Anything you have ever ate. Where can i you me buy it, Where to Buy, Where to find it: Internet Online, Supermarkets. Widely available from street food stalls, especially in durian-growing regions like, and at markets. Online: Easily ordered from platforms like Abcdefg in various grades and sizes. Caution Warning: Precautions: Individuals with kidney stones should exercise caution regarding consumption, as sweet potatoes are high in oxalate. Additionally, excessive intake may lead to bloating or an excessive intake of starch. Key Additional Tips Profit Useful Benefit Available Nutrition : Sweet potatoes are rich in Vitamin A (from beta-carotene), Vitamin C, potassium, and dietary fiber. They help regulate blood sugar levels, prevent heart disease, and reduce the risk of cancer. The fiber content stimulates the digestive system and promotes a feeling of fullness, making them an excellent choice for those looking to manage their weight. Blood sugar control: With a low-to-moderate Glycemic Index (GI), it helps maintain stable blood sugar levels when consumed in appropriate amounts. Eye health support: High in beta-carotene—which the body converts into Vitamin A—it supports vision and reduces the risk of macular degeneration. Immune system support and antioxidant properties: Vitamin C and anthocyanins (abundant in purple sweet potatoes) help slow aging and reduce the risk of colon cancer. Digestive and excretory health: Dietary fiber adds bulk to the stool and helps prevent constipation. And the finally then You can eat it and Sell it to the Merchant or Customer with Who people you Know Knew known, i hope you have fun and enjoy it.
ClickMeSeeAllFull
ClickMeSeeOnMoreDetail
ClickMeSeeOnMorePictureImage
ClickMeSeeOnMoreVideo
Vegetable: Processer Processed Processing food Menu: 7.Yam Fried Crispy
Method: All Works: Yam Fried Crispy
Method: How to make made cook: Recipe Procedure: Method: All Works: Yam Fried Crispy Materials Ingredients: 2 sweet potatoes (washed and peeled, if desired), 2 tablespoons vegetable oil or olive oil, 1–2 tablespoons cornstarch or tapioca starch (helps keep them crispy longer), 1/2 teaspoon salt. Key Preparation Directions Instructions Methods: 1. Cut and soak: Cut the sweet potatoes into evenly sized strips and soak them in ice-cold water for about 20–30 minutes to remove excess starch. Then, pat them completely dry. 2. Coat with oil and starch: Toss the dried sweet potatoes with vegetable oil and cornstarch; you can also add a little salt and paprika powder for extra flavor. 3.Baking or Frying: Baking Method: Arrange on a baking tray and bake at approximately 180–200°C, or use an air fryer, for 20–25 minutes (flip halfway through). Frying Method: Heat enough oil for deep-frying in a pan over medium heat until very hot. Fry the sweet potatoes until golden and crispy, then remove and let drain. Summary Summation Notes: Making delicious sweet potato fries—crispy on the outside and soft on the inside—is easy. Simply prepare the main ingredients: sweet potatoes, vegetable oil, and salt (or cornstarch for coating to add extra crispiness). Additional tips: You can add any topping your want such as Fruit Vegetable or Anything you have ever ate. Where can i you me buy it, Where to Buy, Where to find it: Internet Online, Supermarkets. Widely available from street food stalls, especially in durian-growing regions like, and at markets. Online: Easily ordered from platforms like Abcdefg in various grades and sizes. Caution Warning: Precautions: Individuals with kidney stones should exercise caution regarding consumption, as sweet potatoes are high in oxalate. Additionally, excessive intake may lead to bloating or an excessive intake of starch. Key Additional Tips Profit Useful Benefit Available Nutrition : Sweet potatoes are rich in Vitamin A (from beta-carotene), Vitamin C, potassium, and dietary fiber. They help regulate blood sugar levels, prevent heart disease, and reduce the risk of cancer. The fiber content stimulates the digestive system and promotes a feeling of fullness, making them an excellent choice for those looking to manage their weight. Blood sugar control: With a low-to-moderate Glycemic Index (GI), it helps maintain stable blood sugar levels when consumed in appropriate amounts. Eye health support: High in beta-carotene—which the body converts into Vitamin A—it supports vision and reduces the risk of macular degeneration. Immune system support and antioxidant properties: Vitamin C and anthocyanins (abundant in purple sweet potatoes) help slow aging and reduce the risk of colon cancer. Digestive and excretory health: Dietary fiber adds bulk to the stool and helps prevent constipation. And the finally then You can eat it and Sell it to the Merchant or Customer with Who people you Know Knew known, i hope you have fun and enjoy it.
ClickMeSeeAllFull
ClickMeSeeOnMoreDetail
ClickMeSeeOnMorePictureImage
ClickMeSeeOnMoreVideo
Vegetable: Processer Processed Processing food Menu: 8.Yam Chips Crispy
Method: All Works: Yam Chips Crispy
Method: How to make made cook: Recipe Procedure: Method: All Works: Yam Chips Crispy Materials Ingredients: 500g sweet potatoes (yellow, orange, or purple), vegetable oil for frying, fine salt or granulated sugar (to taste), and a thin-slicing knife. Key Preparation Directions Instructions Methods: 1. Prepare the sweet potatoes: Peel and wash them thoroughly. Slicing: Use a knife to slice them into paper-thin, uniform pieces. 2. Rinse: Soak and rinse the sweet potato slices in clean water twice to remove the starch; this prevents them from sticking together during frying and ensures crispiness. Dry: Remove from the water, let drain, and pat completely dry with paper towels. 3. Frying: Heat oil in a pan over medium-low heat. Once hot, add the sweet potatoes, spreading them out to prevent sticking. Stir continuously until they turn golden and crispy and the oil bubbling subsides. 4. Drain off the oil: Remove from the pan and place on a wire rack to drain. Sprinkle with salt or toss with salt and/or sugar to taste; once cooled, store in an airtight jar. Summary Summation Notes: To make sweet potato chips that stay crispy for a long time, slice the sweet potatoes into uniform, thin pieces, rinse them to remove excess starch, pat them dry, and fry them in medium-hot oil until golden and crisp. Additional tips: You can add any topping your want such as Fruit Vegetable or Anything you have ever ate. Where can i you me buy it, Where to Buy, Where to find it: Internet Online, Supermarkets. Widely available from street food stalls, especially in durian-growing regions like, and at markets. Online: Easily ordered from platforms like Abcdefg in various grades and sizes. Caution Warning: Precautions: Individuals with kidney stones should exercise caution regarding consumption, as sweet potatoes are high in oxalate. Additionally, excessive intake may lead to bloating or an excessive intake of starch. Key Additional Tips Profit Useful Benefit Available Nutrition : Sweet potatoes are rich in Vitamin A (from beta-carotene), Vitamin C, potassium, and dietary fiber. They help regulate blood sugar levels, prevent heart disease, and reduce the risk of cancer. The fiber content stimulates the digestive system and promotes a feeling of fullness, making them an excellent choice for those looking to manage their weight. Blood sugar control: With a low-to-moderate Glycemic Index (GI), it helps maintain stable blood sugar levels when consumed in appropriate amounts. Eye health support: High in beta-carotene—which the body converts into Vitamin A—it supports vision and reduces the risk of macular degeneration. Immune system support and antioxidant properties: Vitamin C and anthocyanins (abundant in purple sweet potatoes) help slow aging and reduce the risk of colon cancer. Digestive and excretory health: Dietary fiber adds bulk to the stool and helps prevent constipation. And the finally then You can eat it and Sell it to the Merchant or Customer with Who people you Know Knew known, i hope you have fun and enjoy it.
ClickMeSeeAllFull
ClickMeSeeOnMoreDetail
ClickMeSeeOnMorePictureImage
ClickMeSeeOnMoreVideo
Vegetable: Processer Processed Processing food Menu: 9.Yam Bake Butter Cheese Milk
Method: All Works: Yam Bake Butter Cheese Milk
Method: How to make made cook: Recipe Procedure: Method: All Works: Yam Bake Butter Cheese Milk Materials Ingredients: 2–3 sweet potatoes, 20g unsalted butter, 2–3 tbsp plain milk (adjust to taste for desired smoothness), shredded mozzarella cheese (to taste), and a pinch of salt. Key Preparation Directions Instructions Methods: 1. Cook it: Wash the sweet potato thoroughly, then steam or roast it in an air fryer at 200°C for about 30–35 minutes until the flesh is tender. 2. Mash and mix: Cut the sweet potato in half and scoop the flesh into a bowl (reserving the skin to use as a cup). Mash the flesh until smooth while it is still hot. 3. Add butter and milk: Add fresh butter, plain milk, and a pinch of salt to the mashed potatoes. Mix until the texture is smooth, creamy, and fragrant. 4. Add cheese and bake: Scoop the mashed potato mixture back into the potato skins, mounding it high. Generously top with mozzarella cheese and bake for the final step: place in an oven or air fryer at 180°C for 5–10 minutes until the cheese melts and turns a beautiful golden yellow. Ready to serve. Summary Summation Notes: Here is how to make delicious, rich, and gooey butter-milk-cheese baked sweet potatoes. Prepare the main ingredients—sweet potatoes, fresh butter, plain milk, and mozzarella cheese—and follow these simple steps: Additional tips: You can add any topping your want such as Fruit Vegetable or Anything you have ever ate. Where can i you me buy it, Where to Buy, Where to find it: Internet Online, Supermarkets. Widely available from street food stalls, especially in durian-growing regions like, and at markets. Online: Easily ordered from platforms like Abcdefg in various grades and sizes. Caution Warning: Precautions: Individuals with kidney stones should exercise caution regarding consumption, as sweet potatoes are high in oxalate. Additionally, excessive intake may lead to bloating or an excessive intake of starch. Key Additional Tips Profit Useful Benefit Available Nutrition : Sweet potatoes are rich in Vitamin A (from beta-carotene), Vitamin C, potassium, and dietary fiber. They help regulate blood sugar levels, prevent heart disease, and reduce the risk of cancer. The fiber content stimulates the digestive system and promotes a feeling of fullness, making them an excellent choice for those looking to manage their weight. Blood sugar control: With a low-to-moderate Glycemic Index (GI), it helps maintain stable blood sugar levels when consumed in appropriate amounts. Eye health support: High in beta-carotene—which the body converts into Vitamin A—it supports vision and reduces the risk of macular degeneration. Immune system support and antioxidant properties: Vitamin C and anthocyanins (abundant in purple sweet potatoes) help slow aging and reduce the risk of colon cancer. Digestive and excretory health: Dietary fiber adds bulk to the stool and helps prevent constipation. And the finally then You can eat it and Sell it to the Merchant or Customer with Who people you Know Knew known, i hope you have fun and enjoy it.
ClickMeSeeAllFull
ClickMeSeeOnMoreDetail
ClickMeSeeOnMorePictureImage
ClickMeSeeOnMoreVideo
Vegetable: Processer Processed Processing food Menu: 10.Yam Melt
Method: All Works: Yam Melt
Method: How to make made cook: Recipe Procedure: Method: All Works: Yam Melt Materials Ingredients: 500g sweet potatoes (orange or purple varieties), 700ml fresh or boxed coconut milk, 100–130g coconut sugar, 30–50g granulated sugar (adjust sweetness to taste), 1 tsp salt, 2–3 pandan leaves (tied into a knot), clear lime water (for soaking the sweet potatoes). Key Preparation Directions Instructions Methods: 1. Peel the sweet potatoes, wash them thoroughly, and cut them into bite-sized pieces. Soak the pieces in clear lime water for about 30 minutes to firm up the flesh and prevent it from becoming mushy during boiling. Then, rinse the sweet potatoes thoroughly with fresh water and set them aside to drain. 2. Pour the coconut milk into a pot and add the pandan leaves. Place over medium heat (do not let the coconut milk come to a rolling boil). 3. Once the coconut milk begins to heat up, add the sweet potatoes and cook until tender (you will notice the flesh changing color and becoming translucent). 4. Season with coconut sugar, granulated sugar, and salt. Stir until the sugar dissolves and adjust the taste to your preference. Once the flavors have infused and the dish is thoroughly cooked, turn off the heat and transfer to a serving bowl. Summary Summation Notes: To create a delicious, aromatic, and pleasantly chewy *Buad Man Thet* (sweet potato in coconut milk), start by cutting the sweet potatoes into bite-sized pieces and soaking them in clear lime water for about 30 minutes. Then, simmer them in coconut milk with coconut sugar and salt over low heat until tender. The secret to enhancing the richness and adding a savory touch is to drizzle a little thick coconut cream mixed with a pinch of salt over the top just before serving. Additional tips: You can add any topping your want such as Fruit Vegetable or Anything you have ever ate. Where can i you me buy it, Where to Buy, Where to find it: Internet Online, Supermarkets. Widely available from street food stalls, especially in durian-growing regions like, and at markets. Online: Easily ordered from platforms like Abcdefg in various grades and sizes. Caution Warning: Precautions: Individuals with kidney stones should exercise caution regarding consumption, as sweet potatoes are high in oxalate. Additionally, excessive intake may lead to bloating or an excessive intake of starch. Key Additional Tips Profit Useful Benefit Available Nutrition : Sweet potatoes are rich in Vitamin A (from beta-carotene), Vitamin C, potassium, and dietary fiber. They help regulate blood sugar levels, prevent heart disease, and reduce the risk of cancer. The fiber content stimulates the digestive system and promotes a feeling of fullness, making them an excellent choice for those looking to manage their weight. Blood sugar control: With a low-to-moderate Glycemic Index (GI), it helps maintain stable blood sugar levels when consumed in appropriate amounts. Eye health support: High in beta-carotene—which the body converts into Vitamin A—it supports vision and reduces the risk of macular degeneration. Immune system support and antioxidant properties: Vitamin C and anthocyanins (abundant in purple sweet potatoes) help slow aging and reduce the risk of colon cancer. Digestive and excretory health: Dietary fiber adds bulk to the stool and helps prevent constipation. And the finally then You can eat it and Sell it to the Merchant or Customer with Who people you Know Knew known, i hope you have fun and enjoy it.
ClickMeSeeAllFull
ClickMeSeeOnMoreDetail
ClickMeSeeOnMorePictureImage
ClickMeSeeOnMoreVideo
Vegetable: Processer Processed Processing food Menu: 1.Manioc tapioca Cassava Grill
Method: All Works: Manioc tapioca Cassava Grill
Method: How to make made cook: Recipe Procedure: Method: All Works: Manioc tapioca Cassava Grill Materials Ingredients: 1 kg cassava (5-minute variety), 500 g coconut cream, 280 g coconut sugar, 2 tsp salt, 3 pandan leaves. Key Preparation Directions Instructions Methods: 1. Boil the cassava: Peel the cassava, wash it thoroughly, and cut it into chunks. Boil in water until tender (be careful not to let it become mushy), then remove and set aside to drain. 2. Prepare the coconut sauce: Combine coconut milk, coconut sugar, salt, and pandan leaves in a pot. Simmer over low heat, stirring until the sugar dissolves and the mixture thickens and becomes aromatic. Remove from heat and set aside. 3. Grilling the cassava: Grill the boiled cassava pieces over low heat on a charcoal grill, or use a grill pan or air fryer. Turn them over frequently until the exterior turns a beautiful golden yellow and develops a slightly charred aroma. 4. To serve: Arrange the grilled cassava on a plate and lightly smash it until slightly fluffy, if desired. Drizzle with the thickened coconut milk and serve. Summary Summation Notes: To make delicious grilled cassava with a soft, chewy texture and a coconut milk topping, start by peeling the cassava and boiling it until tender. Meanwhile, simmer coconut milk with coconut sugar and salt. Finally, grill the cassava over low heat until golden and fragrant before drizzling the coconut milk over it. Additional tips: You can add any topping your want such as Fruit Vegetable or Anything you have ever ate. Where can i you me buy it, Where to Buy, Where to find it: Internet Online, Supermarkets. Widely available from street food stalls, especially in durian-growing regions like, and at markets. Online: Easily ordered from platforms like Abcdefg in various grades and sizes. Caution Warning: Precautions: Do not eat raw cassava because it contains cyanide; it must always be cooked thoroughly before consumption. Key Additional Tips Profit Useful Benefit Available Nutrition : Cassava is primarily valued as a high-energy carbohydrate source used for human consumption, animal feed, and industrial processing. For human consumption, the tubers can be boiled, steamed, candied, or baked; additionally, cassava starch is gluten-free, making it suitable for those with wheat allergies. For animal feed, fresh tubers, cassava pulp, and leaves are utilized due to their protein content. Starch and Sweetener Industry and Economy: Cassava starch is used to produce noodles, snacks, and glucose. Renewable Energy: It is used to produce ethanol for fuel. And the finally then You can eat it and Sell it to the Merchant or Customer with Who people you Know Knew known, i hope you have fun and enjoy it.
ClickMeSeeAllFull
ClickMeSeeOnMoreDetail
ClickMeSeeOnMorePictureImage
ClickMeSeeOnMoreVideo
Vegetable: Processer Processed Processing food Menu: 2.Manioc Tapioca Cassava Roast
Method: All Works: Manioc Tapioca Cassava Roast
Method: How to make made cook: Recipe Procedure: Method: All Works: Manioc Tapioca Cassava Roast Materials Ingredients: 1 kg cassava (5-minute variety), 1 teaspoon fine salt or sea salt flakes (adjust to taste), water for boiling. Key Preparation Directions Instructions Methods: 1. Peel the cassava completely, wash it thoroughly, and cut it into bite-sized pieces. 2. Place them in a pot and add enough water to cover. Boil over medium heat until tender (look for a smooth, translucent appearance or test by piercing with a fork). Remove and drain thoroughly until completely dry. 3. Place the boiled sweet potato pieces in a pan over low heat and toss them back and forth until the surface dries slightly. 4. Sprinkle in the fine salt and continue to stir-fry for another 2–3 minutes until the salt evenly coats the potato pieces; then, turn off the heat and serve. Summary Summation Notes: To make salt-tossed cassava (a popular variation involves tossing boiled cassava with salt or sprinkling salt over candied cassava), begin by peeling and washing the cassava, boiling it until tender, and then tossing it with salt to achieve a perfect balance of salty and savory flavors. Additional tips: You can add any topping your want such as Fruit Vegetable or Anything you have ever ate. Where can i you me buy it, Where to Buy, Where to find it: Internet Online, Supermarkets. Widely available from street food stalls, especially in durian-growing regions like, and at markets. Online: Easily ordered from platforms like Abcdefg in various grades and sizes. Caution Warning: Precautions: Do not eat raw cassava because it contains cyanide; it must always be cooked thoroughly before consumption. Key Additional Tips Profit Useful Benefit Available Nutrition : Cassava is primarily valued as a high-energy carbohydrate source used for human consumption, animal feed, and industrial processing. For human consumption, the tubers can be boiled, steamed, candied, or baked; additionally, cassava starch is gluten-free, making it suitable for those with wheat allergies. For animal feed, fresh tubers, cassava pulp, and leaves are utilized due to their protein content. Starch and Sweetener Industry and Economy: Cassava starch is used to produce noodles, snacks, and glucose. Renewable Energy: It is used to produce ethanol for fuel. And the finally then You can eat it and Sell it to the Merchant or Customer with Who people you Know Knew known, i hope you have fun and enjoy it.
ClickMeSeeAllFull
ClickMeSeeOnMoreDetail
ClickMeSeeOnMorePictureImage
ClickMeSeeOnMoreVideo
Vegetable: Processer Processed Processing food Menu: 3.Manioc Tapioca Cassava Dip Flour Fried
Method: All Works: Manioc Tapioca Cassava Dip Flour Fried
Method: How to make made cook: Recipe Procedure: Method: All Works: Manioc Tapioca Cassava Dip Flour Fried Materials Ingredients: Cassava mixture: 500 g grated or sliced cassava, 80–100 g granulated sugar, 1 tsp salt, 200 g coarsely grated semi-mature coconut. Batter: 150 g rice flour, 150–200 ml clear lime water, 100 ml thick coconut cream, a pinch of salt and sugar. Key Preparation Directions Instructions Methods: 1. Wash and peel the cassava, then either grate it into strips or boil it until soft. Combine the cassava with sugar, salt, and grated coconut; knead the mixture thoroughly, then shape it into flat, round patties and set aside. 2. Combine rice flour, thick coconut milk, clear lime water, salt, and sugar; stir until completely dissolved and smooth to create the batter. 3. Place a pan on the stove, add oil, and heat over medium heat. Once the oil is hot, coat the cassava pieces thoroughly in the batter and carefully drop them into the oil to fry. 4. Fry until the batter is golden, crispy, and cooked through. Remove and let drain on a wire rack or paper towels, then serve. Summary Summation Notes: To make batter-fried cassava (a traditional fried cassava snack), start by grating or boiling the cassava and mixing it with sugar and coconut. Shape the mixture into patties, dip them in a batter made from rice flour and clear lime water, and then fry them in hot oil until golden and crispy. Additional tips: You can add any topping your want such as Fruit Vegetable or Anything you have ever ate. Where can i you me buy it, Where to Buy, Where to find it: Internet Online, Supermarkets. Widely available from street food stalls, especially in durian-growing regions like, and at markets. Online: Easily ordered from platforms like Abcdefg in various grades and sizes. Caution Warning: Precautions: Do not eat raw cassava because it contains cyanide; it must always be cooked thoroughly before consumption. Key Additional Tips Profit Useful Benefit Available Nutrition : Cassava is primarily valued as a high-energy carbohydrate source used for human consumption, animal feed, and industrial processing. For human consumption, the tubers can be boiled, steamed, candied, or baked; additionally, cassava starch is gluten-free, making it suitable for those with wheat allergies. For animal feed, fresh tubers, cassava pulp, and leaves are utilized due to their protein content. Starch and Sweetener Industry and Economy: Cassava starch is used to produce noodles, snacks, and glucose. Renewable Energy: It is used to produce ethanol for fuel. And the finally then You can eat it and Sell it to the Merchant or Customer with Who people you Know Knew known, i hope you have fun and enjoy it.
ClickMeSeeAllFull
ClickMeSeeOnMoreDetail
ClickMeSeeOnMorePictureImage
ClickMeSeeOnMoreVideo
Vegetable: Processer Processed Processing food Menu: 4.Manioc Tapioca Cassava Fried Crispy
Method: All Works: Manioc Tapioca Cassava Fried Crispy
Method: How to make made cook: Recipe Procedure: Method: All Works: Manioc Tapioca Cassava Fried Crispy Materials Ingredients: Fresh cassava (peeled and with the central core removed), fine salt, vegetable oil for frying, clean water for boiling. Key Preparation Directions Instructions Methods: 1. Peeling: Completely remove the brown skin and the pink layer. Trimming: Cut the yam into evenly sized long strips and remove the hard central core. 2. Boiling: Boil in salted water for approximately 15–20 minutes until the inside is tender but not mushy. Drying: Remove, rinse with cold water, and let drain until completely dry. 3. Heat the oil: Pour vegetable oil into a pan and heat over medium heat until very hot. First fry: Add the cassava to the oil; once it floats and begins to hold its shape, remove it and set aside. 4. Second fry: Increase the heat and fry again until golden brown and crispy. Remove and drain off the excess oil. Summary Summation Notes: To make cassava fries that are crispy on the outside and soft on the inside, peel and wash the cassava, boil it in salted water until tender, and then fry it in hot oil until golden and crispy. Additional tips: You can add any topping your want such as Fruit Vegetable or Anything you have ever ate. Where can i you me buy it, Where to Buy, Where to find it: Internet Online, Supermarkets. Widely available from street food stalls, especially in durian-growing regions like, and at markets. Online: Easily ordered from platforms like Abcdefg in various grades and sizes. Caution Warning: Precautions: Do not eat raw cassava because it contains cyanide; it must always be cooked thoroughly before consumption. Key Additional Tips Profit Useful Benefit Available Nutrition : Cassava is primarily valued as a high-energy carbohydrate source used for human consumption, animal feed, and industrial processing. For human consumption, the tubers can be boiled, steamed, candied, or baked; additionally, cassava starch is gluten-free, making it suitable for those with wheat allergies. For animal feed, fresh tubers, cassava pulp, and leaves are utilized due to their protein content. Starch and Sweetener Industry and Economy: Cassava starch is used to produce noodles, snacks, and glucose. Renewable Energy: It is used to produce ethanol for fuel. And the finally then You can eat it and Sell it to the Merchant or Customer with Who people you Know Knew known, i hope you have fun and enjoy it.
ClickMeSeeAllFull
ClickMeSeeOnMoreDetail
ClickMeSeeOnMorePictureImage
ClickMeSeeOnMoreVideo
Vegetable: Processer Processed Processing food Menu: 5.Manioc Tapioca Cassava Fried Crispy on in Cheese Powder
Method: All Works: Manioc Tapioca Cassava Fried Crispy Chips Stick on in Cheese Powder
Method: How to make made cook: Recipe Procedure: Method: All Works: Manioc Tapioca Cassava Fried Crispy on in Cheese Powder Materials Ingredients: 500g fresh cassava (peeled, washed to remove sap, and with the hard central core removed), 1/2 teaspoon salt, vegetable oil for frying, 2–3 tablespoons instant cheese powder. Key Preparation Directions Instructions Methods: 1. Prepare the cassava: Cut the cassava into evenly sized sticks and wash thoroughly to remove excess starch. 2. Boil until cooked: Place a pot of water with a little salt on the stove. Add the cassava and boil for about 10–15 minutes until the flesh is tender. Remove from the pot, set aside, and pat completely dry. 3. Fry until crispy: Heat palm oil or vegetable oil in a pan over medium heat. Fry the cassava until the exterior turns golden and crispy, then remove and set aside to drain the oil. 4. Toss with cheese powder: Place the cassava fries into the prepared container, sprinkle with cheese powder, and shake or toss until the powder evenly coats the fries. Summary Summation Notes: To make cassava fries tossed with cheese powder, start by peeling and cutting the cassava into sticks. Boil them until tender, then fry or bake until crispy before tossing them thoroughly with cheese powder. Additional tips: You can add any topping your want such as Fruit Vegetable or Anything you have ever ate. Where can i you me buy it, Where to Buy, Where to find it: Internet Online, Supermarkets. Widely available from street food stalls, especially in durian-growing regions like, and at markets. Online: Easily ordered from platforms like Abcdefg in various grades and sizes. Caution Warning: Precautions: Do not eat raw cassava because it contains cyanide; it must always be cooked thoroughly before consumption. Key Additional Tips Profit Useful Benefit Available Nutrition : Cassava is primarily valued as a high-energy carbohydrate source used for human consumption, animal feed, and industrial processing. For human consumption, the tubers can be boiled, steamed, candied, or baked; additionally, cassava starch is gluten-free, making it suitable for those with wheat allergies. For animal feed, fresh tubers, cassava pulp, and leaves are utilized due to their protein content. Starch and Sweetener Industry and Economy: Cassava starch is used to produce noodles, snacks, and glucose. Renewable Energy: It is used to produce ethanol for fuel. And the finally then You can eat it and Sell it to the Merchant or Customer with Who people you Know Knew known, i hope you have fun and enjoy it.
ClickMeSeeAllFull
ClickMeSeeOnMoreDetail
ClickMeSeeOnMorePictureImage
ClickMeSeeOnMoreVideo
Vegetable: Processer Processed Processing food Menu: 6.Manioc Tapioca Cassava Fried Crispy on in BBQBarbeque Powder
Method: All Works: Manioc Tapioca Cassava Fried Crispy Chips Stick on in BBQBarbeque Powder
Method: How to make made cook: Recipe Procedure: Method: All Works: Manioc Tapioca Cassava Fried Crispy on in BBQBarbeque Powder Materials Ingredients: 500g cassava (peeled and washed thoroughly), 1/4 teaspoon salt, vegetable oil (for frying), water (for boiling), 1–2 tablespoons barbecue powder (adjust to taste). Key Preparation Directions Instructions Methods: 1. Prepare and boil the cassava: Cut the cassava into evenly sized sticks. Boil them in salted water for about 5–10 minutes until tender but not mushy. Remove from the water, drain well, and let them air-dry completely. 2. Fry until crispy: Heat palm oil or vegetable oil in a pan over medium-high heat. Once the oil is very hot, add the cassava and fry for approximately 2–3 minutes per side until the surface turns golden yellow and crispy. Remove from the pan, drain the excess oil, and let it cool for 30 minutes. 3. Second fry: Heat palm oil or vegetable oil in a pan over medium-high heat. Once the oil is very hot, add the cassava and fry for approximately 2–3 minutes per side until the surface turns golden yellow and crispy. Remove from the pan and set aside to drain the excess oil. 4. Toss with barbecue seasoning: Place the hot, fried cassava chips in a mixing bowl. Sprinkle with barbecue seasoning and toss or shake until the pieces are evenly coated. Ready to serve. Summary Summation Notes: To make cassava fries tossed in barbecue seasoning, start by preparing the cassava—boiling it until tender—and then frying it until crispy on the outside and soft on the inside. Finally, toss the fries with barbecue powder until they are aromatic and perfectly coated. Additional tips: You can add any topping your want such as Fruit Vegetable or Anything you have ever ate. Where can i you me buy it, Where to Buy, Where to find it: Internet Online, Supermarkets. Widely available from street food stalls, especially in durian-growing regions like, and at markets. Online: Easily ordered from platforms like Abcdefg in various grades and sizes. Caution Warning: Precautions: Do not eat raw cassava because it contains cyanide; it must always be cooked thoroughly before consumption. Key Additional Tips Profit Useful Benefit Available Nutrition : Cassava is primarily valued as a high-energy carbohydrate source used for human consumption, animal feed, and industrial processing. For human consumption, the tubers can be boiled, steamed, candied, or baked; additionally, cassava starch is gluten-free, making it suitable for those with wheat allergies. For animal feed, fresh tubers, cassava pulp, and leaves are utilized due to their protein content. Starch and Sweetener Industry and Economy: Cassava starch is used to produce noodles, snacks, and glucose. Renewable Energy: It is used to produce ethanol for fuel. And the finally then You can eat it and Sell it to the Merchant or Customer with Who people you Know Knew known, i hope you have fun and enjoy it.
ClickMeSeeAllFull
ClickMeSeeOnMoreDetail
ClickMeSeeOnMorePictureImage
ClickMeSeeOnMoreVideo
Vegetable: Processer Processed Processing food Menu: 7.Manioc Tapioca Cassava Fried Crispy on in Seaweed Powder
Method: All Works: Manioc Tapioca Cassava Fried Crispy Chips Stick on in Seaweed Powder
Method: How to make made cook: Recipe Procedure: Method: All Works: Manioc Tapioca Cassava Fried Crispy on in Seaweed Powder Materials Ingredients: 500 g fresh cassava (peeled and thoroughly washed to remove sap), 1/2 tsp salt, vegetable oil (for frying), 2 tbsp seasoned seaweed powder. Key Preparation Directions Instructions Methods: 1. Prepare the cassava: Cut the cassava into slices or long strips of uniform size (approximately 1 centimeter thick). Rinse thoroughly with clean water, then drain and pat completely dry. 2. Boil until tender (Tip): Boil the cassava in salted boiling water for about 5–7 minutes until tender (do not let it become mushy). Remove, soak in ice-cold water, and then let it dry completely. 3. First fry: Heat oil in a pan over medium heat. Fry the cassava until golden and crispy all over (approximately 1–8 minutes). Remove, drain the oil, and let it cool for 20–30 minutes. Second fry: Heat oil in a pan over medium heat. Fry the cassava again until golden and crispy all over. Remove and drain the oil. 4. Coat with seaweed powder: While the fried cassava is still hot, place it in a mixing bowl. Sprinkle the seaweed powder over it, then shake or toss until the pieces are evenly coated. Ready to serve. Summary Summation Notes: To make cassava fries tossed with seaweed powder, start by preparing the ingredients: cut the cassava into strips, fry them until crispy, and then toss them with the seaweed powder. Additional tips: You can add any topping your want such as Fruit Vegetable or Anything you have ever ate. Where can i you me buy it, Where to Buy, Where to find it: Internet Online, Supermarkets. Widely available from street food stalls, especially in durian-growing regions like, and at markets. Online: Easily ordered from platforms like Abcdefg in various grades and sizes. Caution Warning: Precautions: Do not eat raw cassava because it contains cyanide; it must always be cooked thoroughly before consumption. Key Additional Tips Profit Useful Benefit Available Nutrition : Cassava is primarily valued as a high-energy carbohydrate source used for human consumption, animal feed, and industrial processing. For human consumption, the tubers can be boiled, steamed, candied, or baked; additionally, cassava starch is gluten-free, making it suitable for those with wheat allergies. For animal feed, fresh tubers, cassava pulp, and leaves are utilized due to their protein content. Starch and Sweetener Industry and Economy: Cassava starch is used to produce noodles, snacks, and glucose. Renewable Energy: It is used to produce ethanol for fuel. And the finally then You can eat it and Sell it to the Merchant or Customer with Who people you Know Knew known, i hope you have fun and enjoy it.
ClickMeSeeAllFull
ClickMeSeeOnMoreDetail
ClickMeSeeOnMorePictureImage
ClickMeSeeOnMoreVideo
Vegetable: Processer Processed Processing food Menu: 8.Manioc Tapioca Cassava Toast
Method: All Works: Manioc Tapioca Cassava Toast
Method: How to make made cook: Recipe Procedure: Method: All Works: Manioc Tapioca Cassava Toast Materials Ingredients: Boiled fresh cassava (peeled and thoroughly washed to remove sap), 1/2 teaspoon salt, butter, plain milk, mozzarella cheese, and evaporated or condensed milk (to taste). Key Preparation Directions Instructions Methods: 1. Prepare the filling: Mash 1 cup of boiled cassava until smooth, then mix in 1 tablespoon of melted butter and a pinch of salt. 2. Assembly: Hollow out the center of a thick slice of bread—or cut an opening in the middle—and firmly stuff it with the mashed cassava filling. 3. Apply butter and cheese: Spread butter over the outer side of the bread and lightly drizzle with a little fresh milk. Place a cheese slice or sprinkle shredded mozzarella cheese on top. 4. Toast until crispy: Toast in a pan or oven over low heat until the bread is crispy and the cheese is melted and gooey. Drizzle with milk: Drizzle with sweetened condensed milk and/or evaporated milk to taste, then serve. Summary Summation Notes: To make cassava-filled toast topped with butter, condensed milk, and cheese, prepare thick-sliced bread, finely mashed boiled cassava, fresh butter, sweetened condensed milk, and shredded cheese. Sauté the mashed cassava with a little butter to create the filling, then stuff it into the bread (either by hollowing out the center or slicing it open). Spread butter on the outside, sprinkle with cheese, toast until crispy, and drizzle with condensed milk. Additional tips: You can add any topping your want such as Fruit Vegetable or Anything you have ever ate. Where can i you me buy it, Where to Buy, Where to find it: Internet Online, Supermarkets. Widely available from street food stalls, especially in durian-growing regions like, and at markets. Online: Easily ordered from platforms like Abcdefg in various grades and sizes. Caution Warning: Precautions: Do not eat raw cassava because it contains cyanide; it must always be cooked thoroughly before consumption. Key Additional Tips Profit Useful Benefit Available Nutrition : Cassava is primarily valued as a high-energy carbohydrate source used for human consumption, animal feed, and industrial processing. For human consumption, the tubers can be boiled, steamed, candied, or baked; additionally, cassava starch is gluten-free, making it suitable for those with wheat allergies. For animal feed, fresh tubers, cassava pulp, and leaves are utilized due to their protein content. Starch and Sweetener Industry and Economy: Cassava starch is used to produce noodles, snacks, and glucose. Renewable Energy: It is used to produce ethanol for fuel. And the finally then You can eat it and Sell it to the Merchant or Customer with Who people you Know Knew known, i hope you have fun and enjoy it.
ClickMeSeeAllFull
ClickMeSeeOnMoreDetail
ClickMeSeeOnMorePictureImage
ClickMeSeeOnMoreVideo
Vegetable: Processer Processed Processing food Menu: 9.Manioc Tapioca Cassava Bake Butter Cheese Milk
Method: All Works: Manioc Tapioca Cassava Bake Butter Cheese Milk
Method: How to make made cook: Recipe Procedure: Method: All Works: Manioc Tapioca Cassava Bake Butter Cheese Milk Materials Ingredients: 500g fresh cassava (peeled and washed thoroughly), 3 tablespoons unsalted or salted butter, 2 tablespoons sweetened condensed milk (adjust for desired sweetness and richness), 3 tablespoons fresh milk or evaporated milk, shredded mozzarella and cheddar cheese (to taste), and a pinch of salt. Key Preparation Directions Instructions Methods: 1. Boil the cassava: Cut the cassava into bite-sized pieces. Boil in water until tender and soft, then remove and drain. 2. Mix in butter and milk: While the potatoes are still hot, add the fresh butter, fresh milk, and sweetened condensed milk. Use a fork to mash or mix everything together until the butter melts and is thoroughly incorporated into the potatoes. 3. Add cheese and bake: Scoop the cassava mixture into a baking tray and sprinkle evenly with shredded mozzarella and cheddar cheese. 4. Bake until browned: Place in an oven or air fryer at approximately 200°C for 5–10 minutes until the cheese melts and the surface turns a beautiful golden yellow. Ready to serve. Summary Summation Notes: To make delicious, tender, rich, and aromatic butter-milk-cheese baked cassava, prepare cassava, fresh butter, and grated cheese. Boil the cassava until tender, mix in the butter, milk, and cheese, and then bake until the cheese melts into a beautiful golden color. Additional tips: You can add any topping your want such as Fruit Vegetable or Anything you have ever ate. Where can i you me buy it, Where to Buy, Where to find it: Internet Online, Supermarkets. Widely available from street food stalls, especially in durian-growing regions like, and at markets. Online: Easily ordered from platforms like Abcdefg in various grades and sizes. Caution Warning: Precautions: Do not eat raw cassava because it contains cyanide; it must always be cooked thoroughly before consumption. Key Additional Tips Profit Useful Benefit Available Nutrition : Cassava is primarily valued as a high-energy carbohydrate source used for human consumption, animal feed, and industrial processing. For human consumption, the tubers can be boiled, steamed, candied, or baked; additionally, cassava starch is gluten-free, making it suitable for those with wheat allergies. For animal feed, fresh tubers, cassava pulp, and leaves are utilized due to their protein content. Starch and Sweetener Industry and Economy: Cassava starch is used to produce noodles, snacks, and glucose. Renewable Energy: It is used to produce ethanol for fuel. And the finally then You can eat it and Sell it to the Merchant or Customer with Who people you Know Knew known, i hope you have fun and enjoy it.
ClickMeSeeAllFull
ClickMeSeeOnMoreDetail
ClickMeSeeOnMorePictureImage
ClickMeSeeOnMoreVideo
Vegetable: Processer Processed Processing food Menu: 10.Manioc Tapioca Cassava Melt on in Coconut Milk
Method: All Works: Manioc Tapioca Cassava Melt on in Coconut Milk
Method: How to make made cook: Recipe Procedure: Method: All Works: Manioc Tapioca Cassava Melt on in Coconut Milk Materials Ingredients: Cassava (recommended variety: "5-Minute Cassava"), 600 g; a mixture of thick and thin coconut milk (or 1 cup of boxed coconut milk mixed with water); palm sugar or coconut sugar, 3–4 tbsp; granulated sugar, 1–2 tbsp (adjust sweetness to taste); salt, 1/4–1/2 tsp; pandan leaves, 2–3. Key Preparation Directions Instructions Methods: 1. Prepare the cassava: Peel the cassava, wash it thoroughly, and cut it into bite-sized pieces. 2. Boil until cooked: Bring water to a boil in a pot. Add the cassava and boil until tender and the flesh turns translucent (approximately 15 minutes), then remove and drain. 3. Simmer with coconut milk: Place another pot on the stove and add the coconut milk, palm sugar, granulated sugar, salt, and pandan leaves. Stir until everything is well dissolved. 4. Combine: Add the cooked cassava to the coconut milk pot. Simmer over low heat for another 5–10 minutes to allow the coconut milk to soak into the cassava, then turn off the heat and serve. Summary Summation Notes: Here is how to make delicious *Buad Man Sampalang* (cassava in coconut milk) with a wonderfully chewy, tender texture. The main ingredients are cassava, coconut milk, and sugar. Simply follow the easy steps below. Additional tips: You can add any topping your want such as Fruit Vegetable or Anything you have ever ate. Where can i you me buy it, Where to Buy, Where to find it: Internet Online, Supermarkets. Widely available from street food stalls, especially in durian-growing regions like, and at markets. Online: Easily ordered from platforms like Abcdefg in various grades and sizes. Caution Warning: Precautions: Do not eat raw cassava because it contains cyanide; it must always be cooked thoroughly before consumption. Key Additional Tips Profit Useful Benefit Available Nutrition : Cassava is primarily valued as a high-energy carbohydrate source used for human consumption, animal feed, and industrial processing. For human consumption, the tubers can be boiled, steamed, candied, or baked; additionally, cassava starch is gluten-free, making it suitable for those with wheat allergies. For animal feed, fresh tubers, cassava pulp, and leaves are utilized due to their protein content. Starch and Sweetener Industry and Economy: Cassava starch is used to produce noodles, snacks, and glucose. Renewable Energy: It is used to produce ethanol for fuel. And the finally then You can eat it and Sell it to the Merchant or Customer with Who people you Know Knew known, i hope you have fun and enjoy it.
ClickMeSeeAllFull
ClickMeSeeOnMoreDetail
ClickMeSeeOnMorePictureImage
ClickMeSeeOnMoreVideo
Vegetable: Processer Processed Processing food Menu: 1.Taro Grill
Method: All Works: Taro Grill
Method: How to make made cook: Recipe Procedure: Method: All Works: Taro Grill Materials Ingredients: 800 g taro (cut into pieces), 100 g thick coconut milk Unsweetened milk (amount to taste) 120 g palm sugar (adjust to taste), 1/4 tsp salt, 15 g unsalted butter (for aroma) Key Preparation Directions Instructions Methods: 1. Peel the taro and wash it thoroughly (wear gloves to prevent skin irritation). Steam the taro in boiling water for about 20–25 minutes until tender. Transfer the cooked taro to a bowl and mash it thoroughly while it is still hot. 2. Combine the coconut milk, fresh milk, palm sugar, and salt, stirring until completely dissolved. Pour the coconut milk mixture into the mashed taro, add the butter, and cook over low heat, stirring constantly, until the mixture is smooth and no longer sticks to the pan. 3. Let it cool slightly, then shape the taro into bite-sized, flat, round patties. 4. Place on a low-heat stove or grill on a rack until the outer skin of the taro becomes taut and aromatic. Summary Summation Notes: You can easily make popular grilled taro dishes—such as *Phueak Thip*—by preparing the ingredients, steaming and mashing the taro, mixing in the seasonings, shaping the mixture into balls, and grilling them over charcoal until fragrant. Additional tips: You can add any topping your want such as Fruit Vegetable or Anything you have ever ate. Where can i you me buy it, Where to Buy, Where to find it: Internet Online, Supermarkets. Widely available from street food stalls, especially in durian-growing regions like, and at markets. Online: Easily ordered from platforms like Abcdefg in various grades and sizes. Caution Warning: Precautions: Always cook thoroughly: Do not eat it raw, as it contains calcium oxalate, which causes itching and throat irritation. Choose suitable preparation methods: For better health, opt for boiling or steaming rather than frying or adding large amounts of sugar. Key Additional Tips Profit Useful Benefit Available Nutrition : Taro offers significant benefits, notably providing high energy, promoting satiety, and supporting the digestive system. A 100-gram serving of raw taro provides approximately 112 kilocalories. It promotes satiety by acting as a complex carbohydrate that digests and absorbs slowly, helping to regulate blood sugar levels. It aids digestion due to its high dietary fiber content, which improves digestive system function. Additionally, it supports bone health, as it contains iron and fluoride that help strengthen bones and teeth. And the finally then You can eat it and Sell it to the Merchant or Customer with Who people you Know Knew known, i hope you have fun and enjoy it.
ClickMeSeeAllFull
ClickMeSeeOnMoreDetail
ClickMeSeeOnMorePictureImage
ClickMeSeeOnMoreVideo
Vegetable: Processer Processed Processing food Menu: 2.Taro Roasted Salt
Method: All Works: Taro Roasted Salt
Method: How to make made cook: Recipe Procedure: Method: All Works: Taro Roasted Salt Materials Ingredients: 500g fragrant taro, 1/2 tsp fine salt, 100ml water (for dissolving the salt), frying oil, pandan leaves (for added aroma). Key Preparation Directions Instructions Methods: 1. Prepare the taro: Peel the taro, wash it thoroughly, and cut or slice it into long strips or thin sheets as desired. Prepare the salt water: Dissolve salt in water and set aside. 2. Fry the taro: Place a pan on the stove, add oil, and heat over medium heat. Add pandan leaves, then fry the taro until golden and crispy. 3. Salt-tossing: Just before the taro becomes fully crisp, either sprinkle the prepared salt water into the pan of sizzling fried taro or toss the drained taro thoroughly with the salt water while it is still hot. 4. Let cool: Remove and place on a wire rack or colander until completely dry and cool. Ready to serve. Summary Summation Notes: To make salt-roasted taro (or salted taro chips), the main ingredients required are aromatic taro, fine salt, and vegetable oil. The process begins by slicing and frying the taro until crispy, then thoroughly tossing it with a salty brine. Additional tips: You can add any topping your want such as Fruit Vegetable or Anything you have ever ate. Where can i you me buy it, Where to Buy, Where to find it: Internet Online, Supermarkets. Widely available from street food stalls, especially in durian-growing regions like, and at markets. Online: Easily ordered from platforms like Abcdefg in various grades and sizes. Caution Warning: Precautions: Always cook thoroughly: Do not eat it raw, as it contains calcium oxalate, which causes itching and throat irritation. Choose suitable preparation methods: For better health, opt for boiling or steaming rather than frying or adding large amounts of sugar. Key Additional Tips Profit Useful Benefit Available Nutrition : Taro offers significant benefits, notably providing high energy, promoting satiety, and supporting the digestive system. A 100-gram serving of raw taro provides approximately 112 kilocalories. It promotes satiety by acting as a complex carbohydrate that digests and absorbs slowly, helping to regulate blood sugar levels. It aids digestion due to its high dietary fiber content, which improves digestive system function. Additionally, it supports bone health, as it contains iron and fluoride that help strengthen bones and teeth. And the finally then You can eat it and Sell it to the Merchant or Customer with Who people you Know Knew known, i hope you have fun and enjoy it.
ClickMeSeeAllFull
ClickMeSeeOnMoreDetail
ClickMeSeeOnMorePictureImage
ClickMeSeeOnMoreVideo
Vegetable: Processer Processed Processing food Menu: 3.Taro Dip Flour Fry
Method: All Works: Taro Dip Flour Fry
Method: How to make made cook: Recipe Procedure: Method: All Works: Taro Dip Flour Fry Materials Ingredients: 500g fragrant taro (peeled and cut into sticks or fairly thick pieces), 100g all-purpose flour, 50g crispy frying flour, 30g rice flour (helps maintain crispiness), 1/2 tsp salt, 1 tsp ground pepper, 200–250ml ice-cold water or clear lime water, vegetable oil for frying. Key Preparation Directions Instructions Methods: 1. Prepare the taro: Wash the peeled taro thoroughly, then cut it into bite-sized sticks or thick pieces, as desired. 2. Prepare the batter: Combine wheat flour, crispy frying flour, and rice flour in a mixing bowl. Add salt and ground pepper, then mix well. Dissolve the batter: Gradually add ice-cold water or clear lime water to the flour mixture. Stir until smooth and well-combined, ensuring there are no lumps (the batter should be thick enough to coat the taro pieces effectively). 3. Coating with batter: Toss or coat the cut taro pieces thoroughly in the batter mixture. 4. Frying: Heat a generous amount of vegetable oil in a pan over medium heat until very hot. Fry the batter-coated taro in small batches to prevent sticking. Fry until the batter is golden, crispy, and the taro is tender. Remove from the pan and let drain on a wire rack or paper towels. Serve with your preferred dipping sauce. Summary Summation Notes: To make crispy, delicious batter-fried taro, start by preparing the main ingredients: aromatic taro, all-purpose flour, and crispy frying flour. Cut the taro into pieces or strips and toss them with the flour mixture before frying in hot oil until golden and crispy. Additional tips: You can add any topping your want such as Fruit Vegetable or Anything you have ever ate. Where can i you me buy it, Where to Buy, Where to find it: Internet Online, Supermarkets. Widely available from street food stalls, especially in durian-growing regions like, and at markets. Online: Easily ordered from platforms like Abcdefg in various grades and sizes. Caution Warning: Precautions: Always cook thoroughly: Do not eat it raw, as it contains calcium oxalate, which causes itching and throat irritation. Choose suitable preparation methods: For better health, opt for boiling or steaming rather than frying or adding large amounts of sugar. Key Additional Tips Profit Useful Benefit Available Nutrition : Taro offers significant benefits, notably providing high energy, promoting satiety, and supporting the digestive system. A 100-gram serving of raw taro provides approximately 112 kilocalories. It promotes satiety by acting as a complex carbohydrate that digests and absorbs slowly, helping to regulate blood sugar levels. It aids digestion due to its high dietary fiber content, which improves digestive system function. Additionally, it supports bone health, as it contains iron and fluoride that help strengthen bones and teeth. And the finally then You can eat it and Sell it to the Merchant or Customer with Who people you Know Knew known, i hope you have fun and enjoy it.
ClickMeSeeAllFull
ClickMeSeeOnMoreDetail
ClickMeSeeOnMorePictureImage
ClickMeSeeOnMoreVideo
Vegetable: Processer Processed Processing food Menu: 4.Taro Fry Cripy
Method: All Works: Taro Fry Cripy
Method: How to make made cook: Recipe Procedure: Method: All Works: Taro Fry Cripy Materials Ingredients: 1 whole fresh taro (approx. 500g), vegetable oil (for frying), fine salt (for seasoning), clean water (for washing and soaking) All-purpose frying flour (or wheat flour) Key Preparation Directions Instructions Methods: 1. Peel and cut: Thoroughly peel the taro, wash it, and cut it into sticks of uniform length, similar to French fries. 2. Rinse: Rinse the cut taro in clean water to remove excess starch, then pat it completely dry with paper towels. Finally, toss the taro in all-purpose frying flour. 3. Heat the oil: Pour oil into a pan and heat over medium heat. First fry: Fry the taro strips for about 5 minutes, or until the surface begins to change color and becomes crispy. Remove from the pan, drain the oil, and let them cool for 20–30 minutes. 4.Second fry: Fry the taro strips for 1–5 minutes, then remove and let drain. Seasoning: Sprinkle with a little fine salt while the taro is still warm and toss to combine. Ready to serve. Summary Summation Notes: To make delicious taro fries that are crispy on the outside and soft and chewy on the inside, start by preparing the taro. Cut it into sticks or Chips and fry it in hot oil. Additional tips: You can add any topping your want such as Fruit Vegetable or Anything you have ever ate. Where can i you me buy it, Where to Buy, Where to find it: Internet Online, Supermarkets. Widely available from street food stalls, especially in durian-growing regions like, and at markets. Online: Easily ordered from platforms like Abcdefg in various grades and sizes. Caution Warning: Precautions: Always cook thoroughly: Do not eat it raw, as it contains calcium oxalate, which causes itching and throat irritation. Choose suitable preparation methods: For better health, opt for boiling or steaming rather than frying or adding large amounts of sugar. Key Additional Tips Profit Useful Benefit Available Nutrition : Taro offers significant benefits, notably providing high energy, promoting satiety, and supporting the digestive system. A 100-gram serving of raw taro provides approximately 112 kilocalories. It promotes satiety by acting as a complex carbohydrate that digests and absorbs slowly, helping to regulate blood sugar levels. It aids digestion due to its high dietary fiber content, which improves digestive system function. Additionally, it supports bone health, as it contains iron and fluoride that help strengthen bones and teeth. And the finally then You can eat it and Sell it to the Merchant or Customer with Who people you Know Knew known, i hope you have fun and enjoy it.
ClickMeSeeAllFull
ClickMeSeeOnMoreDetail
ClickMeSeeOnMorePictureImage
ClickMeSeeOnMoreVideo
Vegetable: Processer Processed Processing food Menu: 5.Taro Chips Stick Fry Crispy on in Cheese Powder
Method: All Works: Taro Chips Stick Fry Crispy on in Cheese Powder
Method: How to make made cook: Recipe Procedure: Method: All Works: Taro Chips Stick Fry Crispy on in Cheese Powder Materials Ingredients: 1 whole fresh taro (approx. 500g), vegetable oil (for frying), fine salt (for seasoning), clean water (for washing and soaking) All-purpose frying flour (or wheat flour) Cheese Powder. Key Preparation Directions Instructions Methods: 1. Peel and cut: Thoroughly peel the taro, wash it, and cut it into sticks of uniform length, similar to French fries. 2. Rinse: Rinse the cut taro in clean water to remove excess starch, then pat it completely dry with paper towels. Finally, toss the taro in all-purpose frying flour. 3. Heat the oil: Pour oil into a pan and heat over medium heat. First fry: Fry the taro strips for about 5 minutes, or until the surface begins to change color and becomes crispy. Remove from the pan, drain the oil, and let them cool for 20–30 minutes. 4. Second fry: Fry the taro strips for 1–5 minutes, then remove and let them drain. Seasoning: Sprinkle with cheese powder while the taro is still warm and toss to coat evenly. Ready to serve. Summary Summation Notes: To make delicious taro fries that are crispy on the outside and soft and chewy on the inside, start by preparing the taro. Cut it into sticks or Chips and fry it in hot oil. Additional tips: You can add any topping your want such as Fruit Vegetable or Anything you have ever ate. Where can i you me buy it, Where to Buy, Where to find it: Internet Online, Supermarkets. Widely available from street food stalls, especially in durian-growing regions like, and at markets. Online: Easily ordered from platforms like Abcdefg in various grades and sizes. Caution Warning: Precautions: Always cook thoroughly: Do not eat it raw, as it contains calcium oxalate, which causes itching and throat irritation. Choose suitable preparation methods: For better health, opt for boiling or steaming rather than frying or adding large amounts of sugar. Key Additional Tips Profit Useful Benefit Available Nutrition : Taro offers significant benefits, notably providing high energy, promoting satiety, and supporting the digestive system. A 100-gram serving of raw taro provides approximately 112 kilocalories. It promotes satiety by acting as a complex carbohydrate that digests and absorbs slowly, helping to regulate blood sugar levels. It aids digestion due to its high dietary fiber content, which improves digestive system function. Additionally, it supports bone health, as it contains iron and fluoride that help strengthen bones and teeth. And the finally then You can eat it and Sell it to the Merchant or Customer with Who people you Know Knew known, i hope you have fun and enjoy it.
ClickMeSeeAllFull
ClickMeSeeOnMoreDetail
ClickMeSeeOnMorePictureImage
ClickMeSeeOnMoreVideo
Vegetable: Processer Processed Processing food Menu: 6.Taro Chips Stick Fry Crispy on in BBQBarbeque Powder
Method: All Works: Taro Chips Stick Fry Crispy on in BBQBarbeque Powder
Method: How to make made cook: Recipe Procedure: Method: All Works: Taro Chips Stick Fry Crispy on in BBQBarbeque Powder Materials Ingredients: 1 whole fresh taro (approx. 500g), vegetable oil (for frying), fine salt (for seasoning), clean water (for washing and soaking) All-purpose frying flour (or wheat flour) BBQBarbeque Powder Key Preparation Directions Instructions Methods: 1. Peel and cut: Thoroughly peel the taro, wash it, and cut it into sticks of uniform length, similar to French fries. 2. Rinse: Rinse the cut taro in clean water to remove excess starch, then pat it completely dry with paper towels. Finally, toss the taro in all-purpose frying flour. 3. Heat the oil: Pour oil into a pan and heat over medium heat. First fry: Fry the taro strips for about 5 minutes, or until the surface begins to change color and becomes crispy. Remove from the pan, drain the oil, and let them cool for 20–30 minutes. 4. Second fry: Fry the taro strips for 1–5 minutes, then remove and let them drain. Seasoning: Sprinkle with BBQBarbeque powder while the taro is still warm and toss to coat evenly. Ready to serve. Summary Summation Notes: To make delicious taro fries that are crispy on the outside and soft and chewy on the inside, start by preparing the taro. Cut it into sticks or Chips and fry it in hot oil. Additional tips: You can add any topping your want such as Fruit Vegetable or Anything you have ever ate. Where can i you me buy it, Where to Buy, Where to find it: Internet Online, Supermarkets. Widely available from street food stalls, especially in durian-growing regions like, and at markets. Online: Easily ordered from platforms like Abcdefg in various grades and sizes. Caution Warning: Precautions: Always cook thoroughly: Do not eat it raw, as it contains calcium oxalate, which causes itching and throat irritation. Choose suitable preparation methods: For better health, opt for boiling or steaming rather than frying or adding large amounts of sugar. Key Additional Tips Profit Useful Benefit Available Nutrition : Taro offers significant benefits, notably providing high energy, promoting satiety, and supporting the digestive system. A 100-gram serving of raw taro provides approximately 112 kilocalories. It promotes satiety by acting as a complex carbohydrate that digests and absorbs slowly, helping to regulate blood sugar levels. It aids digestion due to its high dietary fiber content, which improves digestive system function. Additionally, it supports bone health, as it contains iron and fluoride that help strengthen bones and teeth. And the finally then You can eat it and Sell it to the Merchant or Customer with Who people you Know Knew known, i hope you have fun and enjoy it.
ClickMeSeeAllFull
ClickMeSeeOnMoreDetail
ClickMeSeeOnMorePictureImage
ClickMeSeeOnMoreVideo
Vegetable: Processer Processed Processing food Menu: 7.Taro Chips Stick Fry Crispy on in Seaweed Powder
Method: All Works: Taro Chips Stick Fry Crispy on in Seaweed Powder
Method: How to make made cook: Recipe Procedure: Method: All Works: Taro Chips Stick Fry Crispy on in Seaweed Powder Materials Ingredients: 1 whole fresh taro (approx. 500g), vegetable oil (for frying), fine salt (for seasoning), clean water (for washing and soaking) All-purpose frying flour (or wheat flour) Seaweed Powder. Key Preparation Directions Instructions Methods: 1. Peel and cut: Thoroughly peel the taro, wash it, and cut it into sticks of uniform length, similar to French fries. 2. Rinse: Rinse the cut taro in clean water to remove excess starch, then pat it completely dry with paper towels. Finally, toss the taro in all-purpose frying flour. 3. Heat the oil: Pour oil into a pan and heat over medium heat. First fry: Fry the taro strips for about 5 minutes, or until the surface begins to change color and becomes crispy. Remove from the pan, drain the oil, and let them cool for 20–30 minutes. 4. Second fry: Fry the taro strips for 1–5 minutes, then remove and let them drain. Seasoning: Sprinkle with Seaweed powder while the taro is still warm and toss to coat evenly. Ready to serve. Summary Summation Notes: To make delicious taro fries that are crispy on the outside and soft and chewy on the inside, start by preparing the taro. Cut it into sticks or Chips and fry it in hot oil. Additional tips: You can add any topping your want such as Fruit Vegetable or Anything you have ever ate. Where can i you me buy it, Where to Buy, Where to find it: Internet Online, Supermarkets. Widely available from street food stalls, especially in durian-growing regions like, and at markets. Online: Easily ordered from platforms like Abcdefg in various grades and sizes. Caution Warning: Precautions: Always cook thoroughly: Do not eat it raw, as it contains calcium oxalate, which causes itching and throat irritation. Choose suitable preparation methods: For better health, opt for boiling or steaming rather than frying or adding large amounts of sugar. Key Additional Tips Profit Useful Benefit Available Nutrition : Taro offers significant benefits, notably providing high energy, promoting satiety, and supporting the digestive system. A 100-gram serving of raw taro provides approximately 112 kilocalories. It promotes satiety by acting as a complex carbohydrate that digests and absorbs slowly, helping to regulate blood sugar levels. It aids digestion due to its high dietary fiber content, which improves digestive system function. Additionally, it supports bone health, as it contains iron and fluoride that help strengthen bones and teeth. And the finally then You can eat it and Sell it to the Merchant or Customer with Who people you Know Knew known, i hope you have fun and enjoy it.
ClickMeSeeAllFull
ClickMeSeeOnMoreDetail
ClickMeSeeOnMorePictureImage
ClickMeSeeOnMoreVideo
Vegetable: Processer Processed Processing food Menu: 8.Taro Toast
Method: All Works: Taro Toast
Method: How to make made cook: Recipe Procedure: Method: All Works: Taro Toast Materials Ingredients: Bread: Thick-sliced bread or an uncut loaf of bread. Taro filling: 250g steamed taro, 150ml coconut milk, 80g granulated sugar, and a pinch of salt. Topping and sauce: 3 tablespoons unsalted or salted butter, sweetened condensed milk, and shredded mozzarella cheese. Key Preparation Directions Instructions Methods: 1. While still hot, mash the steamed taro until smooth. Add coconut milk, sugar, and salt to a pan. Turn on low heat and stir the mixture until it becomes thick, smooth, and separates from the pan. Let it cool. 2. Slice the bread down the middle—without cutting all the way through—to create a pocket for the filling, then spoon the taro paste into the opening, packing it in firmly. 3. Spread fresh butter over the outer surface of the bread and sprinkle shredded mozzarella cheese on top; alternatively, spread a mixture of butter and sweetened condensed milk for added richness and moisture. 4. Toast in a pan over low heat, or cook in an oven or air fryer at 180°C for about 3–5 minutes until the cheese melts and the bread turns golden and crispy. Drizzle with sweetened condensed milk before serving. Summary Summation Notes: To make delicious, aromatic taro-filled toast with butter, cheese, and condensed milk, start by preparing the taro filling. Slice the bread open and stuff it with the filling, then spread generously with butter and top with cheese and condensed milk. Finally, toast it until the outside is crispy and the inside is soft. Additional tips: You can add any topping your want such as Fruit Vegetable or Anything you have ever ate. Where can i you me buy it, Where to Buy, Where to find it: Internet Online, Supermarkets. Widely available from street food stalls, especially in durian-growing regions like, and at markets. Online: Easily ordered from platforms like Abcdefg in various grades and sizes. Caution Warning: Precautions: Always cook thoroughly: Do not eat it raw, as it contains calcium oxalate, which causes itching and throat irritation. Choose suitable preparation methods: For better health, opt for boiling or steaming rather than frying or adding large amounts of sugar. Key Additional Tips Profit Useful Benefit Available Nutrition : Taro offers significant benefits, notably providing high energy, promoting satiety, and supporting the digestive system. A 100-gram serving of raw taro provides approximately 112 kilocalories. It promotes satiety by acting as a complex carbohydrate that digests and absorbs slowly, helping to regulate blood sugar levels. It aids digestion due to its high dietary fiber content, which improves digestive system function. Additionally, it supports bone health, as it contains iron and fluoride that help strengthen bones and teeth. And the finally then You can eat it and Sell it to the Merchant or Customer with Who people you Know Knew known, i hope you have fun and enjoy it.
ClickMeSeeAllFull
ClickMeSeeOnMoreDetail
ClickMeSeeOnMorePictureImage
ClickMeSeeOnMoreVideo
Vegetable: Processer Processed Processing food Menu: 9.Taro Bake Butter Cheese Milk
Method: All Works: Taro Bake Butter Cheese Milk
Method: How to make made cook: Recipe Procedure: Method: All Works: Taro Bake Butter Cheese Milk Materials Ingredients: 300g diced taro, 2 tbsp unsalted butter, 1 tbsp sweetened condensed milk, 2 tbsp fresh milk, 50–80g shredded mozzarella cheese. Key Preparation Directions Instructions Methods: 1. Steam the diced taro in boiling water for 15 minutes until tender, then transfer to a baking dish. 2. Melt the fresh butter, then mix in the fresh milk and sweetened condensed milk, stirring until well combined. 3. Pour the milk and butter mixture over the steamed taro, then sprinkle cheese evenly over the top. 4. Bake at 180°C for 10 minutes, or until the cheese melts and turns golden yellow. Serve. Summary Summation Notes: Making butter-milk-cheese baked taro involves three main steps: preparing and steaming the taro, making the butter-milk sauce, and topping it with cheese before baking until fragrant and gooey. Additional tips: You can add any topping your want such as Fruit Vegetable or Anything you have ever ate. Where can i you me buy it, Where to Buy, Where to find it: Internet Online, Supermarkets. Widely available from street food stalls, especially in durian-growing regions like, and at markets. Online: Easily ordered from platforms like Abcdefg in various grades and sizes. Caution Warning: Precautions: Always cook thoroughly: Do not eat it raw, as it contains calcium oxalate, which causes itching and throat irritation. Choose suitable preparation methods: For better health, opt for boiling or steaming rather than frying or adding large amounts of sugar. Key Additional Tips Profit Useful Benefit Available Nutrition : Taro offers significant benefits, notably providing high energy, promoting satiety, and supporting the digestive system. A 100-gram serving of raw taro provides approximately 112 kilocalories. It promotes satiety by acting as a complex carbohydrate that digests and absorbs slowly, helping to regulate blood sugar levels. It aids digestion due to its high dietary fiber content, which improves digestive system function. Additionally, it supports bone health, as it contains iron and fluoride that help strengthen bones and teeth. And the finally then You can eat it and Sell it to the Merchant or Customer with Who people you Know Knew known, i hope you have fun and enjoy it.
ClickMeSeeAllFull
ClickMeSeeOnMoreDetail
ClickMeSeeOnMorePictureImage
ClickMeSeeOnMoreVideo
Vegetable: Processer Processed Processing food Menu: 10.Taro Melt in Coconut Milk
Method: All Works: Taro Melt in Coconut Milk
Method: How to make made cook: Recipe Procedure: Method: All Works: Taro Melt in Coconut Milk Materials Ingredients: Aromatic taro: 500 g (peeled and cut into bite-sized pieces) Coconut cream and coconut milk: 2 cups (reserve a small amount of coconut cream for drizzling on top) Coconut sugar: ½ – ¾ cup (adjust to taste) Salt: ½ tsp Pandan leaves: 4–5 leaves (washed and tied into a knot) Key Preparation Directions Instructions Methods: 1. Prepare the taro: Soak the cut taro in clear lime water for about 10–15 minutes (this helps prevent the taro from becoming mushy during boiling), then rinse with clean water and set aside. 2. Simmer the coconut milk: Pour the thin coconut milk and the first-pressed coconut milk (Part A) into a pot, add the pandan leaves, and turn on the heat to medium-low. Season: Add the coconut sugar and salt, then stir until the sugar has completely dissolved. 3. Boil the taro: Add the taro to the coconut milk and boil until tender (be careful not to stir too often, as this can cause the taro to break apart). 4. Add the coconut cream: Once the taro is tender, reduce the heat and add the remaining coconut cream. Let it come to a gentle simmer, then turn off the heat and serve. Summary Summation Notes: To make delicious, aromatic, and creamy taro in coconut milk—where the taro remains tender without turning mushy—prepare the following key ingredients: 500g of fragrant taro, 2 cups of coconut milk, half a cup of coconut sugar, a pinch of salt, and 4–5 pandan leaves. Additional tips: You can add any topping your want such as Fruit Vegetable or Anything you have ever ate. Where can i you me buy it, Where to Buy, Where to find it: Internet Online, Supermarkets. Widely available from street food stalls, especially in durian-growing regions like, and at markets. Online: Easily ordered from platforms like Abcdefg in various grades and sizes. Caution Warning: Precautions: Always cook thoroughly: Do not eat it raw, as it contains calcium oxalate, which causes itching and throat irritation. Choose suitable preparation methods: For better health, opt for boiling or steaming rather than frying or adding large amounts of sugar. Key Additional Tips Profit Useful Benefit Available Nutrition : Taro offers significant benefits, notably providing high energy, promoting satiety, and supporting the digestive system. A 100-gram serving of raw taro provides approximately 112 kilocalories. It promotes satiety by acting as a complex carbohydrate that digests and absorbs slowly, helping to regulate blood sugar levels. It aids digestion due to its high dietary fiber content, which improves digestive system function. Additionally, it supports bone health, as it contains iron and fluoride that help strengthen bones and teeth. And the finally then You can eat it and Sell it to the Merchant or Customer with Who people you Know Knew known, i hope you have fun and enjoy it.
ClickMeSeeAllFull
ClickMeSeeOnMoreDetail
ClickMeSeeOnMorePictureImage
ClickMeSeeOnMoreVideo
Vegetable: Processer Processed Processing food Menu: 1.Seaweed Grill
Method: All Works: Seaweed Grill
Method: How to make made cook: Recipe Procedure: Method: All Works: Seaweed Grill Materials Ingredients: Large sheets of seaweed (nori) for sushi or plain dried seaweed; 1–2 tablespoons of vegetable oil mixed with sesame oil; a pinch of fine salt or seasoned salt; a pastry brush; and a flat pan or grill. Key Preparation Directions Instructions Methods: 1. Mix the vegetable oil and sesame oil together in a small bowl. Place a sheet of seaweed on a cutting board or plate. Using a brush, apply a thin layer of the oil mixture over the entire sheet, then sprinkle lightly with salt—be careful not to make it too salty. 2. Place a pan over low to medium heat until hot (do not add oil). 3. Place the coated seaweed sheet into the pan, press down gently for 2–3 seconds, and flip it over until the seaweed turns dark green and becomes crispy. 4. Remove from the heat and let cool, then cut into bite-sized pieces. Store in an airtight container immediately to maintain crispness. Summary Summation Notes: Here is an easy way to make delicious, crispy, and aromatic grilled seaweed using just a few key ingredients: dried seaweed sheets, sesame oil, and salt. Additional tips: You can add any topping that your want such as Fruit Vegetable or Anything you have ever ate. Where can i you me buy it, Where to Buy, Where to find it: Internet Online, Supermarkets. Widely available from street food stalls, especially in durian-growing regions like, and at markets. Online: Easily ordered from platforms like Abcdefg in various grades and sizes. Caution Warning: Precautions: - Key Additional Tips Profit Useful Benefit Available Nutrition : Seaweed offers significant benefits, including high nutritional value, weight management support, and health promotion. It is rich in minerals—such as iodine, which supports thyroid function—and contains vitamins A, B, and C, as well as calcium and iron. It aids in weight management by providing low energy and few calories (approximately 20 kcal per tablespoon) and is high in dietary fiber, which promotes a feeling of fullness. It supports the digestive system, as the fiber helps improve bowel function and prevents constipation. Additionally, it offers antioxidant properties, containing compounds that reduce cellular inflammation and slow down physical degeneration. And the finally then You can eat it and Sell it to the Merchant or Customer with Who people you Know Knew known, i hope you have fun and enjoy it.
ClickMeSeeAllFull
ClickMeSeeOnMoreDetail
ClickMeSeeOnMorePictureImage
ClickMeSeeOnMoreVideo
Vegetable: Processer Processed Processing food Menu: 2.Seaweed Roast
Method: All Works: Seaweed Roast
Method: How to make made cook: Recipe Procedure: Method: All Works: Seaweed Roast Materials Ingredients: Dried seaweed sheets (as desired), 1 tablespoon sesame oil, 1 teaspoon salt (adjust to taste), 1 tablespoon roasted white sesame seeds. Key Preparation Directions Instructions Methods: 1. Tear or cut the seaweed sheets into small pieces or thin strips. Place a pan over the lowest heat setting without using any oil. 2. Add the sesame oil and gently toss with the seaweed. 3. Stir-fry until the seaweed starts to crisp up and release its aroma. 4. Turn off the heat, sprinkle with salt and roasted white sesame seeds, stir to combine, then transfer to a dish and let cool completely. Summary Summation Notes: Making salt-roasted seaweed is simple: gather the main ingredients—seaweed sheets, sesame oil, and salt—and roast the mixture in a pan over low heat until it becomes crispy and aromatic. Additional tips: You can add any topping that your want such as Fruit Vegetable or Anything you have ever ate. Where can i you me buy it, Where to Buy, Where to find it: Internet Online, Supermarkets. Widely available from street food stalls, especially in durian-growing regions like, and at markets. Online: Easily ordered from platforms like Abcdefg in various grades and sizes. Caution Warning: Precautions: - Key Additional Tips Profit Useful Benefit Available Nutrition : Seaweed offers significant benefits, including high nutritional value, weight management support, and health promotion. It is rich in minerals—such as iodine, which supports thyroid function—and contains vitamins A, B, and C, as well as calcium and iron. It aids in weight management by providing low energy and few calories (approximately 20 kcal per tablespoon) and is high in dietary fiber, which promotes a feeling of fullness. It supports the digestive system, as the fiber helps improve bowel function and prevents constipation. Additionally, it offers antioxidant properties, containing compounds that reduce cellular inflammation and slow down physical degeneration. And the finally then You can eat it and Sell it to the Merchant or Customer with Who people you Know Knew known, i hope you have fun and enjoy it.
ClickMeSeeAllFull
ClickMeSeeOnMoreDetail
ClickMeSeeOnMorePictureImage
ClickMeSeeOnMoreVideo
Vegetable: Processer Processed Processing food Menu: 3.Seaweed Fry Crispy
Method: All Works: Seaweed Fry Crispy
Method: How to make made cook: Recipe Procedure: Method: All Works: Seaweed Fry Crispy Materials Ingredients: Seaweed sheets (sushi-grade or snack-style), 1 cup crispy frying batter mix, 3/4 cup ice-cold water, salt or seasoning powder (to taste), frying oil, chili powder, sugar. Key Preparation Directions Instructions Methods: 1. Prepare the seaweed: Cut the seaweed sheets into bite-sized pieces, taking care to keep them away from moisture. 2. Coating with flour: Thoroughly coat the seaweed sheets with crispy frying flour. Then, lightly sprinkle ice-cold water over the sheets (avoid making them overly damp or soggy) and dust with another thin layer of flour. 3. Prepare the pan: Add oil to the pan and heat over medium heat. Frying: Fry the seaweed in the hot oil for about 1 minute until golden and crispy. 4. Drain the oil: Remove from the pan and place on a wire rack to let the excess oil drain off. Then, sprinkle with a little salt, chili powder, and sugar (adjust to taste) and serve. Ingredient preparation, batter mixing, and the frying process. Summary Summation Notes: Ingredient preparation, batter mixing, and the frying process. Additional tips: You can add any topping that your want such as Fruit Vegetable or Anything you have ever ate. Where can i you me buy it, Where to Buy, Where to find it: Internet Online, Supermarkets. Widely available from street food stalls, especially in durian-growing regions like, and at markets. Online: Easily ordered from platforms like Abcdefg in various grades and sizes. Caution Warning: Precautions: - Key Additional Tips Profit Useful Benefit Available Nutrition : Seaweed offers significant benefits, including high nutritional value, weight management support, and health promotion. It is rich in minerals—such as iodine, which supports thyroid function—and contains vitamins A, B, and C, as well as calcium and iron. It aids in weight management by providing low energy and few calories (approximately 20 kcal per tablespoon) and is high in dietary fiber, which promotes a feeling of fullness. It supports the digestive system, as the fiber helps improve bowel function and prevents constipation. Additionally, it offers antioxidant properties, containing compounds that reduce cellular inflammation and slow down physical degeneration. And the finally then You can eat it and Sell it to the Merchant or Customer with Who people you Know Knew known, i hope you have fun and enjoy it.
ClickMeSeeAllFull
ClickMeSeeOnMoreDetail
ClickMeSeeOnMorePictureImage
ClickMeSeeOnMoreVideo
Vegetable: Processer Processed Processing food Menu: 4.Seaweed Fry Crispy on in Cheese Powder
Method: All Works: Seaweed Fry Crispy on in Cheese Powder
Method: How to make made cook: Recipe Procedure: Method: All Works: Seaweed Fry Crispy on in Cheese Powder Materials Ingredients: Seaweed sheets (sushi-grade or snack-style), 1 cup crispy frying batter mix, 3/4 cup ice-cold water, cheese powder(to taste), frying oil, chili powder. Key Preparation Directions Instructions Methods: 1. Prepare the seaweed: Cut the seaweed sheets into bite-sized pieces, taking care to keep them away from moisture. 2. Coating with flour: Thoroughly coat the seaweed sheets with crispy frying flour. Then, lightly sprinkle ice-cold water over the sheets (avoid making them overly damp or soggy) and dust with another thin layer of flour. 3. Prepare the pan: Add oil to the pan and heat over medium heat. Frying: Fry the seaweed in the hot oil for about 1 minute until golden and crispy. 4. Drain the oil: Remove from the pan and place on a wire rack to let the excess oil drain off. Then, sprinkle with Cheese powder and chili powder(if you want) (adjust to taste) and serve. Summary Summation Notes: Ingredient preparation, batter mixing, and the frying process. Additional tips: You can add any topping that your want such as Fruit Vegetable or Anything you have ever ate. Where can i you me buy it, Where to Buy, Where to find it: Internet Online, Supermarkets. Widely available from street food stalls, especially in durian-growing regions like, and at markets. Online: Easily ordered from platforms like Abcdefg in various grades and sizes. Caution Warning: Precautions: - Key Additional Tips Profit Useful Benefit Available Nutrition : Seaweed offers significant benefits, including high nutritional value, weight management support, and health promotion. It is rich in minerals—such as iodine, which supports thyroid function—and contains vitamins A, B, and C, as well as calcium and iron. It aids in weight management by providing low energy and few calories (approximately 20 kcal per tablespoon) and is high in dietary fiber, which promotes a feeling of fullness. It supports the digestive system, as the fiber helps improve bowel function and prevents constipation. Additionally, it offers antioxidant properties, containing compounds that reduce cellular inflammation and slow down physical degeneration. And the finally then You can eat it and Sell it to the Merchant or Customer with Who people you Know Knew known, i hope you have fun and enjoy it.
ClickMeSeeAllFull
ClickMeSeeOnMoreDetail
ClickMeSeeOnMorePictureImage
ClickMeSeeOnMoreVideo
Vegetable: Processer Processed Processing food Menu: 5.Seaweed Fry Crispy on in BBQBarbeque Powder
Method: All Works: Seaweed Fry Crispy on in BBQBarbeque Powder
Method: How to make made cook: Recipe Procedure: Method: All Works: Seaweed Fry Crispy on in BBQBarbeque Powder Materials Ingredients: Seaweed sheets (sushi-grade or snack-style), 1 cup crispy frying batter mix, 3/4 cup ice-cold water, barbeque powder(to taste), frying oil, chili powder. salt, sugar. Key Preparation Directions Instructions Methods: 1. Prepare the seaweed: Cut the seaweed sheets into bite-sized pieces, taking care to keep them away from moisture. 2. Soak the seaweed in ice-cold water, then pat it dry. 3. Prepare the pan: Add oil to the pan and heat over medium heat. Frying: Fry the seaweed in the hot oil for about 1 minute until golden and crispy. 4. Drain the oil: Remove from the pan and place on a wire rack to let the excess oil drain off. Then, sprinkle with barbeque powder, chili powder, salt and sugar(if you want) (adjust to taste) and serve. Summary Summation Notes: Ingredient preparation, batter mixing, and the frying process. Additional tips: You can add any topping that your want such as Fruit Vegetable or Anything you have ever ate. Where can i you me buy it, Where to Buy, Where to find it: Internet Online, Supermarkets. Widely available from street food stalls, especially in durian-growing regions like, and at markets. Online: Easily ordered from platforms like Abcdefg in various grades and sizes. Caution Warning: Precautions: - Key Additional Tips Profit Useful Benefit Available Nutrition : Seaweed offers significant benefits, including high nutritional value, weight management support, and health promotion. It is rich in minerals—such as iodine, which supports thyroid function—and contains vitamins A, B, and C, as well as calcium and iron. It aids in weight management by providing low energy and few calories (approximately 20 kcal per tablespoon) and is high in dietary fiber, which promotes a feeling of fullness. It supports the digestive system, as the fiber helps improve bowel function and prevents constipation. Additionally, it offers antioxidant properties, containing compounds that reduce cellular inflammation and slow down physical degeneration. And the finally then You can eat it and Sell it to the Merchant or Customer with Who people you Know Knew known, i hope you have fun and enjoy it.
ClickMeSeeAllFull
ClickMeSeeOnMoreDetail
ClickMeSeeOnMorePictureImage
ClickMeSeeOnMoreVideo
Vegetable: Processer Processed Processing food Menu: 6.Seaweed Fry Crispy on in Paprika Powder
Method: All Works: Seaweed Fry Crispy on in Paprika Powder
Method: How to make made cook: Recipe Procedure: Method: All Works: Seaweed Fry Crispy on in Paprika Powder Materials Ingredients: Dried seaweed sheets or wakame seaweed, tempura batter mix, ice-cold water (for mixing the batter), vegetable oil for frying, paprika powder, and seasoning powder (sugar, salt, or a little chicken/pork seasoning powder, to taste). Key Preparation Directions Instructions Methods: 1. Prepare and cut: Cut the seaweed into the desired shapes—such as squares of the required size—and then soak or rinse it in clean water. 2. Boil or blanch: In hot or very hot water for 10 seconds to 1 minute. 3. Soak in water: Soak in ice-cold water (from the freezer), then pat dry. Lightly and evenly dust the seaweed with all-purpose crispy frying flour (powder type) and toss until well-coated. 4. Frying: Heat oil in a pan to the desired temperature. Add the seaweed and fry for a duration ranging from 1 second to 1 minute. Remove from the pan and drain off the excess oil. Toss the seaweed with paprika powder until evenly coated, then transfer to a serving dish. Summary Summation Notes: Making crispy fried seaweed tossed with paprika powder is simple. Start by preparing the main ingredients: seaweed sheets (or wakame), crispy frying batter, and paprika powder. Coat the seaweed in the batter and fry it in hot oil until crispy, then toss or shake it thoroughly with the paprika powder. Additional tips: You can add any topping that your want such as Fruit Vegetable or Anything you have ever ate. Where can i you me buy it, Where to Buy, Where to find it: Internet Online, Supermarkets. Widely available from street food stalls, especially in durian-growing regions like, and at markets. Online: Easily ordered from platforms like Abcdefg in various grades and sizes. Caution Warning: Precautions: - Key Additional Tips Profit Useful Benefit Available Nutrition : Seaweed offers significant benefits, including high nutritional value, weight management support, and health promotion. It is rich in minerals—such as iodine, which supports thyroid function—and contains vitamins A, B, and C, as well as calcium and iron. It aids in weight management by providing low energy and few calories (approximately 20 kcal per tablespoon) and is high in dietary fiber, which promotes a feeling of fullness. It supports the digestive system, as the fiber helps improve bowel function and prevents constipation. Additionally, it offers antioxidant properties, containing compounds that reduce cellular inflammation and slow down physical degeneration. And the finally then You can eat it and Sell it to the Merchant or Customer with Who people you Know Knew known, i hope you have fun and enjoy it.
ClickMeSeeAllFull
ClickMeSeeOnMoreDetail
ClickMeSeeOnMorePictureImage
ClickMeSeeOnMoreVideo
Vegetable: Processer Processed Processing food Menu: 7.Seaweed Fry Crispy on in Wasabi Powder
Method: All Works: Seaweed Fry Crispy on in Wasabi Powder
Method: How to make made cook: Recipe Procedure: Method: All Works: Seaweed Fry Crispy on in Wasabi Powder Materials Ingredients: Dried seaweed sheets, ice-cold water, vegetable oil for frying, wasabi powder, and seasoning powder (fish sauce, sugar, salt, or a little chicken/pork seasoning powder, to taste). Key Preparation Directions Instructions Methods: 1. Prepare and cut: Cut the seaweed into the desired shapes—such as squares of the required size—and then soak or rinse it in clean water. 2. Boil or blanch: In hot or very hot water for 10 seconds to 1 minute. 3. Soak in water: Soak in ice-cold water (from the freezer), then pat dry. 4. Frying: Heat the oil in a pan to the desired temperature, then fry the seaweed for a duration ranging from 1 second to 1 minute. Remove the seaweed and let it drain. Toss the seaweed thoroughly with wasabi powder, season with salt, sugar, and fish sauce (to taste), and then transfer to a plate to serve. Summary Summation Notes: To make crispy fried seaweed tossed with wasabi powder, start by preparing seaweed sheets and wasabi powder. Fry the seaweed in hot oil until crispy, then toss and coat it thoroughly with the wasabi powder. Additional tips: You can add any topping that your want such as Fruit Vegetable or Anything you have ever ate. Where can i you me buy it, Where to Buy, Where to find it: Internet Online, Supermarkets. Widely available from street food stalls, especially in durian-growing regions like, and at markets. Online: Easily ordered from platforms like Abcdefg in various grades and sizes. Caution Warning: Precautions: - Key Additional Tips Profit Useful Benefit Available Nutrition : Seaweed offers significant benefits, including high nutritional value, weight management support, and health promotion. It is rich in minerals—such as iodine, which supports thyroid function—and contains vitamins A, B, and C, as well as calcium and iron. It aids in weight management by providing low energy and few calories (approximately 20 kcal per tablespoon) and is high in dietary fiber, which promotes a feeling of fullness. It supports the digestive system, as the fiber helps improve bowel function and prevents constipation. Additionally, it offers antioxidant properties, containing compounds that reduce cellular inflammation and slow down physical degeneration. And the finally then You can eat it and Sell it to the Merchant or Customer with Who people you Know Knew known, i hope you have fun and enjoy it.
ClickMeSeeAllFull
ClickMeSeeOnMoreDetail
ClickMeSeeOnMorePictureImage
ClickMeSeeOnMoreVideo
Vegetable: Processer Processed Processing food Menu: 8.Seaweed Dip Flour Crispy
Method: All Works: Seaweed Dip Flour Crispy
Method: How to make made cook: Recipe Procedure: Method: All Works: Seaweed Dip Flour Fry Crispy Materials Ingredients: Dried seaweed sheets (as desired), 1 cup all-purpose crispy frying flour, 3/4 cup ice-cold water, vegetable oil for frying, and seasoning powder, salt, or sugar (to taste). Key Preparation Directions Instructions Methods: 1. Prepare the mixture: Combine the crispy frying flour with ice-cold water and stir until smooth and free of lumps. 2. Prepare the ingredients: Place a pan on the stove, add oil, and heat over medium heat. 3. Quickly dip the seaweed into the batter mixture and fry in oil until the batter turns golden and crispy. Remove and drain off the excess oil; the frying time ranges from 1 second to 1 minute. 4. Sprinkle with seasoning powder to taste and serve. Summary Summation Notes: Making batter-fried seaweed is simple; just prepare the main ingredients: seaweed sheets or wakame, crispy frying flour, and ice-cold water. Additional tips: You can add any topping that your want such as Fruit Vegetable or Anything you have ever ate. Where can i you me buy it, Where to Buy, Where to find it: Internet Online, Supermarkets. Widely available from street food stalls, especially in durian-growing regions like, and at markets. Online: Easily ordered from platforms like Abcdefg in various grades and sizes. Caution Warning: Precautions: - Key Additional Tips Profit Useful Benefit Available Nutrition : Seaweed offers significant benefits, including high nutritional value, weight management support, and health promotion. It is rich in minerals—such as iodine, which supports thyroid function—and contains vitamins A, B, and C, as well as calcium and iron. It aids in weight management by providing low energy and few calories (approximately 20 kcal per tablespoon) and is high in dietary fiber, which promotes a feeling of fullness. It supports the digestive system, as the fiber helps improve bowel function and prevents constipation. Additionally, it offers antioxidant properties, containing compounds that reduce cellular inflammation and slow down physical degeneration. And the finally then You can eat it and Sell it to the Merchant or Customer with Who people you Know Knew known, i hope you have fun and enjoy it.
ClickMeSeeAllFull
ClickMeSeeOnMoreDetail
ClickMeSeeOnMorePictureImage
ClickMeSeeOnMoreVideo
Vegetable: Processer Processed Processing food Menu: 9.Seaweed Bake Butter Cheese Milk
Method: All Works: Seaweed Bake Butter Cheese Milk
Method: How to make made cook: Recipe Procedure: Method: All Works: Seaweed Bake Butter Cheese Milk Materials Ingredients: Seaweed sheets (baked or roasted type), unsalted butter (1–2 tablespoons, melted), evaporated milk or fresh milk (1 tablespoon), and mozzarella cheese or cheese slices torn into small pieces. Key Preparation Directions Instructions Methods: 1. Prepare the ingredients: Mix the melted butter with the milk, and place the seaweed sheet on a microwave-safe plate. 2. Prepare the ingredients: Use a brush to evenly coat the seaweed sheet with the butter and milk mixture, then sprinkle cheese over the sheet as desired. 3. Bake: Microwave on medium heat for approximately 60–90 seconds, or until the cheese melts and releases an aroma. 4. Serve: Remove from heat and let cool slightly so the cheese sets and becomes crispy; ready to eat. Summary Summation Notes: Making butter-milk-cheese baked seaweed is simple: prepare seaweed sheets, melted butter, plain milk, and grated cheese. Brush the butter and milk mixture onto the seaweed sheets, sprinkle with cheese, and bake in an oven or microwave until the cheese melts and becomes crispy and aromatic. Additional tips: You can add any topping that your want such as Fruit Vegetable or Anything you have ever ate. Where can i you me buy it, Where to Buy, Where to find it: Internet Online, Supermarkets. Widely available from street food stalls, especially in durian-growing regions like, and at markets. Online: Easily ordered from platforms like Abcdefg in various grades and sizes. Caution Warning: Precautions: - Key Additional Tips Profit Useful Benefit Available Nutrition : Seaweed offers significant benefits, including high nutritional value, weight management support, and health promotion. It is rich in minerals—such as iodine, which supports thyroid function—and contains vitamins A, B, and C, as well as calcium and iron. It aids in weight management by providing low energy and few calories (approximately 20 kcal per tablespoon) and is high in dietary fiber, which promotes a feeling of fullness. It supports the digestive system, as the fiber helps improve bowel function and prevents constipation. Additionally, it offers antioxidant properties, containing compounds that reduce cellular inflammation and slow down physical degeneration. And the finally then You can eat it and Sell it to the Merchant or Customer with Who people you Know Knew known, i hope you have fun and enjoy it.
ClickMeSeeAllFull
ClickMeSeeOnMoreDetail
ClickMeSeeOnMorePictureImage
ClickMeSeeOnMoreVideo
Vegetable: Processer Processed Processing food Menu: 10.Seaweed Tosat Butter Cheese Milk
Method: All Works: Seaweed Tosat Butter Cheese Milk
Method: How to make made cook: Recipe Procedure: Method: All Works: Seaweed Tosat Butter Cheese Milk Materials Ingredients: 2 slices of thick-cut bread; 2 tablespoons of salted or unsalted butter; sweetened condensed milk (to taste); 1–2 slices of cheese or shredded mozzarella cheese; 2–3 sheets of seasoned seaweed (whole sheets or strips). Key Preparation Directions Instructions Methods: 1. Spread fresh butter over the bread slices, covering both the outer sides and the inner sides that will be pressed together. 2. Place a cheese slice and torn seasoned seaweed onto the inner side of the bread to form the filling. 3. Press the bread slices together, then toast them in a pan or on a griddle over low heat until the bread turns golden brown and crispy, and the cheese inside begins to melt. 4. Remove from the pan and cut into bite-sized pieces; drizzle with sweetened condensed milk and sprinkle with seaweed flakes for garnish before serving. Summary Summation Notes: Making butter, condensed milk, and cheese toast with a seaweed filling is simple. Prepare the main ingredients: thick-sliced bread, fresh butter, sweetened condensed milk, cheese slices or mozzarella, and seasoned seaweed. Spread butter on the bread and toast until crispy, then add the cheese and seaweed as a filling and drizzle with sweetened condensed milk for added flavor. Additional tips: You can add any topping that your want such as Fruit Vegetable or Anything you have ever ate. Where can i you me buy it, Where to Buy, Where to find it: Internet Online, Supermarkets. Widely available from street food stalls, especially in durian-growing regions like, and at markets. Online: Easily ordered from platforms like Abcdefg in various grades and sizes. Caution Warning: Precautions: - Key Additional Tips Profit Useful Benefit Available Nutrition : Seaweed offers significant benefits, including high nutritional value, weight management support, and health promotion. It is rich in minerals—such as iodine, which supports thyroid function—and contains vitamins A, B, and C, as well as calcium and iron. It aids in weight management by providing low energy and few calories (approximately 20 kcal per tablespoon) and is high in dietary fiber, which promotes a feeling of fullness. It supports the digestive system, as the fiber helps improve bowel function and prevents constipation. Additionally, it offers antioxidant properties, containing compounds that reduce cellular inflammation and slow down physical degeneration. And the finally then You can eat it and Sell it to the Merchant or Customer with Who people you Know Knew known, i hope you have fun and enjoy it.
ClickMeSeeAllFull
ClickMeSeeOnMoreDetail
ClickMeSeeOnMorePictureImage
ClickMeSeeOnMoreVideo
Vegetable: Processer Processed Processing food Menu: 1.Tomato Sauce Homemade
Method: All Works: Tomato Sauce Homemade
Method: How to make made cook: Recipe Procedure: Method: All Works: Tomato Sauce Homemade Materials Ingredients: 1,000 g ripe tomatoes (large or plum tomatoes), 50 g granulated sugar, 1 tsp salt, 50 ml vinegar, and a small amount of water (for blending and simmering). Key Preparation Directions Instructions Methods: 1. Prepare the tomatoes: Wash the tomatoes thoroughly and score a cross-shaped cut into the base of each one. Boil them in water for about 10 minutes until the skins begin to loosen. Then, remove them, place them in cold water, and peel off the skins. 2. Blend until smooth: Cut in half and optionally remove the seeds, then place the flesh into a blender. Add a little water and blend until completely smooth and uniform. 3. Simmer and season: Pour the blended tomatoes into a pot and place over medium heat. Add sugar, salt, and vinegar, then stir until well combined. 4. Let it cool: Simmer over low heat until the sauce reaches the desired consistency. Taste to ensure a well-balanced sweet and sour flavor, then turn off the heat. Allow it to cool completely before transferring it into clean glass jars or bottles with tight-fitting lids. Summary Summation Notes: Making homemade tomato sauce is simple, requires only a few key ingredients, and results in a safe product free from preservatives. Additional tips: You can add any topping that your want such as Fruit Vegetable or Anything you ever have eaten before. Where can i you me buy it, Where to Buy, Where to find it: Internet Online, Supermarkets. Widely available from street food stalls, especially in durian-growing regions like, and at markets. Online: Easily ordered from platforms like Abcdefg in various grades and sizes. Caution Warning: Precautions: - Key Additional Tips Profit Useful Benefit Available Nutrition : Tomatoes offer significant benefits for skin health, cancer prevention, and strengthening the immune system. Skin nourishment: High in lycopene and Vitamin C, helping to moisturize the skin, reduce wrinkles, and protect against sun damage. Cancer prevention: Antioxidants help reduce the risk of cancer, particularly prostate and colon cancer. Heart health: Helps reduce hardening of the arteries and lowers the risk of heart disease. Digestive health: High water and fiber content helps prevent constipation. Eye health: Contains Vitamin A and beta-carotene, promoting bright, healthy eyes. And the finally then You can eat it and Sell it to the Merchant or Customer with Who people you Know Knew known, i hope you have fun and enjoy it.
ClickMeSeeAllFull
ClickMeSeeOnMoreDetail
ClickMeSeeOnMorePictureImage
ClickMeSeeOnMoreVideo
Vegetable: Processer Processed Processing food Menu: 2.Tomato Dip Flour Fry
Method: All Works: Tomato Dip Flour Fry
Method: How to make made cook: Recipe Procedure: Method: All Works: Tomato Dip Flour Fry Materials Ingredients: 3–4 fresh tomatoes (perfectly ripe or green), 1 cup wheat flour or crispy frying flour, 1 egg (beaten), 1 cup breadcrumbs, salt and ground pepper (for seasoning), vegetable oil for frying. Key Preparation Directions Instructions Methods: 1. Prepare the tomatoes: Wash the tomatoes thoroughly, pat them dry, and slice them into rounds about half an inch thick. Season: Lightly sprinkle salt and ground pepper on both sides of the tomato slices. 2. Prepare the coating station: Set up three bowls—the first containing flour, the second containing beaten eggs, and the third containing breadcrumbs. 3. Coating: Lightly coat the tomato slices in flour, dip them in egg, and then coat them thoroughly with breadcrumbs. 4. Frying: Heat oil in a pan over medium heat. Once the oil is hot, fry the tomatoes until they are golden brown and crispy. Remove them from the pan and set aside to drain the excess oil. Summary Summation Notes: To make fried tomatoes that are crispy on the outside and tender and juicy on the inside, simply slice the tomatoes, coat them in flour, egg, and breadcrumbs, and fry them in hot oil until golden brown. Additional tips: You can add any topping that your want such as Fruit Vegetable or Anything you ever have eaten before. Where can i you me buy it, Where to Buy, Where to find it: Internet Online, Supermarkets. Widely available from street food stalls, especially in durian-growing regions like, and at markets. Online: Easily ordered from platforms like Abcdefg in various grades and sizes. Caution Warning: Precautions: - Key Additional Tips Profit Useful Benefit Available Nutrition : Tomatoes offer significant benefits for skin health, cancer prevention, and strengthening the immune system. Skin nourishment: High in lycopene and Vitamin C, helping to moisturize the skin, reduce wrinkles, and protect against sun damage. Cancer prevention: Antioxidants help reduce the risk of cancer, particularly prostate and colon cancer. Heart health: Helps reduce hardening of the arteries and lowers the risk of heart disease. Digestive health: High water and fiber content helps prevent constipation. Eye health: Contains Vitamin A and beta-carotene, promoting bright, healthy eyes. And the finally then You can eat it and Sell it to the Merchant or Customer with Who people you Know Knew known, i hope you have fun and enjoy it.
ClickMeSeeAllFull
ClickMeSeeOnMoreDetail
ClickMeSeeOnMorePictureImage
ClickMeSeeOnMoreVideo
Vegetable: Processer Processed Processing food Menu: 3.Tomato Griller
Method: All Works: Tomato Griller
Method: How to make made cook: Recipe Procedure: Method: All Works: Tomato Griller Materials Ingredients: Tomatoes (such as Ruby or Sida tomatoes), olive oil, salt, ground black pepper, and minced garlic or oregano (to taste). Key Preparation Directions Instructions Methods: 1. Prepare the tomatoes: Wash the tomatoes thoroughly, pat them dry, and cut them in half. 2. Season: Brush the tomato slices with olive oil, then sprinkle with salt, pepper, and minced garlic. 3. Grilling: Preheat the grill or grill pan over medium heat. Place the tomatoes cut-side down on the grate. 4. Cooking time: Grill for approximately 4–6 minutes until the surface is beautifully charred and the meat is tender and sweet. Summary Summation Notes: Making delicious, aromatic grilled tomatoes is easy: simply brush them with olive oil and grill them on a stovetop or in a pan until they are cooked and juicy. Additional tips: You can add any topping that your want such as Fruit Vegetable or Anything you ever have eaten before. Where can i you me buy it, Where to Buy, Where to find it: Internet Online, Supermarkets. Widely available from street food stalls, especially in durian-growing regions like, and at markets. Online: Easily ordered from platforms like Abcdefg in various grades and sizes. Caution Warning: Precautions: - Key Additional Tips Profit Useful Benefit Available Nutrition : Tomatoes offer significant benefits for skin health, cancer prevention, and strengthening the immune system. Skin nourishment: High in lycopene and Vitamin C, helping to moisturize the skin, reduce wrinkles, and protect against sun damage. Cancer prevention: Antioxidants help reduce the risk of cancer, particularly prostate and colon cancer. Heart health: Helps reduce hardening of the arteries and lowers the risk of heart disease. Digestive health: High water and fiber content helps prevent constipation. Eye health: Contains Vitamin A and beta-carotene, promoting bright, healthy eyes. And the finally then You can eat it and Sell it to the Merchant or Customer with Who people you Know Knew known, i hope you have fun and enjoy it.
ClickMeSeeAllFull
ClickMeSeeOnMoreDetail
ClickMeSeeOnMorePictureImage
ClickMeSeeOnMoreVideo
Vegetable: Processer Processed Processing food Menu: 4.Tomato Roaster Salt
Method: All Works: Tomato Roaster Salt
Method: How to make made cook: Recipe Procedure: Method: All Works: Tomato Roaster Salt Materials Ingredients: Cherry tomatoes or small tomatoes: 300 g (washed and halved); fine salt or sea salt: 1/2 teaspoon; olive oil: 1 tablespoon. Key Preparation Directions Instructions Methods: 1. Prepare the pan: Place the pan over medium heat; you don't need much oil—just a light drizzle of olive oil is enough. 2. Sauté until cooked: Add the sliced tomatoes and sprinkle salt over them. 3. Stir-fry until dry: Continue stirring and sautéing for about 10–15 minutes until the liquid from the tomatoes evaporates and the skins are slightly charred. Turn off the heat. 4. Garnish with your choice of vegetables, fruits, or meat. Serve immediately. Summary Summation Notes: To achieve a fragrant, delicious, and perfectly dry salt-roasted tomato, place a pan over medium heat and sauté the tomatoes with salt and a little olive oil until the skins begin to wrinkle and the juices reduce and blend together. Additional tips: You can add any topping that your want such as Fruit Vegetable or Anything you ever have eaten before. Where can i you me buy it, Where to Buy, Where to find it: Internet Online, Supermarkets. Widely available from street food stalls, especially in durian-growing regions like, and at markets. Online: Easily ordered from platforms like Abcdefg in various grades and sizes. Caution Warning: Precautions: - Key Additional Tips Profit Useful Benefit Available Nutrition : Tomatoes offer significant benefits for skin health, cancer prevention, and strengthening the immune system. Skin nourishment: High in lycopene and Vitamin C, helping to moisturize the skin, reduce wrinkles, and protect against sun damage. Cancer prevention: Antioxidants help reduce the risk of cancer, particularly prostate and colon cancer. Heart health: Helps reduce hardening of the arteries and lowers the risk of heart disease. Digestive health: High water and fiber content helps prevent constipation. Eye health: Contains Vitamin A and beta-carotene, promoting bright, healthy eyes. And the finally then You can eat it and Sell it to the Merchant or Customer with Who people you Know Knew known, i hope you have fun and enjoy it.
ClickMeSeeAllFull
ClickMeSeeOnMoreDetail
ClickMeSeeOnMorePictureImage
ClickMeSeeOnMoreVideo
Vegetable: Processer Processed Processing food Menu: 5.Tomato Roaster Cheese Powder
Method: All Works: Tomato Roaster Cheese Powder
Method: How to make made cook: Recipe Procedure: Method: All Works: Tomato Roaster Cheese Powder Materials Ingredients: 1–2 cups cherry tomatoes or large tomatoes (cut into bite-sized pieces), 1 teaspoon olive oil or butter, 1–2 tablespoons Parmesan cheese powder, a pinch of salt, and ground black pepper and oregano powder (to taste). Key Preparation Directions Instructions Methods: 1. Prepare the tomatoes: Wash the tomatoes thoroughly, then cut them in half (or into thick slices) and pat them dry. Sauté in the pan: Place a pan over medium heat and add olive oil or butter. Once the oil is hot, place the tomatoes cut-side down to sear. 2. Cook: Sauté and gently toss the tomatoes until the skins begin to wrinkle and the flesh becomes juicy (takes about 3–5 minutes). 3. Sprinkle with cheese powder: Turn off the heat or reduce it to the lowest setting. Immediately sprinkle on the cheese powder, salt, black pepper, and oregano while the tomatoes are still hot. 4. Toss: Stir-fry until the cheese powder melts and evenly coats the tomatoes. Transfer to a serving plate and serve while hot. Summary Summation Notes: Making cheese-dusted sautéed tomatoes is simple: sear or sauté the tomatoes in a pan until tender and juicy, then sprinkle with cheese powder and seasonings to enhance the aroma and richness. Additional tips: You can add any topping that your want such as Fruit Vegetable or Anything you ever have eaten before. Where can i you me buy it, Where to Buy, Where to find it: Internet Online, Supermarkets. Widely available from street food stalls, especially in durian-growing regions like, and at markets. Online: Easily ordered from platforms like Abcdefg in various grades and sizes. Caution Warning: Precautions: - Key Additional Tips Profit Useful Benefit Available Nutrition : Tomatoes offer significant benefits for skin health, cancer prevention, and strengthening the immune system. Skin nourishment: High in lycopene and Vitamin C, helping to moisturize the skin, reduce wrinkles, and protect against sun damage. Cancer prevention: Antioxidants help reduce the risk of cancer, particularly prostate and colon cancer. Heart health: Helps reduce hardening of the arteries and lowers the risk of heart disease. Digestive health: High water and fiber content helps prevent constipation. Eye health: Contains Vitamin A and beta-carotene, promoting bright, healthy eyes. And the finally then You can eat it and Sell it to the Merchant or Customer with Who people you Know Knew known, i hope you have fun and enjoy it.
ClickMeSeeAllFull
ClickMeSeeOnMoreDetail
ClickMeSeeOnMorePictureImage
ClickMeSeeOnMoreVideo
Vegetable: Processer Processed Processing food Menu: 6.Tomato Roaster BBQBarbeque Seasoning Powder
Method: All Works: Tomato Roaster BBQBarbeque Seasoning Powder
Method: How to make made cook: Recipe Procedure: Method: All Works: Tomato Roaster BBQBarbeque Seasoning Powder Materials Ingredients: 15–20 cherry tomatoes, 1 tablespoon fresh butter (unsalted or salted), 1–2 teaspoons barbecue seasoning powder (adjust to taste), dried oregano (for sprinkling). Key Preparation Directions Instructions Methods: 1. Prepare the tomatoes: Wash the cherry tomatoes thoroughly and pat them completely dry. Prick each tomato 1–2 times with a fork to prevent the skin from bursting when exposed to heat. 2. Set up the pan: Turn the heat to low-medium, add the butter to the pan, and wait until it has completely melted. 3. Sauté until cooked: Add the cherry tomatoes and sauté gently, watching until their skins begin to tighten and take on a glossy, juicy sheen. 4. Seasoning: Sprinkle barbecue seasoning evenly over the mixture. Continue to stir-fry over low heat for another 2–3 minutes until the seasoning coats the tomato pieces and becomes aromatic. Serving: Turn off the heat, transfer to a plate, sprinkle with a little oregano, and serve immediately. Summary Summation Notes: You can easily make barbecue-seasoned sautéed tomatoes by stir-frying cherry tomatoes with butter and barbecue powder until they are dry and the flavor has fully infused. Additional tips: You can add any topping that your want such as Fruit Vegetable or Anything you ever have eaten before. Where can i you me buy it, Where to Buy, Where to find it: Internet Online, Supermarkets. Widely available from street food stalls, especially in durian-growing regions like, and at markets. Online: Easily ordered from platforms like Abcdefg in various grades and sizes. Caution Warning: Precautions: - Key Additional Tips Profit Useful Benefit Available Nutrition : Tomatoes offer significant benefits for skin health, cancer prevention, and strengthening the immune system. Skin nourishment: High in lycopene and Vitamin C, helping to moisturize the skin, reduce wrinkles, and protect against sun damage. Cancer prevention: Antioxidants help reduce the risk of cancer, particularly prostate and colon cancer. Heart health: Helps reduce hardening of the arteries and lowers the risk of heart disease. Digestive health: High water and fiber content helps prevent constipation. Eye health: Contains Vitamin A and beta-carotene, promoting bright, healthy eyes. And the finally then You can eat it and Sell it to the Merchant or Customer with Who people you Know Knew known, i hope you have fun and enjoy it.
ClickMeSeeAllFull
ClickMeSeeOnMoreDetail
ClickMeSeeOnMorePictureImage
ClickMeSeeOnMoreVideo
Vegetable: Processer Processed Processing food Menu: 7.Tomato Roaster Paprika Seasoning Powder
Method: All Works: Tomato Roaster Paprika Seasoning Powder
Method: How to make made cook: Recipe Procedure: Method: All Works: Tomato Roaster Paprika Seasoning Powder Materials Ingredients: 1 cup cherry tomatoes or plum tomatoes (halved), 1–2 tablespoons olive oil, 1 teaspoon paprika (adjust to taste), 1/4 teaspoon salt, 1/4 teaspoon ground black pepper, 1 teaspoon minced garlic (optional). Key Preparation Directions Instructions Methods: 1. Prepare the tomatoes: Wash them thoroughly and pat them completely dry. Cut them in half crosswise; this helps them cook faster and allows the juices to release and blend well with the seasonings. 2. Place a pan over medium heat and add olive oil. Once the pan is hot, add the tomatoes and sauté (if you like garlic, add minced garlic at this stage). Sauté until the tomato skins begin to shrivel and show slight char marks (approximately 3–5 minutes). 3. Season by sprinkling in salt, black pepper, and paprika, then toss quickly for about 30 seconds to prevent the paprika from burning. 4. Ready to serve: spoon onto a plate to accompany steak or grilled chicken breast, or place directly onto toasted bread (bruschetta). Summary Summation Notes: Paprika-roasted tomatoes are an easy-to-make side dish; the tomatoes' natural sweet-and-sour flavor pairs perfectly with the mild, aromatic heat and smokiness of the paprika powder. Additional tips: You can add any topping that your want such as Fruit Vegetable or Anything you ever have eaten before. Where can i you me buy it, Where to Buy, Where to find it: Internet Online, Supermarkets. Widely available from street food stalls, especially in durian-growing regions like, and at markets. Online: Easily ordered from platforms like Abcdefg in various grades and sizes. Caution Warning: Precautions: - Key Additional Tips Profit Useful Benefit Available Nutrition : Tomatoes offer significant benefits for skin health, cancer prevention, and strengthening the immune system. Skin nourishment: High in lycopene and Vitamin C, helping to moisturize the skin, reduce wrinkles, and protect against sun damage. Cancer prevention: Antioxidants help reduce the risk of cancer, particularly prostate and colon cancer. Heart health: Helps reduce hardening of the arteries and lowers the risk of heart disease. Digestive health: High water and fiber content helps prevent constipation. Eye health: Contains Vitamin A and beta-carotene, promoting bright, healthy eyes. And the finally then You can eat it and Sell it to the Merchant or Customer with Who people you Know Knew known, i hope you have fun and enjoy it.
ClickMeSeeAllFull
ClickMeSeeOnMoreDetail
ClickMeSeeOnMorePictureImage
ClickMeSeeOnMoreVideo
Vegetable: Processer Processed Processing food Menu: 8.Tomato Roaster Seaweed Sheet and Seasoning Powder
Method: All Works: Tomato Roaster Seaweed Sheet and Seasoning Powder
Method: How to make made cook: Recipe Procedure: Method: All Works: Tomato Roaster Seaweed Sheet and Seasoning Powder Materials Ingredients: 1 cup cherry tomatoes (approx. 15–20 tomatoes), 1–2 teaspoons seaweed powder (Aonori or seasoned seaweed powder), 1 teaspoon olive oil (or vegetable oil), a pinch of salt (just a little to enhance sweetness), toasted white sesame seeds for garnish (optional). Key Preparation Directions Instructions Methods: 1. Prepare the tomatoes: Wash the cherry tomatoes thoroughly, remove the stems, and pat them completely dry. (You can roast them whole to keep the insides juicy, or cut them in half for better flavor absorption, depending on your preference.) 2. Heat the pan: Place a pan (a non-stick pan is recommended) on the stove over medium-low heat. Spray or add a small amount of olive oil, just enough to coat the pan. 3. Sauté the tomatoes: Place the tomatoes in a pan and sauté or sear them. Sprinkle with a little salt and continue cooking until the tomato skins tighten, begin to split slightly, and release an aroma (this takes approximately 3–5 minutes). 4. Toss with seaweed powder: Turn off the heat immediately, then sprinkle the seaweed powder all over. Quickly toss to ensure the powder coats the tomatoes while they are still hot (avoid sprinkling while the heat is on, as the powder may burn and turn bitter). To serve: Transfer to a plate and garnish with roasted white sesame seeds for added aroma. It is ready to be enjoyed as a healthy snack. Summary Summation Notes: Sautéed tomatoes with seaweed powder make for a very easy-to-prepare snack or side dish. They combine the natural sweet-and-sour flavor of tomatoes with the savory, salty, and umami-rich notes—plus the distinctive aroma—of Japanese seaweed powder. Cherry tomatoes are typically used for this dish to ensure a juicy texture and a convenient, bite-sized eating experience. Additional tips: You can add any topping that your want such as Fruit Vegetable or Anything you ever have eaten before. Where can i you me buy it, Where to Buy, Where to find it: Internet Online, Supermarkets. Widely available from street food stalls, especially in durian-growing regions like, and at markets. Online: Easily ordered from platforms like Abcdefg in various grades and sizes. Caution Warning: Precautions: - Key Additional Tips Profit Useful Benefit Available Nutrition : Tomatoes offer significant benefits for skin health, cancer prevention, and strengthening the immune system. Skin nourishment: High in lycopene and Vitamin C, helping to moisturize the skin, reduce wrinkles, and protect against sun damage. Cancer prevention: Antioxidants help reduce the risk of cancer, particularly prostate and colon cancer. Heart health: Helps reduce hardening of the arteries and lowers the risk of heart disease. Digestive health: High water and fiber content helps prevent constipation. Eye health: Contains Vitamin A and beta-carotene, promoting bright, healthy eyes. And the finally then You can eat it and Sell it to the Merchant or Customer with Who people you Know Knew known, i hope you have fun and enjoy it.
ClickMeSeeAllFull
ClickMeSeeOnMoreDetail
ClickMeSeeOnMorePictureImage
ClickMeSeeOnMoreVideo
Vegetable: Processer Processed Processing food Menu: 9.Tomato Bake Butter Cheese Milk
Method: All Works: Tomato Bake Butter Cheese Milk
Method: How to make made cook: Recipe Procedure: Method: All Works: Tomato Bake Butter Cheese Milk Materials Ingredients: 2–4 large tomatoes, 1–2 tablespoons unsalted butter, 1 tablespoon fresh milk, grated mozzarella and cheddar cheese (to taste), and a pinch of salt and ground pepper. Key Preparation Directions Instructions Methods: 1. Prepare the tomatoes: Wash the tomatoes thoroughly, trim off the tops, and gently scoop out the pulp and seeds with a spoon to create a cup-like shape. 2. Prepare the butter-milk sauce: Mix together melted butter, fresh milk, salt, and pepper. Spoon a small amount into the slits in the tomatoes. 3. Add cheese: Sprinkle both types of grated cheese over the top until the tomato is fully covered. 4. Bake until cooked: Place in an oven or air fryer at approximately 180 degrees Celsius for 10-15 minutes, or until the cheese melts, turns golden brown, and becomes beautifully stretchy. Ready to serve. Summary Summation Notes: Making butter, milk, and cheese-baked tomatoes is easy: simply scoop out the tomato pulp, mix together butter, milk, and cheese, stuff the mixture back into the tomatoes, and bake until the cheese is melted, gooey, and aromatic. Additional tips: You can add any topping that your want such as Fruit Vegetable or Anything you ever have eaten before. Where can i you me buy it, Where to Buy, Where to find it: Internet Online, Supermarkets. Widely available from street food stalls, especially in durian-growing regions like, and at markets. Online: Easily ordered from platforms like Abcdefg in various grades and sizes. Caution Warning: Precautions: - Key Additional Tips Profit Useful Benefit Available Nutrition : Tomatoes offer significant benefits for skin health, cancer prevention, and strengthening the immune system. Skin nourishment: High in lycopene and Vitamin C, helping to moisturize the skin, reduce wrinkles, and protect against sun damage. Cancer prevention: Antioxidants help reduce the risk of cancer, particularly prostate and colon cancer. Heart health: Helps reduce hardening of the arteries and lowers the risk of heart disease. Digestive health: High water and fiber content helps prevent constipation. Eye health: Contains Vitamin A and beta-carotene, promoting bright, healthy eyes. And the finally then You can eat it and Sell it to the Merchant or Customer with Who people you Know Knew known, i hope you have fun and enjoy it.
ClickMeSeeAllFull
ClickMeSeeOnMoreDetail
ClickMeSeeOnMorePictureImage
ClickMeSeeOnMoreVideo
Vegetable: Processer Processed Processing food Menu: 10.Tomato Smoothie Milk Shake
Method: All Works: Tomato Smoothie Milk Shake
Method: How to make made cook: Recipe Procedure: Method: All Works: Tomato Smoothie Milk Shake Materials Ingredients: 3 Roma tomatoes (or other ripe tomatoes), 60 ml fresh milk (plain), 45 ml sweetened condensed milk (adjust to taste), a pinch of salt (to balance the flavor), ½ teaspoon lime juice (to reduce any raw/grassy taste and add freshness), and 1 glass of ice. Key Preparation Directions Instructions Methods: 1. Wash the tomatoes thoroughly, then cut them in half or into small pieces. 2. Add the tomato pulp, fresh milk, sweetened condensed milk, salt, and lime juice into the blender jar. 3. Blend all the ingredients together until smooth. 4. Add ice and blend until smooth and creamy; pour into a glass and serve immediately for a refreshing treat. Summary Summation Notes: How to make a delicious and easy-to-drink tomato and milk smoothie: It's simple! Just prepare the ingredients and blend them together. Additional tips: You can add any topping that your want such as Fruit Vegetable or Anything you ever have eaten before. Where can i you me buy it, Where to Buy, Where to find it: Internet Online, Supermarkets. Widely available from street food stalls, especially in durian-growing regions like, and at markets. Online: Easily ordered from platforms like Abcdefg in various grades and sizes. Caution Warning: Precautions: - Key Additional Tips Profit Useful Benefit Available Nutrition : Tomatoes offer significant benefits for skin health, cancer prevention, and strengthening the immune system. Skin nourishment: High in lycopene and Vitamin C, helping to moisturize the skin, reduce wrinkles, and protect against sun damage. Cancer prevention: Antioxidants help reduce the risk of cancer, particularly prostate and colon cancer. Heart health: Helps reduce hardening of the arteries and lowers the risk of heart disease. Digestive health: High water and fiber content helps prevent constipation. Eye health: Contains Vitamin A and beta-carotene, promoting bright, healthy eyes. And the finally then You can eat it and Sell it to the Merchant or Customer with Who people you Know Knew known, i hope you have fun and enjoy it.
ClickMeSeeAllFull
ClickMeSeeOnMoreDetail
ClickMeSeeOnMorePictureImage
ClickMeSeeOnMoreVideo
Vegetable: Processer Processed Processing food Menu: 1.Carrot Smoothie Milk Shake
Method: All Works: Carrot Smoothie Milk Shake
Method: How to make made cook: Recipe Procedure: Method: All Works: Carrot Smoothie Milk Shake Materials Ingredients: 1 cup chopped carrots (washed and peeled), 150 ml fresh milk, 1–2 tablespoons sweetened condensed milk (adjust to taste), 1 tablespoon honey or syrup (for a mellow sweetness), a pinch of salt (to balance the flavor), 1 cup crushed ice. Key Preparation Directions Instructions Methods: 1. Prepare the carrots: Wash the carrots thoroughly, peel them, and cut them into small pieces to make blending easier and ensure a smooth consistency. 2. Add to the blender: Place the carrots, fresh milk, sweetened condensed milk, honey, and salt into the blender. 3. Blend the mixture: Add ice, then blend at high speed until the mixture is completely smooth and uniform. 4. Serve: Pour into a glass and enjoy immediately for a refreshing treat. Summary Summation Notes: To make a delicious, aromatic, and easy-to-drink carrot and fresh milk smoothie, simply blend fresh carrots with fresh milk and other ingredients until the mixture is completely smooth. Additional tips: You can add any topping that your want such as Fruit Vegetable or Anything you ever have eaten before. Where can i you me buy it, Where to Buy, Where to find it: Internet Online, Supermarkets. Widely available from street food stalls, especially in durian-growing regions like, and at markets. Online: Easily ordered from platforms like Abcdefg in various grades and sizes. Caution Warning: Precautions: - Key Additional Tips Profit Useful Benefit Available Nutrition : Carrots are orange root vegetables rich in vitamins and antioxidants—particularly beta-carotene—offering numerous health benefits. They support eye health: the body converts beta-carotene into vitamin A, which nourishes the retina and helps prevent night blindness. They boost immunity: antioxidants protect body cells and strengthen the immune system. They aid the digestive system: high fiber content helps relieve constipation and improves digestive function. Cardiovascular health: Helps lower cholesterol levels and improves blood circulation efficiency. Cancer risk reduction: Antioxidants help inhibit and prevent the growth of certain types of cancer cells. Consuming cooked carrots (such as those lightly heated or prepared with healthy oils) allows the body to absorb beta-carotene more effectively than eating them raw. And the finally then You can eat it and Sell it to the Merchant or Customer with Who people you Know Knew known, i hope you have fun and enjoy it.
ClickMeSeeAllFull
ClickMeSeeOnMoreDetail
ClickMeSeeOnMorePictureImage
ClickMeSeeOnMoreVideo
Vegetable: Processer Processed Processing food Menu: 2.Carrot Dip Flour Fry
Method: All Works: Carrot Dip Flour Fry
Method: How to make made cook: Recipe Procedure: Method: All Works: Carrot Dip Flour Fry Materials Ingredients: 1 carrot (sliced into rounds, cut into strips, or grated) 3–5 tablespoons crispy frying flour 50 ml ice-cold water (or ice-cold club soda) Seasoning powder or a pinch of salt Vegetable oil for frying Key Preparation Directions Instructions Methods: 1. Prepare the carrots: Peel and wash them thoroughly, then cut them into sticks or rounds as desired. If you prefer a softer texture, you can blanch them briefly beforehand. 2. Prepare the batter: Combine the crispy frying flour, seasoning powder, and ice-cold water (or ice-cold soda water), stirring until the mixture is smooth and free of lumps. 3. Coating: Toss or coat the prepared carrots thoroughly in the batter mixture. Frying: Heat oil in a pan over medium-high heat. Once the oil is hot, fry the carrots until golden brown and crispy on both sides, taking approximately 3–4 minutes. 4. Drain off the oil: Remove from the pan and place on a wire rack to drain. Arrange on a plate and serve with sweet chili sauce, or ketchup and chili sauce. Summary Summation Notes: Making crispy, delicious battered carrots is easy: simply cut the carrots into bite-sized pieces, mix crispy frying batter with ice-cold water, and fry them in hot oil until golden and crispy. Additional tips: You can add any topping that your want such as Fruit Vegetable or Anything you ever have eaten before. Where can i you me buy it, Where to Buy, Where to find it: Internet Online, Supermarkets. Widely available from street food stalls, especially in durian-growing regions like, and at markets. Online: Easily ordered from platforms like Abcdefg in various grades and sizes. Caution Warning: Precautions: - Key Additional Tips Profit Useful Benefit Available Nutrition : Carrots are orange root vegetables rich in vitamins and antioxidants—particularly beta-carotene—offering numerous health benefits. They support eye health: the body converts beta-carotene into vitamin A, which nourishes the retina and helps prevent night blindness. They boost immunity: antioxidants protect body cells and strengthen the immune system. They aid the digestive system: high fiber content helps relieve constipation and improves digestive function. Cardiovascular health: Helps lower cholesterol levels and improves blood circulation efficiency. Cancer risk reduction: Antioxidants help inhibit and prevent the growth of certain types of cancer cells. Consuming cooked carrots (such as those lightly heated or prepared with healthy oils) allows the body to absorb beta-carotene more effectively than eating them raw. And the finally then You can eat it and Sell it to the Merchant or Customer with Who people you Know Knew known, i hope you have fun and enjoy it.
ClickMeSeeAllFull
ClickMeSeeOnMoreDetail
ClickMeSeeOnMorePictureImage
ClickMeSeeOnMoreVideo
Vegetable: Processer Processed Processing food Menu: 3.Carrot Griller
Method: All Works: Carrot Griller
Method: How to make made cook: Recipe Procedure: Method: All Works: Carrot Griller Materials Ingredients: Olive oil or melted butter; salt and ground black pepper; honey or minced garlic (if a sweet, glossy glaze is desired); grill pan or barbecue grill. Key Preparation Directions Instructions Methods: 1. Prepare the carrots: Wash them thoroughly, peel, and cut into your desired size. (If the pieces are too large, you can boil or steam them in boiling water for about 3–5 minutes until tender; this helps reduce the grilling time.) 2. Season: Place the carrots in a mixing bowl, drizzle with olive oil or melted butter, sprinkle with salt and pepper, and toss until well combined. 3. Grilling: Preheat a grill pan or grill over low to medium heat and lightly brush the grate with oil. 4. Grilling: Place the carrots on the grill and turn them every 3–4 minutes. Grill until tender and nicely charred—this takes about 10–15 minutes. Serving: Remove from the heat; you can drizzle with a honey-garlic mixture or squeeze on some lime juice for extra flavor before serving. Summary Summation Notes: Making delicious, sweet, and aromatic grilled carrots is easy: simply prepare the ingredients and grill them over medium heat. Additional tips: You can add any topping that your want such as Fruit Vegetable or Anything you ever have eaten before. Where can i you me buy it, Where to Buy, Where to find it: Internet Online, Supermarkets. Widely available from street food stalls, especially in durian-growing regions like, and at markets. Online: Easily ordered from platforms like Abcdefg in various grades and sizes. Caution Warning: Precautions: - Key Additional Tips Profit Useful Benefit Available Nutrition : Carrots are orange root vegetables rich in vitamins and antioxidants—particularly beta-carotene—offering numerous health benefits. They support eye health: the body converts beta-carotene into vitamin A, which nourishes the retina and helps prevent night blindness. They boost immunity: antioxidants protect body cells and strengthen the immune system. They aid the digestive system: high fiber content helps relieve constipation and improves digestive function. Cardiovascular health: Helps lower cholesterol levels and improves blood circulation efficiency. Cancer risk reduction: Antioxidants help inhibit and prevent the growth of certain types of cancer cells. Consuming cooked carrots (such as those lightly heated or prepared with healthy oils) allows the body to absorb beta-carotene more effectively than eating them raw. And the finally then You can eat it and Sell it to the Merchant or Customer with Who people you Know Knew known, i hope you have fun and enjoy it.
ClickMeSeeAllFull
ClickMeSeeOnMoreDetail
ClickMeSeeOnMorePictureImage
ClickMeSeeOnMoreVideo
Vegetable: Processer Processed Processing food Menu: 4.Carrot Bake Butter Cheese Milk
Method: All Works: Carrot Bake Butter Cheese Milk
Method: How to make made cook: Recipe Procedure: Method: All Works: Carrot Bake Butter Cheese Milk Materials Ingredients: 500g carrots, 2 tbsp unsalted butter, 150g fresh milk, 1/2 tsp salt, 150g mozzarella cheese (for topping). Key Preparation Directions Instructions Methods: 1. Prepare the carrots: Peel and wash them thoroughly, then cut them into small pieces to ensure they cook quickly. Boil the carrots: Cook them in boiling water until tender and fully cooked, then remove and set aside to drain. 2. Mash and mix: Place the cooked carrots in a bowl, then add the unsalted butter, fresh milk, and salt. Mash everything together until the mixture is smooth and creamy. 3. Stir until combined: Pour the mixture into a pan over low heat. Stir briefly until the mixture is smooth and well-blended, then turn off the heat. 4. Bake with cheese: Spoon the mashed carrots into a heat-resistant dish and sprinkle mozzarella cheese evenly over the top. Bake at approximately 200°C until the cheese melts and turns a beautiful golden yellow. Ready to serve. Summary Summation Notes: Making butter-milk-cheese baked carrots (or baked mashed carrots with cheese) is simple: boil the carrots, mix in butter, milk, and salt, and mash until smooth; then, sprinkle with cheese and bake. Additional tips: You can add any topping that your want such as Fruit Vegetable or Anything you ever have eaten before. Where can i you me buy it, Where to Buy, Where to find it: Internet Online, Supermarkets. Widely available from street food stalls, especially in durian-growing regions like, and at markets. Online: Easily ordered from platforms like Abcdefg in various grades and sizes. Caution Warning: Precautions: - Key Additional Tips Profit Useful Benefit Available Nutrition : Carrots are orange root vegetables rich in vitamins and antioxidants—particularly beta-carotene—offering numerous health benefits. They support eye health: the body converts beta-carotene into vitamin A, which nourishes the retina and helps prevent night blindness. They boost immunity: antioxidants protect body cells and strengthen the immune system. They aid the digestive system: high fiber content helps relieve constipation and improves digestive function. Cardiovascular health: Helps lower cholesterol levels and improves blood circulation efficiency. Cancer risk reduction: Antioxidants help inhibit and prevent the growth of certain types of cancer cells. Consuming cooked carrots (such as those lightly heated or prepared with healthy oils) allows the body to absorb beta-carotene more effectively than eating them raw. And the finally then You can eat it and Sell it to the Merchant or Customer with Who people you Know Knew known, i hope you have fun and enjoy it.
ClickMeSeeAllFull
ClickMeSeeOnMoreDetail
ClickMeSeeOnMorePictureImage
ClickMeSeeOnMoreVideo
Vegetable: Processer Processed Processing food Menu: 5.Carrot in Coconut Milk Desert
Method: All Works: Carrot in Coconut Milk Dessert
Method: How to make made cook: Recipe Procedure: Method: All Works: Carrot in Coconut Milk Dessert Materials Ingredients: 400g carrots, 400ml coconut milk, clear lime water (for soaking the carrots), 2 tbsp coconut sugar, 3 tbsp granulated sugar, 1/2 tsp salt, 2–3 pandan leaves (washed and tied into a knot). Key Preparation Directions Instructions Methods: 1. Prepare the sweet potatoes: Peel and wash the sweet potatoes thoroughly, then cut them into bite-sized pieces. Soak in clear lime water: Soak the sweet potato pieces in clear lime water for approximately 1 hour to firm up the flesh and prevent them from becoming mushy during boiling. Afterward, remove them, rinse with clean water, and set aside to drain. 2. Simmer the sweet potatoes in coconut milk: Place the coconut milk, coconut sugar, granulated sugar, and salt into a pot. Turn on low heat, add the pandan leaves, and stir until the sugars have completely dissolved. 3. Cook until tender: Add the prepared sweet potatoes and carrots to the pot of coconut milk. Simmer over low heat, cooking steadily until the vegetables are tender and have absorbed the coconut milk (be careful not to let the coconut milk separate or boil too vigorously). 4. Serve: Once cooked until tender and the flavor is perfectly sweet and creamy to your liking, turn off the heat and ladle into a bowl, ready to enjoy. Summary Summation Notes: To make *Kaeng Buat* (sweet coconut milk dessert) using orange sweet potatoes—ensuring a smooth, tender texture and a rich, aromatic, and perfectly balanced coconut milk broth—simply follow the easy steps below. Additional tips: You can add any topping that your want such as Fruit Vegetable or Anything you ever have eaten before. Where can i you me buy it, Where to Buy, Where to find it: Internet Online, Supermarkets. Widely available from street food stalls, especially in durian-growing regions like, and at markets. Online: Easily ordered from platforms like Abcdefg in various grades and sizes. Caution Warning: Precautions: - Key Additional Tips Profit Useful Benefit Available Nutrition : Carrots are orange root vegetables rich in vitamins and antioxidants—particularly beta-carotene—offering numerous health benefits. They support eye health: the body converts beta-carotene into vitamin A, which nourishes the retina and helps prevent night blindness. They boost immunity: antioxidants protect body cells and strengthen the immune system. They aid the digestive system: high fiber content helps relieve constipation and improves digestive function. Cardiovascular health: Helps lower cholesterol levels and improves blood circulation efficiency. Cancer risk reduction: Antioxidants help inhibit and prevent the growth of certain types of cancer cells. Consuming cooked carrots (such as those lightly heated or prepared with healthy oils) allows the body to absorb beta-carotene more effectively than eating them raw. And the finally then You can eat it and Sell it to the Merchant or Customer with Who people you Know Knew known, i hope you have fun and enjoy it.
ClickMeSeeAllFull
ClickMeSeeOnMoreDetail
ClickMeSeeOnMorePictureImage
ClickMeSeeOnMoreVideo
Vegetable: Processer Processed Processing food Menu: 6.Carrot Crispy Toast
Method: All Works: Carrot Toast
Method: How to make made cook: Recipe Procedure: Method: All Works: Carrot Toast Materials Ingredients: 2 thick slices of bread, 2 tablespoons fresh butter (salted or unsalted), sweetened condensed milk (to taste), 3 tablespoons finely grated carrot, cheese (shredded mozzarella or cheddar slices), a pinch of salt (for sautéing the carrot). Key Preparation Directions Instructions Methods: 1. Prepare the carrot filling: Heat a pan with a little butter, add the grated carrots, and sauté until soft. Season with a pinch of salt, then remove from the pan and set aside. 2. Prepare the bread: Slice a thick piece of bread down the middle to create a pocket for the filling (or use two slices to make a sandwich). Add the filling: Stuff the sautéed carrots into the pocket. 3. Apply butter and milk: Spread fresh butter over the outer side of the bread and drizzle with sweetened condensed milk to taste. 4. Add cheese: Place a cheese slice or sprinkle mozzarella cheese over the bread. Cook: Toast in a pan over low heat with the lid on until the cheese melts, or bake in an oven at 180°C for about 5–8 minutes until the bread is crispy and the cheese turns golden yellow. Summary Summation Notes: Making carrot-filled butter, condensed milk, and cheese toast is simple: sauté cooked carrots for the filling, spread butter and condensed milk on the bread, top with cheese, and then toast or bake until the cheese is melted and gooey. Additional tips: You can add any topping that your want such as Fruit Vegetable or Anything you ever have eaten before. Where can i you me buy it, Where to Buy, Where to find it: Internet Online, Supermarkets. Widely available from street food stalls, especially in durian-growing regions like, and at markets. Online: Easily ordered from platforms like Abcdefg in various grades and sizes. Caution Warning: Precautions: - Key Additional Tips Profit Useful Benefit Available Nutrition : Carrots are orange root vegetables rich in vitamins and antioxidants—particularly beta-carotene—offering numerous health benefits. They support eye health: the body converts beta-carotene into vitamin A, which nourishes the retina and helps prevent night blindness. They boost immunity: antioxidants protect body cells and strengthen the immune system. They aid the digestive system: high fiber content helps relieve constipation and improves digestive function. Cardiovascular health: Helps lower cholesterol levels and improves blood circulation efficiency. Cancer risk reduction: Antioxidants help inhibit and prevent the growth of certain types of cancer cells. Consuming cooked carrots (such as those lightly heated or prepared with healthy oils) allows the body to absorb beta-carotene more effectively than eating them raw. And the finally then You can eat it and Sell it to the Merchant or Customer with Who people you Know Knew known, i hope you have fun and enjoy it.
ClickMeSeeAllFull
ClickMeSeeOnMoreDetail
ClickMeSeeOnMorePictureImage
ClickMeSeeOnMoreVideo
Vegetable: Processer Processed Processing food Menu: 7.Carrot Crispy Stick Chip in Cheese Powder
Method: All Works: Carrot Crispy Stick Chip in Cheese Powder
Method: How to make made cook: Recipe Procedure: Method: All Works: Carrot Crispy Stick Chip in Cheese Powder Materials Ingredients: 2–3 carrots, 1–2 tablespoons olive oil, Parmesan cheese powder (to taste), a pinch of salt, and paprika or garlic powder (for added aroma, as desired). Key Preparation Directions Instructions Methods: 1. Prepare the carrots: Wash the carrots thoroughly, peel them, and cut them into bite-sized strips. 2. Toss: Place the carrots in a mixing bowl. Add olive oil, salt, paprika, and Parmesan cheese powder, then toss until the carrots are evenly coated. 3. Bake or roast: Place the carrots on a baking tray with the cheese side facing down. Bake at approximately 200°C for 20–25 minutes until the carrots are tender and the cheese is beautifully browned and crispy. Summary Summation Notes: Making cheese-dusted carrots (or crispy cheese-roasted carrots) is simple: cut the carrots into sticks, toss them with olive oil and seasonings, then roast or cook them until they are crispy and fragrant with cheese. Additional tips: You can add any topping that your want such as Fruit Vegetable or Anything you ever have eaten before. Where can i you me buy it, Where to Buy, Where to find it: Internet Online, Supermarkets. Widely available from street food stalls, especially in durian-growing regions like, and at markets. Online: Easily ordered from platforms like Abcdefg in various grades and sizes. Caution Warning: Precautions: - Key Additional Tips Profit Useful Benefit Available Nutrition : Carrots are orange root vegetables rich in vitamins and antioxidants—particularly beta-carotene—offering numerous health benefits. They support eye health: the body converts beta-carotene into vitamin A, which nourishes the retina and helps prevent night blindness. They boost immunity: antioxidants protect body cells and strengthen the immune system. They aid the digestive system: high fiber content helps relieve constipation and improves digestive function. Cardiovascular health: Helps lower cholesterol levels and improves blood circulation efficiency. Cancer risk reduction: Antioxidants help inhibit and prevent the growth of certain types of cancer cells. Consuming cooked carrots (such as those lightly heated or prepared with healthy oils) allows the body to absorb beta-carotene more effectively than eating them raw. And the finally then You can eat it and Sell it to the Merchant or Customer with Who people you Know Knew known, i hope you have fun and enjoy it.
ClickMeSeeAllFull
ClickMeSeeOnMoreDetail
ClickMeSeeOnMorePictureImage
ClickMeSeeOnMoreVideo
Vegetable: Processer Processed Processing food Menu: 8.Carrot Crispy Stick Chip in BBQBarbeque Powder
Method: All Works: Carrot Crispy Stick Chip in BBQBarbeque Powder
Method: How to make made cook: Recipe Procedure: Method: All Works: Carrot Crispy Stick Chip in BBQBarbeque Powder Materials Ingredients: 500g carrots (peeled and cut into sticks or fairly thick rounds), 1–2 tablespoons barbecue seasoning powder, 1–2 tablespoons olive oil or vegetable oil, a pinch of salt. Key Preparation Directions Instructions Methods: 1. Prepare the carrots: Wash the carrots thoroughly, peel them, and cut them into long strips or bite-sized pieces. 2. Toss: Place the carrots in a mixing bowl, add olive oil and a little salt, and toss to coat the carrots thoroughly. 3. Sprinkle with barbecue powder: Add the barbecue powder and toss everything together again until the carrots are evenly coated. 4. Sautéing or Roasting: Sautéing method: Place a pan over medium-low heat and add a little oil (or use a non-stick pan without extra oil). Add the carrots and sauté, stirring frequently for about 10–15 minutes, until they are tender and have a nicely charred surface. Roasting method: Arrange the carrots on a baking tray lined with parchment paper. Roast in the oven at 200°C for 20–25 minutes until tender and fragrant. Summary Summation Notes: Making delicious, aromatic, and flavorful BBQ-seasoned roasted carrots is easy; simply follow the steps and ingredient list below. Additional tips: You can add any topping that your want such as Fruit Vegetable or Anything you ever have eaten before. Where can i you me buy it, Where to Buy, Where to find it: Internet Online, Supermarkets. Widely available from street food stalls, especially in durian-growing regions like, and at markets. Online: Easily ordered from platforms like Abcdefg in various grades and sizes. Caution Warning: Precautions: - Key Additional Tips Profit Useful Benefit Available Nutrition : Carrots are orange root vegetables rich in vitamins and antioxidants—particularly beta-carotene—offering numerous health benefits. They support eye health: the body converts beta-carotene into vitamin A, which nourishes the retina and helps prevent night blindness. They boost immunity: antioxidants protect body cells and strengthen the immune system. They aid the digestive system: high fiber content helps relieve constipation and improves digestive function. Cardiovascular health: Helps lower cholesterol levels and improves blood circulation efficiency. Cancer risk reduction: Antioxidants help inhibit and prevent the growth of certain types of cancer cells. Consuming cooked carrots (such as those lightly heated or prepared with healthy oils) allows the body to absorb beta-carotene more effectively than eating them raw. And the finally then You can eat it and Sell it to the Merchant or Customer with Who people you Know Knew known, i hope you have fun and enjoy it.
ClickMeSeeAllFull
ClickMeSeeOnMoreDetail
ClickMeSeeOnMorePictureImage
ClickMeSeeOnMoreVideo
Vegetable: Processer Processed Processing food Menu: 9.Carrot Crispy Stick Chip in Seaweed Powder
Method: All Works: Carrot Crispy Stick Chip in Seaweed Powder
Method: How to make made cook: Recipe Procedure: Method: All Works: Carrot Crispy Stick Chip in Seaweed Powder Materials Ingredients: 1 carrot (cut into thick strips or rounds, as preferred), 1–2 teaspoons seasoned seaweed powder (original or nori flavor), 1 tablespoon vegetable oil or olive oil, a pinch of salt (to enhance the carrot's sweetness), roasted white sesame seeds (for garnish). Key Preparation Directions Instructions Methods: 1. Prepare the carrots: Wash them thoroughly, peel them, and cut them into long strips resembling French fries to ensure a substantial, satisfying crunch. 2. Set up the pan: Turn on the heat to medium, add vegetable oil, and wait until the pan starts to get hot. 3. Sauté the carrots: Add the carrots to the pan and sauté, sprinkling with a little salt. Continue cooking until the carrots begin to soften and develop slight char marks on the outside (approximately 5–7 minutes) to bring out their natural sweetness. 4. Season with seaweed: Turn off the heat, then sprinkle in the seaweed powder. Toss to coat the carrot pieces evenly while they are still hot (Tip: Turning off the heat before adding the seaweed powder prevents it from burning and turning bitter). To serve: Transfer to a plate and garnish with roasted white sesame seeds for added aroma; ready to enjoy as a snack or side dish. Summary Summation Notes: Here is how to make pan-roasted carrots with seaweed powder—a simple, healthy dish that combines the natural sweetness of carrots with the savory, aromatic flavor of seaweed powder. Additional tips: You can add any topping that your want such as Fruit Vegetable or Anything you ever have eaten before. Where can i you me buy it, Where to Buy, Where to find it: Internet Online, Supermarkets. Widely available from street food stalls, especially in durian-growing regions like, and at markets. Online: Easily ordered from platforms like Abcdefg in various grades and sizes. Caution Warning: Precautions: - Key Additional Tips Profit Useful Benefit Available Nutrition : Carrots are orange root vegetables rich in vitamins and antioxidants—particularly beta-carotene—offering numerous health benefits. They support eye health: the body converts beta-carotene into vitamin A, which nourishes the retina and helps prevent night blindness. They boost immunity: antioxidants protect body cells and strengthen the immune system. They aid the digestive system: high fiber content helps relieve constipation and improves digestive function. Cardiovascular health: Helps lower cholesterol levels and improves blood circulation efficiency. Cancer risk reduction: Antioxidants help inhibit and prevent the growth of certain types of cancer cells. Consuming cooked carrots (such as those lightly heated or prepared with healthy oils) allows the body to absorb beta-carotene more effectively than eating them raw. And the finally then You can eat it and Sell it to the Merchant or Customer with Who people you Know Knew known, i hope you have fun and enjoy it.
ClickMeSeeAllFull
ClickMeSeeOnMoreDetail
ClickMeSeeOnMorePictureImage
ClickMeSeeOnMoreVideo
Vegetable: Processer Processed Processing food Menu: 10.Carrot Crispy Stick Chip in Wasabi Powder
Method: All Works: Carrot Crispy Stick Chip in Wasabi Powder
Method: How to make made cook: Recipe Procedure: Method: All Works: Carrot Crispy Stick Chip in Wasabi Powder Materials Ingredients: 2–3 carrots (peeled and cut into cubes or sticks), 1 tablespoon olive oil or melted butter, 1/2–1 teaspoon wasabi powder (adjust according to desired spiciness), 1/4 teaspoon salt, a pinch of sugar (optional, to balance the flavor). Key Preparation Directions Instructions Methods: 1. Prepare the carrots: Wash the carrots thoroughly, peel them, and cut them into pieces of the desired size (it is recommended to cut them into uniform sizes so they cook evenly). 2. Sauté the carrots: Place a pan over medium heat and add olive oil or butter. Add the carrots and sauté, stirring continuously for about 5–7 minutes, until they begin to soften and develop a nice, light char on the surface. 3. Season with wasabi: Turn off the heat (or reduce to the lowest setting to prevent the wasabi powder from burning or becoming overly pungent), then sprinkle in the wasabi powder, salt, and sugar. 4. Toss: Toss until the carrot pieces are thoroughly coated with the wasabi powder, then transfer to a serving plate and serve immediately. Summary Summation Notes: Making carrots sautéed with wasabi powder is simple: cut the carrots into bite-sized pieces, sauté them in oil or butter until tender, and then toss with wasabi powder and salt to add a spicy, zesty kick. Additional tips: You can add any topping that your want such as Fruit Vegetable or Anything you ever have eaten before. Where can i you me buy it, Where to Buy, Where to find it: Internet Online, Supermarkets. Widely available from street food stalls, especially in durian-growing regions like, and at markets. Online: Easily ordered from platforms like Abcdefg in various grades and sizes. Caution Warning: Precautions: - Key Additional Tips Profit Useful Benefit Available Nutrition : Carrots are orange root vegetables rich in vitamins and antioxidants—particularly beta-carotene—offering numerous health benefits. They support eye health: the body converts beta-carotene into vitamin A, which nourishes the retina and helps prevent night blindness. They boost immunity: antioxidants protect body cells and strengthen the immune system. They aid the digestive system: high fiber content helps relieve constipation and improves digestive function. Cardiovascular health: Helps lower cholesterol levels and improves blood circulation efficiency. Cancer risk reduction: Antioxidants help inhibit and prevent the growth of certain types of cancer cells. Consuming cooked carrots (such as those lightly heated or prepared with healthy oils) allows the body to absorb beta-carotene more effectively than eating them raw. And the finally then You can eat it and Sell it to the Merchant or Customer with Who people you Know Knew known, i hope you have fun and enjoy it.
ClickMeSeeAllFull
ClickMeSeeOnMoreDetail
ClickMeSeeOnMorePictureImage
ClickMeSeeOnMoreVideo
Vegetable: Processer Processed Processing food Menu: 1.Broccoli Smoothie Shake Milk
Method: All Works: Broccoli Smoothie Shake Milk
Method: How to make made cook: Recipe Procedure: Method: All Works: Broccoli Smoothie Shake Milk Materials Ingredients: Chopped broccoli: 1/2 cup (blanched or steamed for 1–2 minutes to reduce the raw, grassy smell and preserve the vibrant green color); Plain fresh milk: 1 cup; Sweetened condensed milk or honey: 1–2 tablespoons (adjust sweetness to taste); A pinch of salt (to balance the flavors). Key Preparation Directions Instructions Methods: 1. Prepare the broccoli: Wash the broccoli thoroughly, soak it in water mixed with a little salt or vinegar, and then rinse it under running water. 2. Blanch the vegetables. Bring water to a boil and blanch the broccoli for about 1–2 minutes, then remove and plunge it into ice-cold water to preserve its vibrant green color and reduce any raw, grassy odor. 3. Blend the ingredients: Place the blanched broccoli, plain fresh milk, sweetened condensed milk (or honey), and salt into the blender jar. 4. Blend until smooth. Blend at medium speed until all ingredients are thoroughly combined and smooth. Pour into a glass and serve immediately, or chill before drinking for a refreshing treat. Summary Summation Notes: Here is how to make a delicious, smooth, and easy-to-drink broccoli and fresh milk smoothie—simply follow the steps below. Additional tips: You can add any topping that your want such as Fruit Vegetable or Anything you ever have eaten before. Where can i you me buy it, Where to Buy, Where to find it: Internet Online, Supermarkets. Widely available from street food stalls, especially in durian-growing regions like, and at markets. Online: Easily ordered from platforms like Abcdefg in various grades and sizes. Caution Warning: Precautions: - Key Additional Tips Profit Useful Benefit Available Nutrition : Broccoli is a highly beneficial vegetable, rich in Vitamin C, Vitamin K, folate, and dietary fiber that support the body's health. Antioxidant properties: Contains sulforaphane and glucosinolates, which help protect cells and reduce the risk of chronic diseases. Immune system support: High in Vitamin C, helping to prevent colds and boost disease resistance. Digestive health: Contains fiber that stimulates bowel function and relieves constipation. Heart health: Helps lower cholesterol levels and regulate blood pressure. Bone and eye health: Contains calcium, Vitamin K, and lutein, which strengthen bones and support eye health. To maximize benefits, slice and let it rest: Cut the broccoli and leave it for 30–40 minutes before cooking to allow enzymes to produce the highest levels of sulforaphane. Use the steaming method: Steam for 3–5 minutes; this preserves Vitamin C and other nutrients better than boiling it in water for an extended period. And the finally then You can eat it and Sell it to the Merchant or Customer with Who people you Know Knew known, i hope you have fun and enjoy it.
ClickMeSeeAllFull
ClickMeSeeOnMoreDetail
ClickMeSeeOnMorePictureImage
ClickMeSeeOnMoreVideo
Vegetable: Processer Processed Processing food Menu: 2.Broccoli Bake Butter Cheese Milk
Method: All Works: Broccoli Bake Butter Cheese Milk
Method: How to make made cook: Recipe Procedure: Method: All Works: Broccoli Bake Butter Cheese Milk Materials Ingredients: 150–200 g broccoli, 1 tbsp unsalted butter, 1 tbsp finely chopped onion, 1 tbsp all-purpose flour, 1/2 cup fresh milk (or a mix with whipping cream), a pinch of salt and ground pepper, and cheese for baking (shredded mozzarella and cheddar) to taste. Key Preparation Directions Instructions Methods: 1. Prepare the broccoli: Cut the broccoli into bite-sized pieces and wash thoroughly. Blanch in rapidly boiling water with a pinch of salt for about 1 minute until the color is vibrant green, then remove and immediately plunge into ice-cold water. Drain well. 2. Prepare the butter-milk sauce: Place a pan over low heat and melt the butter. Add the chopped onion and sauté until cooked and fragrant, then add the wheat flour and stir until well combined with the butter. 3. Add milk: Gradually pour in the fresh milk while stirring briskly to prevent the flour from clumping. Season with salt and pepper. Simmer until the sauce reaches the desired smooth, thick consistency, then turn off the heat. 4. Combine and Bake: Place the prepared broccoli into a baking dish and pour the prepared butter-milk sauce over it. Sprinkle generously with mozzarella and cheddar cheese. Bake: Cook in an oven or air fryer at approximately 180–200°C until the cheese melts, turns golden brown, and becomes aromatic. Ready to serve. Summary Summation Notes: Here is an easy way to make delicious, rich, and aromatic oven-baked broccoli with butter, milk, and cheese: simply blanch the broccoli, prepare a creamy butter-and-milk sauce, and bake it all together until the cheese is wonderfully gooey. Additional tips: You can add any topping that your want such as Fruit Vegetable or Anything you ever have eaten before. Where can i you me buy it, Where to Buy, Where to find it: Internet Online, Supermarkets. Widely available from street food stalls, especially in durian-growing regions like, and at markets. Online: Easily ordered from platforms like Abcdefg in various grades and sizes. Caution Warning: Precautions: - Key Additional Tips Profit Useful Benefit Available Nutrition : Broccoli is a highly beneficial vegetable, rich in Vitamin C, Vitamin K, folate, and dietary fiber that support the body's health. Antioxidant properties: Contains sulforaphane and glucosinolates, which help protect cells and reduce the risk of chronic diseases. Immune system support: High in Vitamin C, helping to prevent colds and boost disease resistance. Digestive health: Contains fiber that stimulates bowel function and relieves constipation. Heart health: Helps lower cholesterol levels and regulate blood pressure. Bone and eye health: Contains calcium, Vitamin K, and lutein, which strengthen bones and support eye health. To maximize benefits, slice and let it rest: Cut the broccoli and leave it for 30–40 minutes before cooking to allow enzymes to produce the highest levels of sulforaphane. Use the steaming method: Steam for 3–5 minutes; this preserves Vitamin C and other nutrients better than boiling it in water for an extended period. And the finally then You can eat it and Sell it to the Merchant or Customer with Who people you Know Knew known, i hope you have fun and enjoy it.
ClickMeSeeAllFull
ClickMeSeeOnMoreDetail
ClickMeSeeOnMorePictureImage
ClickMeSeeOnMoreVideo
Vegetable: Processer Processed Processing food Menu: 3.Broccoli Griller
Method: All Works: Broccoli Griller
Method: How to make made cook: Recipe Procedure: Method: All Works: Broccoli Griller Materials Ingredients: 1 head of broccoli, 2–3 tablespoons olive oil, ½ teaspoon salt, ½ teaspoon ground black pepper. Key Preparation Directions Instructions Methods: 1. Prepare the vegetables: Wash the broccoli thoroughly and cut it into bite-sized florets. 2. Season: Place the broccoli in a bowl and toss thoroughly with olive oil, salt, and pepper. 3. Grilling/Roasting: Cook in an air fryer at 160–180°C for 10–15 minutes (or grill in a pan over medium heat until nicely charred). 4. Serve: Spoon onto a plate and serve immediately. Summary Summation Notes: Here’s how to make delicious roasted broccoli—crispy on the outside and tender on the inside—using an air fryer or a grill pan. Additional tips: You can add any topping that your want such as Fruit Vegetable or Anything you ever have eaten before. Where can i you me buy it, Where to Buy, Where to find it: Internet Online, Supermarkets. Widely available from street food stalls, especially in durian-growing regions like, and at markets. Online: Easily ordered from platforms like Abcdefg in various grades and sizes. Caution Warning: Precautions: - Key Additional Tips Profit Useful Benefit Available Nutrition : Broccoli is a highly beneficial vegetable, rich in Vitamin C, Vitamin K, folate, and dietary fiber that support the body's health. Antioxidant properties: Contains sulforaphane and glucosinolates, which help protect cells and reduce the risk of chronic diseases. Immune system support: High in Vitamin C, helping to prevent colds and boost disease resistance. Digestive health: Contains fiber that stimulates bowel function and relieves constipation. Heart health: Helps lower cholesterol levels and regulate blood pressure. Bone and eye health: Contains calcium, Vitamin K, and lutein, which strengthen bones and support eye health. To maximize benefits, slice and let it rest: Cut the broccoli and leave it for 30–40 minutes before cooking to allow enzymes to produce the highest levels of sulforaphane. Use the steaming method: Steam for 3–5 minutes; this preserves Vitamin C and other nutrients better than boiling it in water for an extended period. And the finally then You can eat it and Sell it to the Merchant or Customer with Who people you Know Knew known, i hope you have fun and enjoy it.
ClickMeSeeAllFull
ClickMeSeeOnMoreDetail
ClickMeSeeOnMorePictureImage
ClickMeSeeOnMoreVideo
Vegetable: Processer Processed Processing food Menu: 4.Broccoli Dip Flour Fry
Method: All Works: Broccoli Dip Flour Fry
Method: How to make made cook: Recipe Procedure: Method: All Works: Broccoli Dip Flour Fry Materials Ingredients: 1 head of broccoli, 1 cup crispy frying flour, 1/2 cup ice-cold water (for the batter), vegetable oil for frying, and fine salt or cheese seasoning powder (to taste). Key Preparation Directions Instructions Methods: 1. Prepare the broccoli: Wash the broccoli thoroughly, cut it into bite-sized florets, and let it drain. Prepare the batter: Mix crispy frying flour with ice-cold water, stirring until the consistency is just right—neither too runny nor too thick. 2. Heat the oil: Place a pan on the stove, add vegetable oil, and heat over medium-high heat until the oil is very hot. 3. Coat and fry: Dip the broccoli florets into the prepared batter, then carefully drop them into the hot oil. Fry for approximately 2–3 minutes until the batter turns golden brown and crispy. 4. Drain and rest: Remove from the oil and place on a wire rack or paper towels. Sprinkle with extra salt or cheese powder to taste. Ready to serve with ketchup or cheese dip. Summary Summation Notes: Here is how to make crispy, non-greasy batter-fried broccoli: simply prepare the ingredients and fry them in very hot oil. Additional tips: You can add any topping that your want such as Fruit Vegetable or Anything you ever have eaten before. Where can i you me buy it, Where to Buy, Where to find it: Internet Online, Supermarkets. Widely available from street food stalls, especially in durian-growing regions like, and at markets. Online: Easily ordered from platforms like Abcdefg in various grades and sizes. Caution Warning: Precautions: - Key Additional Tips Profit Useful Benefit Available Nutrition : Broccoli is a highly beneficial vegetable, rich in Vitamin C, Vitamin K, folate, and dietary fiber that support the body's health. Antioxidant properties: Contains sulforaphane and glucosinolates, which help protect cells and reduce the risk of chronic diseases. Immune system support: High in Vitamin C, helping to prevent colds and boost disease resistance. Digestive health: Contains fiber that stimulates bowel function and relieves constipation. Heart health: Helps lower cholesterol levels and regulate blood pressure. Bone and eye health: Contains calcium, Vitamin K, and lutein, which strengthen bones and support eye health. To maximize benefits, slice and let it rest: Cut the broccoli and leave it for 30–40 minutes before cooking to allow enzymes to produce the highest levels of sulforaphane. Use the steaming method: Steam for 3–5 minutes; this preserves Vitamin C and other nutrients better than boiling it in water for an extended period. And the finally then You can eat it and Sell it to the Merchant or Customer with Who people you Know Knew known, i hope you have fun and enjoy it.
ClickMeSeeAllFull
ClickMeSeeOnMoreDetail
ClickMeSeeOnMorePictureImage
ClickMeSeeOnMoreVideo
Vegetable: Processer Processed Processing food Menu: 5.Broccoli Roasted Salt
Method: All Works: Broccoli Roasted Salt
Method: How to make made cook: Recipe Procedure: Method: All Works: Broccoli Roasted Salt Materials Ingredients: 1 head of broccoli (cut into bite-sized pieces), 1–2 tablespoons minced garlic, salt (for blanching and seasoning), a pinch of sugar, vegetable oil for stir-frying. Key Preparation Directions Instructions Methods: 1. Prepare the vegetables: Cut the broccoli into florets, wash thoroughly, and drain. 2. Blanch the vegetables: Bring water with a pinch of salt to a boil. Blanch the broccoli for about 1 minute, then immediately transfer it to cold water to preserve its vibrant green color. Drain and set aside. 3. Salt-roasting: Heat oil in a pan over maximum heat until the pan is very hot, then add the garlic and blanched broccoli. 4. Seasoning: Sprinkle in salt and sugar. Stir-fry quickly over high heat—avoid cooking for too long so the vegetables remain crisp rather than becoming mushy. Serving: Transfer to a plate and serve immediately while hot. Summary Summation Notes: Making crispy, delicious salt-roasted broccoli is easy: simply blanch the vegetable briefly in boiling water before roasting it over high heat with garlic and salt. Additional tips: You can add any topping that your want such as Fruit Vegetable or Anything you ever have eaten before. Where can i you me buy it, Where to Buy, Where to find it: Internet Online, Supermarkets. Widely available from street food stalls, especially in durian-growing regions like, and at markets. Online: Easily ordered from platforms like Abcdefg in various grades and sizes. Caution Warning: Precautions: - Key Additional Tips Profit Useful Benefit Available Nutrition : Broccoli is a highly beneficial vegetable, rich in Vitamin C, Vitamin K, folate, and dietary fiber that support the body's health. Antioxidant properties: Contains sulforaphane and glucosinolates, which help protect cells and reduce the risk of chronic diseases. Immune system support: High in Vitamin C, helping to prevent colds and boost disease resistance. Digestive health: Contains fiber that stimulates bowel function and relieves constipation. Heart health: Helps lower cholesterol levels and regulate blood pressure. Bone and eye health: Contains calcium, Vitamin K, and lutein, which strengthen bones and support eye health. To maximize benefits, slice and let it rest: Cut the broccoli and leave it for 30–40 minutes before cooking to allow enzymes to produce the highest levels of sulforaphane. Use the steaming method: Steam for 3–5 minutes; this preserves Vitamin C and other nutrients better than boiling it in water for an extended period. And the finally then You can eat it and Sell it to the Merchant or Customer with Who people you Know Knew known, i hope you have fun and enjoy it.
ClickMeSeeAllFull
ClickMeSeeOnMoreDetail
ClickMeSeeOnMorePictureImage
ClickMeSeeOnMoreVideo
Vegetable: Processer Processed Processing food Menu: 6.Broccoli Crispy Stick Chips on in Cheese Powder
Method: All Works: Broccoli Crispy Stick Chips on in Cheese Powder
Method: How to make made cook: Recipe Procedure: Method: All Works: Broccoli Crispy Stick Chips on in Cheese Powder Materials Ingredients: 1 head of broccoli, 1 cup crispy frying batter mix, ice-cold water (or water mixed with ice), cheese seasoning powder, vegetable oil for frying, a little salt (for washing or blanching). Key Preparation Directions Instructions Methods: 1. Prepare the broccoli: Cut the broccoli into bite-sized pieces, wash thoroughly, and set aside to drain completely. 2. Prepare the batter: Mix the crispy frying flour with ice-cold water. Stir until well combined, ensuring the batter has the right consistency—neither too runny nor too thick. 3. Coating and Frying: Heat oil in a pan over medium-high heat. Dip the broccoli into the prepared batter, then fry it in the hot oil. 4. Drain the oil: Fry the broccoli until it turns a beautiful golden yellow and becomes crispy. Remove it from the pan and place it on a wire rack to drain the excess oil. Toss with cheese powder: While the fried broccoli is still hot, transfer it to a bowl and sprinkle with cheese seasoning powder. Toss or shake well to ensure the powder evenly coats every piece. Ready to serve. Summary Summation Notes: To make crispy, appetizing fried broccoli tossed in cheese powder, coat the broccoli in a crispy frying batter mixed with ice-cold water and fry until golden and crisp; then, toss the fried broccoli with cheese powder. Additional tips: You can add any topping that your want such as Fruit Vegetable or Anything you ever have eaten before. Where can i you me buy it, Where to Buy, Where to find it: Internet Online, Supermarkets. Widely available from street food stalls, especially in durian-growing regions like, and at markets. Online: Easily ordered from platforms like Abcdefg in various grades and sizes. Caution Warning: Precautions: - Key Additional Tips Profit Useful Benefit Available Nutrition : Broccoli is a highly beneficial vegetable, rich in Vitamin C, Vitamin K, folate, and dietary fiber that support the body's health. Antioxidant properties: Contains sulforaphane and glucosinolates, which help protect cells and reduce the risk of chronic diseases. Immune system support: High in Vitamin C, helping to prevent colds and boost disease resistance. Digestive health: Contains fiber that stimulates bowel function and relieves constipation. Heart health: Helps lower cholesterol levels and regulate blood pressure. Bone and eye health: Contains calcium, Vitamin K, and lutein, which strengthen bones and support eye health. To maximize benefits, slice and let it rest: Cut the broccoli and leave it for 30–40 minutes before cooking to allow enzymes to produce the highest levels of sulforaphane. Use the steaming method: Steam for 3–5 minutes; this preserves Vitamin C and other nutrients better than boiling it in water for an extended period. And the finally then You can eat it and Sell it to the Merchant or Customer with Who people you Know Knew known, i hope you have fun and enjoy it.
ClickMeSeeAllFull
ClickMeSeeOnMoreDetail
ClickMeSeeOnMorePictureImage
ClickMeSeeOnMoreVideo
Vegetable: Processer Processed Processing food Menu: 7.Broccoli Crispy Stick Chips on in BBQBarbeque Powder
Method: All Works: Broccoli Crispy Stick Chips on in BBQBarbeque Powder
Method: How to make made cook: Recipe Procedure: Method: All Works: Broccoli Crispy Stick Chips on in BBQBarbeque Powder Materials Ingredients: 1 head of broccoli, 1 cup crispy frying flour, 1/2 cup ice-cold water, 2–3 tablespoons barbecue powder, vegetable oil for frying. Key Preparation Directions Instructions Methods: 1. Prepare the broccoli: Wash and clean it, cut it into bite-sized florets, and pat them completely dry to prevent oil from splattering. 2. Prepare the batter: Mix the crispy frying flour with ice-cold water and stir until the mixture reaches a moderately thick consistency (do not make it too runny). 3. Coat with batter and fry: Heat oil in a pan over medium-high heat. Dip the broccoli into the batter and fry immediately. 4. Remove and drain: Fry until the batter turns golden yellow and crispy. Remove and place on a wire rack to drain the oil. Season with barbecue powder: Transfer the crispy fried broccoli to a mixing bowl, sprinkle with barbecue powder, and shake or toss gently while still hot so the seasoning adheres well to the batter. Summary Summation Notes: To make crispy, barbecue-seasoned fried broccoli that stays crunchy and tastes delicious, start by washing and cutting the broccoli into bite-sized pieces. Coat them in a batter made with crispy frying flour and ice-cold water, then deep-fry in very hot oil until golden and crispy. Finally, toss the broccoli with barbecue seasoning immediately while it is still hot. Additional tips: You can add any topping that your want such as Fruit Vegetable or Anything you ever have eaten before. Where can i you me buy it, Where to Buy, Where to find it: Internet Online, Supermarkets. Widely available from street food stalls, especially in durian-growing regions like, and at markets. Online: Easily ordered from platforms like Abcdefg in various grades and sizes. Caution Warning: Precautions: - Key Additional Tips Profit Useful Benefit Available Nutrition : Broccoli is a highly beneficial vegetable, rich in Vitamin C, Vitamin K, folate, and dietary fiber that support the body's health. Antioxidant properties: Contains sulforaphane and glucosinolates, which help protect cells and reduce the risk of chronic diseases. Immune system support: High in Vitamin C, helping to prevent colds and boost disease resistance. Digestive health: Contains fiber that stimulates bowel function and relieves constipation. Heart health: Helps lower cholesterol levels and regulate blood pressure. Bone and eye health: Contains calcium, Vitamin K, and lutein, which strengthen bones and support eye health. To maximize benefits, slice and let it rest: Cut the broccoli and leave it for 30–40 minutes before cooking to allow enzymes to produce the highest levels of sulforaphane. Use the steaming method: Steam for 3–5 minutes; this preserves Vitamin C and other nutrients better than boiling it in water for an extended period. And the finally then You can eat it and Sell it to the Merchant or Customer with Who people you Know Knew known, i hope you have fun and enjoy it.
ClickMeSeeAllFull
ClickMeSeeOnMoreDetail
ClickMeSeeOnMorePictureImage
ClickMeSeeOnMoreVideo
Vegetable: Processer Processed Processing food Menu: 8.Broccoli Fry Crispy Stick Chips on in Seaweed Powder
Method: All Works: Broccoli Fry Crispy Stick Chips on in Seaweed Powder
Method: How to make made cook: Recipe Procedure: Method: All Works: Broccoli Fry Crispy Stick Chips on in Seaweed Powder Materials Ingredients: 1 head of broccoli, 1 cup crispy frying flour, 1/2 cup ice-cold water, vegetable oil for frying, seasoned seaweed powder (amount to taste). Key Preparation Directions Instructions Methods: 1. Prepare the vegetables: Cut the broccoli into bite-sized florets, wash thoroughly, and drain until completely dry. 2. Prepare the batter: Mix the crispy frying flour with ice-cold water and stir until the mixture reaches a moderately thick consistency. 3. Coating: Coat the broccoli thoroughly in the batter. Frying: Heat oil in a pan over medium-high heat. Once the oil is hot, fry the broccoli until golden and crispy, then remove and set aside to drain the excess oil. 4. Toss with seaweed powder: While the fried broccoli is still warm, place it in a mixing bowl, sprinkle with seaweed powder, and toss until well combined. Ready to serve. Summary Summation Notes: Making crispy fried broccoli tossed with seaweed seasoning is simple: wash the broccoli, cut it into bite-sized pieces, coat them in crispy frying batter, and fry until golden and crisp. Then, immediately toss the fried broccoli with the seaweed seasoning. Additional tips: You can add any topping that your want such as Fruit Vegetable or Anything you ever have eaten before. Where can i you me buy it, Where to Buy, Where to find it: Internet Online, Supermarkets. Widely available from street food stalls, especially in durian-growing regions like, and at markets. Online: Easily ordered from platforms like Abcdefg in various grades and sizes. Caution Warning: Precautions: - Key Additional Tips Profit Useful Benefit Available Nutrition : Broccoli is a highly beneficial vegetable, rich in Vitamin C, Vitamin K, folate, and dietary fiber that support the body's health. Antioxidant properties: Contains sulforaphane and glucosinolates, which help protect cells and reduce the risk of chronic diseases. Immune system support: High in Vitamin C, helping to prevent colds and boost disease resistance. Digestive health: Contains fiber that stimulates bowel function and relieves constipation. Heart health: Helps lower cholesterol levels and regulate blood pressure. Bone and eye health: Contains calcium, Vitamin K, and lutein, which strengthen bones and support eye health. To maximize benefits, slice and let it rest: Cut the broccoli and leave it for 30–40 minutes before cooking to allow enzymes to produce the highest levels of sulforaphane. Use the steaming method: Steam for 3–5 minutes; this preserves Vitamin C and other nutrients better than boiling it in water for an extended period. And the finally then You can eat it and Sell it to the Merchant or Customer with Who people you Know Knew known, i hope you have fun and enjoy it.
ClickMeSeeAllFull
ClickMeSeeOnMoreDetail
ClickMeSeeOnMorePictureImage
ClickMeSeeOnMoreVideo
Vegetable: Processer Processed Processing food Menu: 9.Broccoli Fry Crispy Stick Chips on in Wasabi Powder
Method: All Works: Broccoli Fry Crispy Stick Chips on in Wasabi Powder
Method: How to make made cook: Recipe Procedure: Method: All Works: Broccoli Fry Crispy Stick Chips on in Wasabi Powder Materials Ingredients: Broccoli: 1 head (cut into bite-sized pieces) Crispy batter mix: 1 cup Rice flour: 2 tablespoons (helps keep crispy) Ice-cold water: for mixing the batter Wasabi powder: 1-2 tablespoons (adjust to your liking) Salt: 1/2 teaspoon Vegetable oil: for frying Key Preparation Directions Instructions Methods: 1. Prepare and blanch the broccoli: Wash the broccoli thoroughly and cut it into small, evenly sized florets. Bring water to a boil and add a pinch of salt. Briefly blanch the broccoli for about 30 seconds, then immediately transfer it to ice-cold water to preserve its vibrant green color and crisp texture. Drain well and pat the broccoli completely dry (this step is crucial; if the vegetables are wet, they won't crisp up during frying, and the oil may splatter). 2. Prepare the batter by combining the crispy frying flour, rice flour, and salt. Gradually add ice-cold water and stir until the flour dissolves and the mixture reaches a thick, viscous consistency similar to sweetened condensed milk. 3. To fry until crispy and puffed: Heat oil in a pan over medium heat until very hot. Coat the broccoli thoroughly in the batter and fry the pieces individually to prevent them from sticking together. Fry until the batter turns a beautiful golden-yellow and becomes crispy, then remove and set aside to drain the excess oil. 4. Toss with wasabi powder: Place the still-warm, crispy fried broccoli into a large mixing bowl. Sprinkle the instant wasabi powder over it, then gently shake or toss until the powder evenly coats the batter. Serve immediately. Summary Summation Notes: To make crispy fried broccoli tossed with wasabi powder, simply coat the broccoli in batter and fry until light and crispy, then toss it with wasabi seasoning powder. The result is a delightful treat that is crispy on the outside and tender on the inside, offering a sharp, nose-tingling kick that makes it truly addictive. Additional tips: You can add any topping that your want such as Fruit Vegetable or Anything you ever have eaten before. Where can i you me buy it, Where to Buy, Where to find it: Internet Online, Supermarkets. Widely available from street food stalls, especially in durian-growing regions like, and at markets. Online: Easily ordered from platforms like Abcdefg in various grades and sizes. Caution Warning: Precautions: - Key Additional Tips Profit Useful Benefit Available Nutrition : Broccoli is a highly beneficial vegetable, rich in Vitamin C, Vitamin K, folate, and dietary fiber that support the body's health. Antioxidant properties: Contains sulforaphane and glucosinolates, which help protect cells and reduce the risk of chronic diseases. Immune system support: High in Vitamin C, helping to prevent colds and boost disease resistance. Digestive health: Contains fiber that stimulates bowel function and relieves constipation. Heart health: Helps lower cholesterol levels and regulate blood pressure. Bone and eye health: Contains calcium, Vitamin K, and lutein, which strengthen bones and support eye health. To maximize benefits, slice and let it rest: Cut the broccoli and leave it for 30–40 minutes before cooking to allow enzymes to produce the highest levels of sulforaphane. Use the steaming method: Steam for 3–5 minutes; this preserves Vitamin C and other nutrients better than boiling it in water for an extended period. And the finally then You can eat it and Sell it to the Merchant or Customer with Who people you Know Knew known, i hope you have fun and enjoy it.
ClickMeSeeAllFull
ClickMeSeeOnMoreDetail
ClickMeSeeOnMorePictureImage
ClickMeSeeOnMoreVideo
Vegetable: Processer Processed Processing food Menu: 10.Broccoli Toast
Method: All Works: Broccoli Toast
Method: How to make made cook: Recipe Procedure: Method: All Works: Broccoli Toast Materials Ingredients: 2–4 slices of bread, 1 cup finely chopped or minced broccoli, 1 tablespoon fresh butter, 3 tablespoons sliced onion, 8 tablespoons fresh milk, a pinch of salt, and grated cheese (mozzarella) to taste. Key Preparation Directions Instructions Methods: 1. Prepare the broccoli filling: Melt the butter in a pan, add the sliced onion, and sauté until fragrant. Then, add the finely chopped broccoli and fresh milk. 2. Season: Add a pinch of salt. Stir-fry until all ingredients are cooked and well-combined, and the liquid has reduced slightly. Turn off the heat. 3. Assemble the toast: Spread the sautéed broccoli mixture evenly over the bread slice, then sprinkle with grated cheese to taste. 4. Bake or pan-toast until crispy: Bake in an oven or cook in a pan over low heat with the lid on until the cheese melts and the bread turns golden brown and crispy. Summary Summation Notes: Here’s how to make easy, cheesy broccoli pizza toast—simply toast the bread in a pan or oven until crispy and delicious. Additional tips: You can add any topping that your want such as Fruit Vegetable or Anything you ever have eaten before. Where can i you me buy it, Where to Buy, Where to find it: Internet Online, Supermarkets. Widely available from street food stalls, especially in durian-growing regions like, and at markets. Online: Easily ordered from platforms like Abcdefg in various grades and sizes. Caution Warning: Precautions: - Key Additional Tips Profit Useful Benefit Available Nutrition : Broccoli is a highly beneficial vegetable, rich in Vitamin C, Vitamin K, folate, and dietary fiber that support the body's health. Antioxidant properties: Contains sulforaphane and glucosinolates, which help protect cells and reduce the risk of chronic diseases. Immune system support: High in Vitamin C, helping to prevent colds and boost disease resistance. Digestive health: Contains fiber that stimulates bowel function and relieves constipation. Heart health: Helps lower cholesterol levels and regulate blood pressure. Bone and eye health: Contains calcium, Vitamin K, and lutein, which strengthen bones and support eye health. To maximize benefits, slice and let it rest: Cut the broccoli and leave it for 30–40 minutes before cooking to allow enzymes to produce the highest levels of sulforaphane. Use the steaming method: Steam for 3–5 minutes; this preserves Vitamin C and other nutrients better than boiling it in water for an extended period. And the finally then You can eat it and Sell it to the Merchant or Customer with Who people you Know Knew known, i hope you have fun and enjoy it.
ClickMeSeeAllFull
ClickMeSeeOnMoreDetail
ClickMeSeeOnMorePictureImage
ClickMeSeeOnMoreVideo
Vegetable: Processer Processed Processing food Menu: 1.Mushroom Milk Soup
Method: All Works: Mushroom Milk Soup
Method: How to make made cook: Recipe Procedure: Method: All Works: Mushroom Milk Soup Materials Ingredients: 200g fresh shiitake mushrooms (chopped), 1 onion (finely chopped), 1–2 tbsp butter, 3 cloves minced garlic, 1 cup fresh milk or whipping cream, 2 cups chicken stock or water, salt and ground pepper (to taste). Key Preparation Directions Instructions Methods: 1. Sauté the onion and mushrooms: Melt the butter in a pan. Add the onion and garlic, and sauté until translucent. Then, add the shiitake mushrooms and sauté until fragrant. 2. Simmer: Add chicken stock to the pan and simmer over medium heat for about 10 minutes until the mushrooms are tender. 3. Blend and season: Blend the mixture until smooth, or scoop out just the solids and mash them to your liking, then return the mixture to the pot. 4. Add richness: Stir in fresh milk or whipping cream and heat until hot (be careful not to let it boil vigorously). Season with salt and pepper, then serve hot. Summary Summation Notes: How to make creamy shiitake mushroom soup easily in 15 minutes with just a few ingredients. Additional tips: You can add any topping that your want such as Fruit Vegetable or Anything you ever have eaten before. Where can i you me buy it, Where to Buy, Where to find it: Internet Online, Supermarkets. Widely available from street food stalls, especially in durian-growing regions like, and at markets. Online: Easily ordered from platforms like Abcdefg in various grades and sizes. Caution Warning: Precautions: - Key Additional Tips Profit Useful Benefit Available Nutrition : Mushrooms are a natural, low-calorie food source rich in protein, dietary fiber, vitamins, and various essential minerals that benefit the body. Boosts immunity: Contains polysaccharides, such as beta-glucan, which enhance the function of white blood cells in eliminating pathogens. Supports heart health and lowers lipids: Contains potassium to help regulate heart rhythm and dietary fiber to help reduce blood cholesterol levels. Antioxidant properties: Rich in selenium and antioxidants, helping to reduce inflammation and slow down cellular degeneration. Source of vitamins B and D: Supports the nervous and digestive systems and strengthens bones; certain varieties, such as button mushrooms, are high in vitamin D. Straw mushrooms: High in Vitamin C; help boost immunity and promote wound healing. Enoki mushrooms: Support liver health and alleviate gastric inflammation. Shiitake mushrooms: Rich in antioxidants; help reduce the risk of cardiovascular disease. Reishi mushrooms: A Chinese herbal tonic that nourishes the body, helps slow aging, and combats fatigue. And the finally then You can eat it and Sell it to the Merchant or Customer with Who people you Know Knew known, i hope you have fun and enjoy it.
ClickMeSeeAllFull
ClickMeSeeOnMoreDetail
ClickMeSeeOnMorePictureImage
ClickMeSeeOnMoreVideo
Vegetable: Processer Processed Processing food Menu: 2.Mushroom ZipZaap Sour Soup
Method: All Works: Mushroom ZipZaap Sour Soup
Method: How to make made cook: Recipe Procedure: Method: All Works: Mushroom ZipZaap Sour Soup Materials Ingredients: 200g mixed mushrooms (straw mushrooms, oyster mushrooms, enoki mushrooms, king oyster mushrooms); 5 slices of galangal; 2 stalks of lemongrass (bruised and cut into sections); 4–5 torn kaffir lime leaves; 3–4 bruised shallots; 5–10 bird's eye chilies (bruised) or roasted dried chilies; chopped culantro and spring onions (for garnish); 2 tbsp fish sauce; 2 tbsp lime juice; 1 tbsp roasted rice powder; chili powder (to taste). Key Preparation Directions Instructions Methods: 1. Pour water into a pot and place it over medium heat until it boils. 2. Add galangal, lemongrass, shallots, and kaffir lime leaves, and boil until the aroma of the herbs is released. 3. Add all the mixed mushrooms and continue boiling for about 3–5 minutes until they are tender; then, turn off the heat and remove the pot from the stove. (Avoid adding lime juice while the soup is boiling, as this preserves the fresh, aromatic acidity and prevents a bitter taste.) 4. Season with fish sauce, chili powder, toasted rice powder, and bird's eye chilies; squeeze in lime juice. Stir everything together and adjust the seasoning to taste. Transfer to a serving bowl, garnish with sawtooth coriander and sliced spring onions, and serve. Summary Summation Notes: Here is how to make a bold and spicy mixed mushroom *Tom Saep*—it is easily prepared in a single step by boiling the herbs, adding the mixed mushrooms, and seasoning to taste. Additional tips: You can add any topping that your want such as Fruit Vegetable or Anything you ever have eaten before. Where can i you me buy it, Where to Buy, Where to find it: Internet Online, Supermarkets. Widely available from street food stalls, especially in durian-growing regions like, and at markets. Online: Easily ordered from platforms like Abcdefg in various grades and sizes. Caution Warning: Precautions: - Key Additional Tips Profit Useful Benefit Available Nutrition : Mushrooms are a natural, low-calorie food source rich in protein, dietary fiber, vitamins, and various essential minerals that benefit the body. Boosts immunity: Contains polysaccharides, such as beta-glucan, which enhance the function of white blood cells in eliminating pathogens. Supports heart health and lowers lipids: Contains potassium to help regulate heart rhythm and dietary fiber to help reduce blood cholesterol levels. Antioxidant properties: Rich in selenium and antioxidants, helping to reduce inflammation and slow down cellular degeneration. Source of vitamins B and D: Supports the nervous and digestive systems and strengthens bones; certain varieties, such as button mushrooms, are high in vitamin D. Straw mushrooms: High in Vitamin C; help boost immunity and promote wound healing. Enoki mushrooms: Support liver health and alleviate gastric inflammation. Shiitake mushrooms: Rich in antioxidants; help reduce the risk of cardiovascular disease. Reishi mushrooms: A Chinese herbal tonic that nourishes the body, helps slow aging, and combats fatigue. And the finally then You can eat it and Sell it to the Merchant or Customer with Who people you Know Knew known, i hope you have fun and enjoy it.
ClickMeSeeAllFull
ClickMeSeeOnMoreDetail
ClickMeSeeOnMorePictureImage
ClickMeSeeOnMoreVideo
Vegetable: Processer Processed Processing food Menu: 3.Mushroom Partgarpow
Method: All Works: Mushroom Partgarpow
Method: How to make made cook: Recipe Procedure: Method: All Works: Mushroom Partgarpow Materials Ingredients: 300g mushrooms of your choice (e.g., straw mushrooms, shimeji, or oyster mushrooms), 1 handful of holy basil leaves, 3–4 cloves of garlic, 5–10 red Jinda chilies or bird's eye chilies (adjust spiciness to taste), 1 tablespoon vegetable oil (for stir-frying), 1–2 tablespoons oyster sauce, 1 tablespoon light soy sauce or fish sauce, a pinch of sugar, and a splash of water. Key Preparation Directions Instructions Methods: 1. Prepare the ingredients: Wash the mushrooms thoroughly and cut them into bite-sized pieces; coarsely pound the garlic and chili. 2. Sauté the chili and garlic: Place a pan on the stove, add oil, and set the heat to medium. Once the oil is hot, add the pounded chili and garlic and sauté until fragrant. 3. Add the prepared mushrooms to the pan and pour in a little water to prevent the mixture from becoming too dry. Stir-fry until the mushrooms begin to soften and cook through. Season with oyster sauce, light soy sauce (or fish sauce), and sugar. Stir everything together well and adjust the seasoning to taste. 4. Add the holy basil leaves. Increase the heat slightly, add the leaves, and stir-fry quickly just until they wilt and release their aroma. Then, turn off the heat and serve immediately. Summary Summation Notes: Here is an easy way to make delicious, flavorful mushroom stir-fry with holy basil. Start by preparing the ingredients and stir-frying over high heat to bring out the aromatic scent of the holy basil and chili. Additional tips: You can add any topping that your want such as Fruit Vegetable or Anything you ever have eaten before. Where can i you me buy it, Where to Buy, Where to find it: Internet Online, Supermarkets. Widely available from street food stalls, especially in durian-growing regions like, and at markets. Online: Easily ordered from platforms like Abcdefg in various grades and sizes. Caution Warning: Precautions: - Key Additional Tips Profit Useful Benefit Available Nutrition : Mushrooms are a natural, low-calorie food source rich in protein, dietary fiber, vitamins, and various essential minerals that benefit the body. Boosts immunity: Contains polysaccharides, such as beta-glucan, which enhance the function of white blood cells in eliminating pathogens. Supports heart health and lowers lipids: Contains potassium to help regulate heart rhythm and dietary fiber to help reduce blood cholesterol levels. Antioxidant properties: Rich in selenium and antioxidants, helping to reduce inflammation and slow down cellular degeneration. Source of vitamins B and D: Supports the nervous and digestive systems and strengthens bones; certain varieties, such as button mushrooms, are high in vitamin D. Straw mushrooms: High in Vitamin C; help boost immunity and promote wound healing. Enoki mushrooms: Support liver health and alleviate gastric inflammation. Shiitake mushrooms: Rich in antioxidants; help reduce the risk of cardiovascular disease. Reishi mushrooms: A Chinese herbal tonic that nourishes the body, helps slow aging, and combats fatigue. And the finally then You can eat it and Sell it to the Merchant or Customer with Who people you Know Knew known, i hope you have fun and enjoy it.
ClickMeSeeAllFull
ClickMeSeeOnMoreDetail
ClickMeSeeOnMorePictureImage
ClickMeSeeOnMoreVideo
Vegetable: Processer Processed Processing food Menu: 4.Mushroom Pasta
Method: All Works: Mushroom Pasta
Method: How to make made cook: Recipe Procedure: Method: All Works: Mushroom Pasta Materials Ingredients: 200g pasta (spaghetti or your preferred type), 150g mushrooms (e.g., champignon or king oyster mushrooms), 2 tbsp unsalted butter, 1 tbsp minced garlic, 200ml whipping cream, salt and ground black pepper, grated Parmesan cheese (to taste). Key Preparation Directions Instructions Methods: 1. Cook the pasta: Bring salted water to a boil, cook the pasta until al dente, then remove and set aside. 2. Sauté the mushrooms: Heat a pan and sauté the garlic in butter until fragrant. Add the sliced mushrooms and cook until tender and beautifully browned. 3. Make the cream sauce: Pour the whipping cream into a pan and simmer over low heat. Season with salt and pepper. 4. Toss: Add the cooked pasta to the sauce and toss until the noodles are evenly coated. Transfer to a plate and serve. Summary Summation Notes: Here is an easy way to make delicious, rich mushroom cream pasta using key ingredients like mushrooms and whipping cream. Additional tips: You can add any topping that your want such as Fruit Vegetable or Anything you ever have eaten before. Where can i you me buy it, Where to Buy, Where to find it: Internet Online, Supermarkets. Widely available from street food stalls, especially in durian-growing regions like, and at markets. Online: Easily ordered from platforms like Abcdefg in various grades and sizes. Caution Warning: Precautions: - Key Additional Tips Profit Useful Benefit Available Nutrition : Mushrooms are a natural, low-calorie food source rich in protein, dietary fiber, vitamins, and various essential minerals that benefit the body. Boosts immunity: Contains polysaccharides, such as beta-glucan, which enhance the function of white blood cells in eliminating pathogens. Supports heart health and lowers lipids: Contains potassium to help regulate heart rhythm and dietary fiber to help reduce blood cholesterol levels. Antioxidant properties: Rich in selenium and antioxidants, helping to reduce inflammation and slow down cellular degeneration. Source of vitamins B and D: Supports the nervous and digestive systems and strengthens bones; certain varieties, such as button mushrooms, are high in vitamin D. Straw mushrooms: High in Vitamin C; help boost immunity and promote wound healing. Enoki mushrooms: Support liver health and alleviate gastric inflammation. Shiitake mushrooms: Rich in antioxidants; help reduce the risk of cardiovascular disease. Reishi mushrooms: A Chinese herbal tonic that nourishes the body, helps slow aging, and combats fatigue. And the finally then You can eat it and Sell it to the Merchant or Customer with Who people you Know Knew known, i hope you have fun and enjoy it.
ClickMeSeeAllFull
ClickMeSeeOnMoreDetail
ClickMeSeeOnMorePictureImage
ClickMeSeeOnMoreVideo
Vegetable: Processer Processed Processing food Menu: 5.Mushroom Griller
Method: All Works: Mushroom Griller
Method: How to make made cook: Recipe Procedure: Method: All Works: Mushroom Griller Materials Ingredients: 5 King Oyster mushrooms (or mushrooms of your choice), 2 tablespoons oyster sauce, 1 tablespoon seasoning sauce or light soy sauce, 1 teaspoon sugar, 1 teaspoon sesame oil or rice bran oil, roasted white sesame seeds for garnish. Key Preparation Directions Instructions Methods: 1. Prepare the mushrooms: Wash the King Oyster mushrooms thoroughly and slice them into pieces of your preferred thickness. Make the sauce: Combine oyster sauce, seasoning sauce, sugar, and sesame oil, then stir well. 2. First grilling stage: Lightly oil a pan or grill. Grill the mushrooms over medium heat until they are about 50% cooked, or until clear liquid begins to seep out. 3. Apply the sauce: Brush the prepared sauce all over both sides of the mushrooms. 4. Continue grilling: Grill until the mushrooms are tender, the sauce has infused the flesh, and they have developed a beautiful color. To serve: Sprinkle with toasted white sesame seeds and enjoy while hot. Summary Summation Notes: Here is an easy way to make delicious, aromatic, and flavorful grilled mushrooms with sauce, using King Oyster mushrooms and a simple process. Additional tips: You can add any topping that your want such as Fruit Vegetable or Anything you ever have eaten before. Where can i you me buy it, Where to Buy, Where to find it: Internet Online, Supermarkets. Widely available from street food stalls, especially in durian-growing regions like, and at markets. Online: Easily ordered from platforms like Abcdefg in various grades and sizes. Caution Warning: Precautions: - Key Additional Tips Profit Useful Benefit Available Nutrition : Mushrooms are a natural, low-calorie food source rich in protein, dietary fiber, vitamins, and various essential minerals that benefit the body. Boosts immunity: Contains polysaccharides, such as beta-glucan, which enhance the function of white blood cells in eliminating pathogens. Supports heart health and lowers lipids: Contains potassium to help regulate heart rhythm and dietary fiber to help reduce blood cholesterol levels. Antioxidant properties: Rich in selenium and antioxidants, helping to reduce inflammation and slow down cellular degeneration. Source of vitamins B and D: Supports the nervous and digestive systems and strengthens bones; certain varieties, such as button mushrooms, are high in vitamin D. Straw mushrooms: High in Vitamin C; help boost immunity and promote wound healing. Enoki mushrooms: Support liver health and alleviate gastric inflammation. Shiitake mushrooms: Rich in antioxidants; help reduce the risk of cardiovascular disease. Reishi mushrooms: A Chinese herbal tonic that nourishes the body, helps slow aging, and combats fatigue. And the finally then You can eat it and Sell it to the Merchant or Customer with Who people you Know Knew known, i hope you have fun and enjoy it.
ClickMeSeeAllFull
ClickMeSeeOnMoreDetail
ClickMeSeeOnMorePictureImage
ClickMeSeeOnMoreVideo
Vegetable: Processer Processed Processing food Menu: 6.Mushroom Roaster
Method: All Works: Mushroom Roaster
Method: How to make made cook: Recipe Procedure: Method: All Works: Mushroom Roaster Materials Ingredients: 200g mushrooms of your choice (e.g., King Oyster or fresh Shiitake), 1 tablespoon minced garlic, 1–2 tablespoons chopped red Jinda chili (adjust to taste), 1/2 teaspoon salt, a pinch of sugar, 1 tablespoon vegetable oil for stir-frying, and chopped spring onion for garnish. Key Preparation Directions Instructions Methods: 1. Prepare the mushrooms: Wash them thoroughly and cut them into bite-sized pieces. If using King Oyster mushrooms, dice them or cut them into thick slices. Pat them dry if they are damp. 2. Sauté the mushrooms until cooked: Place a pan over medium heat and add a little oil. Add the mushrooms and sauté or stir-fry until they are cooked and their moisture begins to dry up. 3. Add the chili-salt mixture: Add the minced garlic and chili, and sauté until fragrant and well-combined with the mushrooms. 4. Seasoning: Season with salt and a little sugar. Continue stir-frying until dry and the flavors are well-incorporated. Serving: Turn off the heat, transfer to a plate, sprinkle with chopped spring onions, and serve. Summary Summation Notes: How to make salt-roasted mushrooms (or salt and chili-roasted mushrooms)—a delicious, healthy, and easy-to-make dish featuring the aromatic flavors of garlic and chili. Additional tips: You can add any topping that your want such as Fruit Vegetable or Anything you ever have eaten before. Where can i you me buy it, Where to Buy, Where to find it: Internet Online, Supermarkets. Widely available from street food stalls, especially in durian-growing regions like, and at markets. Online: Easily ordered from platforms like Abcdefg in various grades and sizes. Caution Warning: Precautions: - Key Additional Tips Profit Useful Benefit Available Nutrition : Mushrooms are a natural, low-calorie food source rich in protein, dietary fiber, vitamins, and various essential minerals that benefit the body. Boosts immunity: Contains polysaccharides, such as beta-glucan, which enhance the function of white blood cells in eliminating pathogens. Supports heart health and lowers lipids: Contains potassium to help regulate heart rhythm and dietary fiber to help reduce blood cholesterol levels. Antioxidant properties: Rich in selenium and antioxidants, helping to reduce inflammation and slow down cellular degeneration. Source of vitamins B and D: Supports the nervous and digestive systems and strengthens bones; certain varieties, such as button mushrooms, are high in vitamin D. Straw mushrooms: High in Vitamin C; help boost immunity and promote wound healing. Enoki mushrooms: Support liver health and alleviate gastric inflammation. Shiitake mushrooms: Rich in antioxidants; help reduce the risk of cardiovascular disease. Reishi mushrooms: A Chinese herbal tonic that nourishes the body, helps slow aging, and combats fatigue. And the finally then You can eat it and Sell it to the Merchant or Customer with Who people you Know Knew known, i hope you have fun and enjoy it.
ClickMeSeeAllFull
ClickMeSeeOnMoreDetail
ClickMeSeeOnMorePictureImage
ClickMeSeeOnMoreVideo
Vegetable: Processer Processed Processing food Menu: 7.Mushroom Bake Butter Cheese Milk
Method: All Works: Mushroom Bake Butter Cheese Milk
Method: How to make made cook: Recipe Procedure: Method: All Works: Mushroom Bake Butter Cheese Milk Materials Ingredients: Mushrooms (e.g., King Oyster or Champignon): 200–300 g; Unsalted butter: 2 tbsp; Milk: 3–4 tbsp (for added creaminess); Shredded mozzarella cheese: to taste; Cheddar or Parmesan cheese: a small amount (for aroma and savoriness); Minced garlic: 1 tbsp; Salt and ground pepper: a pinch; Oregano: for garnish. Key Preparation Directions Instructions Methods: 1. Prepare the mushrooms: Wash them thoroughly and drain well. Cut them into bite-sized pieces; if using champignons, slice them or trim off the stems. 2. Sauté with butter and garlic: Place a pan over low heat and sauté the unsalted butter and minced garlic until fragrant. Add the mushrooms and stir-fry quickly; season with salt and pepper. Add milk: Pour in the milk and mix well with the mushrooms and butter. Once it begins to simmer slightly, turn off the heat. 3. Baked Cheese: Place the mushrooms in an oven-safe dish or air fryer. Sprinkle cheese generously over the top and sprinkle with oregano. 4. Bake until the cheese melts: Place in an oven at 200°C or an air fryer at 160–180°C for about 5–10 minutes until the cheese melts and turns a beautiful golden yellow. Ready to serve. Summary Summation Notes: Here is how to make delicious, aromatic, and gooey butter-milk-cheese baked mushrooms—you can easily follow these simple steps. Additional tips: You can add any topping that your want such as Fruit Vegetable or Anything you ever have eaten before. Where can i you me buy it, Where to Buy, Where to find it: Internet Online, Supermarkets. Widely available from street food stalls, especially in durian-growing regions like, and at markets. Online: Easily ordered from platforms like Abcdefg in various grades and sizes. Caution Warning: Precautions: - Key Additional Tips Profit Useful Benefit Available Nutrition : Mushrooms are a natural, low-calorie food source rich in protein, dietary fiber, vitamins, and various essential minerals that benefit the body. Boosts immunity: Contains polysaccharides, such as beta-glucan, which enhance the function of white blood cells in eliminating pathogens. Supports heart health and lowers lipids: Contains potassium to help regulate heart rhythm and dietary fiber to help reduce blood cholesterol levels. Antioxidant properties: Rich in selenium and antioxidants, helping to reduce inflammation and slow down cellular degeneration. Source of vitamins B and D: Supports the nervous and digestive systems and strengthens bones; certain varieties, such as button mushrooms, are high in vitamin D. Straw mushrooms: High in Vitamin C; help boost immunity and promote wound healing. Enoki mushrooms: Support liver health and alleviate gastric inflammation. Shiitake mushrooms: Rich in antioxidants; help reduce the risk of cardiovascular disease. Reishi mushrooms: A Chinese herbal tonic that nourishes the body, helps slow aging, and combats fatigue. And the finally then You can eat it and Sell it to the Merchant or Customer with Who people you Know Knew known, i hope you have fun and enjoy it.
ClickMeSeeAllFull
ClickMeSeeOnMoreDetail
ClickMeSeeOnMorePictureImage
ClickMeSeeOnMoreVideo
Vegetable: Processer Processed Processing food Menu: 8.Mushroom Dip Flour Fry
Method: All Works: Mushroom Dip Flour Fry
Method: How to make made cook: Recipe Procedure: Method: All Works: Mushroom Dip Flour Fry Materials Ingredients: 500g oyster mushrooms or enoki mushrooms, 250g crispy frying flour, 1 teaspoon ground pepper, 1/2 teaspoon salt, an appropriate amount of ice-cold water (or ice-cold soda water), and palm oil for frying. Key Preparation Directions Instructions Methods: 1. Prepare the mushrooms: Wash them thoroughly, tear them into bite-sized pieces, and let them air-dry or pat them completely dry to prevent them from releasing water during frying. 2. Prepare the batter: Place the crispy frying flour, ground pepper, and salt in a mixing bowl. Gradually add ice-cold water and stir until the mixture is smooth (free of lumps) and has a moderate consistency (similar to condensed milk). 3. Heat the pan: Add enough oil to cover the mushrooms. Use medium heat and wait for the oil to heat up. 4. Coating and Frying: Coat the mushrooms thoroughly in the batter, gently squeeze out the excess, and carefully drop them into the pan to fry. Do not overcrowd the pan. Frying and Draining: Fry until the mushrooms turn golden yellow and the batter is crispy; then, remove them and place them on a wire rack to drain the oil. Summary Summation Notes: To make crispy, non-greasy battered mushrooms, start by washing the mushrooms thoroughly and letting them dry completely. Then, coat them in a batter mixed with ice-cold water and fry over medium heat until golden brown. Additional tips: You can add any topping that your want such as Fruit Vegetable or Anything you ever have eaten before. Where can i you me buy it, Where to Buy, Where to find it: Internet Online, Supermarkets. Widely available from street food stalls, especially in durian-growing regions like, and at markets. Online: Easily ordered from platforms like Abcdefg in various grades and sizes. Caution Warning: Precautions: - Key Additional Tips Profit Useful Benefit Available Nutrition : Mushrooms are a natural, low-calorie food source rich in protein, dietary fiber, vitamins, and various essential minerals that benefit the body. Boosts immunity: Contains polysaccharides, such as beta-glucan, which enhance the function of white blood cells in eliminating pathogens. Supports heart health and lowers lipids: Contains potassium to help regulate heart rhythm and dietary fiber to help reduce blood cholesterol levels. Antioxidant properties: Rich in selenium and antioxidants, helping to reduce inflammation and slow down cellular degeneration. Source of vitamins B and D: Supports the nervous and digestive systems and strengthens bones; certain varieties, such as button mushrooms, are high in vitamin D. Straw mushrooms: High in Vitamin C; help boost immunity and promote wound healing. Enoki mushrooms: Support liver health and alleviate gastric inflammation. Shiitake mushrooms: Rich in antioxidants; help reduce the risk of cardiovascular disease. Reishi mushrooms: A Chinese herbal tonic that nourishes the body, helps slow aging, and combats fatigue. And the finally then You can eat it and Sell it to the Merchant or Customer with Who people you Know Knew known, i hope you have fun and enjoy it.
ClickMeSeeAllFull
ClickMeSeeOnMoreDetail
ClickMeSeeOnMorePictureImage
ClickMeSeeOnMoreVideo
Vegetable: Processer Processed Processing food Menu: 9.Mushroom Crispy Stick Chip Cheese Powder
Method: All Works: Mushroom Crispy Stick Chip Cheese Powder
Method: How to make made cook: Recipe Procedure: Method: All Works: Mushroom Crispy Stick Chip Cheese Powder Materials Ingredients: 300g Enoki or oyster mushrooms, 1 cup crispy frying flour, ½ cup ice-cold water, cheese powder (for sprinkling), vegetable oil (for frying). Key Preparation Directions Instructions Methods: 1. 300g Enoki or oyster mushrooms, 1 cup crispy frying flour, ½ cup ice-cold water, cheese powder (for sprinkling), vegetable oil (for frying). 2. Prepare the batter: Mix the crispy frying flour with ice-cold water and stir until smooth and free of lumps. 3. Coating and Frying: Heat oil in a pan over medium heat. Coat the mushrooms in batter and fry until golden and crispy (10 seconds to 2 minutes). Draining: Remove the mushrooms and set aside to drain off the excess oil. 4. Toss with cheese powder: Place the fried mushrooms in a mixing bowl, sprinkle with cheese powder, and shake until the mushrooms are evenly coated. Summary Summation Notes: To make crispy fried mushrooms tossed in cheese powder that stay crunchy and do not absorb excess oil, start by coating them in a crispy frying batter mixed with ice-cold water, then fry them in medium-hot oil before tossing them with the cheese powder. Additional tips: You can add any topping that your want such as Fruit Vegetable or Anything you ever have eaten before. Where can i you me buy it, Where to Buy, Where to find it: Internet Online, Supermarkets. Widely available from street food stalls, especially in durian-growing regions like, and at markets. Online: Easily ordered from platforms like Abcdefg in various grades and sizes. Caution Warning: Precautions: - Key Additional Tips Profit Useful Benefit Available Nutrition : Mushrooms are a natural, low-calorie food source rich in protein, dietary fiber, vitamins, and various essential minerals that benefit the body. Boosts immunity: Contains polysaccharides, such as beta-glucan, which enhance the function of white blood cells in eliminating pathogens. Supports heart health and lowers lipids: Contains potassium to help regulate heart rhythm and dietary fiber to help reduce blood cholesterol levels. Antioxidant properties: Rich in selenium and antioxidants, helping to reduce inflammation and slow down cellular degeneration. Source of vitamins B and D: Supports the nervous and digestive systems and strengthens bones; certain varieties, such as button mushrooms, are high in vitamin D. Straw mushrooms: High in Vitamin C; help boost immunity and promote wound healing. Enoki mushrooms: Support liver health and alleviate gastric inflammation. Shiitake mushrooms: Rich in antioxidants; help reduce the risk of cardiovascular disease. Reishi mushrooms: A Chinese herbal tonic that nourishes the body, helps slow aging, and combats fatigue. And the finally then You can eat it and Sell it to the Merchant or Customer with Who people you Know Knew known, i hope you have fun and enjoy it.
ClickMeSeeAllFull
ClickMeSeeOnMoreDetail
ClickMeSeeOnMorePictureImage
ClickMeSeeOnMoreVideo
Vegetable: Processer Processed Processing food Menu: 10.Mushroom Crispy Stick Chip BBQBarbeque Powder
Method: All Works: Mushroom Crispy Stick Chip BBQBarbeque Powder
Method: How to make made cook: Recipe Procedure: Method: All Works: Mushroom Crispy Stick Chip BBQBarbeque Powder Materials Ingredients: 500g oyster mushrooms, 250g crispy frying flour, 2 tbsp rice flour (helps maintain crispiness), 300g ice-cold water, 1–2 tbsp barbecue seasoning powder, a pinch of ground pepper and seasoning powder, and vegetable oil for frying. Key Preparation Directions Instructions Methods: 1. Tear the oyster mushrooms into bite-sized pieces—neither too thick nor too thin—and let them drain well. 2. Combine the crispy frying flour, rice flour, seasoning powder, and ground pepper. Add ice-cold water to the flour mixture and stir until smooth and free of lumps. 3. Place a pan on the stove, add oil, and heat over medium-high heat. Once the oil is hot, coat the mushrooms thoroughly in the batter and drop them into the pan one by one, ensuring they do not stick together. 4. Fry until the mushrooms turn golden brown and crispy. Remove from the pan and let them drain. Place the crispy mushrooms in a bowl, sprinkle with barbecue seasoning, and shake or toss until evenly coated. Ready to serve. Summary Summation Notes: To make crispy, delicious, and non-greasy barbecue-flavored fried mushrooms, start by coating oyster mushrooms in a batter made with crispy frying flour and ice-cold water, then toss them with a rich barbecue seasoning powder. Additional tips: You can add any topping that your want such as Fruit Vegetable or Anything you ever have eaten before. Where can i you me buy it, Where to Buy, Where to find it: Internet Online, Supermarkets. Widely available from street food stalls, especially in durian-growing regions like, and at markets. Online: Easily ordered from platforms like Abcdefg in various grades and sizes. Caution Warning: Precautions: - Key Additional Tips Profit Useful Benefit Available Nutrition : Mushrooms are a natural, low-calorie food source rich in protein, dietary fiber, vitamins, and various essential minerals that benefit the body. Boosts immunity: Contains polysaccharides, such as beta-glucan, which enhance the function of white blood cells in eliminating pathogens. Supports heart health and lowers lipids: Contains potassium to help regulate heart rhythm and dietary fiber to help reduce blood cholesterol levels. Antioxidant properties: Rich in selenium and antioxidants, helping to reduce inflammation and slow down cellular degeneration. Source of vitamins B and D: Supports the nervous and digestive systems and strengthens bones; certain varieties, such as button mushrooms, are high in vitamin D. Straw mushrooms: High in Vitamin C; help boost immunity and promote wound healing. Enoki mushrooms: Support liver health and alleviate gastric inflammation. Shiitake mushrooms: Rich in antioxidants; help reduce the risk of cardiovascular disease. Reishi mushrooms: A Chinese herbal tonic that nourishes the body, helps slow aging, and combats fatigue. And the finally then You can eat it and Sell it to the Merchant or Customer with Who people you Know Knew known, i hope you have fun and enjoy it.
ClickMeSeeAllFull
ClickMeSeeOnMoreDetail
ClickMeSeeOnMorePictureImage
ClickMeSeeOnMoreVideo
Vegetable: Processer Processed Processing food Menu: 1.Asparagus Bamboo Shoot TomZaap Sour Soup
Method: All Works: Asparagus Bamboo Shoot TomZaap Sour Soup
Method: How to make made cook: Recipe Procedure: Method: All Works: Asparagus Bamboo Shoot TomZaap Sour Soup Materials Ingredients: 500g boiled bamboo shoots (shredded into strips), 2 cups *Yanang* leaf juice, 300–500g meat of choice (e.g., pork soft bone or chicken feet), galangal, lemongrass, and kaffir lime leaves (for the broth), 3–5 crushed shallots, crushed bird's eye chilies (to taste), chopped sawtooth coriander and spring onions, 2 tbsp toasted rice powder, chili powder (to taste), 2 tbsp fermented fish sauce (*pla ra*), 1–2 tbsp fish sauce, 1–2 tbsp lime juice. Key Preparation Directions Instructions Methods: 1. Prepare the broth: Place a pot on the stove and add *Yanang* leaf juice and water. Add galangal, lemongrass, kaffir lime leaves, and crushed shallots. Bring the mixture to a boil. 2. Simmer the meat: Add the meat (pork bones or chicken feet) and simmer over low heat until tender to your liking. Regularly skim off the foam to keep the broth clear. 3. Prepare the bamboo shoots: Rinse the boiled bamboo shoots in clean water once or twice to reduce bitterness and any unwanted odors. Add the bamboo shoots: Place the prepared shredded bamboo shoots into the pot and continue boiling for approximately 10–15 minutes, allowing them to absorb the flavors and cook thoroughly. 4. Add the bamboo shoots: Add the prepared shredded bamboo shoots to the pot. Continue boiling for approximately 10–15 minutes, allowing the bamboo shoots to absorb the aroma and cook thoroughly. Summary Summation Notes: Here is how to make *Tom Saep* (Spicy and Sour Soup) with bamboo shoots—delicious, rich in flavor, bold and spicy, and fragrant with toasted rice and herbs. You can easily prepare it by following the steps below. Additional tips: You can add any topping that your want such as Fruit Vegetable or Anything you ever have eaten before. Where can i you me buy it, Where to Buy, Where to find it: Internet Online, Supermarkets. Widely available from street food stalls, especially in durian-growing regions like, and at markets. Online: Easily ordered from platforms like Abcdefg in various grades and sizes. Caution Warning: Precautions: Do not eat raw: Raw bamboo shoots contain toxic cyanide; they must be boiled in water for 10–15 minutes to eliminate the toxin. Gout: They are high in purines; individuals with high uric acid levels or gout should avoid them. Key Additional Tips Profit Useful Benefit Available Nutrition : Bamboo shoots offer significant benefits due to their high fiber content, which aids digestion, and their low calorie count, making them ideal for weight management. Key advantages include: promoting healthy digestion (high fiber content helps relieve constipation and supports intestinal health); aiding weight management (low in energy and calories while providing a feeling of fullness); and being rich in minerals (containing Vitamin A and Vitamin C, which provide antioxidant properties). And the finally then You can eat it and Sell it to the Merchant or Customer with Who people you Know Knew known, i hope you have fun and enjoy it.
ClickMeSeeAllFull
ClickMeSeeOnMoreDetail
ClickMeSeeOnMorePictureImage
ClickMeSeeOnMoreVideo
Vegetable: Processer Processed Processing food Menu: 2.Asparagus Bamboo Shoot Partgarpow
Method: All Works: Asparagus Bamboo Shoot Partgarpow
Method: How to make made cook: Recipe Procedure: Method: All Works: Asparagus Bamboo Shoot Partgarpow Materials Ingredients: 200g minced pork; 200g bamboo shoots (boiled and shredded, or pickled bamboo shoots); 1 cup holy basil leaves; chili and garlic (coarsely pounded, to taste); 1 tbsp vegetable oil. Seasonings: 1 tbsp oyster sauce, 1 tbsp light soy sauce, 1 tbsp fish sauce, ½ tsp sugar, and a little water. Key Preparation Directions Instructions Methods: 1. Prepare the chili and garlic: Heat oil in a pan over medium heat. Once the oil is hot, add the pounded chili and garlic and sauté until fragrant. 2. Stir-fry the minced pork: Add the minced pork and stir-fry until cooked and well-combined with the chili and garlic. 3. Add the bamboo shoots and season: Add the bamboo shoots and stir-fry. Season with oyster sauce, light soy sauce, fish sauce, and sugar. Add a little water to prevent the mixture from becoming too dry. 4. Add holy basil: Increase the heat to high, add the holy basil leaves, and stir-fry quickly until they wilt. Then, turn off the heat and serve: Spoon over hot steamed rice and enjoy with a crispy fried egg. Summary Summation Notes: Here is how to make spicy, delicious, and flavorful Stir-fried Minced Pork with Bamboo Shoots and Holy Basil—it’s easy to prepare by following the steps below. Additional tips: You can add any topping that your want such as Fruit Vegetable or Anything you ever have eaten before. Where can i you me buy it, Where to Buy, Where to find it: Internet Online, Supermarkets. Widely available from street food stalls, especially in durian-growing regions like, and at markets. Online: Easily ordered from platforms like Abcdefg in various grades and sizes. Caution Warning: Precautions: Do not eat raw: Raw bamboo shoots contain toxic cyanide; they must be boiled in water for 10–15 minutes to eliminate the toxin. Gout: They are high in purines; individuals with high uric acid levels or gout should avoid them. Key Additional Tips Profit Useful Benefit Available Nutrition : Bamboo shoots offer significant benefits due to their high fiber content, which aids digestion, and their low calorie count, making them ideal for weight management. Key advantages include: promoting healthy digestion (high fiber content helps relieve constipation and supports intestinal health); aiding weight management (low in energy and calories while providing a feeling of fullness); and being rich in minerals (containing Vitamin A and Vitamin C, which provide antioxidant properties). And the finally then You can eat it and Sell it to the Merchant or Customer with Who people you Know Knew known, i hope you have fun and enjoy it.
ClickMeSeeAllFull
ClickMeSeeOnMoreDetail
ClickMeSeeOnMorePictureImage
ClickMeSeeOnMoreVideo
Vegetable: Processer Processed Processing food Menu: 3.Asparagus Bamboo Shoot Pasta
Method: All Works: Asparagus Bamboo Shoot Pasta
Method: How to make made cook: Recipe Procedure: Method: All Works: Asparagus Bamboo Shoot Pasta Materials Ingredients: 100g pasta (spaghetti or fettuccine), 5–6 asparagus spears (cut into bite-sized pieces), 5–7 fresh shrimp (peeled), 1 clove minced garlic, 2 tbsp dashi stock, 1 tbsp shoyu (Japanese soy sauce), 1 tsp mirin, salt and vegetable oil (for sautéing). Key Preparation Directions Instructions Methods: 1. Boil the pasta: Bring water to a boil in a pot and add a little salt. Once boiling, add the pasta and cook until *al dente* (firm to the bite), then remove and drain. 2. Blanch the asparagus: Briefly blanch the asparagus in boiling water to preserve its vibrant color and crisp texture (10 seconds to 10 minutes), then remove and set aside. 3. Stir-fry the shrimp: Heat a little oil in a pan and sauté the garlic until fragrant. Add the shrimp and stir-fry until cooked, then remove and set aside. 4. Stir-fry everything together: Add the asparagus to the pan, followed by the pasta, dashi stock, soy sauce, and mirin; stir-fry until well combined. To serve: Add the reserved shrimp back in, toss everything together once more, and transfer to a plate, ready to eat. Summary Summation Notes: Here is an easy way to make a fusion-style pasta with shrimp and asparagus: simply boil the pasta, then sauté it with crisp asparagus and fresh shrimp, seasoning the dish with a Japanese-style sauce. Additional tips: You can add any topping that your want such as Fruit Vegetable or Anything you ever have eaten before. Where can i you me buy it, Where to Buy, Where to find it: Internet Online, Supermarkets. Widely available from street food stalls, especially in durian-growing regions like, and at markets. Online: Easily ordered from platforms like Abcdefg in various grades and sizes. Caution Warning: Precautions: Do not eat raw: Raw bamboo shoots contain toxic cyanide; they must be boiled in water for 10–15 minutes to eliminate the toxin. Gout: They are high in purines; individuals with high uric acid levels or gout should avoid them. Key Additional Tips Profit Useful Benefit Available Nutrition : Bamboo shoots offer significant benefits due to their high fiber content, which aids digestion, and their low calorie count, making them ideal for weight management. Key advantages include: promoting healthy digestion (high fiber content helps relieve constipation and supports intestinal health); aiding weight management (low in energy and calories while providing a feeling of fullness); and being rich in minerals (containing Vitamin A and Vitamin C, which provide antioxidant properties). And the finally then You can eat it and Sell it to the Merchant or Customer with Who people you Know Knew known, i hope you have fun and enjoy it.
ClickMeSeeAllFull
ClickMeSeeOnMoreDetail
ClickMeSeeOnMorePictureImage
ClickMeSeeOnMoreVideo
Vegetable: Processer Processed Processing food Menu: 4.Asparagus Bamboo Shoot Spaghetti
Method: All Works: Asparagus Bamboo Shoot Spaghetti
Method: How to make made cook: Recipe Procedure: Method: All Works: Asparagus Bamboo Shoot Spaghetti Materials Ingredients: 100g spaghetti; 1 cup boiled bamboo shoots (sliced or cut into strips); 1 tbsp minced garlic; dried chili pieces (to taste); bacon or other meat of choice (optional); vegetable oil for stir-frying; oyster sauce, fish sauce, and a little sugar. Key Preparation Directions Instructions Methods: 1. Boil the pasta: Bring water to a boil and add a little salt. Cook the spaghetti for about 8–10 minutes until done, then remove and set aside. 2. Sauté the aromatics: Heat oil in a pan, then add the garlic and dried chilies and sauté until fragrant. 2. Sauté the aromatics: Heat oil in a pan, then add the garlic and dried chilies and sauté until fragrant. 4. Toss the noodles: Add the boiled spaghetti and toss everything together until well combined. Taste and adjust the seasoning as desired, then serve. Summary Summation Notes: How to make spicy Thai-style spaghetti with bamboo shoots and dried chili—simple to prepare with just a few ingredients. Additional tips: You can add any topping that your want such as Fruit Vegetable or Anything you ever have eaten before. Where can i you me buy it, Where to Buy, Where to find it: Internet Online, Supermarkets. Widely available from street food stalls, especially in durian-growing regions like, and at markets. Online: Easily ordered from platforms like Abcdefg in various grades and sizes. Caution Warning: Precautions: Do not eat raw: Raw bamboo shoots contain toxic cyanide; they must be boiled in water for 10–15 minutes to eliminate the toxin. Gout: They are high in purines; individuals with high uric acid levels or gout should avoid them. Key Additional Tips Profit Useful Benefit Available Nutrition : Bamboo shoots offer significant benefits due to their high fiber content, which aids digestion, and their low calorie count, making them ideal for weight management. Key advantages include: promoting healthy digestion (high fiber content helps relieve constipation and supports intestinal health); aiding weight management (low in energy and calories while providing a feeling of fullness); and being rich in minerals (containing Vitamin A and Vitamin C, which provide antioxidant properties). And the finally then You can eat it and Sell it to the Merchant or Customer with Who people you Know Knew known, i hope you have fun and enjoy it.
ClickMeSeeAllFull
ClickMeSeeOnMoreDetail
ClickMeSeeOnMorePictureImage
ClickMeSeeOnMoreVideo
Vegetable: Processer Processed Processing food Menu: 5.Asparagus Bamboo Shoot Bake Butter Cheese Milk
Method: All Works: Asparagus Bamboo Shoot Bake Butter Cheese Milk
Method: How to make made cook: Recipe Procedure: Method: All Works: Asparagus Bamboo Shoot Bake Butter Cheese Milk Materials Ingredients: 15–20 fresh asparagus spears, 2 tablespoons melted butter, 3–4 tablespoons fresh milk or whipping cream, shredded mozzarella or cheddar cheese (to taste), and a pinch of salt and ground black pepper (for seasoning). Key Preparation Directions Instructions Methods: 1. Prepare the asparagus: Wash the asparagus thoroughly, trim off the tough woody ends, and lightly peel the lower stems to remove any fibrous texture. Blanch the asparagus: Blanch the asparagus in boiling water with a pinch of salt for about 2–3 minutes, then immediately transfer it to an ice-water bath to preserve its vibrant green color and crisp texture. Arrange for baking: Arrange the asparagus in an oven-safe tray or dish. 2. Pour over the butter-milk sauce: Combine the melted butter and fresh milk, then season with a little salt and pepper. Pour the mixture over the prepared asparagus. 3. Sprinkle cheese: Sprinkle shredded mozzarella cheese over the asparagus to taste. 4. Bake: Place in an oven at 180–200°C and bake for approximately 10 minutes, or until the cheese melts into a golden yellow color and releases a fragrant aroma. Summary Summation Notes: You can easily prepare butter-milk-cheese baked asparagus (or any similar cheese-baked dish) using an oven or an air fryer by roasting fresh asparagus with butter and milk for a rich, aromatic, and delicious flavor. Additional tips: You can add any topping that your want such as Fruit Vegetable or Anything you ever have eaten before. Where can i you me buy it, Where to Buy, Where to find it: Internet Online, Supermarkets. Widely available from street food stalls, especially in durian-growing regions like, and at markets. Online: Easily ordered from platforms like Abcdefg in various grades and sizes. Caution Warning: Precautions: Do not eat raw: Raw bamboo shoots contain toxic cyanide; they must be boiled in water for 10–15 minutes to eliminate the toxin. Gout: They are high in purines; individuals with high uric acid levels or gout should avoid them. Key Additional Tips Profit Useful Benefit Available Nutrition : Bamboo shoots offer significant benefits due to their high fiber content, which aids digestion, and their low calorie count, making them ideal for weight management. Key advantages include: promoting healthy digestion (high fiber content helps relieve constipation and supports intestinal health); aiding weight management (low in energy and calories while providing a feeling of fullness); and being rich in minerals (containing Vitamin A and Vitamin C, which provide antioxidant properties). And the finally then You can eat it and Sell it to the Merchant or Customer with Who people you Know Knew known, i hope you have fun and enjoy it.
ClickMeSeeAllFull
ClickMeSeeOnMoreDetail
ClickMeSeeOnMorePictureImage
ClickMeSeeOnMoreVideo
Vegetable: Processer Processed Processing food Menu: 6.Asparagus Bamboo Shoot Griller
Method: All Works: Asparagus Bamboo Shoot Griller
Method: How to make made cook: Recipe Procedure: Method: All Works: Asparagus Bamboo Shoot Griller Materials Ingredients: Fresh bamboo shoots (choose ones that aren't too mature); fine salt (a small amount to sprinkle for aroma or for seasoning to taste); charcoal stove or grill. Key Preparation Directions Instructions Methods: (Caution: If using fresh bamboo shoots and you are unsure if they are fully cooked, boil them in boiling water for at least 15-30 minutes before cooking to ensure safety.) 1. Prepare the bamboo shoots: Peel off the tough or dirty outer layers of the fresh bamboo shoots and wash them thoroughly. 2. Grilling: Place the bamboo shoots on a grill grate over low to medium heat (using charcoal). Turn them frequently until the outer skin is charred and the flesh inside is tender and aromatic. 3. Peel and clean: Once cooked, set aside to cool slightly. Then, peel off the charred outer layer, leaving only the creamy-white bamboo shoot flesh inside. 4. Preparation or storage: You can shred the bamboo shoots into strips (creating a fibrous texture) for use in other dishes—such as bamboo shoot salad (*sup nor mai*)—or store them in a food preservation bag. Summary Summation Notes: Here are the simple steps for grilling (or roasting) bamboo shoots to make them aromatic, delicious, and safe: Additional tips: You can add any topping that your want such as Fruit Vegetable or Anything you ever have eaten before. Where can i you me buy it, Where to Buy, Where to find it: Internet Online, Supermarkets. Widely available from street food stalls, especially in durian-growing regions like, and at markets. Online: Easily ordered from platforms like Abcdefg in various grades and sizes. Caution Warning: Precautions: Do not eat raw: Raw bamboo shoots contain toxic cyanide; they must be boiled in water for 10–15 minutes to eliminate the toxin. Gout: They are high in purines; individuals with high uric acid levels or gout should avoid them. Key Additional Tips Profit Useful Benefit Available Nutrition : Bamboo shoots offer significant benefits due to their high fiber content, which aids digestion, and their low calorie count, making them ideal for weight management. Key advantages include: promoting healthy digestion (high fiber content helps relieve constipation and supports intestinal health); aiding weight management (low in energy and calories while providing a feeling of fullness); and being rich in minerals (containing Vitamin A and Vitamin C, which provide antioxidant properties). And the finally then You can eat it and Sell it to the Merchant or Customer with Who people you Know Knew known, i hope you have fun and enjoy it.
ClickMeSeeAllFull
ClickMeSeeOnMoreDetail
ClickMeSeeOnMorePictureImage
ClickMeSeeOnMoreVideo
Vegetable: Processer Processed Processing food Menu: 7.Asparagus Bamboo Shoot Roaster
Method: All Works: Asparagus Bamboo Shoot Roaster
Method: How to make made cook: Recipe Procedure: Method: All Works: Asparagus Bamboo Shoot Roaster Materials Ingredients: Fresh bamboo shoots: Peel and wash thoroughly. Salt: An appropriate amount for sprinkling during roasting. Clean water: For adding later during boiling. Key Preparation Directions Instructions Methods: (Caution: If using fresh bamboo shoots and you are unsure if they are fully cooked, boil them in boiling water for at least 15 minutes before cooking for safety.) 1. Prepare the bamboo shoots: Cut or shred the fresh bamboo shoots into strips or pieces as desired. 2. Dry-roasting with salt: Heat a pan and add the bamboo shoots. Sprinkle with salt and dry-roast without adding any water; the heat will help soften the bamboo shoots and reduce their toughness. 3. Add water: Once the bamboo shoots begin to soften, add a little clean water and simmer for a short while longer. 4. Rinse and use: Scoop out or drain the cooking water, rinse again with clean water, and it is ready to be used in curry or stir-fry dishes. Summary Summation Notes: Roasting bamboo shoots with salt is a method used to soften the flesh and reduce bitterness or astringency before using them in a curry. Additional tips: You can add any topping that your want such as Fruit Vegetable or Anything you ever have eaten before. Where can i you me buy it, Where to Buy, Where to find it: Internet Online, Supermarkets. Widely available from street food stalls, especially in durian-growing regions like, and at markets. Online: Easily ordered from platforms like Abcdefg in various grades and sizes. Caution Warning: Precautions: Do not eat raw: Raw bamboo shoots contain toxic cyanide; they must be boiled in water for 10–15 minutes to eliminate the toxin. Gout: They are high in purines; individuals with high uric acid levels or gout should avoid them. Key Additional Tips Profit Useful Benefit Available Nutrition : Bamboo shoots offer significant benefits due to their high fiber content, which aids digestion, and their low calorie count, making them ideal for weight management. Key advantages include: promoting healthy digestion (high fiber content helps relieve constipation and supports intestinal health); aiding weight management (low in energy and calories while providing a feeling of fullness); and being rich in minerals (containing Vitamin A and Vitamin C, which provide antioxidant properties). And the finally then You can eat it and Sell it to the Merchant or Customer with Who people you Know Knew known, i hope you have fun and enjoy it.
ClickMeSeeAllFull
ClickMeSeeOnMoreDetail
ClickMeSeeOnMorePictureImage
ClickMeSeeOnMoreVideo
Vegetable: Processer Processed Processing food Menu: 8.Asparagus Bamboo Shoot Dip Flour Fry
Method: All Works: Asparagus Bamboo Shoot Dip Flour Fry
Method: How to make made cook: Recipe Procedure: Method: All Works: Asparagus Bamboo Shoot Dip Flour Fry Materials Ingredients: 300g boiled bamboo shoots (shredded or cut into bite-sized pieces), 1 cup ready-made crispy frying batter mix, 1/2 cup ice-cold water (helps the batter stay crispy longer), vegetable oil for frying, salt(to taste). Key Preparation Directions Instructions Methods: (Caution: If using fresh bamboo shoots and you are unsure if they are fully cooked, boil them in boiling water for at least 15 minutes before cooking for safety.) 1. Prepare the bamboo shoots: Shred the boiled bamboo shoots into long strips, or use a fork to scrape them into strips or sticks, making them easy to bite and allowing them to absorb the batter well. 2. Prepare the batter: Toss the prepared bamboo shoots with the crispy frying flour, or mix the crispy frying flour with ice-cold water, stirring until smooth and free of lumps. 3. First fry: Light the fire and heat the wok with enough oil to submerge the ingredients halfway; set the heat to medium-high. Add the flour-coated bamboo shoots to the wok and fry for 1–5 minutes—or until the batter turns golden brown and crispy—then set aside. 4. Second frying: Heat oil in a pan over medium heat. Once the oil is hot, toss the bamboo shoots in the flour mixture and fry for 1–5 minutes (depending on preference) until golden brown and crispy. Remove from the pan and let drain on a wire rack or paper towels. Toss thoroughly with salt before serving. Summary Summation Notes: Here is an easy way to make crispy, delicious batter-fried bamboo shoots by preparing the bamboo shoots and mixing the crispy frying batter. Additional tips: You can add any topping that your want such as Fruit Vegetable or Anything you ever have eaten before. Where can i you me buy it, Where to Buy, Where to find it: Internet Online, Supermarkets. Widely available from street food stalls, especially in durian-growing regions like, and at markets. Online: Easily ordered from platforms like Abcdefg in various grades and sizes. Caution Warning: Precautions: Do not eat raw: Raw bamboo shoots contain toxic cyanide; they must be boiled in water for 10–15 minutes to eliminate the toxin. Gout: They are high in purines; individuals with high uric acid levels or gout should avoid them. Key Additional Tips Profit Useful Benefit Available Nutrition : Bamboo shoots offer significant benefits due to their high fiber content, which aids digestion, and their low calorie count, making them ideal for weight management. Key advantages include: promoting healthy digestion (high fiber content helps relieve constipation and supports intestinal health); aiding weight management (low in energy and calories while providing a feeling of fullness); and being rich in minerals (containing Vitamin A and Vitamin C, which provide antioxidant properties). And the finally then You can eat it and Sell it to the Merchant or Customer with Who people you Know Knew known, i hope you have fun and enjoy it.
ClickMeSeeAllFull
ClickMeSeeOnMoreDetail
ClickMeSeeOnMorePictureImage
ClickMeSeeOnMoreVideo
Vegetable: Processer Processed Processing food Menu: 9.Asparagus Bamboo Shoot Crispy Chips Stick on in Cheese Powder
Method: All Works: Asparagus Bamboo Shoot Crispy Chips Stick on in Cheese Powder
Method: How to make made cook: Recipe Procedure: Method: All Works: Asparagus Bamboo Shoot Crispy Chips Stick on in Cheese Powder Materials Ingredients: 300g boiled bamboo shoots (shredded or cut into bite-sized pieces), 1 cup ready-made crispy frying batter mix, 1/2 cup ice-cold water (helps the batter stay crispy longer), vegetable oil for frying, cheese powder(to taste). Key Preparation Directions Instructions Methods: (Caution: If using fresh bamboo shoots and you are unsure if they are fully cooked, boil them in boiling water for at least 15 minutes before cooking for safety.) 1. Prepare the bamboo shoots: Shred the boiled bamboo shoots into long strips, or use a fork to scrape them into strips or sticks, making them easy to bite and allowing them to absorb the batter well. 2. Prepare the batter: Toss the prepared bamboo shoots with the crispy frying flour, or mix the crispy frying flour with ice-cold water, stirring until smooth and free of lumps. 3. First fry: Light the fire and heat the wok with enough oil to submerge the ingredients halfway; set the heat to medium-high. Add the flour-coated bamboo shoots to the wok and fry for 1–5 minutes—or until the batter turns golden brown and crispy—then set aside. 4. Second frying: Heat oil in a pan over medium heat. Once the oil is hot, toss the bamboo shoots in the flour mixture and fry for 1–5 minutes (depending on preference) until golden brown and crispy. Remove from the pan and let drain on a wire rack or paper towels. Toss thoroughly with cheese powder before serving. Summary Summation Notes: Here is an easy way to make crispy, delicious batter-fried bamboo shoots by preparing the bamboo shoots and mixing the crispy frying batter. Additional tips: You can add any topping that your want such as Fruit Vegetable or Anything you ever have eaten before. Where can i you me buy it, Where to Buy, Where to find it: Internet Online, Supermarkets. Widely available from street food stalls, especially in durian-growing regions like, and at markets. Online: Easily ordered from platforms like Abcdefg in various grades and sizes. Caution Warning: Precautions: Do not eat raw: Raw bamboo shoots contain toxic cyanide; they must be boiled in water for 10–15 minutes to eliminate the toxin. Gout: They are high in purines; individuals with high uric acid levels or gout should avoid them. Key Additional Tips Profit Useful Benefit Available Nutrition : Bamboo shoots offer significant benefits due to their high fiber content, which aids digestion, and their low calorie count, making them ideal for weight management. Key advantages include: promoting healthy digestion (high fiber content helps relieve constipation and supports intestinal health); aiding weight management (low in energy and calories while providing a feeling of fullness); and being rich in minerals (containing Vitamin A and Vitamin C, which provide antioxidant properties). And the finally then You can eat it and Sell it to the Merchant or Customer with Who people you Know Knew known, i hope you have fun and enjoy it.
ClickMeSeeAllFull
ClickMeSeeOnMoreDetail
ClickMeSeeOnMorePictureImage
ClickMeSeeOnMoreVideo
Vegetable: Processer Processed Processing food Menu: 10.Asparagus Bamboo Shoot Crispy Chips Stick on in BBQ Barbeque Powder
Method: All Works: Asparagus Bamboo Shoot Crispy Chips Stick on in BBQ Barbeque Powder
Method: How to make made cook: Recipe Procedure: Method: All Works: Asparagus Bamboo Shoot Crispy Chips Stick on in BBQ Barbeque Powder Materials Ingredients: 300g boiled bamboo shoots (shredded or cut into bite-sized pieces), 1 cup ready-made crispy frying batter mix, 1/2 cup ice-cold water (helps the batter stay crispy longer), vegetable oil for frying, BBQ Barbeque powder(to taste). Key Preparation Directions Instructions Methods: (Caution: If using fresh bamboo shoots and you are unsure if they are fully cooked, boil them in boiling water for at least 15 minutes before cooking for safety.) 1. Prepare the bamboo shoots: Shred the boiled bamboo shoots into long strips, or use a fork to scrape them into strips or sticks, making them easy to bite and allowing them to absorb the batter well. 2. Prepare the batter: Toss the prepared bamboo shoots with the crispy frying flour, or mix the crispy frying flour with ice-cold water, stirring until smooth and free of lumps. 3. First fry: Light the fire and heat the wok with enough oil to submerge the ingredients halfway; set the heat to medium-high. Add the flour-coated bamboo shoots to the wok and fry for 1–5 minutes—or until the batter turns golden brown and crispy—then set aside. 4. Second frying: Heat oil in a pan over medium heat. Once the oil is hot, toss the bamboo shoots in the flour mixture and fry for 1–5 minutes (depending on preference) until golden brown and crispy. Remove from the pan and let drain on a wire rack or paper towels. Toss thoroughly with BBQ Barbeque powder before serving. Summary Summation Notes: Here is an easy way to make crispy, delicious batter-fried bamboo shoots by preparing the bamboo shoots and mixing the crispy frying batter. Additional tips: You can add any topping that your want such as Fruit Vegetable or Anything you ever have eaten before. Where can i you me buy it, Where to Buy, Where to find it: Internet Online, Supermarkets. Widely available from street food stalls, especially in durian-growing regions like, and at markets. Online: Easily ordered from platforms like Abcdefg in various grades and sizes. Caution Warning: Precautions: Do not eat raw: Raw bamboo shoots contain toxic cyanide; they must be boiled in water for 10–15 minutes to eliminate the toxin. Gout: They are high in purines; individuals with high uric acid levels or gout should avoid them. Key Additional Tips Profit Useful Benefit Available Nutrition : Bamboo shoots offer significant benefits due to their high fiber content, which aids digestion, and their low calorie count, making them ideal for weight management. Key advantages include: promoting healthy digestion (high fiber content helps relieve constipation and supports intestinal health); aiding weight management (low in energy and calories while providing a feeling of fullness); and being rich in minerals (containing Vitamin A and Vitamin C, which provide antioxidant properties). And the finally then You can eat it and Sell it to the Merchant or Customer with Who people you Know Knew known, i hope you have fun and enjoy it.
ClickMeSeeAllFull
ClickMeSeeOnMoreDetail
ClickMeSeeOnMorePictureImage
ClickMeSeeOnMoreVideo
Animal Poison: Discovery World Wide Life Animal Menu: 1.Centipede Bug Poison Animal Poison Animal
Dangerous Often See in Daily Routine: Method Procedure Management All Works: Centipede Bug Poison Animal
First Aid Instructions Treatment Cure Methods: Treatment for centipede envenomation involves cleaning the wound and administering pain medication; antibiotics and a tetanus vaccine may also be given. Caution: Do not use a sharp object to cut the wound, do not use your mouth to suck out the venom, and do not apply herbs or unclean substances to the wound, as this poses a risk of bacterial infection. First Aid Instructions: If bitten by a centipede, immediately wash the wound with clean water and soap. Then, apply a cold compress to alleviate pain and seek medical attention if symptoms are severe. Wash the wound: Clean the bitten area with clean water and mild soap; do not use alcohol or apply ammonia unnecessarily. Apply a cold compress: Use a cold pack or ice wrapped in a clean cloth; apply for approximately 10 minutes at a time, alternating with a 10-minute break, to help reduce pain and swelling. Take medication for symptom relief: If there is pain, you may take paracetamol. Caution: Do not use a sharp object to cut the wound, do not use your mouth to suck out the venom, and do not apply herbs or unclean substances to the wound, as this poses a risk of bacterial infection. Souce Place Live Any Wherever can i you me See it: Centipedes are commonly found in dark, damp areas that offer easy concealment, such as under rocks, woodpiles, in drains, and in humid, secluded corners indoors. Locations where they are found outdoors and in nature include: under rocks, piles of decaying leaves, or rotting wood; underground or in damp soil; and in tall grass or dense vegetation. Indoors and within buildings, they are found in: drains and sinks (common entry points via piping); damp nooks, under sinks, or in crawl spaces; wall cracks and gaps beneath doors or windows; and under cabinets, beds, or in humid bedrooms. Protection From: You can prevent centipedes from entering your home by blocking entry points, eliminating moisture, and using scents or substances that centipedes dislike. To prevent and repel centipedes, seal entry points: install insect screens over drains, apply weatherstripping to door and window edges, and fill cracks in the walls. Sprinkle quicklime: scatter quicklime around the house or in damp areas; its alkaline and drying properties deter centipedes from crossing over it. Use pungent-smelling substances: Spray vinegar, wood vinegar, or peppermint essential oil in corners and crevices. Keep the home tidy: Avoid piling items on the floor to eliminate dark, hidden spots, and get rid of small insects that serve as food for centipedes. Attribute Behavior Time Food For Animal: Centipedes are venomous predators that prefer humid environments and are nocturnal. Their primary foraging behavior involves hunting prey—such as cockroaches, ants, or small insects—at night, while they hide in dark corners during the day. Regarding their habitat preferences, they favor damp, poorly ventilated, and muggy areas, such as beneath piles of laundry, inside drains, under flowerpots, or in cluttered nooks within the home. They possess keen senses for detecting odors and heat, allowing them to effectively locate prey or sources of moisture. Care for offspring: Mother centipedes closely tend to their eggs and larvae, curling their bodies around them for protection until the young are able to fend for themselves. Centipedes reproduce sexually; however, the male does not engage in direct sperm insertion. Instead, he deposits a spermatophore (a packet containing sperm) on the ground for the female to collect for fertilization. The reproductive process begins with attraction and courtship: centipedes are typically solitary creatures that congregate only during the mating season. The female releases chemicals known as pheromones to attract the male. Upon approaching, the pair use their antennae and legs to touch one another in a manner resembling a dance. Sperm transfer: The male produces a silk pad or a sperm-containing sac (spermatophore) and deposits it on a surface; the female then approaches and collects this sac into her own reproductive tract to fertilize her eggs. Egg-laying and brood care: After fertilization, the female seeks a moist, sheltered spot to lay her eggs. She coils her body around them to provide protection and maintain moisture, guarding and tending to the eggs until they hatch. Centipedes produce approximately 10 to 60 offspring per brood (though some species may lay up to 100–150 eggs, either in a single batch or over the course of the breeding season). Egg-laying and brood care: Female centipedes lay their eggs in damp environments, such as beneath rocks, under tree bark, or in secure soil crevices. Protection: The mother curls her body around the eggs and offspring to shield them from danger and fungal growth until the young hatch and become self-sufficient. Indoor sightings: Discovering a large number of young centipedes (dozens) emerging usually indicates the presence of a nest or a mother centipede nearby. Centipedes are carnivores that use venomous fangs to subdue their prey. Their diet includes small insects (such as crickets, cockroaches, flies, and various larvae), small animals (such as frogs, small amphibians, or small reptiles found in damp areas), and other meat sources (whether in captivity or the wild, they can consume meat scraps, such as pork). Regarding their foraging habits, centipedes typically hunt at night and hide in cool, dark, and damp places during the day. Medical Medicine Professsion: Takhab 5 Tua (Five Centipedes) herbal remedy is a traditional herbal product formulated to relieve coughing and soothe the throat. Product Information and Key Ingredients: It does not contain actual centipedes but utilizes a formula combining Thai and Chinese herbs. Key ingredients—such as *Ya Dam* (an extract from plants in the *Aloe* family)—provide a bitter taste and anti-inflammatory properties. Active Component: Collaborative studies have identified the natural compound pyrogallol, which inhibits and eliminates over 99.9% of the bacteria causing pharyngitis (sore throat) within 5 minutes. Key products: Cough lozenges (available in sachets and tins) in four flavors: Herbal, Plum, Mint, and Lemongrass; Cough spray for quick, convenient oral application and throat soothing; Takabb 5-Centipede Brand Inhaler featuring a new formula that combines camphor, menthol, and borneol. Rate Cost Per Money SuperMarket on The Internet Online: Live centipedes / fresh and dried centipedes (for medicinal use or as pets). Price data based on interviews with farmers (via Thairath): Live centipedes (4–6 inches): 5–50 Baht per piece (depending on size and species); Frozen centipedes: 50 Baht per piece or approximately 500 Baht per kilogram; Dried centipedes (for export): Approximately 3,000–10,000 Baht per kilogram. Food Process Trending For Restuarant: - Key Timeline Evolution Adventure: Centipedes were among the first invertebrates to move onto land and breathe atmospheric oxygen, having evolved over a period of more than 400 million years—appearing long before the dawn of the dinosaur era. Timeline and Key Evolutionary Milestones of Centipedes Over 400 million years ago: Centipedes and their Myriapod ancestors emerged and adapted to life on land. Evolution of venom: During the first 50 million years of their evolutionary history, centipede venom consisted of only about four simple components. The diversification of venom into specific types and the occurrence of horizontal gene transfer (involving bacteria, fungi, and oomycetes) took place only after the five extant orders of centipedes had already evolved. Evolutionary Classification: The subclass Chilopoda (centipedes and their relatives) is divided into two main groups based on the position of their respiratory openings (spiracles): Notostigmophora (e.g., Scutigeromorpha), where the spiracles are located on the dorsal side; and Pleurostigmophora, a group with spiracles located on the sides of the body, featuring deeper and more complex respiratory structures. Evolution of Specialized Organs (Forcipules): The first pair of legs (maxillipeds) has evolved into forcipules—claw-like or pincer-like venomous appendages situated beneath the head. Although not true mouthparts, they are specifically adapted for grasping prey and injecting venom. Centipedes are predatory animals that play a beneficial role in pest control. As carnivores, they feed on small insects, insect eggs, mites, and aphids, thereby reducing pest populations and maintaining ecological balance by helping to regulate the numbers of other small creatures in nature. And the finally then You can eat it and Sell it to the Merchant or Customer with Who people you Know Knew known, i hope you have fun and enjoy it.
ClickMeSeeAllFull
ClickMeSeeOnMoreDetail
ClickMeSeeOnMorePictureImage
ClickMeSeeOnMoreVideo
Animal Poison: Discovery World Wide Life Animal Menu: 2.King cobra Snake Poison Animal Poison Animal
Dangerous Often See in Daily Routine: Method Procedure Management All Works: King cobra Snake Poison Animal
First Aid Instructions Treatment Cure Methods: The best and most correct way to treat king cobra envenomation is to rush the patient to the hospital immediately to receive antivenom. King cobra venom is a neurotoxin that causes muscle weakness, tongue rigidity, and foaming at the mouth, and can lead to respiratory arrest. First aid: Stay calm and try to minimize body movement to prevent the venom from spreading rapidly into the bloodstream. Wash the wound with clean water and soap. Immobilize the bitten area and keep it at or below heart level. Remove jewelry—such as rings or bracelets—from the affected area, as swelling may occur later. Seek medical attention at a hospital as soon as possible. Warning Caution: Strictly avoid applying a tourniquet or binding the area too tightly, as this can cut off blood supply to the extremities and cause tissue death. Do not attempt to suck out the blood, cut the wound, use sharp objects on the wound, or apply heat (such as a flame). Do not apply substances like toothpaste, ash, alcohol, or herbal remedies to the wound. Do not consume alcohol or take medications that have a depressant effect. Souce Place Live Any Wherever can i you me See it: The king cobra is primarily found in South Asia, Southeast Asia, and southern China. Natural forest habitats include tropical rainforests, dense forests, open woodlands, bamboo forests, and dense mangrove forests. Regarding terrain, they inhabit areas near streams, flatlands, and mountainous regions at elevations up to 2,000 meters above sea level. In terms of adaptation, they are often found near water sources and agricultural areas bordering forests. For nesting, the female typically uses materials such as leaves or bamboo clumps to construct a nest for laying and incubating her eggs. Protection Save From: The safest way to prevent encounters with king cobras and handle such situations is to maintain a safe distance, stay calm, and avoid approaching or provoking them. To prevent king cobras from entering your home and surrounding areas, eliminate food sources: king cobras primarily feed on other snakes and rodents, so maintaining cleanliness and removing hiding spots for these animals helps reduce the likelihood of a snake entering. Manage the area around the house: Keep the grass short, clear away overgrown vegetation, keep belongings organized, and ensure the garden is not overly dense or cluttered to eliminate dark hiding spots. Seal off entry points: Plug any holes, cracks, or gaps around the house that snakes could use to gain access. Use strong odors for relief: Pouring a mixture of kerosene or sulfur powder and water around the perimeter of the house (at least once a month) may help repel or deter them initially, but this should be done with caution. What to do when encountering a king cobra at close range (3–5 meters): Stand still; do not move or run away. By nature, snakes fear humans and will usually flee first, unless they are protecting a nest or eggs, or feel cornered. Avoid confrontation: If you are being chased or encounter one at close range, try throwing a hat or jacket in front of the snake to distract it. Strictly avoid hitting or attempting to catch the snake yourself: Approaching or trying to harm it may cause the snake to feel threatened and strike. Call for professional help: If a snake is hiding in your home or living area, keep an eye on it from a safe distance and call a rescue team. Behavior Attribute Time Food For Animal: The primary diet of the king cobra consists of other snakes—both venomous and non-venomous—such as cobras, rat snakes, and trinket snakes, as well as larger snakes or even members of their own species. Diet and Feeding Habits: Other snakes—these are a favorite and primary food source, earning the species the nickname "King of Snakes." Other reptiles—in certain areas, such as southern Thailand, King Cobras may supplement their diet with small monitor lizards (such as the Bengal monitor or Asian water monitor) when snakes are scarce. Small mammals—such as rats or rabbits; these are rarely consumed, as the snakes primarily target cold-blooded animals or other snakes. Primary diet: Other snake species—both venomous and non-venomous—such as rat snakes, radiated rat snakes, cobras, and reticulated pythons; they even prey on other king cobras. Other food sources (when prey is scarce): Small animals such as rats, frogs, or monitor lizards. King Cobras are generally peace-loving and tend to flee quickly upon encountering humans; however, when threatened, they become aggressive, spreading their hoods and rearing up—lifting about one-third of their body length—to intimidate the intruder. Key behavioral traits include their foraging habits: they hunt during the day (avoiding intense heat) and at dusk. Their diet consists primarily of other snakes, such as rat snakes, radiated rat snakes, and even small reticulated pythons. Self-defense: When startled or threatened, it raises its head high, spreads its hood, hisses loudly, and fixes its gaze on the threat; however, it is naturally wary of humans and prefers to flee unless cornered. Nesting and egg care: It is one of the few snake species in which the female builds a nest out of leaves and guards the eggs until they hatch. Benefit Professsion of: King cobras play a vital role in maintaining ecological balance by helping to control the populations of other snake species in the wild. Their benefits include: maintaining natural balance—as king cobras primarily feed on other snakes (including both venomous and non-venomous varieties), they prevent the overpopulation of other snake species; and preserving the food chain—acting as an apex predator in forest ecosystems, they help ensure the proper functioning of the animal life cycle. Medical benefits: King cobra venom affects the nervous system; scientists and medical professionals utilize it in research to produce antivenom, as well as to analyze the toxins for the future development of therapeutic drugs. Rate Cost Per Money SuperMarket on The Internet Online: A live king cobra is a protected wildlife species; trading one is illegal. However, if referring to a statue for worship or a plant, prices start from 1 to 100 Dollar. 1. Live King Cobra – Legal Status: Protected wildlife; buying and selling are strictly prohibited. Black Market Price: No legal price exists; illicit sales are illegal. 2. King Cobra Statue (for vow fulfillment or worship) – Price: Approximately 9–10 Dollar per piece. Where to buy: Available online via.... Wan Phaya Chong-ang (plant associated with traditional beliefs) – Price: Approximately 1–10 Dollar per plant or rhizome. Breeding Farming Fertilization Hybridization Reproduction : The breeding season for king cobras occurs in early summer, between March and April (or roughly January to May, depending on the region), and they reproduce by laying eggs once a year. King Cobra reproductive behavior and processes—combat for mates: During the breeding season, male King Cobras exhibit increased aggression and territoriality. They engage in ritualized combat, intertwining their bodies and wrestling to assert dominance and secure the right to mate with a female (this is a display of strength rather than a fight to the death). Approaching the female: The male slithers toward a female ready to mate; multiple males may approach a single female simultaneously. Nest building and egg-laying: The female king cobra lays approximately 20–30 eggs at a time (up to a maximum of about 45). Uniquely, unlike most venomous snakes, she meticulously gathers leaves and twigs to construct a nest, allowing the heat generated by the decomposing vegetation to incubate the eggs. Nest guarding: The female coils atop the nest to guard the eggs throughout the incubation period, while the male remains nearby; during this time, the king cobra becomes highly aggressive and fiercely defends its territory against intruders. King cobras lay approximately 20–40 eggs per clutch (though up to 40–50 eggs per nest have occasionally been recorded). As egg-laying reptiles rather than live-bearers, they reproduce only once a year. The mother constructs a nest using leaves and twigs—often situated within bamboo clumps—and personally incubates and guards the eggs until they hatch. Food Process Trending For Restuarant: - Key Timeline Evolution Adventure Story of: The king cobra (scientific name: *Ophiophagus hannah*) is the longest venomous snake in the world and is classified within the group of advanced snakes (Alethinophidia). Regarding its discovery and scientific naming, in 1836, the Danish naturalist Theodor Edward Cantor described four king cobra specimens and assigned the scientific name *Hamadryas hannah* (or *Hamadryad*). Change of genus: It was subsequently reclassified into the genus *Ophiophagus*—derived from Greek words meaning "snake-eating"—reflecting its distinctive behavior of hunting and consuming other snakes. Phylogenetic relationships: Genetic analysis using cytochrome b and multi-gene data reveals that the king cobra represents an early-diverging lineage leading to mambas, rather than being closely related to the typical cobras of the genus *Naja*. And the finally then You can eat it and Sell it to the Merchant or Customer with Who people you Know Knew known, i hope you have fun and enjoy it.
ClickMeSeeAllFull
ClickMeSeeOnMoreDetail
ClickMeSeeOnMorePictureImage
ClickMeSeeOnMoreVideo
Animal Poison: Discovery World Wide Life Animal Menu: 3.Viper Venom Color Cobra Snake Poison Animal
Dangerous Often See in Daily Routine: Method Procedure Management All Works: Viper Venom Color Cobra Snake Poison Animal
First Aid Instructions Treatment Cure Methods: The treatment and first aid for a bite by a white-lipped pit viper involve staying calm, minimizing body movement, and washing the wound with clean water and soap, followed by immediate transport to a hospital for medical assessment and the administration of antivenom. First aid: Stay calm and still; try to minimize movement of the bitten area to prevent the venom from spreading rapidly into the bloodstream. Position the body: Keep the bitten area at or below heart level. Clean the wound: Gently wash the wound with clean water and soap; do not apply ash, toothpaste, alcohol, or any herbal remedies to the wound. Remove jewelry: Promptly remove rings, watches, or jewelry around the wound before the hand or leg swells. Hospital-based medical treatment and diagnosis: Doctors will draw blood to assess clotting function (e.g., Venous Clotting Time or VCT) and measure platelet counts. Administration of antivenom: The green pit viper possesses hematotoxic venom that prevents blood clotting or causes low platelet counts. Doctors will consider administering green pit viper antivenom based on the severity of symptoms (typically around 3 vials, or at the physician's discretion). Warning Caution: Important prohibitions: Do not make incisions, do not suck out the blood with your mouth, do not apply a tourniquet, and do not consume alcohol. Souce Place Live Any Wherever can i you me See it: The White-lipped Pit Viper typically inhabits low bushes, tree branches, clumps of grass, and overgrown ground areas. It is also found in the vicinity of homes—such as in eaves, woodpiles, or plant pots. Regarding its habitat and behavior, it favors remaining motionless to camouflage itself among green branches, leaves, or bushes. Near houses, it is frequently encountered under the house, in eaves, and amidst woodpiles or plant pots. It is nocturnal, hunting both in trees and on the ground. Protection Save From: You can prevent White-lipped Pit Vipers from entering your property by modifying the environment around your home to make it less hospitable for them to live or hide. Since these snakes prefer trees, bushes, and damp, secluded corners, preventive measures include: trimming tree branches and shrubs—specifically those extending toward the house or windows—to prevent snakes from using them as pathways to the roof or interior; and eliminating food sources by controlling populations of rodents and small animals, which are the snake's preferred prey. Clear away clutter: Tidy up belongings and organize items; avoid leaving dark corners or piles of damp debris around the house. Use strong-smelling oils: Pour pungent substances—such as kerosene, turpentine, or engine oil—around high-risk areas or the perimeter of the house to deter snakes from lingering nearby. What to do if you encounter a White-lipped pit viper: Stay calm and maintain a safe distance—this is a venomous snake (affecting the circulatory system), but it generally does not attack unless threatened. Observe its location: Back away and keep an eye on where it slithers to hide. Call for help: Do not attempt to catch or strike the snake yourself; instead, call a rescue hotline. Behavior Attribute Time Food For Animal: The White-lipped Pit Viper is characterized by slow, deliberate movement rather than speed; it has an aggressive temperament and is ready to strike immediately if approached. Regarding its general behavior and foraging habits, it is nocturnal. It inhabits both arboreal environments (tree branches and shrubs) and overgrown ground areas, often remaining motionless to blend into its surroundings. It typically seeks shelter in crevices under eaves, woodpiles, flowerpots, or clumps of grass near homes. Diet: Feeds on birds, mice, lizards, geckos, rodents, and amphibians. Movement: Slow-moving, but capable of striking rapidly over a considerable distance when threatened. Reproduction: Mostly gives birth to live young, typically in litters of 8–12. Benefit Professsion of: The white-lipped pit viper plays a beneficial role in the ecosystem and medicine by controlling populations of rats and rodents. Its benefits in nature include pest control—feeding on rats, birds, and lizards—and maintaining balance by helping to curb rodent infestations that damage agricultural crops. Medical benefits of snake venom research: The venom of the white-lipped pit viper affects the circulatory system. Serum production: The venom is used to study and produce antivenom. Drug development: Scientists study substances within the venom to develop medications for treating disorders related to the blood and circulatory system. Rate Cost Per Money SuperMarket on The Internet Online: The market price for White-lipped Pit Vipers (and related species) in the exotic pet trade varies widely—ranging from $1 to over $10,000 —depending on the specific species and subspecies, rarity, color morphs, and market demand. As these are venomous snakes (possessing venom ranging from mild to moderately severe, primarily affecting the circulatory system), trade is generally limited to a niche group of specialized keepers. A rough price breakdown is as follows:Common species / Easily found in Thailand: Such as the Big-eyed Pit Viper or standard native varieties; starting prices are relatively low, ranging from approximately $1 to $20. Species with unique coloration / Rare varieties: Such as Blue Morph pit vipers or those with unusual colors (e.g., the blue pit viper featured on the ENNXO page); prices start at around $100 and up. Collector-grade morphs: For specimens exhibiting exceptional or extremely rare color mutations, prices within collector circles and specialized markets can soar to the tens or even hundreds of thousands of baht, depending on buyer preference and auction outcomes. (Caution: The White-lipped Pit Viper is venomous and dangerous. Keepers must study its behavior and handling techniques, possess proper safety equipment, and ensure access to antivenom or a nearby hospital capable of handling emergencies.) Farming Breeding Fertilization Hybridization Reproduction : Generally, pit vipers of the genus *Trimeresurus* are viviparous (or ovoviviparous), meaning they give birth to live young. Regarding reproduction and gestation: they typically produce a litter of approximately 8–12 offspring (though some species or fully mature females may produce as many as 7–30). The birthing period usually occurs during the transition from the hot season to the rainy season, specifically around late July to August. Exception: While most species give birth to live young, there are reports that certain species within this group or closely related lineages (such as *Trimeresurus hageni*) are oviparous (egg-laying). Food Process Trending For Restuarant: - Key Timeline Evolution Adventure Story of: Pit vipers of the genus *Trimeresurus* diverged from the subfamily Crotalinae (within the family Viperidae) to adapt to an arboreal and shrub-dwelling lifestyle in South and Southeast Asia. Regarding their evolution, characteristics, and classification: they belong to the subfamily Crotalinae (pit vipers)—snakes that have evolved specialized organs on the sides of their heads to detect warm-blooded prey in the dark. Physical adaptations: A broad, triangular head, a slender neck, and vertical pupils facilitate ambush hunting; the green body provides camouflage amidst foliage, while the short, prehensile tail allows for a secure grip on branches. Hemotoxic venom: The evolution of venom affecting the blood-clotting system aids in the rapid digestion and processing of prey, such as birds or small rodents. And the finally then You can eat it and Sell it to the Merchant or Customer with Who people you Know Knew known, i hope you have fun and enjoy it.
ClickMeSeeAllFull
ClickMeSeeOnMoreDetail
ClickMeSeeOnMorePictureImage
ClickMeSeeOnMoreVideo
Animal Poison: Discovery World Wide Life Animal Menu: 4.Rattlesnake Sound Snake Poison Animal
Dangerous Often See in Daily Routine: Method Procedure Management All Works: Rattlesnake Sound Snake Poison Animal
First Aid Instructions Treatment Cure Methods: The most critical step in treating rattlesnake envenomation is to rush to a hospital to receive antivenin from a medical professional. First aid measures include staying calm and moving away from the snake to prevent further bites; keeping the bitten area as still as possible and positioned below heart level to slow the spread of venom; and washing the wound with clean water. Strictly avoid the following: using a tourniquet, sucking out the venom with your mouth, making incisions or cuts in the wound, and applying cold compresses to the wound. Medical treatment in the hospital involving the administration of antivenom: This is the primary, definitive treatment that neutralizes the specific snake venom. Assessment and blood tests: Doctors will consider administering painkillers or intravenous fluids and provide treatment for any accompanying symptoms. Warning Caution: If bitten by a rattlesnake, it is crucial to seek medical attention as soon as possible, as the venom is potent and potentially life-threatening. Recommended actions: Gently clean the wound and apply a bandage to slow the spread of venom, then immediately proceed to the nearest hospital or medical facility. Precautions (Strictly Prohibited Actions): Do not apply cold compresses to the wound; do not use a tourniquet; do not attempt to suck out the venom using your mouth or any device; do not cut the wound, burn it with fire, or cauterize it with a hot object; and do not consume alcohol or stimulants such as tea or coffee. Souce Place Live Any Wherever can i you me See it: Rattlesnakes are native to North, Central, and South America; they are not found in the wild in Thailand. Natural Habitat and Terrain: They prefer arid environments such as deserts, grasslands, and rocky hills. Shelters: They typically hide in rock crevices, burrows, or cliff fissures. Foraging Behavior: They primarily live and hunt on the ground rather than in trees and are generally nocturnal. Protection Save From: Preventing rattlesnakes and minimizing the risk of encounters involves two main approaches: modifying your property to keep snakes out and adopting safe behaviors when in high-risk areas. Here are the details: 1. Methods to prevent rattlesnakes from entering your property. Rattlesnakes often venture onto residential premises in search of food and warm hiding spots. Disrupting these factors is the most effective way to prevent them from entering: Eliminate food sources completely: Keep trash cans tightly sealed and do not leave pet food outdoors overnight to avoid attracting rodents, which are a favorite prey of rattlesnakes. Keep the garden clear: Maintain short grass (no more than 2 inches high) and avoid planting dense, low-growing shrubs along fences to prevent snakes from finding places to hide. Seal gaps around the house: Repair cracks, holes, or spaces beneath doors and windows, and use fine-mesh screens to cover vents and drainage pipes. Keep the area tidy: Move piles of wood, stones, or fertilizer away from the house, as these provide excellent hiding spots for snakes. Self-protection in high-risk areas (such as when hiking or gardening): Dress in a way that fully covers the body—wear loose-fitting long trousers and calf-high leather boots. Since rattlesnakes typically strike at a low level, wearing thick clothing can help reduce the amount of venom injected or prevent the fangs from penetrating the skin. Use a walking stick: Use a hiking pole or a stick to tap the ground—such as in tall grass or around rocky areas—before stepping forward; this helps check the path and provides an early warning. Stay alert for hissing or rattling sounds: Rattlesnakes shake their tails to warn of a threat. If you hear such a sound, freeze in place and slowly back away; do not make any sudden movements. Important Note: For pet owners (especially dog owners) living abroad or in areas where rattlesnakes are prevalent, a rattlesnake vaccine for dogs is available to help reduce the severity of the venom's effects in the event of a bite. If a person is bitten, strictly avoid using a tourniquet, making incisions in the wound, or attempting to suck out the venom; instead, seek immediate medical attention at the nearest hospital. Behavior Attribute Time Food For Animal: A primary behavior of the rattlesnake is shaking its tail to warn predators or humans when it feels threatened. Warning via tail-shaking: Upon sensing vibrations or perceiving danger, the snake coils its body and vibrates its keratin rattle—producing a distinctive rattling sound—to drive predators away. Hunting only when hungry: They hunt for prey solely when hungry; on average, an adult rattlesnake goes about two weeks between meals. Thermal sensing: They possess heat-sensing organs located between their eyes and nostrils, which aid in locating and hunting prey in the dark. Concealment: They typically avoid open areas and human encounters, preferring to inhabit crevices or underground spaces. Social behavior: Research indicates that they do not always prefer solitude; they also exhibit social tendencies. Benefit Professsion of: Rattlesnakes play a vital role in maintaining ecological balance. They help control rodent populations by feeding on rodents and small animals, thereby preventing overpopulation. This helps reduce the spread of diseases and protects crops; controlling rodent numbers minimizes agricultural damage and lowers the risk of rodent-borne illnesses. Natural tick control: Certain rattlesnake species consume ticks found on wildlife, helping to reduce tick populations in the environment. Medical benefits: Compounds found in rattlesnake venom are highly valuable in scientific and medical research. Role in the food chain: They serve as both predators and a food source for other predators within the ecosystem. Rate Cost Per Money SuperMarket on The Internet Online: The selling price of rattlesnakes in the exotic pet market ranges from approximately $1 to over $500. Prices depend primarily on the species, size, and the rarity of the color pattern (morph). Examples of market prices—specifically in international markets where trade is legally permitted—show that prices for common species are relatively accessible: Western/Eastern Diamondback Rattlesnake (common varieties): Price approx. $1–$100; Canebrake/Timber Rattlesnake: Price approx. $1–$500; Albino Western Diamondback: Price approx. $1–$1,000; White Speckled Rattlesnake: Price approx. $1–$2,000. Farming Breeding Fertilization Hybridization Reproduction : Rattlesnakes are viviparous animals; the eggs hatch inside the mother's body, and the female does not lay eggs to hatch externally. Reproductive details and process—Mating season: Occurs during spring or between June and August (depending on the species and region). Reproductive frequency: Female rattlesnakes mate and give birth only once every two to three years. Sperm storage: Females can store sperm within their bodies for extended periods, allowing fertilization to occur after the mating season. Gestation period: The pregnancy or egg-retention period lasts from approximately 90 days to nearly six months (varying by species). Offspring count: They give birth to approximately 5 to 20 offspring at a time (or up to 25 in some species, such as the prairie rattlesnake). Birth and Growth of Snakelets – Characteristics at Birth: Snakelets are born encased in a thin, transparent membrane. Shortly after being expelled by the mother, they use their snouts to break through the membrane and breathe. Special Abilities: Newborn snakelets are self-sufficient within minutes and possess fully functional venom glands and fangs. Formation of the rattle: At 1–2 weeks of age, the young snakes undergo their first shed, and the first segment of the rattle is formed (a new segment is added with each subsequent shed). Afterward, they disperse to forage for food on their own. Food Process Trending For Restuarant: - Key Timeline Evolution Adventure Story of: Rattlesnakes evolved their sound-producing rattle from an ancestral tail-shaking behavior used to threaten predators—a behavior that existed prior to the evolution of the rattle itself. Ancestral behavior: Rattlesnake ancestors already engaged in tail-shaking to warn of danger or deter predators, even before the rattle organ had developed. Development of the rattle: *New Scientist* reports that the rattle structure consists of modified keratin scales stacked in multiple hollow layers. Adding segments: Each time a rattlesnake sheds its skin, one keratin segment is added to its rattle. Newborn snakes: Newly hatched snakes have only a single segment at the tip of their tail and cannot yet produce a sound. General Information and Distribution (Family and Genus): Classified under the family Viperidae and the subfamily Crotalinae, comprising two main genera: *Crotalus* and *Sistrurus*. Native Range: Found exclusively in the Americas, ranging from southern Canada down to central Argentina. Distinctive Feature: Possesses infrared-sensing organs (pit organs) located between the eyes and nostrils to aid in hunting prey at night. And the finally then You can eat it and Sell it to the Merchant or Customer with Who people you Know Knew known, i hope you have fun and enjoy it.
ClickMeSeeAllFull
ClickMeSeeOnMoreDetail
ClickMeSeeOnMorePictureImage
ClickMeSeeOnMoreVideo
Animal Poison: Discovery World Wide Life Animal Menu: 5.Color Sea Snake Poison Animal
Dangerous Often See in Daily Routine: Method Procedure Management All Works: Color Sea Snake Poison Animal
First Aid Instructions Treatment Cure Methods: The most important measure for treating sea snake envenomation is to rush the patient to the hospital immediately for medical treatment, as sea snake venom is highly potent and typically causes damage to muscles (myotoxicity) and the nervous system. It is important to note that there is currently no specific antivenom available in Thailand for sea snake bites. Consequently, medical treatment focuses on close monitoring and symptomatic care—such as administering intravenous fluids to flush out toxins and prevent acute kidney failure, as well as preparing mechanical ventilation in case the patient develops muscle paralysis leading to respiratory arrest. If someone is bitten by a sea snake, please follow these correct first-aid procedures: First aid for sea snake bites 1. Stay calm and minimize the patient's movement: Immobilize the bitten area as much as possible to slow the spread of venom into the bloodstream. 2. Position the body: Keep the bitten limb at or below the level of the heart. 3. Clean the wound: Wash the wound with clean water. Pressure Immobilization: If possible, use an elastic bandage to apply firm, even pressure—wrapping from the extremity upwards to a point above the wound (ensure the wrap is snug enough to allow one finger to fit underneath). Use a splint to keep the affected limb immobilized. • Seek immediate medical attention: Transport the patient to the nearest medical facility right away. Taking a photograph of the snake to show the doctor can aid in assessment, but do not waste time trying to catch the snake. Warning Caution: Strictly Prohibited Actions • Do not suck out the venom with your mouth or use a sharp object to cut open the wound. • Do not apply a tourniquet too tightly, as this can cut off blood supply to the limb, potentially causing tissue death (necrosis). • Do not clean the wound with alcohol or harsh chemicals, and do not apply herbal poultices to the wound. • Do not consume alcohol, tea, coffee, or sedatives. Sea snake bites are extremely dangerous due to the high potency of the venom and the potential lack of immediately available specific antivenom. Precautions and guidelines when encountering a sea snake: • Do not approach or touch: Sea snakes are generally shy but often bite if handled or accidentally stepped on. • Watch out for rocky crevices: Murky water can obscure snakes hiding in these areas. • Extra caution for fishermen: Those removing fish from nets are at high risk. • Symptoms to watch for: Nausea, vomiting, swollen tongue, blurred vision, difficulty speaking or swallowing, numbness, and weakness. Symptoms may appear anywhere from 15 minutes to 9 hours after the bite. • First aid: Clean the wound with an antiseptic, such as alcohol or tincture of iodine. • Seek immediate medical attention: Do not panic; rush the patient to the nearest hospital as quickly as possible. Souce Place Live Any Wherever can i you me See it: Most sea snakes inhabit shallow tropical and subtropical waters, ranging from the eastern Pacific Ocean to the Indian Ocean. Habitat and Distribution • Coastal waters: Most sea snakes prefer shallow coastal waters and estuaries. • Coral reefs: They are frequently found along shallow coral reefs, particularly in areas less than 15 meters deep. • Rock crevices: Often hides in small cracks or beneath rocky outcrops along the coastlines of various islands. • Distribution: Found in the Indian and Pacific Oceans, but not in the Atlantic Ocean or the Caribbean Sea. Protection Save From: Sea snake encounters can be prevented by avoiding contact and remaining vigilant when in or near the water or on the beach. Prevention and what to do if you encounter one: • Avoid stepping on or touching them: Sea snakes are generally not aggressive and do not attack humans; however, they often bite if accidentally stepped on or handled. • Wear protective footwear: Wear appropriate shoes when wading in water or walking along rocky coastal areas. • Stay still if spotted: If you encounter a sea snake in the water or on the beach, remain motionless, slowly back away, and do not attempt to harm or approach it. • Beware of mating season: Sea snakes may exhibit more defensive behavior during the mating season; exercise extra caution in coral reef areas or river mouths. Behavior Attribute Time Food For Animal: Sea snakes possess physical characteristics and behaviors adapted for an aquatic lifestyle; they often float or rest motionless at the water's surface and are capable of swimming backwards using their vertically flattened, paddle-like tails. Physical Characteristics and Movement • Body Shape: Long, scaled body with a vertically flattened, paddle-like tail that aids in swimming. • Movement: Agile swimmer; capable of swimming backwards. • Respiration: Lacking gills, they must regularly surface to breathe air. They possess a long lung extending from the body to the vent and are capable of floating motionless at the water's surface to rest. Behavior and Temperament • Temperament: Generally docile, shy, and non-aggressive; they rarely exhibit aggressive behavior toward humans. • Curiosity: They are naturally curious and may sometimes swim closer to observe divers, though without any intent to cause harm. • Feeding: Forages for small fish among rock crevices or on the seabed. • Defense: Generally does not bite humans, except if accidentally stepped on or during the breeding season, when it may act defensively. Benefit Professsion of: Sea snakes are valuable for culinary use, leather products, and medical research. Food and Products • Local cuisine and traditional tonics: They are commonly prepared fresh—boiled, stir-fried, made into fish balls, or infused in liquor. They are believed to alleviate back pain, treat insomnia, and remedy digestive disorders. In Japan, they are used to make soup or are smoked. • Leather goods: Sea snake skin can be processed into various leather products. Research and Medical Applications • Toxin Research: Researchers study sea snake venom to identify toxins that specifically target brain cells and the nervous system. • Drug Development: Natural substances and animal venoms provide insights into memory-related disorders, such as Alzheimer's disease, paving the way for the development of new drugs in the future. Rate Cost Per Money SuperMarket on The Internet Online: In many countries, the legal trade or popular ownership of live venomous sea snakes does not exist. This is because true sea snakes possess highly potent venom that attacks the muscular and nervous systems; furthermore, specific antivenom is unavailable in many regions, and keeping them in a closed environment is extremely difficult. However, based on market purposes, the pricing of sea snakes and related groups can be categorized as follows: Food and Traditional Medicine Market (Dried / Fresh Sea Snakes) In the past, sea snakes were harvested in various countries for use in fish balls or leather goods, though this practice has largely ceased. However, in places like Vietnam and Okinawa (Japan), sea snakes remain a popular delicacy (prepared as shabu-shabu or soup, or sold in dried, pre-packaged form). • Export Price (Dried): Prices depend on specific agreements, size, and cleanliness. Trading typically occurs on a per-kilogram basis among dealers of traditional Chinese medicine and wild game products. Land snakes resembling sea snakes or freshwater aquatic snakes (Exotic Pets) People often mistakenly believe that sea snakes are sold as pets; however, the varieties actually available in pet markets or online are safer land or freshwater snakes, such as: • Rainbow Water Snake: Price approximately 550 – 3,000 Baht (non-venomous freshwater snake). • Corn Snake / Black Kingsnake: Average price 1,000 – 9,000+ Baht (popular land snakes; easy to keep, non-venomous). Elephant Trunk Snake: A large freshwater snake with rough, wrinkled skin resembling an elephant's trunk. It is non-venomous and lives entirely in the water. Average price: $1–$100 (often a popular choice for those interested in keeping aquatic snakes). Farming Breeding Fertilization Hybridization Reproduction : Most sea snakes give birth to live young in the water, with the exception of the sea krait group (subfamily Laticaudinae, such as the yellow-lipped sea krait), which must come ashore to lay eggs. Reproductive characteristics of sea snakes: • Fertilization: Internal; males possess paired reproductive organs known as hemipenes. • Live-bearing group (subfamily Hydrophiinae): • They live and remain in the water at all times, including during mating and giving birth. • Eggs incubate within the mother's body (ovoviviparous) until the young are fully developed and born directly into the sea. • Egg-laying group (Subfamily Laticaudinae): • e.g., Yellow-lipped sea kraits. • Must come ashore—onto sandy beaches or into rocky crevices—to mate and lay eggs. • Breeding season: • In tropical or warm-water regions, mating may occur year-round. • In cold-water regions or waters with distinct seasons, mating is limited to the warmer months. Food Process Trending For Restuarant: - Key Timeline Evolution Adventure Story of: Sea snakes evolved from venomous terrestrial ancestors belonging to the cobra family (Elapidae) and began adapting to an aquatic lifestyle approximately 6–8 million years ago. Evolution and Origins • Terrestrial origins: Snake ancestors were four-legged land animals over 60 million years ago before losing their limbs and adapting to their environment. Eventually, around 6–8 million years ago, snakes in the subfamily Hydrophiinae began to diverge and evolve into marine species within the Coral Triangle region of Southeast Asia. • Classification: Sea snakes are divided into distinct evolutionary groups: true sea snakes (subfamily Hydrophiinae), which spend their entire lives and give birth in the water; and sea kraits (subfamily Laticaudinae), which must still come ashore to lay their eggs. Physical Adaptations • Tail characteristics: A flattened, paddle-like tail that aids in swimming and agile underwater propulsion. • Respiratory system: An elongated right lung that extends along the length of the body, helping to store oxygen and regulate buoyancy. • Salt glands: Sublingual or specialized glands have evolved to excrete excess salt from the body, an adaptation necessitated by their saltwater habitat. Venom and Behavior • Venom potency: Highly potent neurotoxic venom affecting the nervous system and muscles. A single drop (0.03 ml) contains enough toxin to kill up to three adults; however, the mortality rate among bite victims is approximately 25% because sea snakes are naturally shy and non-aggressive. Habitat: They primarily inhabit shallow coastal waters in tropical and temperate regions—such as the yellow-bellied sea snake (*Pelamis platura*), the most widely distributed species, which spends its entire life in the ocean without ever coming ashore. And the finally then You can eat it and Sell it to the Merchant or Customer with Who people you Know Knew known, i hope you have fun and enjoy it.
ClickMeSeeAllFull
ClickMeSeeOnMoreDetail
ClickMeSeeOnMorePictureImage
ClickMeSeeOnMoreVideo
Animal Poison: Discovery World Wide Life Animal Menu: 6.Spider Bug Poison Animal
Dangerous Often See in Daily Routine: Method Procedure Management All Works: Spider Bug Poison Animal
First Aid Instructions Treatment Cure Methods: If bitten by a spider, immediately wash the wound with soap and clean water, and apply a cold compress to reduce swelling. First Aid Procedures • Wash the wound: Clean the bitten area with warm water or clean water and soap to prevent infection. • Apply a cold compress: Use a clean cloth soaked in cold water or an ice pack on the wound for 15 minutes at a time to alleviate pain and swelling. • Positioning: Elevate the bitten area, if possible, to reduce swelling. • Immobilization: Try not to move the bitten limb to prevent the venom from spreading more rapidly. When to seek immediate medical attention • Experiencing severe symptoms, such as intense muscle pain, cramping, chest tightness, or difficulty breathing. • Suspected bite from a highly venomous spider, such as a widow spider. • The affected person belongs to a high-risk group, such as young children, the elderly, or individuals with underlying medical conditions. If you require further information, please specify: • What symptoms are currently present? • Do you know what the spider looked like? Warning Caution: The primary precaution when encountering or protecting yourself from spiders is to avoid direct contact and remain vigilant for venomous spiders that may be hiding in dark corners of the home. Precautions and identification tips: • Observe characteristics: Venomous spiders often have very dark coloration—such as black or red—and distinct markings (e.g., an hourglass shape on the underside of the abdomen). In contrast, non-venomous spiders tend to be small with slender legs and will flee when they encounter humans. • Hiding places: Venomous spiders are commonly found in dark, dry areas, such as inside shoes or storage boxes, beneath woodpiles, or in secluded nooks and crannies. • Symptoms after a bite: A bite from a venomous spider may cause pain, swelling, redness and heat, numbness, muscle spasms, or necrotic wounds. Prevention methods • Tidy up the home: Regularly clean the house and remove spiderwebs. • Wear protective clothing: Wear long-sleeved shirts and long trousers when entering dark areas or handling piles of materials. First Aid • Immediately clean the wound with soap and water or saline solution. • Apply a cold compress to the bite area using a clean cloth; do not apply heat or rub the wound with alcohol. • Seek medical attention immediately if severe symptoms occur, such as chest tightness, difficulty breathing, intense pain, or if the wound spreads and develops necrotic tissue. Souce Place Live Any Wherever can i you me See it: Spiders prefer living in dark, secluded nooks and areas with high humidity that are rarely disturbed. Spider Habitats • Room corners and ceilings: Secluded corners under the roof, window ledges, or high ceilings where they can easily spin webs to trap insects. • Bathrooms and damp areas: Cabinet crevices, under sinks, or bathroom corners where moisture attracts small insects like mosquitoes or drain flies. • Material piles and back-of-house areas: Bushes, woodpiles, storage sheds, or beneath plant pots. • Hiding spots: Certain species, such as the house wandering spider (long-legged spider), often roam in search of prey in cabinet crevices or beneath flat surfaces without spinning webs. Protection Save From: An effective way to prevent and repel spiders is to keep the house clean, eliminating damp, dark corners, and using natural scents that spiders dislike, such as peppermint spray or vinegar. Methods to Prevent and Repel Spiders • Use strong natural scents: Mix peppermint or citronella essential oils, or a mixture of vinegar and water, and spray the solution in room corners and along window frames. • Clean regularly: Frequently vacuum and remove cobwebs from ceiling corners, cabinets, and underneath furniture to eliminate hiding spots. • Block entry points: Securely install insect screens on windows and doors, and seal any cracks or gaps in the walls. • Eliminate prey insects: Keep the home free of small insects—such as ants or cockroaches—that attract spiders. Behavior Attribute Time Food For Animal: Spider behaviors and postures vary by species, encompassing aspects such as movement, hunting, and communication. Movement and Balance • Walking and running: Spiders possess eight legs, allowing them to walk, run, or climb with agility. • Anchoring: Before leaping, jumping spiders attach a silk line to the surface to prevent falling and enable an immediate return. • Resting posture: The body lies flat against the surface, the legs are extended, and the pedipalps or front legs move slowly. Hunting behaviors • Web-based hunting: Many spider species wait for prey to fly or walk into their sticky webs. • Ambush and pouncing: Jumping spiders, for example, use their excellent vision to fixate on prey and then pounce on them without using a web. • Silk-spitting: Scientists have observed certain spider species spitting silk to ensnare their prey. • Consuming their own silk: Spiders often eat their old webs to recycle protein and energy. Communication and behavior when threatened • Courtship: Males display behaviors such as crouching, extending and waving their front legs, or vibrating their abdomens to attract the female's attention. • Defensive behavior: When feeling threatened, spiders often raise their front legs high, arch their bodies, or adopt a threatening posture to drive away adversaries. • Staring: Jumping spiders often turn their heads and adjust their position to stare at or survey surrounding movements. Benefit Professsion of: Spiders play a key role in controlling insect populations and maintaining ecological balance. Key benefits of spiders: • Pest control: Spiders consume various garden insects—such as aphids, caterpillars, flies, and red spider mites—thereby reducing damage to agricultural crops. • Household insect control: Spiders help trap and eat mosquitoes, flies, and other small insects that act as disease vectors, helping to keep the home cleaner without the use of chemicals. • Maintaining natural balance: Without spiders, insect populations could surge rapidly and cause environmental damage. • Inspiration for innovation: Spider silk is highly strong and elastic; scientists study these properties to develop new materials and technologies. Rate Cost Per Money SuperMarket on The Internet Online: The price of pet spiders ranges from tens to tens of thousands of baht, depending on the species, size, and sex. Popular spider types and prices • Thai Baboon Spiders and general Tarantulas • Price: Starts at 70–300 baht for popular Thai species, such as the Black Baboon, Blue Baboon, or Zebra Baboon. • General/Rare prices: Imported species or large, fully grown adults range from 1,000 to 10,000 baht or more, depending on their beauty and rarity. Jumping Spiders • Price: Ranges from tens of dollars for common varieties to hundreds—or up to 200 USD (approximately 6,500–7,000 Baht)—for rare species or those with unique coloration. Farming Breeding Fertilization Hybridization Reproduction : Spider reproduction occurs via sexual reproduction involving internal fertilization. The process is complex, encompassing stages such as sperm preparation, courtship, egg-laying, and offspring care. Key information regarding each stage can be found below: 1. Preparation and sperm production • Sperm deposition: The male spins a specialized web—known as a "sperm web"—and deposits his sperm onto it. • Sperm collection: The male uses his pedipalps—reproductive organs located near the head—to draw up and store sperm in a bulb, preparing to transfer it to the female. 2. Courtship and mating • Signaling: The male must engage in courtship behaviors—such as tapping his legs, vibrating the web, or releasing pheromones—to signal to the female that he is of the same species and not prey. • Copulation: The male inserts the embolus (a reproductive organ located on the pedipalp) into the female's genital opening (epigyne) to transfer sperm into the storage organ (spermatheca). • Post-mating behavior: In some species, such as the black widow, the female may consume the male after mating, or the male may die naturally within a few days. However, some species employ strategies to avoid this, such as mating from a distance, where the male's reproductive organ breaks off and remains inside the female. Egg-laying and Egg Sacs • Egg sac formation: Females deposit their eggs into a specially woven silk container known as an egg sac. The number of eggs can range from just a few to several thousand, depending on the spider species. • Lifespan of the female spider: Many female spiders die after depositing their final egg sac; however, some groups—such as the Mygalomorphae—can live up to 25 years and require repeated mating because they continue to molt throughout their lives. Spiderling Development • Hatching and Molting: Spiderlings hatch from the egg sac resembling adults but are smaller in size, with undeveloped reproductive organs. • Number of Molts: Males typically undergo fewer molts (approximately 2–8 times) and mature faster than females (approximately 6–12 times). In some species, such as the velvet spider, the mother even sacrifices herself, allowing her offspring to consume her as their first meal. Food Process Trending For Restuarant: - Key Timeline Evolution Adventure Story of: Spiders evolved from ancient aquatic ancestors approximately 400 million years ago. Evolution and Origins of Spiders • Origins (400 million years ago): Spiders began evolving from aquatic creatures to terrestrial life; their ancestors possessed a broad waist and belonged to the subgroup known as tetrapulmonates (characterized by "book lungs"). • Fossil Evidence (380–305 million years ago): Scientists have determined that the spider lineage has existed for at least 380 million years, and a "spider-like" fossil dating back approximately 305 million years has been discovered in France. • Scientific Classification: Spiders belong to the order Araneae (Clerck, 1757) and the phylum Arthropoda (subgroup Arachnida); currently, more than 40,000 species have been discovered worldwide. • Silk Production Development: Spiders have evolved organs known as "silk glands" to transform proteins into highly strong and elastic silk, which they use for hunting prey and constructing their habitats. And the finally then You can eat it and Sell it to the Merchant or Customer with Who people you Know Knew known, i hope you have fun and enjoy it.
ClickMeSeeAllFull
ClickMeSeeOnMoreDetail
ClickMeSeeOnMorePictureImage
ClickMeSeeOnMoreVideo
Animal Poison: Discovery World Wide Life Animal Menu: 7.Scorpion Bug Poison Animal
Dangerous Often See in Daily Routine: Method Procedure Management All Works: Scorpion Bug Poison Animal
First Aid Instructions Treatment Cure Methods: If stung by a scorpion, immediately wash the wound with water and mild soap, then apply a cold compress to reduce pain and swelling. First Aid Procedures • Clean the wound: Wash the stung area with clean water and soap to disinfect it. • Apply a cold compress: Use a cold pack or ice wrapped in a towel; apply for approximately 10 minutes at a time to reduce pain and swelling and to slow the spread of venom. • Relieve pain: Take paracetamol for initial pain relief or apply a suitable pain-relieving or anti-itch medication. • Rest the stung area: Try to keep it at the same level as your heart to reduce blood circulation, which could otherwise spread the venom. When to see a doctor • Experiencing severe allergic reactions, such as difficulty breathing, dizziness, lightheadedness, nausea, or vomiting. • Pain and swelling do not subside or become unbearable. • Affects young children, the elderly, or individuals with underlying medical conditions. If you would like more information, please let me know: • Are there any severe allergic reactions or breathing difficulties? • Which part of the body is affected? Warning Caution: Key precautions regarding scorpions involve being vigilant in dark, secluded corners and during the rainy season or flooding; administer first aid and seek immediate medical attention if severe symptoms occur. Precautions and Prevention • Inspect before use: Always check shoes, clothing, and towels before using them. • Avoid high-risk areas: Do not wade through stagnant water or walk through overgrown grass unless necessary. • Secure your home: Close doors and windows properly, and keep the house clean to eliminate damp, hidden corners where scorpions might seek shelter. • Do not approach: If you encounter a scorpion, do not attempt to catch or approach it with bare hands; instead, call a professional or a rescue team for assistance. Potential symptoms • The sting site exhibits intense burning pain, redness, and swelling; severe pain typically begins within 30 minutes. • The venom consists primarily of neurotoxins. • High-risk groups—such as children, the elderly, or individuals with severe allergies—may face life-threatening complications, including respiratory or circulatory failure. First Aid Measures • Wash the sting site with soap and clean water. • Apply ice or a cold compress to the painful area for about 10 minutes at a time to reduce pain. • Elevate the stung area to a level above or at the same level as the heart. • Take pain relievers, such as paracetamol. • Seek immediate medical attention if symptoms do not improve, pain is severe, or the person belongs to a high-risk group. Souce Place Live Any Wherever can i you me See it: Scorpions prefer dark, damp environments and avoid light; they often hide under rocks, woodpiles, decaying logs, or the bottoms of flowerpots, or they dig burrows and cavities in the ground. Preferred habitats: • Natural settings: Scrubland, grassy areas, under piles of dry leaves, or beneath rocks. • Around the home: Brick piles, woodpiles, pipes, or overgrown, damp, and cluttered corners. • Indoors: In cabinet crevices, under beds, or in high-humidity areas like bathrooms; they often seek shelter or escape rising water there during the rainy season. Scorpions are nocturnal creatures that typically feed on small insects, such as cockroaches or ants. Protection Save From: Preventing scorpions from entering your home involves managing the surrounding environment, sealing entry points, and eliminating hiding places. Ways to prevent and deal with scorpions: • Clean up the area around the house: Clear away piles of wood, bricks, stones, or dry leaves. • Seal gaps: Use silicone or caulk to fill cracks in walls and gaps around door and window frames. • Block drains: Use fine-mesh screens to cover drains or ventilation openings to prevent scorpions from climbing up. • Eliminate food sources: Reduce populations of cockroaches, ants, and small insects, which are the primary food sources for scorpions. • Use natural scents to repel them: Place or spray essential oils—such as lavender, peppermint, or citrus—in corners and crevices. • Sprinkle quicklime: Apply quicklime in dark, damp spots or crevices around the house, as it is alkaline. • Wear protective gear: Always wear shoes and gloves when walking in dark areas, gardening, or handling old items. Behavior Attribute Time Food For Animal: Scorpions are reclusive creatures that prefer hiding in dark, humid places and are active at night. They exhibit defensive behavior by raising their abdomens high while holding their pincers aloft. Key behaviors and characteristics of scorpions: • Hiding and habitat: They dislike light and typically hide under rocks, woodpiles, or leaf litter, or burrow into dark, moist areas. • Foraging habits: They forage and move about at night, leading a solitary and quiet existence. • Defensive posture: When feeling threatened or touched, they adopt a defensive stance by arching their abdomen (the tail section containing the stinger) over their body and extending their front legs and pincers to threaten or prepare to sting. • Predation: They use their pincers (pedipalps) to grasp prey and employ the stinger at the tip of the tail to inject venom, either to kill prey or for self-defense. • Maternal care: In certain species, such as the giant forest scorpion, the mother exhibits caregiving behaviors toward her offspring, such as helping to capture large prey for them to eat and providing water near the entrance of their burrow. Benefit Professsion of: Scorpions are beneficial to humans and the ecosystem in various ways, including in medicine, food, and natural pest control. Medical and Research Applications • Medicinal use and pain relief: Traditional Chinese medicine utilizes the *Buthus martensii* scorpion species to expel toxins, relieve pain, reduce muscle spasms, and treat conditions such as paralysis, seizures, and tetanus. • Anti-cancer properties: Scorpion toxins and peptides—such as chlorotoxin—are currently being researched for their potential to inhibit and kill cancer cells, as well as to alleviate pain associated with rheumatoid arthritis. Food and Economy • Protein Source: In certain regions or cultures, scorpions are consumed as food due to their high protein content. • Pets: Certain scorpion species, such as the Asian Forest Scorpion (or "Elephant Scorpion"), are bred and sold as exotic pets to enthusiasts. Ecosystem • Pest Control: Scorpions are predators that feed on insects and other small arthropods, helping to maintain a balanced insect population in nature. Rate Cost Per Money SuperMarket on The Internet Online: The price of scorpions depends on the type and intended use; pricing details by category are as follows: • Crispy fried giant forest scorpions (adults, pack of 4): Approximately 86.5 – 120 Baht (sold via online channels such as www.google.com or mobile applications). • Frozen giant forest scorpions (for cooking/wholesale): Approximately 800 Baht per box (containing 20 large scorpions). • Asian Forest Scorpion (pet/live specimen): The typical selling price at pet markets or department stores is around 200 Baht per individual (depending on size and timing). • Replica scorpion: Priced at approximately 15–50 Baht (depending on quantity and the retailer). • Scorpion venom (export/laboratory grade): Commands an extremely high price—based on data from overseas farms or reports on venom extraction—reaching up to approximately 350 million Baht per liter. Farming Breeding Fertilization Hybridization Reproduction : Most scorpions reproduce sexually, involving a complex mating process that includes the transfer of a sperm packet and a relatively long gestation period before giving birth to live young. Scorpion Reproductive Process • Courtship: The male and female meet and begin walking together while holding onto one another—a behavior known as the "scorpion dance." • Spermatophore deposition: The male deposits a sperm-containing structure called a spermatophore onto the ground. • Fertilization: The male drags the female over the spermatophore, prompting her to draw the sperm into her genital opening, where fertilization of the eggs occurs internally. • Gestation: Following fertilization, the female carries the developing embryos internally for a period of approximately 8–12 months. • Birth: The scorpion gives birth to live young through the genital opening (gonopore) located on the abdomen; initially, the young scorpions climb onto and cling to their mother's back. Food Process Trending For Restuarant: - Key Timeline Evolution Adventure Story of: Scorpions are among the oldest ancient animals on Earth, boasting an evolutionary history spanning more than 430 to 440 million years, dating back to the Silurian Period. Evolution and Origins • Origins (440 million years ago): Scorpions emerged during the Silurian Period; fossil evidence indicates that their ancestral forms were originally aquatic before adapting to life on land. Physical Changes: In ancient times, some scorpion species had very large body sizes, reaching up to about 90 centimeters in length, before evolving and reducing their size to only 2–10 centimeters today. • Adaptations for Survival: Having gone through many periods and mass extinctions, scorpions have maintained their basic shape and structure remarkably, such as having 4 pairs of legs, 1 pair of claws, and a 5-segmented tail with a stinger. Enduring characteristic: The scorpion's cuticle possesses the ability to fluoresce a blue-green color under ultraviolet light (UV fluorescence), a physical trait that has persisted since ancient times. And the finally then You can eat it and Sell it to the Merchant or Customer with Who people you Know Knew known, i hope you have fun and enjoy it.
ClickMeSeeAllFull
ClickMeSeeOnMoreDetail
ClickMeSeeOnMorePictureImage
ClickMeSeeOnMoreVideo
Animal Poison: Discovery World Wide Life Animal Menu: 8.Hornet Bug Poison Animal
Dangerous Often See in Daily Routine: Method Procedure Management All Works: Hornet Bug Poison Animal
First Aid Instructions Treatment Cure Methods: First aid for a hornet sting involves washing the wound with clean water and soap, followed by applying a cold compress to reduce swelling and pain. Initial First Aid • Clean the wound: Wash the stung area with soap and water to disinfect it. • Apply a cold compress: Use a cold pack or ice wrapped in a clean cloth for 10 minutes at a time to reduce pain and swelling. • Do not squeeze or pick at the wound: Avoid scratching or picking at the sting site to prevent infection. • Take medication for symptom relief: Paracetamol or antihistamines can be taken to alleviate pain and itching. Dangerous symptoms requiring urgent medical attention Seek immediate medical care if you experience any of the following: • Difficulty breathing, chest tightness, or wheezing • Feeling faint, dizziness, or loss of consciousness • Swelling of the lips, tongue, or throat • Being stung multiple times Warning Caution: Stings from wasps or hornets can trigger severe, life-threatening allergic reactions, as these insects are capable of stinging multiple times. Precautions and Dangerous Symptoms • Common symptoms: Pain, swelling, redness, and raised rashes at the sting site; nausea, vomiting, and dizziness. • Severe symptoms: Swelling of the face, throat, or tongue; chest tightness; breathing difficulties; low blood pressure; and a weak, rapid pulse. • Anaphylactic shock: Can lead to airway obstruction, circulatory system failure, and rapid death. What to do if you encounter or are stung by a hornet • Avoidance: If you spot a hornet nest or a hornet, do not approach or disturb it; worker hornets will signal others to swarm and sting. • First aid: Apply a cold compress to the sting site for 10–15 minutes to reduce pain and swelling. • Seek urgent medical attention: Immediately take the person to the hospital if they have been stung multiple times, received a large amount of venom, or are experiencing severe allergic reactions such as difficulty breathing or facial swelling. Souce Place Live Any Wherever can i you me See it: Wasps typically choose to build their nests in quiet, safe areas close to food sources. Their habitats and nesting sites vary depending on the species, as follows: Wasp Types and Habitats • Social wasps (e.g., yellow hornets, paper wasps): • Nest characteristics: Constructed from a paper-like natural material created by the wasps chewing wood fragments mixed with saliva. • Nesting locations: Commonly found in elevated spots, such as large tree branches, house eaves, building crevices, or undisturbed areas under roofs. • Ground-nesting wasps: • Nest characteristics: Nests are concealed underground, with a small entrance hole on the ground surface. • Habitat: They prefer nesting in underground burrows, tree hollows, grassy thickets, or forested areas; the nests are difficult to spot unless one digs into the ground. • Solitary wasps: • Nest characteristics: They typically build nests individually rather than in groups. • Habitat: They construct small nests in soil crevices, tree hollows, or cracks in concrete walls, temporarily sealing the entrance while foraging. Protection Save From: You can prevent wasps from nesting or posing a threat around your home by modifying the environment and using natural scents that repel them. Methods to prevent and repel wasps: • Inspect the area around your home: Regularly check eaves, balconies, and secluded corners. If you find a nest the size of a ping-pong ball, remove it immediately. • Manage food and waste: Keep trash cans tightly sealed, clean up food scraps or rinse out soda cans, and cover pet food so it does not attract wasps. • Use natural scents: Spray or plant strong-smelling varieties—such as peppermint, citrus (orange/lemon), clove, and citronella—around the house. • Seal gaps: Repair cracks in walls, window frames, or holes in the ground to eliminate potential nesting sites. • Hang a fake nest: Crumple a paper bag to give it volume and hang it up; since wasps are territorial, they will not build a nest nearby. Precautions when encountering a hornet or wasp nest • Do not use fire or smoke: Burning the nest is extremely dangerous, as the insects will swarm out and sting. • Timing for removal: If a small nest must be removed, do so at night when the insects have returned to the nest and are less active. • Call in professionals: If the nest is large or located in a hazardous area, contact local authorities (such as the municipality or sub-district administration organization) or professional pest control experts. Behavior Attribute Time Food For Animal: Wasps are social insects that exhibit systematic behaviors, postures, and actions related to survival, nest building, and territorial defense. Key behaviors and characteristics • Paper nest construction: Wasps use their mandibles to chew wood or bark, mixing it with saliva to create a paper-like pulp. This material is used to build a nest featuring layered patterns and hexagonal cells. • Caste system and roles: • Queen: Responsible for laying eggs and regulating the colony's population. • Workers: The most numerous caste (all female); responsible for foraging, nest construction, nest defense, and caring for the brood. • Males/Reproductive wasps: Responsible for mating and establishing new colonies. • Hunting behavior: They forage during the day, typically using their mandibles and stingers to subdue other insects or larvae, which are then brought back to the nest as a protein source for the developing brood. • Nest defense and attacks: When threatened or if the nest is disturbed, worker wasps display aggressive behavior—circling and launching attacks—and use their stingers to inject venom. Unlike honeybees, their stingers do not detach after stinging, allowing them to sting repeatedly; simultaneously, they release chemical signals to alert other wasps to join the attack. Benefit Professsion of: Wasps play a vital role in naturally controlling pest populations, pollinating plants, and serving as a source of food and medicinal ingredients. Ecological and Agricultural Benefits • Pest Control: Wasps are predators that hunt caterpillars, flies, aphids, and other insects to feed their larvae, effectively reducing pest numbers in both natural environments and agricultural fields. • Pollination: As wasps forage for food, they transfer pollen from one flower to another, supporting plant reproduction and enhancing biodiversity. • Ecosystem Cleanup: Certain wasp species consume the remains of dead insects, helping to drive the natural nutrient cycle. Economic and nutritional benefits • Larvae as a protein source: Wasp larvae (such as those of the *Vespa affinis* or "hornet") are highly prized, hard-to-find edible insects that are rich in protein and nutrients. They are popular ingredients in local cuisine and provide a source of supplementary income for villagers in many areas. Benefits in traditional herbal medicine • Properties of the hornet nest: According to traditional medicinal texts, the hornet nest has a sweet and mild taste. It is valued for its ability to expel gas, neutralize toxins, and eliminate parasites; it also helps treat numbness and abscesses, and alleviates various ailments in accordance with Thai traditional wisdom. Rate Cost Per Money SuperMarket on The Internet Online: Market prices for wasp larvae (varying by season and region) generally range from approximately 410 to 1,400 Baht per kilogram. Summary of market prices by wasp type: • *Hua Suea* (Tiger Wasp / *Vespa affinis*): • Price: 410 – 700 Baht/kg (some areas or farms sell at 500 Baht/kg). • *Lum* (Ground-nesting Wasp / *Vespa tropica*): • Price: 600 – 1,400 Baht/kg (depending on rarity and size). • Whole-nest sales: • 1,000 – 5,000 Baht per nest (depending on nest size and intended use—e.g., for food or as an amulet). Farming Breeding Fertilization Hybridization Reproduction : Wasps reproduce sexually via internal fertilization, with females able to control the sex of their offspring by choosing whether or not to use stored sperm. Reproduction and Sex Determination • Mating: The female wasp (queen) mates with a male only once, typically late in the season, and stores the sperm in a specialized organ called the spermatheca. • Sex Determination (Haplodiploidy): • Fertilized eggs (where sperm is used) develop into females (worker wasps or future queens). • Unfertilized eggs (where sperm is withheld) develop into males. Life Cycle and Reproduction Wasps undergo complete metamorphosis, consisting of four stages: 1. Egg: The queen lays eggs into the constructed nest cells; this stage lasts approximately 5–10 days. 2. Larva: Eggs hatch into small larvae; worker wasps or the queen forage for other insects to feed them; this stage lasts approximately 6–12 days. 3. Pupa: The larva spins a silk cap to seal the nest cell and undergoes transformation; this stage lasts approximately 8–16 days. 4. Adult: The wasp emerges to function as a worker and continue expanding the nest. Food Process Trending For Restuarant: - Key Timeline Evolution Adventure Story of: Since the Thai term "tua tor" can refer to both "interlocking building toys (such as LEGO)" and the insect known as a "wasp," the history and evolution of both are outlined below: 1. History and evolution of "interlocking building toys" (Bricks / LEGO) This type of toy originated from a desire to foster child development, eventually evolving into a global industry. • The Early Era (Wooden Blocks): Originally, building blocks were made of wood—either square or in various geometric shapes. They were designed to help children learn about the alphabet, physics, and gravity through the act of stacking. • The Shift to Plastic (1939–1947): Hilary Fisher Page, a British inventor, created self-locking plastic building blocks under the name "Kiddicraft." Later, in 1947, Ole Kirk Kristiansen—a Danish carpenter and the founder of LEGO—purchased a plastic injection molding machine and refined the concept. • The Birth of Interlocking Bricks (1949): LEGO launched its first plastic bricks under the name "Automatic Binding Bricks." • A Groundbreaking Patent (1958): Godtfred, Ole’s son, patented the LEGO system featuring studs (knobs on top) and locking tubes (on the bottom). This system allowed the bricks to lock together securely without the need for glue—and remarkably, bricks manufactured in 1958 can still be seamlessly combined with those produced today. 2. Natural Evolution of the Wasp Biologically, wasps are insects with a long history and serve as the evolutionary ancestors of various other insect species. • Prehistoric Era (140+ million years ago): Wasps belong to the order Hymenoptera. Fossil evidence dating from the Jurassic to the Cretaceous periods indicates that they evolved from sawflies. From Solitary to Social: Initially, wasps were solitary insects, but they later evolved into social insects with distinct castes comprising the queen, males, and workers. • Origins of bees and ants: Scientists have discovered that wasps are the evolutionary ancestors of bees and ants; bees diverged from a lineage of insect hunters, shifting instead to consuming and collecting floral nectar. • Development of the stinger: The wasp's formidable weapon—the stinger—actually evolved from the female's egg-laying organ, which was adapted for hunting prey and self-defense. And the finally then You can eat it and Sell it to the Merchant or Customer with Who people you Know Knew known, i hope you have fun and enjoy it.
ClickMeSeeAllFull
ClickMeSeeOnMoreDetail
ClickMeSeeOnMorePictureImage
ClickMeSeeOnMoreVideo
Animal Poison: Discovery World Wide Life Animal Menu: 9.Frog Deadly Poison Animal
Dangerous Often See in Daily Routine: Method Procedure Management All Works: Frog Deadly Poison Animal
First Aid Instructions Treatment Cure Methods: The initial response to exposure to the toxin is to seek immediate medical attention and perform localized decontamination if the skin has come into contact with it. First Aid Measures • Wash the skin immediately: Thoroughly wash the exposed area with clean water and plenty of soap to remove the toxin. • Remove clothing: If the toxin has contaminated your clothing, remove it immediately to prevent further exposure. • Do not rub your eyes or touch your face: If the toxin enters your eyes, flush them with clean running water for at least 15 minutes. • Monitor for symptoms: If you experience numbness, muscle weakness, difficulty breathing, or fever, seek immediate medical attention. Prevention of toxin exposure • Avoid direct contact with the frog. • Wear gloves whenever it is necessary to handle or move the frog. • Thoroughly wash hands with soap after touching the frog or enclosure equipment. Warning Caution: Key precautions for handling and preventing poisoning from poison frogs or amphibians are as follows: Precautions and Prevention • Avoid direct contact: Do not handle or touch the frog with bare hands. • Wear protective gloves: If handling or moving the frog is necessary, always wear rubber gloves or fully protective gloves. • Always wash hands thoroughly: Immediately wash your hands and body with soap and clean water after touching the frog or the area where it lives. • Beware of skin wounds: Toxins from the frog can enter the body through cuts, scratches, or mucous membranes. • Understanding captive-bred frogs: Captive-bred poison frogs are non-toxic and safe because they do not consume the specific rainforest insects that serve as the precursors for toxin production. Souce Place Live Any Wherever can i you me See it: The primary habitat of poison frogs (or poison dart frogs) is the tropical rainforests of Central and South America. Habitat Characteristics • Regions found: From Nicaragua in Central America extending down to Peru, Brazil, Colombia, and Guyana. • Environment: They inhabit the forest floor of primary tropical rainforests or humid lowland areas. • Habitat: They primarily live on the ground—among leaf litter, rock piles, or damp vegetation—though some species may inhabit low-growing trees or water-filled tree hollows. An interesting fact: In the wild, poison frogs accumulate toxins from the insects they consume; however, if bred in captivity without these specific insects, the frogs do not develop toxins and are safe to handle. Protection Save From: To prevent contact with and exposure to toxins from poisonous frogs, avoid direct contact, wear protective gloves, and wash your hands thoroughly after any contact. Guidelines for preventing frog poisoning: • Avoid contact: Do not handle or touch frogs in the wild with bare hands. • Wear gloves: Always wear rubber or protective gloves if it is necessary to move or handle them. • Wash hands thoroughly: Lather with soap and wash hands immediately after handling the frog or any equipment inside the enclosure. • First aid: In the event of exposure to the toxin, immediately rinse the affected skin area with plenty of clean water to wash away the toxin. Behavior Attribute Time Food For Animal: The behavior and characteristics of poison frogs (or poison dart frogs) are distinctive and differ from most frogs found in nature, as follows: Lifestyle and foraging habits • Diurnal activity: Unlike most frogs, which are nocturnal, poison frogs prefer to hop around and forage during the day. • Solitary and territorial: They typically inhabit piles of fallen leaves or climb low trees; they maintain distinct territories and often display aggression or fight to defend their space. • Vocalization: Males vocalize to call for mates or to proclaim their territory. Behavior and Self-Defense • Aposematic Coloration: They possess striking, vivid skin colors—such as bright red, yellow, or blue—or eye-catching patterns that signal to predators that they are toxic and unpalatable. • Remaining Motionless or Feigning Death: When faced with danger, they may exhibit "tonic immobility"—a behavior of freezing or remaining perfectly still—to evade predators. Parental care behavior • Carrying tadpoles: The female allows the tadpoles to climb onto her back and carries them—one by one—to deposit them into tiny bodies of water, such as the leaf axils of bromeliads. • Feeding the offspring: The mother frog regularly returns to the tadpoles to lay unfertilized eggs, which serve as food for the tadpoles until they reach maturity. Benefit Professsion of: Poison frogs (such as poison dart frogs) are of immense importance in three key areas: modern medicine, ecology, and traditional culture. Although their venom is potent enough to kill a human in a very short time, scientific processing transforms it into a substance of tremendous value. The benefits of poison frogs can be categorized as follows: 1. Medical and pharmaceutical benefits (a treasure trove of medicinal compounds) The alkaloid compounds found on the skin of poison frogs possess unique chemical structures that scientists study and develop into medicines: High-potency painkiller: Researchers extracted epibatidine from certain species of poison dart frogs and discovered that it possesses a pain-relieving effect up to 200 times more potent than morphine, yet without addictive properties. Currently, its molecular structure is being modified in the laboratory to reduce toxicity and enable its use as a pain medication for humans. • Cardiovascular disease treatment: Certain toxins, such as batrachotoxin, affect the electrical conduction system and sodium channels in muscle and nerve cells. Researchers study these substances to develop treatments for cardiac arrhythmias and muscle relaxants. • Neurological medications: Extracts are being studied for potential development into treatments for Alzheimer's disease, depression, and stroke. • Antibiotics and anti-cancer agents: Frog skin contains peptides that exhibit antifungal and antibacterial properties, as well as activity against tumors or cancer cells. 2. Ecological Benefits (Natural Controllers) • Insect Population Control: Poison frogs primarily feed on ants, termites, mites, and small insects found on the forest floor, helping to prevent these populations from exploding and damaging the rainforest ecosystem. • Indicators of Forest Health: Because poison frogs have delicate, highly permeable skin, they are among the first animals to be affected by environmental contamination or changes; consequently, scientists use them as indicators of forest health. 3. Cultural and Hunting Uses (Historical) • Weapons for obtaining food: Indigenous peoples (such as those in the rainforests of South America) would rub or coat the tips of blowgun darts or arrows with the secretions from the skin of poison frogs to hunt wildlife, such as wild boars or monkeys. The toxin entering the bloodstream would rapidly paralyze the animal, causing it to collapse—a characteristic that gave rise to the name "Poison Dart Frog." 💡 Interesting Fact: Poison dart frogs do not produce toxins from birth; instead, their toxicity stems from accumulating chemicals found in the ants and poisonous insects they consume in the wild. Consequently, poison dart frogs raised in captivity and fed common insects (such as crickets or mealworms) are completely non-toxic and 100% safe to handle. Rate Cost Per Money SuperMarket on The Internet Online: In Thailand's exotic pet market, the selling price for poison dart frogs ranges from 1,500 to over 4,000 baht per individual, depending on the species, aesthetic appeal, and breeding difficulty. These captive-bred frogs are non-toxic because they do not consume the toxic insects found in their natural wild habitat. 1. Prices of live poison dart frogs (Exotic Pets) • Strawberry Poison Dart Frog: Average price is approximately $100 per frog. • Golden Mantella / Golden Poison Frog: Starting price is around $70 per frog. • Azureus Poison Dart Frog and other common varieties: The average international market price is around $30–$40; however, upon importation or international trade, the price typically rises to the $50–$100 range, depending on size and the specific retailer. Farming Breeding Fertilization Hybridization Reproduction : Poison frogs (such as poison dart frogs) reproduce via external fertilization, typically occurring during the rainy season or throughout the year, depending on the tropical rainforest climate. Reproduction and Offspring Care • Courtship: The male vocalizes or performs displays to attract the female. • Egg-laying and Fertilization: The female lays eggs on leaves or in moist areas, and the male releases sperm to fertilize them externally. • Care for eggs and tadpoles: The parent frogs maintain moisture levels, and once the eggs hatch, either the male or female carries the tadpoles to small bodies of water, such as water-filled leaf axils or tree hollows. • Feeding: Females of many poison frog species return to deposit unfertilized eggs into the water to serve as food for the tadpoles. Food Process Trending For Restuarant: - Key Timeline Evolution Adventure Story of: Poison dart frogs (family Dendrobatidae) have undergone millions of years of evolution; their origins, the derivation of their name, and their toxin-production mechanisms are fascinating, as outlined below: Evolution and Origins • Ancestry of Frogs: The earliest amphibians appeared on Earth over 400 million years ago. The majority of modern frogs (approximately 88%) share a common ancestor that recovered and rapidly diversified following the asteroid impact that wiped out the dinosaurs 66 million years ago. • Origins: Poison frogs evolved and inhabit the tropical rainforests of Central and South America, in countries such as Costa Rica, Colombia, and Brazil. Origin of the name "Poison Dart Frog" • Indigenous Amazonian peoples: Indigenous tribes, such as the Chocó people of Colombia, discovered that the skin of these frogs contains potent toxins. • Usage: Indigenous people extracted secretions or toxins from the skin of frogs in the genus *Phyllobates* to coat the tips of darts or arrows, using them as ammunition for blowguns to hunt small game. Evolution of toxicity and warning coloration • Source of toxins: Poison frogs do not naturally produce toxins themselves; instead, they have evolved to sequester alkaloids from the insects they consume, such as ants, mites, and certain types of beetles. • Most potent species: The golden poison frog (*Phyllobates terribilis*) is the most toxic species, producing batrachotoxin—a substance potent enough to kill large birds or monkeys. Aposematic Coloration: Frogs in this group have evolved striking, vivid colors to signal to predators that they are poisonous and should not be eaten. And the finally then You can eat it and Sell it to the Merchant or Customer with Who people you Know Knew known, i hope you have fun and enjoy it.
ClickMeSeeAllFull
ClickMeSeeOnMoreDetail
ClickMeSeeOnMorePictureImage
ClickMeSeeOnMoreVideo
Animal Poison: Discovery World Wide Life Animal Menu: 10.Toad Deadly Poison Animal
Dangerous Often See in Daily Routine: Method Procedure Management All Works: Toad Deadly Poison Animal
First Aid Instructions Treatment Cure Methods: The initial treatment for toad poisoning is to immediately rinse the mouth or skin with running water for at least 15 minutes, and then promptly transport the victim to a hospital or veterinarian. First Aid Measures (for humans or pets exposed to the toxin) • Remove the toxin immediately: Rinse the affected area (such as the mouth or skin) with clean water or tap water. Be careful to prevent water from entering the nose or trachea, which could cause choking or aspiration. • Do not induce vomiting: Do not force vomiting or administer raw egg whites (in humans), as this may lead to aspiration and subsequent pneumonia. • Seek medical attention immediately: Call an emergency hotline or take the affected individual or animal to a doctor or veterinarian as soon as possible for treatment of cardiac and circulatory system issues. Warning Caution: The primary danger associated with toads is the potent toxin found in their mucous glands, skin, blood, eggs, and internal organs; this toxin is highly heat-resistant and does not break down during cooking. Dangers and Exposure • Sources of toxin: Parotid glands, skin, blood, eggs, and internal organs. • Exposure: Occurs through ingestion of the flesh, eggs, or internal organs (often mistaken for frog eggs), as well as through direct skin contact or contact with the eyes. • Toxins: Contains substances such as digitaloids and alkaloids that affect the cardiovascular and nervous systems. Symptoms of poisoning • Initial symptoms: Nausea, vomiting, abdominal pain, diarrhea, excessive salivation, dizziness, and confusion. • Severe symptoms: Delirium, seizures, yellow vision, slow or irregular heartbeat, and death due to circulatory failure. Prohibited actions and emergency procedures • Strictly prohibited: Do not induce vomiting, do not stick fingers down the throat, and do not consume egg whites. • First aid: In case of exposure to the toxin, immediately rinse the affected area with a continuous stream of clean water. Ensure the water does not flow back into the mouth or eyes. • Assistance: Call the emergency hotline or rush the patient to the hospital immediately. Souce Place Live Any Wherever can i you me See it: Toads typically inhabit terrestrial environments, preferring damp ground and hiding in dark, secluded spots. Toad Habitats • Terrestrial areas: They prefer living on dry or slightly moist ground rather than remaining in water constantly. • Hiding spots: They can be found in soil burrows, tree hollows, rotting logs, or beneath piles of decaying leaves. • Homes and gardens: They are often found in gardens with dense shrubbery or in damp, shaded corners where sunlight does not reach. • Breeding sites: Although they live on land, during the breeding season they move to areas near water sources or wetlands to lay their eggs. Protection Save From: The best way to prevent toads from entering your home is to eliminate the factors that attract them, such as sources of standing water, dampness, and insect prey. Guidelines for toad prevention and management: • Eliminate water sources and dampness: Clear away areas of standing water or wet ground, and fill in any holes or ruts in the soil around the house. • Manage food sources and insects: Turn off unnecessary outdoor lights to avoid attracting insects, reduce insect populations by eliminating cockroaches or ants, and properly store or clear away outdoor pet food bowls. • Destroy egg-laying sites: If you find long, clear, gelatinous strands containing black dots (approximately 2 mm in size) in a water source, use a net to scoop them out immediately. • Install barriers: Seal gaps around the house or install a plastic mesh fence buried 6–18 inches into the ground and extending 24 inches above ground in areas where water might be present or where entry points exist. • Use natural methods: Spray a diluted saltwater solution to create a nuisance and drive them away, or sprinkle ash around the garden as a deterrent. • Catch and release: Use large charcoal tongs, or a broom and dustpan, to herd them into a container; then, release them into a grassy area or natural habitat at least 100 meters away from your home, as toads have the ability to remember locations and return to where they were before. Behavior Attribute Time Food For Animal: Toads are amphibians characterized by unique physical traits and behaviors related to survival and their way of life. Physical Characteristics and Appearance • Stout body and rough skin: Possesses a relatively stout body with dry, warty skin that aids in camouflaging with the environment. • Parotoid glands: Features large glands located behind the eyes or near the ears—known as parotoid glands—which secrete toxins when the animal is threatened. • Movement: Moves by walking or crawling interspersed with short hops; these hops are neither as high nor as far as those of frogs, due to their shorter hind legs. Behavior and Lifestyle • Nocturnal activity: Typically active at night; during the day, it hides in burrows beneath rocks or in dark, damp corners. • Feeding: Uses its sticky tongue to rapidly flick and capture insects or small animals, drawing them into its mouth. • Hibernation and aestivation: During the winter or the dry season—lasting 1–3 months—toads burrow into the ground and take refuge in holes to conserve body moisture. • Breeding behavior: With the arrival of the rainy season, they migrate to water sources to lay their eggs, which appear as two long, gelatinous strings. Benefit Professsion of: Toads are amphibians that offer unexpected ecological and medical benefits. Key details are as follows: Agriculture and Ecosystems • Pest and venomous creature control: Toads are nocturnal foragers. Their primary diet consists of winged and wingless insects—such as aphids, caterpillars, crickets, and flying termites—as well as venomous creatures like centipedes and scorpions. • Soil population control: They consume small soil-dwelling organisms, such as nematodes and earthworms, helping to maintain the natural balance around the home. Medical and Research Applications • Utilization of toxins: Toxins secreted from toad skin glands are being researched and used in traditional medicine formulations (such as the Chinese medicine *Chan Su*) to treat heart conditions, alleviate sore throats, and combat certain tumors or cancers, including prostate cancer. • Research on active compounds: Substances such as 5-MeO-DMT, found in certain toad species, are currently being studied for their potential in developing treatments for psychiatric disorders. Economy and Industry • Product Processing: Toad skin can be tanned and crafted into leather goods, such as bags or keychains. • Culinary Use: In some areas, toad meat is used for cooking; however, extreme caution is required to completely remove the poison glands found in the skin and internal organs, as the toxin is potent enough to be fatal. Rate Cost Per Money SuperMarket on The Internet Online: The market price of toads depends on the type and the purpose of the transaction; they can be categorized into the following main groups: 1. Exotic pets (foreign or rare species) • Cane Toad: Popular among exotic pet enthusiasts. Prices range from $1 (for tadpoles) up to $50–$200 per individual, depending on size and sex. • Japanese Toad: Commands a relatively high price, ranging from approximately $300 to $400 per individual. • Albino or uniquely colored toads: Collector groups have posted buy orders offering prices ranging from $150 to over $200 per individual. 2. Common Asian Toad Group (Other Purposes) • Trade by weight (per kilogram): There are niche markets that purchase common Asian toads for processing, animal feed production, or specialized applications. The average market price ranges from approximately 1 to 20 dollars per kilogram. • Toad secretion (toad resin): In the pharmaceutical and chemical industries, toad secretions are extracted for use as ingredients in certain medicines; the pure secretion commands a very high value in international markets. Farming Breeding Fertilization Hybridization Reproduction : Toads reproduce via external fertilization; males call out to attract mates during the rainy season (approximately March to September). Breeding Season and Location • Period: Rainy season (March – September) • Location: Bodies of still or slow-moving water, such as ponds or shallow pools. Reproductive Process 1. Amplexus: The male climbs onto the female's back and holds on tightly, using his forelimbs to clasp her body. 2. Release of gametes: The female toad gradually releases eggs from her body into the water; simultaneously, the male releases sperm to fertilize the eggs in the water, resulting in external fertilization. 3. Egg characteristics: Toad eggs appear as long, clear, gelatinous strings containing black or dark brown eggs, and they are often found wrapped around aquatic plants. Life Cycle and Growth • Incubation Period: Eggs take approximately 2–3 days to hatch. • Tadpole Stage: Black tadpoles live and forage in the water, often gathering in large groups. • Metamorphosis: The tadpoles gradually develop, growing hind and forelimbs while their tails recede, eventually transforming into fully developed adult toads that move onto land. Food Process Trending For Restuarant: - Key Timeline Evolution Adventure Story of: True toads belong to the family Bufonidae, a group that diverged evolutionarily from the common ancestors of frogs and toads; their history, based on paleontological and genetic evidence, is as follows: Origin and Geographical Distribution • Origin in South America: Phylogenomic research indicates that the Bufonidae (true toads) originated in South America approximately 61 million years ago (during the early Cenozoic era, following the extinction of the dinosaurs). • Intercontinental Dispersal: From South America, they dispersed to Africa and Asia—and subsequently to Europe and North America—facilitated by geological changes and tectonic plate movements. Key Evolutionary Traits (Trait Innovation) • Loss of teeth: Toads in the family Bufonidae have evolved to lose teeth on the upper jaw, distinguishing them from most other frogs. • Parotoid glands: Development of glands located on the back and above the eyes that secrete toxins—such as bufotoxins or alkaloids—for defense against predators. • Dry, bumpy skin: Adapted for terrestrial life better than other amphibians; reduces water loss, enabling survival in arid environments. • Bidder's Organ: A distinctive physiological characteristic of this family, consisting of undeveloped ovarian tissue located at the anterior end of the testes in males. And the finally then You can eat it and Sell it to the Merchant or Customer with Who people you Know Knew known, i hope you have fun and enjoy it.
ClickMeSeeAllFull
ClickMeSeeOnMoreDetail
ClickMeSeeOnMorePictureImage
ClickMeSeeOnMoreVideo
Animal Poison: Discovery World Wide Life Animal Menu: 11.Jellyfish Deadly Poison Animal
Dangerous Often See in Daily Routine: Method Procedure Management All Works: Jellyfish Deadly Poison Animal
First Aid Instructions Treatment Cure Methods: Immediate first aid for jellyfish stings involves exiting the water right away and continuously pouring vinegar (4–6% concentration) over the affected area for at least 30 seconds. Correct first aid procedures: • Exit the water immediately: This prevents severe allergic reactions or loss of consciousness while in the water, which could lead to drowning. • Do not rub or scrub: Avoid using bare hands to scratch, massage, or rub the wound, as this can cause inactive stinging cells to release more venom. • Pour vinegar over the area: This helps inhibit the release of venom from attached tentacles but cannot neutralize venom that has already entered the bloodstream. • Remove remaining tentacles: After applying vinegar, carefully remove the tentacles using tweezers or while wearing gloves; do not touch them directly with bare hands. • Strictly prohibited actions: Never wash the wound with fresh water, plain water, alcohol, or ice. Differences in concentration can trigger the stinging cells to release more venom. Precautions and Warning Signs If the patient experiences severe allergic reactions—such as difficulty breathing, chest tightness, dizziness, severe nausea, or loss of consciousness—they must be taken to the hospital immediately. Please let me know if you need further information regarding box jellyfish stings or directions to the nearest medical facility. Warning Caution: The most important precaution when stung by a venomous jellyfish is to strictly avoid rubbing, scrubbing, or washing the wound with fresh water, as this causes undischarged stinging cells to release more venom. Strictly Prohibited Actions (Precautions) • Do not use fresh water: Plain water or tap water will trigger remaining stinging cells to release more venom. • Do not rub or scrub: Do not use bare hands to scratch or massage the area, and do not use a cloth to rub the wound. • Do not use chemicals incorrectly: Do not pour alcohol, liquor, or urine on the area. • Do not handle tentacles with bare hands: Use tweezers or wear gloves if removal is necessary. Proper First Aid • Get out of the water immediately: To prevent loss of consciousness or drowning. • Pour vinegar: Pour vinegar (4–6% concentration) over the affected area for at least 30 seconds to deactivate the stinging cells. • Remove tentacles: Use tweezers, or gently scrape them off with the back of a knife or a plastic card, after applying the vinegar. • Seek immediate medical attention: If severe symptoms occur, such as chest tightness, difficulty breathing, dizziness, or loss of consciousness. Souce Place Live Any Wherever can i you me See it: Venomous jellyfish typically inhabit warm coastal waters and shallow areas worldwide. Typical Habitats • Climate Zones: Most common in tropical and temperate seas. • Key Regions: Frequently found in the Indian and Pacific Oceans, such as in the waters around Thailand and the Philippines, and off the northern coast of Australia. • Depth: Mostly found near the surface or along beaches during high tide and rough seas, though some species may inhabit varying depths. Occurrence in Thailand • Gulf of Thailand coast: Found around Koh Samui and Koh Phangan in Surat Thani Province, as well as on beaches in Hua Hin and Chumphon provinces. • Andaman coast: Found in Phang Nga Bay and other coastal provinces along both the Gulf of Thailand and the Andaman Sea. Protection Save From: The best way to prevent stings from venomous jellyfish is to avoid swimming in areas where they are abundant, especially after rainfall or when winds are blowing towards the shore. Preventive measures when entering the water: • Wear protective clothing: Wear a full-coverage swimsuit or a long-sleeved, long-legged wetsuit to minimize the amount of skin exposed to the seawater. • Consult officials: Look for warning signs or check with the Department of Marine and Coastal Resources or beach staff before entering the water. • Avoid high-risk times: Do not swim at night or shortly after rainfall, as box jellyfish tend to move closer to the shore. First Aid (in case of envenomation) If someone comes into contact with or is stung by a venomous jellyfish, follow the Department of Disease Control’s guidelines: • Get out of the water immediately: Bring the victim out of the water right away to prevent drowning. • Do not rub or scrub: Do not touch, rub, scratch, or scrub the wound with bare hands, as this can cause the stinging cells to release more venom. • Pour vinegar: Pour vinegar (4–6% concentration) over the wound continuously for at least 30 seconds to deactivate the stinging cells. • Do not use fresh water: Strictly avoid washing the wound with fresh water, plain water, alcohol, or clear spirits, as this can cause the venom to spread further. • Remove tentacles: Use tweezers or wear gloves to remove any remaining tentacles after pouring vinegar on the area. • Seek medical attention: Call the 1669 emergency hotline and seek immediate medical care if severe symptoms occur, such as chest tightness, difficulty breathing, or loss of consciousness. Behavior Attribute Time Food For Animal: Characteristics and behavior of venomous jellyfish—particularly highly venomous species such as the Box Jellyfish—include the following distinct features: Physical Appearance and Form • Transparent appearance: The body is clear or pale blue/yellowish, making it difficult to spot in the water. • Cuboid shape: The bell (or body) is box- or cube-shaped, unlike the umbrella or dome shape of typical jellyfish. • Long, flexible tentacles: Tentacles located at the lower corners can extend significantly—some reaching lengths of up to 3 meters—with a total count ranging from 15 to 60. • Movement: Capable of swimming faster and more agilely than typical jellyfish, reaching speeds of up to 5 feet per second; they do not simply drift with the current. Behavior and Predation • Use of Stinging Cells: The tentacles of venomous jellyfish contain stinging cells (nematocysts) that function like a trigger mechanism; upon contact with prey or humans, the stingers automatically and instantly discharge venom. • Shallow-Water Foraging: They are often found swimming near the shore, in shallow waters, or at the water's surface during calm weather or during and after rainfall. • Peak Occurrence: They are typically most abundant during the rainy season or between November and April (depending on the location and jellyfish species). Benefit Professsion of: Toxins and components derived from venomous jellyfish are currently being researched for potential applications in medicine, biotechnology, and health products, despite the fact that the venom itself poses severe risks to the skin and nervous system. Medical and Pharmaceutical Research • Development of Bioactive Peptides: Current research indicates that proteins and hydrolysates extracted from jellyfish possess significant biological activity; for instance, certain enzyme-derived extracts exhibit antioxidant properties and help stimulate the body's immune system. • Potential anti-cancer properties: International research (such as studies on certain Mediterranean jellyfish species) indicates that extracts from some jellyfish possess anti-cancer and inhibitory effects, offering a promising avenue for future research into developing cancer treatments. • Study of toxicological mechanisms: Understanding the protein structures and active substances within nematocysts enables medical professionals to comprehend the mechanisms of tissue damage and immune system responses, thereby facilitating the development of antivenoms or more effective treatment strategies. Cosmetics and Cosmeceuticals Industry • Source of Natural Collagen (Type I Collagen): Jellyfish contain proteins and Type I collagen that are structurally similar to human skin. Thai researchers (such as those at the Thailand Institute of Scientific and Technological Research – TISTR) have extracted these components to develop skincare products—including serums, lotions, and facial cleansers—leveraging their antioxidant properties, ability to stimulate collagen production, and non-irritating nature. Rate Cost Per Money SuperMarket on The Internet Online: The trading price structure for jellyfish—most of which are naturally mildly venomous or belong to species requiring processing (such as *Rhopilema esculentum* or *Nemopilema nomurai*) to remove toxins and cure in salt before consumption—is categorized based on trading characteristics as follows: 1. Purchase price at the buying station (purchased from artisanal fishermen) During the season when jellyfish float to the surface, traders set up buying stations to purchase fresh jellyfish from fishermen for the salt-curing process. The average prices are as follows: • Fresh jellyfish: Purchased at approximately 3–7 Baht per piece (depending on size and condition). 2. Wholesale Prices (for shabu-shabu restaurants, Thai BBQ/Moo Kratha shops, and fresh markets) These are salt-cured jellyfish that have been desalted and are ready for trimming and separation into parts: • Desalted jellyfish (washed): Approximately 45 – 65 Baht per kilogram • Salt-cured jellyfish (quartered): Approximately 450 – 550 Baht per bucket/kilogram • Salt-cured jellyfish (tentacles only): Approximately 600–750 Baht per bucket, or around 1,250 Baht per large bucket (15–17 kg drained weight). • Bullet jellyfish (a popular variety known for its firm, crunchy texture): Sold by the bucket (approx. 15 kg); price is around 3,000–3,200 Baht per bucket. 3. Retail Price (for general consumers) Available at department stores or online platforms (e.g., www.google.com): • Desalted/Ready-to-eat jellyfish (standard): Approximately $1–$2 per pack (500g size) or about $4–$7 per kilogram. • Cannonball jellyfish (retail): As this is an imported or high-demand species, retail prices at restaurants or on social media range from $3 to $12 per piece, depending on size and seasoning. Farming Breeding Fertilization Hybridization Reproduction : Jellyfish have two primary modes of reproduction—sexual and asexual—which alternate within a complex life cycle. Reproductive stages and life cycle of jellyfish: • Adult stage (Medusa): Adult jellyfish exist as males and females; they release eggs and sperm into the water for fertilization, a process of sexual reproduction. • Planula Larva Stage: After fertilization, the embryo develops into a ciliated larva known as a planula. This larva drifts through the water until it attaches to a suitable underwater surface. • Polyp Stage: The attached larva transforms into a form resembling a sea anemone, featuring a mouth and tentacles at the top. During this stage, the polyp can reproduce asexually through budding. • Strobila stage: The polyp grows and undergoes transverse division, forming stacked layers resembling a pile of plates. • Ephyra stage: Each divided layer detaches as a small jellyfish known as an ephyra; it subsequently grows and flips over—orienting its tentacles downward—to develop into an adult jellyfish (medusa). Food Process Trending For Restuarant: - Key Timeline Evolution Adventure Story of: Jellyfish are among the most ancient organisms on Earth, having evolved over 500–600 million years—predating even the era of dinosaurs. Origins and Fossil Evidence • Precambrian Era: Jellyfish ancestors appeared in the oceans 500–600 million years ago; scientists have discovered fossil evidence dating back approximately 540 million years in California. • Phylum Cnidaria: Jellyfish are classified as invertebrates, alongside sea anemones and hydras. Their bodies consist of up to 95% water, and they lack a brain, heart, or bones. Evolution of the stinging cell system (Nematocysts) • Development of stinging cells: A crucial organ for jellyfish survival is the nematocyst—a stinging cell—which evolved from primitive nerve cells and serves functions related to prey capture and self-defense. Mechanism of toxicity: Over hundreds of millions of years, these venom-producing cells have evolved to become increasingly specialized and complex—particularly in box jellyfish (Cubozoa), which possess potent venom capable of rapidly damaging the nervous system, heart, and skin. And the finally then You can eat it and Sell it to the Merchant or Customer with Who people you Know Knew known, i hope you have fun and enjoy it.
ClickMeSeeAllFull
ClickMeSeeOnMoreDetail
ClickMeSeeOnMorePictureImage
ClickMeSeeOnMoreVideo
Animal Poison: Discovery World Wide Life Animal Menu: 12.Stingray Tail Deadly Poison Animal
Dangerous Often See in Daily Routine: Method Procedure Management All Works: Stingray Tail Deadly Poison Animal
First Aid Instructions Treatment Cure Methods: The method for treating the venom and providing first aid after a stingray sting involves washing the wound, controlling bleeding, removing any remaining fragments of the stinger, and soaking the area in warm water to break down the venom's structure and alleviate pain. First Aid Steps: • Exit the water immediately: Get out of the water quickly to prevent further injury and seek assistance. • Wash the wound: Rinse with clean water or saline solution to completely remove sand, mucus, and debris. • Control bleeding: Apply direct pressure to the wound with a clean cloth if there is heavy bleeding. • Remove the stinger: Carefully use tweezers to pull out any large fragments of the stinger (if a fragment is deeply embedded or difficult to remove, do not force it out; seek medical attention immediately). • Soak in warm water: Immerse the stung area in warm water (approximately 43–45°C, or as hot as can be tolerated) for 30–90 minutes. The heat helps break down the stingray's venom proteins and effectively alleviates pain. Precautions and Additional Recommendations • Do not apply a tourniquet or make incisions to suck out the venom yourself, as this may cause tissue damage and worsen the risk of infection. • If there are symptoms of severe allergic reaction, chest tightness, or dizziness, or if the wound is located on the chest or abdomen, seek immediate medical attention at a hospital in accordance with the Department of Fisheries' guidelines. Warning Caution: The primary precaution regarding venomous stingrays is to avoid approaching their tails; they possess sharp barbs with serrated edges—resembling saw teeth—and venom glands that automatically release toxins upon piercing the skin. Dangers and symptoms of envenomation: • Pain: Causes intense pain at the wound site that persists for several hours. • Physical symptoms: Muscle weakness, numbness, and a risk of chronic tissue necrosis at the puncture site. Prevention and Precautions • While diving: If you encounter a stingray, approach it slowly; do not make sudden movements toward it, and avoid using camera flashes. • First aid: If stung by the barb, immediately soak the wound in hot water (approximately 45°C) for 30–60 minutes to alleviate pain caused by the venom. Then, seek medical attention promptly to have the wound cleaned and to receive a tetanus shot. Souce Place Live Any Wherever can i you me See it: Most venomous stingrays inhabit shallow waters—such as sandy or muddy bottoms—along tropical and temperate coastlines worldwide, though some freshwater species are found in rivers or major river basins. Habitat Characteristics • Marine and Coastal: Often found swimming or lying buried beneath sand or mud, or near coral reefs in shallow coastal waters; they use this positioning to conceal themselves while waiting to ambush prey such as shellfish, shrimp, crabs, and small fish. • Freshwater habitats: Freshwater stingrays, such as the Chao Phraya giant stingray, inhabit large rivers or tropical freshwater basins. • Natural behavior: They prefer to lie motionless, camouflaged beneath sand or mud; this often leads to accidental stepping by people in shallow water or along riverbanks. Protection Save From: The best way to prevent being stung by a stingray is to shuffle your feet slowly along the sandy bottom—rather than taking normal steps—when in the water; the vibrations will cause the stingray to swim away before you step on it. Safety guidelines regarding stingrays • Shuffle your feet: Move your feet along the sandy bottom without lifting them high, allowing the stingray to sense the vibrations and swim away.• Wear protective gear: Wear water shoes or footwear suitable for wading in the sea to help minimize injury in case of accidental contact with the fish. • Exercise caution when handling fish: Fishermen and fish handlers should avoid the tail area and be extremely careful of the venomous spines. • Use a walking aid: Use a stick or rod to probe the water ahead if wading in murky water where the seabed is not visible. Behavior Attribute Time Food For Animal: Venomous stingrays are naturally non-aggressive and peace-loving; they typically conceal themselves on the sandy bottom. General Behavior and Characteristics • Concealment: They often lie flat or bury themselves in the sand—in shallow water or along the seabed—to camouflage themselves while waiting for prey or avoiding danger. • Temperament: They are not inclined to chase or attack humans unprovoked; they are generally docile.• Self-defense: If it feels threatened or is accidentally stepped on, it will immediately lash out with its sharp-barbed tail to defend itself. • Movement: It swims using large, expansive pectoral fins that flap gracefully, resembling flight through the water. Precautions when encountering stingrays • Stingray Shuffle: Gently stomp or shuffle your feet along the sandy bottom when walking in shallow water; the vibrations will help scare the stingray away. • Maintain distance: Stay at least 3 meters away from the fish, and strictly avoid touching or approaching the base of its tail. Benefit Professsion of: Although venomous stingrays are notorious for the danger posed by their tail barbs and venom glands, from ecological, scientific, and lifestyle perspectives, humans can derive benefits from them in several ways, as follows: 1. Benefits for medicine and scientific research • Studying venom structure for drug development: Scientists and researchers are investigating the properties of stingray venom to develop therapeutic drugs—much like how venoms from other animals (such as snakes or scorpions) have been used to create medications for blood pressure control or diabetes—because the compounds within the venom often exhibit specific effects on the nervous and circulatory systems. Historical medical study: Records from ancient Roman times indicate that physicians used parts of the electric ray (Torpedo fish) in medicinal formulas and hair-removal preparations; this practice laid the foundation for subsequent interest in the biology of this group of animals. 2. Benefits to the marine ecosystem • Population control and nutrient cycling: Stingrays act as predators within the food web, helping to regulate the populations of benthic organisms—such as mollusks, crabs, and shrimp—and preventing their overabundance. • Seabed disturbance and habitat creation: Their foraging behavior—involving water jets or wing-flapping to dig through the sand—helps cycle nutrients within the substrate and creates small refuges for other organisms in the ecosystem.3. Economic and Lifestyle Benefits • Source of Protein and Food: The meat of many stingray species (including those with venomous spines) is suitable for consumption once the tail—containing the spine and venom gland—has been properly removed. Stingray meat is considered a high-protein, low-fat, and low-calorie food that is rich in unsaturated fatty acids beneficial to the body.• Leather Industry: Stingray skin is strong, durable, and features a beautiful, granular texture. It is often tanned and crafted into high-end leather goods such as wallets, belts, and watch straps. • Marine Tourism: Stingrays attract divers from around the world, generating substantial revenue for the tourism industry in many countries. Rate Cost Per Money SuperMarket on The Internet Online: The market price of stingrays (most of which possess a venomous barb at the base of the tail) generally falls into two main categories based on their intended use: 1. Ornamental fish (kept in tanks or ponds for breeding and competitions) Popular freshwater stingray species equipped with venomous barbs are frequently traded in the ornamental fish market for breeding purposes; prices vary based on the distinctiveness and rarity of the species. • Motoro: An entry-level variety that is easy to keep and features basic patterns; prices start at around 200 Baht per small juvenile. • SP / Motoro hybrids: Prices increase with size; for instance, a pair around 8 inches in size typically sells for about 4,000 Baht (2,000 Baht per fish), while a large breeding female (13–14 inches) can cost up to 15,000 Baht. Black Diamond: Characterized by a jet-black body with bright white spots distributed throughout, this is a top-tier, high-priced variety. Newborns displaying beautiful patterns and large, distinct spots command prices ranging from tens of thousands to hundreds of thousands of baht per fish. 2. Food Products (Fresh Fish and Processed Seafood) For the trade of marine or freshwater stingrays intended for consumption (where the venomous barb is removed by the seller prior to sale for safety reasons), pricing is based on weight (per kilogram): • Fresh fish / Fresh fish fillets: The average price ranges from 100 to 250 Baht per kilogram (wholesale prices for bulk orders of 15 kg or more may be lower, subject to negotiation with the fish wholesaler). • Circular dried stingray (*Pla Kaben Wong*): Stingray meat sliced and dried in a circular shape. The average retail price ranges from 60 to 150 Baht per pack (approximately 100 grams). • Processed sweet stingray: Wholesale price is approximately 295 Baht per kilogram, with an average retail price of 310 Baht per kilogram. • Imported stingray fin (*Eihire*): For Japanese restaurants, the premium grade commands a higher price, at approximately 850 Baht per 500 grams. Farming Breeding Fertilization Hybridization Reproduction : Venomous stingrays reproduce via internal fertilization and are predominantly viviparous (giving birth to live young). Reproductive and propagation process: • Mating: The male uses its reproductive organ (clasper) to transfer sperm for internal fertilization within the female. • Gestation: The gestation period varies by species (e.g., common stingrays or southern stingrays have a gestation period of approximately 4 to 7 months). • Birth: Once the embryos have fully developed within the mother stingray's uterus, the young are born looking like miniature versions of the adults, complete with venomous tail barbs from birth. • Litter size: A mother stingray can give birth to between 1 and 10 offspring per litter, depending on the size and species of the stingray. Food Process Trending For Restuarant: - Key Timeline Evolution Adventure Story of: Venomous stingrays evolved from ancient shark-like ancestors during the Triassic period (approximately 200–250 million years ago), adapting a flattened body shape to forage along the seabed. Origins and Ancient Lineage • Cartilaginous fish: Stingrays belong to the subclass Elasmobranchii—sharing this classification with sharks—and possess a skeleton made of cartilage. • Morphological adaptation: Their pectoral fins expanded and fused with the body, forming a round or disc-like shape that facilitates concealment beneath the sand. Evolution of the venomous spine • Modified scales: The sharp spine—or "sting"—located at the base of the tail evolved from tooth-like placoid scales. • Venom system: A groove beneath the spine houses a venom-producing gland used for defense against large predators, such as sharks; it is not used for hunting prey. Dispersal into freshwater habitats • Freshwater stingray family (Potamotrygonidae): Species in South America and Asia diverged from marine ancestors and adapted to freshwater environments millions of years ago. And the finally then You can eat it and Sell it to the Merchant or Customer with Who people you Know Knew known, i hope you have fun and enjoy it.
ClickMeSeeAllFull
ClickMeSeeOnMoreDetail
ClickMeSeeOnMorePictureImage
ClickMeSeeOnMoreVideo
Animal Poison: Discovery World Wide Life Animal Menu: 13.Electric EEL Deadly Animal
Dangerous Often See in Daily Routine: Method Procedure Management All Works: Electric EEL Deadly Animal
First Aid Instructions Treatment Cure Methods: First aid for an electric eel shock involves immediately separating the victim from the water or the fish using an electrically insulating material, followed by prompt transport to a hospital in all cases. First aid procedures: • Separation from water and the fish: Strictly avoid touching the victim with bare hands or entering the water where the electric eel is present. Instead, use a dry, non-conductive object—such as a dry piece of wood, a dry cloth, or a dry rope—to push or pull the victim to a dry area. • Check breathing and pulse: Determine if the patient is conscious, breathing normally, and has a detectable pulse (e.g., at the neck). • Perform CPR and use an AED: If the patient is unconscious, not breathing, or has no pulse, immediately perform cardiopulmonary resuscitation (CPR) and use an automated external defibrillator (AED) if one is available. • Wound care: If there are burns from the electric shock, wash the wound with clean water and cover it with a clean cloth or dry gauze. • Transport to hospital: Call the emergency hotline (1669) and take the patient to a medical facility for an electrocardiogram (ECG) and a thorough check of internal organ function, even if the patient has regained consciousness and appears normal. Warning Caution: The primary precaution when approaching or encountering an electric eel is the danger posed by the high-voltage electric current they discharge for self-defense and hunting. Dangers and Precautions • High-voltage current: Electric eels can discharge up to 860 volts—several times higher than standard household electricity. This voltage causes severe muscle contractions. • Physical risks: An electric shock can lead to unconsciousness, cardiac arrest, or drowning if the encounter occurs in water. • Continuous electric discharge: They can deliver repeated electric shocks over a sustained period, capable of causing serious harm to humans or other animals. • Maintaining distance: Keep your distance and never touch an electric eel with bare hands, even if it appears motionless or is underwater. Souce Place Live Any Wherever can i you me See it: Electric eels inhabit freshwater environments in South America, particularly within the Amazon River basin and the Amazon River itself. Habitat Characteristics • Water type: Freshwater; slow-flowing, murky, and low-oxygen surface waters. • Locations: Pools, swamps, and oxbow lakes, as well as areas with muddy bottoms and aquatic vegetation. • Distribution: Found in northern and northeastern South America, such as the Orinoco and Amazon river basins. Protection Save From: Protection against the dangers posed by electric eels can be achieved by maintaining a safe distance and wearing protective gear when in areas where they may be encountered. Safety precautions and guidelines: • Maintain distance: Avoid approaching or making direct contact with electric eels. • Wear protective gear: If it is necessary to work in waters inhabited by electric eels (found in the Amazon basin of South America), wear clothing or footwear made of electrically insulating materials, such as thick rubber. Beware of repeated discharges: Electric eels can release high-voltage shocks of 600–800 volts in rapid succession for a short period (approximately 5–10 seconds). Therefore, even after being shocked, do not approach the fish immediately; wait until you are certain it has swum away or calmed down. Behavior Attribute Time Food For Animal: The electric eel has a long, cylindrical, snake-like body without scales and uses electric discharges for navigation, hunting, and self-defense. Behavior and Characteristics • Foraging and Movement: • It is a nocturnal animal. • It has poor eyesight, so it relies on emitting weak electric currents to locate objects and navigate through the water. • It is solitary and employs an ambush strategy to catch prey. • Hunting: • Upon locating prey, it discharges a high-voltage electric current to stimulate the prey's motor neurons, causing sudden muscle tension and spasms that render the prey immobile. • Defense: • It generally avoids confrontation but defends itself aggressively by discharging high-voltage electricity (up to 860 volts in some species) when it feels threatened. • Respiration: • It must periodically surface to breathe air directly due to its specialized respiratory organs. Benefit Professsion of: The primary benefits of the electric eel relate to its own survival in the wild—such as defense against predators, hunting prey by discharging high-voltage electricity to stun or paralyze them, navigation, and communication with others. Furthermore, in the realms of science and technology, the electric eel offers significant benefits and serves as a source of inspiration in the following ways: Inspiration for Battery Invention • Battery Prototype: The electric eel's electricity-generating structure inspired the Italian scientist Alessandro Volta to invent the battery—or "Voltaic Pile"—which was the world's first electrochemical battery over 200 years ago. • Energy Technology Development: The eel's biological mechanisms also enable scientists to conduct research and build upon these principles to develop future materials and technologies for energy storage. Medical Research • Heart Disease Treatment Innovation: Research is being conducted to simulate the natural bio-electric cells of electric eels for application in medical mechanisms—such as developing treatments for heart failure. Rate Cost Per Money SuperMarket on The Internet Online: The market price for electric eels in the rare ornamental fish trade generally ranges from approximately 40 to 160 dollars per fish, depending on size and patterning. Price data by size: • Small size (approx. 5 inches): Approx. 30–40 dollars • Medium to large size (1 foot and up): Approx. 120 dollars and up • Note: International market prices for large imported specimens can reach 60–395 USD (or higher, depending on length). Precautions for Purchase and Handling • Electrical Hazard: Electric eels can discharge electric shocks ranging from 600 to 800 volts, which can be fatal or cause loss of consciousness. • Supervision: Extra caution is required when moving the aquarium and during feeding. Farming Breeding Fertilization Hybridization Reproduction : Electric eels reproduce by laying eggs during the dry season or the onset of the rainy season; the male constructs a nest using saliva or air bubbles to protect the eggs. Reproductive Behavior and Process • Timing: Typically occurs during the dry season or the transition to the rainy season, when river water levels recede. • Nest building: The male electric eel constructs a nest using saliva or air bubbles to conceal and protect the eggs. • Spawning: The female deposits her eggs into the nest prepared by the male, after which the male releases sperm to fertilize them. • Egg care: The male closely guards and protects the nest until the eggs hatch. Food Process Trending For Restuarant: - Key Timeline Evolution Adventure Story of: Electric eels evolved their electricity-generating organs from muscle cells that lost the ability to contract, instead taking on the function of storing and discharging electric charges. Evolution and Background • Not a true eel: Despite a body shape resembling a snake or a common eel, the electric eel actually belongs to the order Gymnotiformes (related to knifefish) and is more closely related to catfish than to true eels (Anguilliformes). Transformation of muscle cells: Certain genes within the muscle cells are deactivated, preventing the cells from contracting normally. Consequently, the energy that would otherwise be used for movement is converted into an electric current. A single cell generates approximately 50 millivolts of electricity. Positive-bias evolution: More than 80 percent of the body consists of electric organs—a feature scientists have identified as a result of convergent evolution occurring independently across various fish groups. These organs serve functions such as navigation, defense, communication, and hunting, and are capable of generating voltages as high as 860 volts. Scientific Study: Humans began seriously studying this ability around 1775, which served as a key inspiration for the invention of the world's first electric battery in 1800. In 2019, scientists classified electric eels into three distinct species within the genus *Electrophorus*. And the finally then You can eat it and Sell it to the Merchant or Customer with Who people you Know Knew known, i hope you have fun and enjoy it.
ClickMeSeeAllFull
ClickMeSeeOnMoreDetail
ClickMeSeeOnMorePictureImage
ClickMeSeeOnMoreVideo
Animal Poison: Discovery World Wide Life Animal Menu: 15.Rove Beetle Bug Deadly Poison Animal
Dangerous Often See in Daily Routine: Method Procedure Management All Works: Rove Beetle Bug Deadly Animal
First Aid Instructions Treatment Cure Methods: The initial first-aid measure upon contact with a rove beetle is to immediately wash the affected skin with water or soap and water, followed by a cold compress to alleviate the burning sensation. First-aid steps: • Wash immediately: Promptly wash the area exposed to the insect with clean water and soap to rinse away the toxin (pederin). • Cold compress: Apply an ice pack wrapped in a cloth to the area experiencing a burning sensation or redness to alleviate pain. • Do not rub or crush: Strictly avoid slapping, hitting, rubbing, or crushing the insect against your skin; instead, blow it away or gently brush it off. • Do not pick or scratch: Avoid picking at or scratching any blisters to prevent secondary bacterial infection. Precautions and when to see a doctor • Mild symptoms: If there is slight redness, the condition may resolve on its own within 2–3 days. • Severe symptoms: If blisters develop, the rash spreads over a large area, pus appears, there is intense burning, or symptoms do not improve within 2–3 days, you should see a doctor immediately. Warning Caution: The most important precaution when encountering a rove beetle is to strictly avoid swatting, hitting, or crushing it against your skin. Doing so causes the release of a toxin called pederin, which can burn the skin and lead to painful, burning blisters. What to do if you encounter or come into contact with the insect: • If it lands on you: Do not swat or brush it off forcefully. Instead, blow it away or use a piece of paper to gently flick it off. • If you accidentally come into contact with the toxin: Immediately wash the affected area with soap and clean water. You may also rinse the area or apply a cold compress to alleviate the burning sensation. • Symptoms: Redness, a burning sensation, and clear blisters forming a linear pattern (resembling a burn) appear approximately 8–12 hours after contact. • Precautions: Do not pick at or scratch the blisters, and avoid indiscriminately applying over-the-counter medications. • When to see a doctor: Seek immediate medical attention from a dermatologist if the affected area spreads extensively, if pus-filled blisters develop, if a fever occurs, or if the toxin comes into contact with your eyes (which carries a risk of blindness). Souce Place Live Any Wherever can i you me See it: The natural habitat of the rove beetle (or "bottom-lifting beetle") is typically in humid tropical regions, particularly in damp soil, grasslands, rice fields, orchards, or areas containing decaying organic matter. Natural Habitats • Damp soil: Such as wet ground or mud along waterways. • Grasslands and crop fields: Such as rice paddies, cornfields, sugarcane fields, or dense patches of weeds. • Piles of organic matter: Such as manure heaps, piles of rotting wood, or accumulated leaf litter. Why do they invade homes? • Escaping floodwaters: During the rainy season, when floodwaters inundate their natural habitats, rove beetles migrate to higher ground to escape the moisture and enter homes. • Attracted to light: These insects are drawn to bright white fluorescent lights at night, often flying in through windows or ventilation openings to land on walls or bedding. Protection Save From: Indoor prevention measures • Keep doors and windows securely closed at night. • Bright lights at night tend to attract insects; use lighting only as necessary or turn off bedroom lights. • Always check and shake out mattresses, pillows, mosquito nets, or clothing before use. The best way to prevent rove beetles is to keep doors and windows tightly closed and avoid using white lights at night to prevent the insects from flying into your home. You can prevent and deal with rove beetles using these simple methods: Preventing entry into the home • Close doors and windows: Shut them securely before nightfall and install fine-mesh screens to prevent small insects from slipping inside. • Manage lighting: Reduce nighttime lighting or switch from white light bulbs to yellow or warm-light bulbs, as white light is more attractive to these insects. • Clean the area around the house: Keep the grass trimmed short and clear away piles of dry leaves, debris, and areas of accumulated moisture, which serve as hiding spots and breeding grounds. What to do if you encounter the insect • Absolutely do not swat or crush it: The toxin it carries, called paederin, causes skin burns, blisters, and a burning sensation. • Use safe removal methods: Gently blow it away, flick it off, use adhesive tape to pick it up and discard it, or use a piece of tissue paper to remove it. • Wash immediately: If you accidentally touch the insect or come into contact with its fluids, wash the area immediately with soap and clean water. Behavior Attribute Time Food For Animal: A distinctive behavior of the rove beetle is its tendency to constantly arch its abdomen—bobbing it up and down or curving it into a J-shape—while on the ground. Behavior and Posture • Movement: Moves and runs very rapidly when disturbed or startled. • Posture/Abdomen: Frequently raises and lowers the tip of its abdomen while twitching its antennae to sense its surroundings or communicate. • Temperament: Not aggressive; it does not actively bite humans to cause harm but typically attempts to flee. • Activity and attraction to light: They forage during the day in marshy grasslands or rice paddies but are attracted to household lights at night. • Defense mechanism: If they land on a person and are brushed off or crushed, they release a toxin called pederin, which causes a burning sensation and skin irritation. Benefit Professsion of: The primary benefit of rove beetles is their role in the natural control of agricultural pests. Agricultural and ecological benefits: • They act as predators, feeding on the eggs, larvae, and adults of pest insects. • They help eliminate planthoppers, leafhoppers, caterpillars, and moth pupae that feed on crops in agricultural fields and rice paddies. • They help destroy the eggs and larvae of flies in the natural environment. • Soil-dwelling species assist in the decomposition of organic matter and plant and animal debris. Although rove beetles are beneficial in helping to reduce the population of agricultural pests, they contain a toxin called pederin, which can cause a burning sensation and blistering of the skin upon contact or if the beetle is crushed. Rate Cost Per Money SuperMarket on The Internet Online: There is no market for trading *Paederus* beetles (rove beetles) as pets, food, or commercial insects, as they are highly toxic and cause severe skin irritation in humans. You might be confusing the *Paederus* beetle with other beetle species that are commonly traded; here are the details: 1. Rove Beetle • Status: Has no commercial value; a naturally occurring insect that often swarms during the rainy season. • Caution: Its body contains a toxin called "Paederin." Contact with the insect—or crushing or squashing it—can cause skin inflammation, a burning sensation, blistering, or severe chemical burns. 2. Other beetle species actively traded in the market If you are looking for beetles that are bought and sold within exotic pet communities or the edible insect market, they might include the following groups: • Rhinoceros beetles / Stag beetles (for display/pets): Prices range from $2–4 per individual to rare foreign species costing anywhere from several thousand to tens of thousands of baht. Sago Weevil / Coconut Weevil (Commercially farmed insect): These are sold either fresh for cooking or dried/freeze-dried as pet food (e.g., for sugar gliders or hedgehogs). Prices range from approximately $10–$20 per kilogram, or about $1–$3 for a small jar. Farming Breeding Fertilization Hybridization Reproduction : Rove beetles (Staphylinidae or *Paederus fuscipes*) reproduce sexually, mating and laying eggs in moist environments—such as manure piles, muddy soil, or heaps of decaying leaves—and possess a rapid life cycle that allows for quick population growth. Life Cycle and Development Rove beetles undergo complete metamorphosis, which consists of four stages: • Egg stage: The female lays eggs singly in moist soil or decaying plant matter. The eggs are oval-shaped and yellowish-white, taking approximately 3–5 days to hatch into larvae. • Larval stage: The larva is slender and elongated; it typically lives in the soil and acts as a predator, feeding on small insects or other organisms. This stage lasts approximately 4–10 days. • Pupal stage: Upon reaching full growth, the larva pupates in the soil, spending about 3–5 days there before molting into an adult. • Adult stage: The adult lives for approximately 1–3 months. Overall, the entire life cycle from egg to adult takes only 2–3 weeks. Factors facilitating rapid reproduction • Weather and seasons: Outbreaks and reproduction peak during the transition from the late rainy season to the early cool season, driven by high soil moisture and abundant food sources. • Attraction to light: After dark, adults leave their natural habitats and are drawn to lights around homes; this is the primary reason humans come into contact with the toxin (pederin) they carry, resulting in skin burns. Food Process Trending For Restuarant: - Key Timeline Evolution Adventure Story of: Rove beetles (family Staphylinidae) belong to an insect lineage with an evolutionary history spanning over 200 million years, dating back to the Triassic period. Evolutionary History and Key Characteristics • Origins: Fossil evidence indicates that the ancestors of this beetle group appeared during the Mesozoic era and have remarkably maintained their original form and behavior (morphological stasis). • Wing evolution: The forewings have shortened into small, hardened plates (elytra), an adaptation that enhances flexibility and agility when maneuvering through crevices in the soil, dense grass, or tree bark. • Toxin production mechanism (Pederin): Pederin is not synthesized directly by the beetle itself but results from a symbiotic relationship with internal bacteria; this toxin serves to protect the beetle from natural predators. Ecological role: Evolution has shaped them into predators of small insects—such as aphids and pest caterpillars—making them highly beneficial to the ecosystem and agriculture. And the finally then You can eat it and Sell it to the Merchant or Customer with Who people you Know Knew known, i hope you have fun and enjoy it.
ClickMeSeeAllFull
ClickMeSeeOnMoreDetail
ClickMeSeeOnMorePictureImage
ClickMeSeeOnMoreVideo
Animal Poison: Discovery World Wide Life Animal Menu: 15.Bombardier Beetle Bug Deadly Poison Animal
Dangerous Often See in Daily Routine: Method Procedure Management All Works: Bombardier Beetle Bug Deadly Animal
First Aid Instructions Treatment Cure Methods: First aid for exposure to toxins from the *Paederus* beetle (often referred to as the "rove beetle," which releases the toxin pederin) involves immediately washing the skin with soap and clean water to remove the toxin. Actions to take upon contact with the insect or if symptoms occur: • Do not swat or crush the insect directly against your skin; instead, blow it away or use clear adhesive tape to remove it. • Immediately wash the affected area with soap and water, or clean it with sterile saline solution. • Apply a cold compress to the area experiencing a burning sensation, redness, or swelling for 10–15 minutes to reduce inflammation. • Do not scratch or pick at any clear blisters to prevent secondary bacterial infection. • Seek medical attention if the rash spreads over a large area, if pus-filled blisters develop, if you run a high fever, or if the affected area is near your eyes. Warning Caution: The primary hazard associated with the bombardier beetle is its release of a hot, highly corrosive chemical substance from its rear end when disturbed; this causes skin burns, blistering, and a burning sensation, and poses a severe danger if it enters the eyes. Dangers and observed symptoms • Skin burns and blisters: Chemicals (benzoquinones) cause a burning sensation, resulting in burns or blisters resembling scalds from hot water. • Eye damage: Contact with the eyes causes severe inflammation and burning pain, and carries a risk of blindness. • Sound and odor: When defending itself, it sprays the substance accompanied by a loud popping sound—resembling a fart—and a pungent, foul odor. Precautions and Prevention • Do not strike with bare hands: Avoid slapping or crushing the insect directly against your skin, as this causes chemicals to be released and come into immediate contact with your body. • Blow it off: If an insect lands on your body, blow it away or gently flick it off using a piece of paper. • First aid: If exposed to the chemical, immediately wash the area with soap and clean water. Apply a cold compress to alleviate any burning sensation. Seek medical attention if the wound worsens or if the substance gets into your eyes. Souce Place Live Any Wherever can i you me See it: Bombardier beetles inhabit terrestrial environments, including ground surfaces, damp areas, and the edges of bodies of water. Habitat Characteristics: • Ground and dark areas: They prefer hiding in moist crevices, such as beneath piles of stones, tree bark, or decaying logs. • Waterside: They are sometimes found near the edges of small pools or bodies of water. • Egg-laying and development: They typically dig burrows or lay small clusters of eggs underground, where the larvae develop into pupae within the soil. Protection Save From: You can protect yourself from the "farting beetle" (also known as the bombardier beetle)—which, when disturbed, sprays a hot, irritating chemical capable of causing painful skin burns—by following these guidelines: Prevention and response methods when encountering the bombardier beetle. • Do not swat or crush with bare hands: If you find a bombardier beetle on your body, strictly avoid swatting or crushing it, as this causes it to release a hot, toxic substance directly onto your skin. • Use blowing or gentle flicking: Instead, blow on it, flick it off, or carefully use a piece of paper or a small stick to remove the insect. • Wash immediately with soap and water: If you accidentally come into contact with the toxin or the insect itself, immediately wash the affected skin area with soap and water to minimize the severity of the reaction. • Manage nighttime lighting: Bombardier beetles and many other types of beetles are attracted to lights at night. Close your window screens, install insect netting, or switch to yellow (warm-toned) light bulbs to reduce the likelihood of attracting insects into your home. Behavior Attribute Time Food For Animal: Bombardier beetles are small beetles belonging to the ground beetle family; they exhibit unique defensive behaviors and postures. Characteristics and defensive behaviors • Chemical Spray: When disturbed or threatened by a predator, it releases chemicals—specifically hydroquinone and hydrogen peroxide—from glands located in its abdomen. • Loud Sound: These chemicals react with each other and are ejected from the rear (anal) end, producing a popping sound similar to a fart. • Hot Mist: The ejected substance takes the form of a hot mist; it is an irritant that causes a burning sensation on the skin, resulting in burns or blisters similar to those caused by acid. General Behavior • Movement: Typically walks along the ground or hides beneath leaf litter, stones, or decaying logs; attracted to lights at night. • Feeding: Hunts other small insects, such as caterpillars, aphids, or earthworms. Benefit Professsion of: The bombardier beetle offers no direct benefit to humans in terms of consumption or agriculture; however, its unique defense mechanism yields immense value for scientific research and biotechnology (biomimicry). Benefits for Research and Technology • Micro-reactor technology prototype: Scientists are studying the chemical mixing and internal pressure control mechanisms of the bombardier beetle to develop miniature reactors and high-precision chemical dispensing systems. • Propulsion and Fire-Extinguishing System Development: The pulsed jet mechanism serves as a guide for designing more efficient industrial propulsion systems and fire-extinguishing equipment. • Engine and Nozzle Innovation: Principles governing the insect's thermal explosion control are being studied to develop nozzles for engine ignition systems and gas turbines capable of operating in extreme cold. Ecological Role • Insect population control: As predatory insects (ground beetles), both adults and larvae consume other small insects and organic debris, thereby helping to maintain natural balance and decompose plant and animal matter in the soil. Rate Cost Per Money SuperMarket on The Internet Online: There is no official market price for the "Bombardier Beetle," as it is not considered an insect of economic value. Unlike crickets, pupae, or grasshoppers, it is not commonly consumed; furthermore, its defense mechanism—capable of spraying a chemical fluid heated to nearly 100 degrees Celsius—makes it unsuitable for general consumption or commercial farming. However, any trading is limited to specific, niche groups, as follows: • Collectors of insect specimens and exhibition pieces: Bombardier beetles are traded as dried specimens for collections or entomological study. Prices depend on the specimen's condition and size (ranging from tens to hundreds of baht per specimen). • Market for exotic live insects (Exotic Pets): While there is trade in exotic ground beetles abroad—catering to those interested in studying their behavior—Thailand lacks dedicated commercial breeding farms to support this market. Farming Breeding Fertilization Hybridization Reproduction : Bombardier beetles reproduce sexually and have a complete life cycle (metamorphosis) through four main stages: egg, larva, pupa, and adult. Reproductive Cycle and Development • Mating: Occurs during warmer months; the male transfers a spermatophore to the female for internal fertilization. • Egg Stage: The female lays dozens to hundreds of fertilized eggs, typically selecting a safe location—such as underground or at the base of a tree—or constructing clay cells attached to rocks and branches for protection. • Larval stage: Upon hatching, the larva resembles a small worm and lives as a predator or parasitoid, feeding on small insects or the pupae of other insects while molting multiple times to grow. • Pupal stage: Once fully grown, the larva stops feeding and enters the pupal stage—either in the soil or in a safe location—to undergo the complete development of its organs and wings. Adult stage: The adult beetle emerges from the pupa and comes to the soil surface to find a mate and reproduce. The adult lifespan can range from a few weeks to several years, depending on the species and environmental conditions. Food Process Trending For Restuarant: - Key Timeline Evolution Adventure Story of: Bombardier beetles belong to the tribe Brachinini within the ground beetle family (Carabidae); over tens of millions of years, they have evolved a complex chemical defense system to survive against predators. Origins and Evolution of the Chemical Mechanism • Ancestral Ground Beetles: The ancestors of bombardier beetles initially possessed anal glands that secreted mild chemical deterrents—such as quinones—to ward off predators; this trait is common among ground beetles. • Development of Paired Glands and Precursors: Over time, through natural selection and mutation, their bodies evolved a compartmentalized abdominal structure. This allowed for the separate storage of two chemicals—hydroquinone and hydrogen peroxide—that are unstable when combined. Mixing chamber and catalytic enzymes: Advanced evolution resulted in the formation of a "mixing chamber" (vestibule) containing two key enzymes: catalase and peroxidase. Mechanism of explosive heat discharge: When threatened, sphincter muscles release two types of chemicals that mix with enzymes, triggering a violent exothermic reaction. This raises the temperature to nearly the boiling point of water (approximately 100°C) and generates the pressure to spray a hot, toxic mist (p-benzoquinone) in rhythmic bursts—accompanied by a loud, fart-like sound—with pinpoint accuracy. And the finally then You can eat it and Sell it to the Merchant or Customer with Who people you Know Knew known, i hope you have fun and enjoy it.
ClickMeSeeAllFull
ClickMeSeeOnMoreDetail
ClickMeSeeOnMorePictureImage
ClickMeSeeOnMoreVideo
Animal Poison: Discovery World Wide Life Animal Menu: 16.Millipede Bug Deadly Poison Animal
Dangerous Often See in Daily Routine: Method Procedure Management All Works: Millipede Bug Deadly Poison Animal
First Aid Instructions Treatment Cure Methods: If exposed to millipede secretions, immediately wash the affected area thoroughly with soap and clean water. First Aid Measures • Wash the skin: Thoroughly cleanse the exposed area with soap and clean water to wash away the chemical substances. • Do not use alcohol: Avoid applying alcohol or strong antiseptics, as these may trigger an allergic reaction or further irritate the skin. • In case of eye contact: Immediately flush the eyes with plenty of clean water and consult a doctor to check for eye inflammation. • Wound care: If burning, redness, or blistering occurs, apply an anti-inflammatory medication or consult a pharmacist. Symptoms generally improve and resolve within one week; however, if severe pain or swelling develops, seek medical attention. Warning Caution: Millipedes do not bite, but when disturbed, they secrete toxins from glands along the sides of their bodies; these secretions can cause a burning sensation or skin inflammation. Precautions and symptoms of toxin exposure: • Toxin characteristics: A clear, colorless liquid containing hydrogen cyanide and phenol. • Skin symptoms: Burning sensation, red rash, pain, swelling, or blistering; pain typically persists for 2–3 days, and the condition resolves within approximately one week. • Eye contact: Causes severe irritation and may lead to eye inflammation. First Aid Measures • Wash immediately: Promptly cleanse the affected area with soap and clean water. • Apply medication: Apply anti-inflammatory or pain-relief medication as needed based on symptoms. • If it gets into the eyes: Immediately flush the eyes with large amounts of clean water and seek urgent medical attention from an ophthalmologist. Souce Place Live Any Wherever can i you me See it: The best way to prevent millipedes from entering your home is to eliminate moisture and leaf litter around the property while creating a protective barrier using natural materials. Methods to prevent and repel millipedes: • Sprinkle agricultural lime: Scatter lime around the house or along walkways; its alkalinity and moisture-reducing properties deter millipedes from crossing the area. • Use wood vinegar: Dilute with water and spray in dark corners, crevices, or around the perimeter of the house; the pungent, smoky odor effectively repels millipedes. • Sprinkle table salt: Scatter salt around the affected area to reduce moisture and drive the millipedes away (exercise caution to avoid sprinkling it near the base of large trees, as this can make the soil saline). • Clear away overgrown and damp areas: Sweep up fallen leaves, trim branches to allow sunlight to reach the ground, and move woodpiles or potted plants away from the immediate vicinity of the house. • Seal cracks and gaps: Use cement or silicone to fill cracks in floors or walls, and install insect-proof strips along the edges of doors and windows. If you find a millipede inside the house, do not step on it directly, as it releases chemicals that can cause skin irritation; instead, use a broom and dustpan to sweep it up and dispose of it outside. Protection Save From: Millipedes inhabit areas with high soil moisture and decaying organic matter. Natural Habitats • Under leaf litter: Hiding beneath piles of dry or decomposing leaves in forests. • Under rotting logs: Living beneath the bark or within cool, damp, decaying wood. • In loose soil: Burrowing into loose soil or hiding beneath clumps of grass. Areas where they are commonly found around the house • Under plant pots: Damp areas beneath pots or garden beds. • Damp, secluded corners: Areas such as outdoor bathrooms or nooks where water collects and humidity remains high. • Rainy season: Millipedes are frequently seen crawling across floors or lawns due to the increased moisture; as noted in online discussions (such as on Pantip), they prefer cool environments and migrate based on changing conditions. Behavior Attribute Time Food For Animal: The behaviors and mannerisms of millipedes are primarily driven by the need for survival, locomotion, and foraging. As slow-moving creatures that neither bite nor possess venomous fangs for combat, they exhibit several common behaviors, as follows: 1. Defense Mechanisms • Coiling or Conglobation: When disturbed, touched, or sensing danger, millipedes immediately curl their bodies into a circle or a tight spiral. This posture protects their legs and vulnerable undersides by tucking them inward, while their hard exoskeleton forms an external shield. Some species, such as pill millipedes, curl up into a perfect sphere resembling a ball. Release of foul-smelling chemicals: If threatened, millipedes release a pungent liquid or gas from glands along the sides of their bodies (ozopores). These secretions contain compounds such as benzoquinones or hydrogen cyanide, which serve to repel ants, insects, and predators, and can cause skin irritation or brown burn-like marks on humans. 2. Movement Characteristics • Wave-like Movement: Millipedes possess numerous legs (two pairs per body segment). When walking, their legs do not become entangled; instead, they move in a sequential, wave-like pattern—propagating from front to back—to generate the thrust needed to propel themselves forward slowly yet steadily. • Lying still while moving its legs: Sometimes, a millipede may be found lying in one spot while moving its legs or twisting its body. This behavior typically occurs when it is trying to right itself after being flipped onto its back or adjusting its orientation to burrow underground or into a pile of leaves. • Using antennae for navigation: Millipedes either lack eyes entirely or possess eyes with very poor vision. Consequently, as they move, they constantly sway their front pair of antennae back and forth to sense their surroundings and detect scents for navigation. Habitat and Foraging Behavior • Hiding in dark, moist places: Millipedes avoid sunlight and dry conditions. They typically burrow beneath rocks, logs, decaying wood, or piles of damp leaves. • Nocturnal: They emerge to forage in the evening or after rainfall, feeding on decaying plant matter and leaf litter; this feeding behavior aids in decomposing organic material, turning it into high-quality fertilizer for the soil. • Migration to escape water: During the rainy season or when the soil becomes waterlogged, millipedes alter their behavior, moving from underground to climb walls and doorframes, or seeking refuge inside homes to find dry areas where they can breathe. Benefit Professsion of: Millipedes play a vital role in the ecosystem by acting as nature's recyclers, helping to break down plant debris and organic matter. Key benefits of millipedes: • Aid in decomposing plant matter: Millipedes feed on dead leaves and decaying twigs, accelerating the decomposition process. • Enrich the soil with nutrients: Millipede droppings are rich in essential nutrients and organic matter, such as nitrogen, phosphorus, and potassium (NPK). • Aids in soil aeration: The movement and foraging activities of millipedes help loosen the soil, allowing plant roots to grow better. • Part of the food chain: Millipedes serve as an important food source for other animals, such as birds, toads, and reptiles. Rate Cost Per Money SuperMarket on The Internet Online: Millipede trading prices in Thailand vary significantly depending on the intended use—such as wholesale for organic fertilizer production or sale as rare, ornamental pets. Millipede Types and Trading Prices • Millipedes for organic fertilizer: • Purchase price: 1–3 USD per kilogram (depending on size). Ornamental millipedes / Exotic pets (e.g., pill millipedes or rare species): • Prices range from hundreds to thousands of baht per individual, depending on patterns and species; for instance, there have been listings at $21 per specimen, and trading occurs within exotic pet enthusiast groups—such as those for pill millipedes. Farming Breeding Fertilization Hybridization Reproduction : Millipedes reproduce sexually; the male transfers a sperm packet to the female using a specialized organ located on its body. Mating behavior • Timing: Millipedes are commonly observed mating during the rainy season, a period characterized by high humidity and abundant food. • Fertilization: The male possesses a reproductive organ modified from the seventh pair of legs (located towards the anterior or front section of the body) to transfer sperm to the female; fertilization occurs internally within the female. Egg-laying and Development • Egg-laying: The female digs into the soil or seeks out a moist, safe nook—such as beneath a pile of decaying leaves or a rotting log—to lay dozens to hundreds of eggs at a time. She often coats the eggs with mucus or soil to protect them from danger and desiccation. • Incubation Period: The eggs take approximately 2–3 weeks to hatch. • Juvenile stage: Upon hatching, juvenile millipedes resemble adults but are smaller and possess fewer body segments and legs. As they grow, they undergo multiple molts to increase the number of segments and legs until they reach adulthood. Food Process Trending For Restuarant: - Key Timeline Evolution Adventure Story of: Millipedes are among the world's earliest terrestrial animals, boasting an evolutionary history spanning 400 to 460 million years. They belong to the phylum Arthropoda and the class Diplopoda. Origins and the Era of Terrestrial Colonization (460–425 million years ago) • Origins: Genetic and molecular clock research indicates that millipede ancestors began evolving and diverging into distinct lineages approximately 460 million years ago (during the Ordovician Period)—predating the emergence of vertebrates onto land. • The Ancient World: During that era, the Earth's surface lacked large trees, foliage, or seed-bearing plants. Early millipedes acted as pioneers and detritivores, feeding on moss, slime, and organic debris on the ground. • Fossil Evidence: The oldest discovered fossils of millipedes and millipede-like creatures (such as *Kampecaris obanensis*) date back approximately 425–428 million years to the Silurian period; they were found in Scotland. The Era of Giant Arthropods and the Carboniferous Period (340–280 million years ago) • Giant Millipede (*Arthropleura*): During the Carboniferous period, *Arthropleura* millipedes evolved to reach massive sizes, exceeding 2 meters in length; they are considered the largest terrestrial invertebrates in Earth's history. They thrived in the lush environments of ancient tropical forests. Development of Protective Armor and Chemical Defenses (260 million years ago) • Chemical weaponry: Evolutionary evidence indicates that by 260 million years ago, millipedes had developed defensive chemical-secreting glands (ozopores)—such as those releasing cyanides or benzoquinones—to protect themselves from predators. Current Diversity: By the Jurassic period, most extant millipede families had already achieved physiological stability. There are over 10,000 species of millipedes worldwide (with estimates reaching up to 80,000 species), including unique species found in Thailand, such as the pink dragon millipede. And the finally then You can eat it and Sell it to the Merchant or Customer with Who people you Know Knew known, i hope you have fun and enjoy it.
ClickMeSeeAllFull
ClickMeSeeOnMoreDetail
ClickMeSeeOnMorePictureImage
ClickMeSeeOnMoreVideo
Animal Poison: Discovery World Wide Life Animal Menu: 17.Mosquito Bug Deadly Poison Animal
Dangerous Often See in Daily Routine: Method Procedure Management All Works: Mosquito Bug Deadly Poison Animal
First Aid Instructions Treatment Cure Methods: Here are the initial steps to treat a mosquito bite and reduce itching and swelling: • Clean the area: Wash the bite site with soap and clean water to remove the mosquito saliva that causes the allergic reaction. • Apply a cold compress: Use a cloth-wrapped ice pack or a cold gel pack on the bite for about 10–15 minutes to help reduce swelling and itching. • Apply anti-itch medication: • Use calamine lotion or a menthol-based topical product to relieve itching. • If there is significant redness, swelling, or inflammation, you may use hydrocortisone cream or a mild topical steroid (consult a pharmacist before use). • Take oral antihistamines: If itching is severe or the rash/swelling is spreading, take an oral antihistamine such as Cetirizine or Chlorpheniramine. • Do not scratch: Scratching can cause skin abrasions and bacterial infections, potentially leading to scarring or dark spots. If you experience other symptoms—such as a high fever, headache, body aches, or abnormally large, swollen bumps (Skeeter Syndrome)—you should see a doctor for further evaluation. Warning Caution: Mosquitoes are vectors for several life-threatening diseases that require close attention and prevention. Key diseases and precautions include the following: Dangerous mosquito-borne diseases • Dengue Fever: Transmitted by *Aedes* mosquitoes (active during the day); symptoms include sudden high fever, body aches, and the appearance of small red spots (petechiae) caused by bleeding under the skin. • Zika Virus: Transmitted by *Aedes* mosquitoes; poses a serious risk to pregnant women, as it can cause microcephaly (abnormally small head size) in infants. • Chikungunya: Transmitted by *Aedes* mosquitoes; characterized by high fever accompanied by severe joint pain, particularly in the fingers and wrists. • Malaria: Transmitted by *Anopheles* mosquitoes (common in forest or border areas); symptoms include high fever, chills, and headache. • Japanese Encephalitis (JE): Transmitted by *Culex* mosquitoes; often found in rural areas or near livestock; causes fever, vomiting, or seizures. • Lymphatic Filariasis (Elephantiasis): Transmitted by *Mansonia* mosquitoes; causes swelling of the arms, legs, or genitals. Important precautions when running a fever (suspected dengue fever) • Do not take NSAID painkillers, such as Ibuprofen or Aspirin, as they increase the risk of bleeding and can worsen bleeding complications. Use only Paracetamol as prescribed by a doctor. Prevention and Risk Reduction • Prevent mosquito bites: Apply mosquito repellent and wear long-sleeved shirts and long trousers that cover the skin, especially during dawn and dusk. • Prevent mosquito breeding: Cover water storage jars, eliminate containers with stagnant water, and change the water in flower vases every 7 days. • Eliminate adult mosquitoes and larvae: Apply Abate sand granules to stagnant water sources or keep fish that eat mosquito larvae. • Install mosquito screens on windows and doors, or sleep under a mosquito net regularly. Souce Place Live Any Wherever can i you me See it: Mosquitoes inhabit and hide in dark, damp, and poorly ventilated areas located near stagnant water sources where they can lay their eggs. Common mosquito hiding spots in the home: • Damp, enclosed areas: Such as beneath plant pots, in drainage trays, or behind the refrigerator. • Dark, secluded spots: Under beds, under sofas, or behind storage boxes. • Bathrooms: High humidity and standing water make these areas ideal for mosquitoes (such as *Culex* species) that enter through drains. • Gardens: Areas with dense, stagnant-air shrubbery. Protection Save From: The best way to prevent mosquitoes is to eliminate stagnant water breeding sites and directly protect yourself from mosquito bites. How to eliminate mosquito breeding sites: • Cover containers: Tightly cover water jars, buckets, or storage containers to prevent mosquitoes from laying eggs. • Change water every 7 days: Replace the water in flower vases or small containers weekly. • Eliminate stagnant water: Turn over unused containers—such as basins or old tires—to prevent water from pooling. • Use Abate sand: Apply larvicide sand to stagnant water containers that cannot be emptied.• Turn on a fan: The airflow makes it difficult for mosquitoes to fly steadily and approach you. • Wear light-colored clothing: Opt for long-sleeved shirts and long trousers in light colors, as mosquitoes are attracted to dark-colored clothing. • Use herbal mosquito repellents: Use [citronella oil]. Sprinkle coffee grounds: Scatter coffee grounds in areas with standing water to prevent mosquitoes from laying eggs. Behavior Attribute Time Food For Animal: Key characteristics and behaviors of mosquitoes can be categorized by species and specific postures, as follows: Resting and blood-feeding postures • Anopheles mosquitoes: When resting or feeding, the abdomen is angled upwards at approximately 45 degrees relative to the resting surface. • *Aedes* and *Culex* mosquitoes: When resting, the body is positioned parallel or nearly parallel to the surface. Feeding Habits and Activity Times • *Aedes* mosquitoes: Prefer to feed and bite humans during the day (especially in the morning and evening). They tend to hide in dark, humid places, such as under beds, behind cabinets, or in bushes. • *Anopheles* mosquitoes: Typically feed and bite humans at night, ranging from dusk and late night through to the early morning. • *Culex* mosquitoes: Feed at night; they are most active around dusk and before dawn. Flight and Host-Seeking Behavior • Sensory perception: Mosquitoes locate hosts by detecting the carbon dioxide we exhale, as well as body heat, sweat, and body odor. • Biting sex: Only female mosquitoes bite and feed on blood, as they require protein for egg development; male mosquitoes do not bite, feeding instead on flower pollen and nectar. • Flight range: Flight distances vary by species; for example, *Aedes* mosquitoes typically fly about 400–600 meters, while *Anopheles* mosquitoes can fly approximately 0.5–2.5 kilometers. Posture of the larvae (wrigglers) in water • *Aedes* mosquito larvae: When surfacing to breathe, they position themselves at an angle of approximately 45 degrees to the water's surface. • *Anopheles* mosquito larvae: When floating at the surface, they position themselves parallel to the water's surface. Benefit Professsion of: Mosquitoes play a beneficial role in the ecosystem by serving as a vital part of the food chain and aiding in plant pollination. Key benefits of mosquitoes: • Food source for other animals: Mosquito larvae serve as food for fish and shrimp, while adult mosquitoes are preyed upon by birds, bats, frogs, and dragonflies. • Pollination: Adult mosquitoes do not rely on blood as their primary food source; instead, they feed on nectar from flowers and plants, thereby assisting in pollination just like other insects. • Helps maintain natural balance: Mosquito larvae consume microorganisms and algae in the water and aid in the decomposition of decaying plant matter. • Research benefits: Scientists use DNA analysis of the blood consumed by mosquitoes to track and survey wildlife populations or endangered species in the area. Rate Cost Per Money SuperMarket on The Internet Online: Regarding the trending market for mosquitoes in Thailand—where they are actually purchased to create glow-in-the-dark mosquito keychains—the pricing details are as follows: Purchase price for mosquito specimens: • Purchase price: 1–2 Zen per mosquito • Key conditions: • Must be mosquitoes caught in the wild; lab-bred or farmed mosquitoes are not accepted. • Minimum purchase quantity per batch: 100–200 mosquitoes. • Additional labor and shipping fees apply based on the buyer's terms (e.g., approximately $15 for labor and $2 for shipping), bringing the total value per shipment to around $21–$30 or more. Product Selling Price (Mosquito Specimen Keychain) • Selling price: $5 per piece (plus $1 for shipping). • As these are handmade items—involving preserving the mosquito, flattening it to set its shape, encasing it in a plastic frame, and heat-curing—orders are typically handled on a pre-order basis, with a waiting period of approximately 7–14 days. Farming Breeding Fertilization Hybridization Reproduction : Mosquito reproduction and proliferation involve a life cycle comprising four key stages and specific behaviors, as follows: 1. Reproductive behaviors and dietary habits • Male mosquitoes: They do not bite or consume blood. They live for approximately 1–2 weeks, subsisting on plant nectar and water. • Female mosquitoes: They require a blood meal to obtain the protein and nutrients needed for egg development (normally, both males and females consume nectar as their primary energy source for flight). • Mating: Most female mosquitoes mate only once (or very few times) but can store sperm to fertilize their eggs throughout their lifetime. 2. Egg-laying Female mosquitoes seek out stagnant water sources to lay their eggs; the method of egg-laying varies by species: • *Aedes* mosquitoes: Lay eggs singly along the edges of containers or just above the soil/water level. • *Culex* mosquitoes: Lay eggs in a cluster (raft) that floats on the water surface. • *Anopheles* mosquitoes: Lay eggs singly, featuring floats, on the water surface. • Number of eggs: Approximately 50–500 eggs are laid per batch, depending on the species and the amount of blood consumed. 3. Four-stage life cycle 1. Egg stage: Eggs hatch into larvae within 24–48 hours upon contact with water (Aedes mosquito eggs can withstand dry conditions for several months). 2. Larval stage (wriggler): Lives in water; breathes through a respiratory siphon at the end of the body; molts four times; lasts approximately 5–7 days. 3. Pupal stage (tumbler): Does not feed but moves quickly in response to light and disturbances; lasts approximately 1–2 days before molting into an adult. 4. Adult stage: Emerges from the water surface, ready to begin the mating cycle and seek a blood meal. Food Process Trending For Restuarant: - Key Timeline Evolution Adventure Story of: Mosquitoes are ancient insects that originated on Earth more than 200 million years ago; they are classified under the phylum Arthropoda, the order Diptera, and the family Culicidae. Mosquito Evolutionary Timeline • Triassic Period (approximately 217 million years ago): Molecular data indicate that the ancestral lineage of mosquitoes emerged during this era. • Jurassic Period (approximately 200–145 million years ago): Mosquitoes began to evolve the behaviors and physical structures characteristic of blood-feeding insects, utilizing reptiles, amphibians, and dinosaurs as food sources. Cretaceous Period (approximately 125–99 million years ago): • Early fossil evidence has been discovered, such as the remains of a male mosquito in Lebanese amber dating back about 125 million years, which possesses blood-sucking mouthparts. • • A 99-million-year-old mosquito larva fossil (scientific name: *Cretosabethes primaevus*) was discovered in Myanmar; this specimen offers a precise glimpse into the biology of that era, mirroring characteristics seen in modern-day mosquitoes. • Cenozoic Era (the period following the age of dinosaurs): Mosquitoes diversified and adapted to various environments across the globe, establishing their role within the food web. And the finally then You can eat it and Sell it to the Merchant or Customer with Who people you Know Knew known, i hope you have fun and enjoy it.
ClickMeSeeAllFull
ClickMeSeeOnMoreDetail
ClickMeSeeOnMorePictureImage
ClickMeSeeOnMoreVideo
Animal Poison: Discovery World Wide Life Animal Menu: 18.Blister Beetle Insect Bug Deadly Poison Animal
Dangerous Often See in Daily Routine: Method Procedure Management All Works: Blister Beetle Insect Bug Deadly Poison Animal
First Aid Instructions Treatment Cure Methods: First aid for contact with or exposure to the toxin from the blister beetle (which secretes a toxin called Cantharidin) depends on the nature of the contact, as follows: 1. In cases of skin contact (resulting in rash, burning sensation, or blistering): • Wash immediately: Promptly wash the affected area with soap and clean water, or wipe with ammonia (if available) to help minimize the spread of the toxin. • Apply a cold compress: Gently apply a cloth-wrapped ice pack to the area experiencing burning pain to reduce inflammation. • Topical treatment: Apply topical antibiotics or anti-itch medication/calamine lotion. • Do not squeeze or pick: Avoid scratching, picking at, or puncturing blisters, as this can lead to secondary bacterial infections. • See a doctor: Seek medical attention if the condition spreads, the wound is extensive, there is severe burning pain, or a fever develops. 2. In case of accidental ingestion of blister beetles (highly dangerous) • Seek immediate medical attention: Ingesting even a few blister beetles can result in exposure to high levels of toxins. Symptoms may include severe abdominal pain, vomiting, throat inflammation, and blood in the urine; it can be life-threatening due to potential circulatory or heart failure. • Hospital treatment: Medical staff will perform gastric lavage (stomach pumping), administer activated charcoal to absorb the toxins, and provide intravenous fluids while closely monitoring kidney and heart function. Warning Caution: Blister beetles contain a potent toxin called cantharidin, which remains stable even when exposed to heat. Important precautions include: Dangers of contact • Skin burns and blisters: Upon contact, the beetle releases a toxin that can cause a burning sensation, red rashes, or blisters on the skin. • Do not crush or swat: If you find one on your body, do not swat or crush it. Instead, blow it away or gently flick it off, then wash your hands thoroughly. Dangers of Ingestion (Potentially Fatal) • Do not ingest: Consuming just three or more blister beetles can lead to death from heart failure. • Symptoms of poisoning: Throat inflammation, difficulty swallowing, severe abdominal pain, nausea, vomiting blood, diarrhea, a drop in blood pressure, and blood in the urine. Souce Place Live Any Wherever can i you me See it: Blister beetles are commonly found in agricultural areas, grasslands, dry dipterocarp forests, and locations where their host plants grow—such as members of the nightshade family (e.g., eggplants and tomatoes), amaranth, and various herbaceous plants. Habitat and Behavior • Distribution: Found throughout all regions of Thailand. They typically perch on leaves or the tender shoots of plants to feed. Period of occurrence: • *Epicauta* species (such as *Epicauta malkini* and *Epicauta waterhousei*, commonly known as black blister beetles with white stripes or amaranth beetles) begin to appear from April onwards, or during the rainy season. • *Mylabris phalerata* is frequently found from August onwards. • Ecosystem: Found in dry and semi-humid ecosystems, such as dry dipterocarp forests or open grasslands. • Larval stage: Blister beetle larvae inhabit the soil; they exhibit behavior where they hitch rides on other insects—such as grasshoppers or bees—to feed on those insects' eggs or food sources as part of their life cycle. Caution: When disturbed, the blister beetle secretes a toxin called cantharidin through its joints and skin. Contact with this substance causes a burning sensation and the formation of blisters. Strictly avoid touching or crushing the beetle with bare hands. Protection Save From: Prevent issues with blister beetles by avoiding direct contact or swatting them, turning off lights that attract insects at night, and—crucially—never consuming them, as they are highly toxic and potentially lethal. How to prevent harm from blister beetles • Do not touch or swat them directly: When disturbed, blister beetles release a yellow, oily toxic substance called cantharidin from their joints or bodies. Contact with the skin causes a burning sensation, blistering, and inflammation. • Do not consume: Strictly avoid cooking or roasting blister beetles, as the toxin cantharidin does not break down when exposed to heat. Consuming as few as three beetles—or ingesting a large amount of the toxin—can cause nausea, vomiting, abdominal pain, and bloody urine, potentially leading to death from circulatory or respiratory failure. • Reduce nighttime lighting: Turn off unnecessary lights or install insect screens to prevent the beetles from flying into the house, attracted by the light. • Wear protective clothing in agricultural areas: When working in fields or orchards (especially in legume plots or during beetle outbreaks), wear clothing that fully covers the body. • Control in agricultural plots: If an infestation is detected, chemical agents such as carbaryl (Sevin 85% WP) may be applied according to agricultural guidelines.First Aid Measures • Skin contact: Wash the affected area with soap and clean water as soon as possible, or wipe it with ammonia. Then, apply a cold compress (ice) and an antibiotic cream. Do not scratch the area, as this can cause the toxin to spread and the wound to enlarge. • Ingestion: Immediately take the person to the hospital so a doctor can perform gastric lavage (stomach pumping) or administer activated charcoal to absorb the toxin. Behavior Attribute Time Food For Animal: The Blister Beetle is a type of beetle with distinct behaviors and characteristics. It is notable for its feeding habits, defense mechanisms, and fascinating life cycle, as detailed below: 1. Defensive Behavior and Posture (Reflex Bleeding) • Release of toxins when disturbed: Its most distinctive behavior occurs when the beetle is startled, frightened, or touched; it will feign death or retract its legs while simultaneously secreting a pale yellow, oily fluid from its leg joints. Potent Toxin: This fluid contains a toxin known as cantharidin, which is highly corrosive. Upon contact with human skin, it causes an immediate burning sensation and the formation of clear, fluid-filled blisters. 2. Feeding Behavior • Voracious and rapid consumption: As adults, blister beetles avidly feed on the leaves and flowers of legumes and vegetable crops, showing a particular preference for the blossoms. • Feeding manner: They perch on the flowers and feed rapidly and voraciously. A single blister beetle can devour an entire bean blossom in less than a minute, making them significant agricultural pests. 3. Mating and reproductive behavior • Period of appearance: They are frequently found in large numbers or swarms from the rainy season through the early winter (May to November), a time when vegetables and flowers are in full bloom. • Egg-laying in soil: After mating, the females burrow into the soil to lay their eggs in clusters. 4. Larval behavior distinct from that of the adult • Predatory behavior: While the adults are herbivores, the larvae—which hatch in the soil—behave as insect predators; they crawl about searching for and consuming grasshopper eggs in the soil as they grow. 5. Easily observable external characteristics • Body: Slender and elongated, measuring approximately 2.5–3.5 centimeters. The thorax is notably constricted, creating the appearance of a distinct "neck" that clearly separates the head from the body. • Striking coloration (Aposematism): Often features bold, contrasting colors to warn predators of toxicity—such as a jet-black body, black wings with transverse yellow or orange bands, or—in some species—an orange-red head and white longitudinal stripes along the wings. Benefit Professsion of: The primary benefit of the blister beetle stems from a natural chemical they produce for self-defense called cantharidin, which is utilized in medical and dermatological applications under medical supervision. Medical and Dermatological Uses • Treatment of warts: Used as a topical solution to induce blistering, thereby helping to eliminate warts from the skin. • Treatment of molluscum contagiosum: Low-concentration cantharidin (e.g., 0.7%) is medically approved for topical treatment of molluscum contagiosum in both children and adults. Further research: Modern medicine and some research studies have explored the application of this substance for other skin conditions or for anti-cancer purposes; however, such use must be conducted under the supervision of a medical specialist. Important Safety Warnings (Crucial) Although they contain substances with medicinal value, blister beetles are highly toxic insects. You must strictly avoid touching or ingesting them. • Skin contact: The substance cantharidin causes severe irritation, a burning sensation, and the formation of blisters or sores. • Ingestion: Causes severe abdominal pain, nausea, vomiting, diarrhea, and bloody urine; it can lead to death from heart or kidney failure. Rate Cost Per Money SuperMarket on The Internet Online: Blister beetles (locally known as *duang fai duean ha* or *duang sano*) are not traded commercially or consumed as food because they are highly toxic insects. Key information about blister beetles: • Toxin: Blister beetles accumulate a toxin known as cantharidin in their bodies. • Physical hazards: • Skin contact causes severe irritation, redness, and painful, burning blisters. • Ingestion causes throat inflammation, severe abdominal pain, vomiting blood, bloody urine, and a drop in blood pressure; it can even lead to death from heart failure (highly dangerous if more than three are consumed). • Agricultural status: Considered a pest that damages agricultural crops; unlike the sago palm weevil, it is not an economically important species raised for consumption or commercial purposes. Farming Breeding Fertilization Hybridization Reproduction : Blister beetles (family Meloidae) possess a complex life cycle and reproductive process that differs from that of typical insects, undergoing a phenomenon known as hypermetamorphosis—a form of multi-stage metamorphosis. 1. Mating and Egg-Laying • Mating: Adults emerge to forage and mate during the summer or rainy season (e.g., the "Fifth-Month Fire Beetle" or the white-striped blister beetle); the male uses his antennae to stimulate the female. • Egg-laying: After mating, the female digs a shallow hole in the soil and deposits a clutch of approximately 100 to 200 eggs (though some species may lay up to a thousand). 2. Life Cycle and Development (4 Main Stages) • Egg Stage: • The eggs are cylindrical and yellow to orange in color; the incubation period is approximately 15 days (depending on weather conditions). • Larval Stage (Specialized Type): • First Stage (Triungulin): Upon hatching, the larva is very small (approximately 1–2.5 millimeters), possesses three pairs of agile legs, and has a long, thread-like tail. • Foraging behavior of the larvae: • These larvae crawl onto flowers or the ground to find a way to attach themselves to—or "hitch a ride" on—other insects, such as ground-nesting bees, or to locate grasshopper eggs. • If they attach to a bee and reach its nest, they will inhabit the nest to feed on bee eggs, honey, or bee larvae; alternatively, some species will directly consume grasshopper eggs buried in the soil. Molting and Morphological Change (Grub Stages): After feeding sufficiently, the larva molts and undergoes a transformation, becoming a plump, legless grub that becomes increasingly less mobile with each growth stage. • Pupal Stage: • Before pupating, the larva enters a dormant phase in the soil (overwintering/coarctate stage) and transforms into a pupa during spring or early summer. • Adult Stage: • Adult beetles emerge from the soil to feed on leaves and flowers (such as bean blossoms or plants in the legume family), mate, and lay eggs to continue the life cycle. • Caution: Adults contain a toxin called cantharidin; when touched, they secrete a fluid that can cause skin blistering and inflammation. Food Process Trending For Restuarant: - Key Timeline Evolution Adventure Story of: The blister beetle—known in some Thai localities as the "Fifth-Month Fire Beetle" (*duang fai duean ha*) or the "Mad Ladybug" (*malaeng tao ba*)—is a type of beetle belonging to the family Meloidae. The evolutionary history and background of this insect are fascinating, encompassing ancient fossil records, complex survival mechanisms, and a long-standing relationship with human history, as detailed below. 1. Evolutionary History and Fossils • Early Cretaceous: Scientists have found that the evolution and diversification of blister beetles began during the Early Cretaceous period (approximately 100 million years ago), coinciding with the time when flowering plants (angiosperms) first evolved on Earth. 3. Evidence in Burmese Amber: The oldest known fossil of an oil beetle was discovered in Burmese amber dating back approximately 99 million years, demonstrating that certain physical characteristics and the production of chemical defenses had already evolved during the age of dinosaurs. 2. Phylogeny The blister beetle family (Meloidae) comprises approximately 2,500 to 3,000 species worldwide, categorized into four main subfamilies based on evolutionary characteristics: 1. Eleticinae: This is the most ancestral (primitive) group. Members of this subfamily do not undergo complex metamorphosis (i.e., they are non-hypermetabolic), and their larvae do not lead a parasitic lifestyle. 1. Meloinae: A more highly evolved group; the larvae transition into parasites or predators, feeding on grasshopper eggs or bee larvae. 2. Tetraonycinae: A group characterized by specific ecological relationships. 3. Nemognathinae: A group whose larvae exhibit phoretic behavior—attaching themselves to other insects—to facilitate dispersal and reproduction. 3. Evolution of Survival Mechanisms (Hypermetamorphosis) Blister beetles have evolved a unique developmental process known as hypermetamorphosis—a form of metamorphosis involving extra stages—which differs from that of typical insects (egg \(\rightarrow \) larva \(\rightarrow \) pupa \(\rightarrow \) adult). Their larval stage is subdivided into several distinct forms: • Early larval stage (Triungulin): Possesses well-developed legs and antennae, allowing for rapid movement to locate and invade host nests—such as ground-nesting bee colonies or grasshopper egg pods. • Subsequent larval stages: Once a food source is found, the legs atrophy, transforming the larva into a legless form resembling a typical beetle grub, dedicated solely to feeding. This evolutionary adaptation reduces intraspecific competition and enables the larvae to better access concentrated nutrient sources in the wild. 4. Cantharidin and Human History What has made the blister beetle (or oil beetle) notable in human history is cantharidin—an oily, yellow fluid secreted from the beetle's leg joints when it feels threatened. Although this substance is highly toxic and causes severe blistering upon contact with the skin, it has been utilized in various ways throughout human history: Ancient Medicine: Between the 17th and 19th centuries, physicians in Europe and Asia (including practitioners of traditional Chinese medicine) used extracts from blister beetles to create skin patches that induced blistering. This practice was believed to "draw out toxins" or cure ailments, and was also used to treat skin conditions and warts. Dangerous Aphrodisiac (Spanish Fly): One of the most infamous historical examples involves the use of powdered blister beetles (specifically of the genus *Lytta*) to create an aphrodisiac known as "Spanish Fly." The substance works by causing irritation and congestion in the urinary tract; however, it is extremely dangerous and has caused countless deaths due to kidney failure in the past. Currently, outbreaks of blister beetles (such as the yellow-and-black striped or black-with-white-bands varieties) are frequently observed in agricultural areas across many countries during the rainy season. There are frequent reports of local residents consuming them out of ignorance, often resulting in fatal consequences, as the toxin is not destroyed by the heat used in cooking. And the finally then You can eat it and Sell it to the Merchant or Customer with Who people you Know Knew known, i hope you have fun and enjoy it.
ClickMeSeeAllFull
ClickMeSeeOnMoreDetail
ClickMeSeeOnMorePictureImage
ClickMeSeeOnMoreVideo
Animal Poison: Discovery World Wide Life Animal Menu: 19.Caterpillar Insect Bug Deadly Poisonous Animal
Dangerous Often See in Daily Routine: Method Procedure Management All Works: Caterpillar Insect Bug Deadly Poisonous Animal
First Aid Instructions Treatment Cure Methods: Treatment and first aid for exposure to stinging caterpillar hairs or venom: First Aid Steps • Do not scratch under any circumstances: Scratching or rubbing can cause the stinging hairs to break, releasing venom deeper into the skin and causing the affected area to spread. • Use adhesive tape to remove stinging hairs: Gently press a piece of sticky tape (such as Scotch tape) onto the area and peel it off to remove stinging hairs or tiny, invisible spines from the skin. • Cleanse: Immediately wash the affected area with clean water and mild soap. • Apply a cold compress: Use an ice pack wrapped in a cloth or a cold gel pack to help alleviate burning sensations, swelling, redness, and pain. • Apply topical medication: • Apply calamine lotion to relieve itching. • Apply a thin layer of steroid cream to reduce inflammation and redness. • Take an antihistamine to help relieve itching and hives. Warning Caution: Precautions and when to see a doctor • Severe symptoms requiring immediate medical attention: If you experience severe allergic reactions, such as difficulty breathing, wheezing, swelling of the face or lips, dizziness, nausea, vomiting, or a rash spreading across the body. • If a burning sensation, redness, swelling, or blistering does not improve within 1–2 days, you should see a doctor for appropriate treatment. Contact with the stinging hairs of a tussock moth caterpillar causes an immediate burning sensation, itching, a red rash, swelling, and numbness. Please observe the following precautions and guidelines: Precautions and things to avoid • Absolutely do not scratch the area; doing so can break the hollow stinging hairs and embed them deeper into the skin, increasing the risk of infection. • Do not rub or wipe the area with plain water immediately, as this may cause the toxin to spread over a wider area. • Be careful to prevent the stinging hairs from entering the eyes or respiratory tract—especially in children—as this could lead to blindness or a severe allergic reaction. Hairy caterpillars (or tussock moth caterpillars) inhabit and forage on trees, shrubs, foliage, and plant sheaths, particularly in the following areas: • Natural areas and forests: Open forests, dry dipterocarp forests, and mixed deciduous forests. • Gardens and agricultural areas: On large trees, fruit trees, or grasses such as sugarcane. • Residential areas: Clinging to trees around the home or ornamental shrubs, hiding in nooks or beneath leaves, and occasionally crawling into clothing or items left out to dry. Souce Place Live Any Wherever can i you me See it: Prevention and control of hairy caterpillars (larvae with stinging hairs that cause itching and irritation) can be managed through both personal protection and measures taken around the home, as follows: Ways to prevent hairy caterpillars from approaching or harming you: • Dress protectively: When gardening, mowing the lawn, or working near large trees, wear long-sleeved shirts, long trousers, gloves, and closed-toe shoes. • Inspect trees around the house: Regularly check the undersides of leaves and branches on trees where hairy caterpillars tend to congregate—such as *Terminalia ivorensis* (Hoo Kra Jong), *Millingtonia hortensis* (Indian cork tree), or hedge plants—especially during the rainy season. • Prune tree branches: Trim branches to ensure the canopy is open and airy, avoiding dense overgrowth or branches that touch the house, thereby reducing hiding spots and pathways for the caterpillars. Methods for Eliminating and Controlling Tussock Moth Caterpillars Around the Home • Use biological agents (safe for humans and pets): • Use *Bacillus thuringiensis* (Bt / TAB BTA) mixed with water for spraying; the caterpillars ingest the agent, become paralyzed, and die within 1–3 days (application should be done in the early morning or evening, and a spreader-sticker should be added to the mixture). Protection Save From: • Natural elimination methods: • Use a mixture of dish soap or laundry detergent, baking soda, vinegar, and water as a spray; alternatively, spray the affected areas with neem or tobacco extract. • Use pungent herbal mixtures—such as diluted garlic, chili, or shallot juice—to spray or water the plants. • Mechanical control: If the infestation is minor, use tongs to collect the pests, place them in a bag or soak them in a concentrated saltwater solution, and then dispose of them. First aid for contact with stinging caterpillars 1. Remove stinging hairs: Use adhesive tape to gently lift away any hairs embedded in the skin; strictly avoid rubbing or scratching with bare hands. 2. Clean the area: Immediately wash the affected area with clean water and mild soap. 3. Relieve itching and pain: Apply a cold compress (ice), rub crushed ivy gourd leaves onto the area, apply anti-allergy or anti-inflammatory cream, and take an antihistamine. 4. See a doctor: Seek medical attention immediately if there are signs of a severe allergic reaction, difficulty breathing, or fever. Behavior Attribute Time Food For Animal: Hairy caterpillars (or "bung" caterpillars) are the larval stage of moths. Their key characteristics and behaviors are as follows: Appearance and Body Shape • Covered in hairs or spines: These hairs contain toxins or irritants used for defense against other animals. • Movement: Most move slowly, using both prolegs (false legs) and true legs to crawl along branches and leaves. • Varied body shapes: Some species are long and fuzzy (such as common hairy caterpillars), while others are short and stout—resembling slugs—or flattened (such as the slug moth caterpillar group). Feeding and Lifestyle Habits • Foliage feeding: Small individuals often feed in clusters on leaves, but as they mature, they disperse to forage individually. • Diurnal concealment: They typically forage and move about at night, remaining hidden beneath leaves during the day to avoid sunlight and natural predators. • Defense mechanisms: When disturbed, they may curl up, remain motionless, or raise their bristles as a threat display; their venomous bristles can detach or pierce the skin, causing an immediate burning sensation, itching, swelling, and redness upon contact. Benefit Professsion of: Hairy caterpillars (a type of moth or butterfly larva) are beneficial to the ecosystem and serve as a traditional food source in certain areas, as follows: Benefits of hairy caterpillars • Part of the food chain: They serve as a natural food source for birds and other insectivorous animals in forests or gardens. • Aids in decomposing organic matter: They consume and break down plant debris, fallen leaves, and other organic materials, returning nutrients to the soil as fertilizer. • Serves as local food: In certain regions, such as Isan, specific types of caterpillars are processed into traditional dishes—such as deep-fried or dry-roasted snacks—that are rich in protein. Caution: Caterpillar hairs contain toxins that cause itching, burning sensations, redness, swelling, or severe allergic reactions upon skin contact; direct contact should be avoided. Rate Cost Per Money SuperMarket on The Internet Online: Bristle worms (marine worms/sandworms) do not have a standardized commodity price or a clear central market price; however, trading and pricing are observed in various forms, such as: • Marine worms (used as fishing bait): Priced at approximately US$0.10–$1.00 per worm (depending on size). • Pesticides for stinging caterpillars (agricultural chemicals): Priced at approximately 10–30 USD per bottle/gallon (e.g., 250 cc or other standard packaging sizes). • General trading/Social media trends: There have been posts or announcements seeking to buy or sell these caterpillars as a viral trend (e.g., 1–10 USD per caterpillar); however, these do not reflect actual commercial market prices. Farming Breeding Fertilization Hybridization Reproduction : Hairy caterpillars are the larval stage of various moth species belonging to families such as Lymantriidae and Erebidae. Their reproductive and developmental cycle comprises four stages, as follows: Reproductive and Propagation Cycle • Egg Stage: Adult moths mate and lay eggs—typically in batches of 250 to 350—on the undersides of leaves or on tree branches (depending on the specific species, such as leaf-eating hairy caterpillars). The incubation period before hatching into larvae is approximately 3 to 5 days. • Larval stage: This is the feeding stage (consuming plant leaves) involving multiple molts (approximately 4–6 times). This phase lasts anywhere from two or three weeks to several months, depending on the species and weather conditions. • Pupal stage: Once fully grown, the larva enters the pupal stage to undergo metamorphosis. This stage lasts approximately 4–7 days. • Adult stage: Emerging from the pupa as a moth, the adult has a short lifespan (approximately 4–8 days), during which it mates and lays eggs for the next generation. Factors Contributing to Rapid Proliferation • Rainy Season: High humidity and an abundance of tender foliage provide ample food, allowing the caterpillars to grow and spread more rapidly than usual. • Host Plants: They inhabit and feed on a wide variety of plants, such as bananas, coconuts, castor beans, legumes, and grasses. Food Process Trending For Restuarant: - Key Timeline Evolution Adventure Story of: Hairy caterpillars (or simply "bung" in Thai) are the larval stage of insects in the order Lepidoptera (butterflies and moths), particularly moths such as those in the families Eupterotidae or Limacodidae (stinging caterpillars). Evolution and Origins of Stinging Caterpillars • Ancestral Origins (190–250 million years ago): • The earliest ancestors of the order Lepidoptera (butterflies and moths) emerged during the Jurassic and Late Triassic periods. • In this early era, the caterpillars lived on the ground, feeding on decaying plant matter, mosses, or ferns; they had not yet evolved the complex stinging hairs seen today. Co-evolution with flowering plants (Cretaceous period – 100 million years ago): • As the world entered an era where flowering plants (angiosperms) became widespread, this group of insects adapted so that their larvae fed primarily on the leaves of various plant species to store energy. Evolution of "venomous hairs" for self-defense: • Because caterpillars move slowly and are easy targets for birds or insectivores, they have evolved to develop hairs or sharp spines covering their bodies. • These hairs (urticating hairs/spines) deliver toxins; upon contact with human or animal skin, they cause burning sensations, itching, or allergic reactions. This serves as a survival mechanism (aposematism/defense mechanism) to avoid predation during the larval stage. Natural life cycle: • It begins at the egg stage, hatching into a caterpillar (which undergoes multiple molts as it feeds and grows). It then enters the pupal stage (with some species spinning a protective cocoon) before undergoing a final molt to emerge as an adult moth, ready to reproduce. And the finally then You can eat it and Sell it to the Merchant or Customer with Who people you Know Knew known, i hope you have fun and enjoy it.
ClickMeSeeAllFull
ClickMeSeeOnMoreDetail
ClickMeSeeOnMorePictureImage
ClickMeSeeOnMoreVideo
Animal Poison: Discovery World Wide Life Animal Menu: 20.Parasitic Worms Deadly Poisonous Animal
Dangerous Often See in Daily Routine: Method Procedure Management All Works: Parasitic Worms Deadly Poisonous Animal
First Aid Instructions Treatment Cure Methods: For initial treatment when a parasitic infection is suspected, you can use deworming medication available at pharmacies; ensure the medication matches the specific type of parasite, or always consult a pharmacist before use. Initial treatment methods • Use standard deworming medication (for common intestinal parasites such as pinworms and roundworms): • Albendazole: Take as directed by a doctor or pharmacist. • Mebendazole: Take orally as directed on the product label or by a pharmacist. • Pyrantel pamoate: Used to treat pinworms or roundworms as directed by a healthcare professional. Observe symptoms and the type of parasite: • In the case of pinworms (indicated by itching around the anus at night), all household members should undergo treatment simultaneously, and sleepwear or bed linens should be washed in hot water. • If a tapeworm infection is suspected, do not indiscriminately self-medicate; consult a doctor for a stool examination and appropriate medication, as safety precautions regarding drug administration and parasite expulsion are necessary. • If symptoms of cutaneous larva migrans (winding red marks on the skin) or neurological symptoms—such as severe headaches or blurred vision—occur, seek medical attention immediately. Precautions • Do not use in children under 2 years of age or in pregnant women (especially during the first trimester) unless under medical supervision. • Individuals with underlying medical conditions, such as liver disease, should consult a doctor or pharmacist before use. If you wish, you may also provide the following details: • What symptoms are present (e.g., anal itching, visible worms in the stool, or abdominal pain). • Whether the user is a child or an adult, and their age. Warning Caution: Important precautions and guidelines for dealing with parasitic infections are as follows: Precautions and risks associated with parasites • Do not immediately purchase and take deworming medication on your own: There are various types of parasites (such as roundworms, tapeworms, and flukes), and different medications are required to treat each type. Failing to identify the specific parasite or determine the correct dosage may result in ineffective treatment or adverse side effects. • Warning signs requiring immediate medical attention: You should see a doctor promptly if you experience chronic abdominal pain, cramping, unexplained weight loss, bloating, alternating diarrhea and constipation, anal itching (especially at night), or if parasite segments are detected in your stool. • Parasites migrating to vital organs: Certain parasites (such as *Gnathostoma* or the pork tapeworm) can migrate to the brain, eyes, or lungs, potentially causing severe headaches, seizures, or vision loss. • Severe complications: Hookworms or liver flukes can cause gastrointestinal bleeding, chronic anemia, and hepatitis, or potentially lead to bile duct cancer. • High-risk groups advised against self-medication: Pregnant women and young children (under 2 years of age) should always consult a doctor first, as certain deworming medications are contraindicated for these groups. Souce Place Live Any Wherever can i you me See it: Parasite habitats or distribution areas can be broadly categorized into two main types: within the bodies of humans or animals (hosts) and in the external environment, as follows: 1. Habitats within the body (host) Different types of parasites inhabit and develop in different organs: • Small and large intestines: e.g., roundworms, whipworms, hookworms, tapeworms, and *Strongyloides*. • Liver and bile ducts: e.g., liver flukes (inhabiting the liver and bile ducts of humans or herbivores). • Lungs and various tissues: e.g., *Gnathostoma* (migrating through the skin, muscles, eyes, or brain) and lung flukes. • Bloodstream: e.g., blood flukes. • Perianal area: e.g., pinworms (females emerge to lay eggs around the anal opening at night). 2. Habitats and environmental transmission Parasites often spread and persist in the environment through the following channels: • Soil: Soil contaminated with human or animal feces, where parasite eggs or larvae (such as hookworms, *Strongyloides*, and roundworms) can develop and survive for periods ranging from several weeks to several years. • Water and natural water sources: Rivers, canals, ponds, or swamps containing freshwater snails, fish, shrimp, or crabs that serve as intermediate hosts for liver flukes, blood flukes, or rat lungworms. • Food and produce: Fresh vegetables or fruits that have not been thoroughly washed (potentially harboring parasite eggs), or undercooked meat (pork, beef, fish, shrimp, shellfish, or crab) containing embedded parasite larvae. Protection Save From: Parasite prevention is achieved by breaking the transmission cycle—preventing parasites or their eggs from entering the body—through good hygiene and careful food choices. Methods for preventing parasitic infections: • Consume thoroughly cooked food: Ensure that meats (such as pork, beef, and fish—especially freshwater fish, *pla som*, *larb*, or *koi*), shrimp, crab, and shellfish are cooked thoroughly using heat. • Thoroughly wash fruits and vegetables: Rinse them multiple times or use potassium permanganate or vinegar to remove parasite eggs or larvae that may be attached to fresh produce. • Always wash your hands thoroughly: Wash your hands with soap and water before eating or preparing food, and after using the restroom. • Drink clean water: Consume boiled water or standard bottled drinking water; avoid drinking water directly from natural sources. • Wear shoes and avoid walking barefoot: This prevents hookworms—which inhabit damp soil or mud—from penetrating the skin. • Use hygienic latrines: Do not defecate indiscriminately; this prevents parasite eggs from spreading into the soil and water sources. • Do not self-medicate with deworming drugs: If you suspect a parasitic infection, consult a doctor or pharmacist for proper diagnosis and appropriate medication. Behavior Attribute Time Food For Animal: Parasites do not exhibit behaviors or postures typical of ordinary animals; instead, they display specific "movement and lifestyle behaviors" (parasitic behavior) within the host's body. These behaviors are categorized based on their patterns of movement and their location, as follows: 1. Intestinal behavior (e.g., roundworms, whipworms, tapeworms) • Attachment and nutrient absorption: They use hooks, suckers, or mouthparts to attach to the intestinal wall and feed on the host's nutrients and blood, causing symptoms such as bloating, flatulence, weight loss, or frequent hunger. • Movement/Crawling: With certain parasites (such as pinworms), the female often crawls out of the anus at night to lay eggs, causing anal itching (anal pruritus) and sleeplessness. • Shedding of segments: Tapeworms shed or release segments (containing eggs) in the stool; these segments may wiggle or move slightly immediately after being passed. 2. Subcutaneous burrowing behavior (e.g., *Gnathostoma* species, hookworms) • Penetrating the skin: Hookworm larvae penetrate the skin of individuals walking barefoot on contaminated soil. • Subcutaneous migration: *Gnathostoma* larvae burrow and migrate through tissues or beneath the skin, causing swelling, redness, and sharp, stinging pain, or resulting in a raised swelling that shifts location (e.g., on the arms, legs, face, or eyelids). 3. Behavior of burrowing into internal organs and the nervous system (e.g., rat lungworm, gnathostome, pork tapeworm). • Aberrant migration: Upon entering the body, if the parasite ends up in the wrong location (e.g., escaping the intestine and entering the bloodstream), it continues to migrate until it embeds itself in various organs such as the liver, lungs, eyes, or brain. • Cyst formation: When the pork tapeworm or rat lungworm enters the muscles or brain, it forms a protective membrane around itself—creating a cyst—which triggers inflammation and leads to symptoms such as severe headaches, neck stiffness, or seizures. Benefit Professsion of: Although most parasites are harmful and deplete the body of nutrients, medical research has found that, in certain cases, they can benefit the human immune system in the following ways: Medical Benefits of Parasites • Helping to reduce the risk of or alleviate allergic conditions: Research indicates that intestinal parasites help balance the immune system, causing the body to reduce excessive reactions to allergens and dermatitis. • Inhibiting autoimmune diseases: Studies have found that certain parasites can help suppress the progression of relapsing-remitting multiple sclerosis and aid in treating chronic inflammatory bowel diseases. Read more at The Conversation. • Helping prevent infections in other organs: Certain substances or immune responses triggered by the presence of parasites may also bolster the body's defense against pathogenic infections in other systems. See more information from the Malaghan Institute. Important Precautions • Risks outweigh benefits: Under normal circumstances, harboring parasites leads to malnutrition, anemia, and fatigue, as they deplete the body of nutrients; in severe cases, this can be life-threatening. • Medical supervision is mandatory for therapeutic use: Utilizing parasites for treatment (such as helminth therapy in research settings) is an experimental procedure or a treatment for specific conditions conducted solely under the care of medical specialists. One must absolutely not allow a parasitic infection to occur or persist unchecked. Rate Cost Per Money SuperMarket on The Internet Online: Worms (parasites) are not traded as commercial products because they are disease-causing organisms that pose health risks. However, if you are referring to "deworming medication" for humans, pets, or livestock, these are available for purchase on the market and via online platforms at the following price points: 1. Deworming medication for humans • Roundworm medication (Mebendazole 100 mg): e.g., Benda; packaged in blisters of 6 tablets, priced at approximately $1 per blister. • Large-size packs / large boxes: Priced at approximately $3–$5, or box sets containing 5 blisters ranging from $4–$15 (depending on the brand and number of tablets). 2. Deworming medication for pets (dogs and cats) • Tablet-form dewormer (e.g., Praferan): Pack of 10 tablets; price is approximately $4. • Clinic deworming service fee: Approximately $1 per tablet (varies by clinic and the animal's weight). Dewormers for livestock (cattle, buffalo, pigs, poultry) • Powder/sachet dewormers (e.g., Farminth): 10g size costs approximately $0.10–$1.00 per sachet; 1 lb (350g) size costs approximately $12.00. • Liquid dewormers (e.g., Fenbendazole): 100cc size costs approximately $10.00 per bottle. Farming Breeding Fertilization Hybridization Reproduction : The reproduction and propagation of parasitic worms (helminths) are categorized primarily according to the specific group of worms. Most rely mainly on sexual reproduction and produce large numbers of eggs or larvae to increase the likelihood of transmission to a new host. 1. Classification based on the parasite's sexual characteristics • Parasites with separate sexes (Dioecious): Found among nematodes (roundworms), such as *Ascaris* (large roundworms) and hookworms. Male and female worms mate within the host's body; the female then produces a vast number of eggs (e.g., *Ascaris* can lay hundreds of thousands of eggs per day), which are subsequently excreted in the feces. Hermaphroditic worms (Monoecious): Found in groups such as tapeworms (Cestodes) and flukes (Trematodes)—for example, pork and beef tapeworms. • In tapeworms, each segment (proglottid) contains both male and female reproductive organs; they can reproduce via self-fertilization within a single segment or through cross-fertilization between segments. Once a segment is fully mature and contains tens of thousands of eggs, it detaches and is passed out with feces to propagate. • Flukes are capable of both self-fertilization and cross-fertilization while residing in the host's bile ducts or blood vessels. 2. Life Cycle and Host Map The parasite's reproduction does not rely on a single host; it involves metamorphosis and requires passing through specific hosts: • Definitive Host: The host (human or animal) in which the parasite reaches maturity, reproduces, and lays eggs. • Intermediate Host: Organisms such as snails, freshwater fish, or shrimp/crabs that harbor parasite larvae, allowing them to develop through various stages until they are ready to infect the definitive host. • Asexual reproduction in the intermediate host: In certain parasite groups—such as blood flukes—after eggs hatch into larvae in water and enter a freshwater snail, the larvae can multiply asexually. They transform into other larval stages (e.g., sporocysts and cercariae) before emerging to swim in search of the definitive host. Food Process Trending For Restuarant: - Key Timeline Evolution Adventure Story of: Helminths have evolved over hundreds of millions of years, originating from free-living ancestors in nature during ancient times before adapting to a parasitic lifestyle to absorb nutrients from their hosts. 1. Origins and beginnings of parasitic worms • Free-living ancestors: Scientists hypothesize that parasitic worms evolved from ancient worms that lived in soil or water (resembling flatworms or roundworms that feed on decaying plant and animal matter). Fossil Records: Ancient evidence of tapeworm eggs has been found in fossilized shark feces dating back to the Permian period—at least 270 million years ago. Meanwhile, evidence of roundworms and other parasitic groups coexisting with fish and prehistoric animals dates back to the Devonian and Mesozoic periods. Evolution into parasitism: This occurred independently across multiple phyla, beginning when free-living larvae accidentally became attached to other animals. They underwent physiological changes—becoming softer and losing certain unused digestive systems—and shifted to absorbing pre-digested nutrients directly from the host's body. 2. Major Groupings and Key Evolutionary Developments Helminths of medical and veterinary importance are divided into two major groups with distinct evolutionary lineages: The Fluke and Tapeworm Group (Flatworms / Platyhelminthes) • Evolution from Exterior to Interior: This group belongs to the phylum Platyhelminthes and developed a specialized body covering known as *Neodermata* to protect against destruction by the host's digestive enzymes. Increasingly complex life cycles: Members of this group of parasites may have initially existed as ectoparasites on fish (such as the Monogenea). They subsequently evolved to inhabit the bodies of terrestrial animals and humans, incorporating "intermediate hosts"—such as snails or fish—to facilitate reproduction and the wider dispersal of their larvae. Roundworms (Nematodes) • Physiological adaptations: They possess unsegmented bodies, a complete digestive tract, and a tough cuticle layer that withstands environmental conditions. • Evolution of migration within the host: Many roundworm species—such as *Ascaris* (large intestinal roundworms) or *Gnathostoma*—have evolved complex life cycles. Their larvae must migrate through the host's tissues, bloodstream, or lungs to progress through various developmental stages before finally settling as adults in the intestine. 3. Co-evolution with Humans • Long-standing relationship: Parasites have co-evolved alongside human ancestors since prehistoric times; parasite eggs have been detected in ancient Egyptian mummies dating back to approximately 1,200 BCE. • Balancing for survival: Evolutionarily successful parasites do not immediately kill the host (human); instead, they maintain a balance that allows them to inhabit the host, extract nutrients, and shed eggs via feces to continue reproducing over many years. Historical perspective: During the Renaissance and the 17th–19th centuries, naturalists such as Carl Linnaeus began classifying parasite species. By the 19th century, scientists had demonstrated that parasites do not arise through spontaneous generation but are transmitted via eggs, the consumption of undercooked food, or skin penetration. And the finally then You can eat it and Sell it to the Merchant or Customer with Who people you Know Knew known, i hope you have fun and enjoy it.
ClickMeSeeAllFull
ClickMeSeeOnMoreDetail
ClickMeSeeOnMorePictureImage
ClickMeSeeOnMoreVideo
Animal Poison Danger: Discovery World Wide Life Animal Menu: 21.The History OF Human Animal
Dangerous Often See in Daily Routine: Method Procedure Management All Works: The History OF Human Animal
First Aid Instructions Treatment Cure Methods: First aid refers to the immediate medical assistance provided to a sick or injured person at the scene of an incident, utilizing available equipment to save lives, prevent the condition from worsening, and facilitate a faster recovery. The steps and procedures for handling various situations are as follows: 3 Key Steps When Encountering an Emergency 1. Check: Always assess the safety of the scene before attempting to help, ensuring you do not put yourself in danger. 2. Call: If you encounter someone who is seriously injured or unconscious, immediately call the emergency hotline (National Institute for Emergency Medicine). 3. Care: Provide initial assistance based on the patient's condition while waiting for the medical team to arrive. Warning Caution: Precautions for interacting or living alongside others can be categorized into key principles essential for maintaining both physical and mental safety, as follows: 1. Personal Safety and Vigilance • Situational Awareness: Look around confidently; avoid constantly looking down at your phone or wearing headphones when returning home alone or in secluded areas. • Trust your intuition: If you feel unsafe, prioritize your safety above all else—even if it seems rude to do so ("Rude/safe > polite/dead"). • Prioritize people over property: If you are being robbed or face danger, surrender your belongings (such as handing over your wallet) and retreat or run away as fast as possible; do not engage in a confrontation unless absolutely necessary. • Movement saves lives: In an emergency, 95% of survival depends on moving or running away from the danger zone ("Get off the X"); do not stand still and become an easy target. 2. Communication and De-escalation • Apply negotiation principles (Verbal Judo): During a confrontation or verbal altercation, utilize the LEAPS method—Listen, Empathize, Ask, Paraphrase, and Summarize—to de-escalate the situation. • Avoid reacting emotionally: If the other party is highly agitated or intoxicated, try to step back, avoid challenging eye contact, and immediately seek assistance from bystanders or authorities. 3. Psychological and Social Boundaries • Be cautious about trusting strangers too quickly: In an era rife with scammers and fraud, verify information and backgrounds thoroughly before disclosing personal details or engaging in transactions with others. • Watch for relationship red flags: In close relationships or the workplace, be alert to controlling behavior, the abuse of power, bullying, or excessive intrusion into personal boundaries. Souce Place Live Any Wherever can i you me See it: Human Habitat refers to the natural and social environments where humans reside and sustain their lives; these habitats have evolved over time and across different eras, as follows: 1. Prehistoric Era (Stone Age) • Housing characteristics: Natural shelters such as caves, rock overhangs, and the shade of trees. • Selection factors: Proximity to water sources (streams) and food supplies (hunting and foraging). • Lifestyle: Temporary settlements and a nomadic existence, with migration driven by natural changes. 2. The Era of Early Agriculture (Beginning with the Neolithic Period) • Housing Characteristics: People began constructing simple shelters—such as huts made from tree branches or local materials—which eventually evolved into permanent settlements. • Selection Factors: River plains with fertile soil, suitable for crop cultivation and animal husbandry. • Lifestyle: People gathered to form village communities; developments included pottery making and metal smelting. 3. Modern Era • Housing characteristics: Development of sturdy, permanent homes; urban communities; self-help settlements; and planned housing estates. • Selection factors: Proximity to employment hubs, factories, educational institutions, or transportation centers. • Lifestyle: Reliance on social infrastructure and technology; spatial management designed to accommodate large populations. Protection Save From: Protecting yourself from dangers or threats posed by other people can be achieved by following these basic safety principles and practices: Observation and Preparedness (Proactive Prevention) • Avoid appearing as an easy target: Walk with confidence and an upright posture, avoid constantly looking down at your phone, and remain aware of your surroundings at all times. • Trust your instincts: If you feel unsafe in a particular area or around a stranger, remove yourself from the situation immediately. • Beware of online risks: Verify the legitimacy of job postings or offers that seem too good to be true to avoid scams or human trafficking. • Prioritize your life over property: If confronted by a hostile individual, surrendering valuables is generally safer than resisting to protect your possessions. How to handle a confrontation with a dangerous individual (De-escalation & Action) • De-escalation: Speak in a calm, steady voice, maintain a safe distance, and avoid appearing confrontational. • Shout for help: If threatened, call out clearly—such as by shouting "Back off!"—or alert those nearby to assist you. • Identify the attacker's vulnerable points if self-defense becomes necessary: target vital areas to create distance—such as the eyes, nose, throat, groin, or knees—then quickly flee to a crowded area. • Identify safe individuals in public spaces: such as police officers, security guards, shop staff, or service counter personnel. Behavior Attribute Time Food For Animal: Human behavior and mannerisms—or body language—constitute a form of non-verbal communication that reflects subconscious thoughts and feelings. These can be categorized according to specific body parts and key gestures as follows: 1. Facial and Eye Body Language • Eye contact: Conveys interest, confidence, and sincerity (excessive eye contact can appear threatening). • Frequent blinking: Indicates stress, anxiety, or dishonesty. • Wide eyes / Dilated pupils: Signal excitement, shock, or interest in what is in front of you. • Rapid eyebrow raising: Conveys shock, interest, or surprise. 2. Hand and arm body language • Crossing arms: Indicates defensiveness, a sense of insecurity, or a closed-off attitude. • Touching the nose / covering the mouth: Often a sign of discomfort, nervousness, or lying. • Hands clasped behind the back: A posture associated with leadership, a position of authority, or a sense of confidence and power. • Fingertips touching (Steepling): Signals self-confidence, knowledge, or leadership. • Playing with hair / Touching ears: Women often play with their hair when interested or shy, whereas men tend to touch their ears or scratch their heads when stressed or uncomfortable. 3. Sitting and Standing Postures • Sitting with legs crossed: Indicates defensiveness, introversion, or—in certain contexts—boredom. • Standing with hands on hips (akimbo): Signals readiness, determination, or aggression/a desire for control. • Leaning forward: Indicates interest and focus on the conversation. • Feet pointing elsewhere: If the feet are turned away from the conversation partner, it suggests a desire to end the conversation or walk away. Caution: Body language should not be interpreted based on a single gesture in isolation; it is essential to consider the context and the individual's habitual behavior. Benefit Professsion of: Humans serve a valuable purpose as "beings endowed with intellect and consciousness." This role extends to fellow human beings, society, and the world, as follows: 1. Contributions to fellow human beings and society • Creating and passing on civilization: Humans have devised language, art, law, and culture, enabling future generations to learn from and further develop them. • Technological and scientific advancement: Developing innovations in medicine, agriculture, and communication to raise living standards and alleviate hardship. • Social support and interdependence: Humans form groups—such as families, communities, and nations—to share responsibilities and provide mutual aid during times of difficulty. 2. Benefits to the world and ecosystems (from the perspective of stewardship) • Studying and documenting the beauty of the universe: Humans are the only beings capable of exploring, naming, and recording the stories of stars, galaxies, and the natural world around them. • Restoration and conservation: Humans possess the capacity for ethical awareness, enabling them to establish protected areas for flora and fauna and to restore forests or degraded ecosystems (through an understanding of psychology and the environment). Rate Cost Per Money SuperMarket on The Internet Online: Human trafficking—including prostitution, forced labor, and organ trafficking—is a serious crime worldwide; there is no legal or officially standardized market price for human beings. Information regarding the "value" of human beings in this context typically originates from reports by international organizations monitoring human trafficking or from black-market valuations, as detailed below: 1. Estimated black market prices for organs (illegal) Based on data compiled and published by various media outlets, such as Sanook, regarding estimated black market prices for human organs, the figures are as follows (these figures represent estimated prices within illegal trading networks, not standard market prices): • Lungs: Approximately $400,000 • Kidney: Approximately $200,000 • Liver: Approximately $200,000 • Cornea: Approximately $25,000 • Skeleton: Approximately $22,000 • Bones and ligaments: Approximately $6,000 • Blood (per liter): Approximately $800 • Skin (per square inch): Approximately $10 2. Situation and pricing within human trafficking networks Regarding human trafficking, international organizations such as the International Organization for Migration (IOM) and the United Nations Office on Drugs and Crime (UNODC) indicate that the "price" of trafficking victims varies according to the type of exploitation and the region—for example: • Forced labor or modern-day slavery: Victims are often trafficked for prices ranging from a few thousand to tens of thousands of baht, subsequently forced to work on fishing vessels, in factories, or in the agricultural sector. • Transnational sex trafficking: The "cost" of victims deceived into prostitution may be designated as a "debt" they are required to repay—an amount often grossly inflated, ranging from hundreds of thousands to millions of baht. Legal Provisions in Thailand Organ trafficking and human trafficking in Thailand are strictly regulated and subject to severe penalties under various laws, such as: • The Anti-Trafficking in Persons Act prescribes penalties ranging from long-term imprisonment to life imprisonment or the death penalty if the offense results in the victim's death. • Regulations of the Medical Council of Thailand and the Thai Red Cross Society strictly prohibit the buying and selling of organs. Organ transplantation in Thailand is permitted only when the organ is voluntarily donated by a deceased person or by a close blood relative or spouse. Farming Breeding Fertilization Hybridization Reproduction : Humans reproduce sexually by combining male and female gametes through a process of internal fertilization. Components and processes of human reproduction • Gametes • Male: Sperm are produced in the testes; they are small and possess a tail for movement. • Female: Ova (eggs) are produced in the ovaries; typically, one egg is released per month. • Fertilization • Occurs when the male ejaculates semen into the female's vagina. • Sperm travel through the uterus to fertilize the egg in the fallopian tube, forming a zygote. • Pregnancy and Development • The zygote undergoes cell division and implants in the uterine wall. • The pregnancy lasts approximately 38 weeks (or 9 months) until the baby is born. Food Process Trending For Restuarant: - Key Timeline Evolution Adventure Story of: Humans evolved from a common ancestor shared with great apes (such as chimpanzees and gorillas) in Africa approximately 6 to 7 million years ago, subsequently developing their physical structure, tool use, and intelligence over time to become modern humans (*Homo sapiens*), according to the *Encyclopædia Britannica* and the Natural History Museum. 2. Timeline of Key Events in Human Evolution • 6–7 million years ago: The evolutionary lineages of human ancestors and great apes diverged in Africa, and bipedalism (walking on two legs) began to emerge (e.g., *Sahelanthropus* and *Ardipithecus*). • 3.3 million years ago: The oldest evidence of the manufacture and use of stone tools was discovered in Kenya. • 2.8 million years ago: Fossils of the genus *Homo* (early humans)—specifically *Homo habilis*—appeared; this species possessed a larger brain and began using more complex tools. • 1.9 million years ago: *Homo erectus* evolved; they possessed larger brains, mastered the use of fire, and began migrating from Africa to Europe and Asia. • 315,000 years ago: Emergence of the *Homo sapiens* species (modern humans), with the oldest fossils discovered at sites such as Jebel Irhoud in Morocco. • 50,000 years ago: Onset of behavioral modernity; humans began creating art and developing complex language, rituals, and culture. And the finally then You can eat it and Sell it to the Merchant or Customer with Who people you Know Knew known, i hope you have fun and enjoy it.
ClickMeSeeAllFull
ClickMeSeeOnMoreDetail
ClickMeSeeOnMorePictureImage
ClickMeSeeOnMoreVideo
Animal Danger: Discovery World Wide Life Animal Menu: 22.Anaconda Animal
Dangerous Often See in Daily Routine: Method Procedure Management All Works: Anaconda Animal
First Aid Instructions Treatment Cure Methods: In the event of a bite or attack by an anaconda (incidents typically involving exotic pets or cases abroad, as the species is not native to Thailand), it is important to note that while anacondas are non-venomous, they possess immense strength and very sharp teeth designed to grip prey. Here are the basic first aid and survival steps: 1. How to survive if being constricted • Do not try to pull the snake's head straight off: Anaconda teeth curve inward; pulling straight out will cause severe tearing of the wound. • Apply pressure to the tail tip or snout: If there is someone to help, try to uncoil the snake starting from its tail, or pour alcohol, hand sanitizer, or an alcohol-based solution onto the snake's mouth/snout area to encourage it to release its grip. • Prevent constriction around the torso: Use your arms to block the snake from wrapping around your chest or neck, as this would prevent you from breathing. 2. First aid for a bite wound (after the snake has released its grip) • Wash the wound immediately with clean water and soap: Since a snake's mouth harbors significant bacteria, an anaconda bite carries a very high risk of infection. • Stop the bleeding: Anaconda teeth are sharp and cause deep wounds; apply firm pressure to the wound with a clean cloth to stop the bleeding. • Apply antiseptic: Initially treat the wound area with Betadine or an antiseptic. • Seek medical attention immediately: To have the wound properly cleaned and treated, receive antibiotics to prevent infection, and get a tetanus shot. Warning Caution: Anacondas are non-venomous snakes, but they pose a danger due to their massive size; they kill prey by constricting them or forcing them underwater to drown before swallowing them whole. Precautions and how to respond when encountering an anaconda: • Beware of underwater attacks: They often lie in wait underwater, keeping only their eyes and nostrils above the surface to ambush prey. • Do not run away: Anacondas can move faster on land or in water than you might expect; running away triggers their predatory instincts. • Do not struggle or fight back: If you are bitten or grabbed at close range, their powerful jaws and teeth will lock on, and their body will begin to constrict. • Avoid high-risk waters: In their natural habitats—such as rainforests or waterways in South America—exercise extra caution when wading through water or approaching dense riverside vegetation. Souce Place Live Any Wherever can i you me See it: Anacondas inhabit South America and the island of Trinidad. Their primary habitats are as follows: Natural Habitats • Geographic Range: Found east of the Andes Mountains, in tropical regions and rainforests. • Terrain/Environment: Inhabits swamps, marshes, lakes, streams, and river systems. • Major River Basins: • Amazon Basin (Brazil) • Orinoco Basin (Colombia) • Various lowlands and wetland areas. Habitat-related behavior • Semi-aquatic lifestyle: They spend most of their lives in or near water, as the water supports their considerable body weight and allows for rapid movement, contrasting with their relatively slow movement on land. • Ambush predation: They often lie in wait underwater to ambush animals coming to drink, such as capybaras, deer, or caimans. Protection Save From: To protect yourself from anacondas (non-venomous snakes that are massive in size and kill by constriction), you should follow these guidelines and precautions: Prevention and response strategies when in anaconda habitats: • Avoid densely overgrown bodies of water in rainforests: Anacondas are aquatic snakes primarily found in the rivers, swamps, and riparian forests of South America. If traveling in such areas, stick to open paths and exercise caution near riverbanks and the water's edge. • Observe your surroundings: Watch the water's surface or dense vegetation near the water. If you notice anything unusual or spot a snake, immediately keep as much distance as possible. • Do not approach or attempt to catch it with bare hands: Anacondas possess immense strength when constricting prey. If you encounter one, let it go its own way and slowly back away. Keep the living area clear (especially if keeping pets or residing in a high-risk area): Trim tree branches and remove clutter to eliminate hiding spots for reptiles or habitats for rats, which serve as prey. How to survive an attack • Stay calm and prevent the snake from tightening its coils around your body: If an anaconda attacks and attempts to constrict you, it is crucial to prevent it from wrapping around your chest or neck, as this could lead to suffocation. • Try to free the head: If someone is with you, work together to grab the snake's head to distract it and break its hold, or try to uncoil the tail first, as the snake has less gripping strength there. Behavior Attribute Time Food For Animal: Anacondas (particularly the green anaconda) exhibit the following key behaviors and characteristics: • Lifestyle and habitat: They are primarily aquatic snakes, favoring slow-moving, shallow waters in rainforests or the Amazon. Their eyes and nostrils are positioned at the top of the head, allowing them to remain submerged while keeping only these features exposed above the water. • Movement: They move with great speed and agility in the water, whereas their movement on land is slower and more cumbersome. • Activity Period: It is a nocturnal and solitary animal. During the day, it typically remains motionless to rest, becoming active at dusk when the air cools. • Hunting Behavior: Although non-venomous, it possesses powerful muscles. It employs an ambush strategy, striking at prey and then tightly coiling its body around the victim (constriction) until it suffocates. • Diet: Adults prey on large animals such as deer, capybaras, wild boars, tapirs, or even caimans, whereas juveniles feed on fish, birds, or small land animals. • Aggression: They are not as ferocious as portrayed in movies; unless provoked or threatened, they generally do not attack humans. • Mating and mate-cannibalism: The mating season occurs from March to May. Females may consume the male after mating to build up energy reserves for gestation. • Reproduction: They do not lay hard-shelled eggs but give birth to live young in the water, producing approximately 20–40 offspring per brood, or up to a maximum of 82. Benefit Professsion of: Anacondas offer no direct commercial or personal utility for humans in daily life; however, they play a crucial role in the ecosystem, as follows: • Population Control: As apex predators in aquatic environments and rainforests, they help regulate the populations of other animals—such as fish, birds, deer, caimans (small crocodilians), and giant capybaras—preventing them from overpopulating and disrupting ecological balance. • Maintaining the food chain balance: Their presence helps regulate the behavior and distribution of other animals within wetlands and the Amazon River basin. • Indicator of natural abundance: Anacondas are sensitive to environmental changes; a healthy anaconda population indicates that the local water sources and ecosystems remain clean and rich in biodiversity. • Education and Ecotourism: These animals serve as subjects for biological and zoological study and attract interest in ecotourism, offering opportunities to learn about wildlife. (Note: Movies and entertainment media often portray anacondas as possessing medicinal properties or being valuable commodities; however, in reality, the hunting and trading of anacondas are regulated and illegal in many countries, and they are not animals that should be exploited for direct use.) Rate Cost Per Money SuperMarket on The Internet Online: The market price of anacondas in the exotic pet trade varies significantly by species across different countries. They can be categorized into two main groups, with additional considerations regarding specific pattern variations, as follows: 1. True Anaconda These belong to the boa family (Boidae). Market prices vary based on color and size: • Yellow Anaconda: This is the most popular species for keeping as a pet in many countries because it is smaller and easier to care for in an enclosure than the Green Anaconda. Prices for hatchlings typically start at around $250–$400 per snake (prices may fluctuate depending on import periods or local breeders). Green Anaconda: This is the largest snake species in the world. It occupies a very niche segment of the pet market and is difficult to acquire due to high import costs and the vast amount of space required as the animal grows. Market prices are generally higher than those of the Yellow Anaconda, and transactions are typically conducted through private negotiation or special import orders (pre-orders). 2. Hognose Snake (Anaconda Morph) When people in the pet community speak of an "Anaconda" at an affordable price, they are often referring to the Hognose Snake—specifically the "Anaconda" morph (named for the spotted pattern along its sides that resembles that of a true anaconda). • Market Price: Approximately $100 – $500, depending on factors such as recessive genes and coloration (e.g., Arctic Anaconda or Super Anaconda morphs). ⚠️ Legal and Ethical Considerations: Although anacondas are not classified as protected wildlife in Thailand, they are listed under Appendix II of the CITES convention. Their trade or possession requires import permits and valid legal documentation to prevent issues related to illegal smuggling. Farming Breeding Fertilization Hybridization Reproduction : Anacondas (particularly the green anaconda) exhibit reproductive characteristics that are distinct from those of typical snakes, as follows: Reproductive Maturity and Mating Period • Age of sexual maturity: Both males and females reach reproductive maturity at approximately 3–4 years of age. • Mating season: Occurs during the dry season, between March and May each year. Mating behavior ("breeding ball") • Aggregation: A large number of males (ranging from 2 to 12–13 individuals) gather around a single female. • Duration: They intertwine to form a mass or "breeding ball," jostling and competing to mate with the female over a period that can last several weeks (up to approximately 4 weeks). • Body size: Females are typically much larger and longer than males (females can reach lengths of about 4.5 meters, while males are around 2.7 meters). Sexual Cannibalism • After mating, some female anacondas may consume the male to obtain nutrients and protein to nourish their bodies during gestation. Gestation and Birth • Live birth: All anaconda species give birth to live young (ovoviviparous) rather than laying eggs to hatch externally; the eggs incubate within the mother's oviducts. • Gestation period: The gestation period lasts approximately 6–7 months. • Litter size: Each litter typically consists of 20–40 offspring (though in some cases, there may be as many as 82), depending on the size and age of the mother. • Size at birth: Newborns measure approximately 68–80 centimeters in length—with some exceeding 1 meter—and are capable of fending for themselves immediately after birth. Food Process Trending For Restuarant: - Key Timeline Evolution Adventure Story of: Anacondas (particularly the green anaconda) exhibit reproductive characteristics that are distinct from those of typical snakes, as follows: Reproductive Maturity and Mating Period • Age of sexual maturity: Both males and females reach reproductive maturity at approximately 3–4 years of age. • Mating season: Occurs during the dry season, between March and May each year. Mating behavior ("breeding ball") • Aggregation: A large number of males (ranging from 2 to 12–13 individuals) gather around a single female. • Duration: They intertwine to form a mass or "breeding ball," jostling and competing to mate with the female over a period that can last several weeks (up to approximately 4 weeks). • Body size: Females are typically much larger and longer than males (females can reach lengths of about 4.5 meters, while males are around 2.7 meters). Sexual Cannibalism • After mating, some female anacondas may consume the male to obtain nutrients and protein to nourish their bodies during gestation. Gestation and Birth • Live birth: All anaconda species give birth to live young (ovoviviparous) rather than laying eggs to hatch externally; the eggs incubate within the mother's oviducts. • Gestation period: The gestation period lasts approximately 6–7 months. • Litter size: Each litter typically consists of 20–40 offspring (though in some cases, there may be as many as 82), depending on the size and age of the mother. • Size at birth: Newborns measure approximately 68–80 centimeters in length—with some exceeding 1 meter—and are capable of fending for themselves immediately after birth. And the finally then You can eat it and Sell it to the Merchant or Customer with Who people you Know Knew known, i hope you have fun and enjoy it.
ClickMeSeeAllFull
ClickMeSeeOnMoreDetail
ClickMeSeeOnMorePictureImage
ClickMeSeeOnMoreVideo
Animal Danger: Discovery World Wide Life Animal Menu: 23.Komodo Lizard Dragon Deadly Poison Animal
Dangerous Often See in Daily Routine: Method Procedure Management All Works: Komodo Lizard Dragon Deadly Poison Animal
First Aid Instructions Treatment Cure Methods: If bitten by a Komodo dragon, seek medical attention at a hospital immediately, as their saliva and venom glands contain both dangerous bacteria and toxins that prevent blood from clotting. First Aid Procedures • Initial bleeding control: Apply direct pressure to the wound with a clean cloth to stop the bleeding. • Wound cleaning: Gently wash the wound with clean water and soap; avoid scrubbing vigorously. • Stay calm and still: Minimize physical movement to prevent the venom or pathogens from spreading rapidly into the bloodstream. • Do not use chemicals or extreme cold: Avoid applying substances like toothpaste, ash, or concentrated alcohol to the wound, and do not use extreme cold therapy (cryotherapy), as these can cause further tissue damage. • Seek immediate medical attention: A doctor will need to administer antibiotics to prevent severe infection and monitor for signs of toxicity or blood clotting disorders. Warning Caution: The Komodo dragon is a large and highly dangerous predator; key precautions include: • Sharp teeth and bite force: They possess nearly 60 serrated, shark-like teeth and powerful neck muscles; upon biting, they tear and pull, causing massive lacerations. • Venom: They have venom glands that release toxins which lower blood pressure, inhibit blood clotting, and cause uncontrollable bleeding or physical weakness. • Claws and skin: They feature thick skin and extremely strong claws, combined with the ability to move with great speed and explosive power. Guidelines for encounters: • Strictly avoid approaching or interfering with them. • If in their natural habitat (e.g., Komodo Island), strictly follow the tour guide's instructions. • Do not wander away from the group. • If you encounter one, remain calm, stay still, and maintain a safe distance. Souce Place Live Any Wherever can i you me See it: The natural habitat of the Komodo dragon is found exclusively on islands in Indonesia, within the Lesser Sunda Islands region. Key islands serving as habitats: • Komodo Island: The main island and the source of the species' name • Rinca Island • Flores Island • Gili Motang Island (Note: There were past reports of sightings on Padar Island, but no individuals have been found there since the 1970s.) Habitat and Environment • Tropical Savanna: The primary habitat for adults; they prefer open, flat areas with tall grass and shrubs. • Diverse Terrain: Found in environments ranging from beaches and dry riverbeds to mountain peaks (at elevations up to 820 meters above sea level). • Age-related Behavior: Juveniles (under 8 months old) inhabit trees and forested areas to avoid danger from larger individuals. Protection Save From: To prevent and respond to an encounter with a Komodo dragon—a large, agile predator equipped with venom glands—follow these guidelines: Preventing and avoiding an attack • Maintain distance: Always keep a distance of at least 3–5 meters from the Komodo dragon, even if it appears to be lying still or sleeping. • Go with a guide or ranger: When visiting their natural habitat—such as Komodo National Park—never explore alone. You must stay with your group and be accompanied by a ranger equipped with a Y-shaped stick (*langka*) for control. • Be mindful of scents and open wounds: Komodo dragons have an extremely keen sense of smell. Do not carry food along hiking trails, and ensure any open wounds are securely covered. Women who are menstruating should inform the rangers beforehand for safety reasons. Do not make loud noises or sudden movements: Making noise or moving quickly may trigger their predatory instincts. How to react if approached or chased • Do not run away immediately: Running triggers a pursuit response; Komodo dragons can sprint at speeds of up to 20 kilometers per hour over short distances. • Back away slowly: If one starts to approach, calmly retreat while keeping your eyes on the animal. • Do not climb a tree to escape (regarding adults): Adult Komodo dragons can climb trees effectively in some situations, and juveniles are agile climbers; therefore, climbing a tree may not always be safe. • Ultimate self-defense: If attacked at close range, use available objects to strike or hit vulnerable areas—such as the eyes or nose—to stun the animal and allow for escape. • Seek immediate medical attention: If bitten or wounded, go to a hospital as quickly as possible. Komodo dragon saliva and venom glands contain substances that prevent blood clotting, as well as dangerous bacteria that can lead to shock and death. Behavior Attribute Time Food For Animal: The Komodo dragon (*Varanus komodoensis*) exhibits distinctive behaviors and postures characteristic of an apex predator on the island, as follows: Threat Display • Threatening and defensive behavior: When feeling threatened or asserting dominance, it opens its mouth wide, inflates its throat, and arches its back while emitting a hissing sound. • Tail usage: It flicks or shakes its tail to signal displeasure or to warn an opponent. • Stance and movement: It often adopts a "high stance," compresses its body laterally, or moves its head and neck to survey its surroundings. Hunting Behavior and Movement • Ambush: It is an ambush predator that lies in wait for prey, relying on its gray or brown skin to blend in with the surroundings. • Speed: Despite its lumbering appearance, it is extremely agile when running or launching an attack on prey. • Tongue usage: Frequently flicks out a long, snake-like tongue to pick up scents and detect airborne chemical particles in order to locate prey. • Hunting large prey: Hunts large ungulates, such as deer or wild boars, by biting them and allowing the venom and bacteria to take effect before tracking them down to feed. Social Behavior and Reproduction • Protection of the young: Komodo dragon hatchlings often roll in animal feces to mask their scent, preventing larger dragons—which prey on the young—from detecting them. • Egg-laying: The female digs a nest in the ground to lay her eggs, covering them with soil and leaves; she then lies over the nest to guard the eggs. Benefit Professsion of: Key benefits derived from the Komodo dragon in the fields of medicine and scientific study include the following: Medical and Pharmaceutical Research • Development of new antibiotics: Scientists have discovered that Komodo dragon blood contains compounds known as antimicrobial peptides (AMPs), which possess the ability to destroy a wide range of bacteria. Combating drug-resistant pathogens (superbugs): Research has been conducted to synthesize proteins that mimic substances found in Komodo dragon blood (such as DRAGON-1). These proteins have been shown to kill highly drug-resistant bacteria in laboratory mice, offering a promising pathway for developing next-generation antibiotics to tackle the future crisis of antimicrobial resistance. Study of toxins and the circulatory system: The venom glands in a Komodo dragon's mouth produce substances that lower blood pressure, inhibit blood clotting, and induce shock in prey; these findings are being used for further research to better understand the mechanisms of blood coagulation and vasodilation. Ecosystem Impact • Apex Predator: Komodo dragons help maintain a balanced population of herbivores on the islands. • Food Chain Balance: They efficiently consume carcasses and remains (leaving very little waste), helping to clean the environment and recycle minerals within the local ecosystem. Rate Cost Per Money SuperMarket on The Internet Online: Trading in Komodo dragons is illegal, as they are a protected wildlife species and critically endangered under CITES and Indonesian wildlife protection laws. However, regarding the black market, authorities have disclosed the following information on prices and smuggling cases: Black Market Prices • Source price in Indonesia (smuggling groups): Smuggling networks have purchased them from hunters for as little as approximately 5.5 million rupiah per animal (or around 400–500 USD, depending on the prevailing exchange rate). • Resale / Transnational Export Price: Trafficking networks resell the animals at prices many times higher than their acquisition cost; reports indicate that prices have reached approximately 1 million to 1.1 million baht per animal (or around 1,000–1,400 USD, based on earlier cases involving social media-based illicit trade). • Smuggling into Thailand: Indonesian police have previously dismantled a transnational wildlife trafficking network that was sourcing Komodo dragons for illicit export to buyers in Thailand. Farming Breeding Fertilization Hybridization Reproduction : Komodo dragons are capable of reproducing both sexually (through conventional mating) and asexually. Key details are as follows: 1. Sexual Reproduction • Mating season: Occurs once a year, generally between May and August. • Attraction and Combat: Females release a specific scent via their feces to attract males, while males fight for mating rights by wrestling and attempting to throw their opponents to the ground. • Egg-laying: Females lay their eggs annually between July and early September, burying them in a dug-out pit; the incubation period lasts approximately 8–9 months. 2. Asexual reproduction (Parthenogenesis) • Reproduction without a male: Female Komodo dragons can lay eggs that hatch without requiring fertilization by a male. • Genetic mechanism: Komodo dragons possess a ZW sex-determination system (females are ZW, while males are ZZ). Eggs produced through this process result in either WW or ZZ genotypes; the ZZ eggs are capable of developing into healthy male offspring. Food Process Trending For Restuarant: - Key Timeline Evolution Adventure Story of: The Komodo dragon (*Varanus komodoensis*) originated and evolved in Australia approximately 4 million years ago, rather than on Indonesian islands as previously believed. Evolutionary Timeline and Path • Origins in Australia (approx. 4 million years ago): Fossils discovered in Queensland, Australia, indicate that the Komodo dragon's ancestors originated there and possessed a massive body size from the very beginning; they did not start small and subsequently grow larger due to island living (refuting the traditional "Island Rule" theory). • Interbreeding among ancestral populations (millions of years ago): Genetic evidence reveals that Komodo dragons once interbred with the ancestors of the Sand monitor in Australia, leaving behind genetic traces that persist to this day. • Migration to Indonesia (approximately 900,000 – 1 million years ago): They migrated across the islands to the west—traversing land bridges or swimming through the Lesser Sunda Islands chain—eventually settling on the islands of Flores, Komodo, and nearby islands. • Extinction in Australia (approx. 50,000 years ago): Komodo dragons went extinct on the Australian mainland around the same time early humans arrived on the continent. • Discovery by the Western world (1910): European explorers began officially recording sightings of Komodo dragons in 1910, and the species received its official scientific name in 1912; today, they remain found only in limited areas within Indonesian national parks. And the finally then You can eat it and Sell it to the Merchant or Customer with Who people you Know Knew known, i hope you have fun and enjoy it.
ClickMeSeeAllFull
ClickMeSeeOnMoreDetail
ClickMeSeeOnMorePictureImage
ClickMeSeeOnMoreVideo
Animal Danger: Discovery World Wide Life Animal Menu: 24.Crocodile Aligator Animal
Dangerous Often See in Daily Routine: Method Procedure Management All Works: Crocodile Aligator Animal
First Aid Instructions Treatment Cure Methods: Treatment and first aid for a crocodile bite must prioritize urgent control of blood loss and the prevention of severe infection, given the high concentration of dangerous bacteria in a crocodile's mouth. The immediate steps to take once the victim has escaped the crocodile are as follows: 1. Stay calm and move to a safe area. • Get the injured person out of the water and away from the water's edge as quickly as possible, as the crocodile may return to attack again. • Immediately call the emergency medical hotline (1669) or rush the person to the nearest hospital. 2. Stop the bleeding immediately (most important) Crocodile bite wounds are typically large, deep lacerations that cause significant blood loss. • Apply direct pressure: Use a thick, clean cloth or a shirt to press firmly directly onto the wound to reduce blood flow. • Elevate the injured area: If the wound is on an arm or leg, raise it above heart level to slow the blood flow. • Using a tourniquet: If there is severe, spurting bleeding from an arm or leg wound that cannot be controlled by direct pressure, use a commercial tourniquet or improvise one using a thick cloth and a stick (acting as a windlass) to tighten it above the wound. 3. Initial wound care (to be performed after bleeding has been controlled) • Clean the wound: If clean water or sterile saline is available, flush the wound to remove as much dirt and bacteria—originating from the water or the crocodile's mouth—as possible. • Do not attempt to suture or tightly seal the wound yourself: Cover the wound loosely with a clean cloth to protect it from further contamination. Do not try to stitch the wound shut or seal it completely; this type of injury requires proper drainage and specific antibiotics prescribed by a doctor to prevent flesh-eating bacterial infections. 4. Monitor for signs of shock • While waiting for the ambulance, have the injured person lie flat and cover them with a blanket to maintain body heat. • If the injured person is unconscious but still breathing, place them in the recovery position to prevent choking. 💡 Important to remember upon arrival at the hospital: Immediately inform the medical staff that the injury was caused by a "crocodile bite." Doctors need to administer specific injectable antibiotics to treat bacteria associated with water and reptiles, as well as an immediate tetanus vaccination. Warning Caution: If you encounter a crocodile—whether in your home or in a body of water—the most important thing is to remain calm. Do not approach the animal and strictly avoid attempting to capture it yourself, as crocodiles are ferocious and capable of moving very quickly. Precautions and actions to take when encountering a crocodile: • Stay calm and do not panic: Screaming or making loud noises may cause the crocodile to feel threatened and trigger an attack. • Slowly retreat to a safe location: Back away slowly while maintaining a safe distance. Find a room that can be securely locked or move to an elevated position, such as on top of a table or cabinet. • Do not approach or feed: Strictly avoid attempting to take selfies with, provoke, or feed the crocodile. • Do not run in a zigzag pattern expecting an easy escape: Although crocodiles have limited neck mobility, they can rapidly pivot their bodies to lash out with their tails or charge. • Promptly notify experts: Immediately contact the police, rescue services, or the local fisheries office, providing clear details regarding the crocodile's location, size, and behavior. Souce Place Live Any Wherever can i you me See it: Crocodiles inhabit various water bodies and wetlands—such as streams, ponds, canals, swamps, rivers, and mangrove forests—and can be categorized based on their natural habitats as follows: • Freshwater crocodiles (Siamese crocodiles): Inhabit slow-moving or still freshwater bodies, such as Bueng Boraphet. • Saltwater crocodile (Estuarine crocodile): Inhabits freshwater, brackish water, mangrove forests, and river estuaries near the sea. • False gharial (Malayan gharial): Inhabits riparian forests and tropical wetlands. • Rearing environments: In addition to the wild, they are found in zoos and breeding farms. Protection Save From: Here are guidelines for preventing and dealing with a crocodile encounter: Prevention and Avoidance • Avoid high-risk waters: Do not swim or walk near the water's edge in areas where warnings have been issued or where crocodiles are known to inhabit. • Build a barrier: If living near a natural body of water, construct a secure fence around your home or farm. • Be mindful of time and location: Pay attention to warning signs and avoid approaching bushes or blind spots along the water's edge, where crocodiles often lie in wait. • Do not feed: Never feed crocodiles or approach them to take selfies. How to react if you encounter a crocodile • Stay calm and retreat quietly: If you encounter a crocodile, remain composed; do not panic or run while making noise. Slowly back away from the area. • Keep your eyes on it: If the crocodile turns toward you or begins to approach, face it and maintain eye contact while backing away slowly to show that you are alert and aware of its presence. Fight back with full force if attacked: If a crocodile attacks, protect vital areas of your body—such as the head, neck, and abdomen—and use all your strength to punch or strike its vulnerable points, like the eyes or snout, to cause pain and force it to let go. Behavior Attribute Time Food For Animal: Key behaviors and characteristics of crocodiles can be categorized into their daily activities and hunting habits, as follows: Behaviors and Body Temperature Regulation • Resting with the mouth open: This serves to dissipate body heat. Since crocodiles are cold-blooded and lack sweat glands like humans, keeping the mouth open allows heat to escape from the oral cavity and throat. • Basking in the sun: They emerge onto riverbanks or rocks to bask in sunlight, which raises their body temperature and aids in metabolic processes. Behavior and Communication • Jaw-clapping and growling: Uses low-frequency sounds, body vibrations, and jaw-clapping to assert territorial boundaries or communicate with other crocodiles. • Use of tail and body: Utilizes its long, flattened tail and body for buoyancy and propulsion while in the water. • Submerged concealment: Capable of holding its breath and remaining submerged for up to an hour without surfacing, efficiently utilizing oxygen via its hemoglobin system. Hunting Behavior • Death Roll: Once a crocodile has seized its prey, it violently twists and rolls its body to tear off chunks of flesh. Benefit Professsion of: Crocodiles offer various benefits, serving as a source of high-protein food, an ingredient for health products, and a raw material for leather goods. Benefits of crocodiles in various aspects: • Crocodile meat: An alternative protein source that is low in fat and calories, provides low energy, and contains beneficial fatty acids—making it suitable for those looking to manage their weight or reduce fat intake. • Crocodile blood: Developed into dietary supplements; beliefs and research suggest it nourishes the body, alleviates symptoms of asthma and allergies, and boosts the immune system. • Crocodile oil and fat: Extracted for use in topical oils or skincare products; contains antioxidants and helps regenerate damaged skin cells. • Skin and other parts: Crocodile skin is processed into high-end leather goods, such as handbags, shoes, and belts. Rate Cost Per Money SuperMarket on The Internet Online: Prices for crocodiles and crocodile products vary depending on the type and intended use, as follows: Prices for crocodile meat and fresh crocodile • Small meat pieces/trimmings: Approximately $3 per kilogram • Red meat/standard meat: Approximately $6–10 per kilogram • Tail loin (thick section of the tail): Approximately $10 per kilogram • Whole crocodile (for roasting/barbecuing): Approximately $30–100, depending on size and the specific farm Farming Breeding Fertilization Hybridization Reproduction : Crocodiles reproduce sexually, with key stages and characteristics as follows: 1. Reproductive Maturity • Female crocodiles become ready to mate at approximately 7–11 years of age (averaging around 9–10 years). 2. Courtship • Occurs early in the year (approximately January–February, or 4–6 weeks prior to the egg-laying season). • Males attract females by making hissing sounds, slapping their jaws against the water or against each other (both above and below the surface), and raising their tails and necks. 3. Fertilization • Fertilization is internal; the male deposits sperm to fertilize the eggs inside the female's body. 4. Egg-laying • Crocodiles lay eggs once a year (approximately during February–March). • The female crocodile lays 30–70 eggs per clutch. • There are two methods of egg-laying: digging a pit to bury the eggs in sand or soil along the riverbank, or constructing a mound of earth. 5. Incubation and Sex Determination • Incubation takes approximately 68–72 days (or more than 60 days); the mother crocodile guards the nest and is highly aggressive. • The sex of the hatchlings is determined by the temperature during the early to middle stages of incubation. • As hatching approaches, the mother crocodile can hear the hatchlings vocalizing inside the eggs and uses her tongue or the roof of her mouth to help break the shells and release them. Food Process Trending For Restuarant: Processed crocodile meat serves as a popular alternative protein source, utilized in a wide variety of products—ranging from ready-to-eat items to dried goods. Key examples include: Types of processed crocodile products • Sun-dried crocodile meat / Sun-dried crocodile tail base (*bong tan*): Meat or the tail base section is marinated in spices and sun-dried; it can be fried and served as a main dish. • Ready-to-eat pounded crocodile meat: Seasoned crocodile meat that is pounded and oven-dried—similar to pounded pork or beef—making it a popular snack. • Crocodile Meatballs: Finely ground crocodile meat shaped into meatballs; used as a substitute for pork or fish in noodle dishes and grilled skewers. • Crocodile Massaman Curry / Crocodile Soup: Crocodile tail meat or cartilage simmered or stewed with curry paste and coconut milk; a nourishing dish rich in protein and iron. • Crocodile Steak / Spicy Stir-fried Crocodile: Body meat sliced and marinated for steaks or used in spicy, flavorful dishes; the texture is tender, resembling a blend of chicken and fish. Key Timeline Evolution Adventure Story of: Crocodiles share a common ancestry with dinosaurs and birds within a group known as Archosaurs, which first appeared on Earth approximately 250 million years ago. Key evolutionary developments across different eras include: 1. The Beginning (Late Permian – Triassic Periods: 250–200 million years ago) • Archosaurs: These served as the ancestral stock for this group, which later diverged into several distinct evolutionary lineages. • Early Crocodiles: Initially, crocodiles were not aquatic animals like their modern counterparts; some species were slender and bipedal (walking on two legs), while others were herbivores. 2. Adaptation to Aquatic Environments and Diversification (Jurassic – Cretaceous Periods: 200–66 million years ago) • Adaptation to wetlands: Ancestors of crocodiles began adapting to life near water sources and evolved into predators. • Prehistoric giant crocodiles: This era saw the existence of colossal crocodiles—such as *Sarcosuchus* and *Deinosuchus*—that reached lengths of 10–12 meters and weighed several tons. Lineage Divergence: Major groups began to clearly emerge in Europe around 145 million years ago, prior to the divergence of the lineages of true crocodiles and alligators. 3. Modern Era (90 million years ago – Present) • Order Crocodilia: Crocodiles in a form closely resembling modern ones clearly emerged around 90 million years ago. • The "Living Fossil" Myth: Although the general public often perceives crocodiles as having remained virtually unchanged for 200 million years, they have actually undergone continuous evolution—adapting their body shapes, skulls, and behaviors—to suit changing environments. In Thailand: Fossils of various ancient crocodilians (such as *Koratosuchus* and *Varanosuchus*) have been discovered, and three main native species are found: the freshwater crocodile, the saltwater crocodile, and the gharial. And the finally then You can eat it and Sell it to the Merchant or Customer with Who people you Know Knew known, i hope you have fun and enjoy it.
ClickMeSeeAllFull
ClickMeSeeOnMoreDetail
ClickMeSeeOnMorePictureImage
ClickMeSeeOnMoreVideo
Animal Danger: Discovery World Wide Life Animal Menu: 25.Shark Animal
Dangerous Often See in Daily Routine: Method Procedure Management All Works: Shark Animal
First Aid Instructions Treatment Cure Methods: First aid for severe wounds caused by a shark attack must prioritize immediate bleeding control and removing the victim from the water. Key steps include: • Get out of the water immediately: Quickly bring the injured person to shore or onto a boat to prevent further attacks and reduce the risk of drowning. • Call for emergency help: Immediately contact rescue services or an emergency medical team. • Stop bleeding directly: Firmly press a clean cloth, a piece of clothing, or your hand against the bleeding wound to stop the flow. If the wound is large and blood is spurting, apply a tourniquet above the wound site—provided you have the equipment and know how to use it correctly. • Keep the patient calm: Talk to the injured person to help them regain their composure and avoid panic; this helps lower their heart rate and reduce blood loss. • Keep the patient warm: Cover the injured person with a blanket or clothing, as they may experience shivering and go into shock due to blood loss. Do not remove foreign objects: If a shark tooth fragment or any object is lodged in the wound, strictly avoid pulling it out yourself; leave this to a medical professional. Warning Caution: Safety precautions regarding sharks and the consumption of shark meat or fins are as follows: Precautions while in the water or at the beach: • Avoid high-risk areas: Do not swim or kayak in areas where sharks are known to frequent—such as near seal colonies or locations where fish congregate close to the shore. • Observe warning flags and signs: Swim only in areas supervised by lifeguards and within designated zones (e.g., between safety flags), and exit the water immediately if a warning signal sounds. Avoid attracting sharks: • Do not wear brightly colored clothing or high-contrast patterns, as sharks can clearly distinguish color contrasts. • Do not throw food into the water, and avoid feeding fish. • Fishermen must not discard fish scraps near areas where people are swimming or near small islands. • Do not enter the water with a dog. • If you see baitfish leaping to escape or a school of fish scattering, exit the water immediately, as a predator may be nearby. Souce Place Live Any Wherever can i you me See it: Most sharks inhabit seas and oceans worldwide—spanning tropical, temperate, and polar regions—and can be found in environments ranging from shallow surface waters, coastal areas, and coral reefs to the deep sea. Shark Habitats • Seas and Oceans: The primary habitat for almost all shark species, including those that prefer warm water and those that prefer cold water. • Coral Reefs and Coastal Areas: Serving as both hunting grounds and refuges for various shark species, such as the blacktip reef shark. • Deep-water zones: Certain shark species prefer dark, high-pressure environments—such as the frilled shark (found at depths exceeding 600–900 meters) or the great white shark, which can dive to depths of over a thousand meters. • Freshwater or brackish water: Some shark genera (such as *Glyphis*, or river sharks) are capable of living in freshwater and brackish water throughout their entire lives. • Thai waters: The seas of Thailand—spanning both the Gulf of Thailand and the Andaman Sea—are home to over 87 shark species, including whale sharks, blacktip reef sharks, and bamboo sharks; these waters are also recognized as Important Shark and Ray Areas (ISRAs). Protection Save From: Shark defense and safety guidelines for entering the sea can be divided into two main parts: prevention before entering the water and how to respond when encountering a shark. 1. Ways to prevent sharks from approaching (before entering the water) • Avoid entering the water alone: Always swim, dive, or surf in a group, as sharks tend to target solitary prey. • Avoid entering the water at sunrise or sunset: These are times when sharks are active and visibility is poor, which can lead them to mistake humans for seals or natural prey. • Avoid river mouths or areas where fishing takes place: Refrain from swimming near river mouths (habitats favored by bull sharks) or areas with fishing boats, as the scent of blood or fish scraps can attract sharks. • Do not enter the water if you have open wounds or are menstruating: Sharks have a keen sense of smell and can detect even minute traces of blood. • Avoid shiny jewelry and high-contrast clothing: The glint from watches or jewelry reflects light in a way that resembles small fish scales, potentially triggering a shark's predatory instincts. 2. How to handle a shark encounter • Stay calm and do not swim away in a panic: Thrashing the water or swimming away frantically can make the shark mistake you for an injured fish and cause it to charge; try to move as slowly as possible. • Maintain eye contact and face the shark: Keep a close watch on its movements at all times and do not look away. Try to back away slowly until you reach a rocky area or a coral reef, which will protect your rear and prevent you from being surrounded. • Make yourself appear larger: If in a group, stay close together; if alone, spread your arms or extend your gear to show that you are not small prey. • Use defensive tools if attacked: If a shark approaches closely or attacks, do not play dead. Instead, use available objects—such as a GoPro camera or snorkel—or strike its vulnerable areas (like the nose and gills, which are highly sensitive) to drive it away. Behavior Attribute Time Food For Animal: Shark behavior and mannerisms reflect their methods of communication, hunting, and aquatic adaptation, as follows: Body Language and Communication • Displays of aggression or submission: Sharks often use postures—such as arching their bodies or raising and lowering their pectoral fins—to signal their status or warn other sharks. • Agonistic display (e.g., in Grey Reef Sharks): Characterized by rapid, twisting, or swaying swimming movements used as a warning when the shark feels threatened. Hunting Behavior and Sensory Perception • Olfaction and Auditory Perception: Sharks rely primarily on their sense of smell and respond to low-frequency sound waves (below 800 Hz) to locate prey. • Electroreception: Used to detect electrical signals from living organisms at close range, aiding in the final approach to the prey. • Curiosity: When encountering humans, most sharks tend to approach out of curiosity rather than aggression. Social Behavior and Mating • Social Structure: While most sharks are solitary, some species—such as hammerheads—can gather in schools. • Mating: The male follows the female, maneuvers to align their bodies, and presses their undersides together near the water's surface. Benefit Professsion of: Sharks provide numerous benefits to marine ecosystems and humans, particularly in maintaining natural balance, as outlined below: Benefits to Ocean Ecosystems • Controlling Marine Animal Populations: As apex predators, sharks help regulate the populations of fish, seals, and sea lions, preventing them from overpopulating and disrupting the food chain. • Selecting for Strength: They hunt and eliminate weak, sick, or infected fish, thereby helping to prevent the spread of disease within the marine environment. • Maintaining the balance of coral reefs and seagrass beds: They help regulate the behavior of herbivores, preventing them from overgrazing on seagrass or coral. • Filtering water and reducing toxic algae blooms: Certain plankton-feeding shark species help filter seawater and prevent phenomena such as harmful algal blooms or the accumulation of toxic algae. • Nutrient cycling: Sharks' movement and waste excretion help distribute essential nutrients to various parts of the ocean. Benefits to Humans and Beliefs (Commercial and Traditional Knowledge) • Ecotourism: Serves as a major attraction for tourists to dive and view sharks, generating income for coastal communities and tourism businesses. • Medical and Dietary Supplements: Various parts, such as shark cartilage, are used as ingredients in joint-health supplements (however, consuming shark meat or fins carries risks associated with heavy metals and accumulated toxins—such as BMAA—which may adversely affect the nervous system). Rate Cost Per Money SuperMarket on The Internet Online: The average market price for sharks in Thailand ranges from approximately 60 to 150 baht per kilogram for common marine shark species used for food. However, prices vary depending on the type, size, and intended use (such as for consumption or ornamental purposes). The price categories can be broken down as follows: 1. Sharks for culinary use (fresh shark / seafood) These are primarily small-to-medium-sized sharks found in Thai waters—such as *Chalam Hin* (bamboo shark), *Chalam Sai* (sand shark), *Chalam Hu Dam* (blacktip reef shark), or *Chalam Khao* (local names for specific shark species). They are commonly prepared in dishes such as *Phat Cha* (spicy stir-fry with herbs) or served blanched with a dipping sauce. • Wholesale/Seafood market price: Approximately $2–3 per kilogram (for bulk purchases or budget-friendly markets). • Standard retail price: Approximately $5 per kilogram. • Online channels: Fresh shark—sold in steaks or scaled and ready-to-cook—is available on platforms such as www.google.com, with prices varying based on the season and shipping costs. 2. Ornamental fish (for aquarium keeping) For enthusiasts who enjoy keeping exotic fish or small freshwater/brackish-water sharks: • Paddlefish (4–5 inches in size): Market prices are relatively high, at approximately $30 per fish. (Note: Thai law protects certain shark species—such as the whale shark, which is classified as a reserved wild animal—strictly prohibiting their trade, hunting, or possession.) Farming Breeding Fertilization Hybridization Reproduction : Sharks reproduce via internal fertilization, where the male uses a specialized reproductive organ (clasper) to transfer sperm into the female—unlike most fish, which release eggs and sperm to fertilize in the water. Their reproductive methods are categorized into three main types: 1. Viviparity (giving birth to live young) • The embryo develops inside the mother's uterus. • It receives nutrients and oxygen via an umbilical cord or placenta, similar to mammals (e.g., the lemon shark). 2. Ovoviviparity (producing eggs that hatch internally) • Eggs are fertilized and develop into embryos within an egg case inside the mother's body. • The young hatch from their eggs inside the mother before being born as live young. Sometimes, larger embryos may consume other eggs or embryos before birth (intrauterine cannibalism). 3. Oviparity (Egg-laying) • The female releases fertilized eggs into the external environment. • The eggs are encased in distinctively shaped, tough shells (often called "mermaid's purses") that feature appendages allowing them to anchor to seaweed or coral reefs until they hatch. Other key characteristics of shark reproduction • Paired reproductive organs: Male sharks possess a pair of reproductive organs known as claspers (left and right). • Asexual reproduction: In very rare instances—such as with certain sharks kept in aquariums—females can conceive and give birth without the egg being fertilized by a male (parthenogenesis). • Multiple mating: Females of some shark species can store and utilize sperm from multiple males during a single reproductive event. Food Process Trending For Restuarant: Steak,Soup. Key Timeline Evolution Adventure Story of: Sharks are creatures believed to have originated more than 450 million years ago—predating trees and appearing roughly 200 million years before dinosaurs. They have survived five mass extinction events. Shark Lineage: • Early Era (420–450 million years ago – Silurian and Devonian periods): • Fossil evidence of early shark scales has been found, such as *Elegestolepis* (dating back approximately 420 million years), as well as fossils like *Fanjingshania* and the whorl-like teeth of *Qianodus* from the Silurian period. • The Golden Age of Sharks (359 million years ago – Carboniferous Period): • Following the mass extinction event at the end of the Devonian Period, sharks became incredibly diverse in the oceans. They possessed body shapes and teeth vastly different from those of modern sharks, earning this era the title "The Golden Age of Sharks." • The Era of Giant Sharks and Megalodon (approximately 20 million years ago): • Ancient seas were home to colossal predators such as the Megalodon, which exceeded 19 meters in length, weighed over 50 tons, and possessed immense bite force, before eventually going extinct due to global climate change. Modern-day sharks: • Over the course of more than 400 million years, the basic body shape of sharks has remained perfectly adapted for hunting—exemplified by the great white shark, tiger shark, and hammerhead shark that we see today. And the finally then You can eat it and Sell it to the Merchant or Customer with Who people you Know Knew known, i hope you have fun and enjoy it.
ClickMeSeeAllFull
ClickMeSeeOnMoreDetail
ClickMeSeeOnMorePictureImage
ClickMeSeeOnMoreVideo
Animal Danger: Discovery World Wide Life Animal Menu: 26.Piranha Animal
Dangerous Often See in Daily Routine: Method Procedure Management All Works: Piranha Animal
First Aid Instructions Treatment Cure Methods: First aid for a piranha bite (following the same principles for general animal bites as recommended by the Mayo Clinic) involves the following key steps: Initial Treatment • Clean the wound immediately: Thoroughly wash the wound area with clean water and soap for 10–15 minutes to remove debris and reduce bacteria. • Stop the bleeding: If there is bleeding, apply direct pressure to the wound using a clean cloth or sterile gauze until the bleeding stops. • Apply an antibiotic cream or an antiseptic solution, such as Betadine, to prevent infection. • Cover the wound: Use clean gauze or a waterproof bandage to protect the area from dust and dirt. • Take pain medication: Paracetamol can be taken to relieve pain or swelling (avoid aspirin for children). Warning Caution: Precautions and Things to Avoid • Do not use unhygienic folk remedies: Do not apply herbal poultices, toothpaste, or foreign substances to the wound, as this can worsen the infection. • Do not squeeze or suck the blood too forcefully: Do not use your mouth to suck blood from the wound. In many countries, piranhas are classified as non-native aquatic species; their importation, breeding, trading, or possession is illegal under Department of Fisheries regulations. Precautions and Legal Penalties in Thailand • Strict Prohibition on Possession: Possession of any live piranha species—including their eggs and milt—is strictly prohibited. • Penalties (Fines and Imprisonment): • Possession: Punishable by imprisonment not exceeding 1 year or a fine not exceeding $40,000 (must be destroyed; release into waterways is prohibited). • Releasing piranhas into natural waterways: Punishable by imprisonment not exceeding 2 years or a fine not exceeding $80,000. • Risks to Ecosystems and Humans: Piranhas are aggressive, carnivorous, schooling fish with razor-sharp teeth. They are ill-suited to the natural aquatic environments of various countries, potentially decimating native fish populations and posing a danger to humans. Souce Place Live Any Wherever can i you me See it: Piranhas inhabit freshwater environments in South America. Habitat Details • Major River Basins: Abundant in the Amazon, Orinoco, and Paraguay–Paraná basins. • Geographical Features: Inhabit rivers, rainforest streams, lakes, and floodplains. • Aquatic Environment: Found in both still and flowing waters; particularly during the rainy season or late summer, they often spawn in shallow water near aquatic vegetation. Protection Save From: To protect yourself from the dangers of piranhas when in their natural habitat or in waters where they may be present, follow these safety guidelines: • Avoid entering the water with open wounds: Do not swim or submerge your body if you have fresh wounds, scratches, or are menstruating, as the scent of blood can easily attract piranhas. • Do not splash or make loud noises: If you are in the water, avoid splashing, thrashing your limbs, or making loud noises. Erratic movements can be mistaken for an injured or struggling prey animal, triggering their predatory instincts. • Avoid shallow waters during the dry season: When water levels drop and bodies of water shrink during the dry season, piranhas congregate in dense numbers; food scarcity makes them more aggressive than usual. • Do not discard food scraps or clean fish in the water: Avoid washing meat or animal carcasses, or dumping food waste into the water, as the smell of blood and fish entrails will attract schools of piranhas. • Do not fish for piranhas near the water's edge without taking precautions: Accidents involving bites often occur while hauling the fish onto the bank; therefore, exercise caution and use appropriate tools. Move calmly if you encounter them: If you spot piranhas in the water, do not panic; move slowly and gently to exit the water as quickly as possible. Avoid swimming away frantically. Behavior Attribute Time Food For Animal: Piranhas exhibit the following key behaviors and characteristics: • Schooling behavior: They typically live and swim in large schools to protect themselves from larger predators; however, individuals of certain species may break away to forage alone as they mature. • True nature in the wild: In reality, piranhas are relatively shy and timid—far from the ferocious creatures depicted in movies. They act as "scavengers," feeding on weak or dying fish and aquatic animals. • Physical displays and posturing: When excited, threatened, or confronting an adversary, they employ visual displays such as spreading their fins wide and turning their side toward the opponent. • Detection of the scent of blood: They possess a keen sense of smell for blood in the water—similar to sharks—capable of detecting it even in extremely dilute concentrations. • Attack behavior: They will swarm and attack a victim rapidly only if the victim is severely injured, bleeding, or in critical condition, or when natural food sources are extremely scarce. • Egg-laying: Eggs are laid during the early rainy season or late summer, typically in shallow water near aquatic plants. Benefit Professsion of: The term "Piranha" can refer to two main contexts, each with vastly different benefits, as follows: 1. Benefits of the "Piranha" (Aquatic Animal) Although piranhas are notorious for their ferocity in movies, they play several important roles in nature and human life: • Maintaining ecosystem balance: Piranhas act as the "sanitation department" of the river basin. They typically consume animal carcasses or prey on weak and sick animals, helping to prevent the spread of disease and keep water sources clean. • A source of protein and food for indigenous peoples: Indigenous tribes in the Amazon basin have long caught piranhas for food. The flesh is white, firm, and naturally sweet; popular dishes include crispy fried piranha and piranha soup. • Historical tools and weapons: Piranha teeth are incredibly strong and razor-sharp. Consequently, indigenous tribes in South America often utilized the fish's jaws and teeth to create cutting tools or arrowheads for hunting. Economic and tourism value: In some countries, piranhas are raised as ornamental fish (where permitted by law) and serve as a target for recreational sport fishing. Country-specific precautions: Live piranhas are illegal in Thailand; their importation, possession, or breeding is strictly prohibited due to the serious threat they pose to local aquatic ecosystems (penalties include a fine of up to $4,000 or imprisonment for up to 6 years). However, importation in the form of frozen meat for consumption is permitted. Rate Cost Per Money SuperMarket on The Internet Online: On the black markets of various countries, piranhas are traded illegally at prices ranging from $40 to $400 per fish. The price depends on factors such as species, size, aesthetic appeal, and the mutual agreement between buyer and seller (for instance, a fish the size of a palm—or aged 4–5 months—typically averages between $200 and $400). However, the trading, breeding, or possession of piranhas is considered a serious offense in many countries, as they are aggressive non-native fish that could devastate ecosystems and pose a danger to humans if they were to escape into natural waterways. Legal Penalties to Know Fisheries regulations prescribe penalties for violations concerning piranhas (genera *Serrasalmus*, *Rooseveltiella*, and *Pygocentrus*) as follows: • Possession, breeding, importation, or trading: Punishable by imprisonment not exceeding 1 year, a fine not exceeding $40,000, or both. • Releasing into aquaculture facilities or natural water bodies: Punishable by imprisonment not exceeding 2 years, a fine not exceeding $80,000, or both. Farming Breeding Fertilization Hybridization Reproduction : Key details regarding piranha reproduction and breeding are as follows: • Spawning: The female lays up to 1,000 eggs at a time in a shallow nest that the pair has excavated together on the river or lake bed. • Fertilization: After the female lays the eggs, the male swims in to release milt (sperm) over them to fertilize them. • Egg care: The parent fish—often the male—guard and protect the eggs from other animals until they hatch. • Natural Breeding Grounds: Primary breeding occurs in South American regions, such as the Amazon and Orinoco basins, rivers in the Guianas, the Paraguay-Paraná river system, and the Pantanal wetlands. • Season and Behavior: As the breeding season approaches, males typically display more intense coloration, while females develop a rounder abdomen due to the presence of eggs. Food Process Trending For Restuarant: Steak, Roast, Grill, Soup. Key Timeline Evolution Adventure Story of: Piranhas are freshwater fish belonging to the family Serrasalmidae (though some classifications place them in the subfamily Serrasalminae within the family Characidae). They possess an interesting evolutionary history, as outlined below: Origins and Evolution • Biological Classification: Piranhas are closely related to pacu—fish belonging to the same family. However, while pacu are primarily herbivorous, piranhas have evolved into carnivores. Dispersal in South America: Geological and biological evidence indicates that piranhas and related fish groups began to evolve and disperse within South American freshwater systems—ranging from the Orinoco River basin in the north to the Amazon basin—in conjunction with historical fluctuations in water levels and changes in river system connectivity (such as periods when certain basin areas were inundated by seawater or transitioned into freshwater systems). Ancient Relatives: Fossils of a Jurassic-era fish (dating back approximately 150 million years) discovered in Germany reveal sharp, piranha-like teeth. While this serves as an example of an ancient carnivorous fish with similar dentition, modern piranha species evolved independently in South America. Discovery and Global Awareness • Historical exploration: Indigenous peoples in the Amazon basin have known the piranha for thousands of years as a native fish. The "Man-Eating" Myth: Its global reputation for ferocity became firmly established in the early 20th century—specifically in 1913—when former U.S. President Theodore Roosevelt visited the Amazon basin. He witnessed a demonstration where locals herded piranhas to rapidly devour an animal carcass, prompting him to describe them in his writings as "the most ferocious fish in the world." This characterization marked the beginning of the negative image associated with the species in Western culture and media. 2. Ecological Reality: In reality, piranhas are not as aggressive toward humans as portrayed in movies. By nature, they are rather shy and act as scavengers, helping to clean the ecosystem by consuming weak or sick fish and animal carcasses. They become agitated or swarm to attack only when they detect the scent of blood from a severely injured animal, or during times when water levels are critically low and food is scarce. And the finally then You can eat it and Sell it to the Merchant or Customer with Who people you Know Knew known, i hope you have fun and enjoy it.
ClickMeSeeAllFull
ClickMeSeeOnMoreDetail
ClickMeSeeOnMorePictureImage
ClickMeSeeOnMoreVideo
Animal Danger: Discovery World Wide Life Animal Menu: 27.Killer Whale Animal
Dangerous Often See in Daily Routine: Method Procedure Management All Works: Killer Whale Animal
First Aid Instructions Treatment Cure Methods: Initial treatment for injuries caused by orcas (killer whales) depends on the nature of the injury; most cases involve large lacerations, blunt force trauma from collisions, or drowning. Although orcas are non-venomous marine animals, they possess immense strength and large, sharp teeth. 1. Lacerations or bite wounds (with heavy bleeding) • Stop the bleeding immediately: Apply firm, direct pressure to the wound using a clean cloth or thick gauze. If blood seeps through, place an additional cloth on top; do not remove the original cloth. • Clean the wound: Once the bleeding stops or if the wound is not deep, wash it thoroughly with clean water and soap to remove debris and bacteria from the seawater. • Elevate the injured area: If possible, raise the injured arm or leg above heart level to help reduce blood flow and swelling. 2. Injuries from impact (fractures or internal organ trauma) • Immobilize the injured area: If a fracture is suspected, do not attempt to pull or realign the bone yourself; instead, use a piece of wood or a thick stack of newspapers to create a temporary splint. • Monitor for internal injuries: A severe blow or strike from the tail can cause internal bleeding. Watch for signs such as dizziness, pale or cold skin, and rapid breathing. Keep the patient lying flat and cover them with a blanket to maintain body warmth. 3. In cases of drowning or unconsciousness • Safely retrieve the person from the water: Bring the patient to shore, taking care to protect the neck and back in case of impact or trauma. • Check for breathing: If the patient is unconscious and not breathing, begin CPR immediately and call emergency medical services (1669). Warning Caution: Precautions and Critical Information • Beware of severe infection: Seawater and the mouths of marine animals harbor dangerous, rapidly growing bacteria (such as *Vibrio*). After administering first aid, the patient must be taken to a hospital immediately to receive antibiotics to prevent sepsis and a tetanus vaccination. Precautions and guidelines for approaching or encountering killer whales (orcas) are as follows: General precautions in the wild • Nature of killer whales: Killer whales are apex predators in the ocean and the largest members of the dolphin family. While there are few reports of them harming humans in the wild, they remain large and powerful wild animals. • Behavioral disturbance: Boat engine noise and vessel movement can interfere with foraging, communication, and echolocation. • Vessel approach (abnormal behavior): In certain areas (such as specific shipping lanes), there have been reports of orcas colliding with or attempting to damage the rudders of sailing vessels. In the event of such an approach or attack, the recommendation is to move the vessel out of the danger zone as quickly as possible; do not waste time attempting countermeasures. Guidelines for Whale Watching (Conservation-Focused) To observe whales at sea safely and without disturbing the animals, please adhere to international standards or the guidelines set by the Department of Marine and Coastal Resources (DMCR), as follows: • Vessel Speed: • Reduce speed to below 7 knots when within a 400-meter radius. • Maintain a speed of no more than 4 knots when within 100–300 meters of the whales. • Avoid sudden changes in speed or rapid acceleration. • Number of approaching vessels: No more than three vessels should approach a whale simultaneously within a range of 100–300 meters. • Approach direction: Vessels should approach only from the side of the whale; approaching directly from the front (head) or rear (tail) is prohibited. • Distance when a calf is present: If a whale with a calf is encountered, vessels must maintain a distance of at least 300 meters. Souce Place Live Any Wherever can i you me See it: Killer whales (Orcas) can be found in oceans worldwide, ranging from tropical to polar regions, though they are particularly abundant in cold waters rich in food sources. Habitat Characteristics • Distribution: Found in both open oceans and shallow coastal waters, with the exception of certain areas such as the Black Sea and the Baltic Sea. • Preferred Depth: Generally found at depths of approximately 20 to 60 meters. Known sighting areas: • Vancouver Island, British Columbia, Canada • Monterey Bay, USA • Coastal waters from the Bering Sea to Southern California • Southern Ocean (polar regions) Population Groups (Ecotypes) Killer whales are categorized into three main groups based on behavior and habitat: 1. Resident: Primarily inhabit coastal areas and feed mainly on fish. 2. Transient (or Big's): Constantly move along the coast and feed on marine mammals (such as seals and sea lions). 3. Offshore: Inhabit the open ocean far from the coast and feed on fish and sharks. Protection Save From: Prevention and response strategies when encountering killer whales (orcas) in the wild primarily focus on avoiding contact and remaining calm, as these whales generally do not exhibit aggressive behavior toward humans (most incidents of contact stem from cases of mistaken identity—where humans are confused with seals—or playful behavior involving boat rudders in certain areas). Prevention and recommended actions upon encountering orca (killer whales) • Avoid waters known for high orca activity: If you are sailing, check for information and avoid routes or areas where orca aggregations have been reported (such as specific straits or coastal zones), in accordance with *Yachting Monthly* recommendations. • Sail in shallow waters: Records indicate that encounters with orcas—or damage caused by them—are extremely rare in shallow waters with a depth of 20 meters or less. • Reduce vessel speed and avoid sudden acceleration: If a whale is spotted nearby, reduce speed to below 7 knots (or adhere to specific whale-watching regulations, such as a maximum of 4 knots at close range). Do not make sudden changes in speed or direction, as this could provoke curiosity or startle the animals. • Maintain a safe distance: In accordance with guidelines from the Department of Marine and Coastal Resources (DMCR) and conservation networks, vessels must keep a safe distance from the whales—avoiding close approaches—especially when a mother and calf are present. Stay calm and do not enter the water: If you are surfing, diving, or on the water's surface and encounter an orca, try to exit the water or return to shore or your boat quietly; avoid splashing or making loud noises that could attract attention. Behavior Attribute Time Food For Animal: The killer whale (or orca) is a marine mammal and the largest member of the oceanic dolphin family. It exhibits distinctive behaviors and characteristics, as follows: Hunting and Lifestyle • Apex pack hunters: Killer whales hunt as a team, employing planning and coordination within a pod that features a matriarchal social structure. • Diverse hunting techniques: Hunting methods vary by region—such as intentionally beaching themselves to catch sea lions on the shore, creating waves to wash seals off ice floes, or herding fish into a tight cluster before striking them with their tails. • Specialized diets: Different groups of killer whales have distinct dietary preferences; some feed exclusively on fish, while others target only marine mammals (such as seals or other whales), without crossing over between these prey categories. Behaviors and Physical Displays • Breaching: Using full force to propel the body out of the water before falling back down—often landing on the side or back. This behavior may serve to communicate, dislodge skin parasites, or simply for play. • Tail or Flipper Slapping: Forcefully striking the water's surface with the tail or pectoral fins to create underwater sounds—acting as a warning, a signal to the pod, or an expression of irritation. • Spyhopping: Raising the head and eyes vertically above the water to scan for prey or observe the surroundings. Key Physical Characteristics • Color and markings: The upper body is solid black with a white belly; there is a distinct white spot near the eye and a gray or white "saddle patch" behind the dorsal fin—markings that allow for the identification of individual whales. • Dorsal fin: Males have a tall, erect dorsal fin reaching up to 1.8 meters, whereas females have a shorter, curved dorsal fin. • Size: Adults measure approximately 23–32 feet in length and can weigh up to 6 tons. Benefit Professsion of: Killer whales (orcas) are immensely valuable to marine ecosystems and human study, serving as a crucial component in maintaining the ocean's balance in the following ways: 1. Maintaining Ecosystem Balance (Apex Predator) As apex predators in the ocean's food chain, orcas play a crucial role in regulating the populations of other marine species—such as seals, sea lions, dolphins, and even sharks and other whale species—preventing them from becoming overabundant. This regulation helps protect the organisms that form the foundation of the food chain (such as small fish or seaweed) from being decimated by herbivores or mid-level predators, thereby ensuring the overall health and balance of the ecosystem. 2. Indicators of Ocean Health and Cleanliness As orcas (killer whales) occupy the top of the food chain, toxins, chemicals, and heavy metals present in seawater accumulate in their bodies through the food they consume—a process known as biomagnification. Consequently, scientists use the analysis of residue levels and the health status of orcas as indicators of marine environmental quality. A decline in the orca population or poor health among them serves as a warning sign that the local ecosystem is facing serious problems. 3. Benefits for Education and Behavioral Science Research Killer whales are highly intelligent animals that exhibit complex social behaviors; they live in pods and utilize vocal signals for communication as well as group-specific hunting techniques. Studying them enables scientists to gain insights into mammalian brain evolution, social systems, and learning processes—including the transmission of knowledge from mother to offspring—which bears a resemblance to human culture. 4. Economic and Tourism Benefits In many countries where killer whales reside or migrate—such as Iceland, Norway, Canada, and the United States—whale-watching activities constitute a tourism industry that generates substantial revenue for local communities while also fostering a sense of nature conservation among tourists. Rate Cost Per Money SuperMarket on The Internet Online: Note: If you are referring to the actual living animal known as the "killer whale" (Orca), there is no standard market price for it. As a protected wildlife species and one subject to international regulations (CITES), commercial trade is strictly prohibited, with exceptions made only for transfers between authorized zoos or research institutions. Farming Breeding Fertilization Hybridization Reproduction : 1. Killer whales (orcas) have a slow reproductive cycle and complex social characteristics; key details are as follows: Reproductive Maturity • Females: Reach reproductive maturity at approximately 10–15 years of age (in the wild). • Males: Reach reproductive maturity later than females, becoming fully mature and ready to mate at around 20 years of age or older (this can be observed through the dorsal fin, which grows taller and straighter starting around age 12–15). 2. Pregnancy and Birth • Breeding season: No fixed season; mating and calving can occur throughout the year. • Gestation period: Approximately 15–18 months (averaging 17 months), making it one of the longest gestation periods among marine mammals. • Number of offspring: One calf per birth (twins are extremely rare). • Birth: The calf is born tail-first to minimize the risk of inhaling water or drowning during the birthing process. 3. Rearing and Growth • Nursing: Whale calves begin nursing underwater from their first day and consume high-fat milk. • Weaning: Calves begin eating solid food between the ages of approximately 6 months and 1 year, and are fully weaned between 1 and 2 years of age. • Family bonds: Killer whales live in matrilineal pods. All pod members (including older siblings and aunts) help care for and protect the calves, and calves typically remain with their mothers for their entire lives. • Birth spacing: Mother whales give birth at intervals of approximately 3–5 years. 4. Menopause • Female killer whales are among the few species on Earth (alongside short-finned pilot whales and humans) that undergo menopause. They typically stop reproducing around the age of 40 but can live for several more decades (with some reaching ages of 50–80 or older), serving as "grandmothers" who help care for and guide the younger members of their pod. Food Process Trending For Restuarant: Steak, Roast, Grill, Soup. Key Timeline Evolution Adventure Story of: The killer whale (scientific name: *Orcinus orca*), also known as the orca, is not actually a whale; rather, it is a mammal belonging to the dolphin family (Delphinidae) and is the largest member of the oceanic dolphin family. Its evolutionary history—transitioning from a land-dwelling animal to a master of the seas—can be traced through the following key timeline: 1. Origins from land-dwelling animals (approximately 50–65 million years ago) • Earliest ancestors: Genetic and fossil evidence indicates that whales and dolphins share a common ancestor with even-toed ungulates (Artiodactyla), such as cattle, pigs, camels, and hippopotamuses. • *Indohyus*: A small, even-toed ungulate resembling a deer or a water deer; it lived on land but would retreat into and forage in fresh water, existing around 50 million years ago. 2. Semi-aquatic Era (approximately 48–50 million years ago) • *Pakicetus*: A four-legged animal roughly the size of a wolf or a goat; it lived along the water's edge and fed on fish and small animals. Although capable of walking on land, its inner ear bone structure had begun to adapt for hearing underwater. • *Ambulocetus* ("Walking Whale"): Possessed a semi-crocodilian, semi-mammalian appearance; its forelimbs and hindlimbs had begun to enlarge and were webbed, serving as paddles for navigating estuaries and coastal waters. • Remingtonocetidae and Protocetidae: These groups spent more time in marine environments; their limbs began to shorten, and their bodies became streamlined for swimming. 3. Evolution into a fully aquatic lifestyle (approximately 33–40 million years ago) • *Basilosaurus* and *Dorudon*: These were ancient whales that became fully aquatic animals. They possessed front flippers instead of legs, their hind limbs were reduced to mere vestigial remnants within the body, and their nostrils had migrated to the top of the head to form a blowhole. Branching into the dolphin family: The evolutionary lineage of whales diverged into two main groups—baleen whales (Mysticeti) and toothed whales (Odontoceti). Killer whales evolved within the toothed whale group and the dolphin family, developing echolocation and complex social behaviors. 4. Origin of the name "Killer Whale" • In the past, sailors observed these animals hunting in groups and feeding on larger whales, leading them to be called "Whale Killers." Over time, the word order was swapped to "Killer Whale"—or *wan phet-cha-khat* (literally "executioner whale") in Thai. And the finally then You can eat it and Sell it to the Merchant or Customer with Who people you Know Knew known, i hope you have fun and enjoy it.
ClickMeSeeAllFull
ClickMeSeeOnMoreDetail
ClickMeSeeOnMorePictureImage
ClickMeSeeOnMoreVideo
×
1
2
3
4
5
6
7
8
9
1
2
3
4
5
6
7
8
9
10
11
12
13
1
2
3
4
5
6
7
8
9
10
1
2
3
4
5
6
7
8
9
10
11
12
13
14
15
1
2
3
4
5
6
7
8
9
10
11
1
2
3
4
5
6
7
8
9
10
1
2
3
4
5
6
7
8
9
10
1
2
3
4
5
6
7
8
9
10
1
2
3
4
5
6
7
8
9
10
1
2
3
4
5
6
7
8
9
10
1
2
3
4
5
6
7
8
9
10
1
2
3
4
5
6
7
8
9
10
1
2
3
4
5
6
7
8
9
10
1
2
3
4
5
6
7
8
9
10
1
2
3
4
5
6
7
8
9
10
1
2
3
4
5
6
7
8
9
10
1
2
3
4
5
6
7
8
9
10
1
2
3
4
5
6
7
8
9
10
1
2
3
4
5
6
7
8
9
10
1
2
3
4
5
6
7
8
9
10
1
2
3
4
5
6
7
8
9
10
1
2
3
4
5
6
7
8
9
10
1
2
3
4
5
6
7
8
9
10
1
2
3
4
5
6
7
8
9
10
1
2
3
4
5
6
7
8
9
10
1
2
3
4
5
6
7
8
9
10
1
2
3
4
5
6
7
8
9
10
1
2
3
4
5
6
7
8
9
10
1
2
3
4
5
6
7
8
9
10
1
2
3
4
5
6
7
8
9
10
1
2
3
4
5
6
7
8
9
10
1
2
3
4
5
6
7
8
9
10
1
2
3
4
5
6
7
8
9
10
1
2
3
4
5
6
7
8
9
10
1
2
3
4
5
6
7
8
9
10
1
2
3
4
5
6
7
8
9
10
11
12
13
14
15
16
17
18
19
20
21
22
23
24
25
26
27
❮
❯
❮
❯
×
Futureplayer
About our Website
Work
Food
Drink
Fruit
Vegetable
TripTourTravelJourney
Vehicle
OtherSoOn